Open HardwareAssembly Instructions
Guides for installation and assembly of the LulzBot line of products made by FAME 3D LLC.
Guides for installation and assembly of the LulzBot line of products made by FAME 3D LLC.
Parts Needed:
4x- M3x10 BHCS (HD-BT00148)
4x- M3 Black Washer (HD-WA0038)
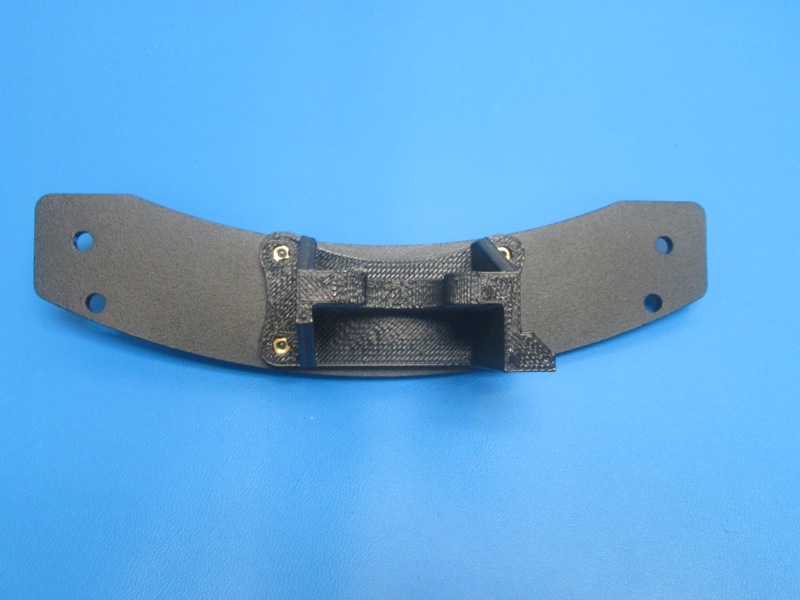
1x- Taz 6 Y Motor Mount (PP-GP0226) with 4x- M3 inserts installed
1x- Y axis End plate (PP-MP0111)
Tools needed:
2mm Hex driver
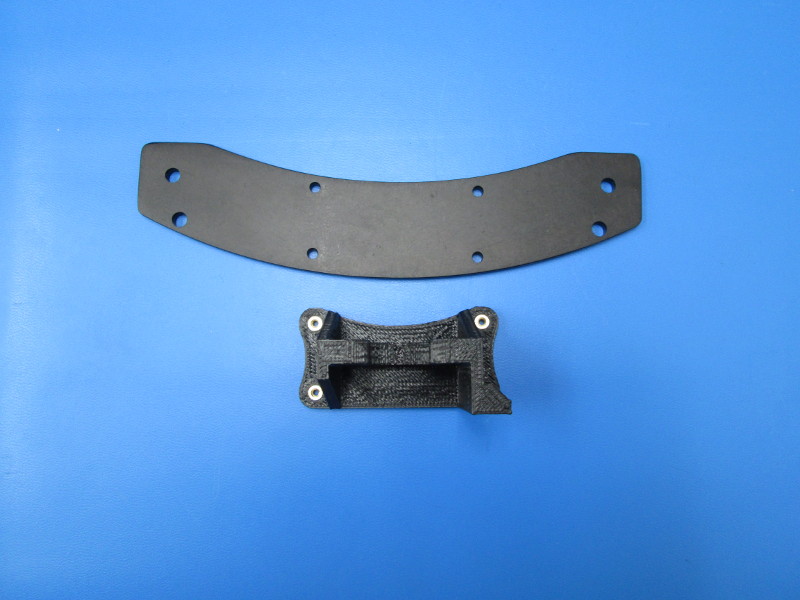
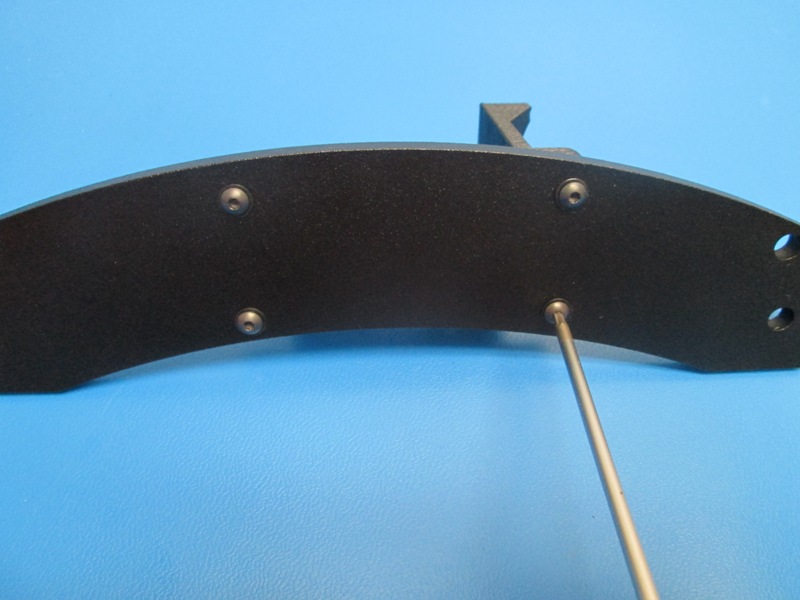
Orientation of the end plate is very important, determine the short side and long side of the plate by measuring the distance from the side of the plate to the second set of holes that are parallel to the side of the plate, the short side measures ~65mm, the long side measures ~ 75mm.
With plate laying flat and the short dimension side on the left side orient the Motor mount so its flange is toward the crown of the plate.
Secure the mount to the plate using four (4) M3x 10 BHCS and four (4) M3 washers. Tighten to hand tight + 1/4 turn
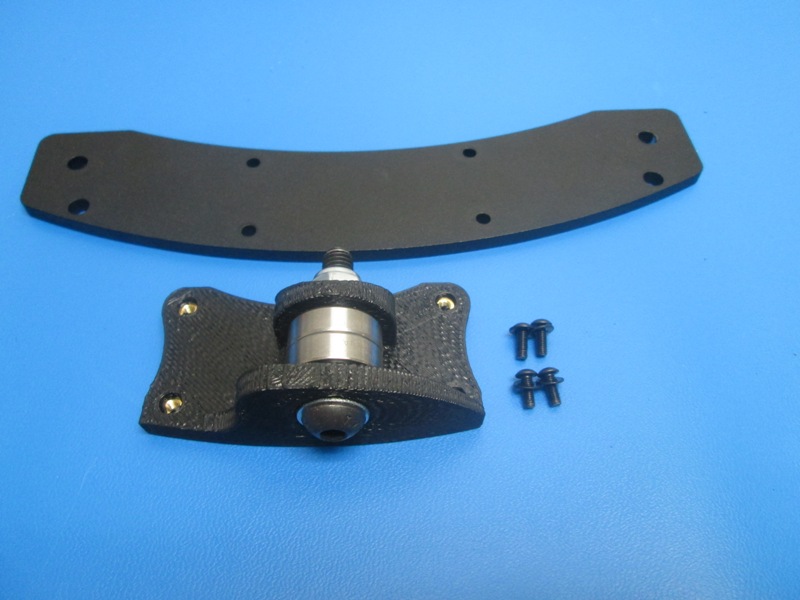
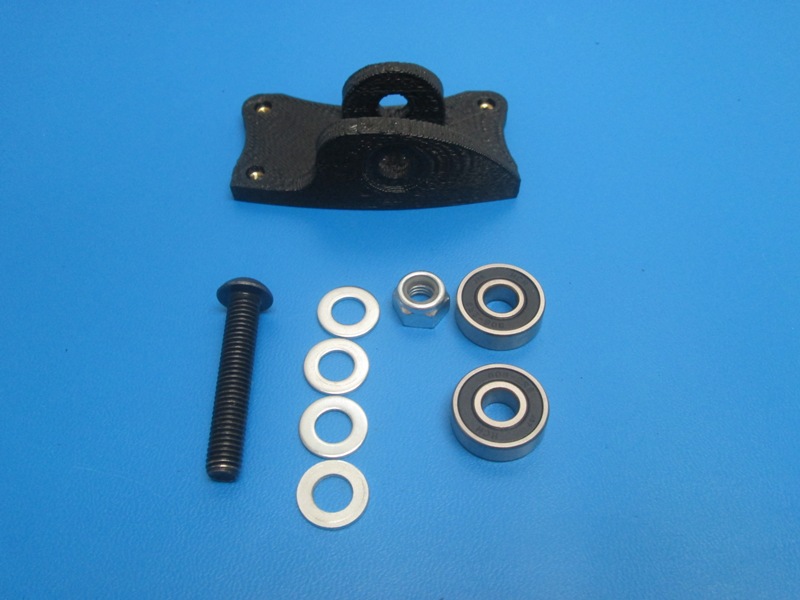
Parts needed:
1x- Idler mount (PP-GP0225) (with 4x M3 inserts)
1x- M8 x40 BHCS (HD-BT0061)
4x- M8 Washer (HD-WA0006)
1x- M8 Nyloc Nut (HD-NT0002)
2x- 608 Bearing (HD-MS0282)
Tools needed:
13mm Wrench
5mm Hex driver
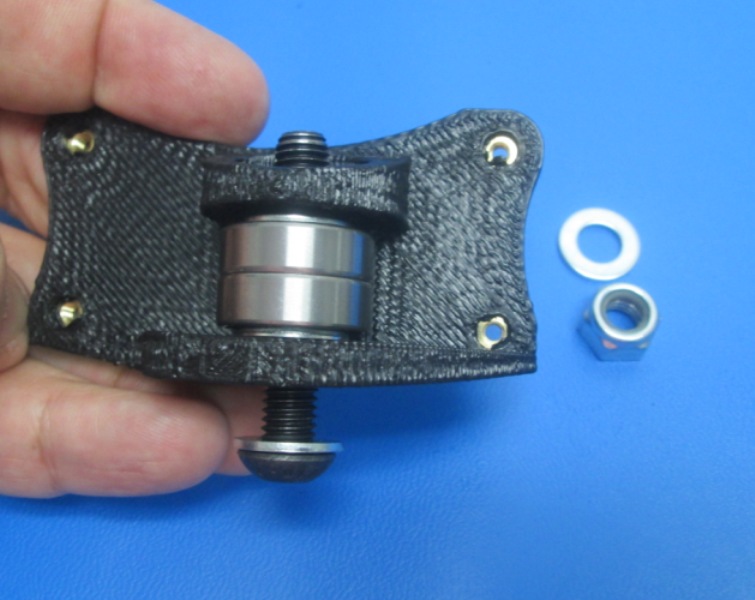
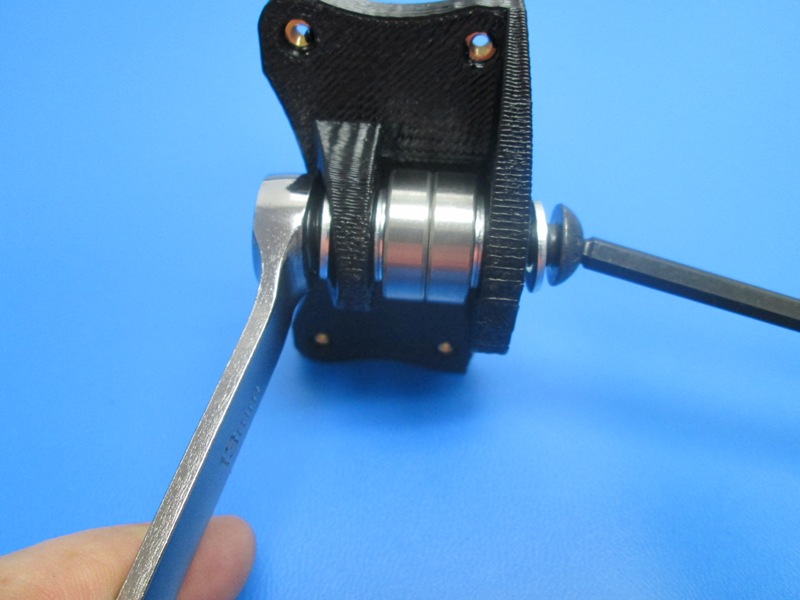
Place two (2) 608 bearings together and place them between the idler mount top and bottom flanges; Install a M8 washer between the top and bottom flanges and the 608 bearing stack; Place a M8 washer onto the M8x 40 BHCS and push the screw through the flanges/ washers/ bearings; Install one M8 washer onto the M8x40 BHCS followed by a M8 Nyloc nut; Thread on the Nyloc nu until 2 to 3 full threads of the M8x40 BHCS extend beyond the Nylon liner in the nut
Parts needed:
4x- M3x 10 BHCS (HD-BT0148)
4x- M3 Black Washer (HD-WA0038)
1x- Taz 6 Y Axis Idler Assembly
1x- Y axis End plate (PP-MP0111)
Tools needed: 2mm Hex driver
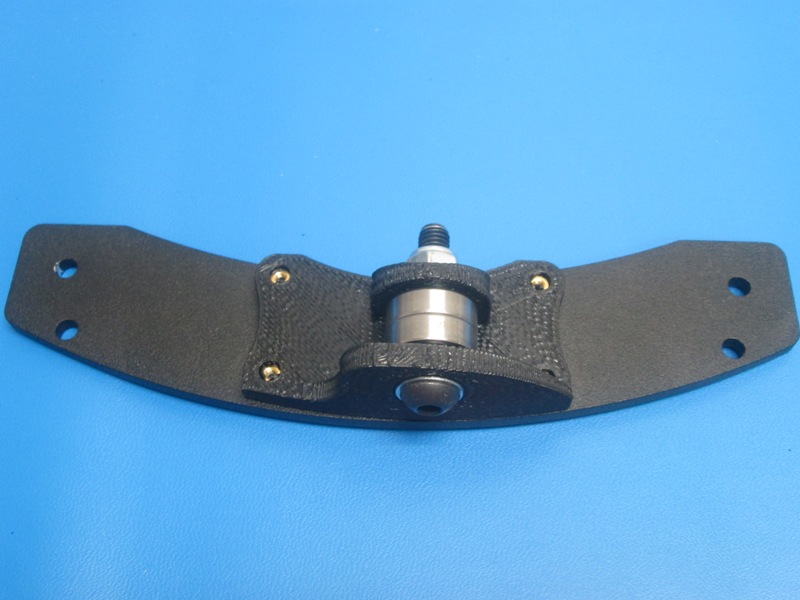
Orientation of the end plate is very important, determine the short side and long side of the plate by measuring the distance from the side of the plate to the second set of holes that are parallel to the side of the plate, the short side measures ~65mm, the long side measures ~ 75mm.
With plate laying flat and the short dimension side on the left postion the the Idler assembly so its M8 screw head is positioned by the crown of the plate.
Secure the mount to the plate using four (4) M3x 10 BHCS and four (4) M3 washers. Tighten to hand tight + ¼ turn or about 12in-lbs (1.36Nm).