Open HardwareAssembly Instructions
Guides for installation and assembly of the LulzBot line of products made by FAME 3D LLC.
Guides for installation and assembly of the LulzBot line of products made by FAME 3D LLC.
Several of these may be prepared for later use
Gather the following materials:
1x- [SH-PG0083] 9x12” Recloseable Bag
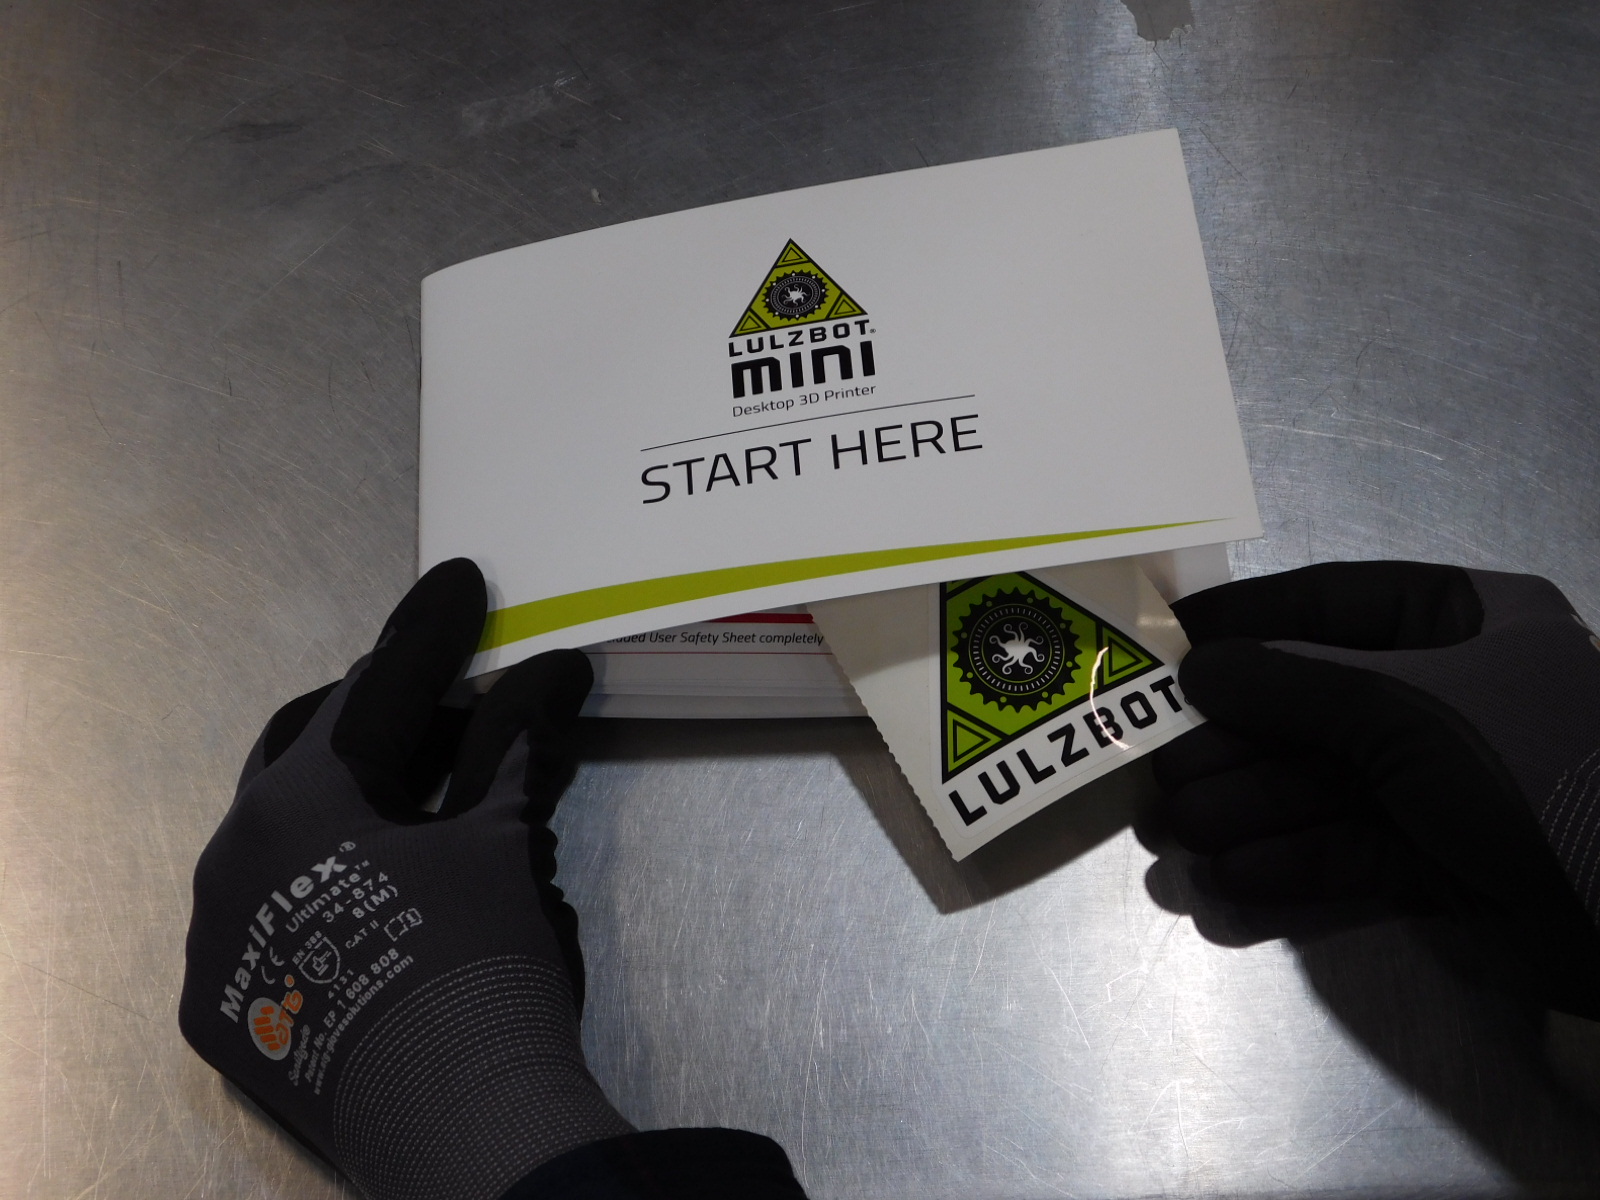
1x- [DC-MS0066] Mini 2 Quick Start Guide
1x- [DC-LB0095] LulzBot Logo Sticker, 3 - Inch
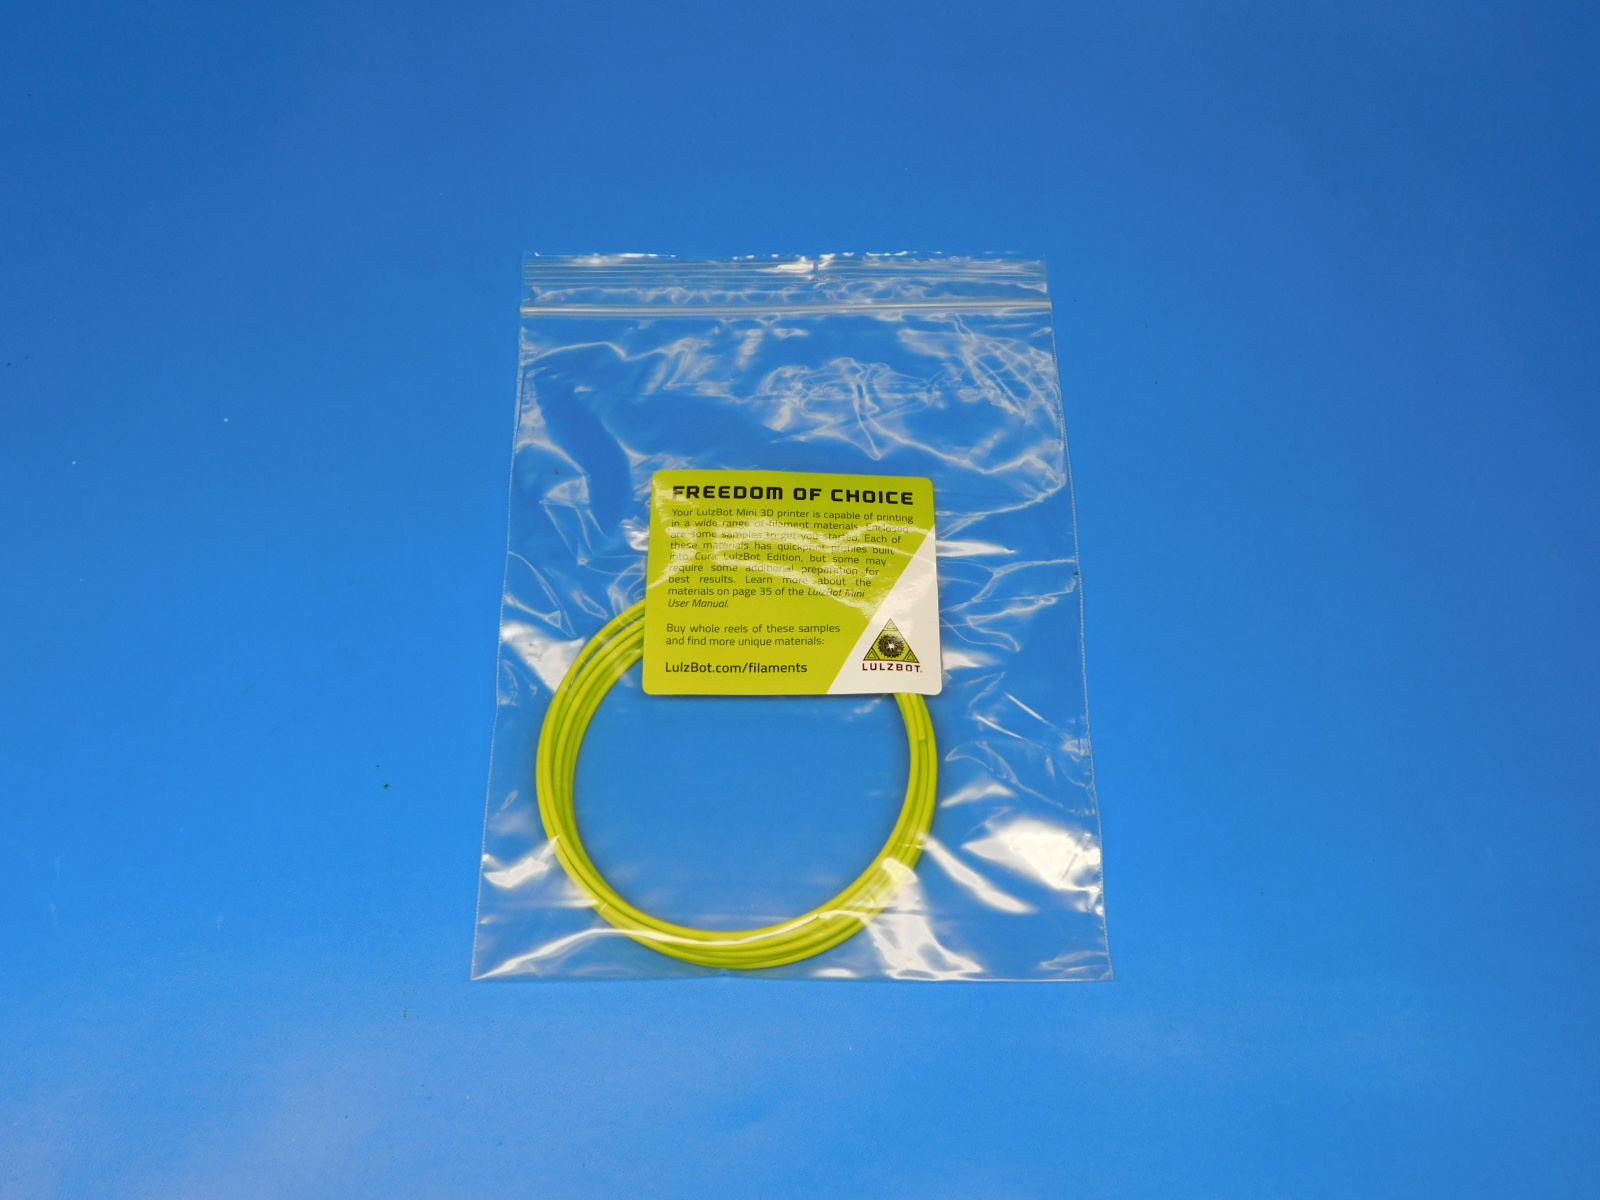
1x- [AS-PK0032] Polylite Sample Filament Kit, Mini 2
1x- [DC-LB0111] Filament Samples Bag Label - Mini
1x- [SH-PG0030] 8X10 2MIL RECLOSABLE BAG 1M/CT
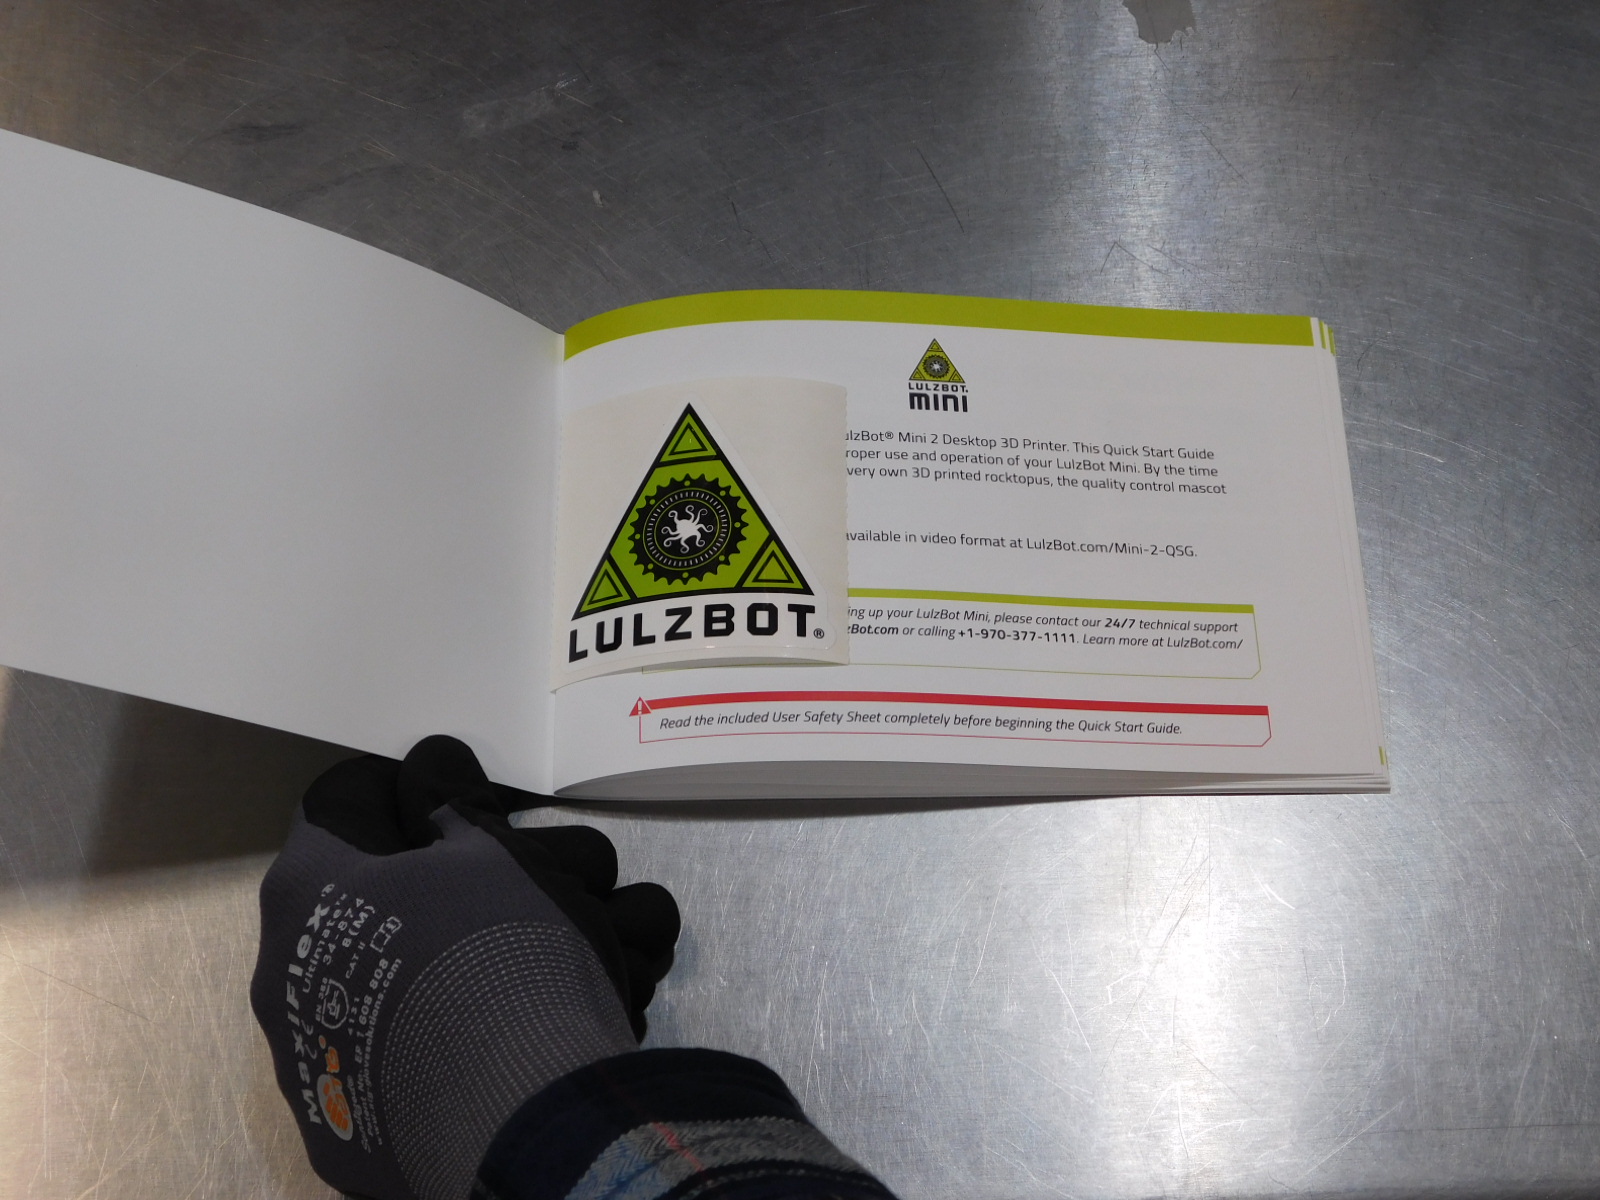
Check to make sure the LulzBot sticker (with backing still attached) is inside the Quick Start Guide [DC-MS0066] between cover and first page

Gather Materials Needed:
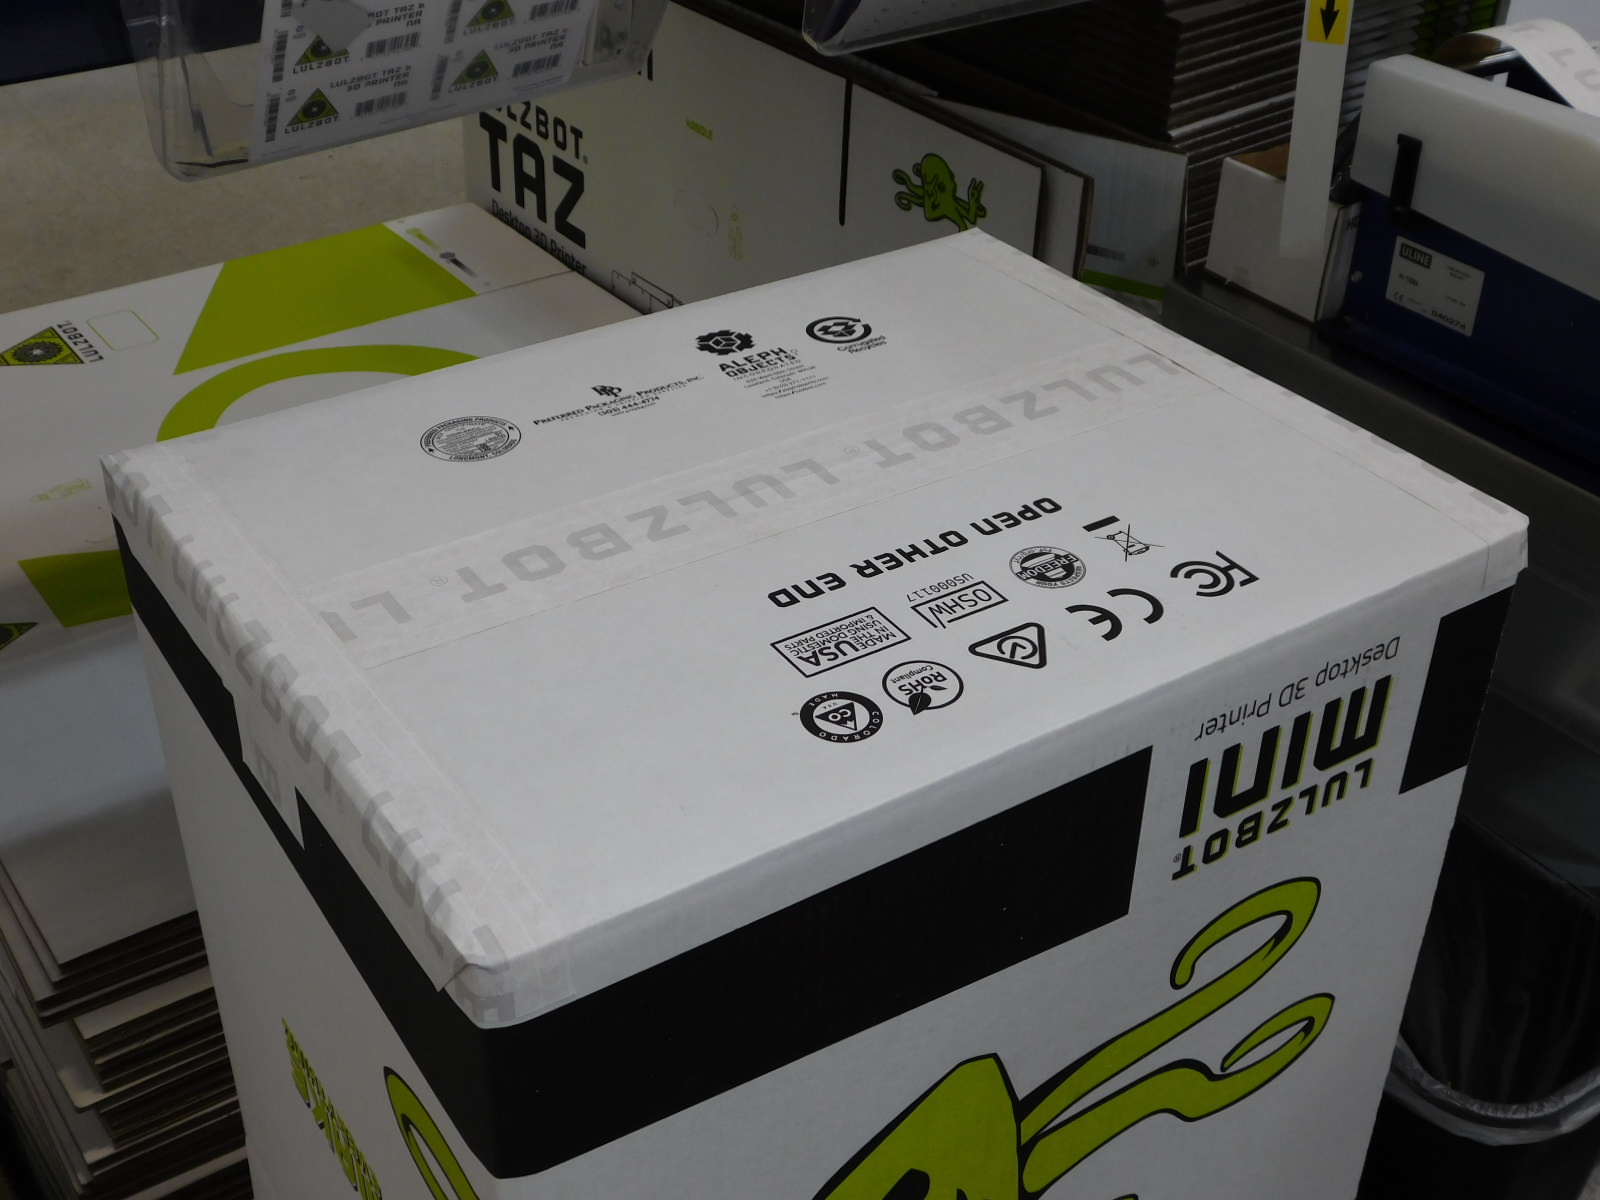
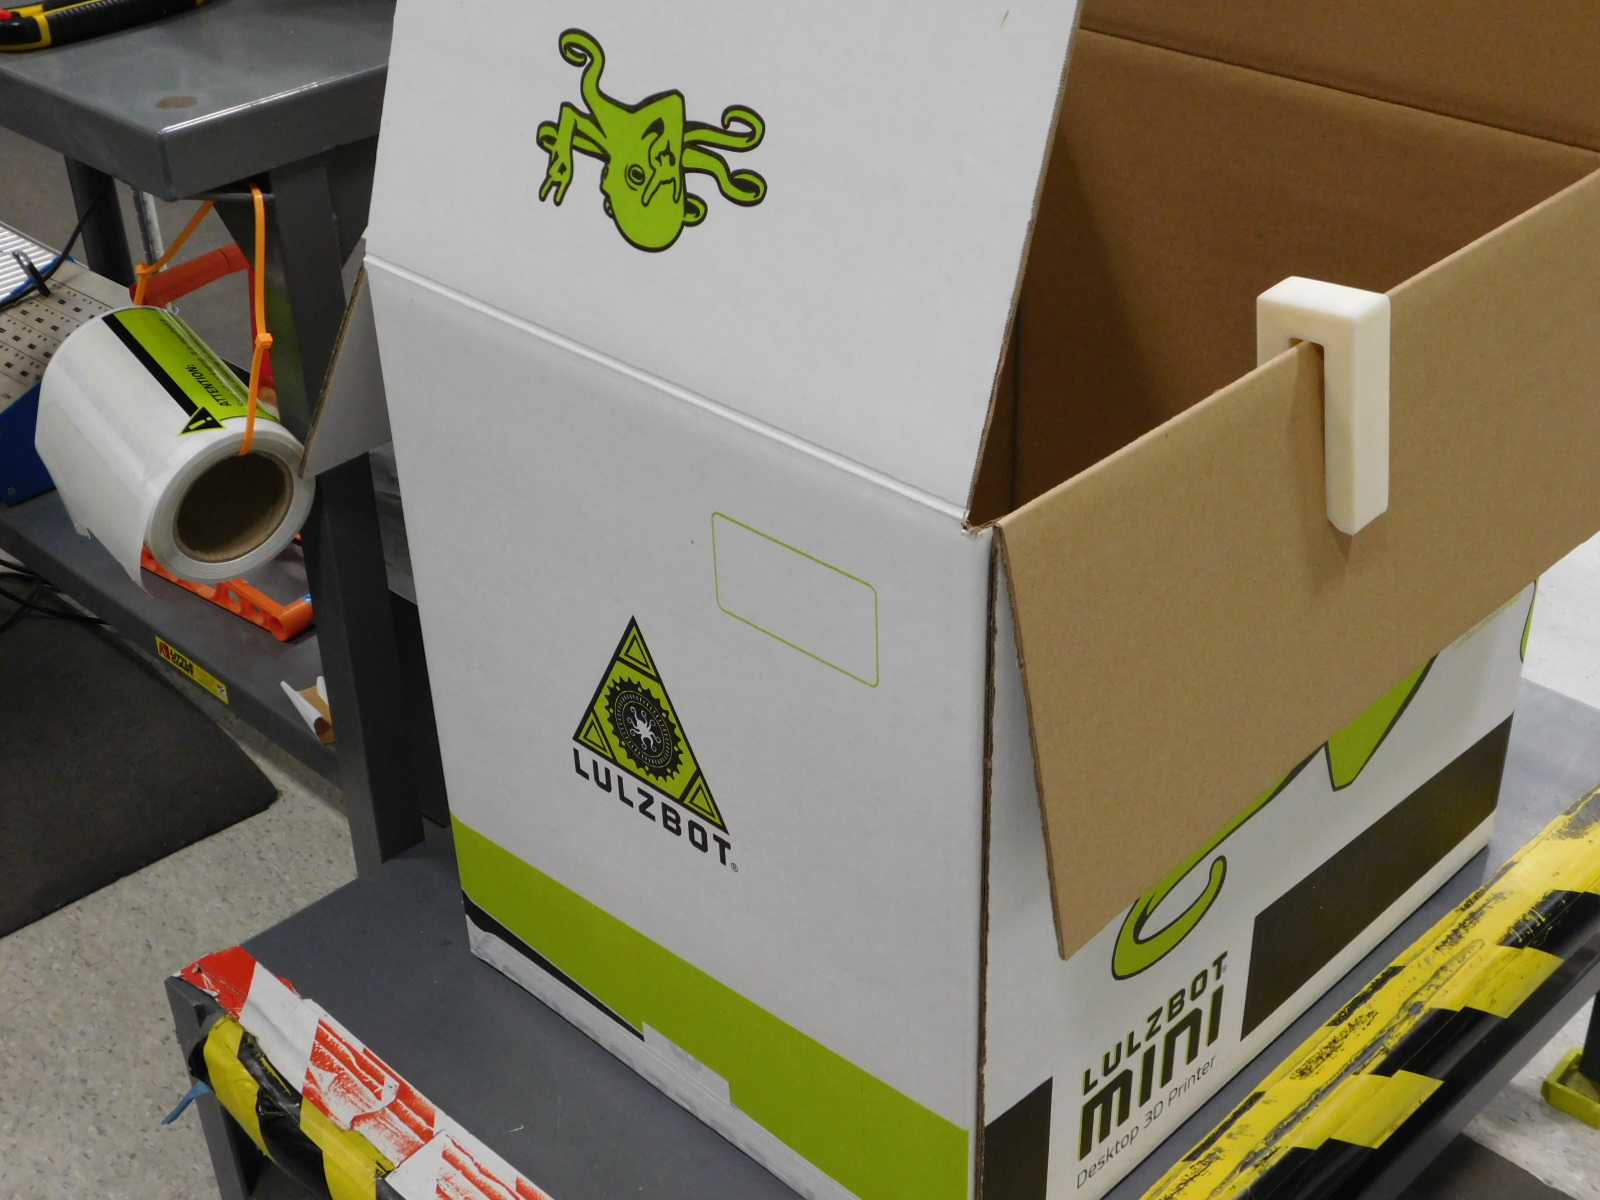
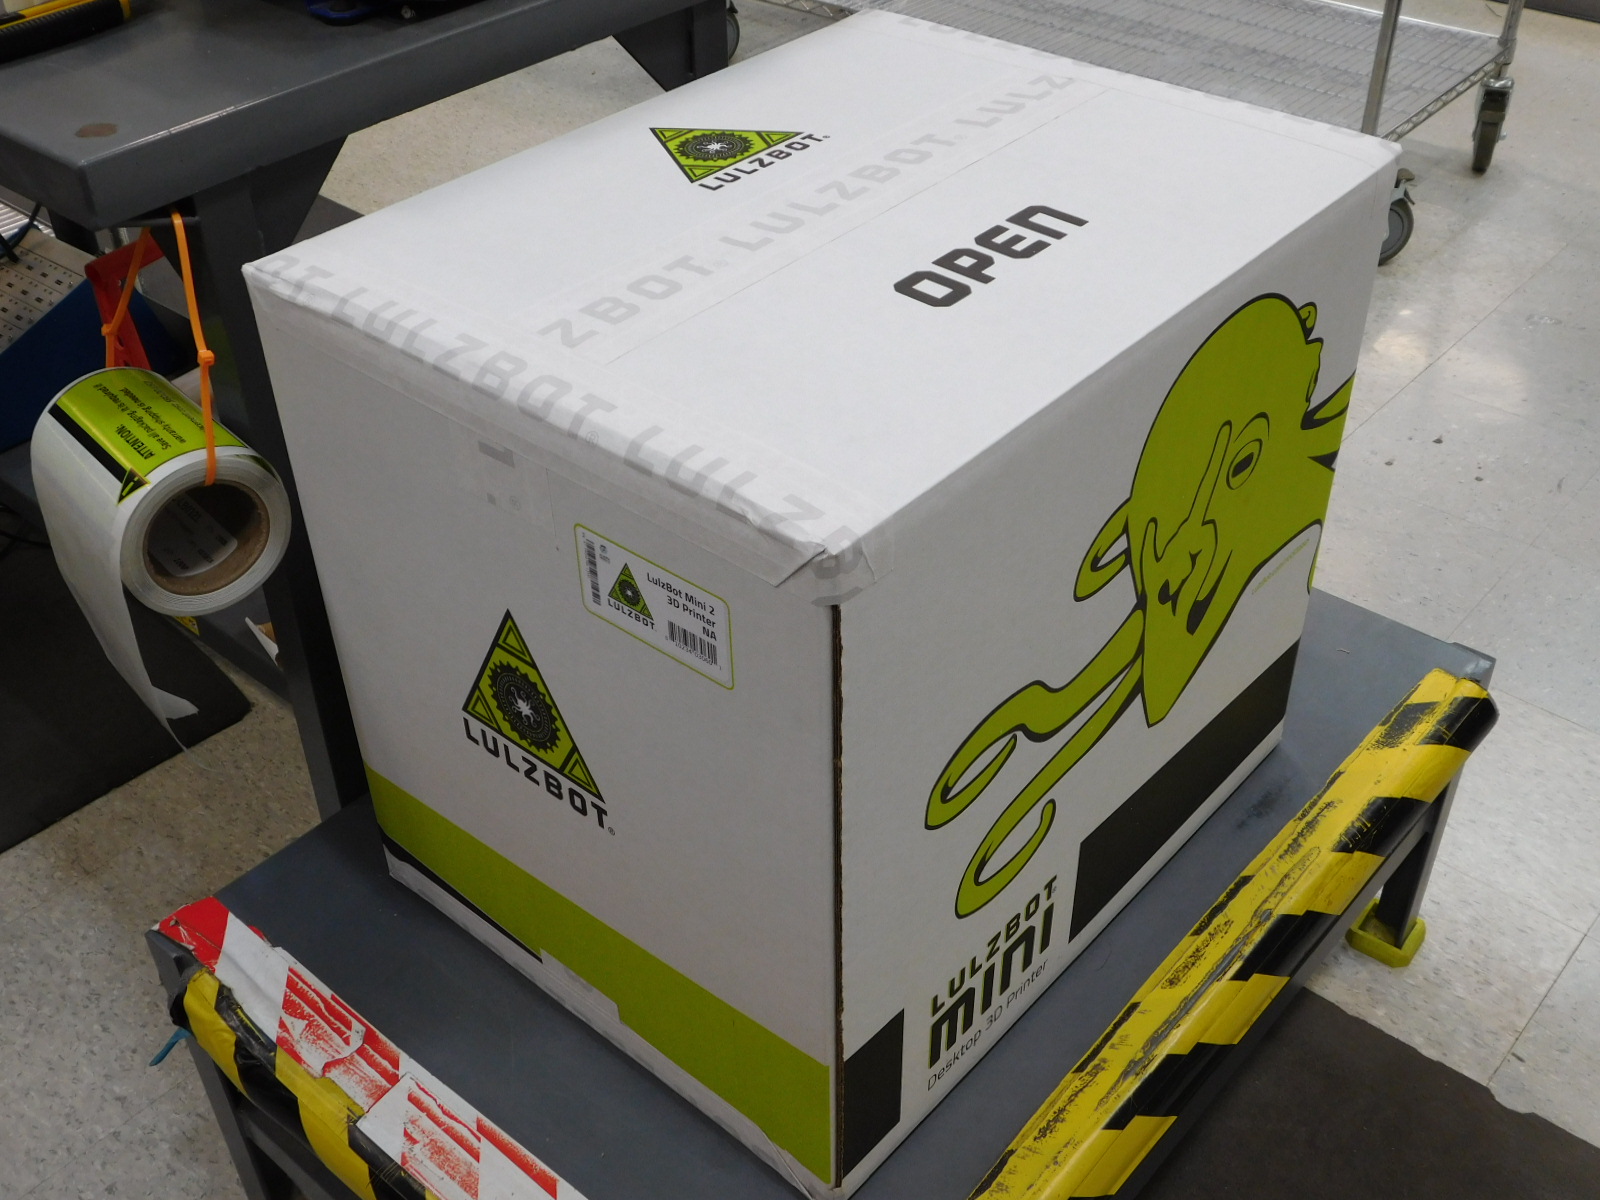
1x- [SH-BX0496] Mini 2 Shipping Box
1725mm- [SH-PG0131] White Reinforced Tape with LulzBot Logo (or 68")
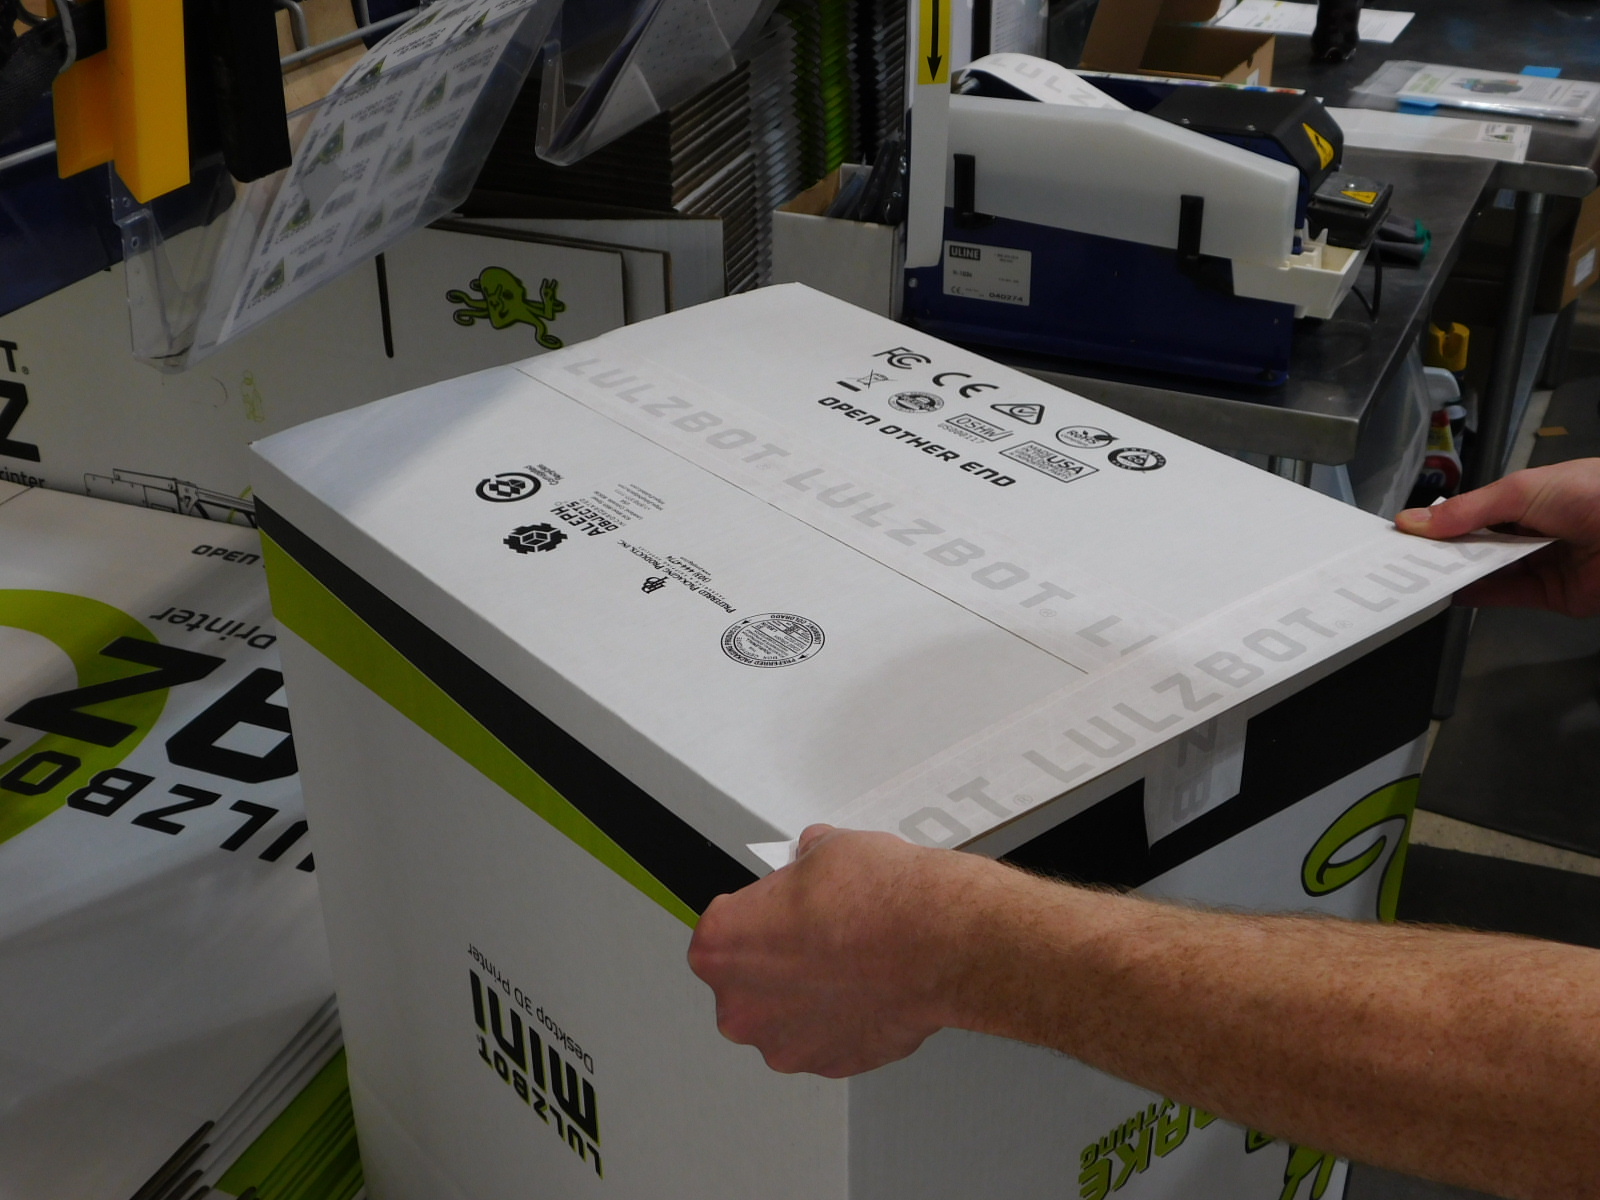
Begin with the box upside down;
Fold the box bottom small end flaps into the box, then fold the long flaps over the end flaps;
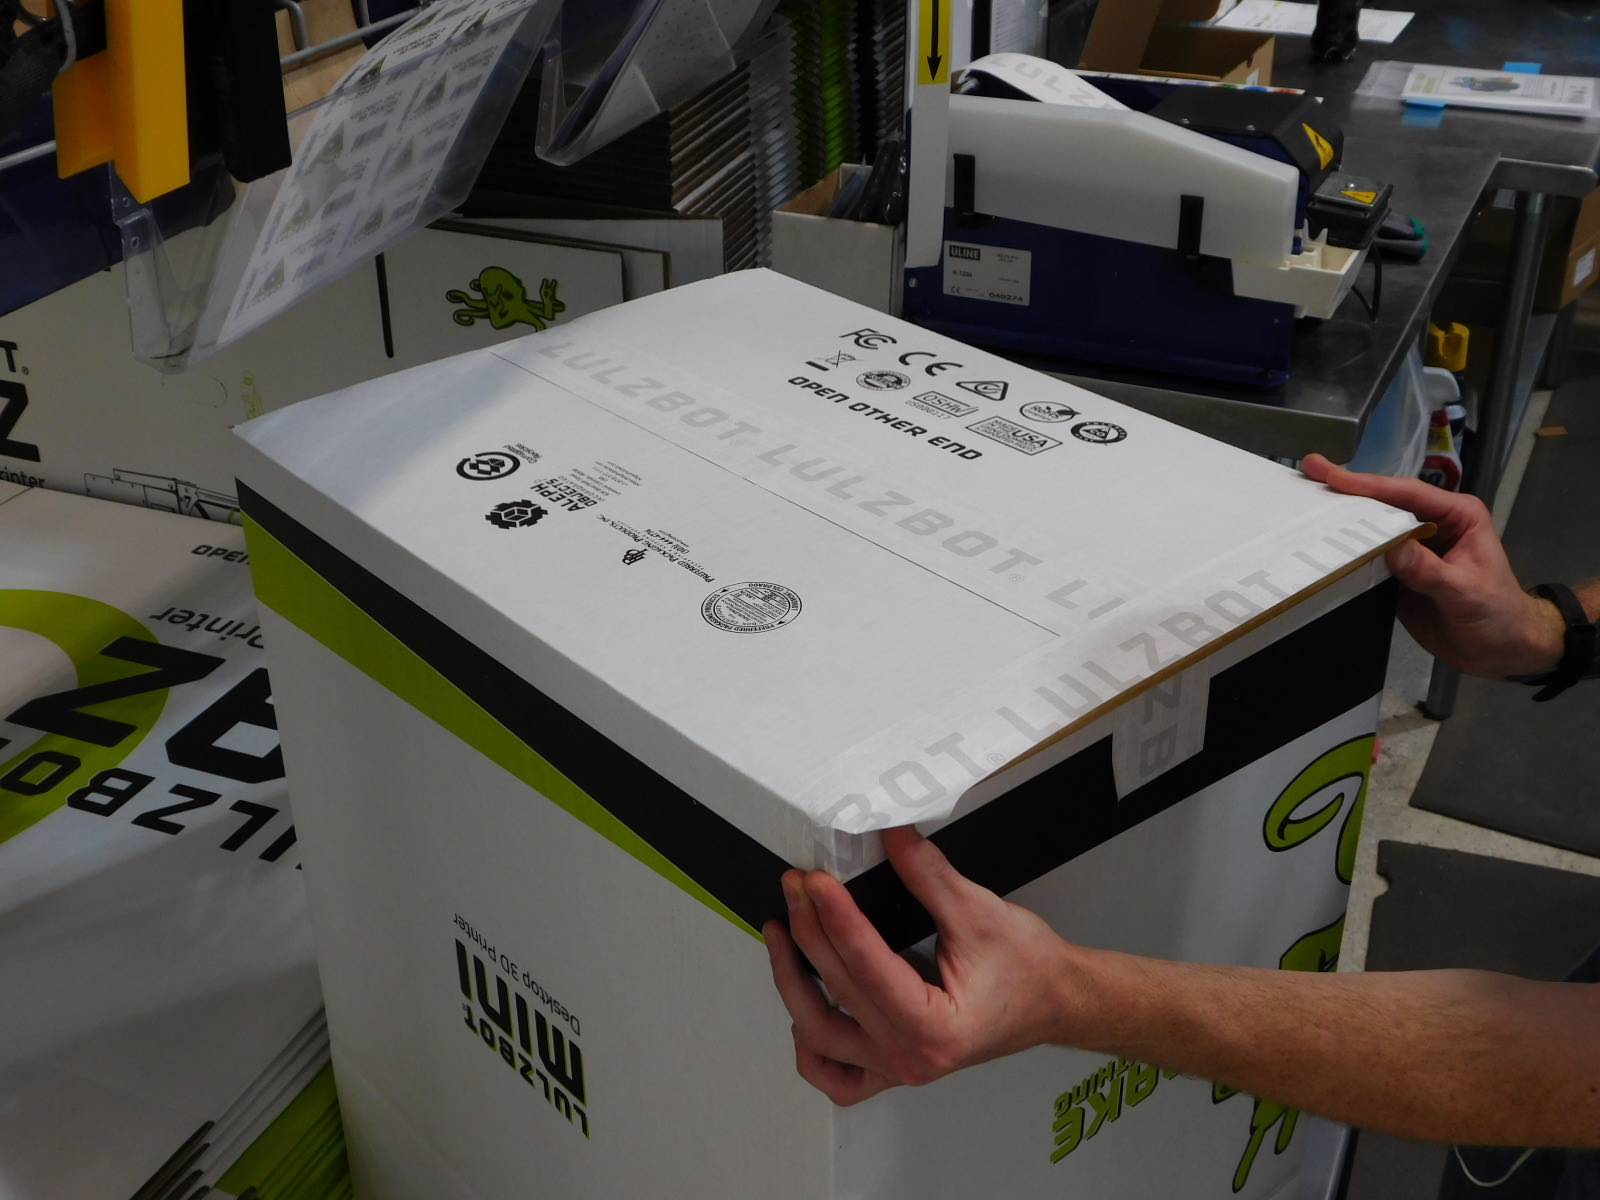
Tape the bottom of the box with white reinforced tape- 28” long.
Apply a 20” strip across the bottom of the box at the box ends so the tape is centered on the box,
Fold down the two lengths of tape that overhang the face and rear of the box;
Fold down and adhere remaining flap of tape to the box. Repeat at the opposite end of the box


Retrieve the following from the boxing queue:
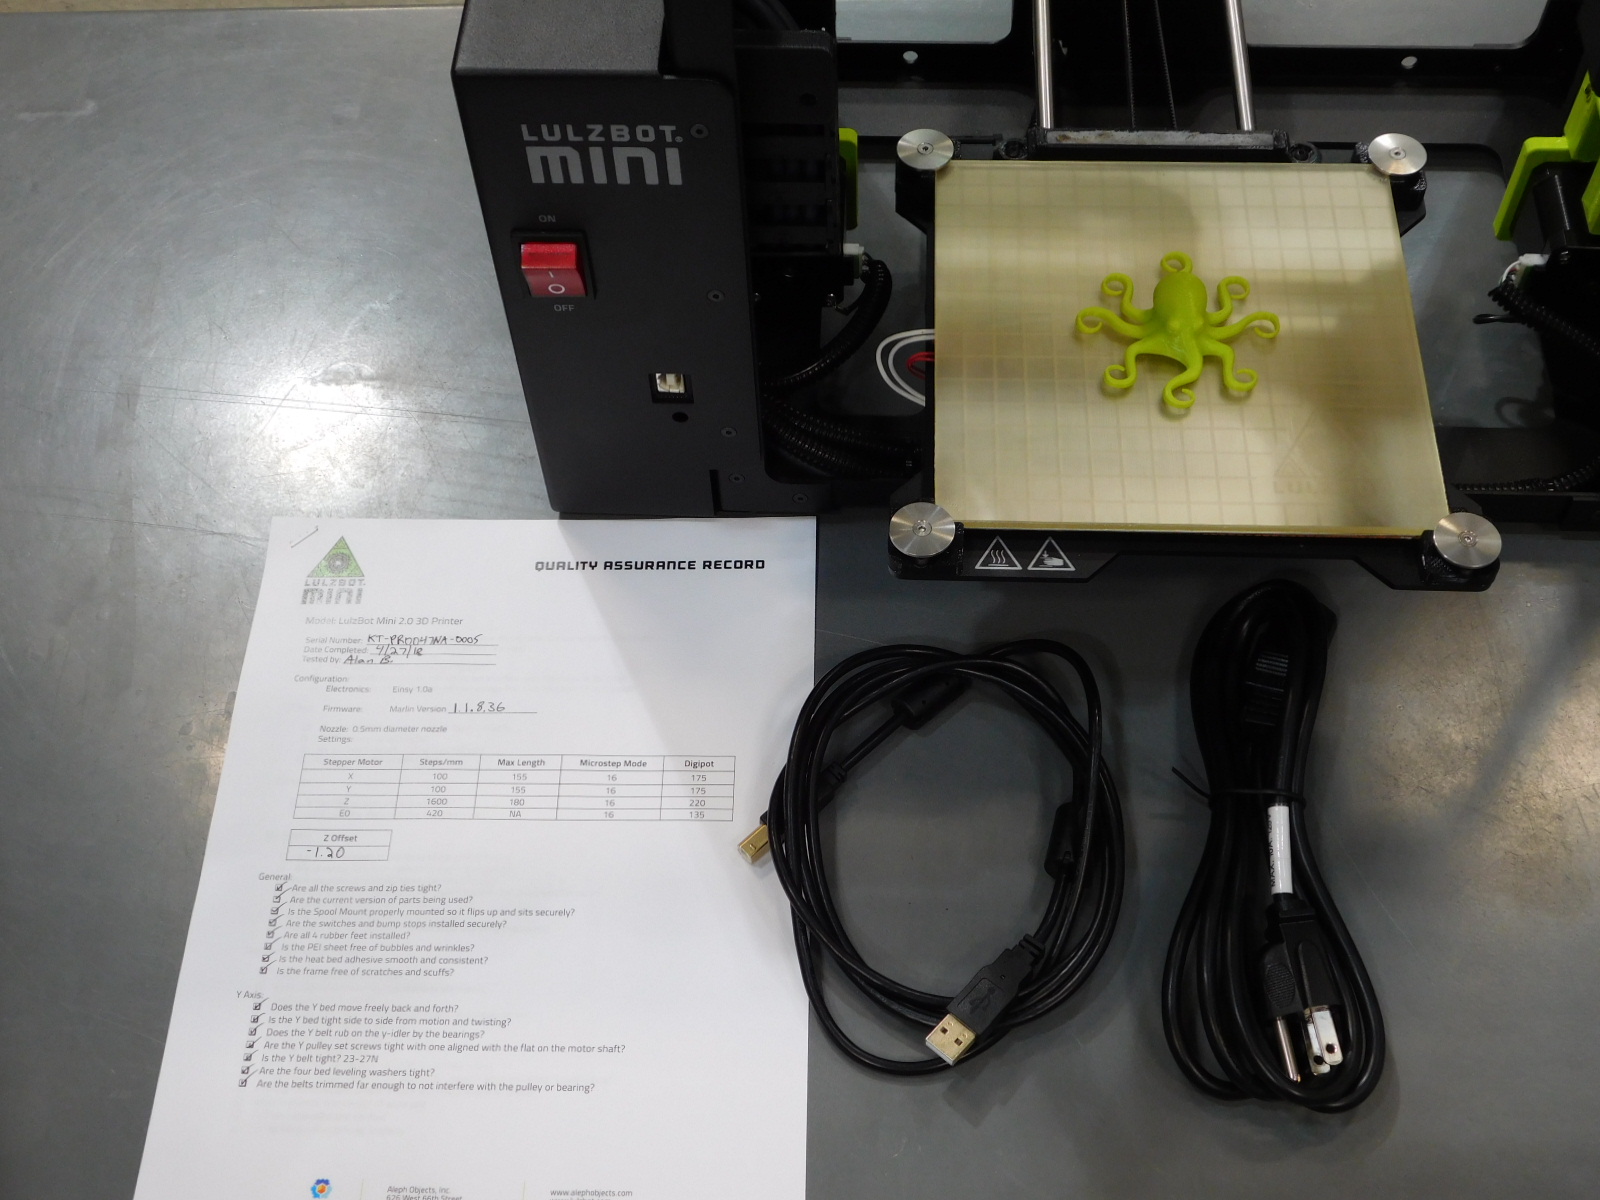
1x- [AS-PR0093] Lulzbot Mini 2 Printer, Calibrated
1x- [EL-CA0063] USB Cable
1x- [EL-CA0030] North American Power Cable
1x- [DC-MS0071] Completed Quality Assurance Record
1x- [EL-MS0385] Preloaded/Tested SD Card
1x- Octopus test print
Other materials required:
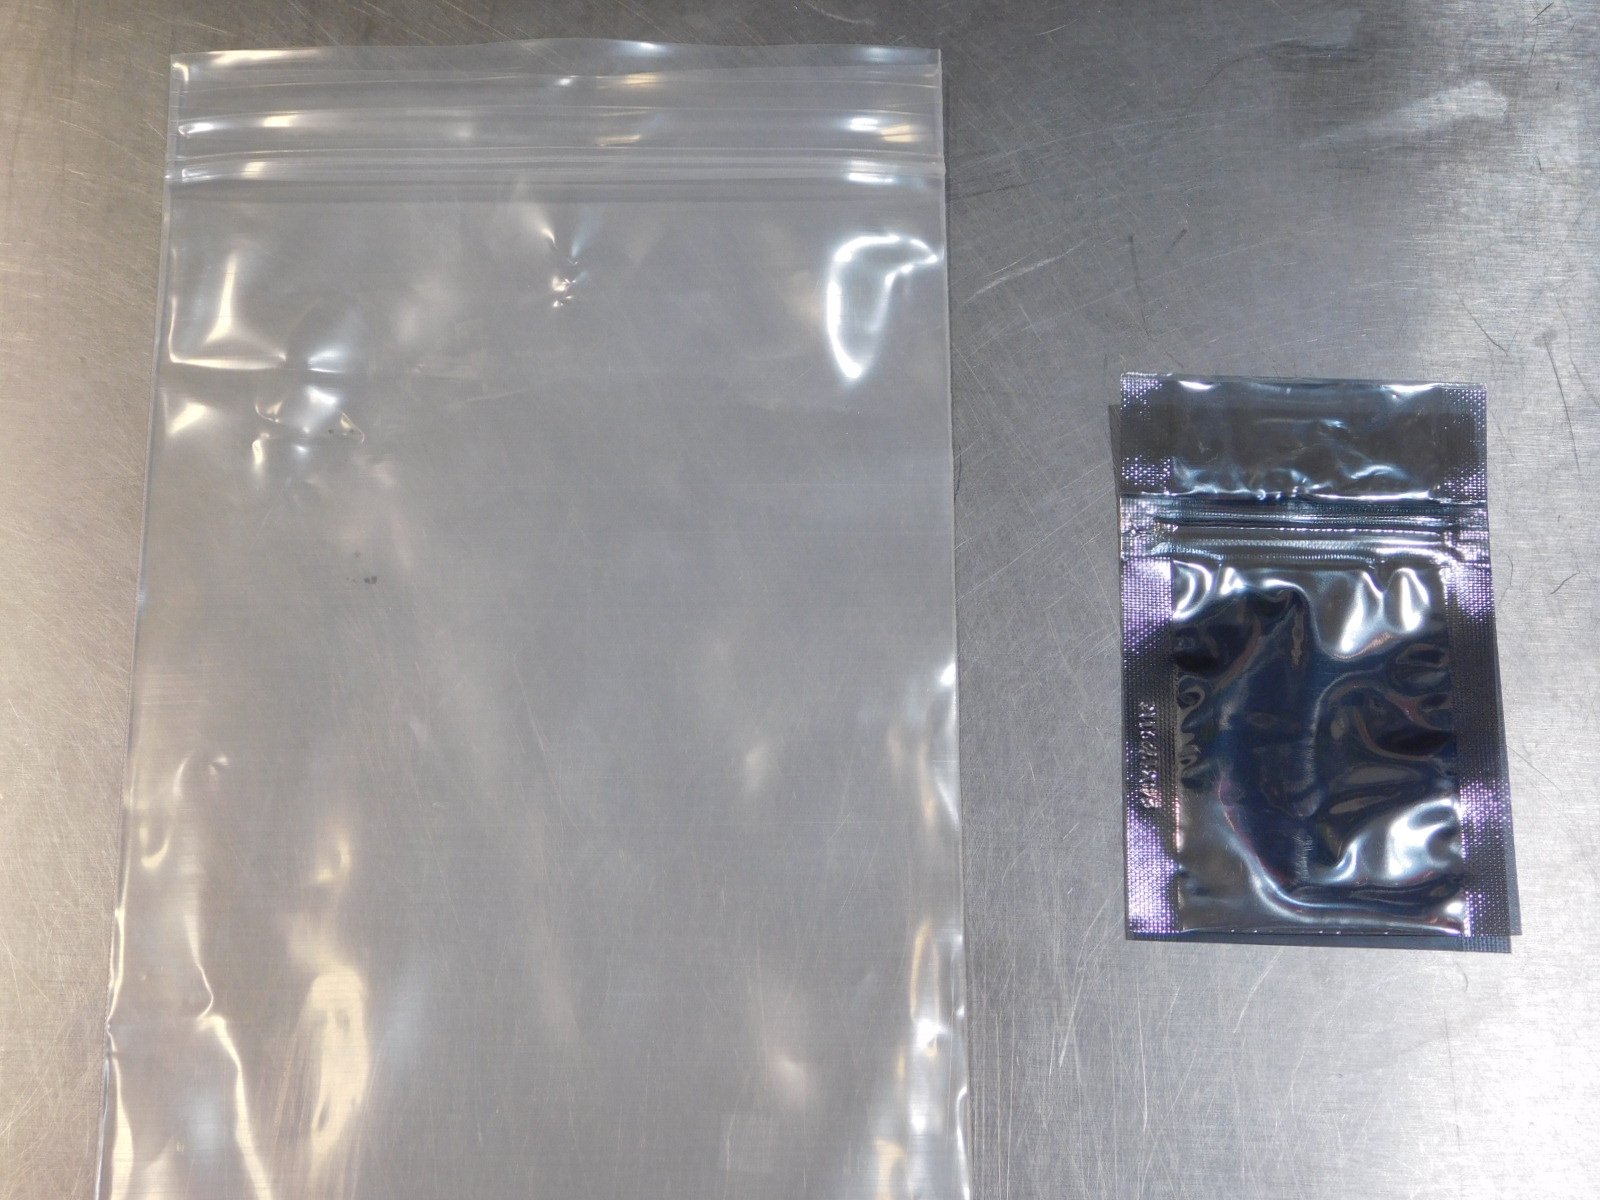
1x- [SH-PG0084] 6x10" 6mil reclosable bag
1x- [SH-PG0031] 2x3" reclosable static shielding bag
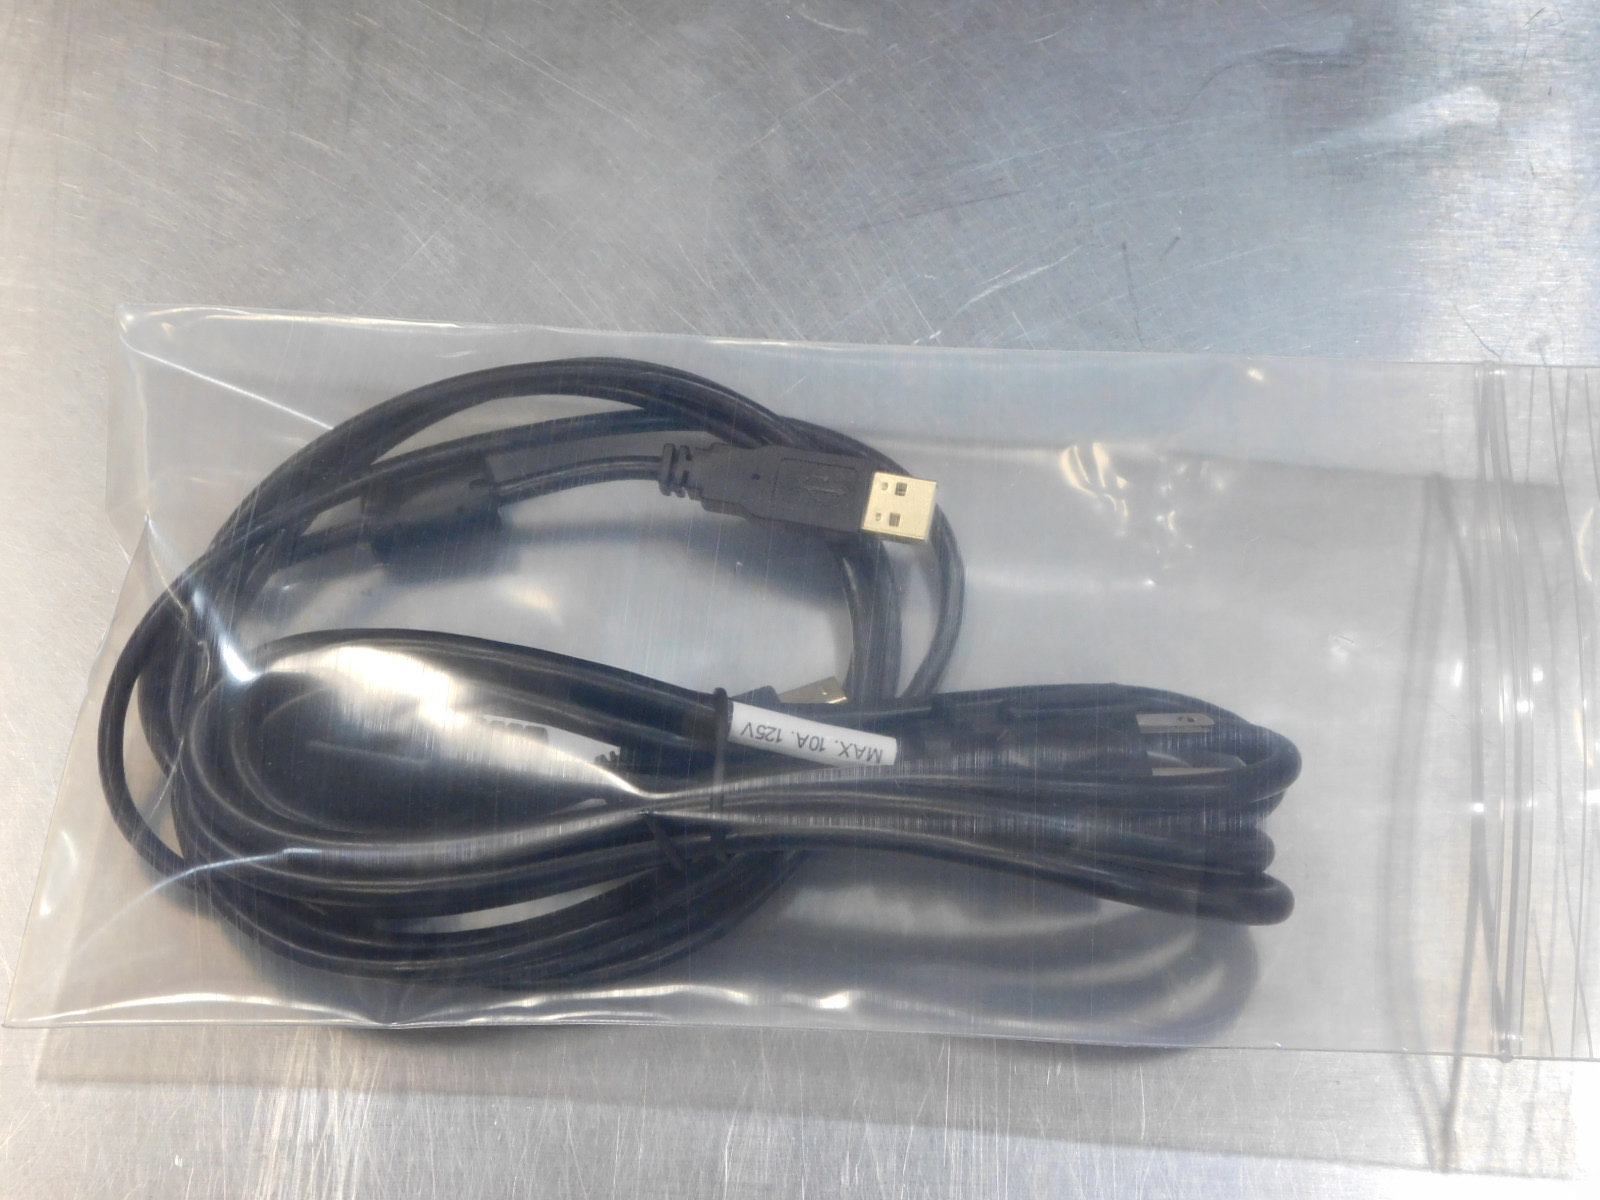
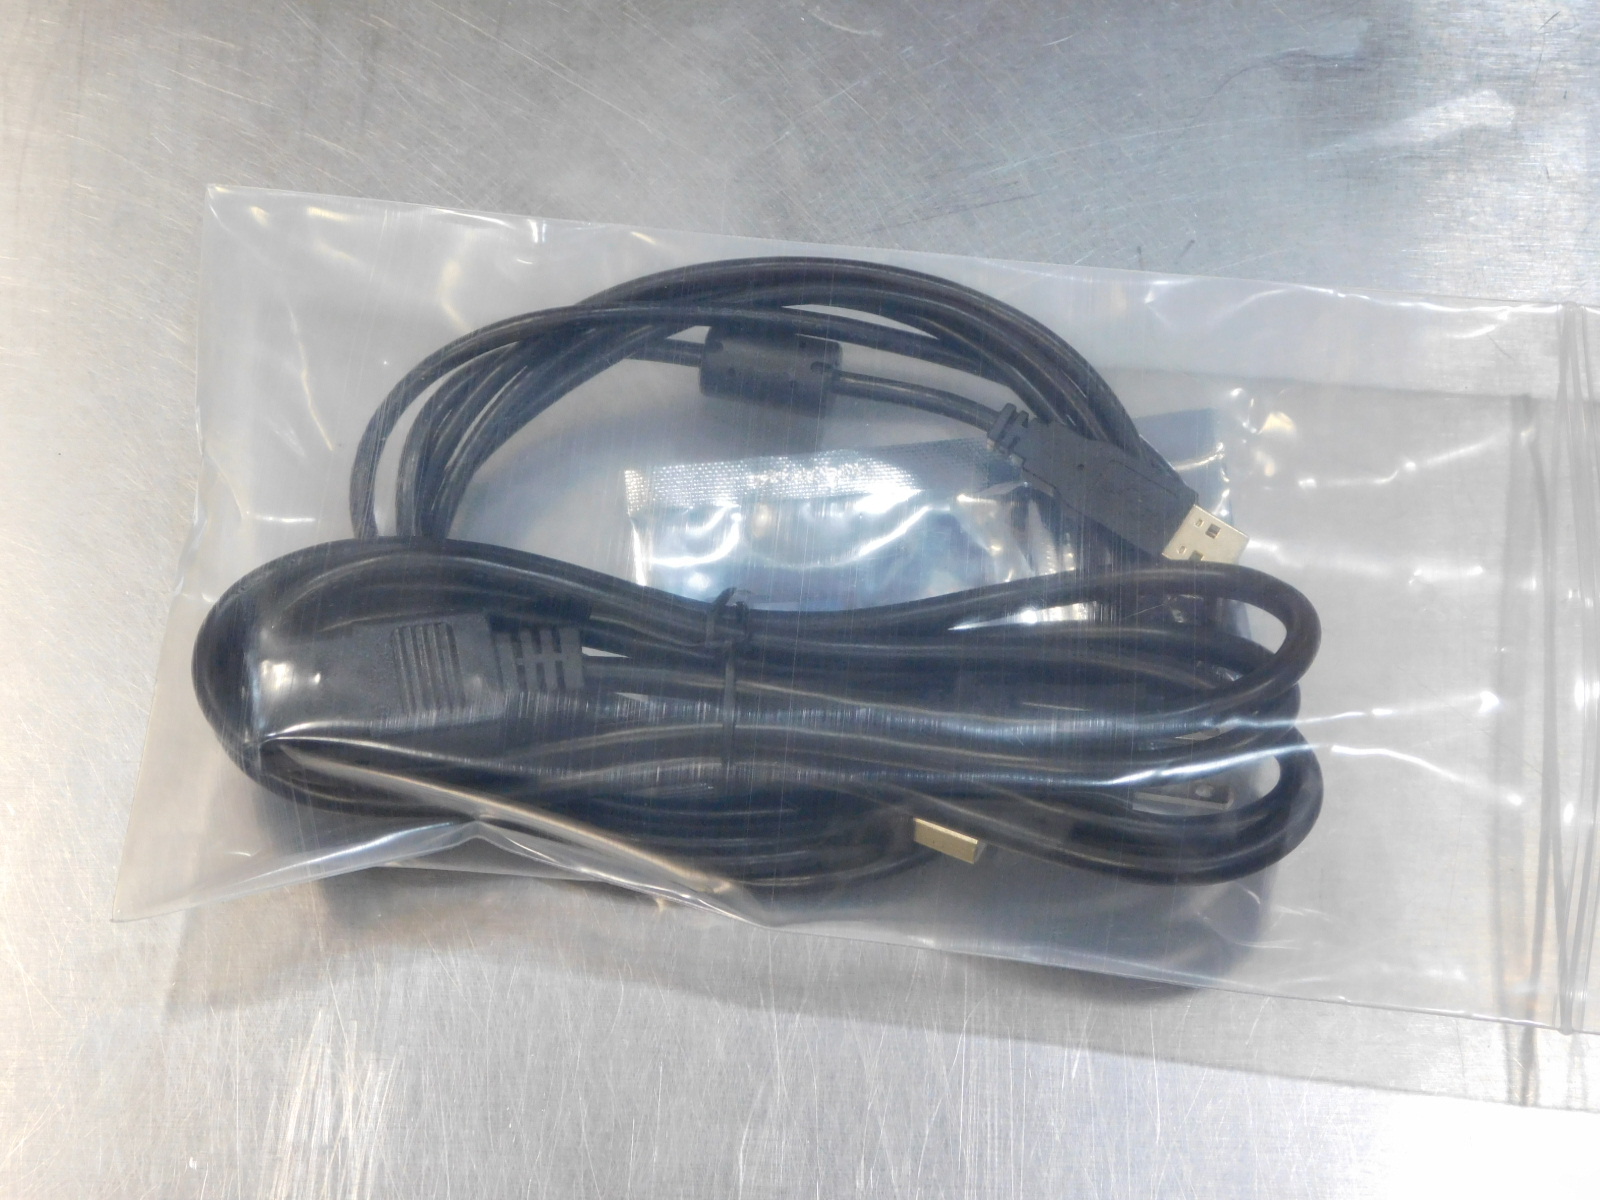
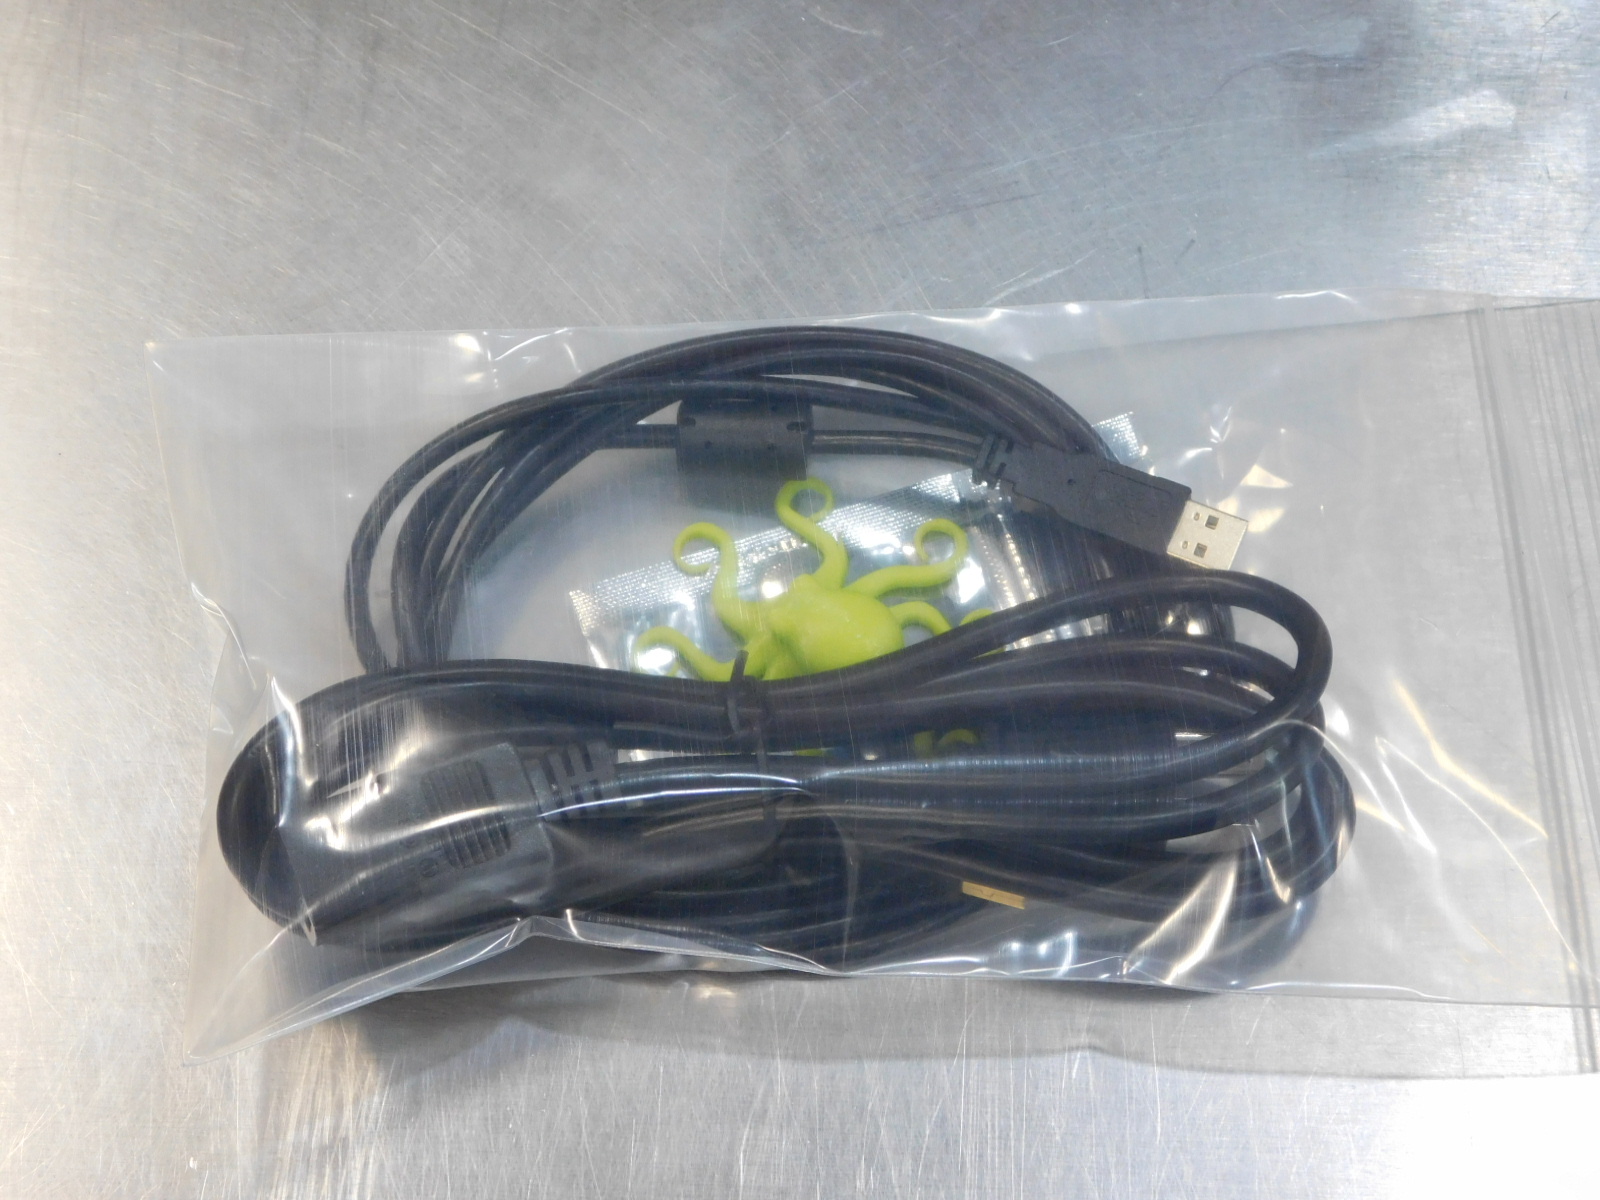
Place the Power Cable [EL-CA0030] into the 6x10" Bag [SH-PG0084] along with the USB Cable [EL-CA0063]
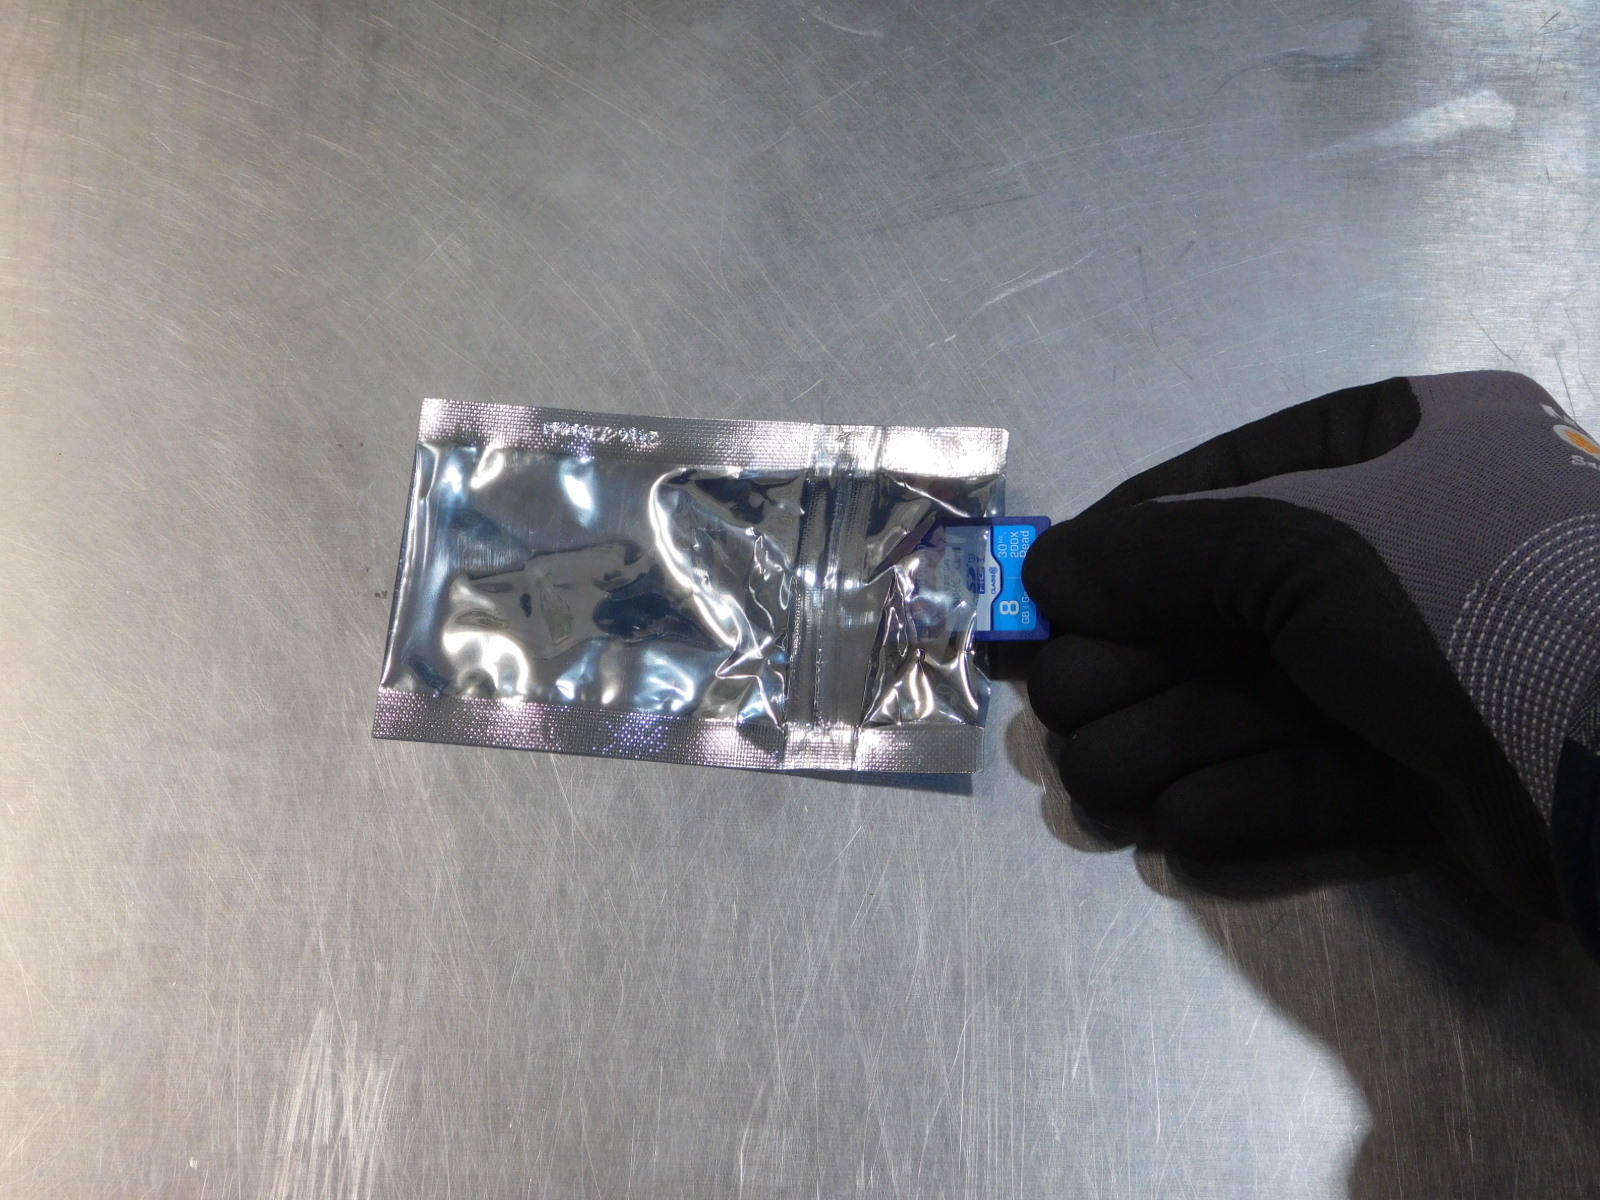
Insert the SD Card [EL-MS0385] into the Static Shielding Bag [SH-PG0031] and place in the 6x10' Bag [SH-PG0084] with the Power/USB Cables.
Carefully place the totally awesome Octopus test print into the 6x10' Bag [SH-PG0084] with the Power/USB Cables and the SD Card (in static bag).
The bag when organized as pictured helps ensure that the octopus test print remains undamaged during the shipping process. Note the position of the octopus. Once all items are in the bag and properly oriented, close the bag.
For UE/ UK shipments:
Additional power cables EL-CA0031 (England/UK) and EL-CA0032 (EU) are added to the shipment
Place the England/ UK power cable (EL-CA0031) and the EU power cable (EL-CA0032) each into a 6”x 10” resealable bag (SH-PG0084) then seal the bag.
For Australian shipments
Additional power cables EL-CA0056 (Australian) and EL-CA0031 (England/UK) are added to the shipment
Place the Australian power cable (EL-CA0056) and the EL-CA0031 (England/UK) cable each into a 6”x 10” resealable bag (SH-PG0084) then seal the bag.
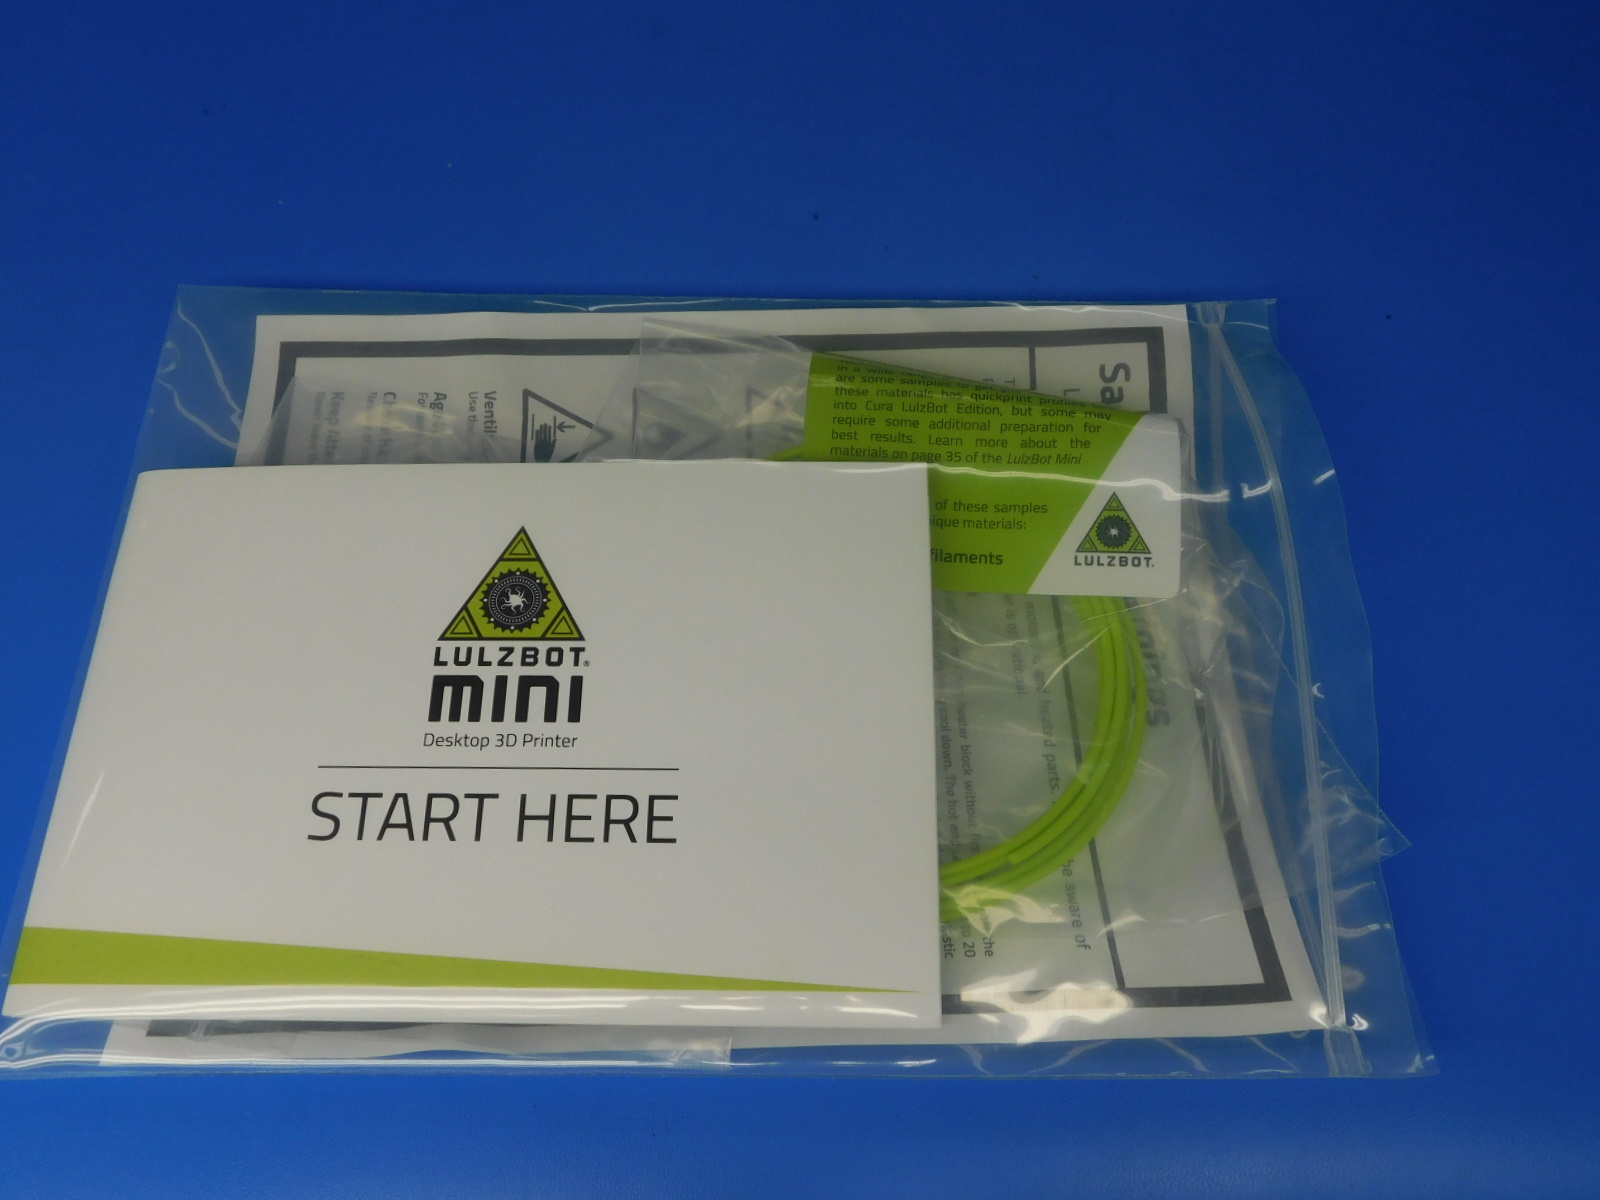
Gather the following materials:
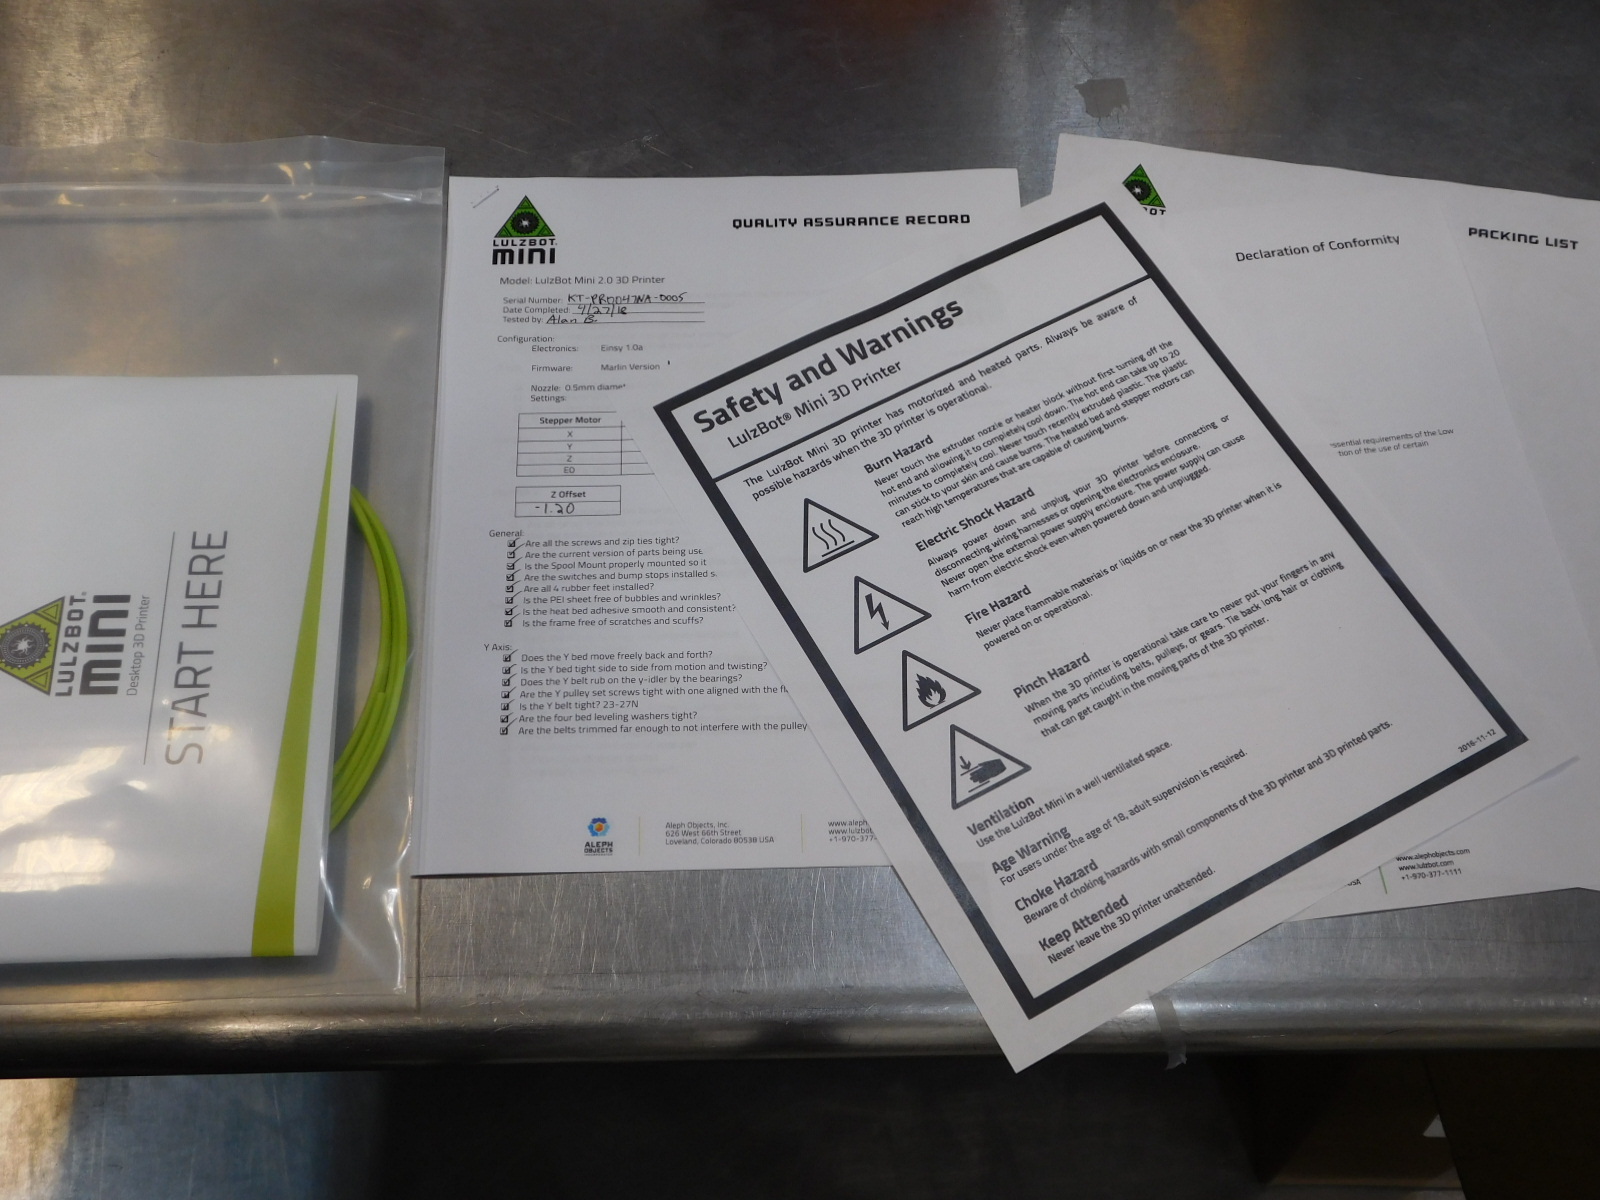
1x- [AS-Pk0028] Mini Document Bag (pre-prepared)
1x- [DC-MS0070] Packing List, Mini 2
1x- [DC-MS0069] EC Declaration of Conformity, Mini 2
1x- [DC-MS0031] Safety & Warnings Sheet
1x- [DC-MS0071] Completed Quality Assurance Record
Complete the Packing list [DC-MS0070]
Copy the machine's serial number off of the Quality Assurance Record [DC-MS0071] and verify that both serial numbers match the serial number on the back of the machine
Fill out your name and today's date
Complete the checklist, ensuring that each item is present and complete
Verify printed documents are clean and free of any stains or damage.
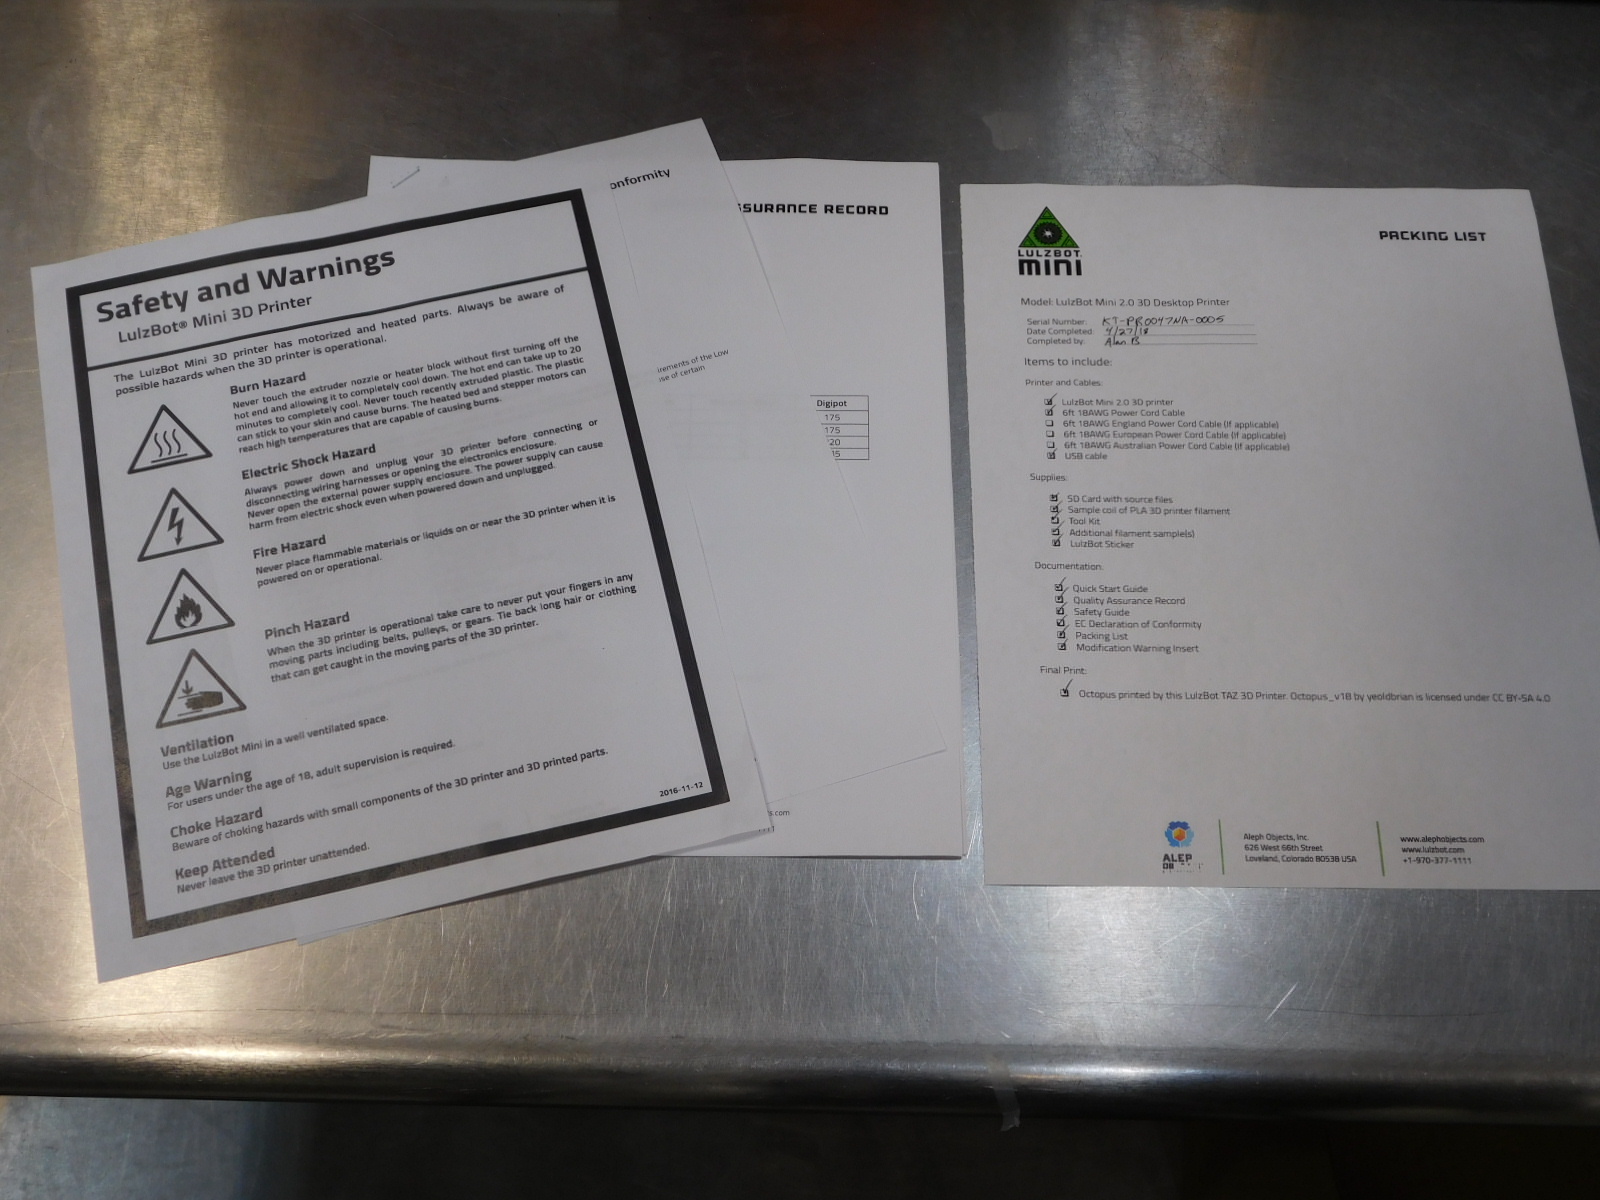
Stack the documents in the following order:
1) Warning sheet, Mini [DC-MS0031]
2) EC Declaration of Conformity, Mini v1.0 [DC-MS0069]
3) Completed Quality Assurance Record [DC-MS0071]
4) Packing List, Mini 1.0 [DC-MS0070]
Flip the Packing List over, so that once the documents are in the bag, the Packing List will show on the back side of the bag.
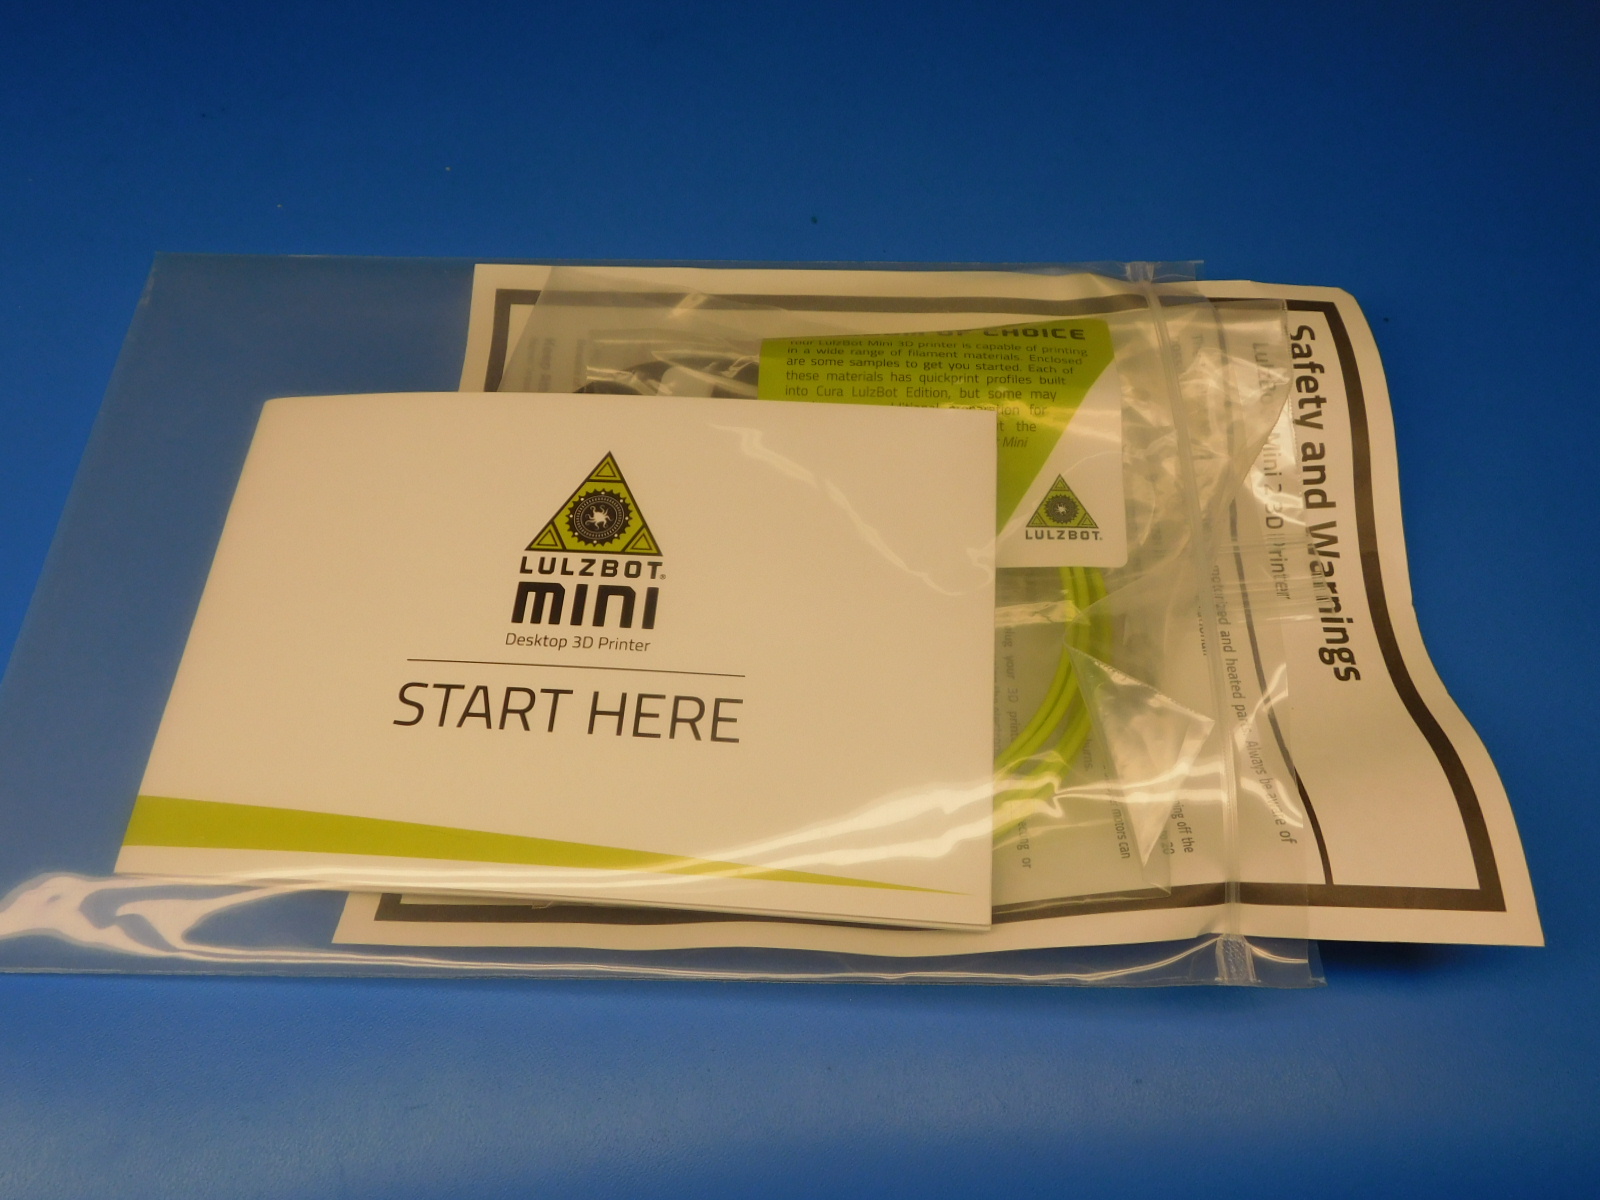
If necessary, remove other items from the bag to ease insertion of the documents as it is important that they do not become creased or folded.
Place the other items back in the bag on the side facing the Warning Sheet, ensuring that the Quick Start Guide is on top, as pictured.

Examine the machine:
Ensure customer facing surfaces are free of unacceptable cosmetic defects.
Ensure the Z-Axis has been placed in proper shipping position.
Ensure that the heat bed is free of unacceptable defects.
Verify the serial number sticker on the rear of the machine is present and matches both the Quality Assurance Record and the Packing List.
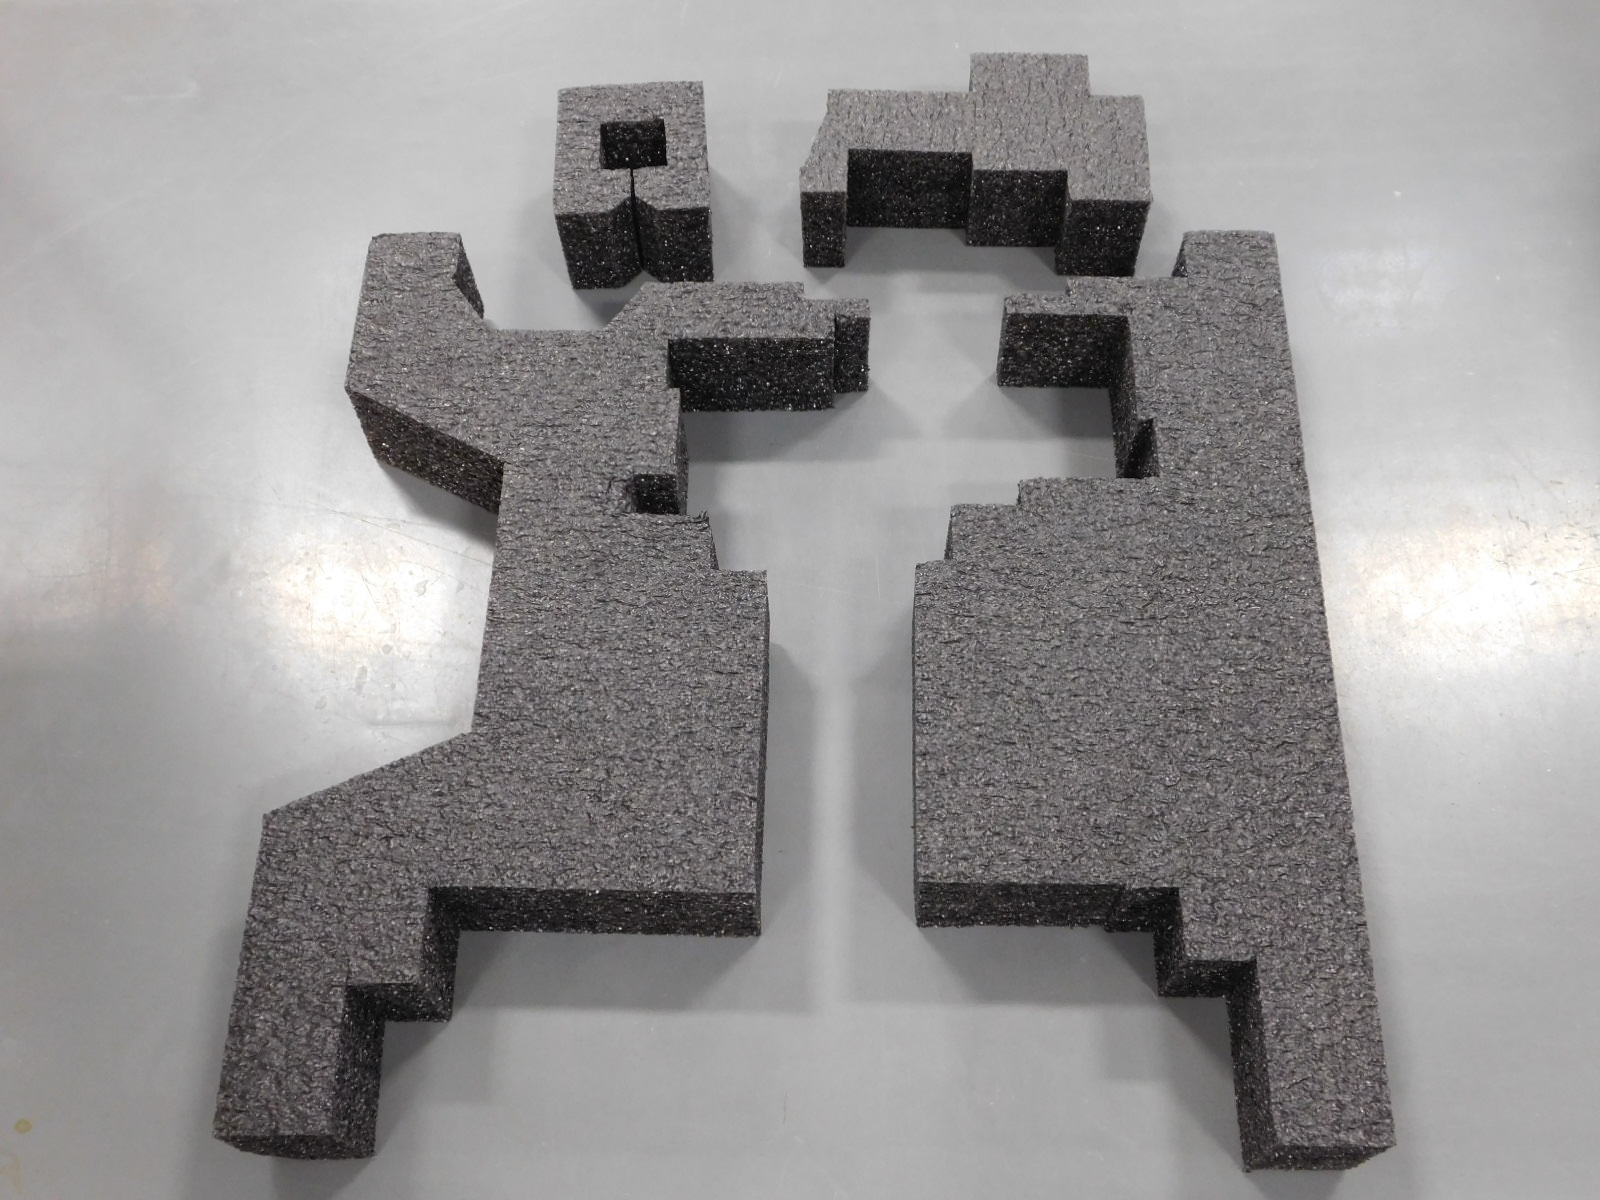
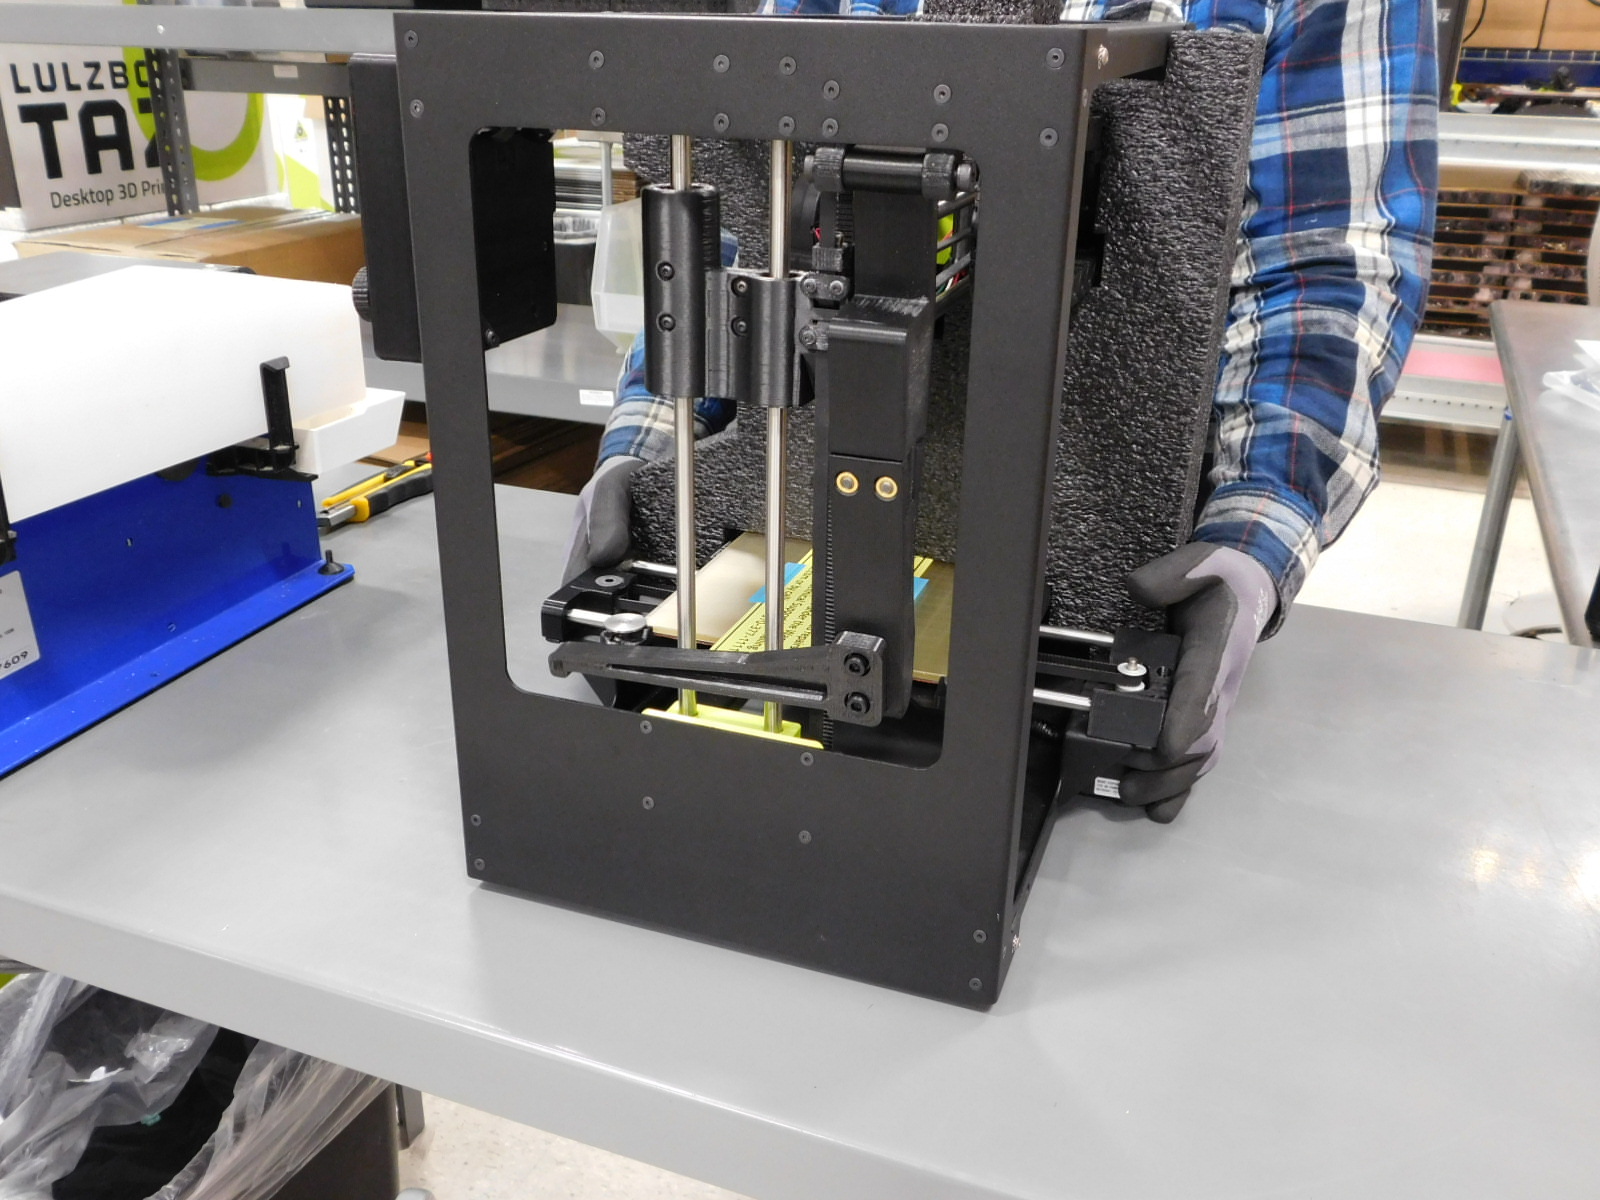
Gather the following materials:
1x- [SH-PG0173] Mini 2 Print Head Stabilizer
1x- [DC-LB0063] Modification Warning Insert
100mm- [SH-PG0069] 1/2' Blue strapping tape
Using two short lengths (~1”) of small blue strapping tape [SH-PG0069], affix the Modification Warning Insert [DC-LB0063] to the printer's heat bed, as pictured.
Break apart the Mini 2 Print Head Stabilizer [SH-PG0173] and keep only the pieces in the picture.
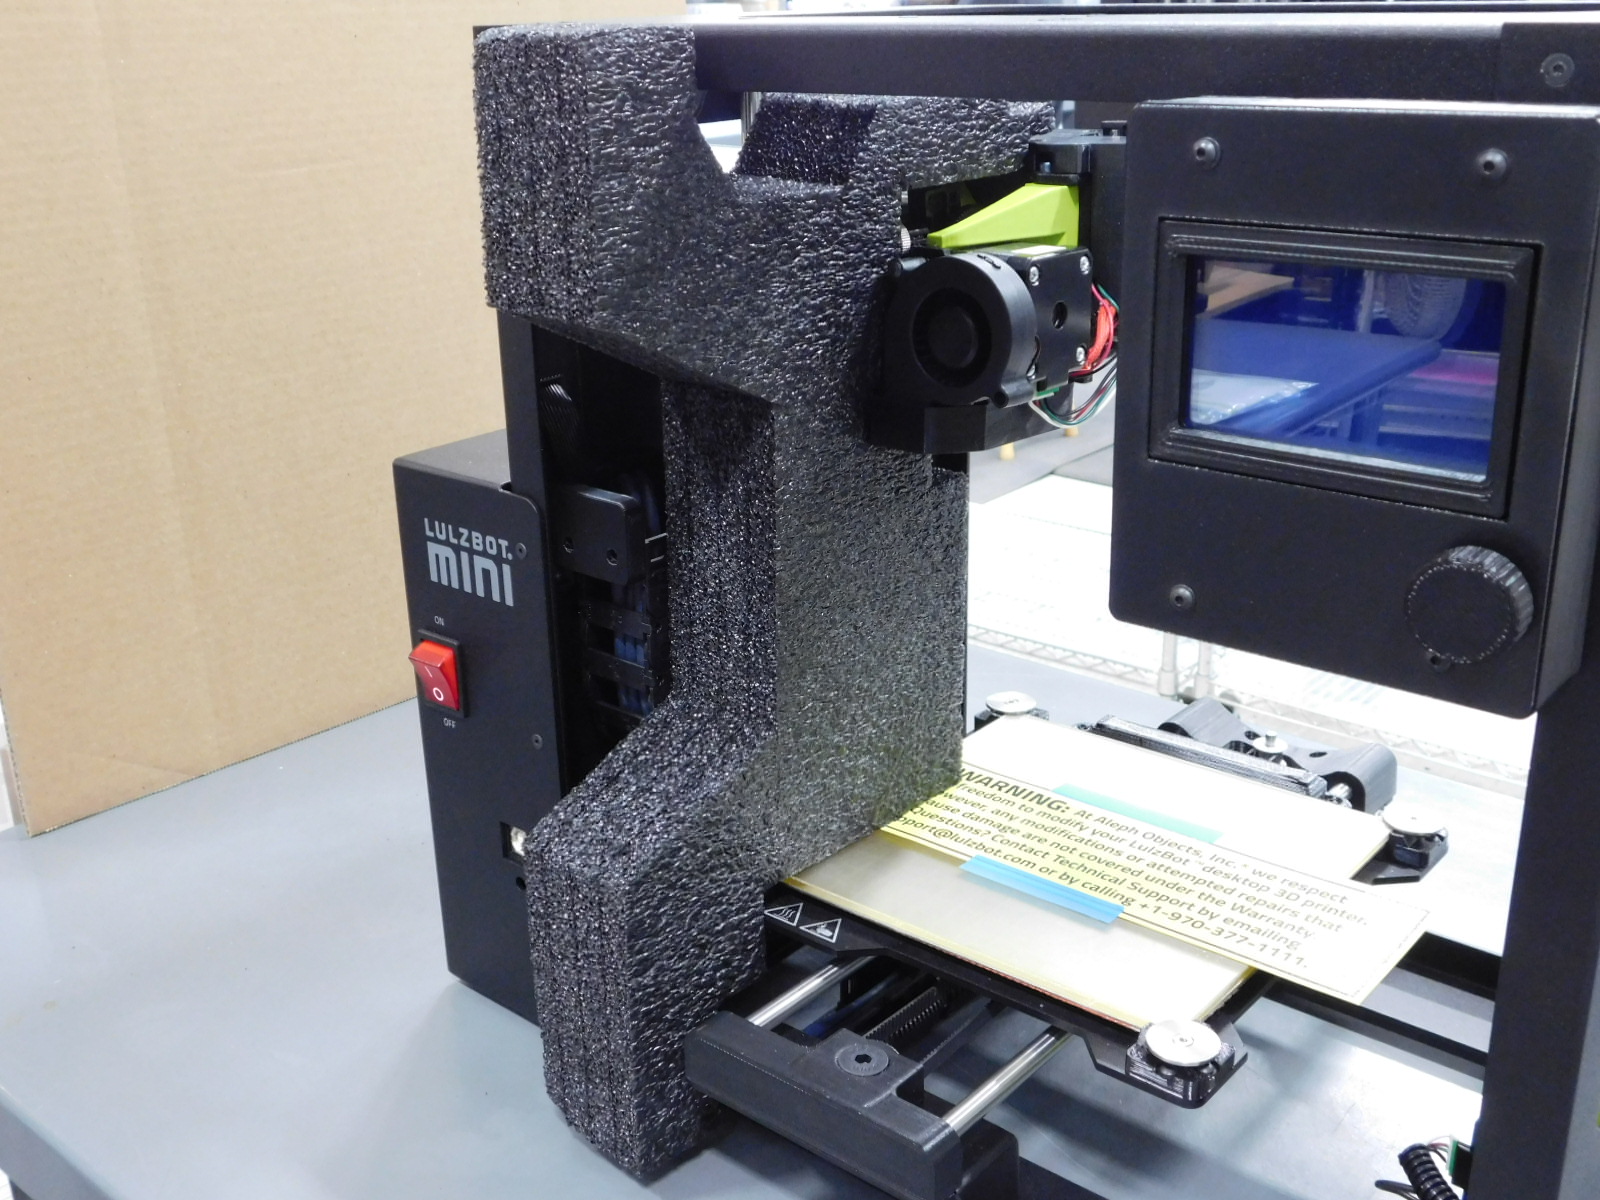
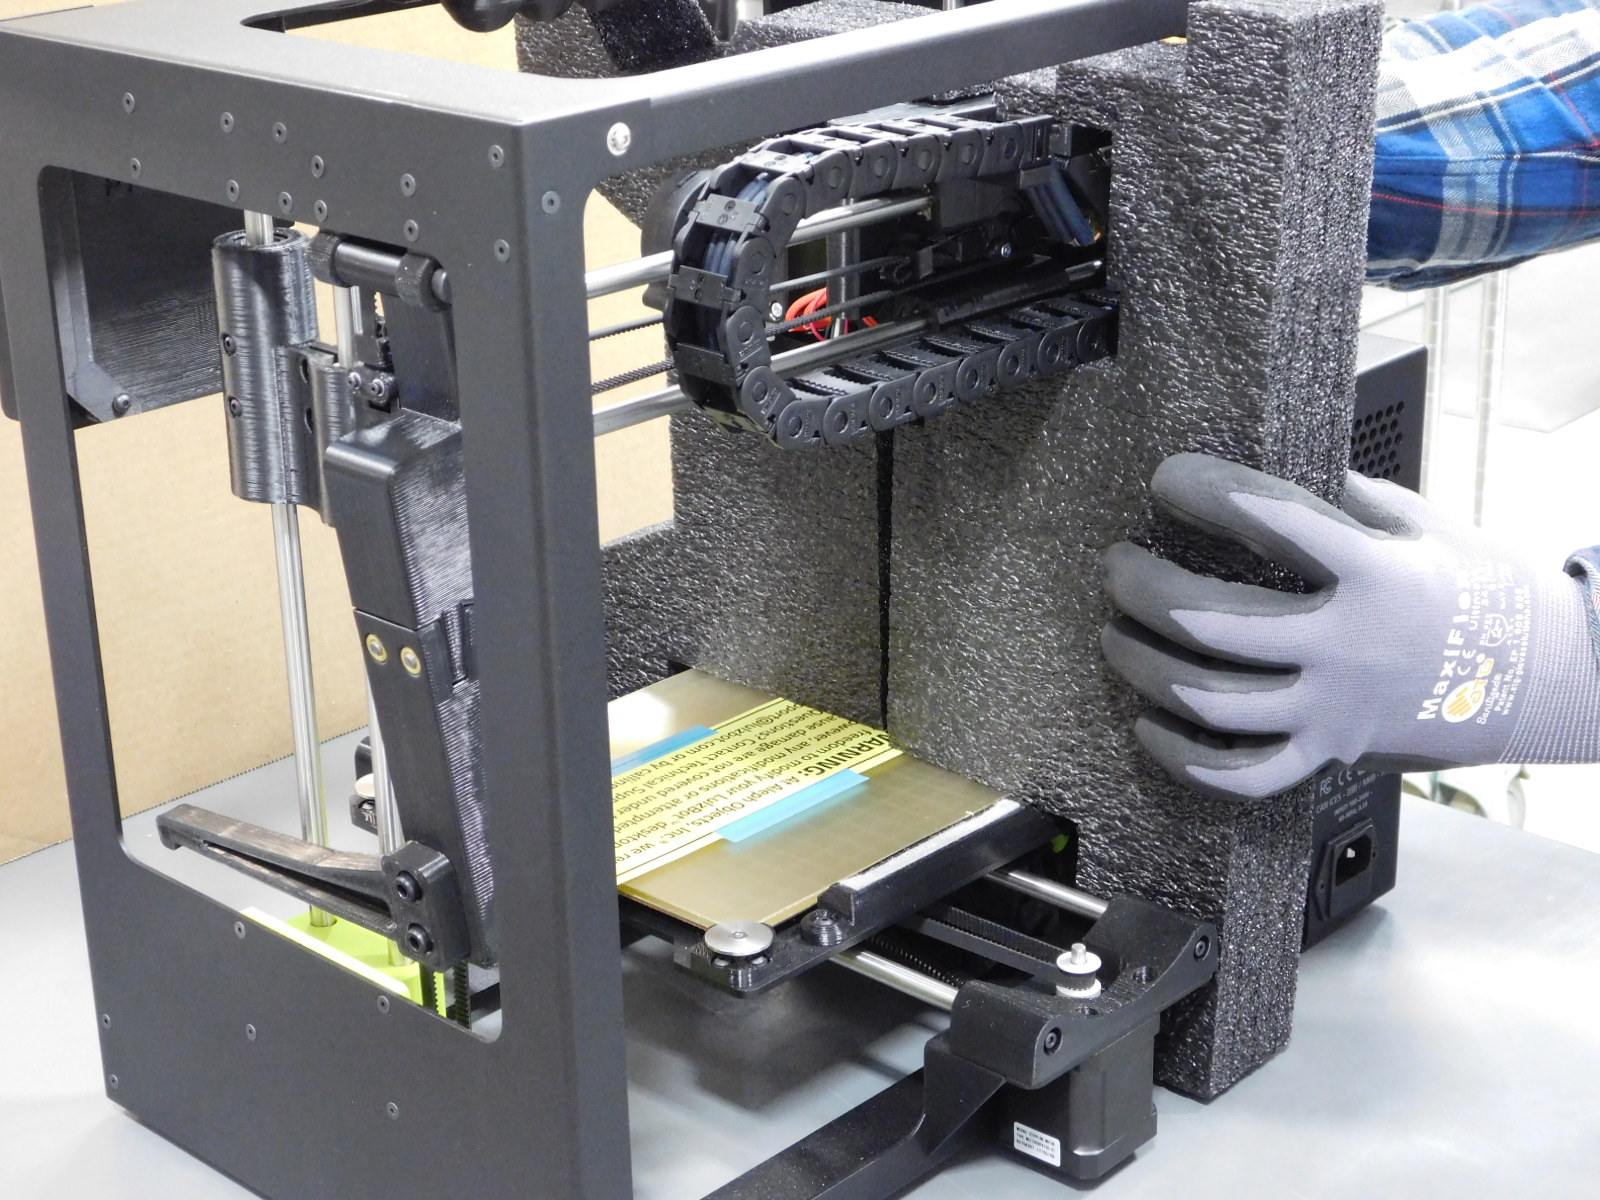
Insert the front foam piece, ensuring the print head is supported.
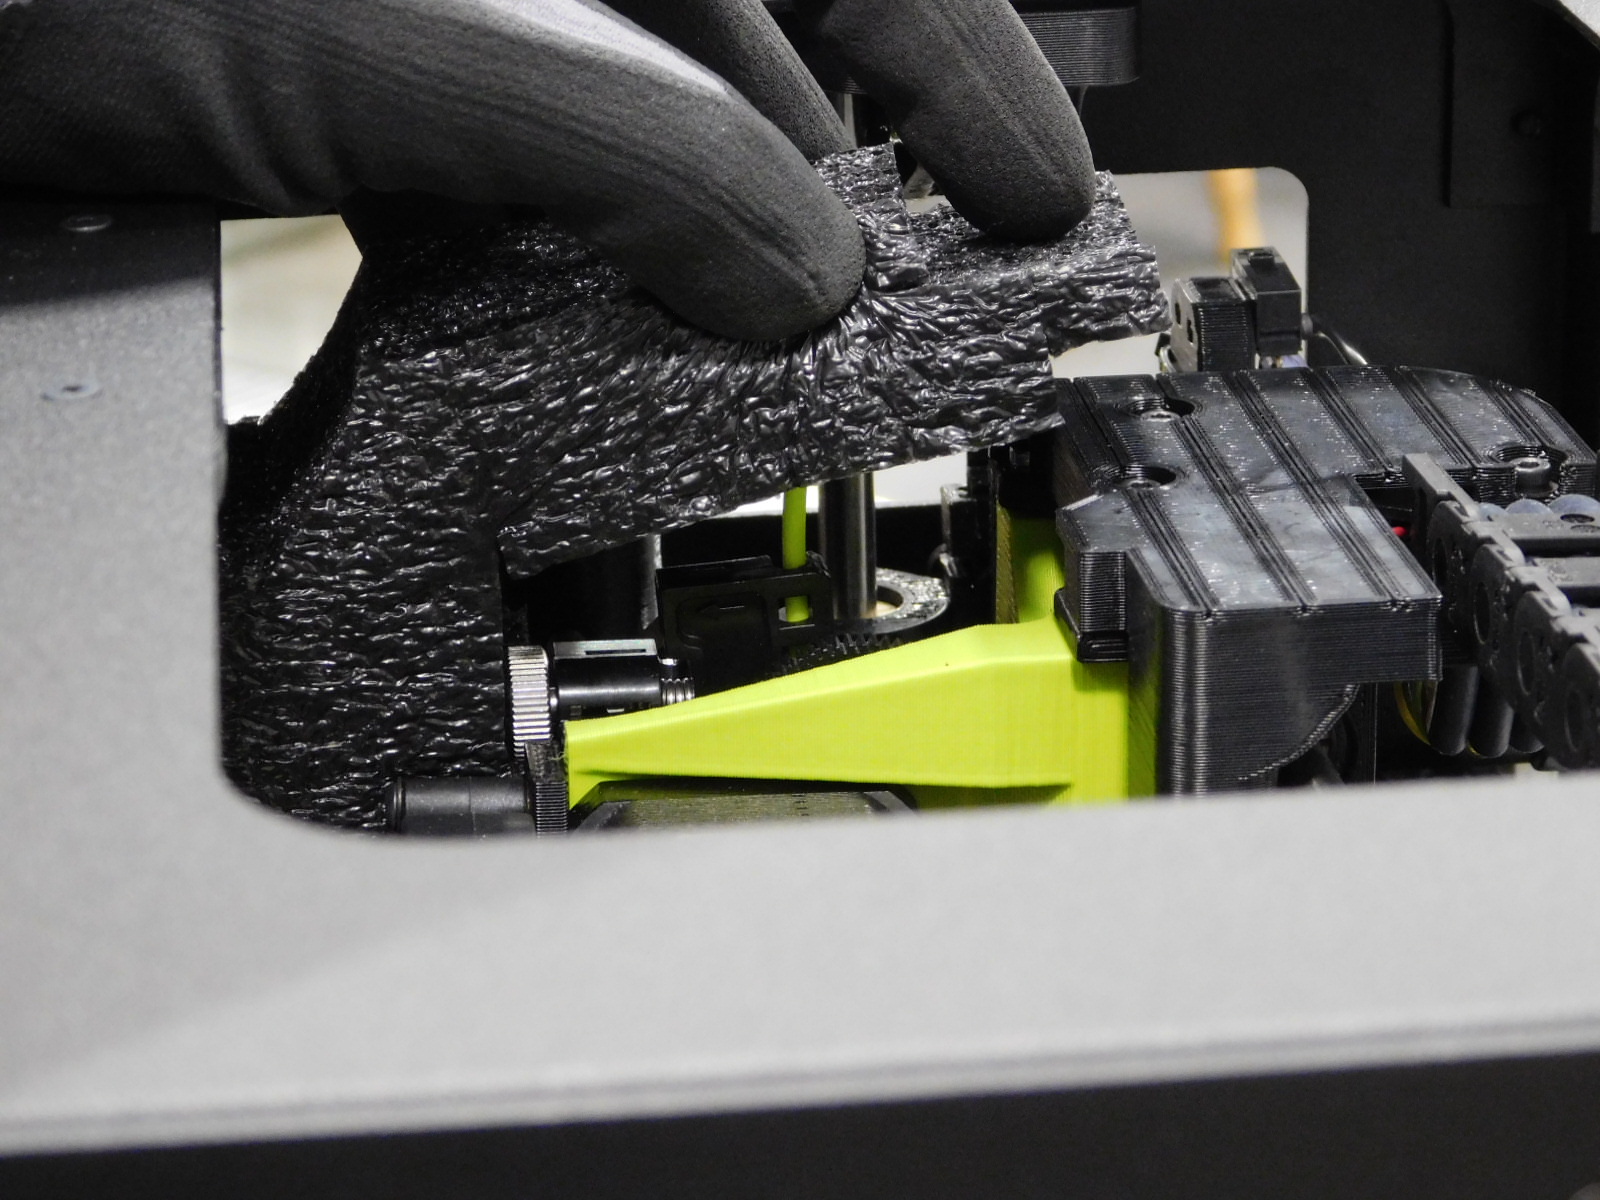
Lift the top of the front foam piece over the filament protruding from the top of the tool head, and poke the filament into the foam so that it rests flat on top as pictured.
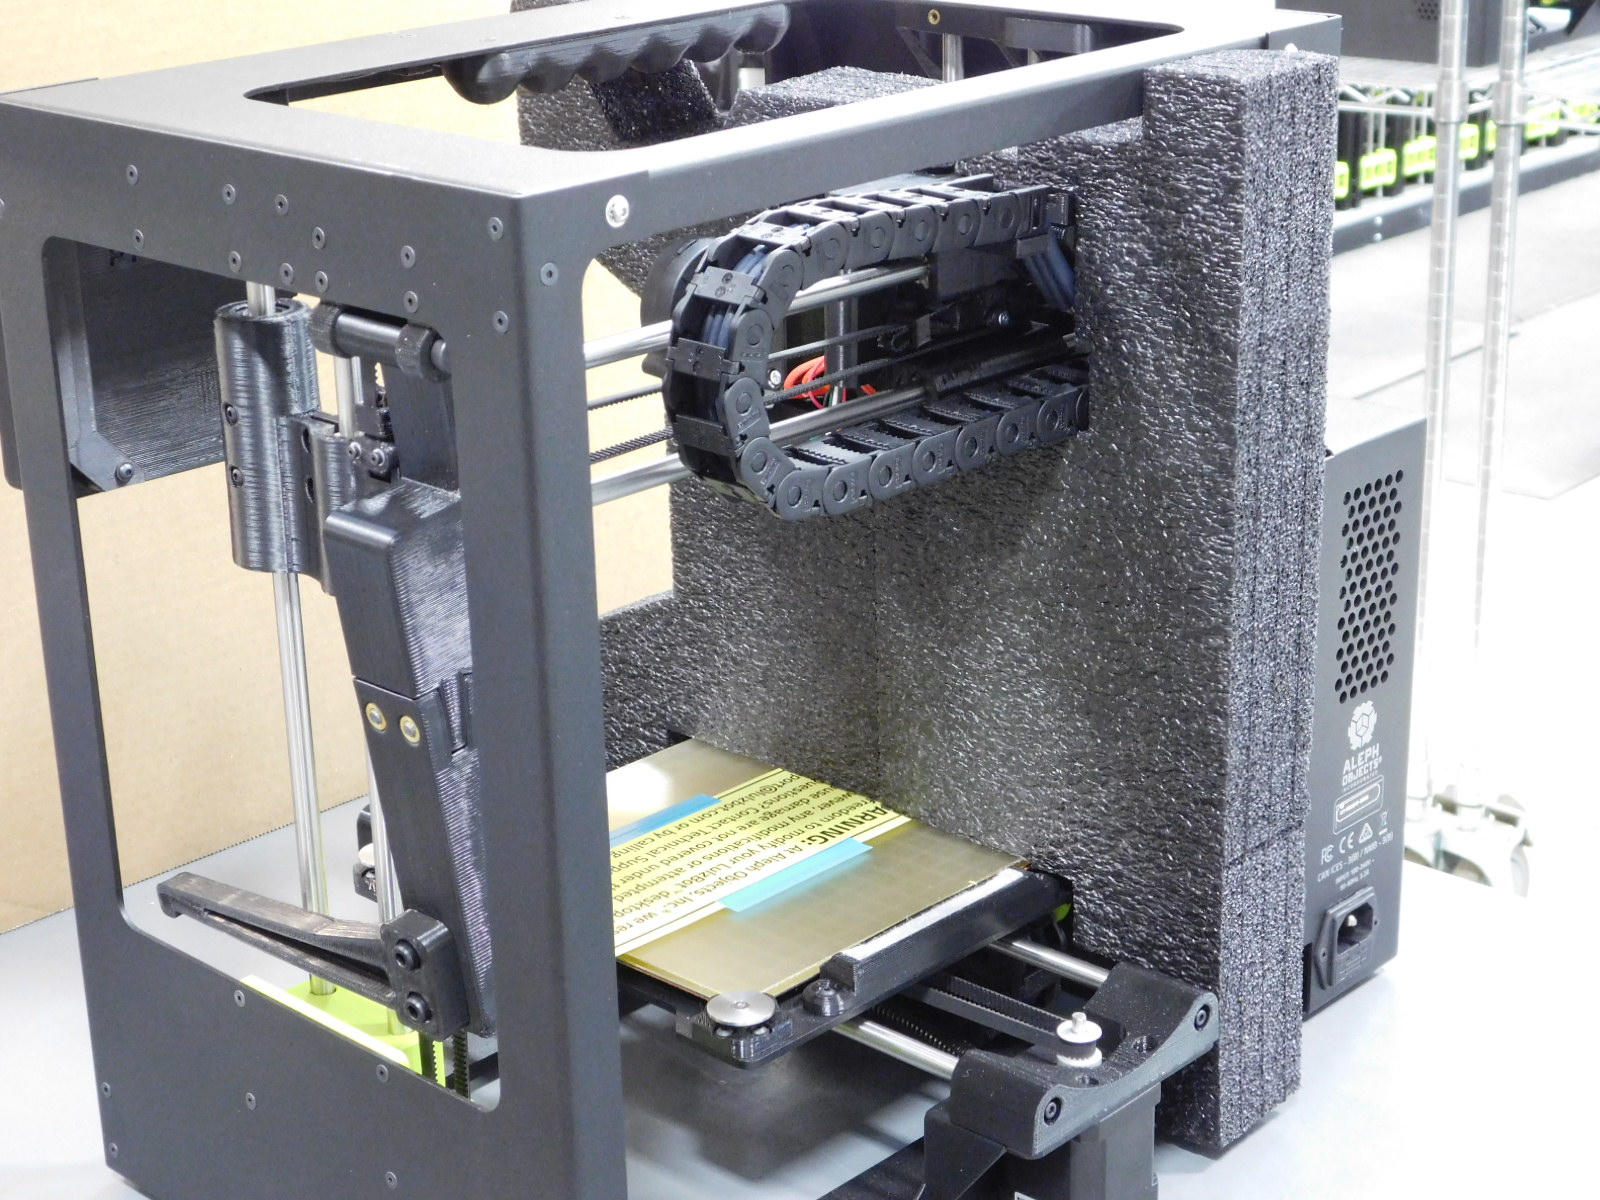
Insert the rear foam piece as pictured. The two halves should meet in the center of the machine.
Place the Cap Foam over the machine's X-Carriage Cap, encompassing both front and rear halves of the packaging foam.
Place the foam ring around the printers spool arm support as pictured.


Gather Materials Needed:
1x- [AS-PR0093] Mini 2 Printer, calibrated – prepared in previous steps
1x- [AS-PK0028] Mini 2 Document Bag – Completed
1x- [AS-PK0029] Mini 2 Toolkit - Completed
1x- [SH-BX0496] Mini 2 Shipping Box – See above for preparation
1x- [SH-PG0176] Mini 2 Foam, Top
1x- [SH-PG0177] Mini 2 Foam, Bottom
1x- [SH-PG0019] Mini 2 Barcode Label
1725mm- [SH-PG0131] White Reinforced Tape with LulzBot Logo (or 68")
1x- [DC-LB0111] Filament Samples Bag Label – Mini 2
1x- [SH-PG0030] 8x10" RECLOSABLE BAG
200mm- [SH-PG0072] 2” wide blue poly tape cut to approximately 100mm long
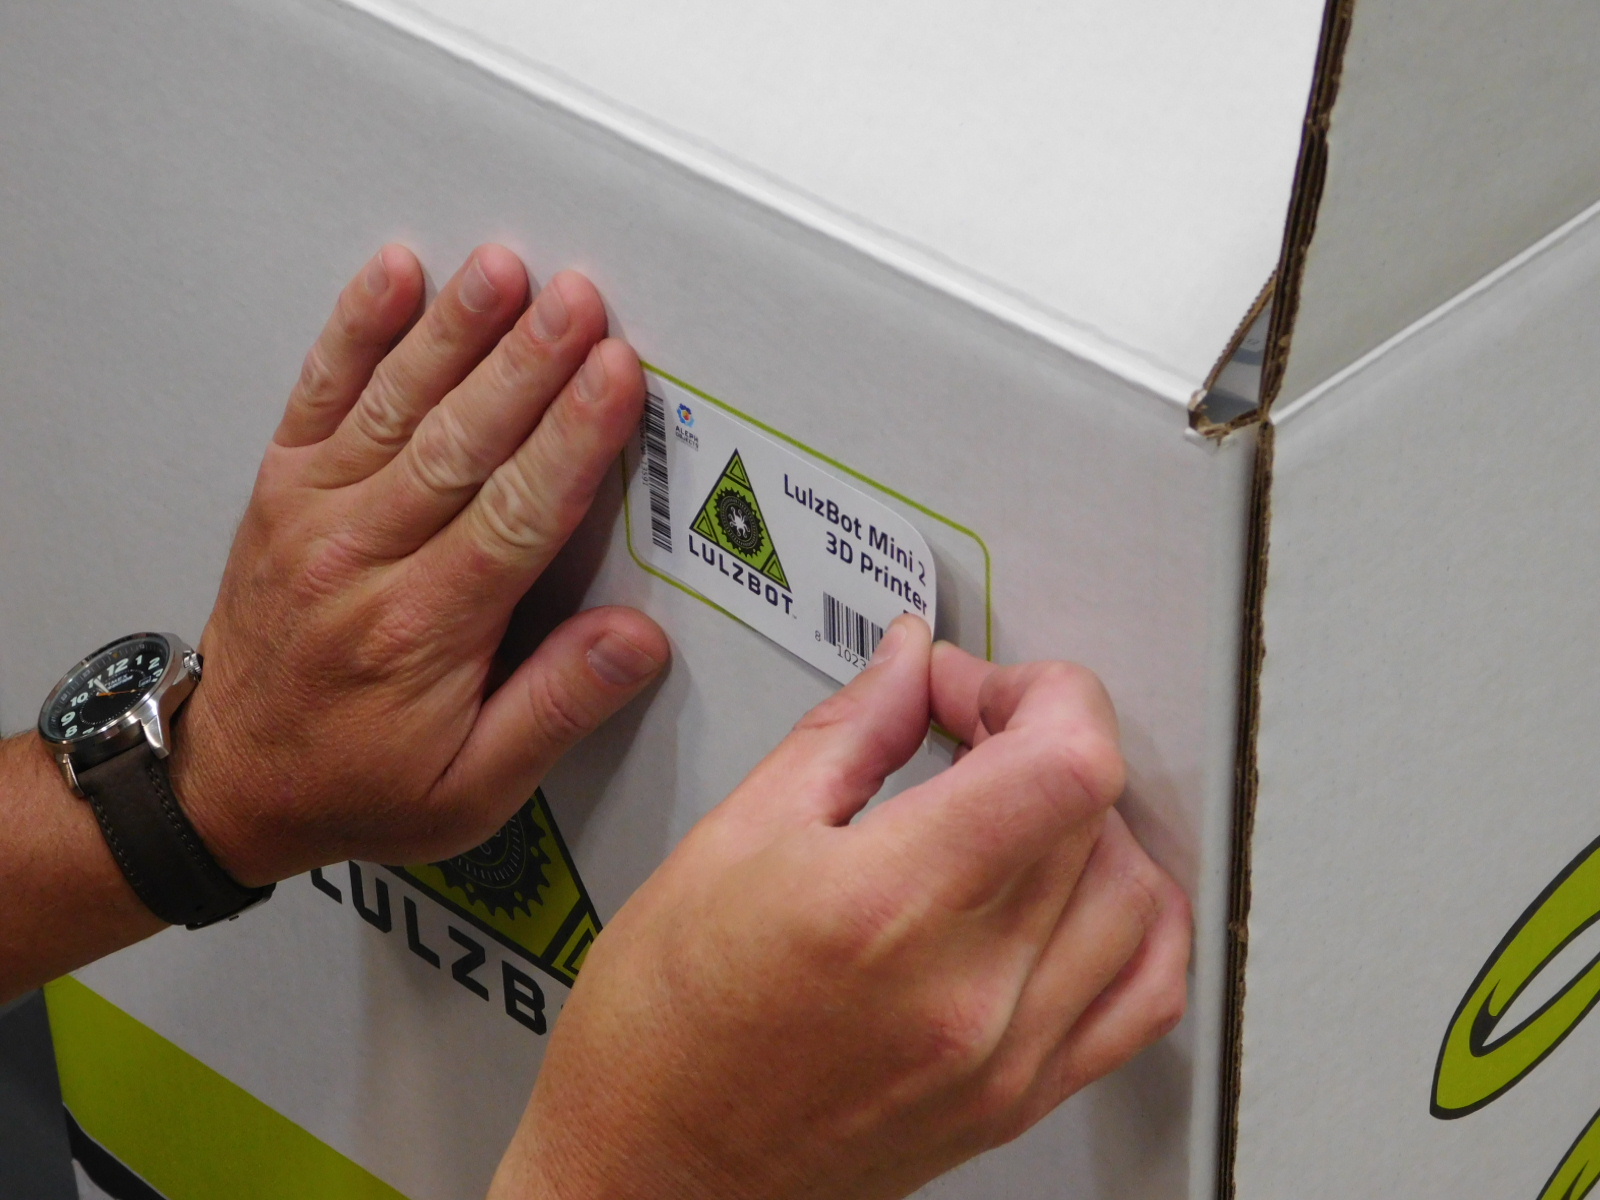
Orient the Shipping Box [SH-BX0496] on the stand upright, with the green outline for the serial number facing you.
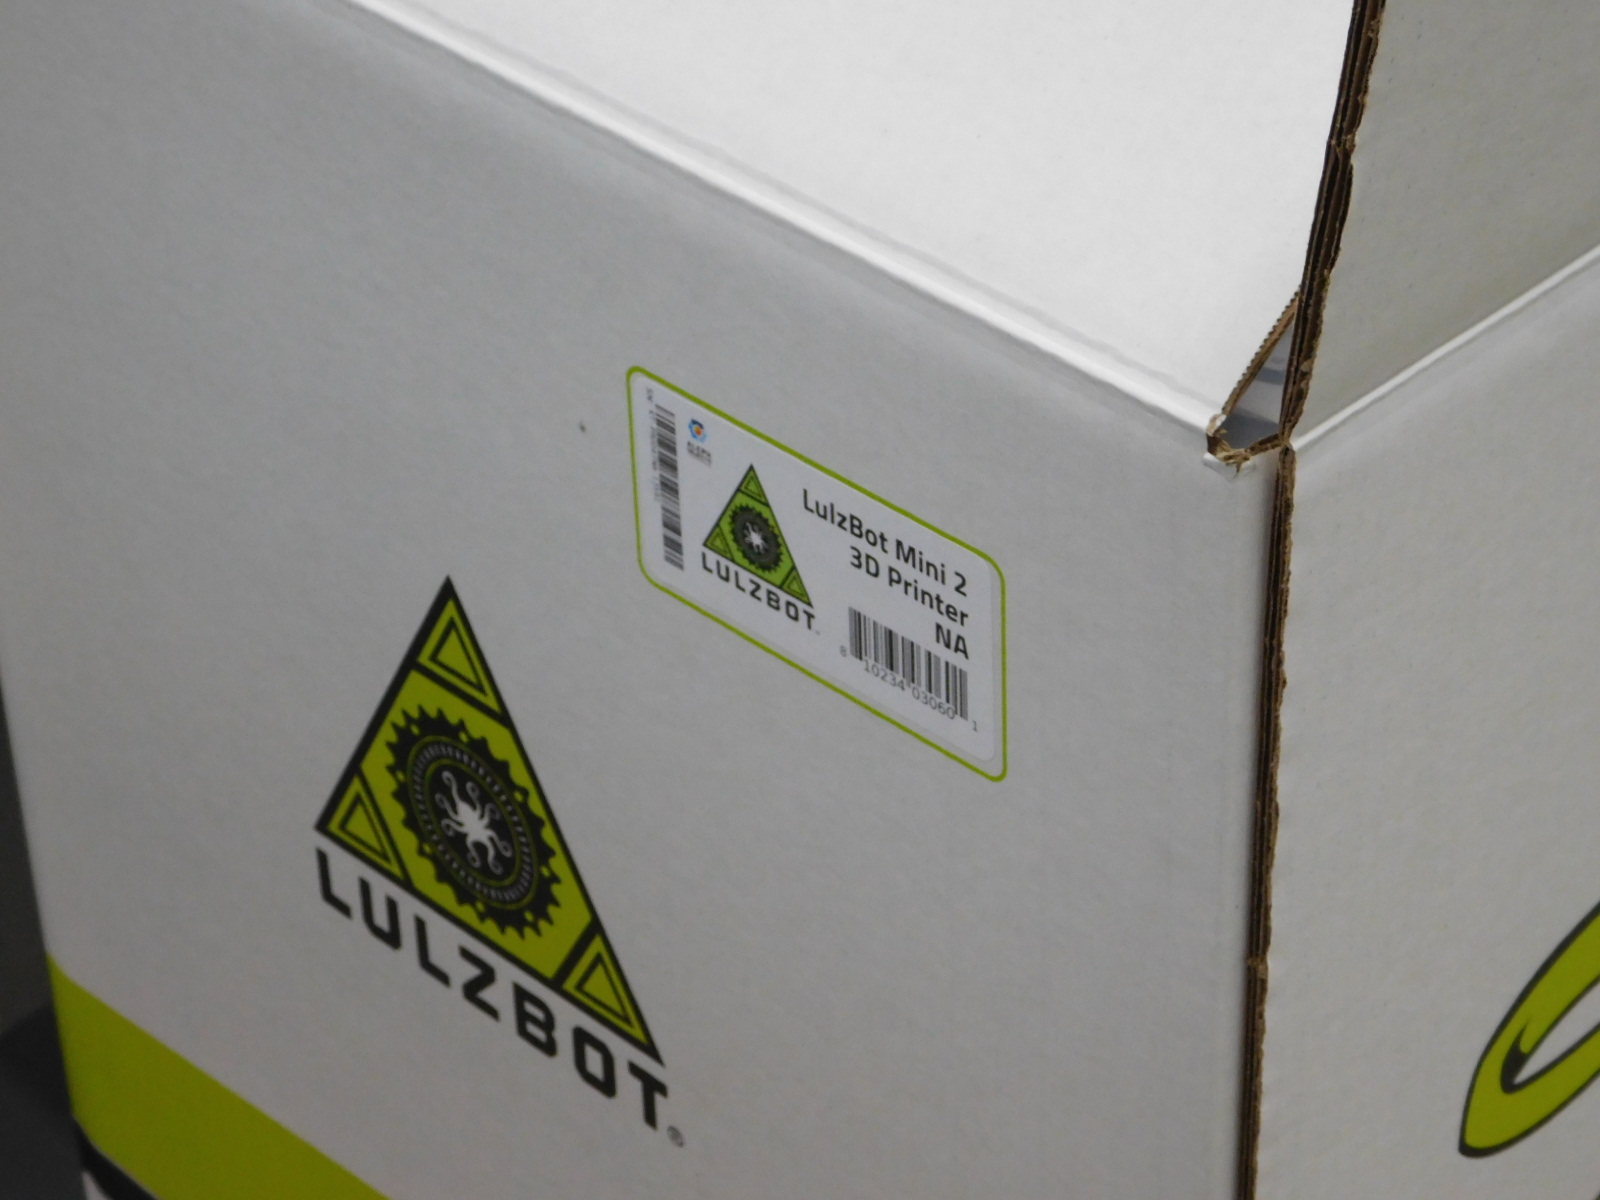
Locate the correct Serial Number/Barcode Label [SH-PG0019] for the machine to be packaged, verify the serial number matches the number on the rear of the machine.
Apply the Serial Number/Barcode Label [SH-PG0019] within the green outline. This should be on the same side of the box as the control box for the printer.
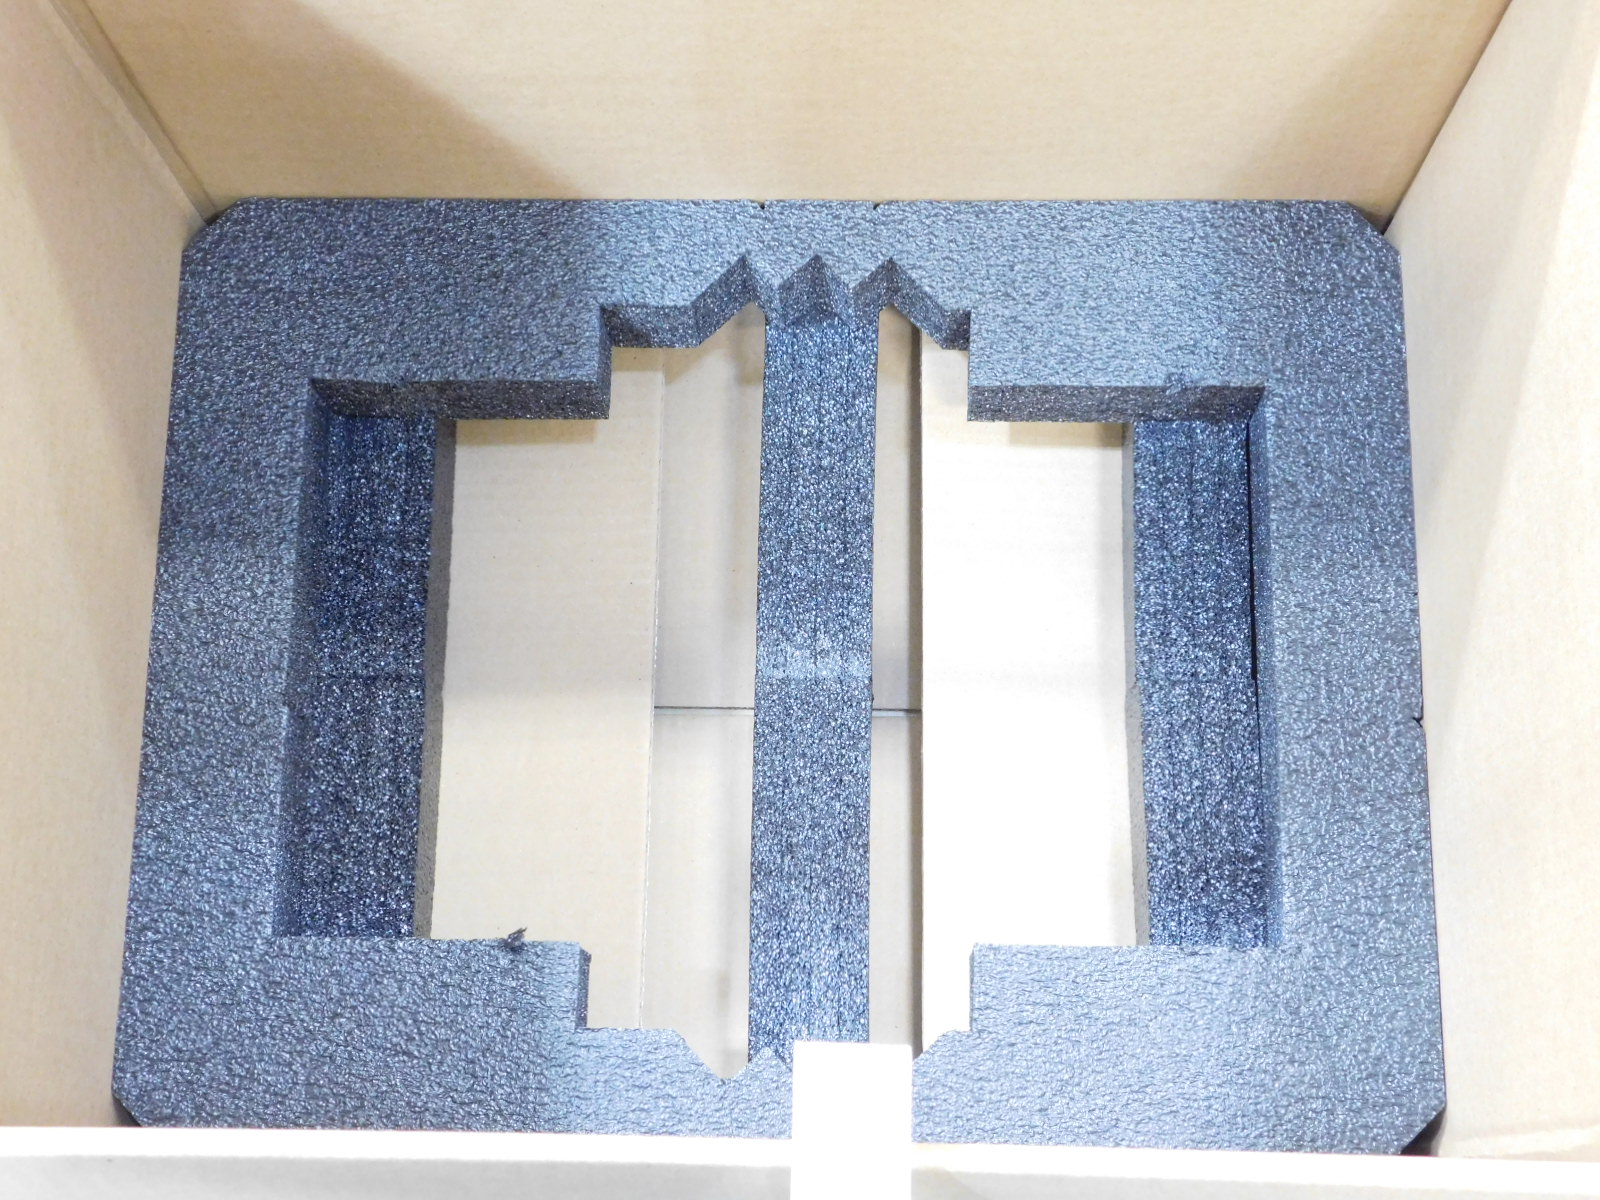
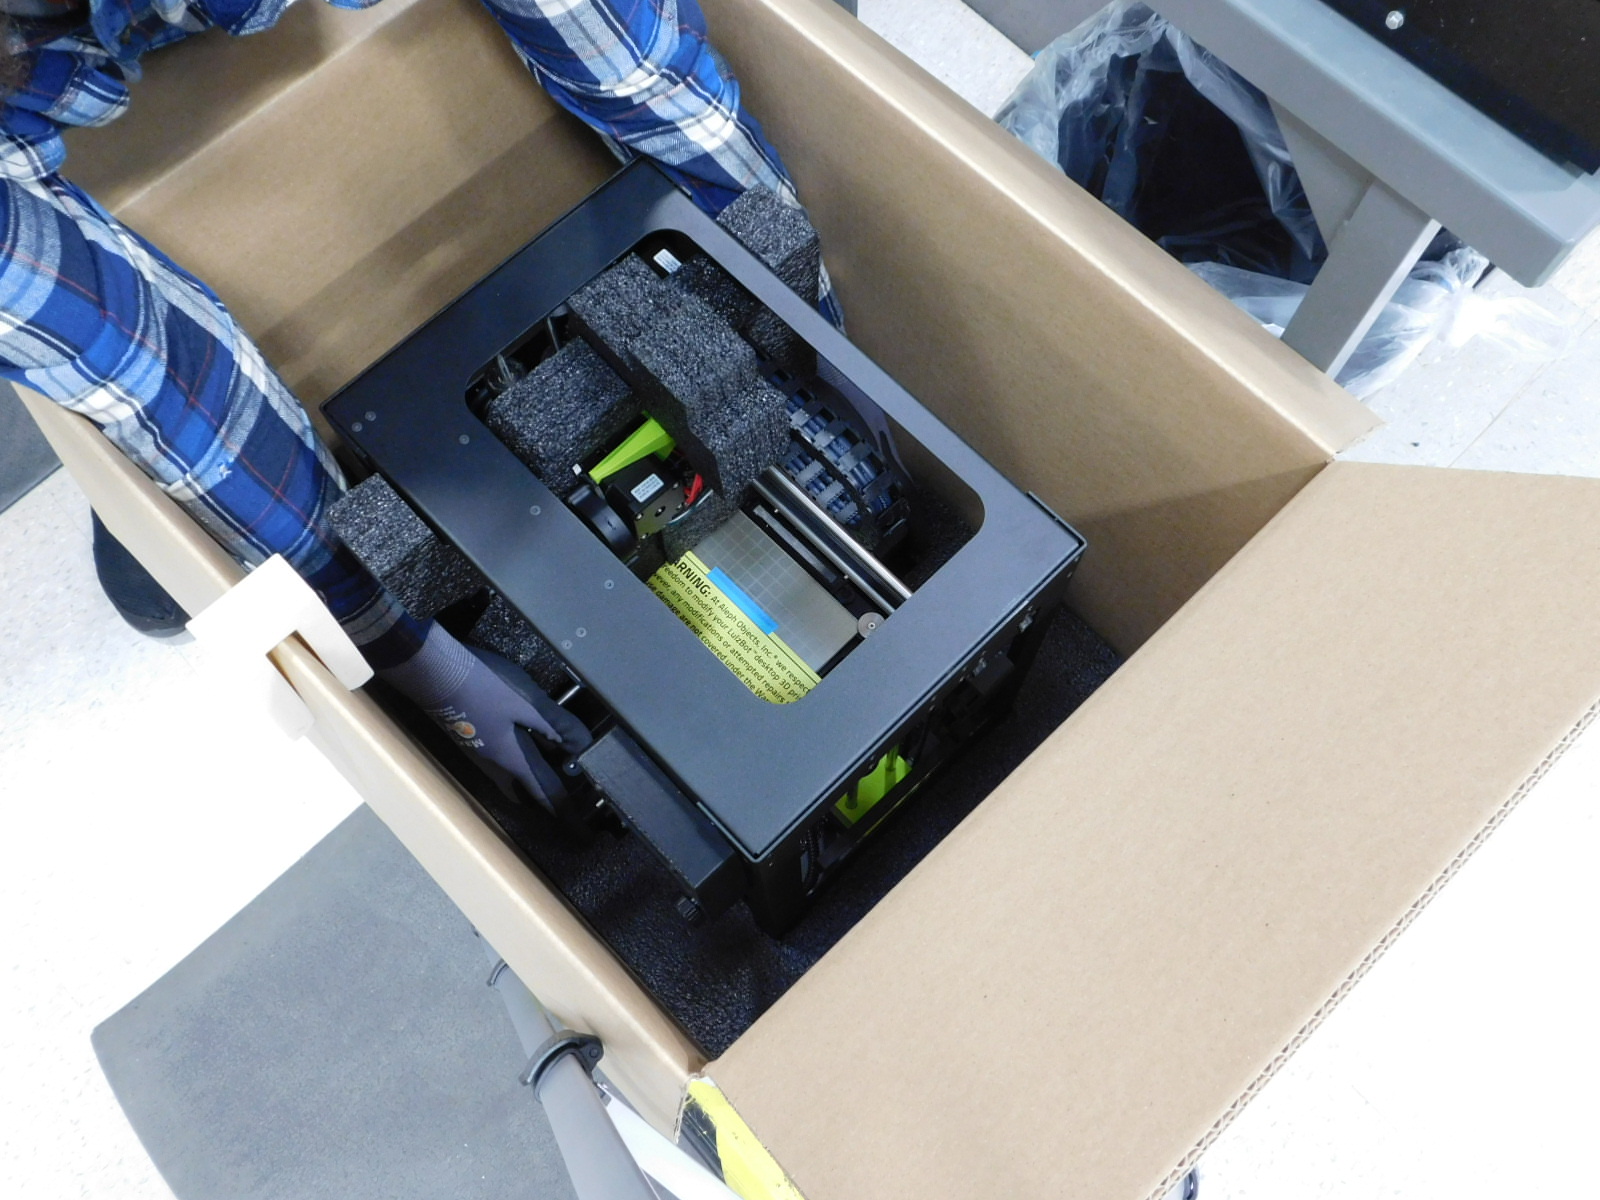
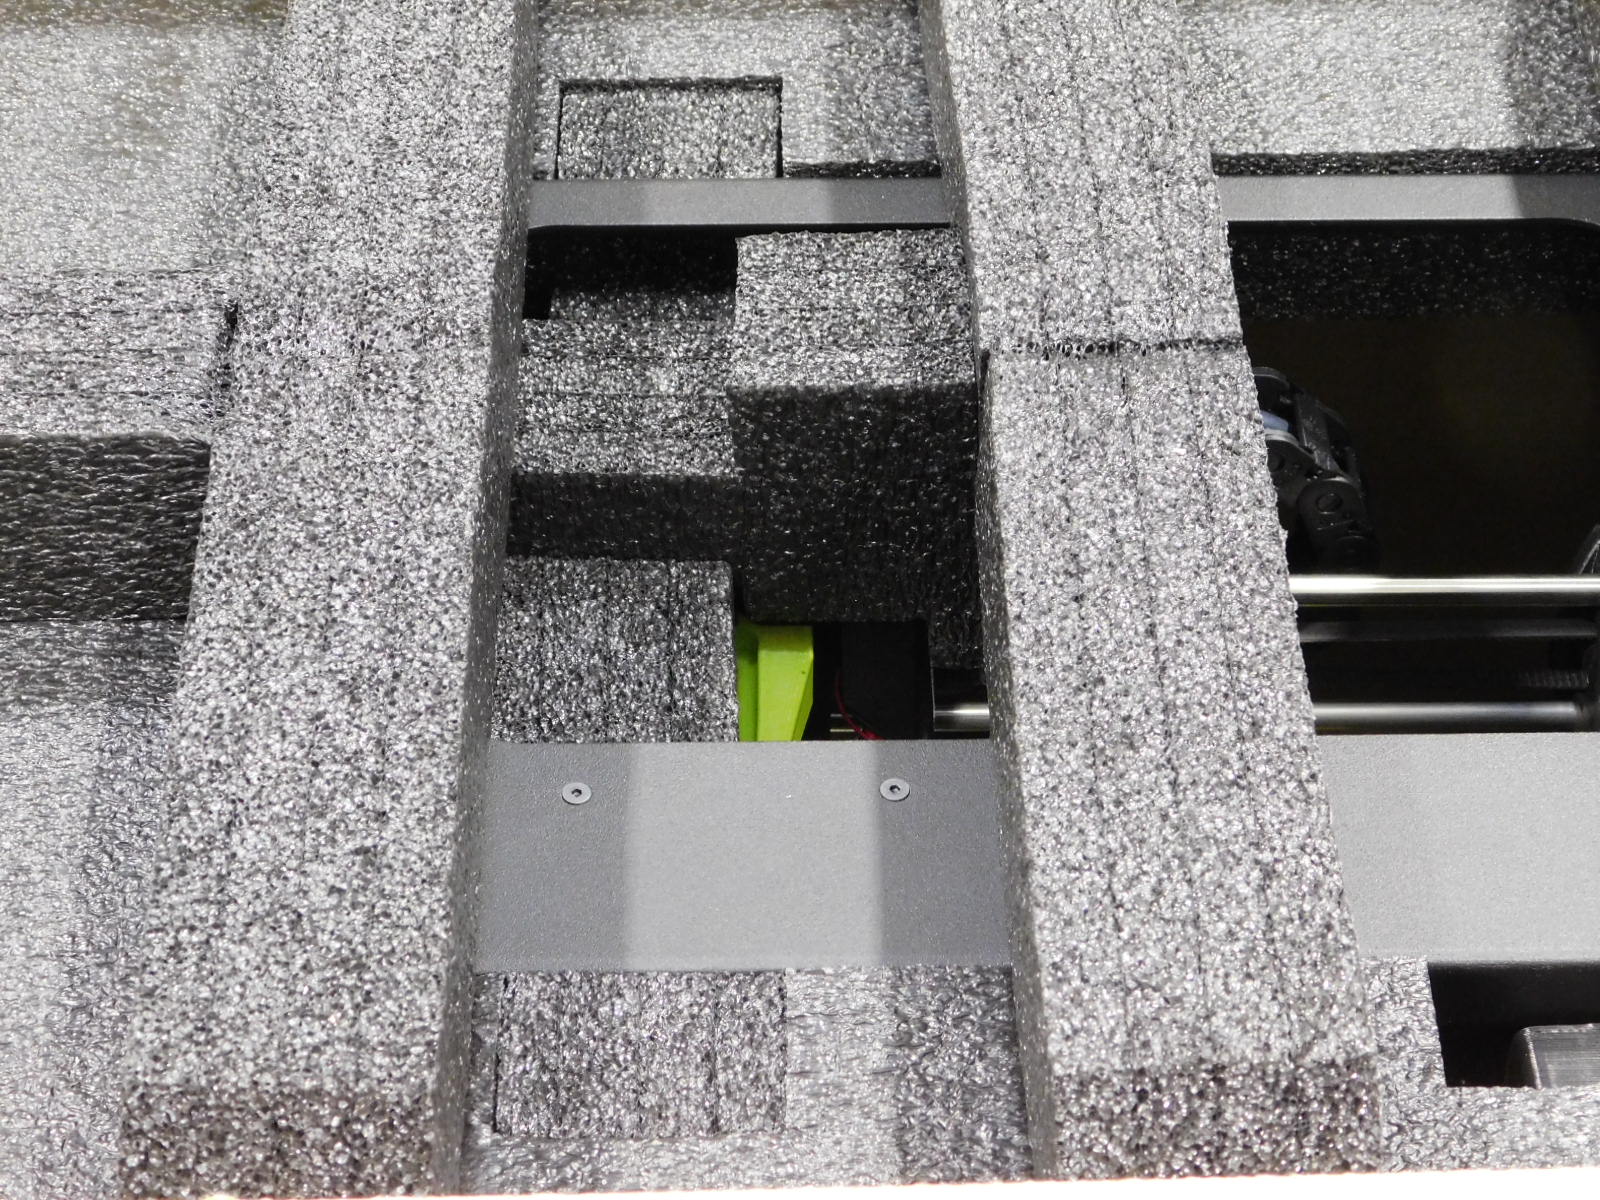
Locate the Mini 2 Foam Bottom [SH-PG0177] refer to picture for identification.
Place the Mini 2 Foam Bottom [SH-PG0177] in the box, ensuring the flat side is facing up and the left side is facing towards you (and the side of the box with the green outline), refer to picture for orientation.
Grab hold of the machine by using your fingers underneath each end of the Y-Axis, as pictured. The control box side of the machine should be facing you.
Lower the machine into the box, ensure the printer is fully seated in the Mini 2 Foam Bottom [SH-PG0177]
Ensure both front and rear foam pieces seat into the Mini 2 Foam Bottom [SH-PG0177] properly


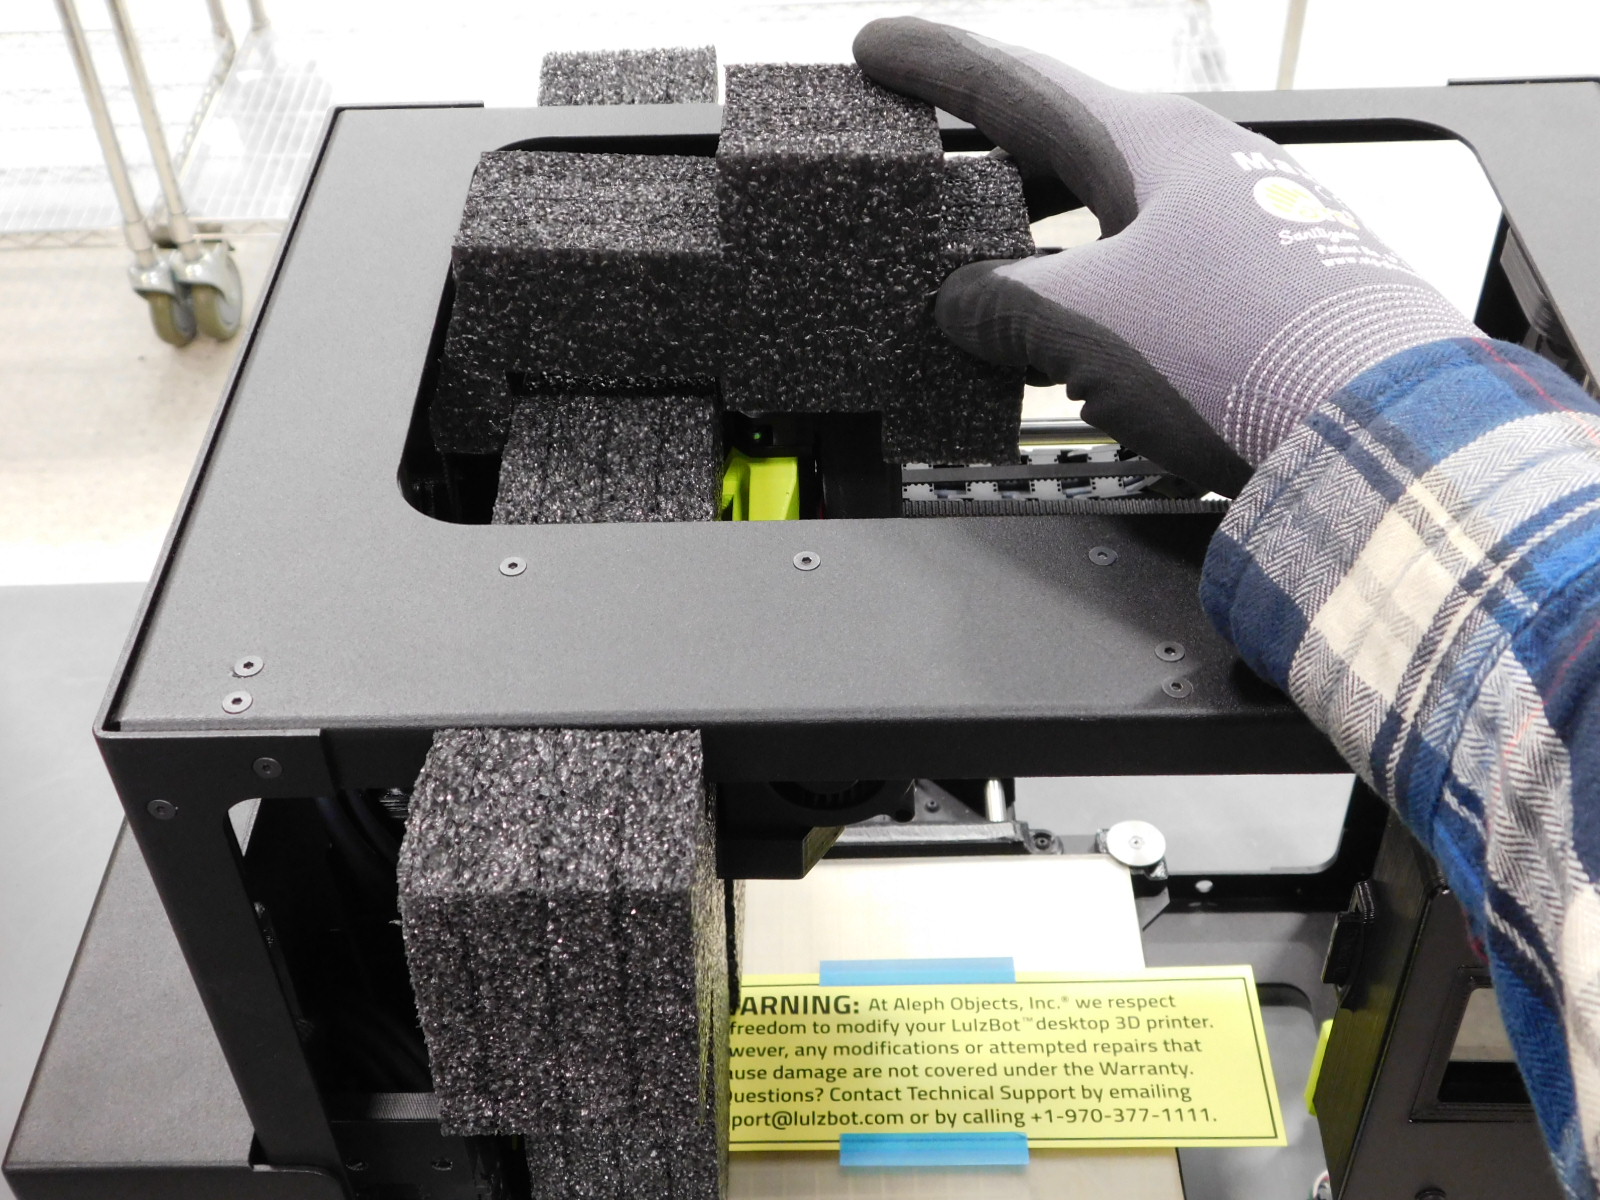
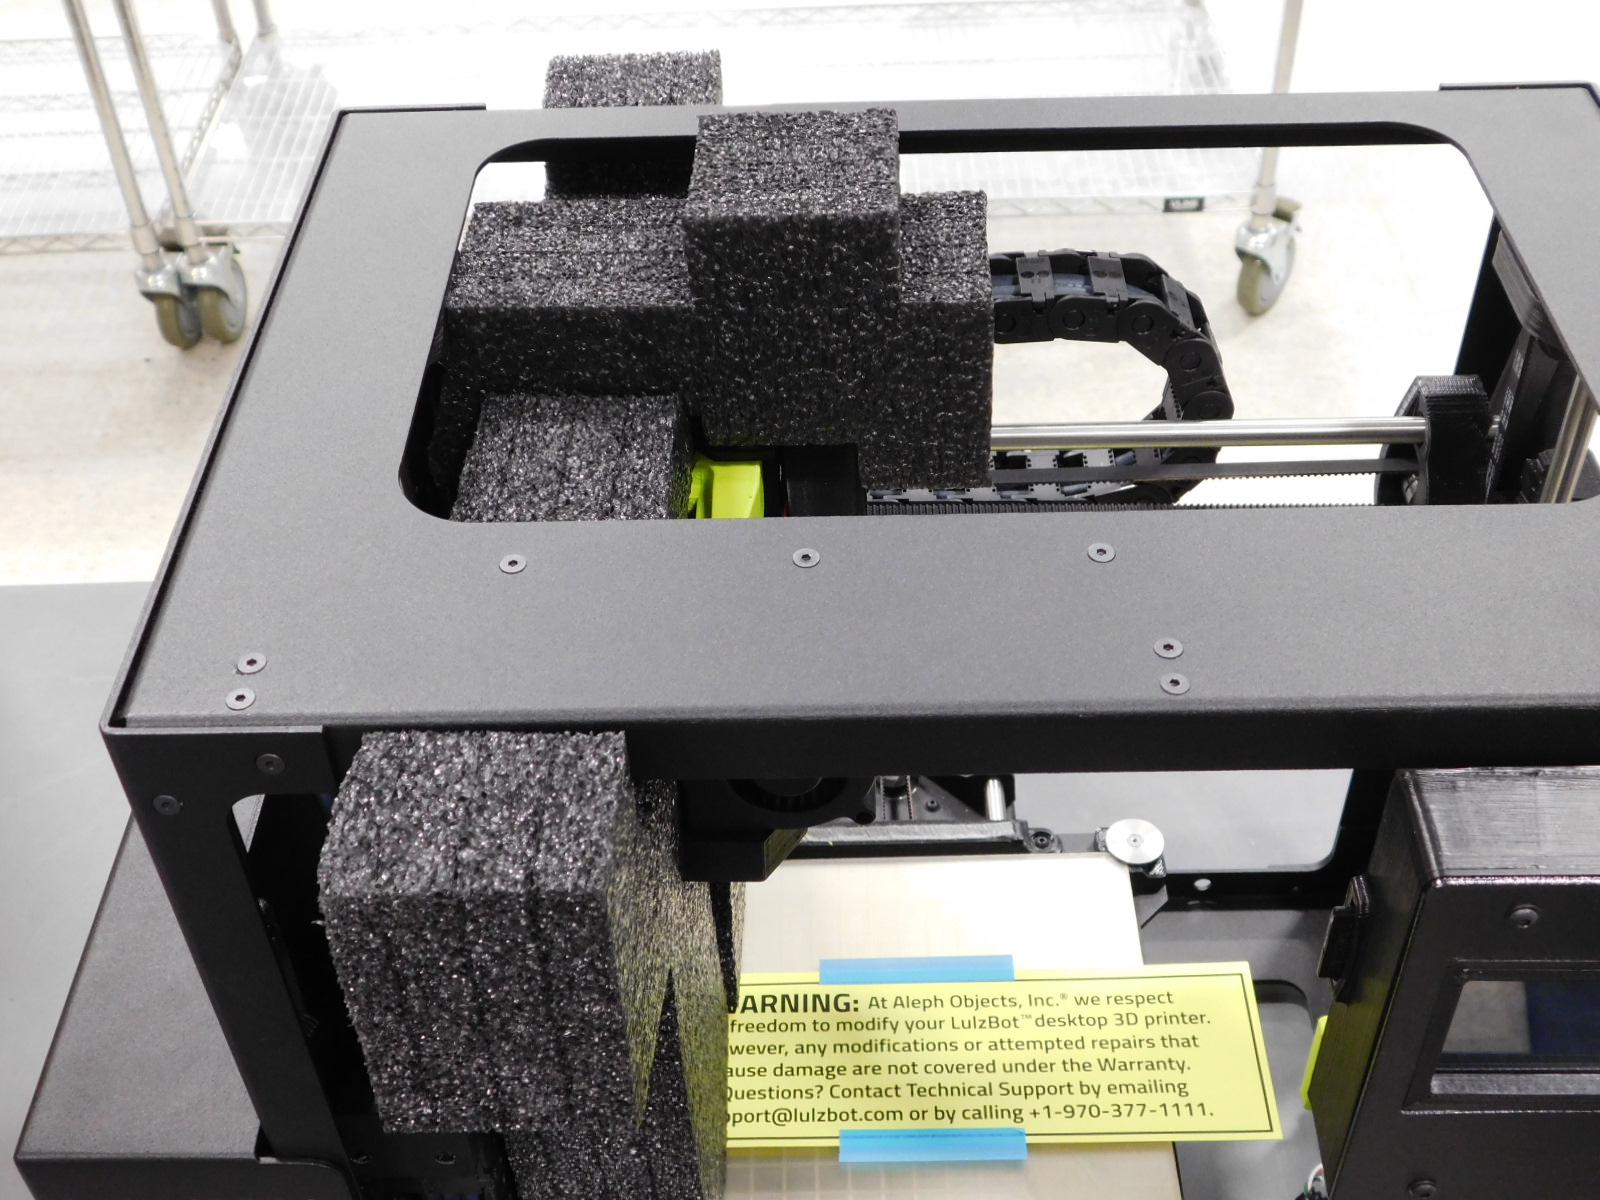
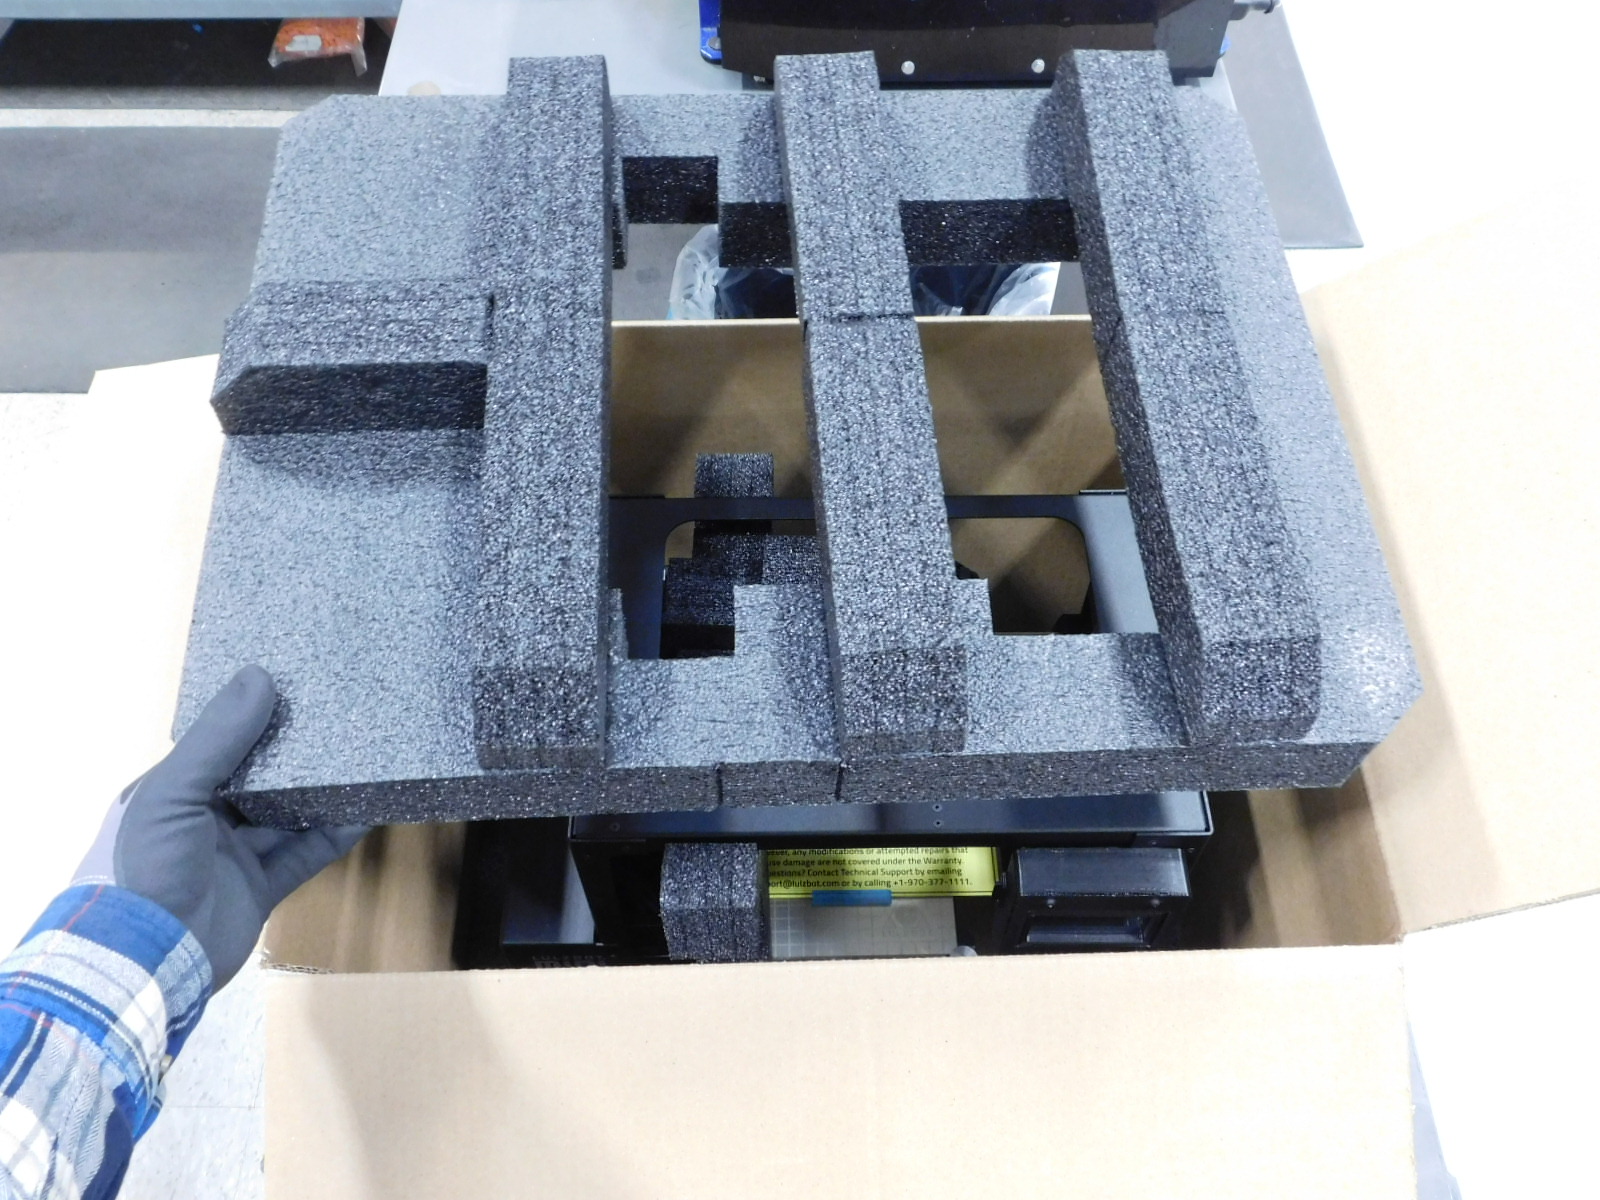
Locate the Mini 2 Foam Top [SH-PG0176] and orient as pictured.
Place the Mini 2 Foam Top [SH-PG0176] on top of the printer and ensure that is fully seated.
Ensure both front and rear foam pieces seat into the Mini 2 Foam Top [SH-PG0176] properly, and the cap foam is seated as shown.
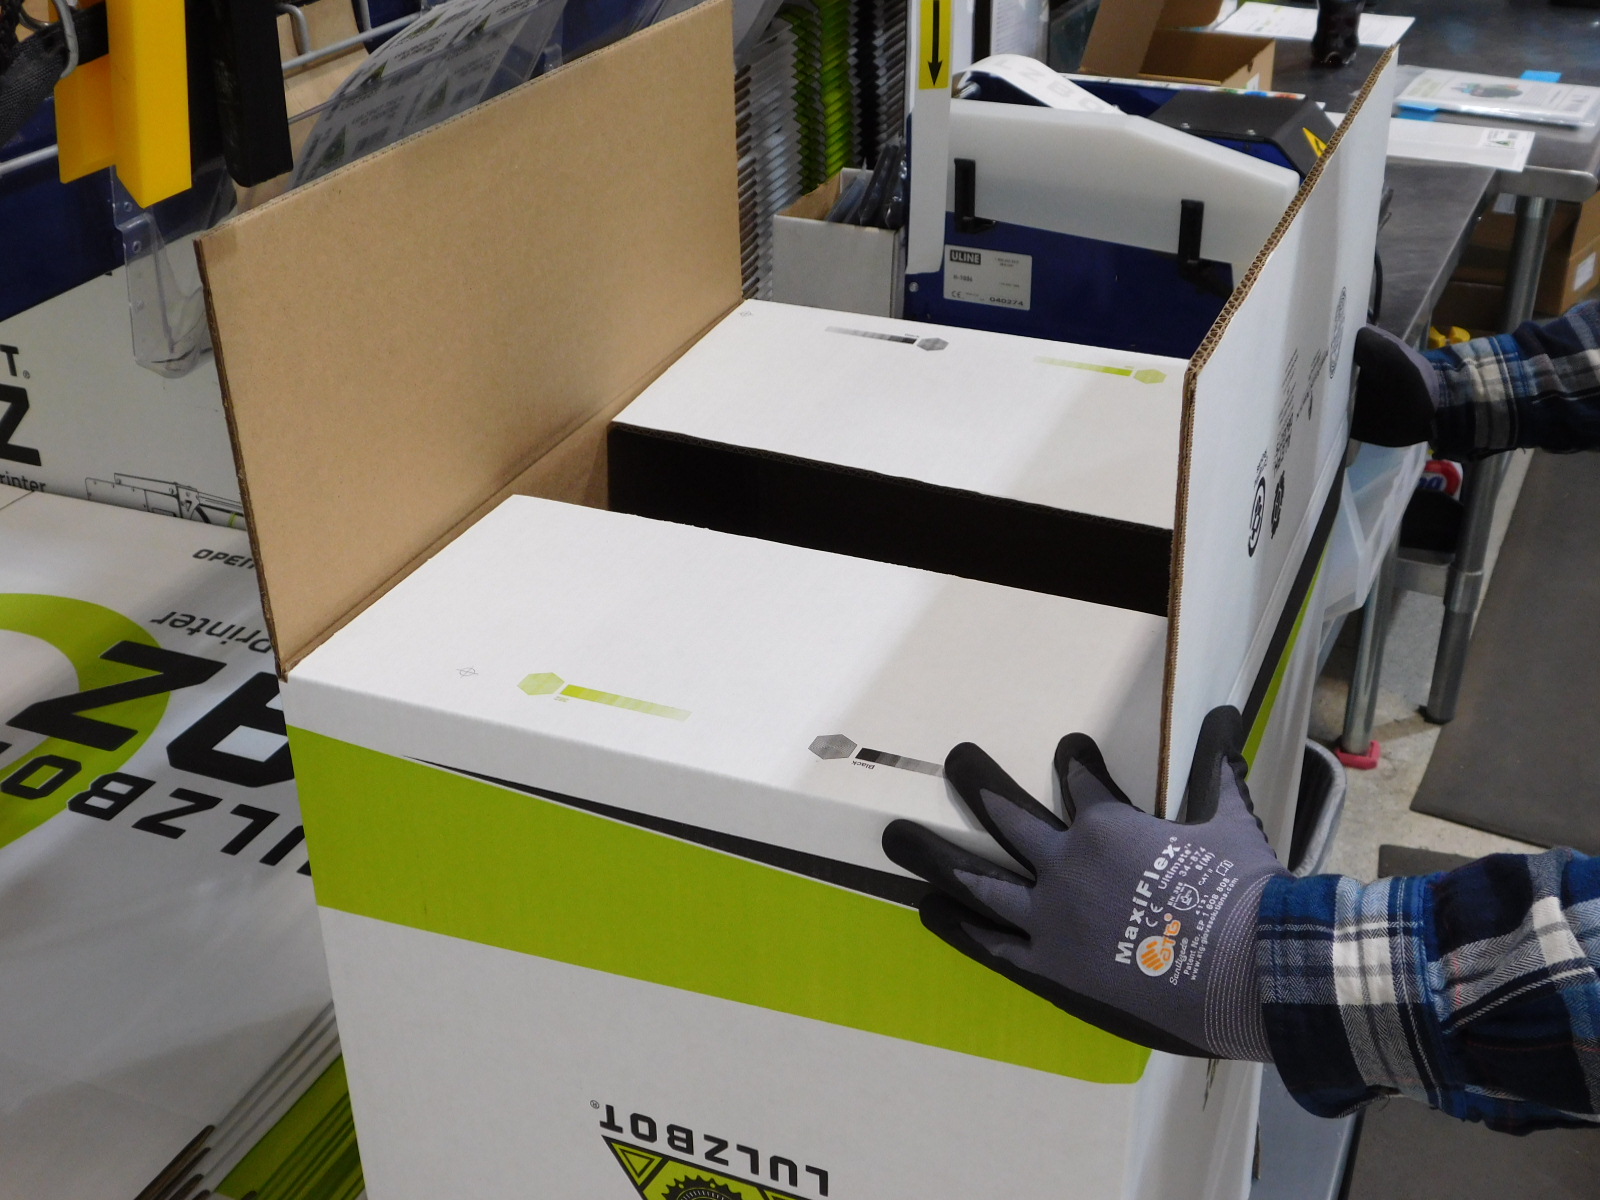
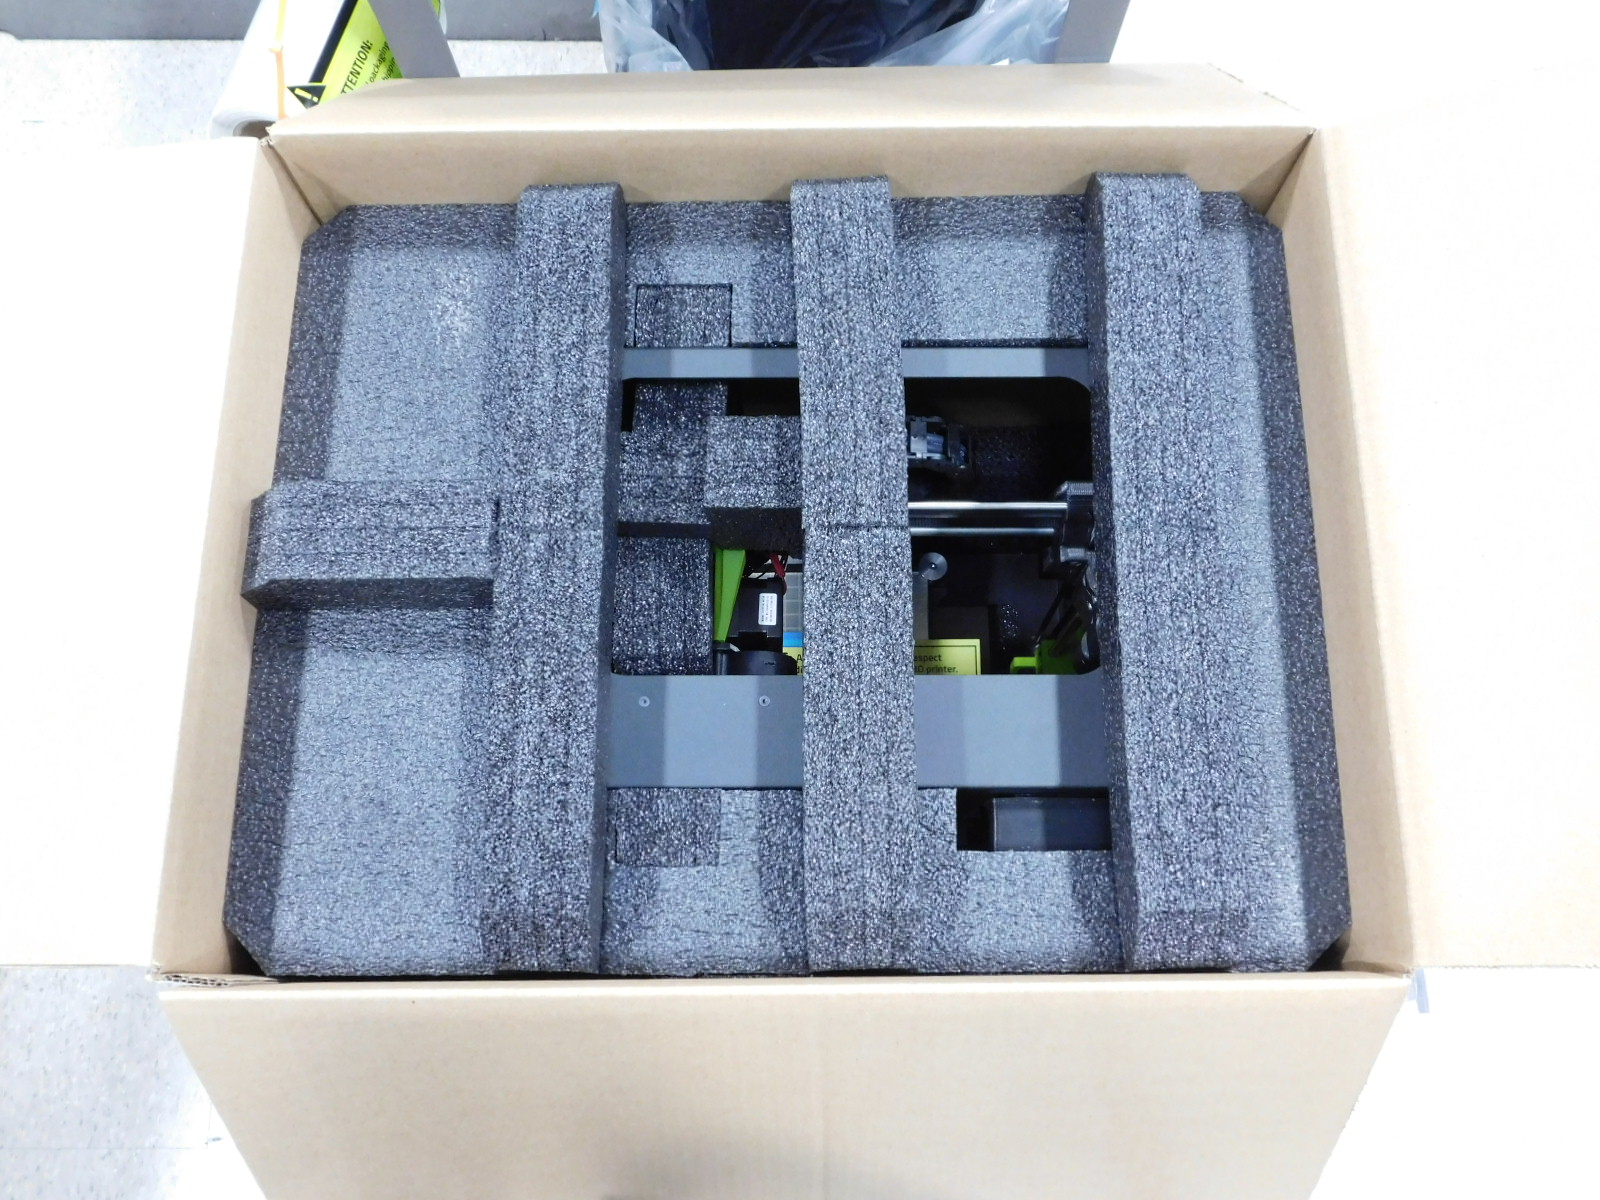
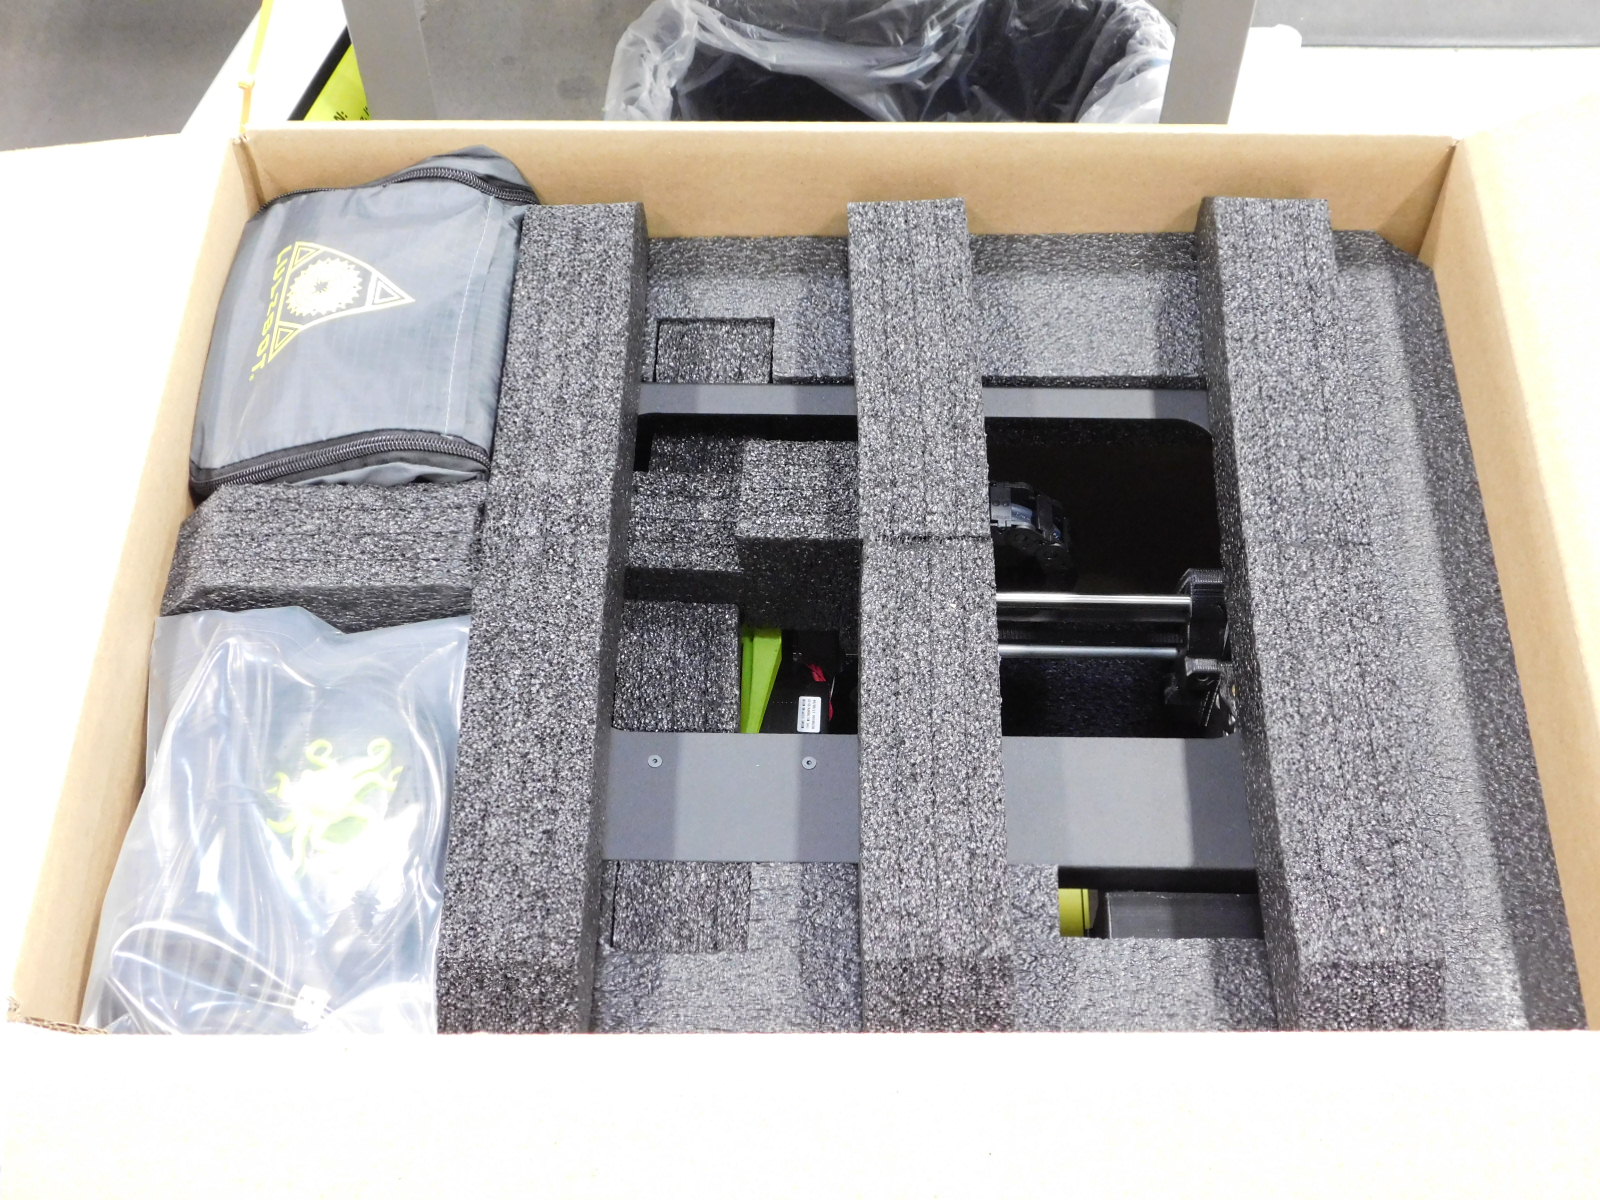
Place the Mini 2 Toolkit [AS-PK0029] into the cell on the Top Foam as pictured.
Place the bag with the cables, SD Card, and Octopus test print in the cell to the right of the Toolkit, as pictured.
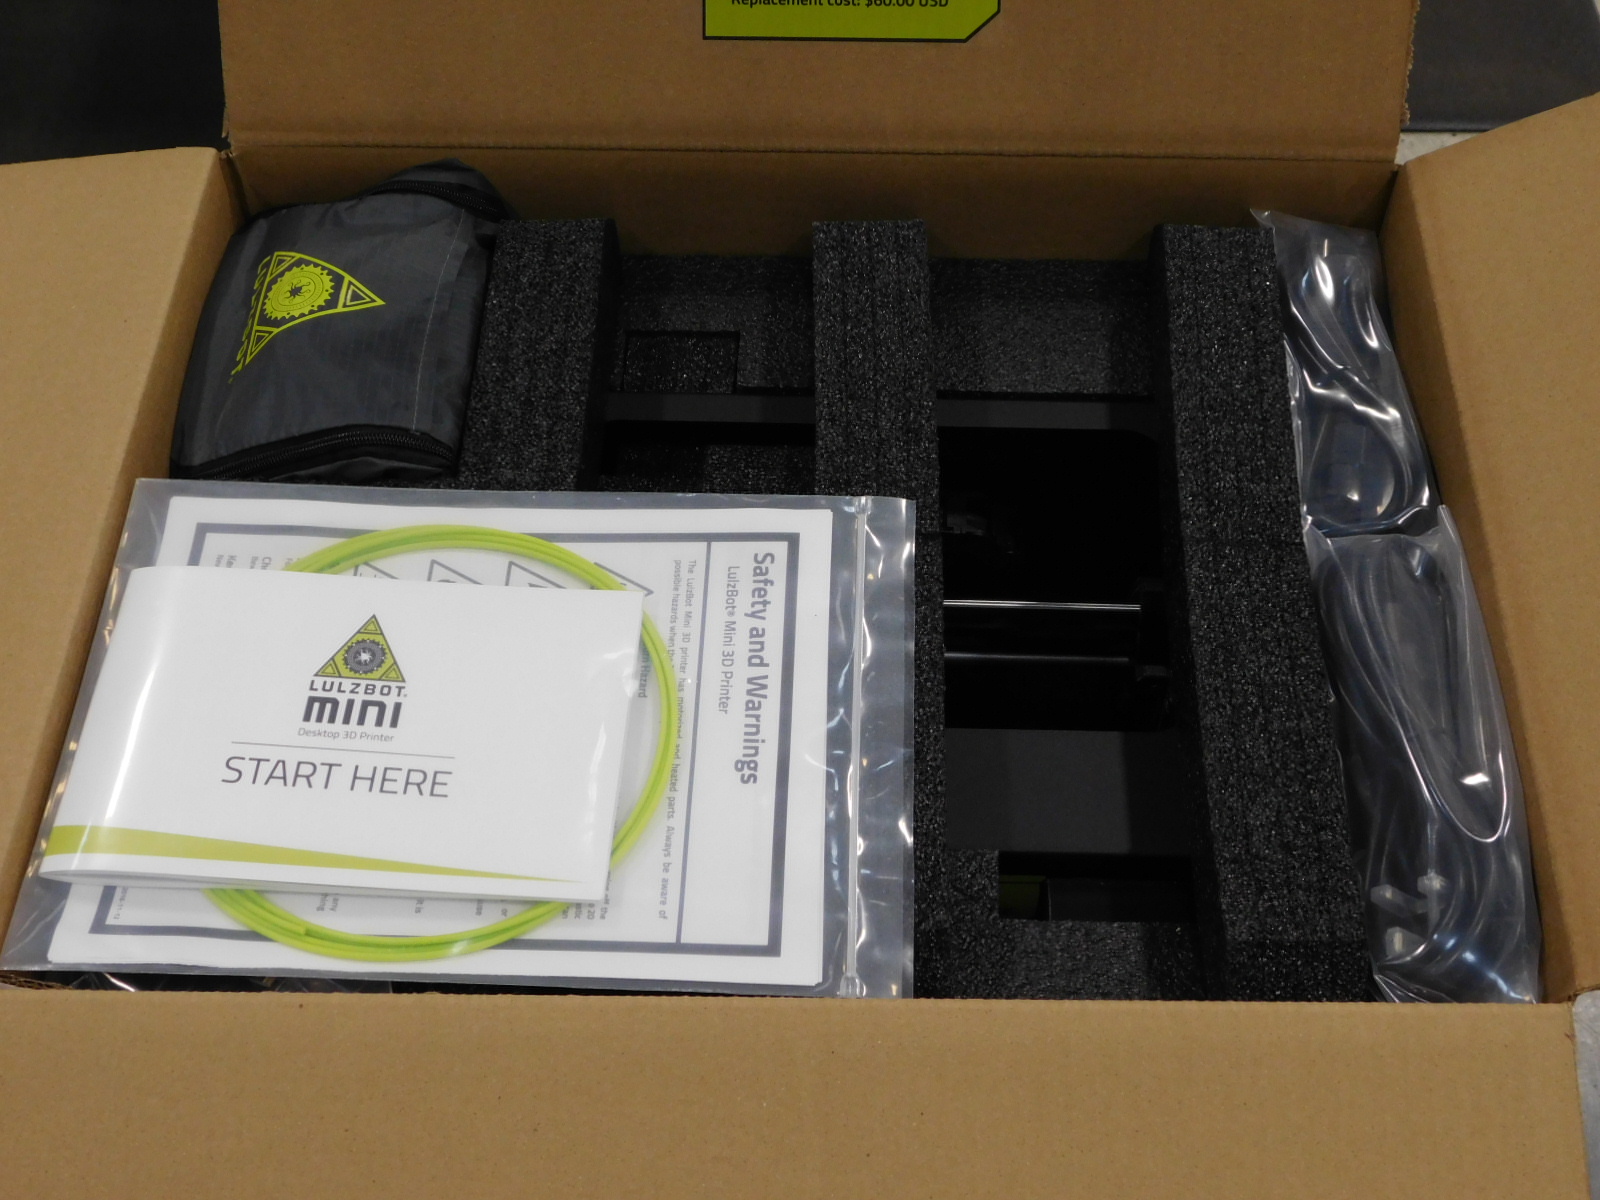
Place the Mini 2 Document Bag [AS-PK0028] over the Mini 2 Toolkit Bag [AS-PK0029], with Start Guide "START HERE" facing up
Place available Filament Sample packs into the 8x10" Resealable bag [SH-PG0030], label the bag with the sample filament bag label [DC-LB0111], seal the bag.
Place bagged sample filament into the box in the corner opposite the documents bag with the filament label facing up, secure the sample filament bag in and place in the location shown with 2x- 2” wide blue poly tape [SH-PG0072] cut to approximately 100mm long each.
Place [DC-LB0121] Save your Mini Packaging Sticker and [DC-LB0174] P65 Warning Label on the inside top flap of the box as pictured.
For EU/UK/AU shipments
Place each additional power cable into a 6x10" Bag [SH-PG0084], fold and place into the long section along the end of the box opposite the Toolkit Bag, as pictured.
Install and secure the filament sample bag per normal procedure
Install the printer document package per normal procedure.
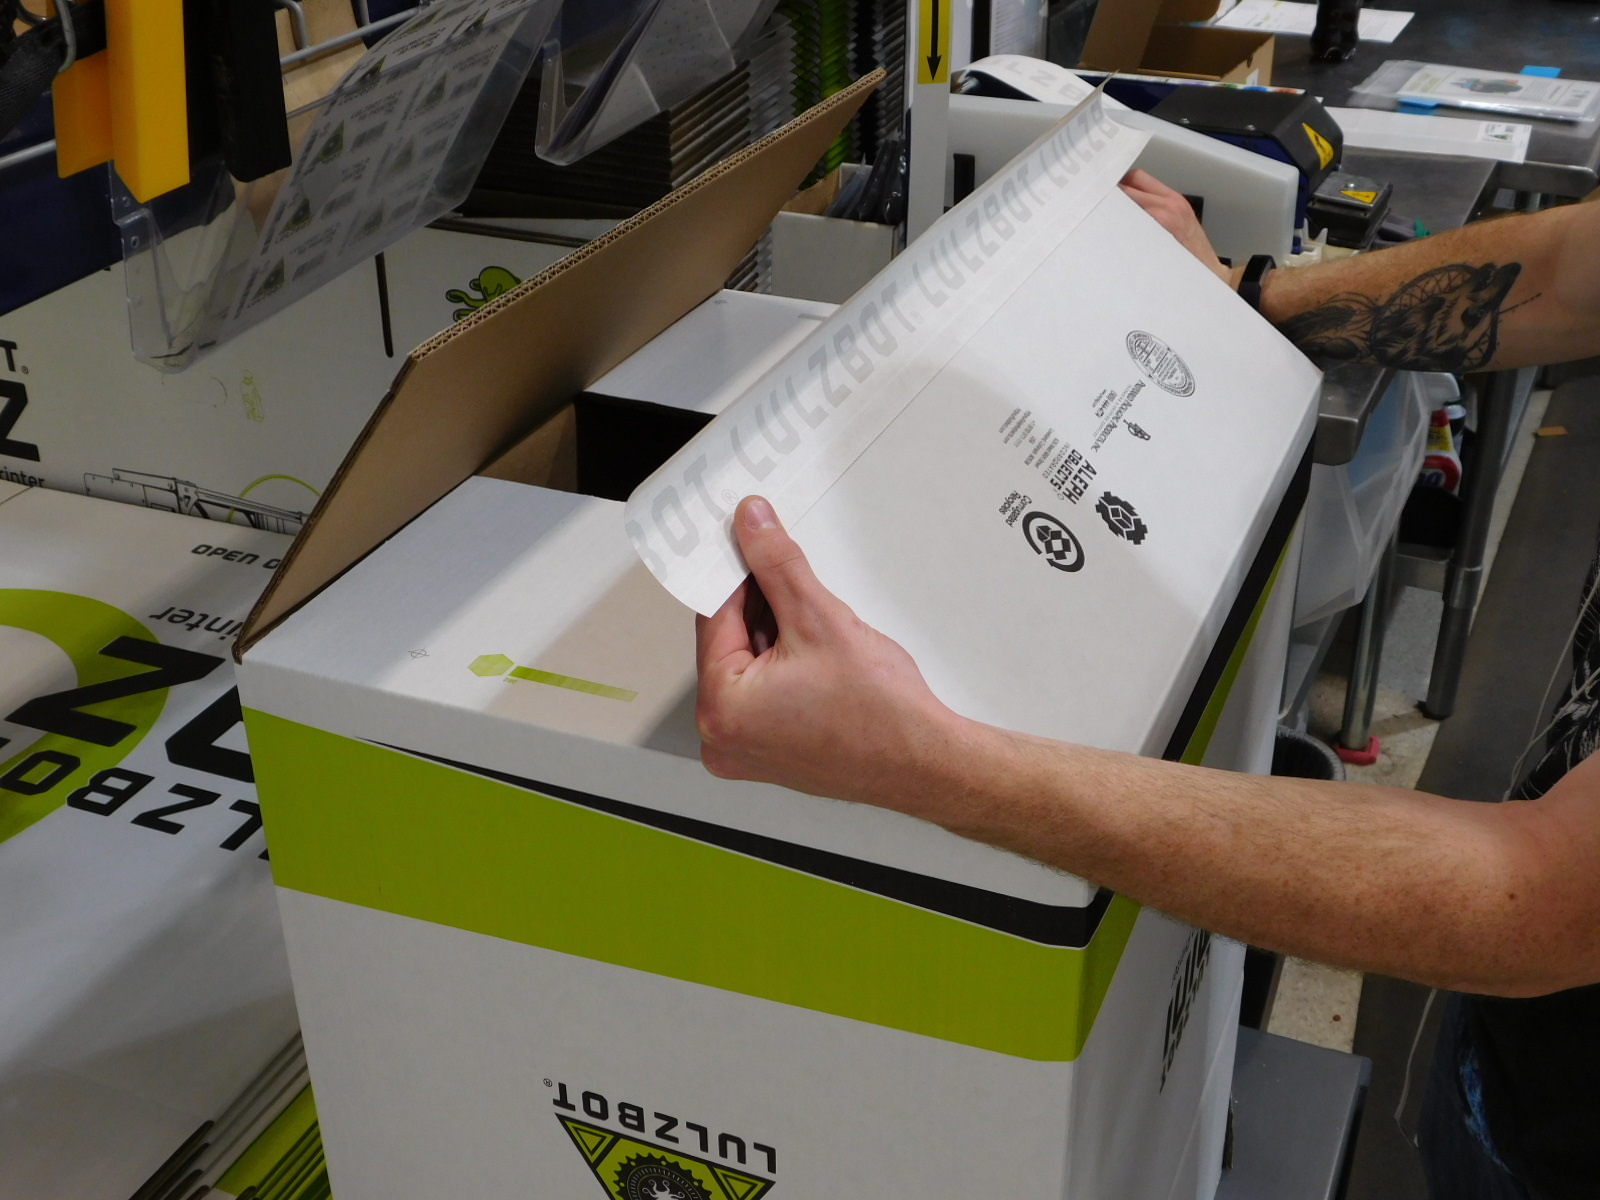
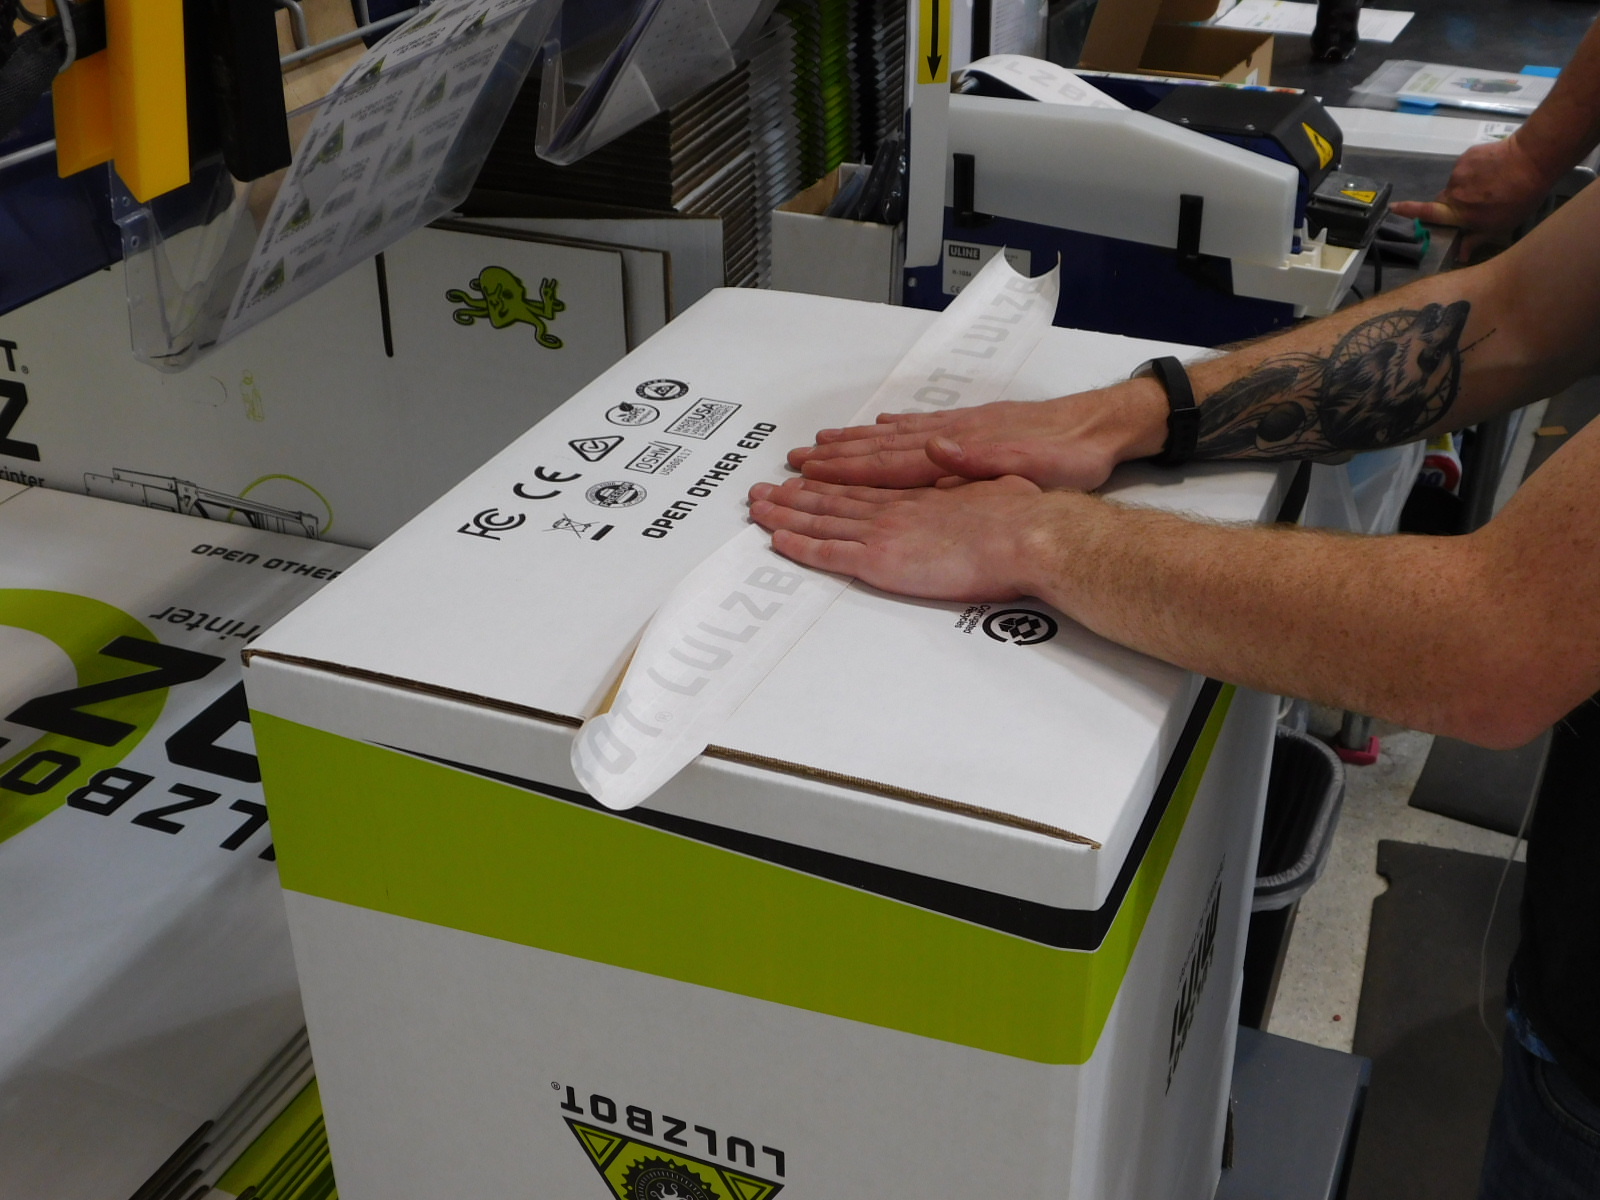
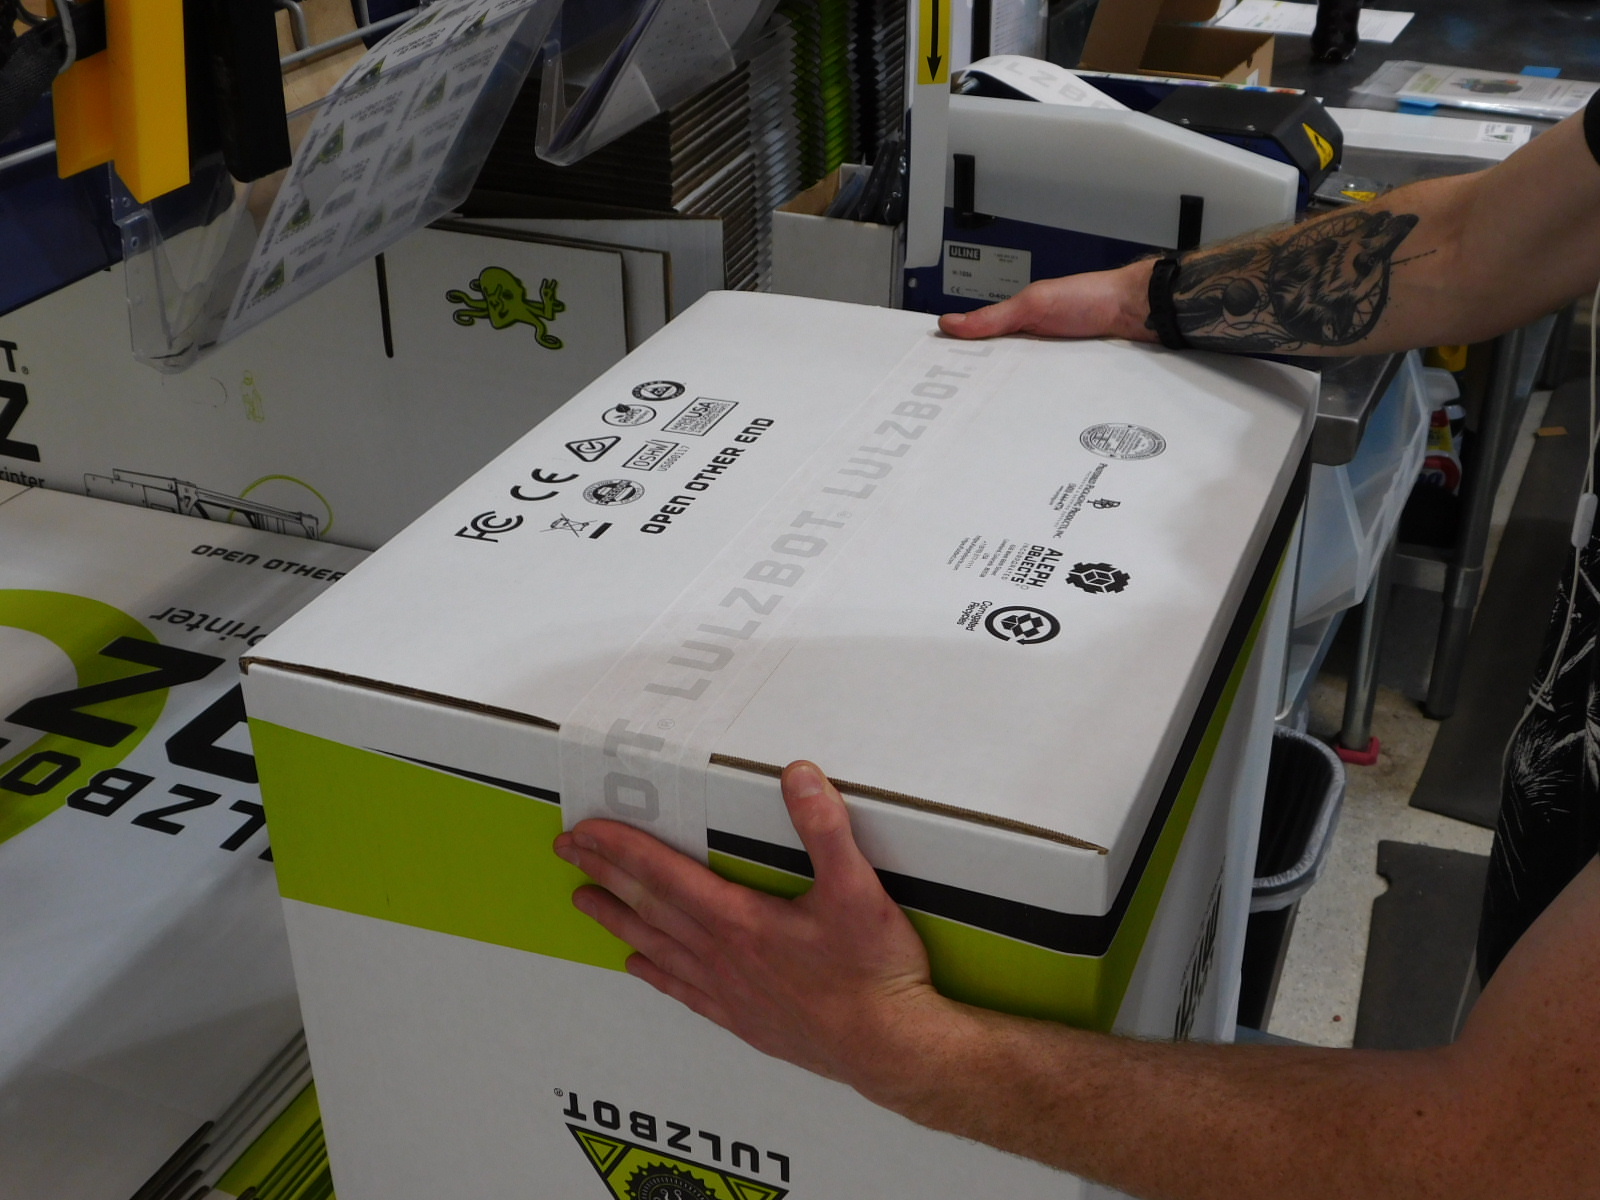
Close and tape the box, utilizing the same procedure used to tape the bottom of the box. Ensure that tape is placed evenly and all edges pressed as flat as possible.


Log the date, time, and your name, in the log entry containing the serial number that matches the Packaged Mini Printer. See your supervisor if you have questions regarding this step.
Once calibrated and packaged, the Lulzbot Mini 3D printer will then be stacked on heat treated pallets for shipping. Following this guide for pallet stacking will help ensure the printer arrives at its destination undamaged and will assist Shipping & Receiving staff in serial number tracking.
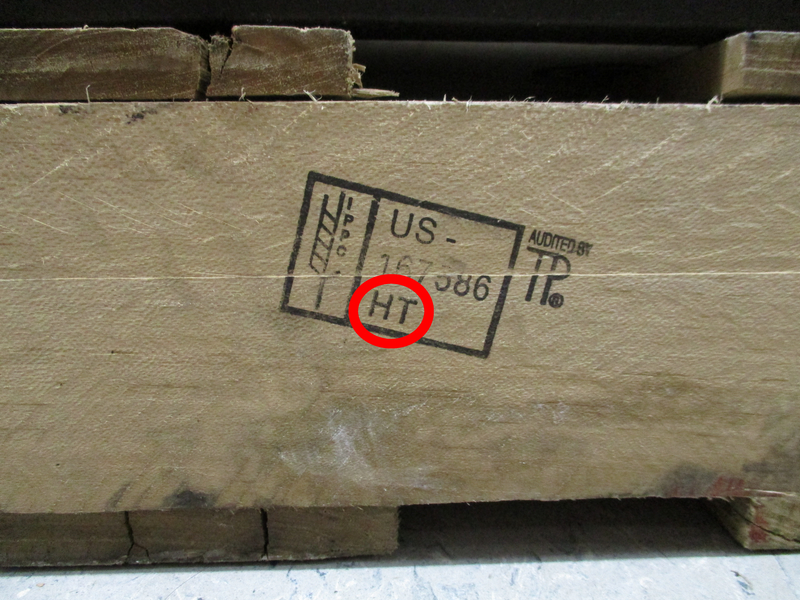
Retrieve a heat treated pallet from Shipping & Receiving. Heat treated pallets are identified by a stamp on the side that reads “HT” at the bottom. Refer to picture for example.
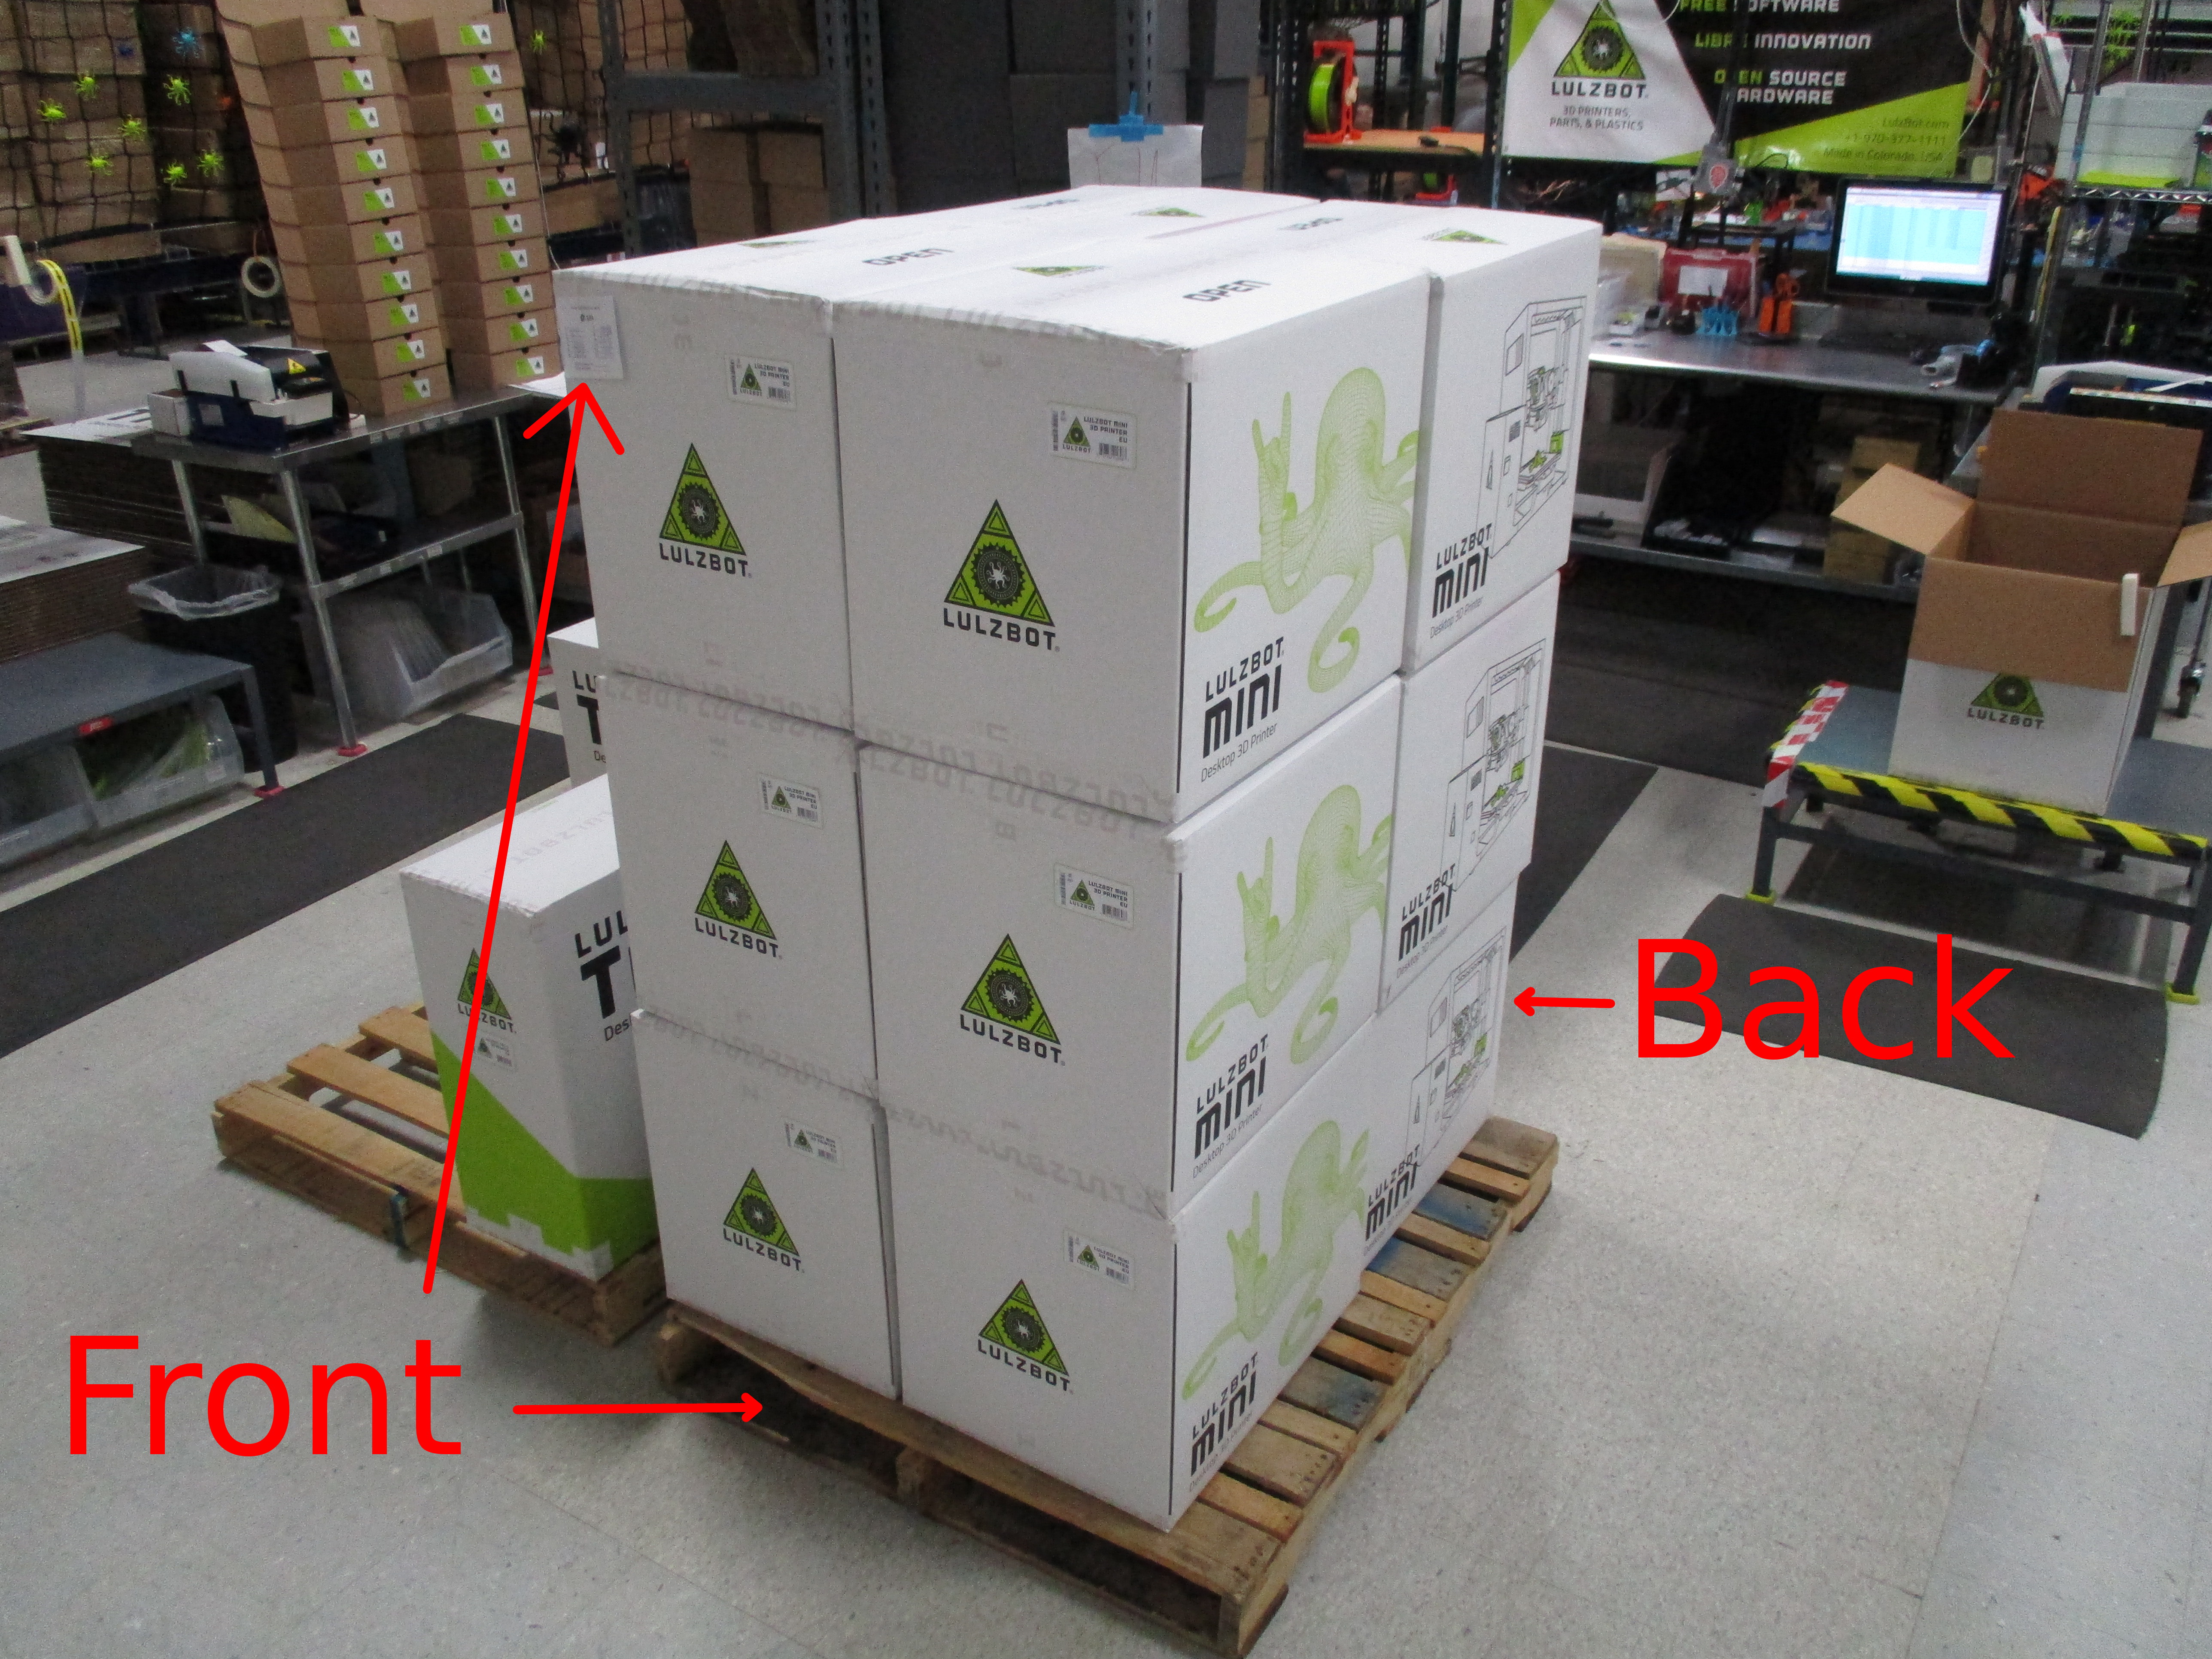
Lulzbot Mini printers are stacked 4 machines per layer, no more than 3 layers in height, for a total of 12 machines per pallet.
The machine’s serial number is located on a sticker on one side of the box. That side of the box should face the front or back of pallet, whichever is closest to the machine’s position on the pallet. Serial numbers are recorded both in the Boxing Log and on the “Serial Numbers By Pallet” sheet, which will be affixed to the completed pallet before being moved to Shipping & Receiving.
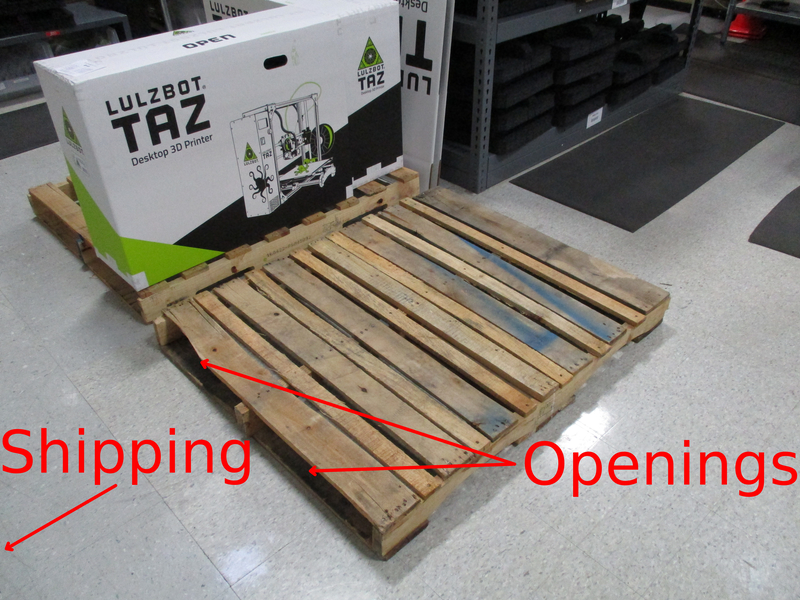
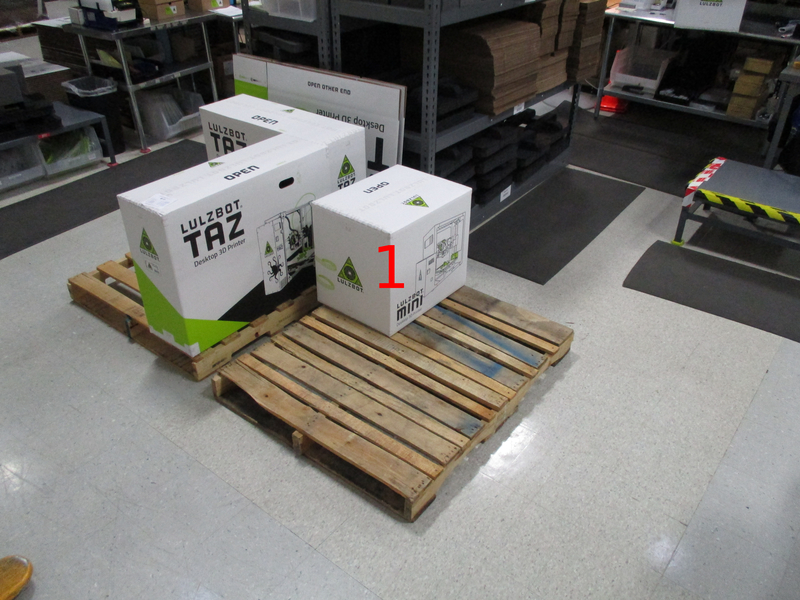
Place an empty heat treated pallet on the floor, with the pallet openings facing the Shipping and Receiving hallway.
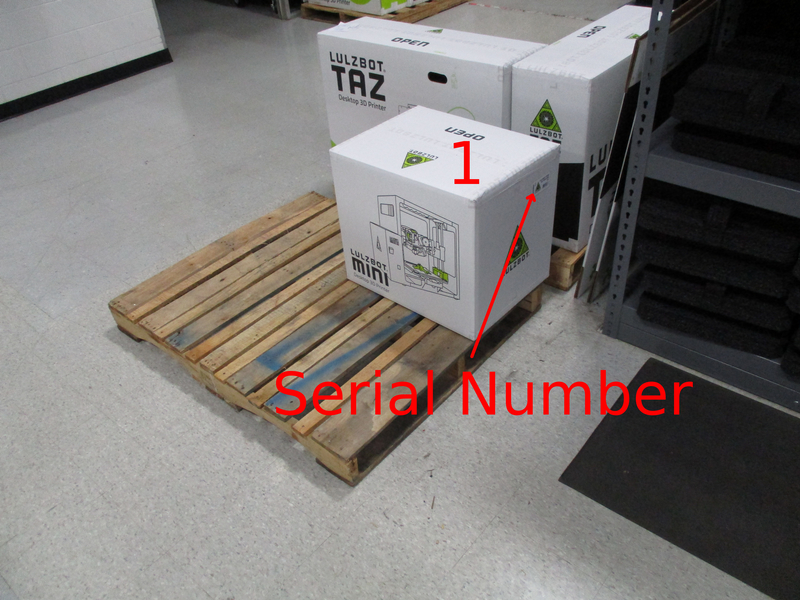
Place the first packaged Mini printer on the pallet in position 1. Make sure the side of the box containing the machine’s serial number faces the pallet openings, as shown. Record the machine’s serial number on the “Serial Numbers by Pallet” sheet.
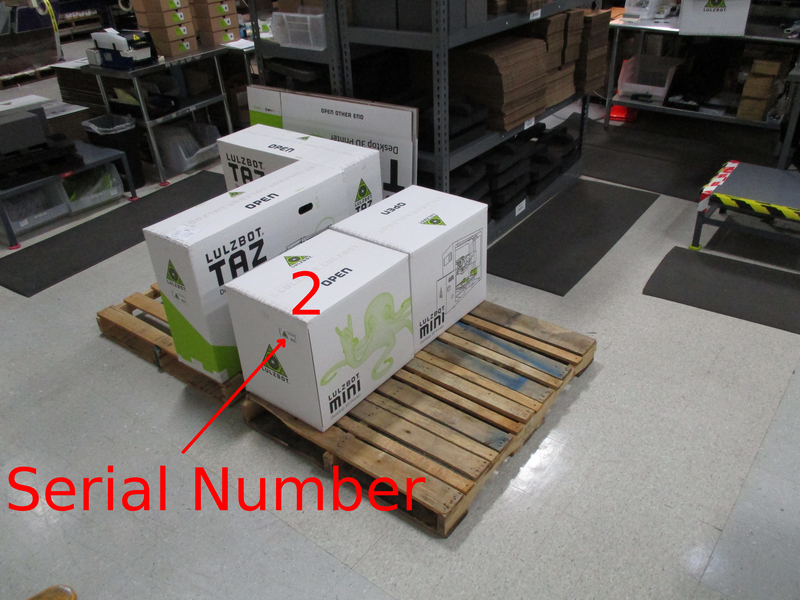
Place the second packaged Mini printer on the pallet in position 2. Make sure the side of the box containing the machine’s serial number faces the pallet openings, as shown. Record the machine’s serial number on the “Serial Numbers by Pallet” sheet.
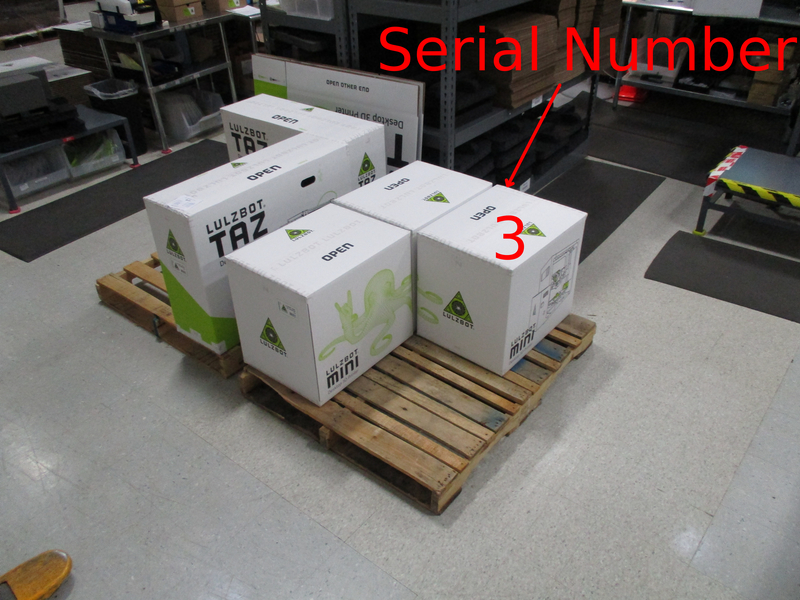
Place the third packaged Mini printer on the pallet in position 2. Make sure the side of the box containing the machine’s serial number faces the pallet openings, as shown. Record the machine’s serial number on the “Serial Numbers by Pallet” sheet.
5.Place the fourth packaged Mini printer on the pallet in position 2. Make sure the side of the box containing the machine’s serial number faces the pallet openings, as shown. Record the machine’s serial number on the “Serial Numbers by Pallet” sheet.
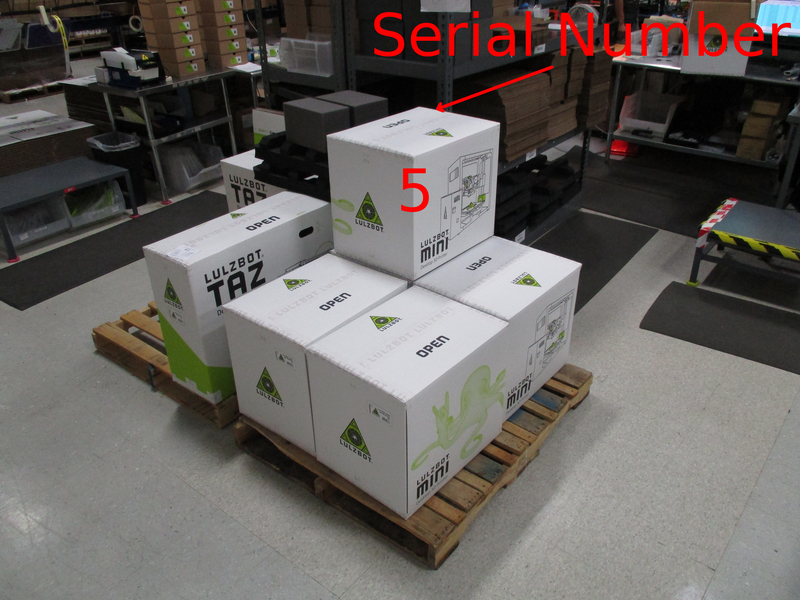
This completes the first layer, proceed to second layer.
1.Place the fifth packaged Mini printer on the pallet in position 5. Make sure the side of the box containing the machine’s serial number faces the pallet openings, as shown. Record the machine’s serial number on the “Serial Numbers by Pallet” sheet.
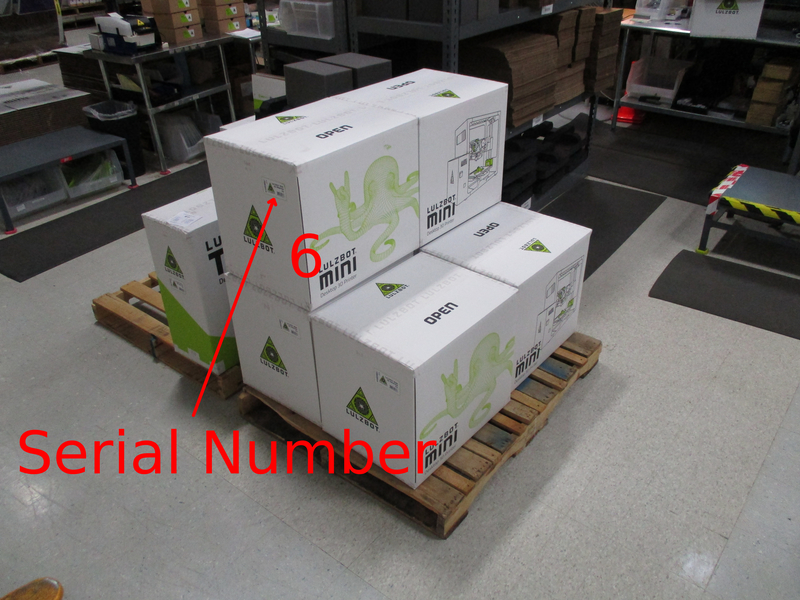
Place the sixth packaged Mini printer on the pallet in position 6. Make sure the side of the box containing the machine’s serial number faces the pallet openings, as shown. Record the machine’s serial number on the “Serial Numbers by Pallet” sheet.
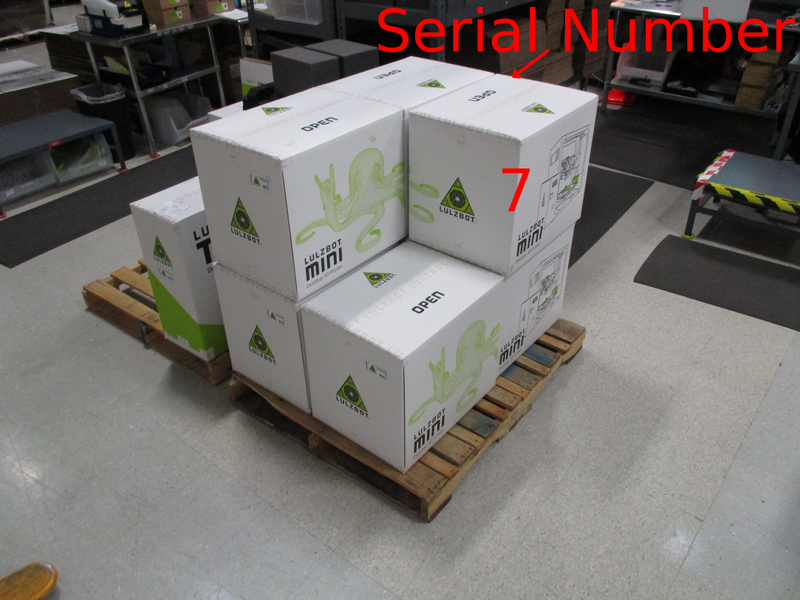
Place the seventh packaged Mini printer on the pallet in position 7. Make sure the side of the box containing the machine’s serial number faces the pallet openings, as shown. Record the machine’s serial number on the “Serial Numbers by Pallet” sheet.
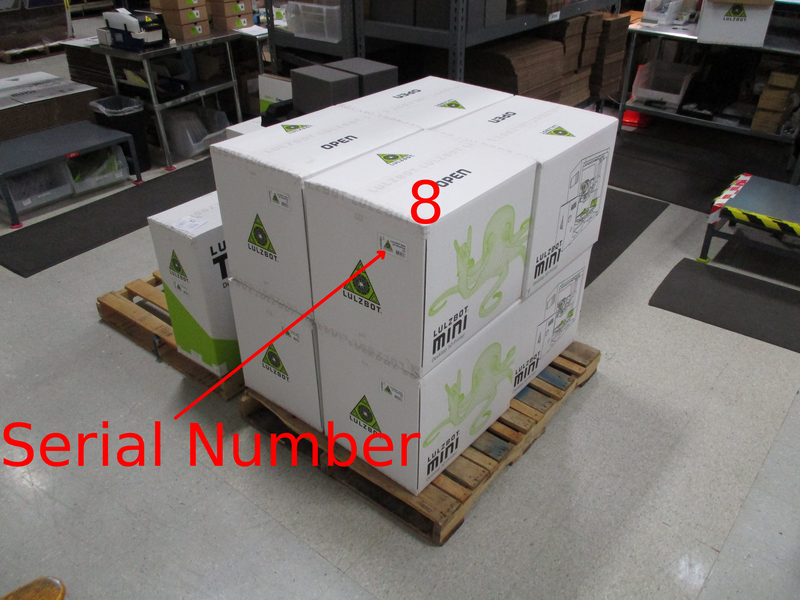
Place the eighth packaged Mini printer on the pallet in position 5. Make sure the side of the box containing the machine’s serial number faces the pallet openings, as shown. Record the machine’s serial number on the “Serial Numbers by Pallet” sheet.
This completes the second layer, proceed to the third and final layer.
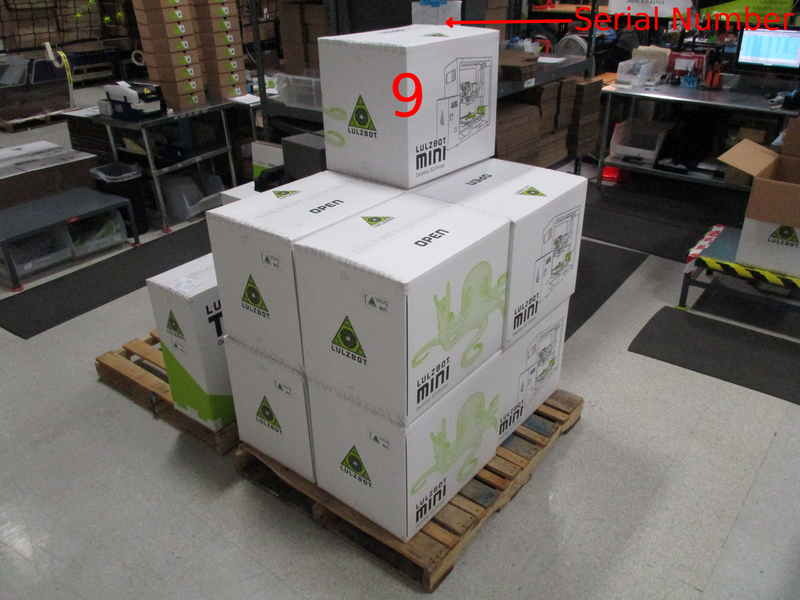
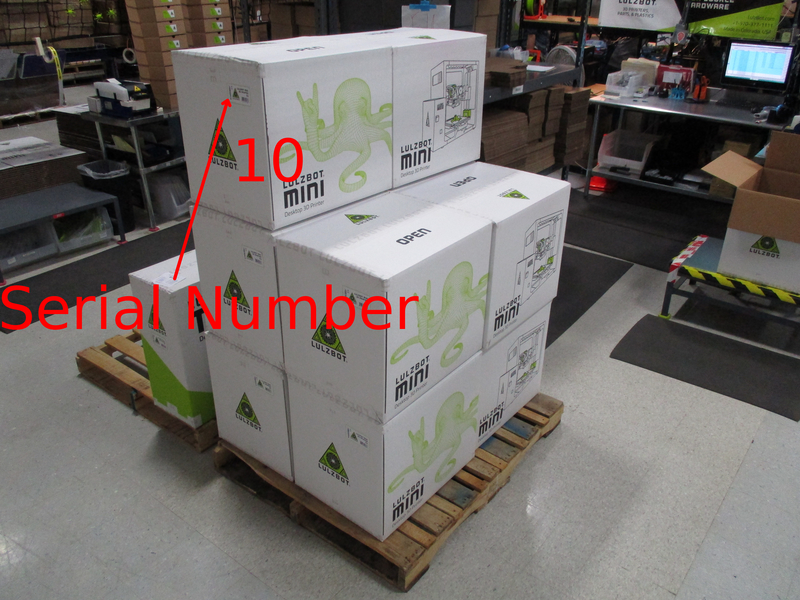
1.Place the ninth packaged Mini printer on the pallet in position 9. Make sure the side of the box containing the machine’s serial number faces the pallet openings, as shown. Record the machine’s serial number on the “Serial Numbers by Pallet” sheet.
Place the tenth packaged Mini printer on the pallet in position 10. Make sure the side of the box containing the machine’s serial number faces the pallet openings, as shown. Record the machine’s serial number on the “Serial Numbers by Pallet” sheet.
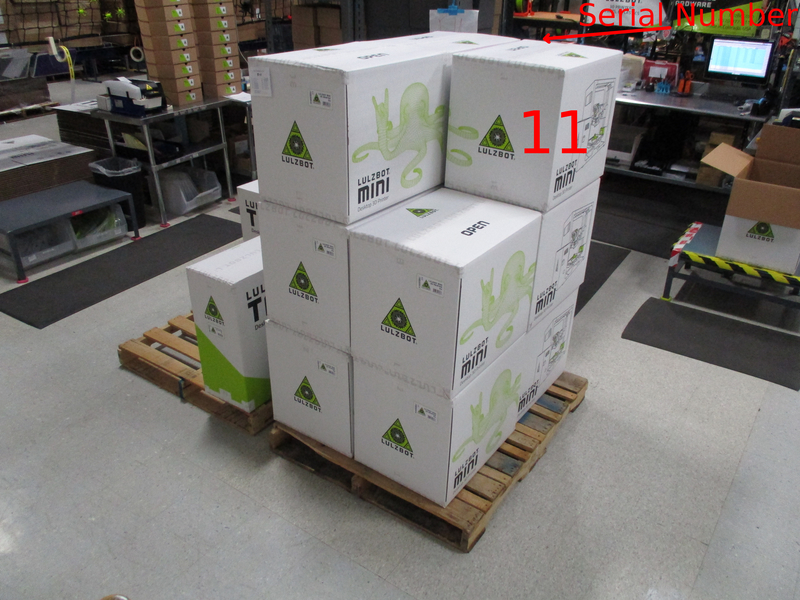
Place the eleventh packaged Mini printer on the pallet in position 11. Make sure the side of the box containing the machine’s serial number faces the pallet openings, as shown. Record the machine’s serial number on the “Serial Numbers by Pallet” sheet.
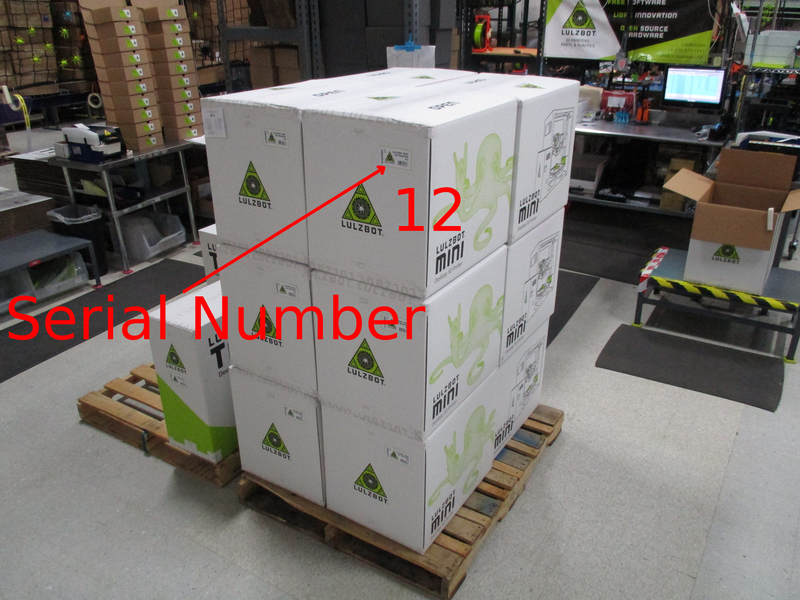
Place the twelfth packaged Mini printer on the pallet in position 12. Make sure the side of the box containing the machine’s serial number faces the pallet openings, as shown. Record the machine’s serial number on the “Serial Numbers by Pallet” sheet.
This completes the third and final layer.
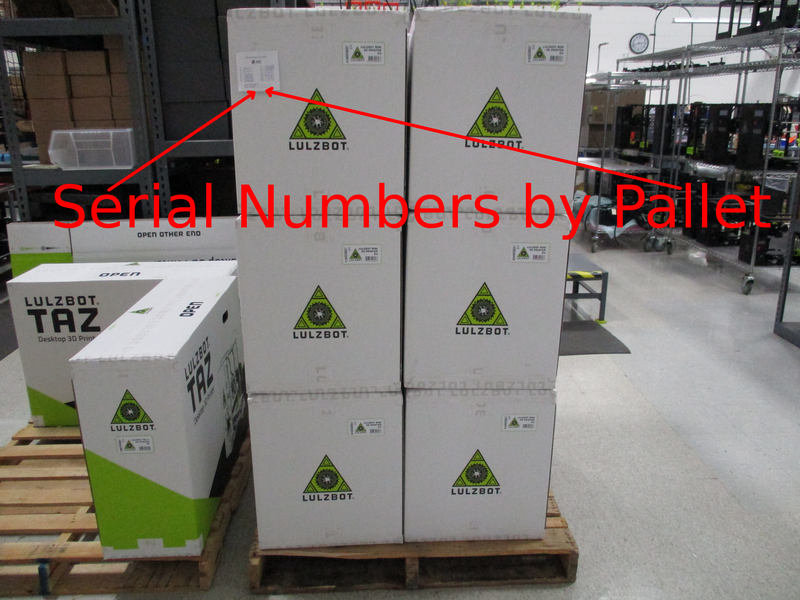
Before transferring the completed pallet to Shipping & Receiving, ensure that all Serial Numbers have been recorded on the serial numbers by pallet sheet.
Use a small piece of transparent tape to affix the “Serial Numbers by Pallet” sheet to the front of the pallet.
The pallet is now ready to be moved to Shipping & Receiving. Make sure to communicate with Shipping & Receiving Clerks for appropriate placement.