Open HardwareAssembly Instructions
Guides for installation and assembly of the LulzBot line of products made by FAME 3D LLC.
Guides for installation and assembly of the LulzBot line of products made by FAME 3D LLC.
Please note;
This installation involves building harnesses, modifying existing pin-out configurations, and working inside the control box on your TAZ machine. Therefore this process is only recommended for advanced users who are comfortable with modifying their TAZ machine.
For this installation, you will need to build additional wire harnesses for the extrusion and heat-sink fans. Lulzbot does not have these harnesses available for purchase.
For the Extrusion Fan Harness:
145cm 24 AWG Black Wire - Available from DigiKey Part # C2015B-1000-ND DigiKey C2015B-1000-ND
145cm 24 AWG Red Wire - Available from DigiKey Part # C2015R-1000-ND DigiKey C2015R-1000-ND
2x Female Molex Terminals - Available from DigiKey Part # WM2510CT-ND DigiKey WM2510TR-ND
2x 24 AWG Wire End Ferrules - Available from DigiKey Part # 298-10558-ND DigiKey 298-10558-ND
1x 2POS Terminal Block Plug - Available from DigiKey Part # WM7819-ND DigiKey WM7819-ND
For the Heat-Sink Fan Harness:
145cm 24 AWG Black Wire - Available from DigiKey Part # C2015B-1000-ND DigiKey C2015B-1000-ND
145cm 24 AWG Red Wire - Available from DigiKey Part # C2015R-1000-ND DigiKey C2015R-1000-ND
4x Female Molex Terminals - Available from DigiKey Part # WM2510CT-ND DigiKey WM2510TR-ND
1x 2POS Female Molex Connector Housing - Available from DigiKey Part # WM2900-ND DigiKey WM2900-ND
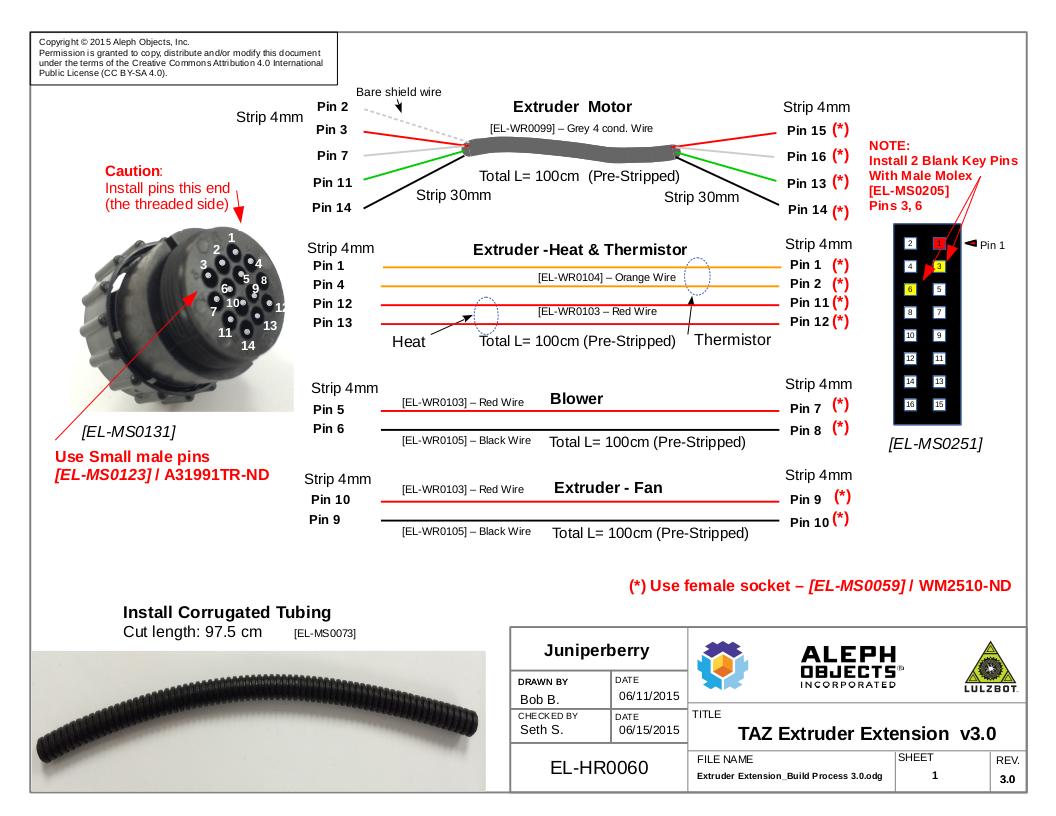
You will also need to replace the existing connector housings at the end of your extruder harness with a single 16 Position Female Molex Connector Housing. To do so, follow the right-hand side of the pin-out diagram attached to this step.
Refer to the instructions in step 2 for removing the existing connector housings and re-using the existing Molex terminals.
A 145cm length of larger Panduit is suggested to fit the extra wires.
16 Position Female Molex Connector Housing - Available from DigiKey Part # WM2525-ND
DigiKey WM2525-ND
145cm of 3/8" Black Panduit - Available from McMaster Carr - Part # 7840K72 McMaster Carr 7840K72
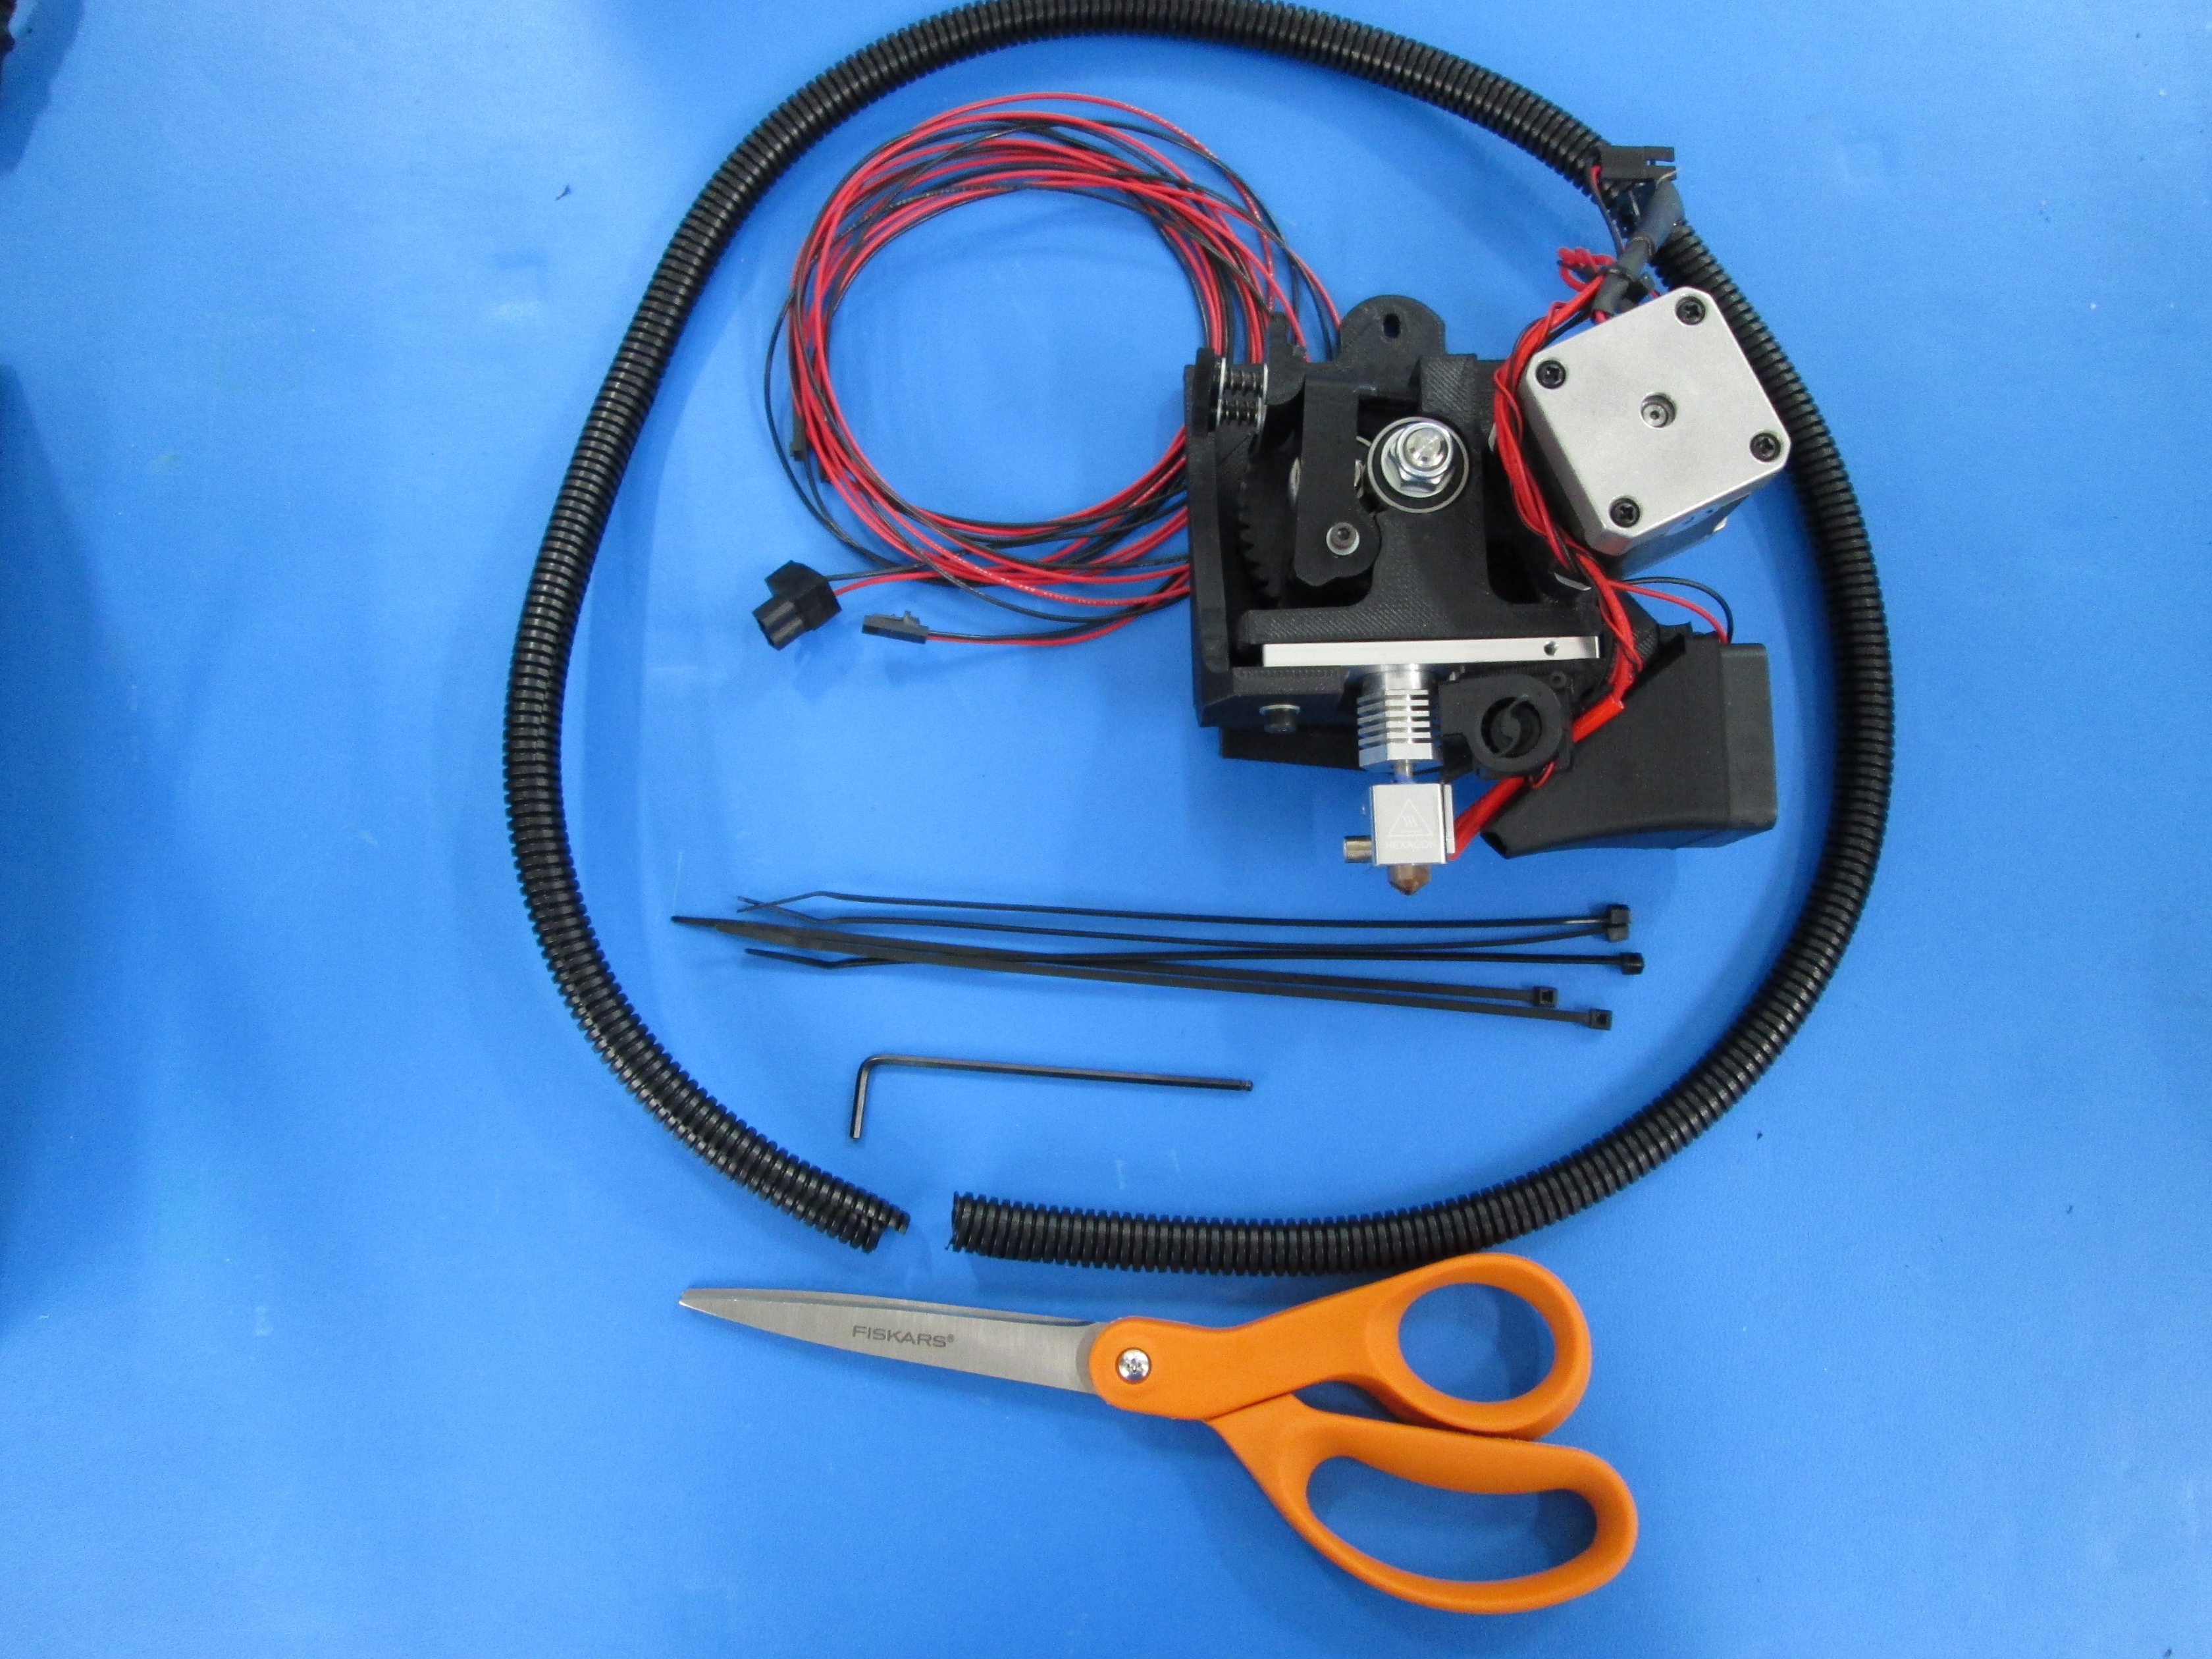
Everything else you should need:
-2.5mm hex tool
-Scissors/any tool to cut zip ties
-Toolhead
-Zip ties
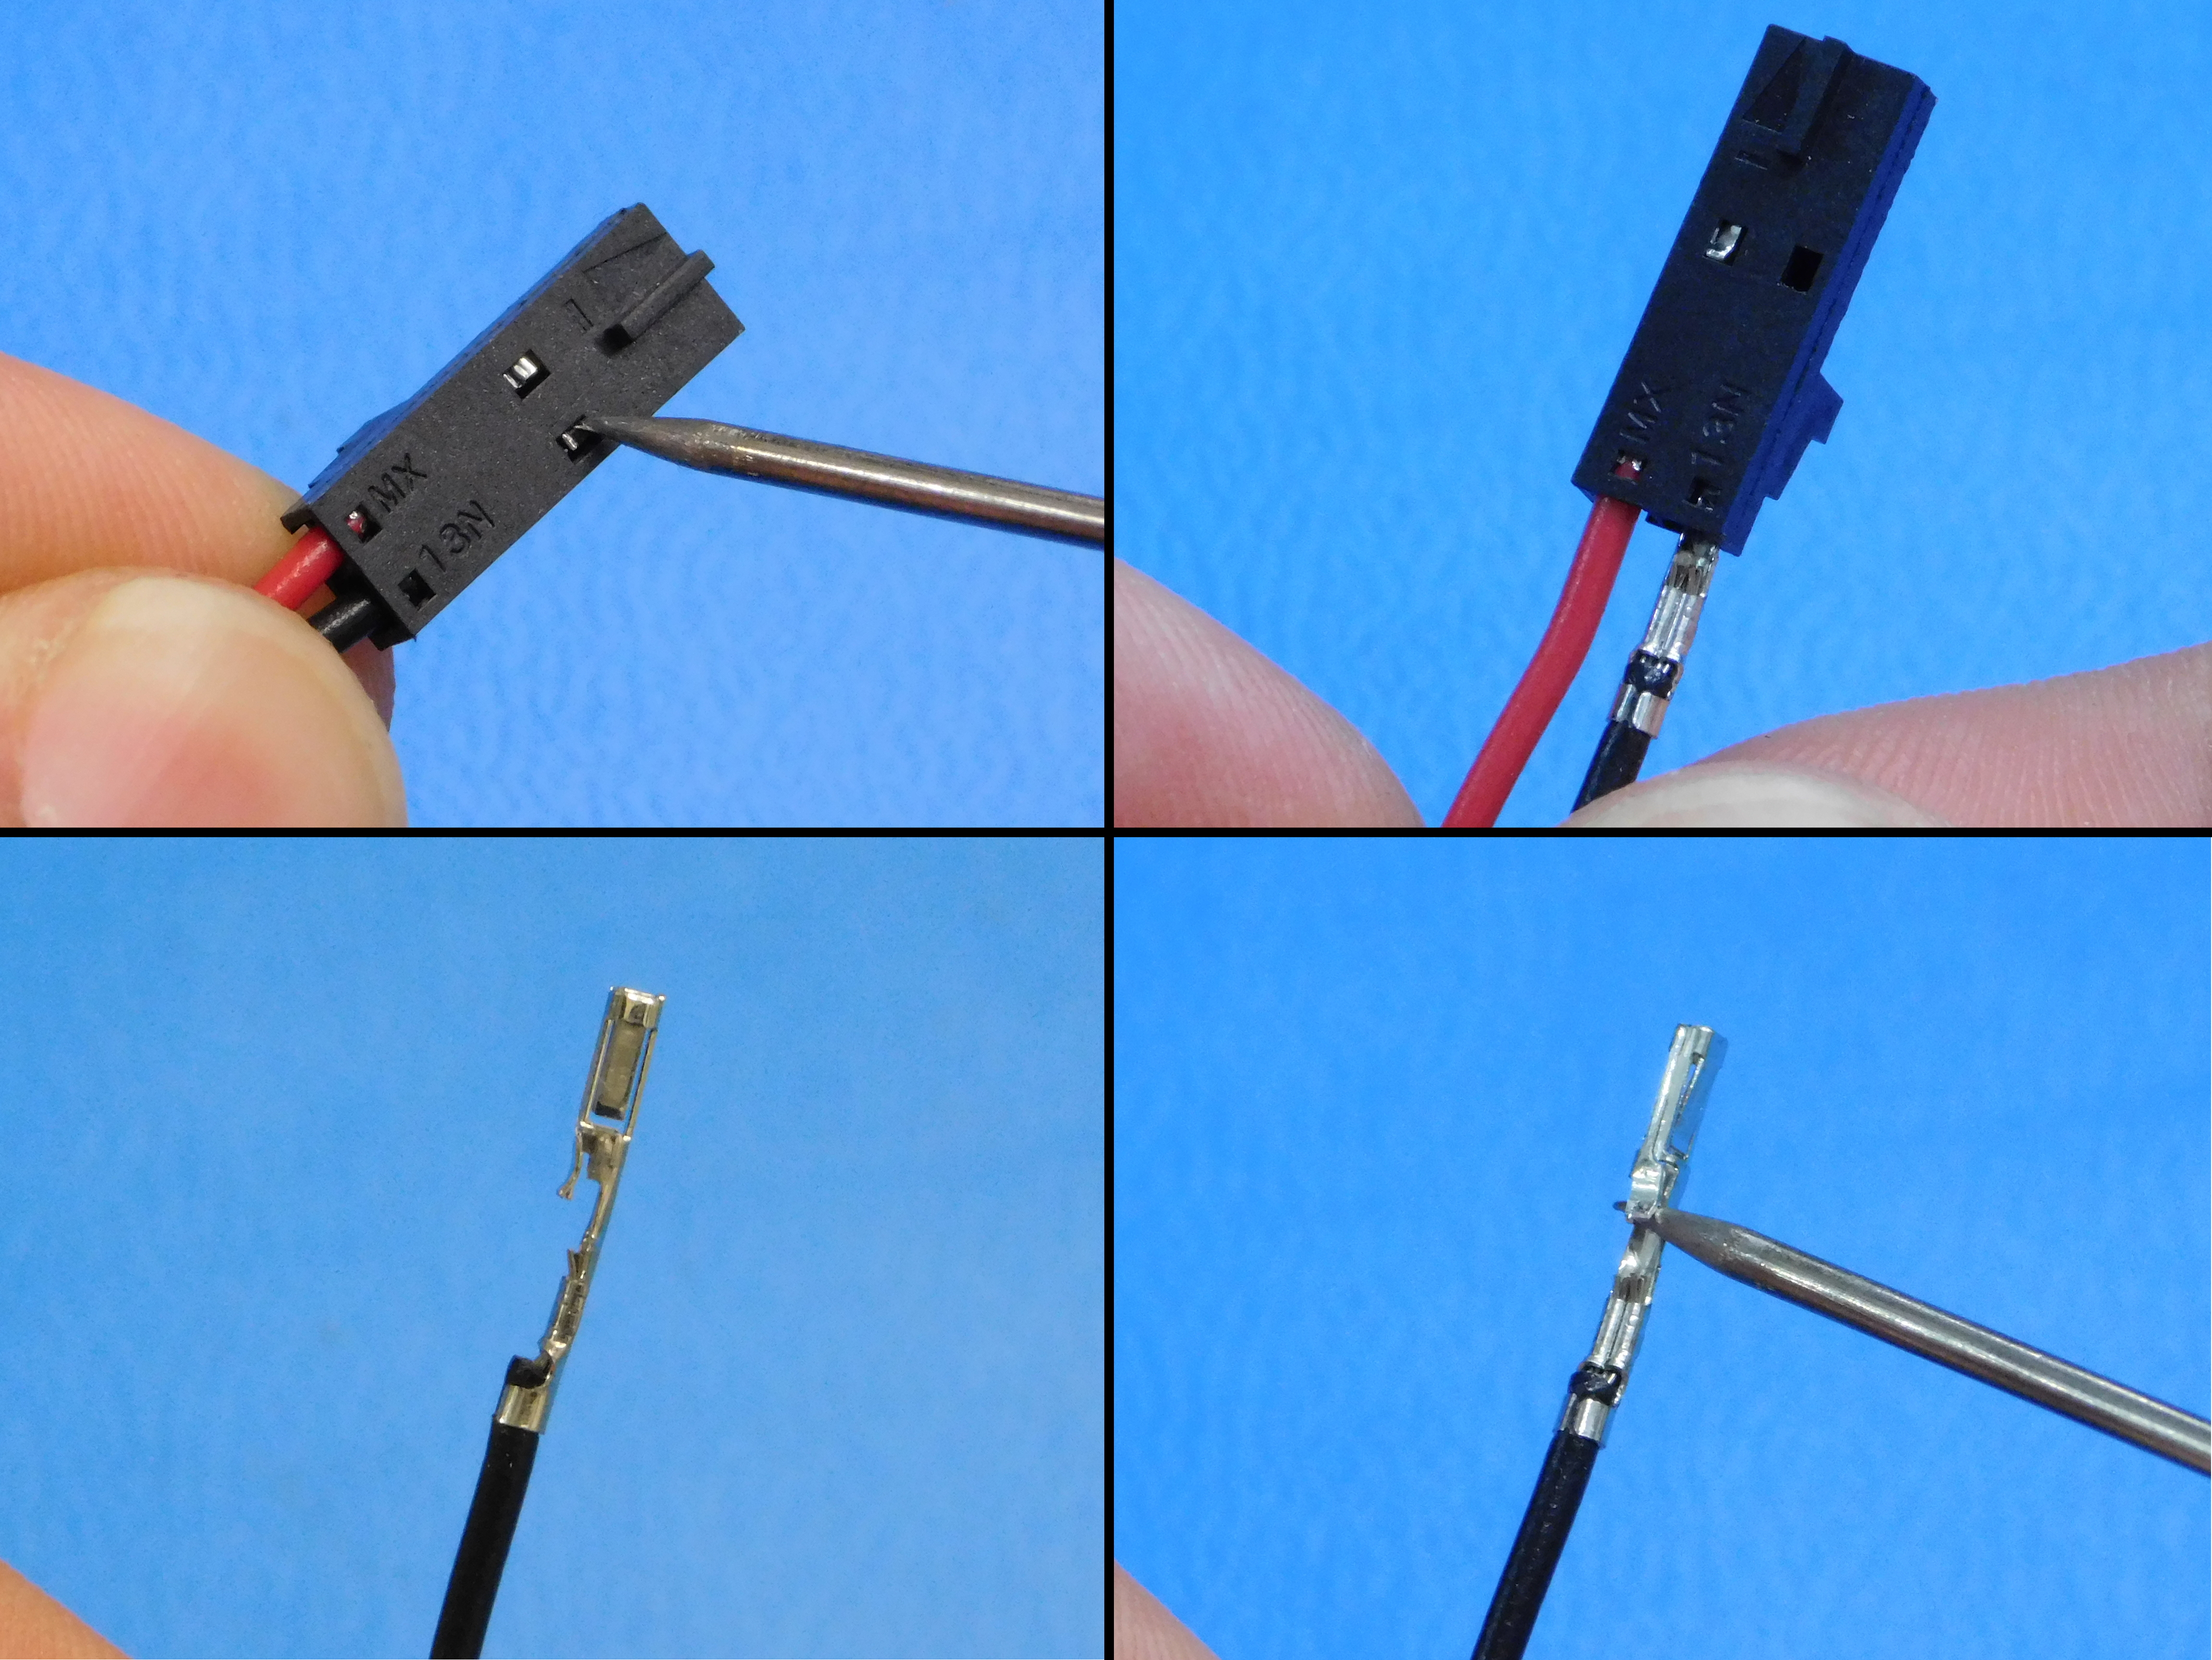
This step describes how to remove Molex terminals from connector housings and prepare them for re-use.
If performed carefully, your existing Molex terminals should be able to be re-used in a new pin-out configuration.
The most suitable tool for this procedure is the dental pick supplied in your accessory kit.
To begin, locate the side of the connector housing that exposes the tab holding the terminal into the connector housing.
Gently poke the tab of the pin to be removed.
It does not need to be pressed all the way down for the terminal to be removed and not doing so allows for the tab to be returned to its starting position more easily.
Pull on the wire to remove the terminal from the connector housing.
Using the dental pick, gently bend the tab back to its starting position.
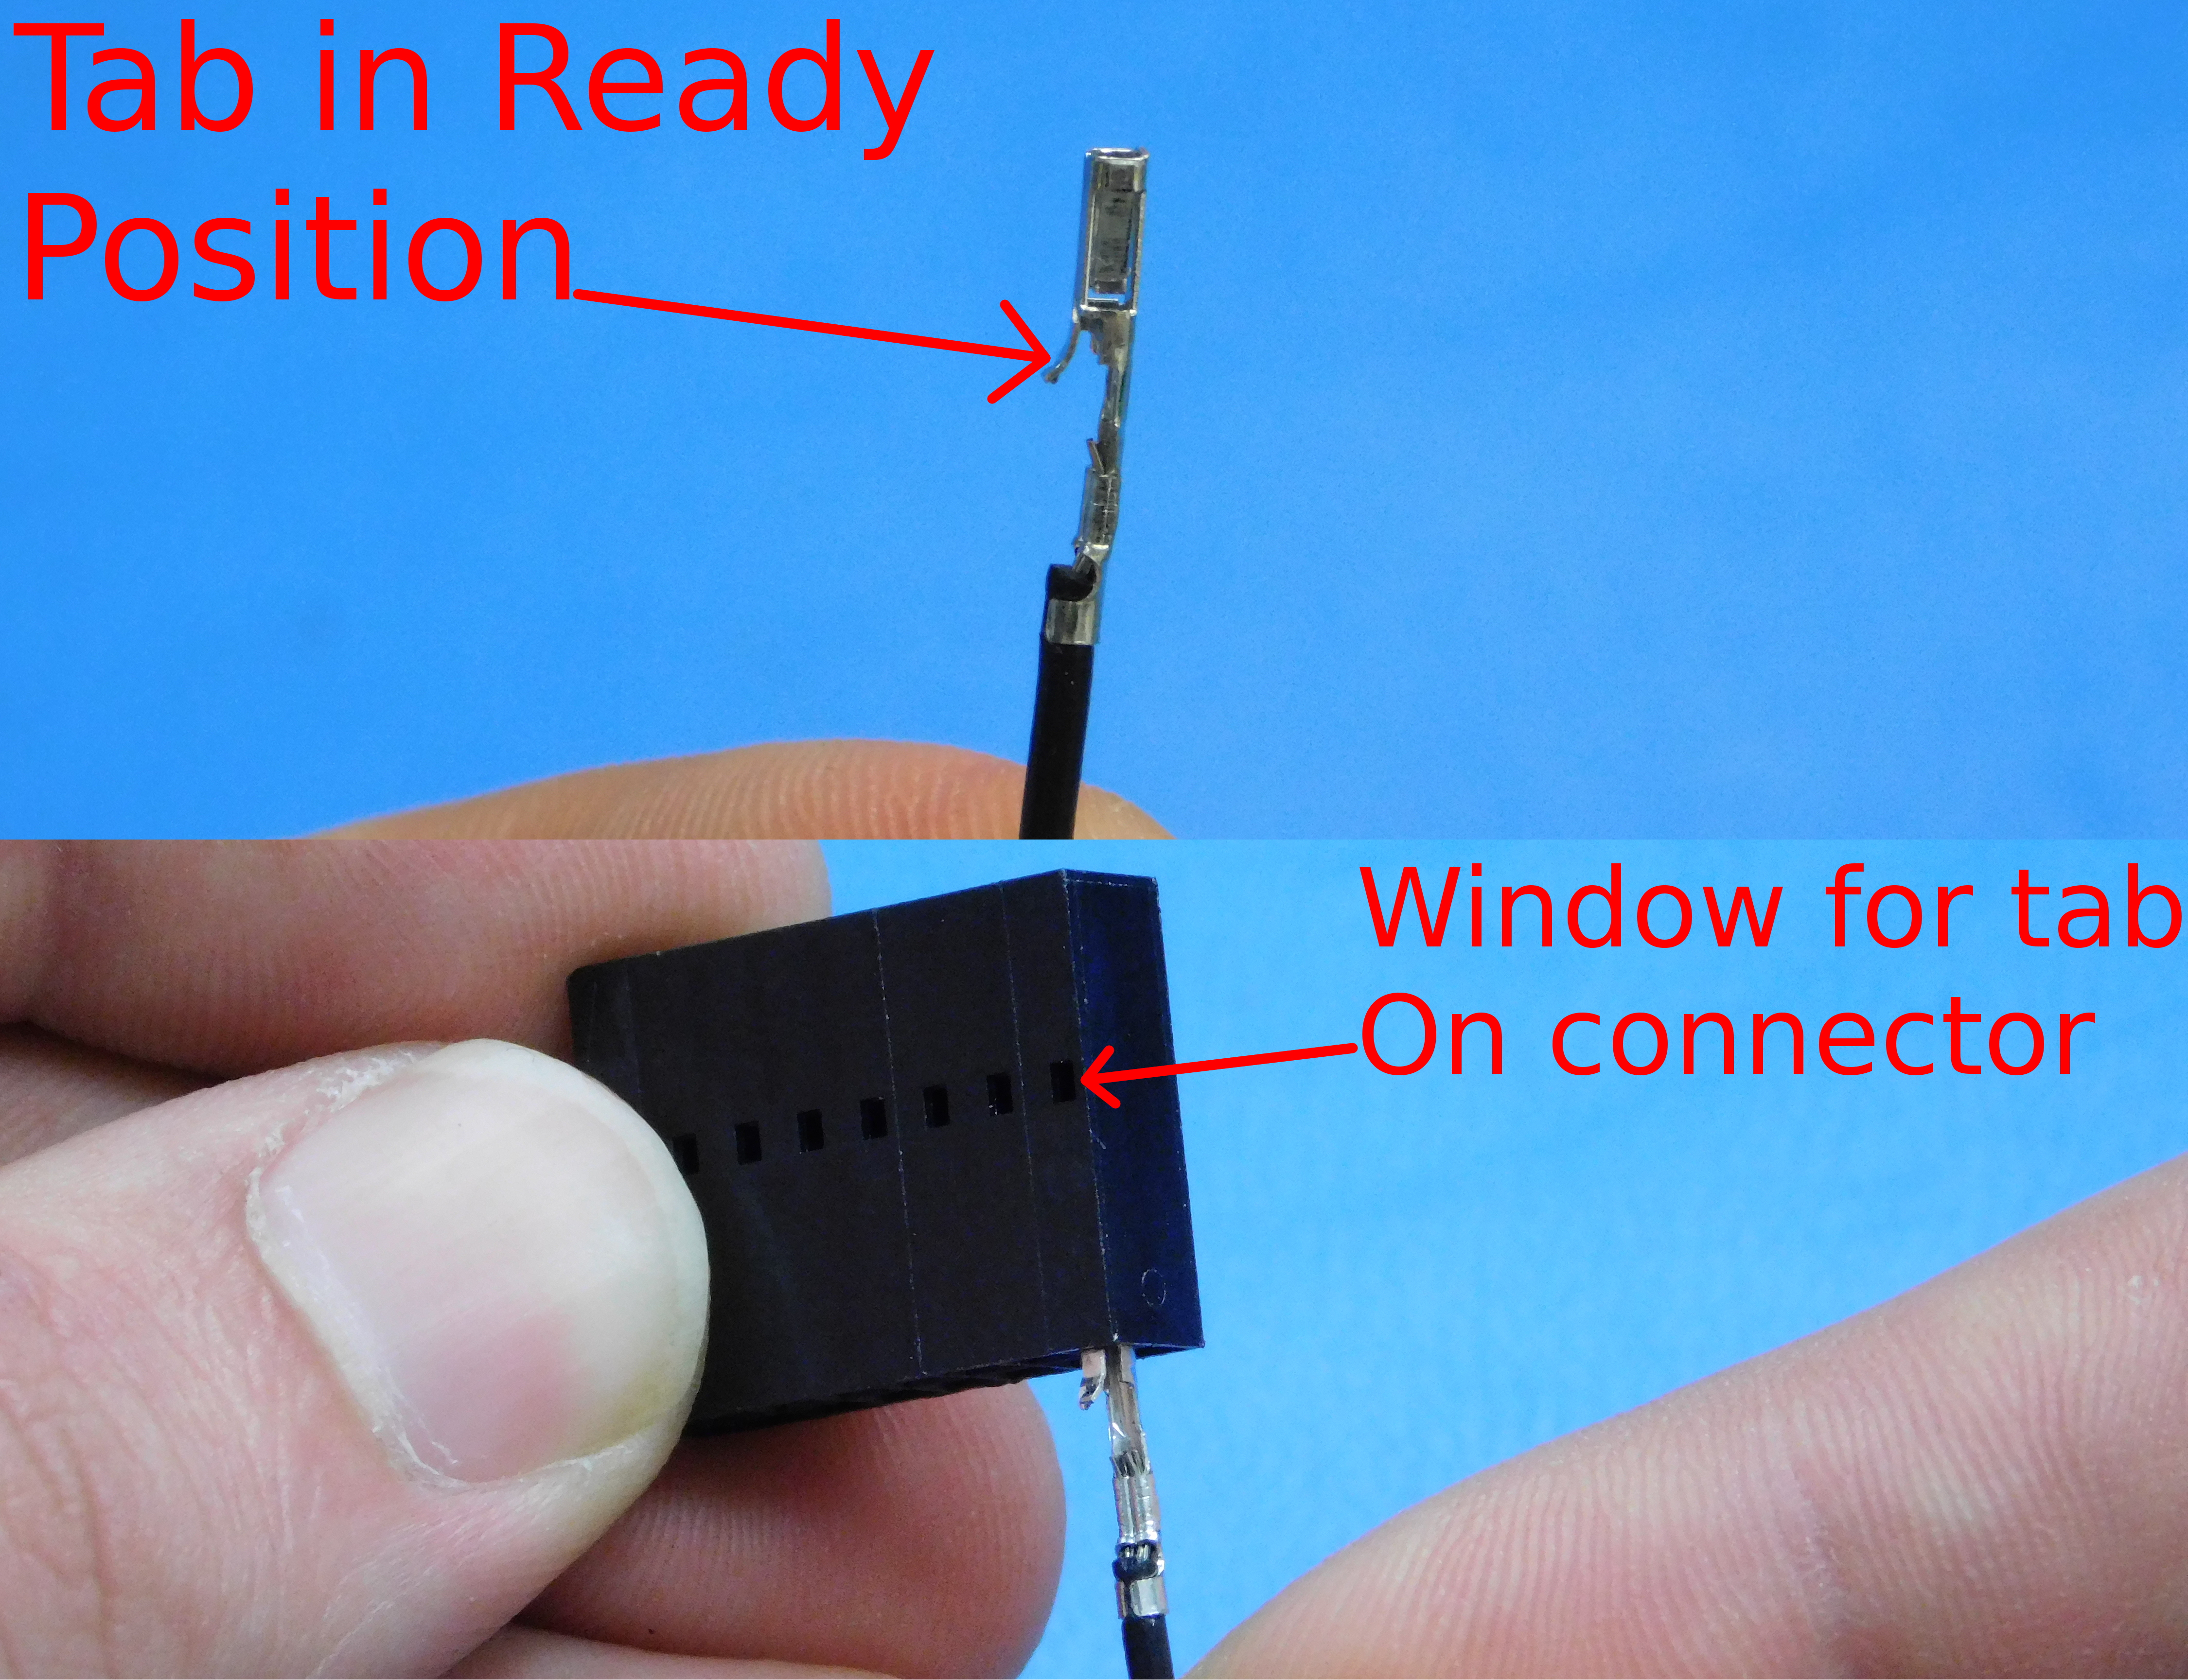
It is now ready to be placed in its new position in the connector housing. When doing so, ensure the tab of the terminal is facing the window on the connector housing so that it properly engages with the window, preventing the terminal from being removed.
-Turn off your TAZ before changing anything for safety and to ensure you don't fry components on your printer.
-Unplug the connectors from the current toolhead.
-Using the 2.5mm hex unscrew the the top screw on the tool head.
-Then lift the toolhead off in an upward motion.

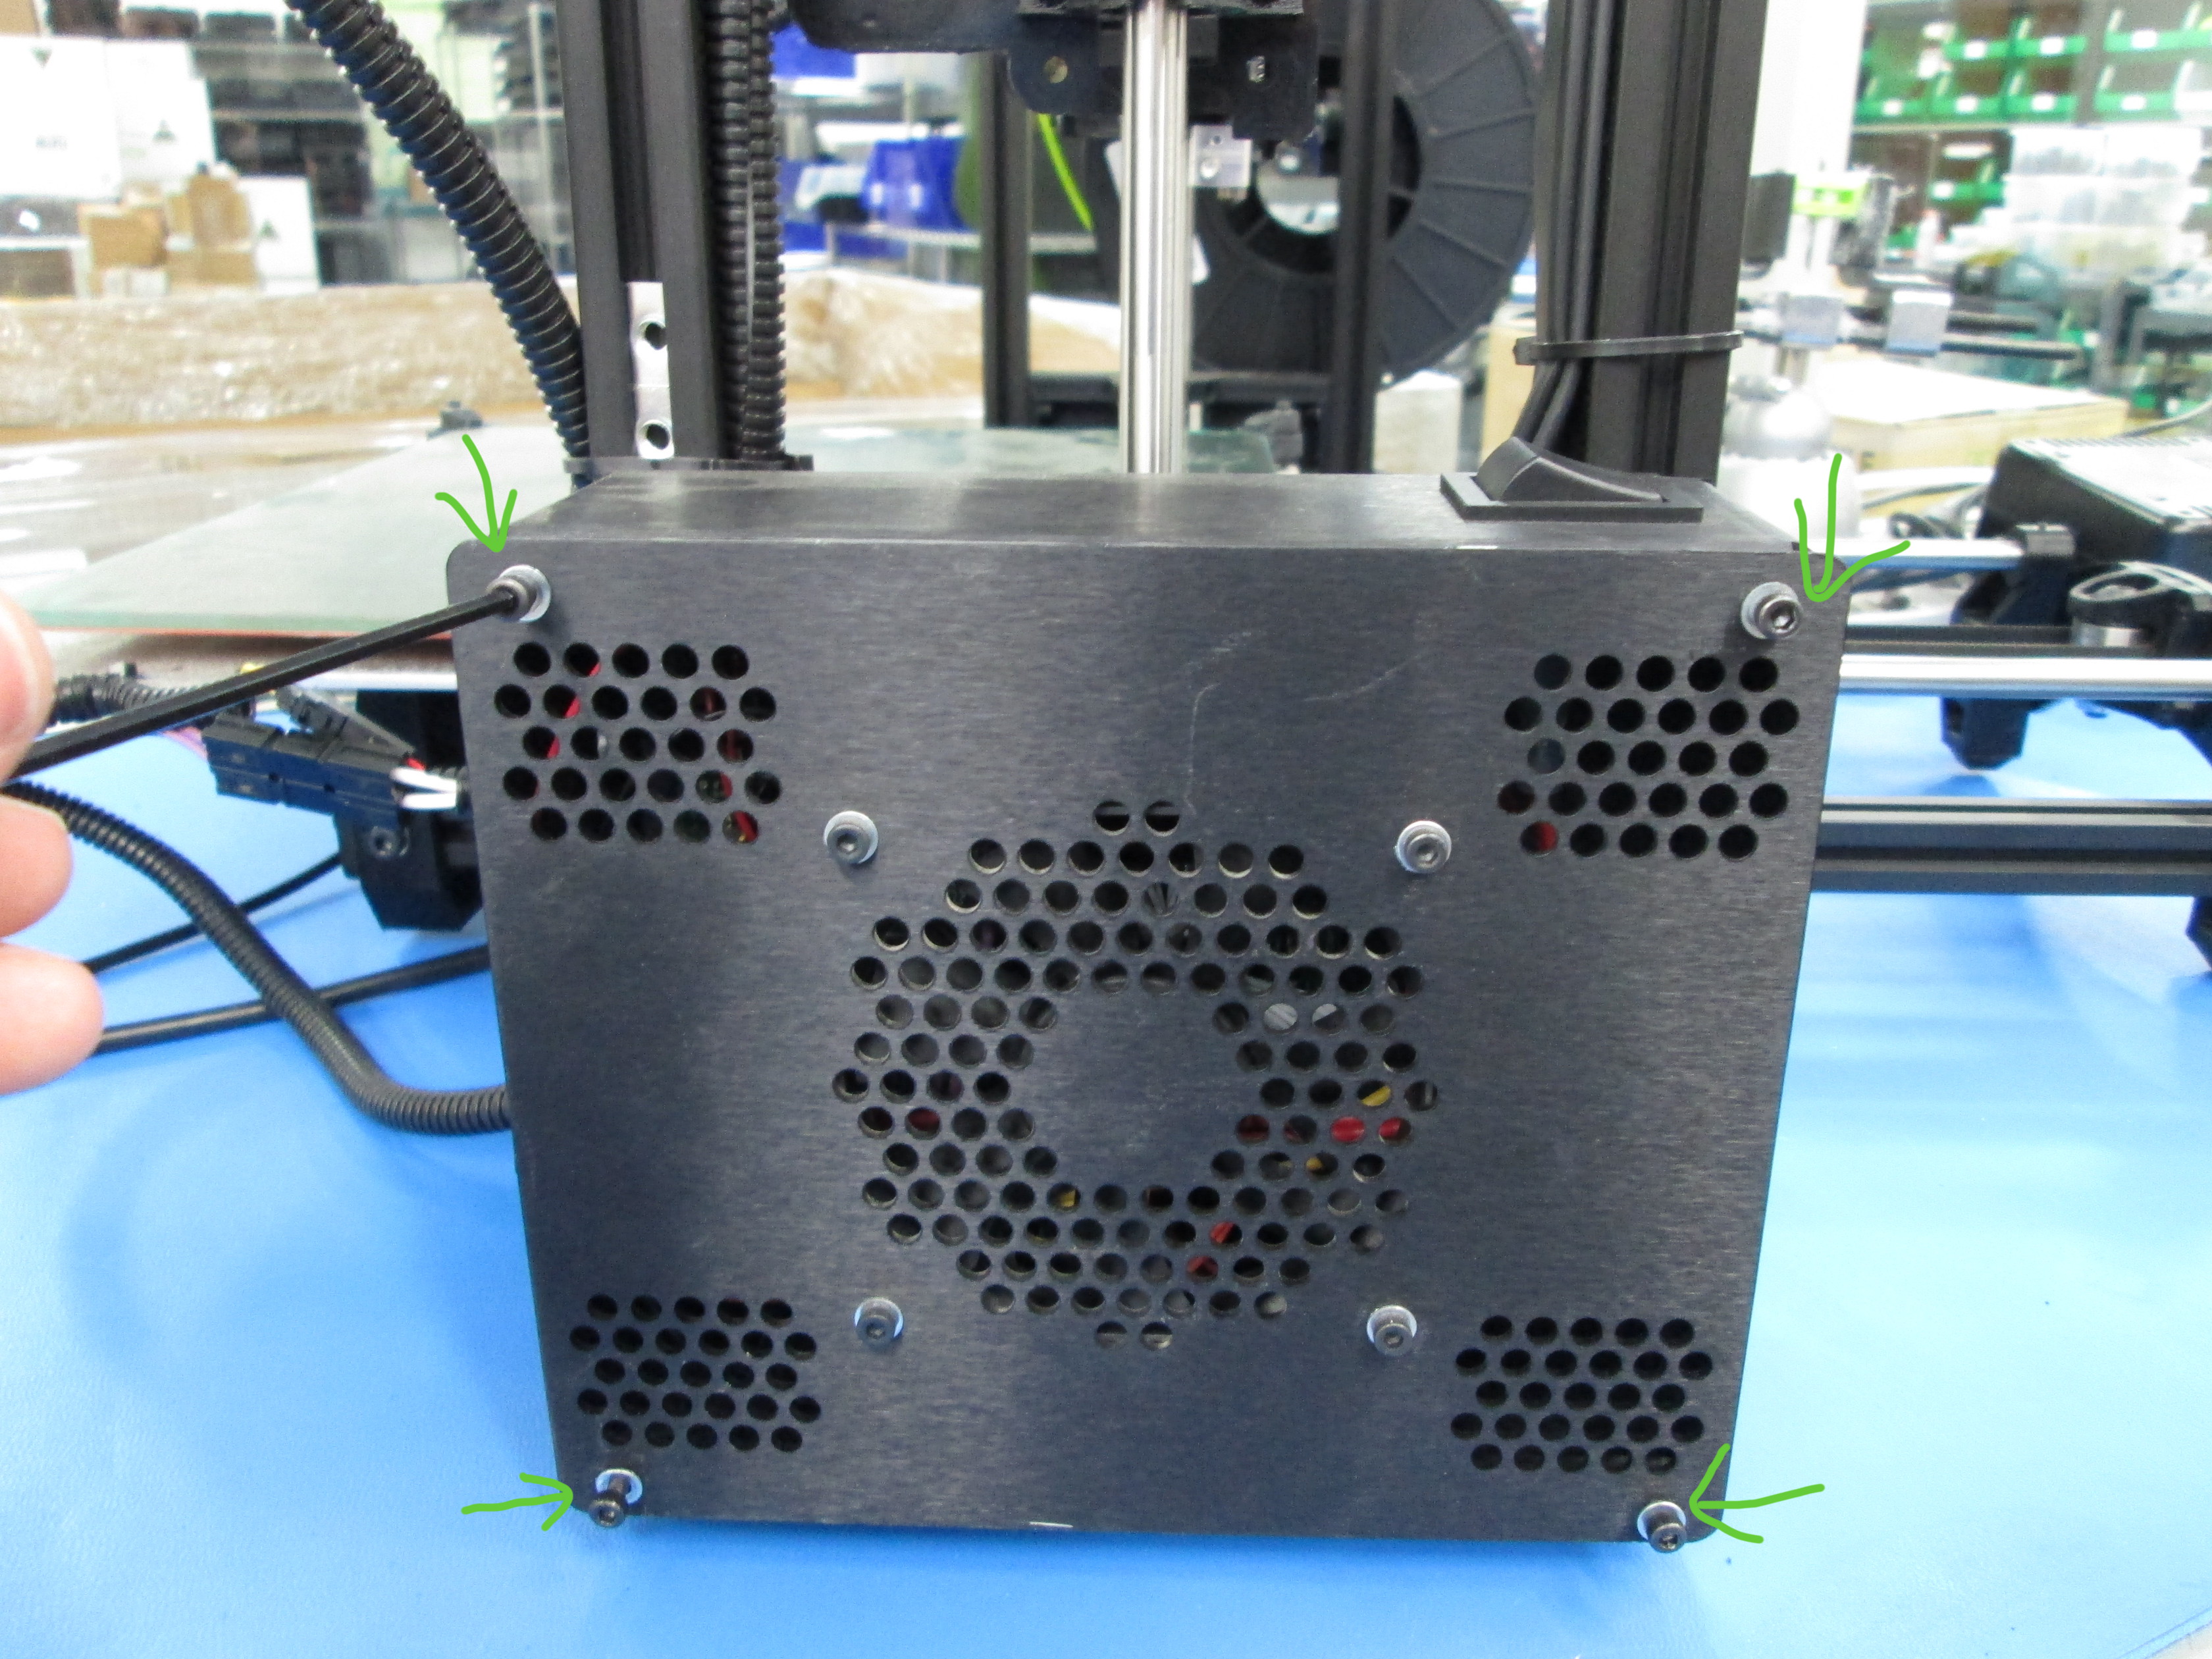
-Using the 2.5mm hex tool, remove the 4 screws on the cover of the control box(When the cover comes off be careful of the case fan wires still connected from the cover to the circuit board).
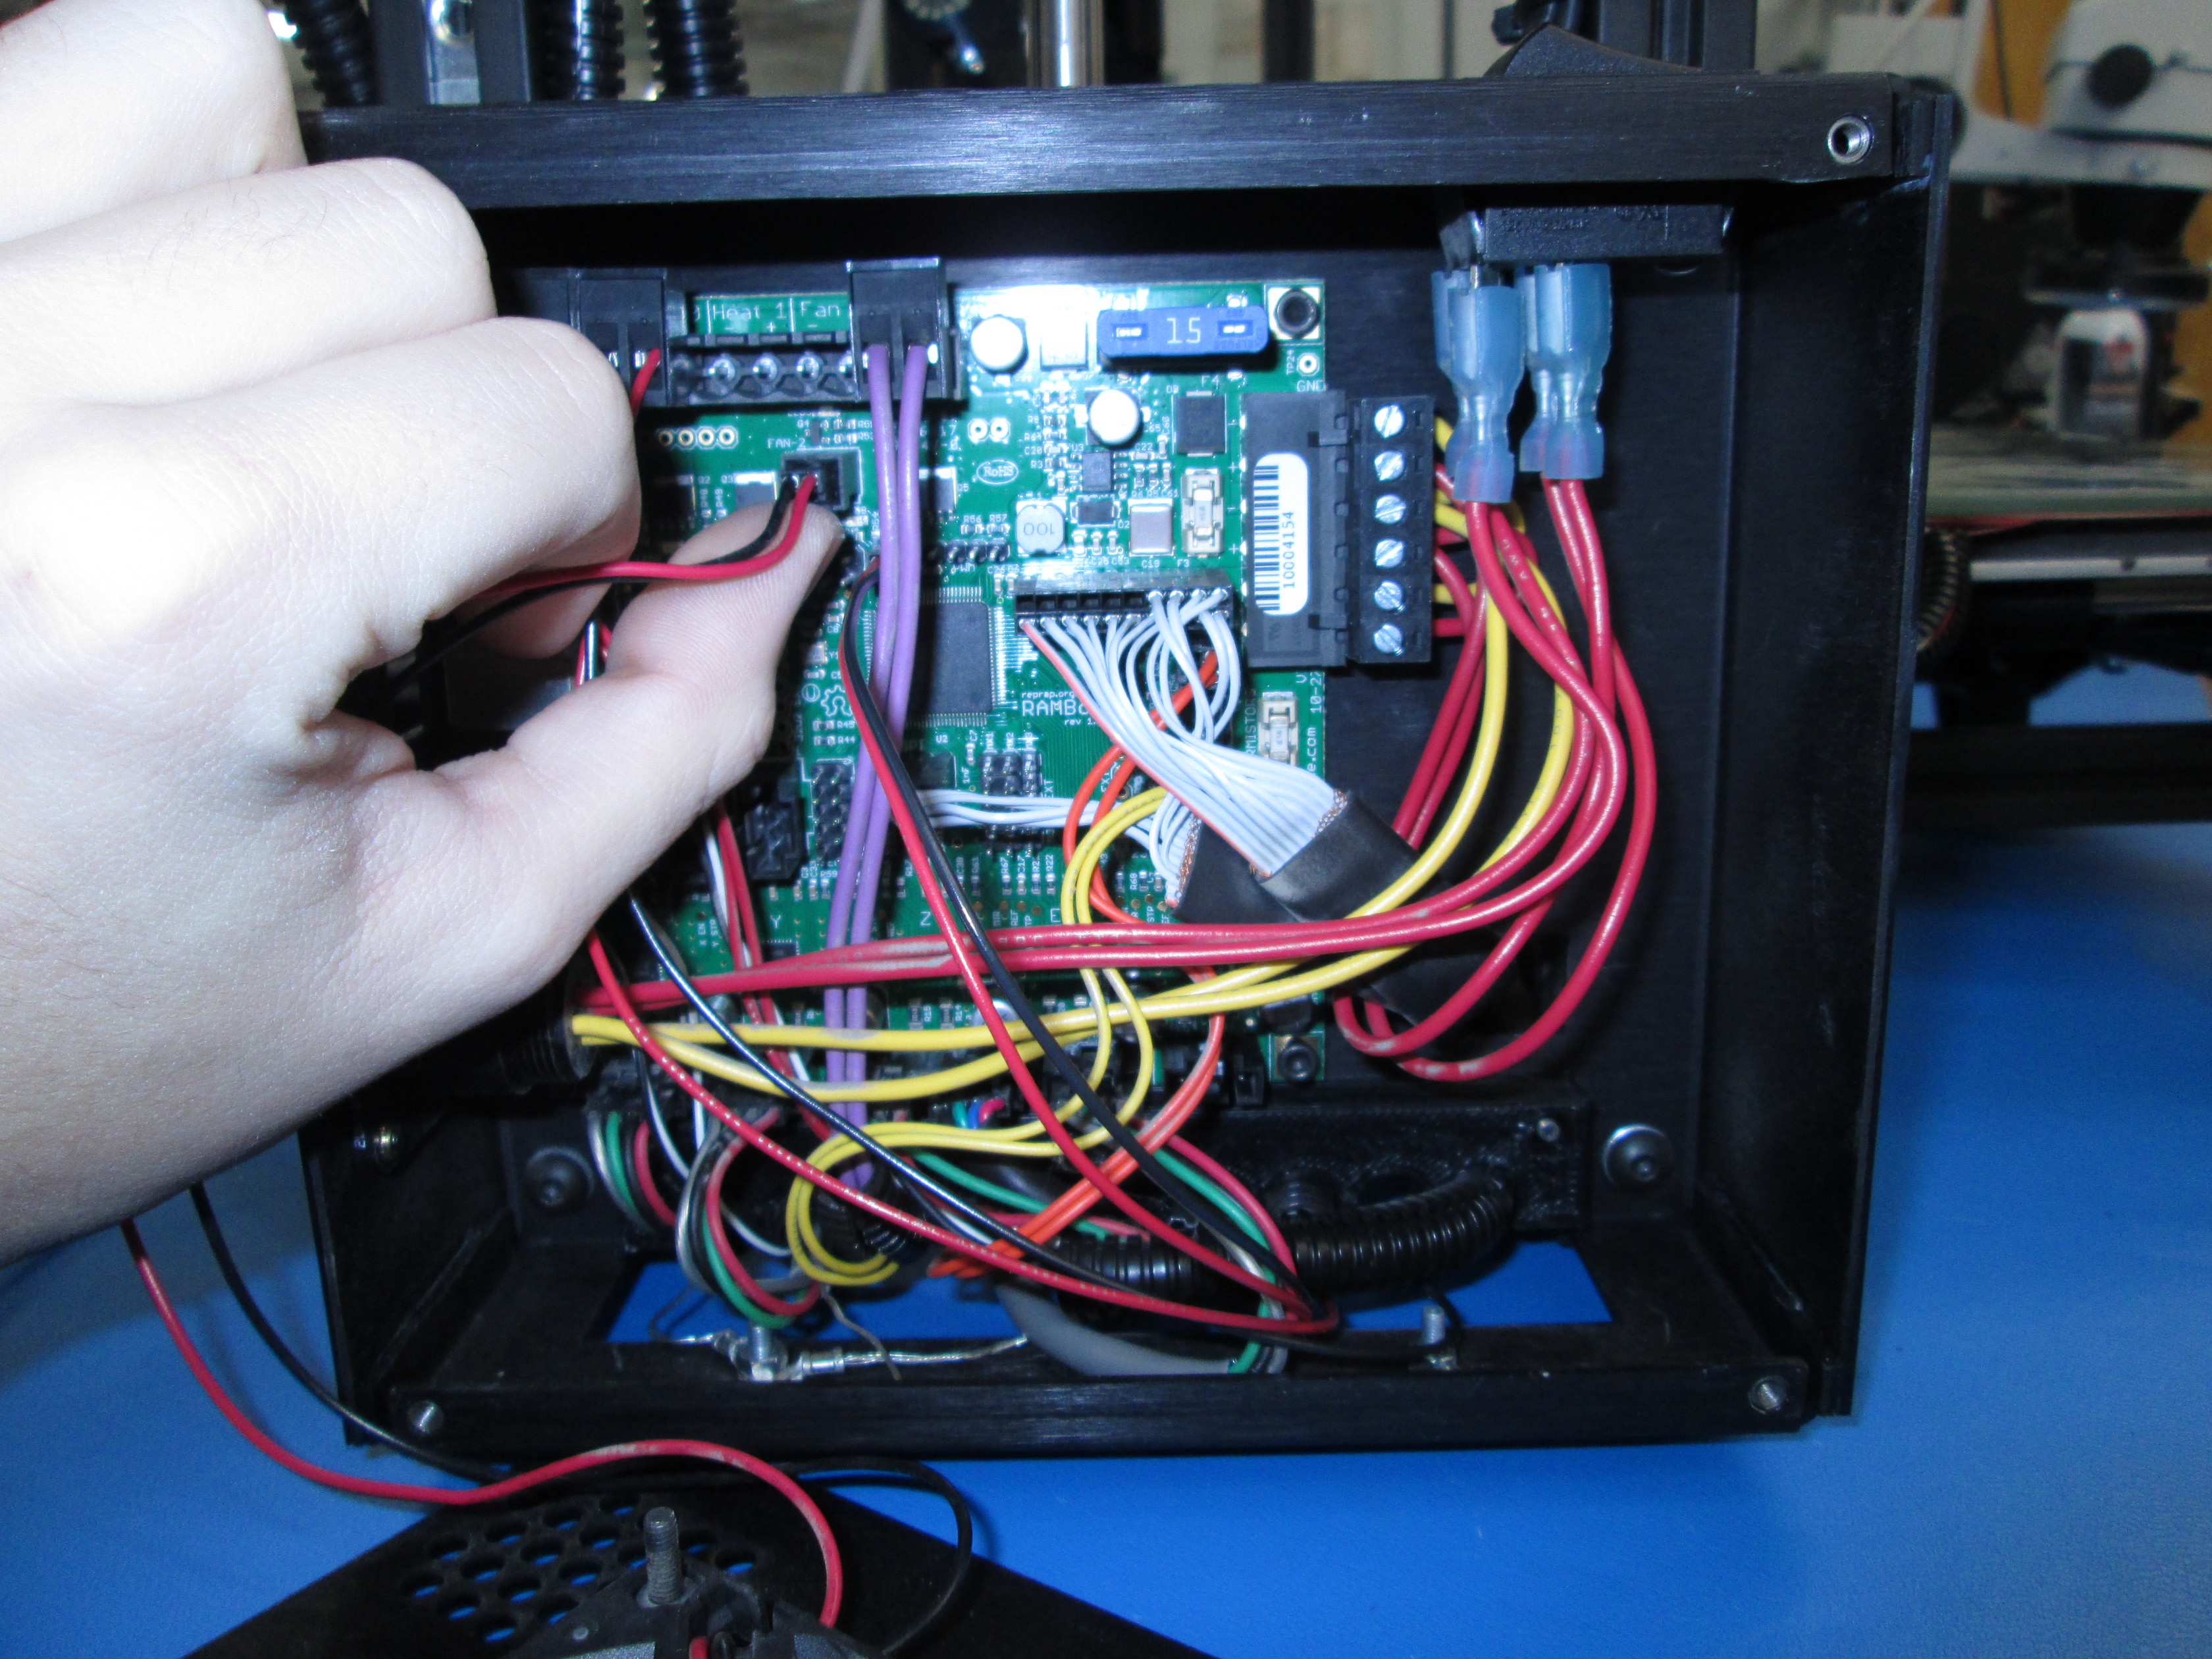
-Remove the fan connector by pushing the tab down on it and pull it away from the board.
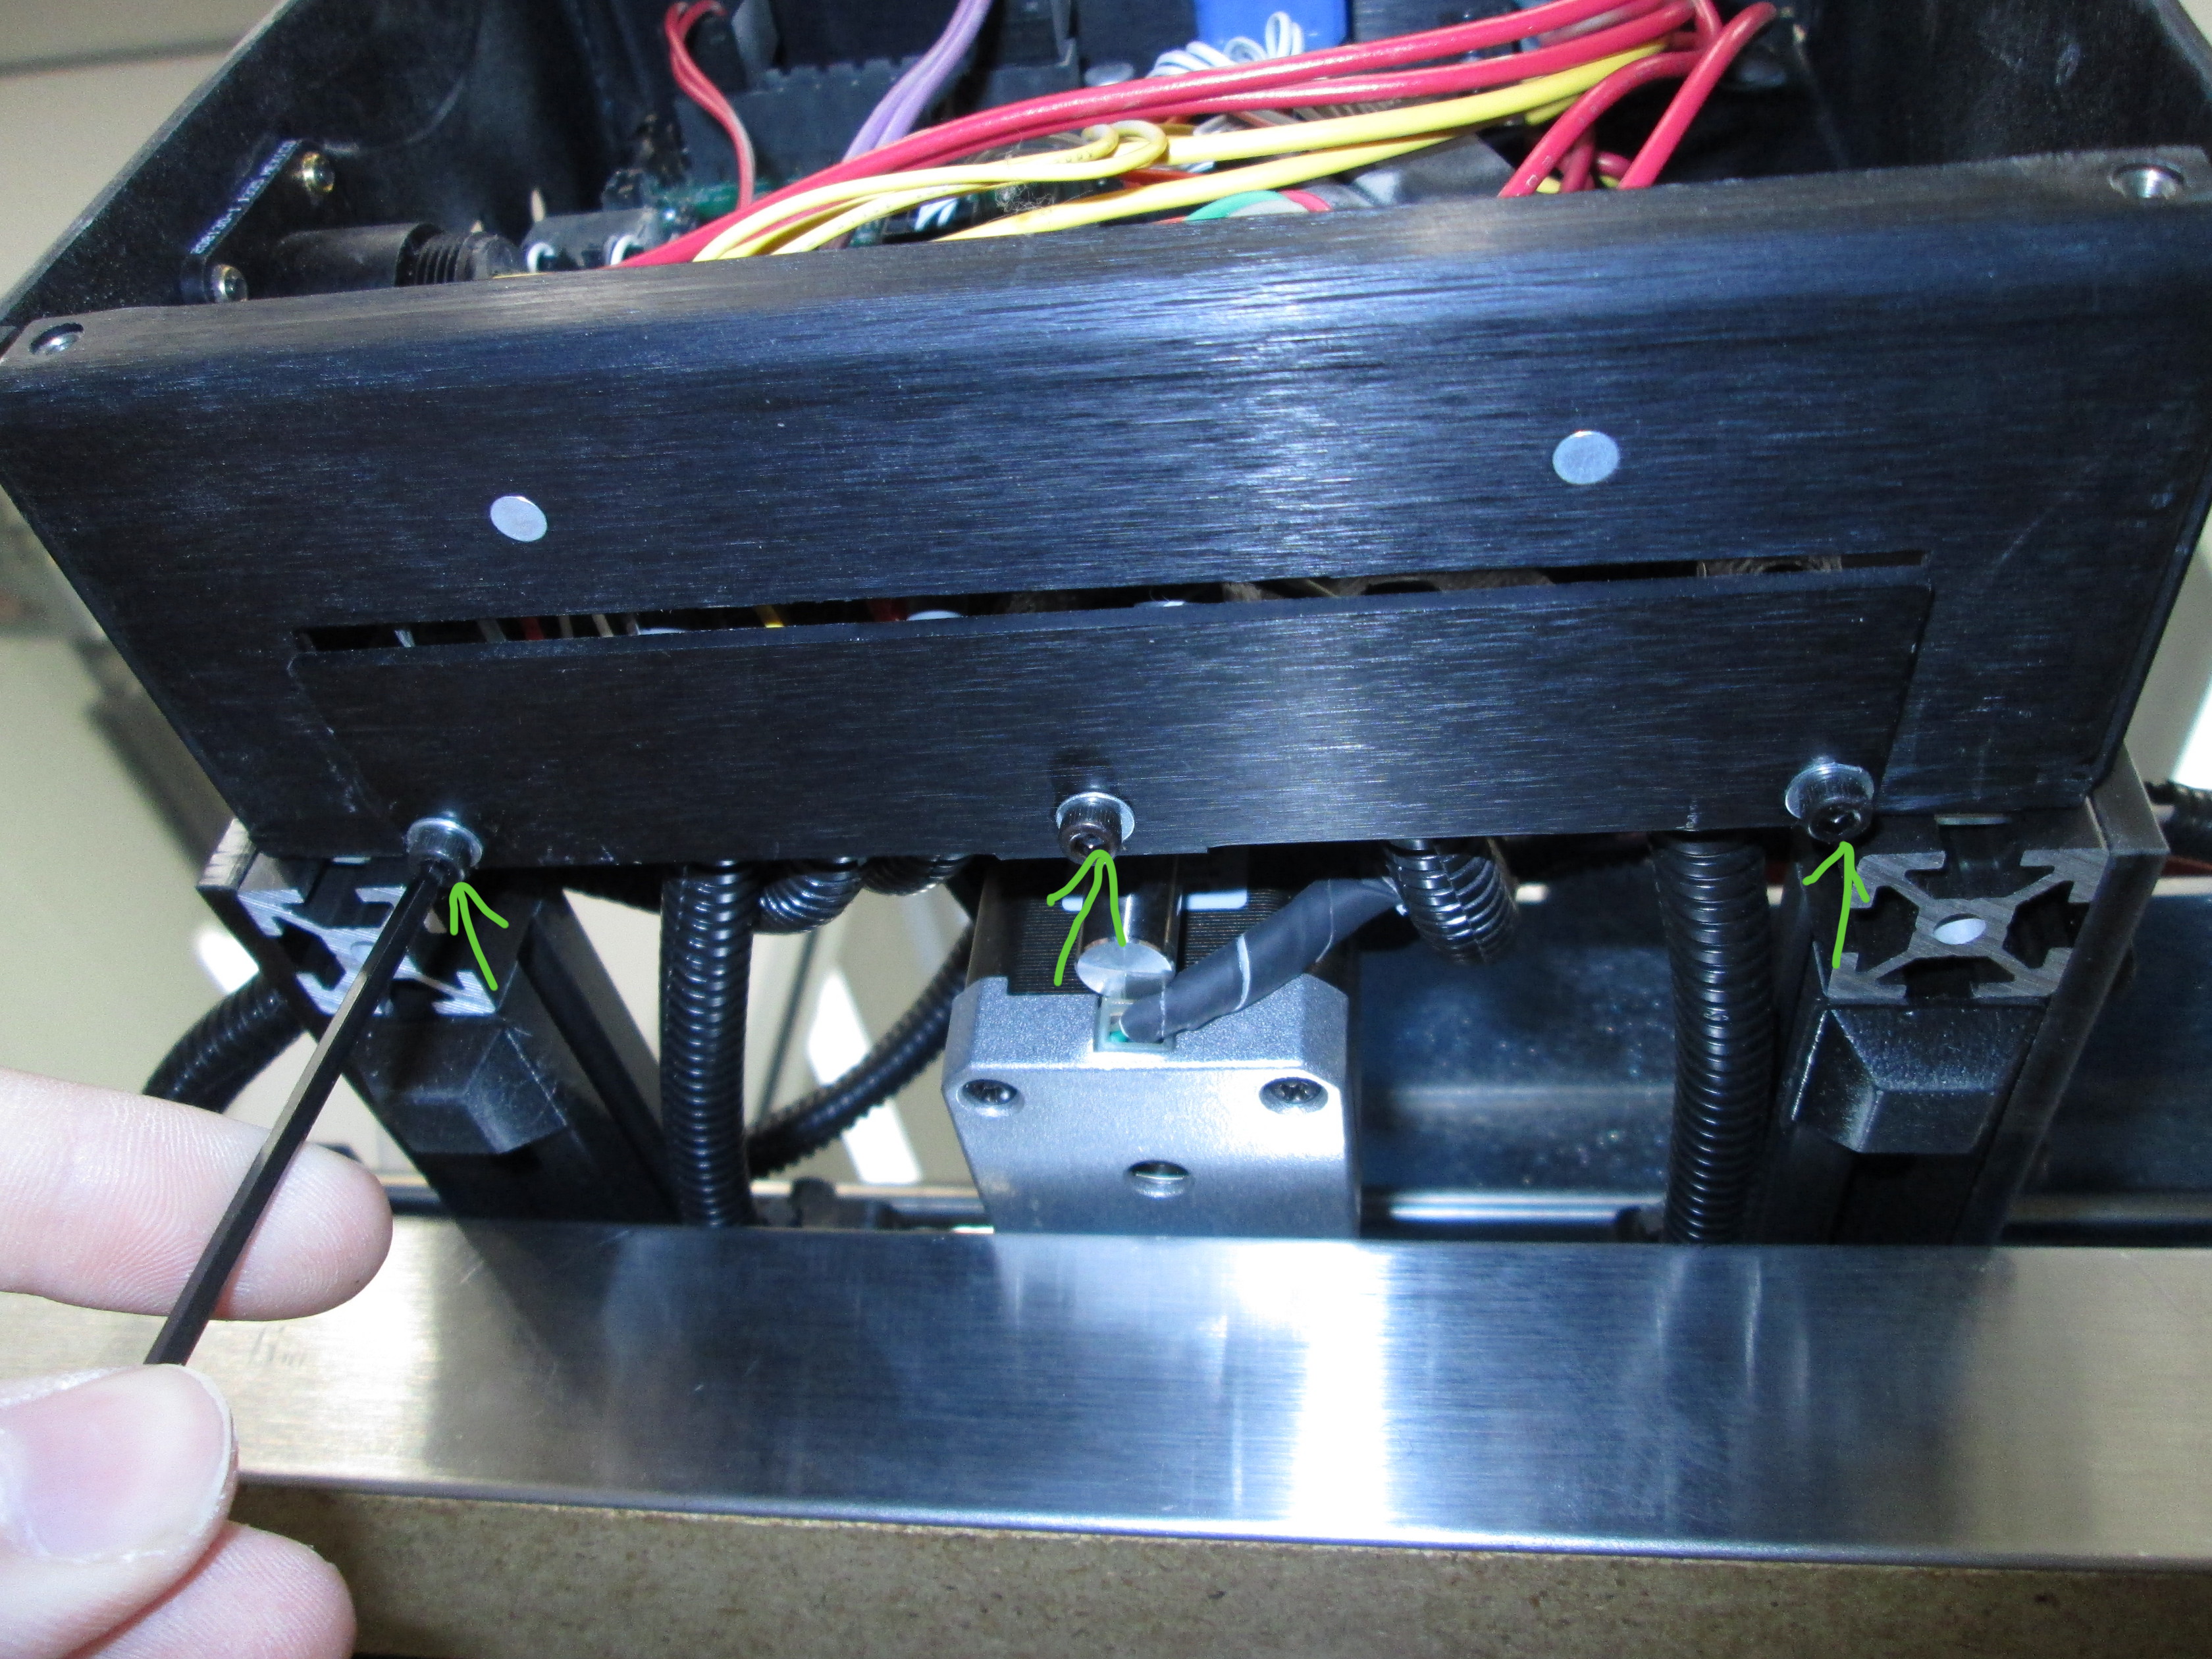
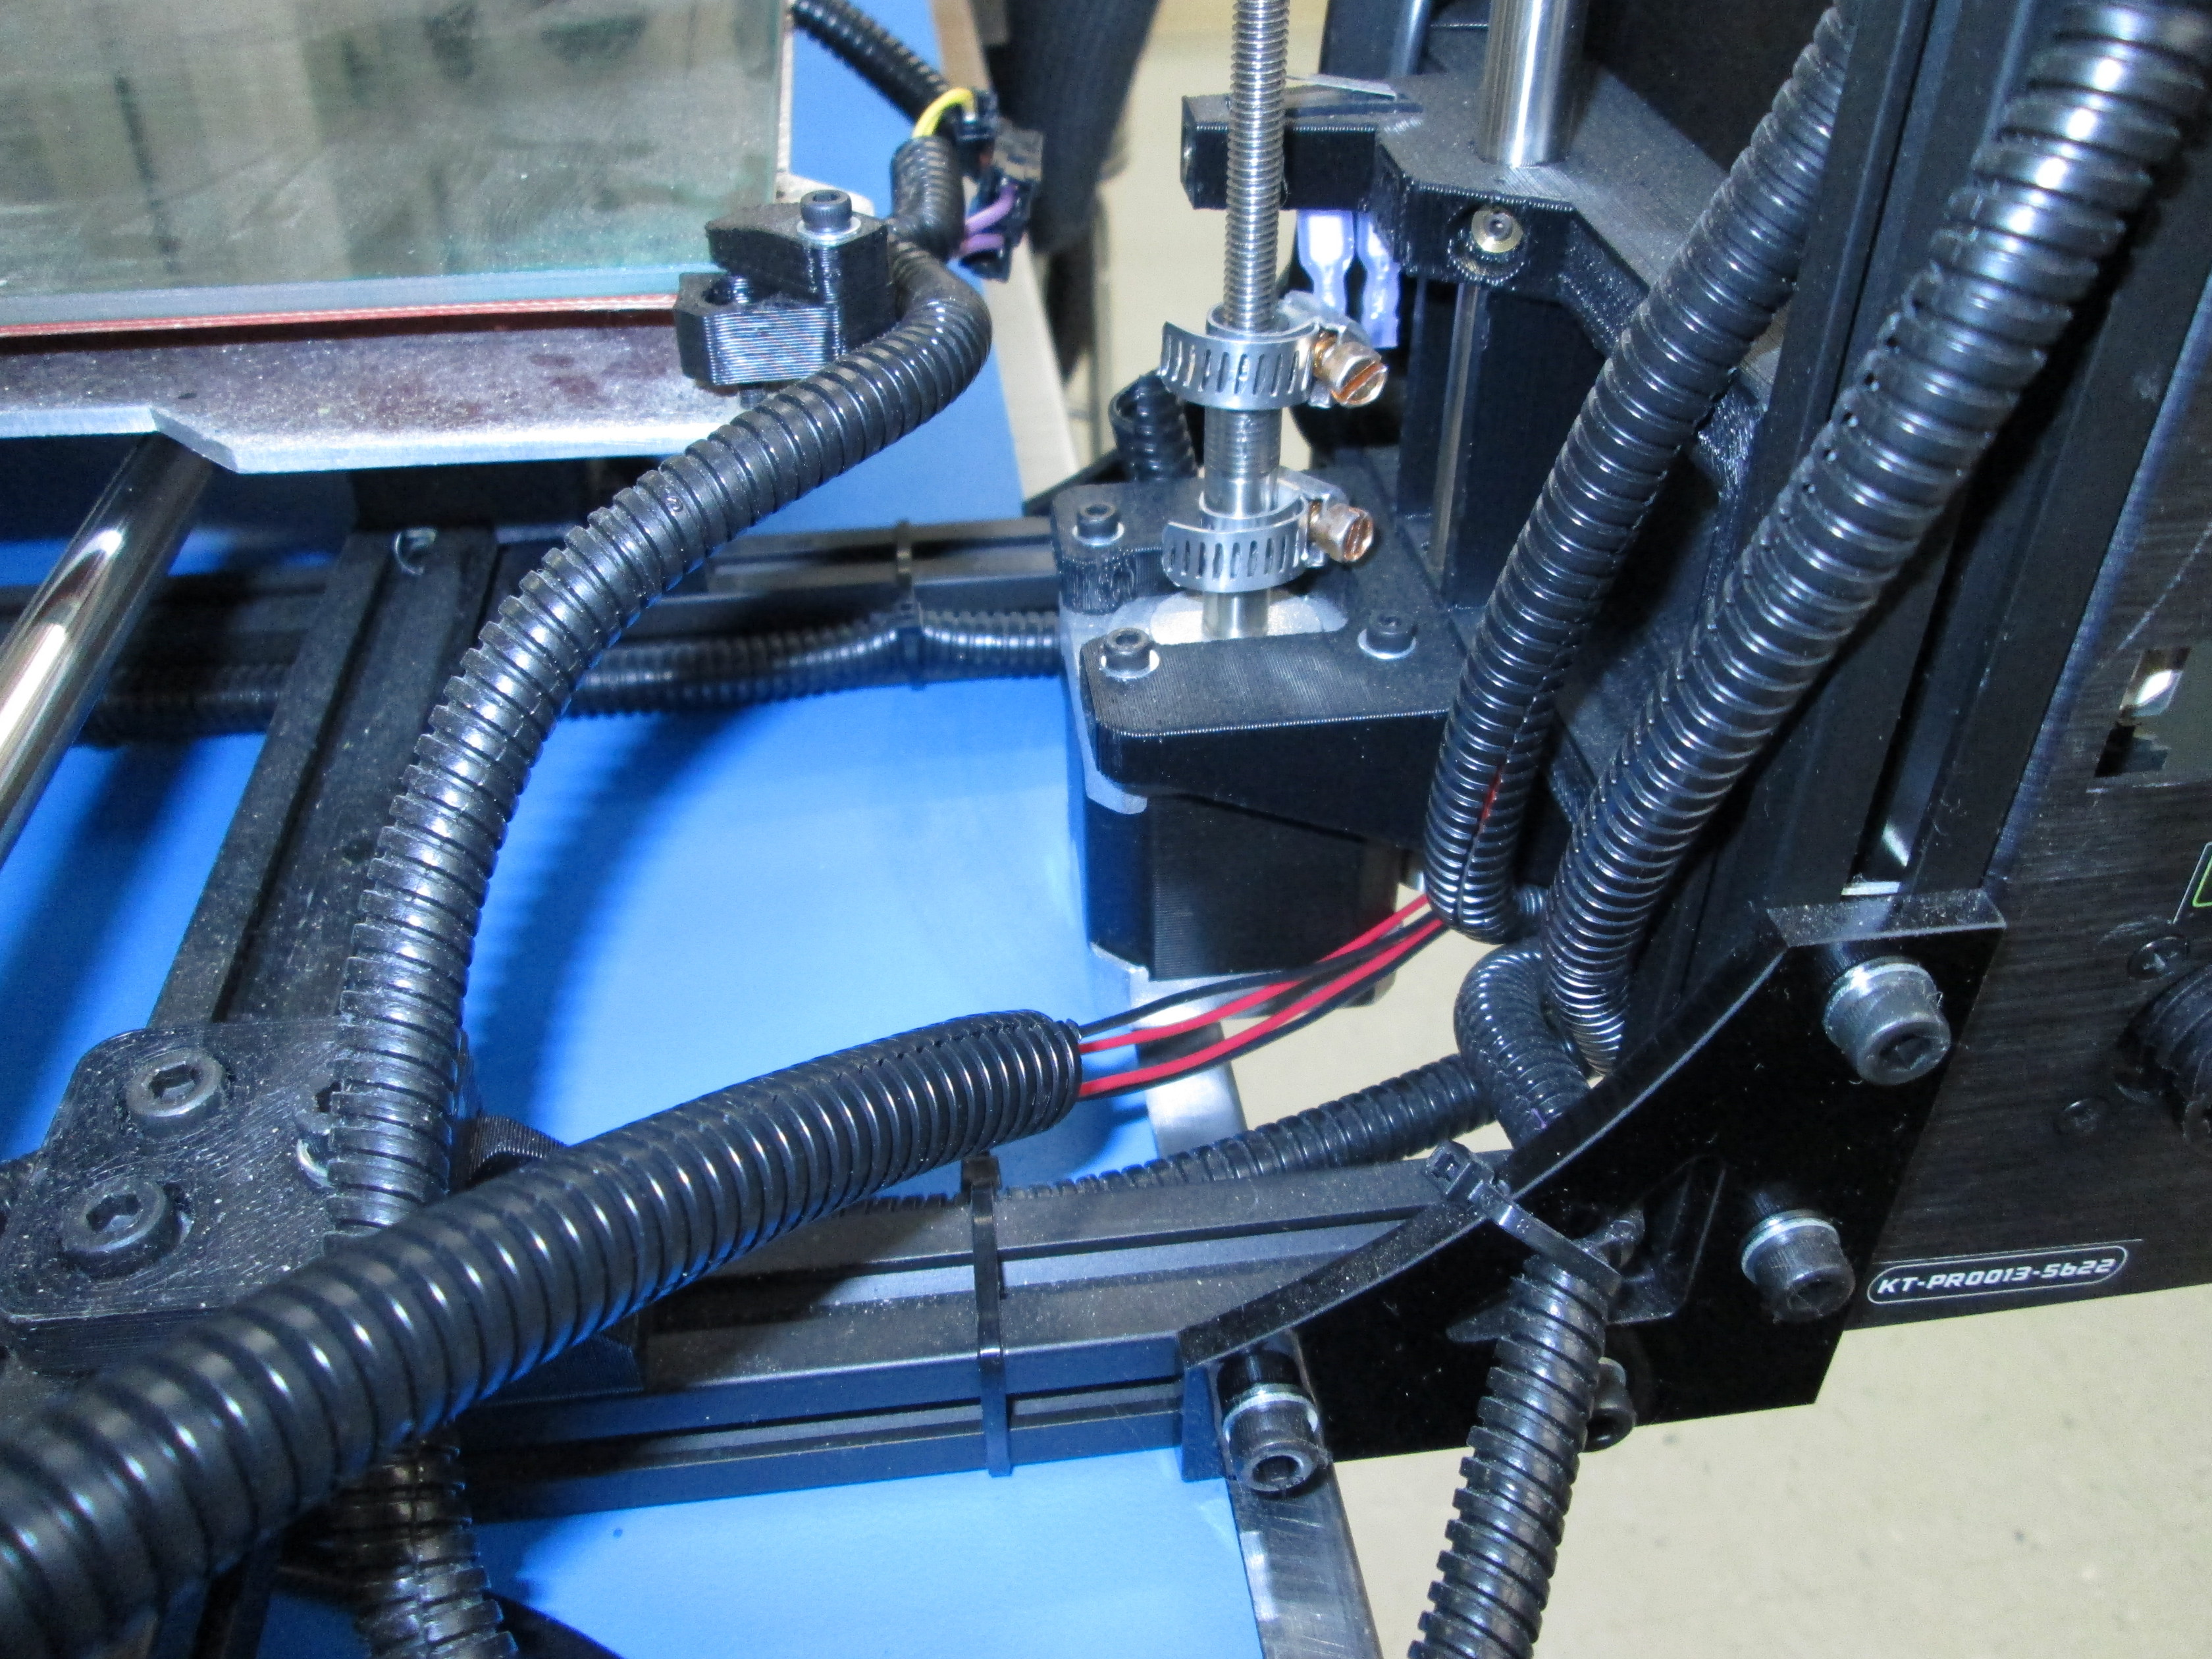
-Move Taz to the edge of table, then remove the 3 tension block screws.
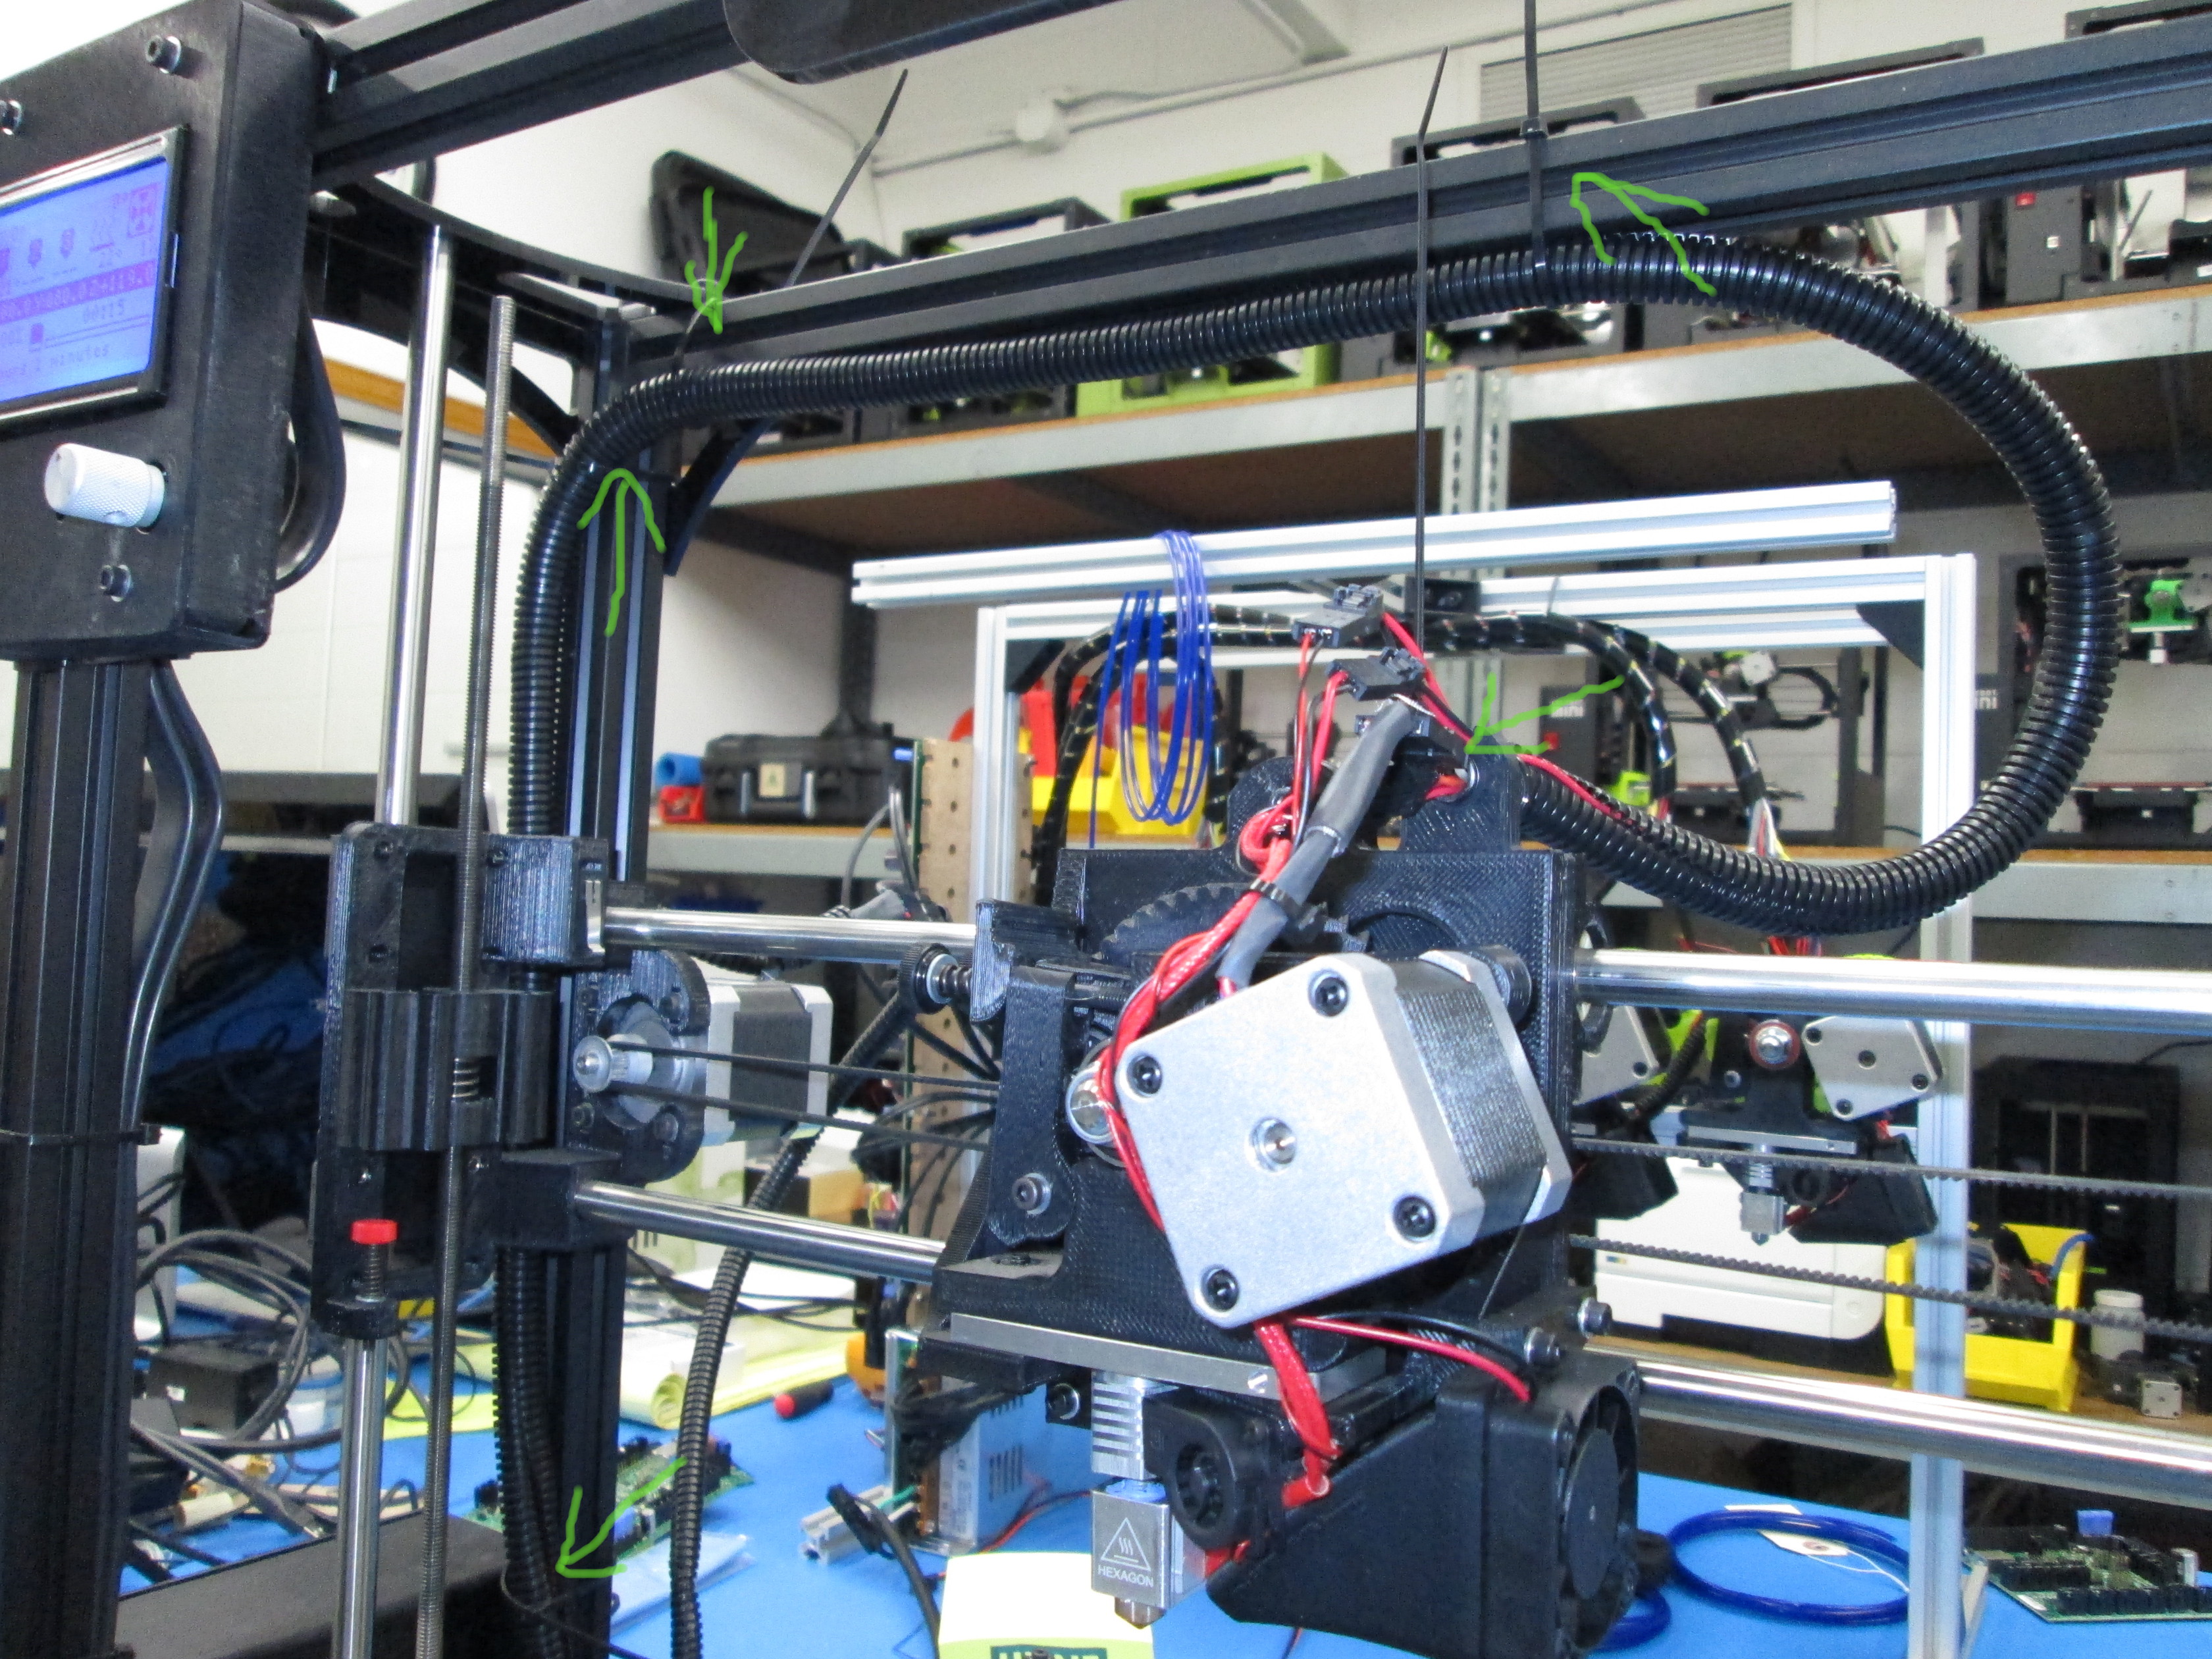
-Insert the 2 sets of wires through the panduit.
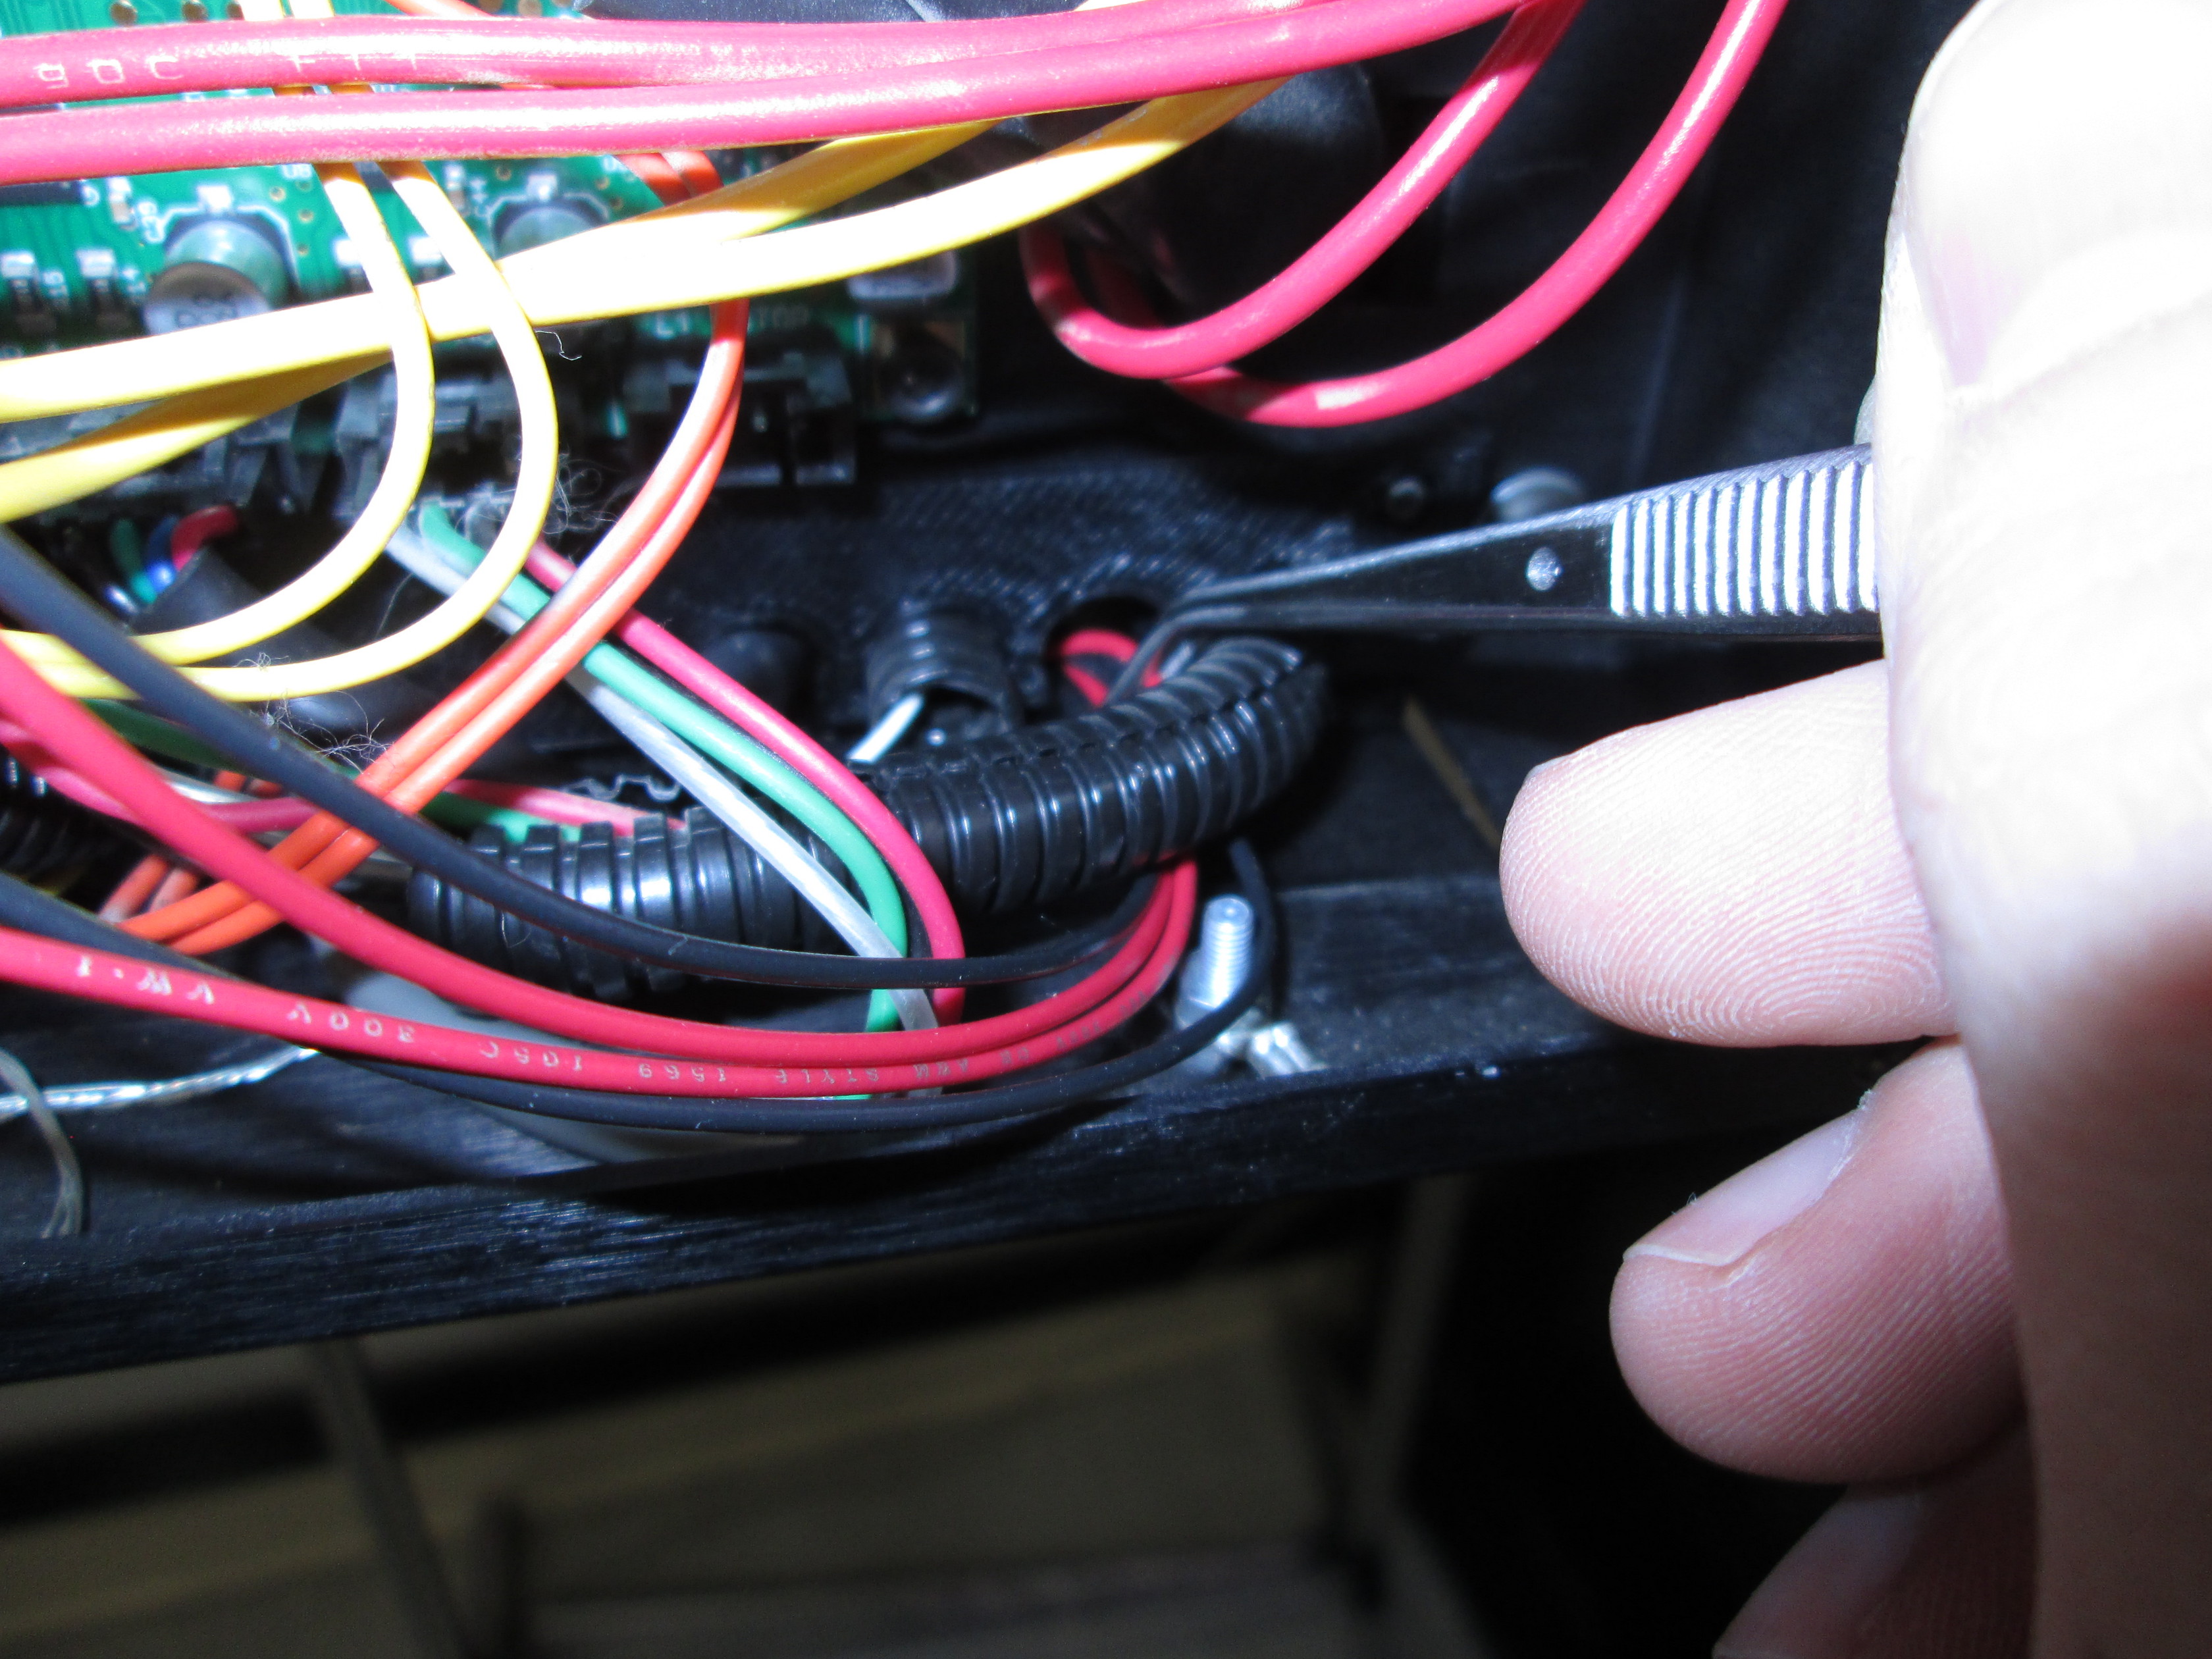
-Route the wires from the back side of printer, into the control box (see Inserting wire 1 and 2 pictures).
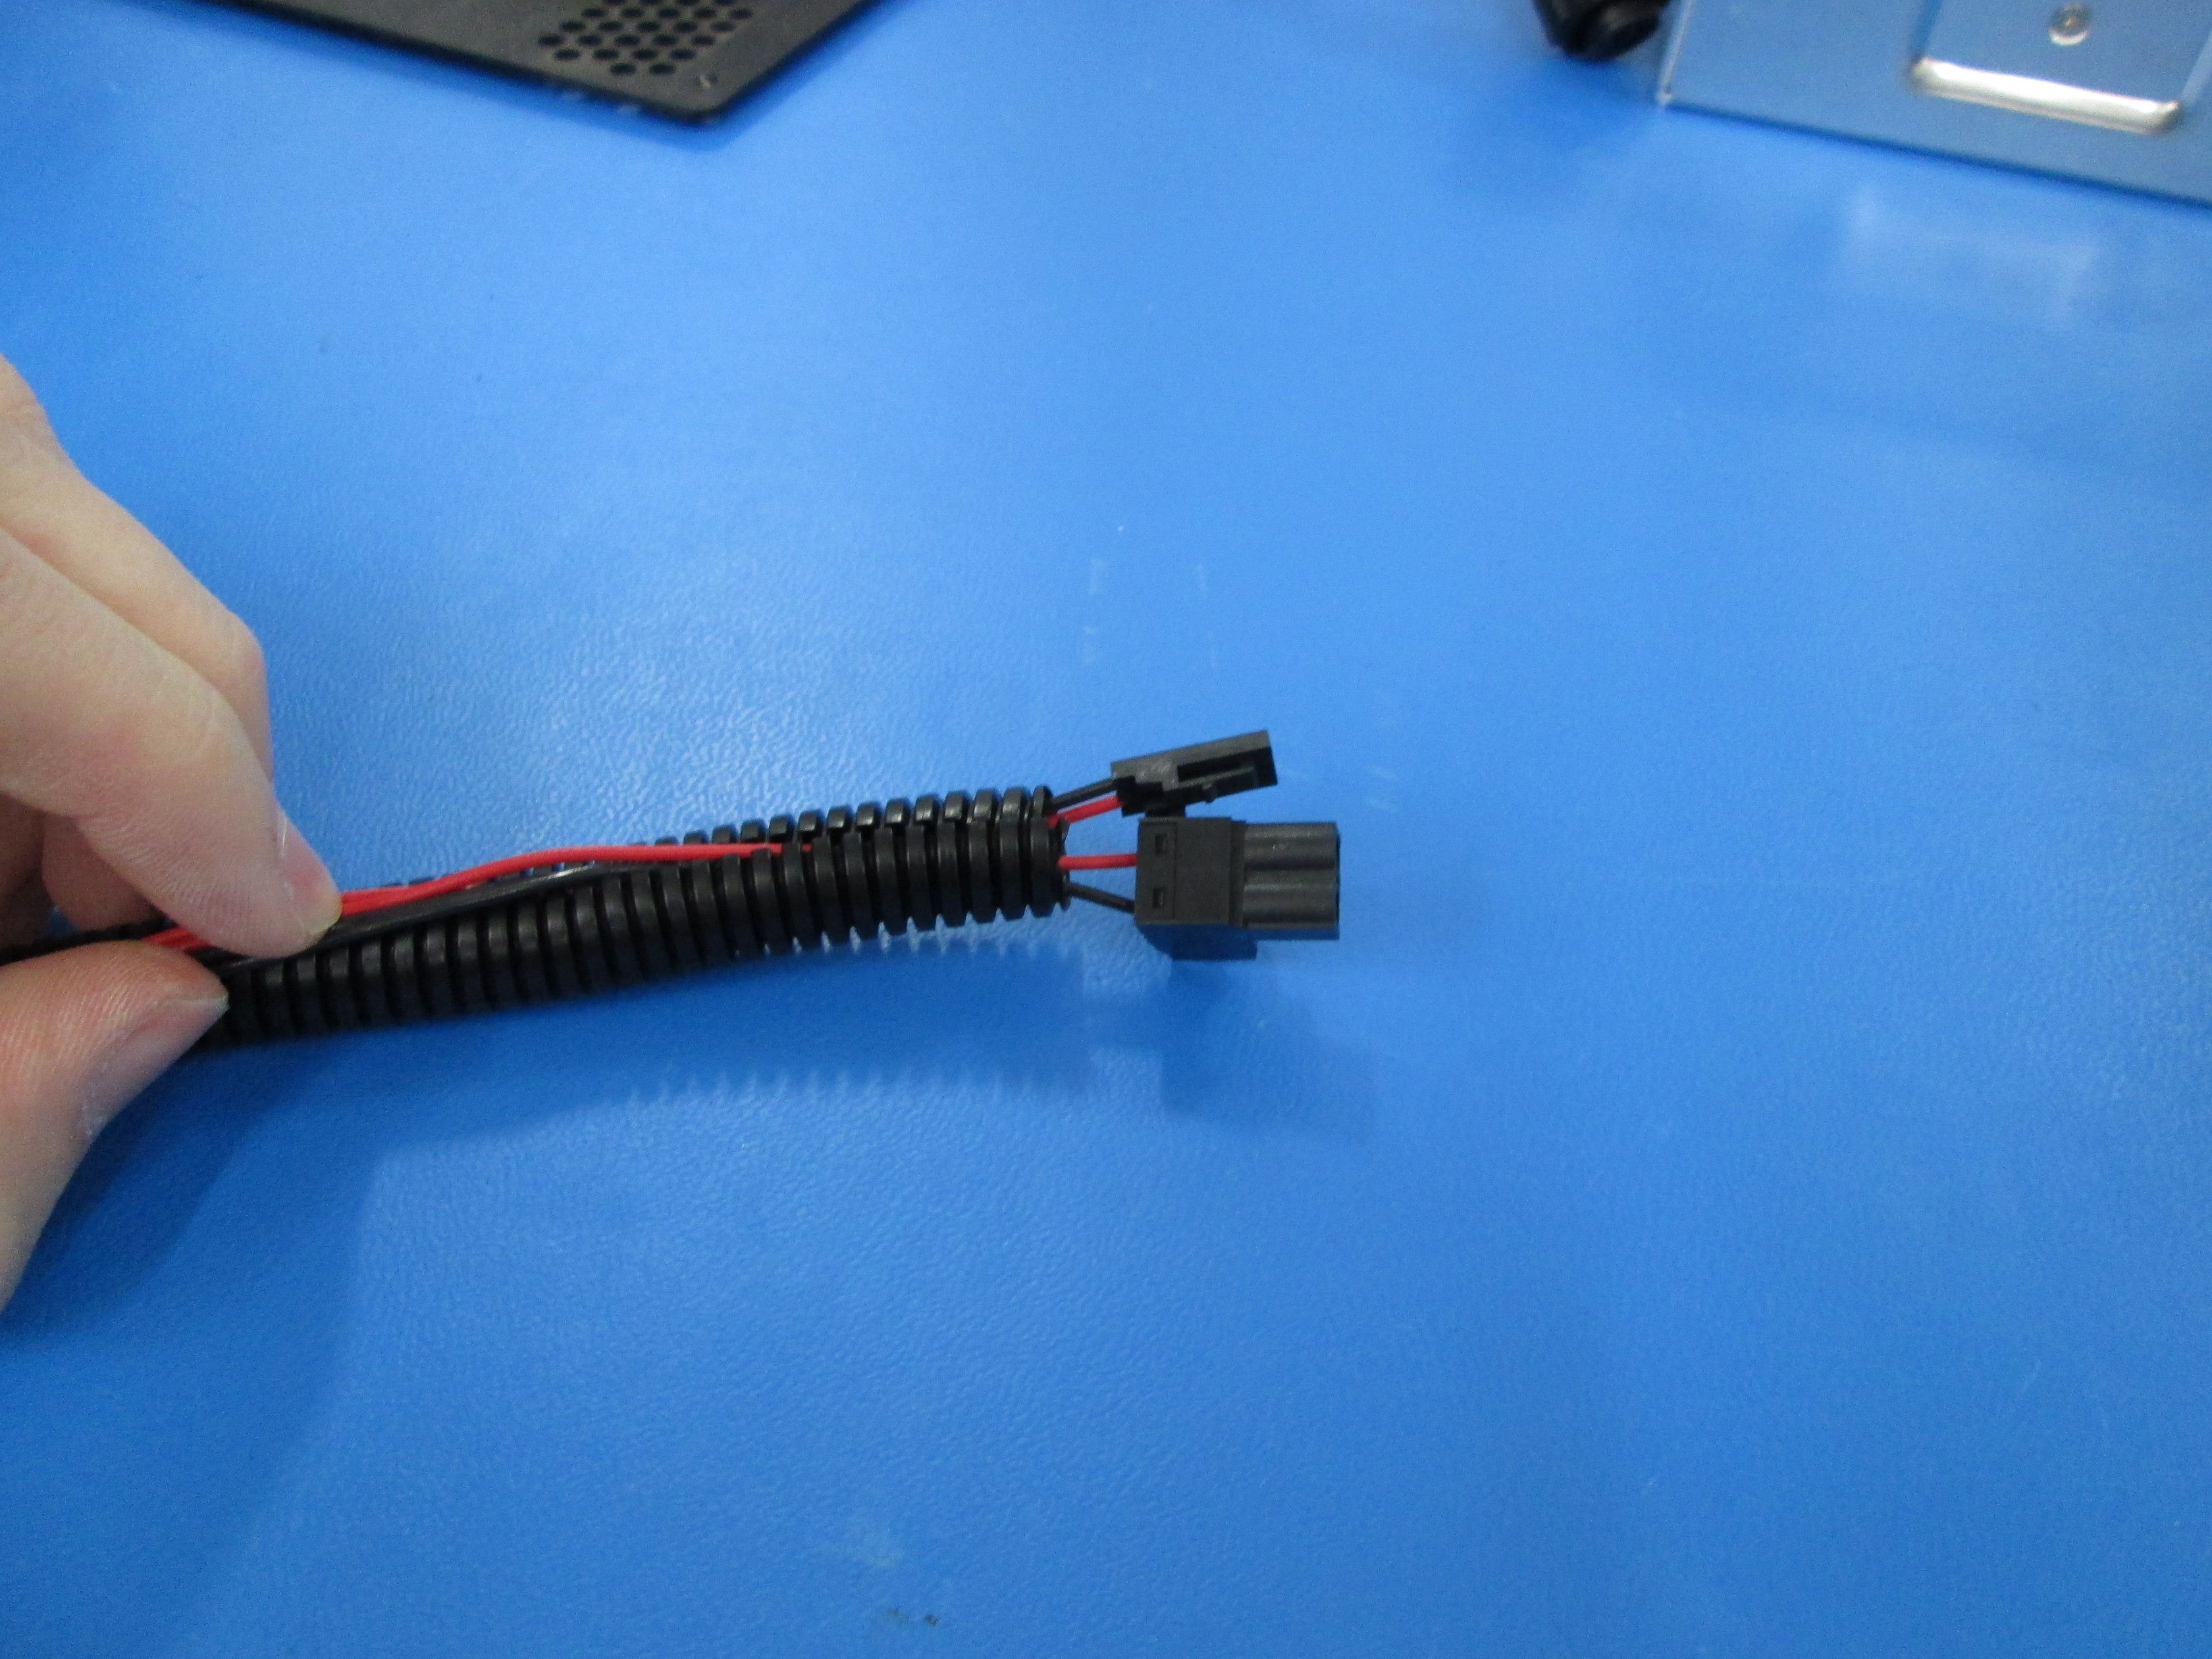
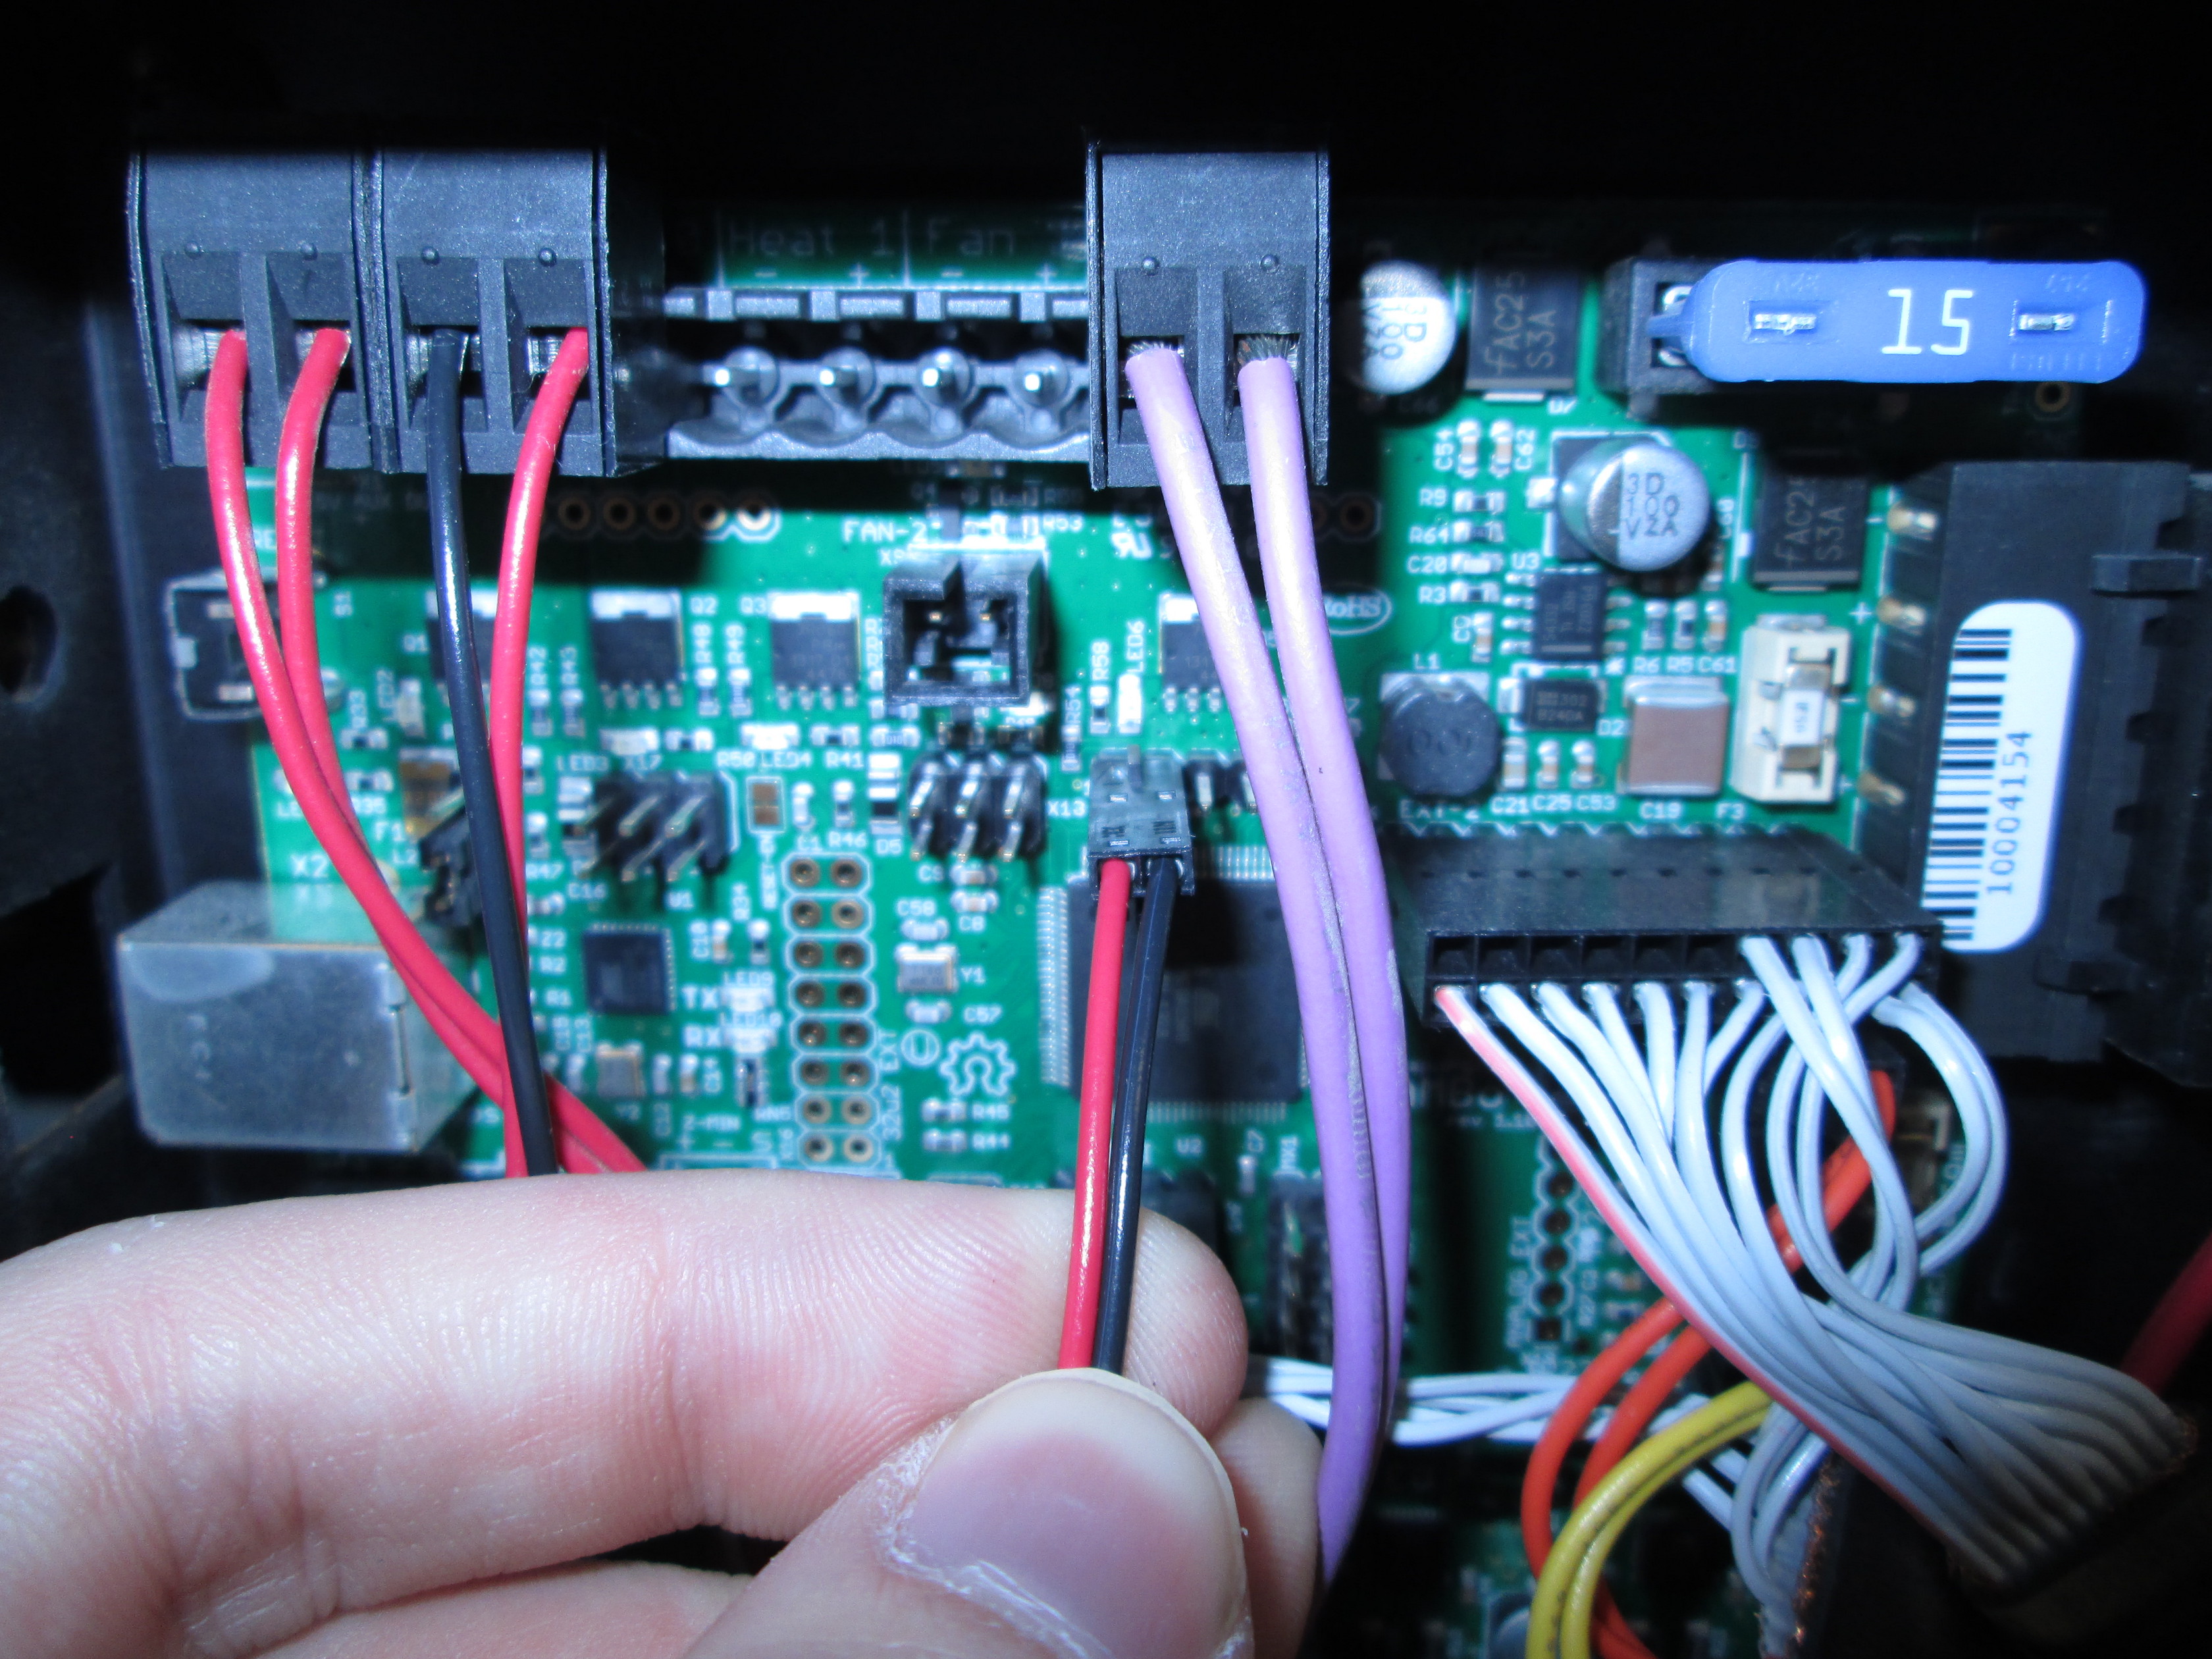
-Plug in the larger connector (should only fit in one way).
-Plug in the smaller connector with tab facing downward as shown in picture.


-Remove old zip ties with scissors.
-Insert extruder wire harness into the new larger panduit.
-Zip tie harness back on (ensure that larger harness is routed under the frame bar so that it does not interfere when doing full build volume prints).
-Cut excess on zip ties once tightned down with scissors


-Start screwing the screws back into the tension block, using the 2.5mm hex tool.
-Hold wires, while putting tension block back on see pictures (tweezers included in your kit may help with getting wires in position while putting tension block on).
-Plug your case fan back in, tab on connector faces downward.
-Replace cover on your control box, using the 2.5mm hex tool.


-Place your new toolhead in the groves in the toolhead mount.
-Using your 2.5mm hex tool screw the toolhead to the mount.
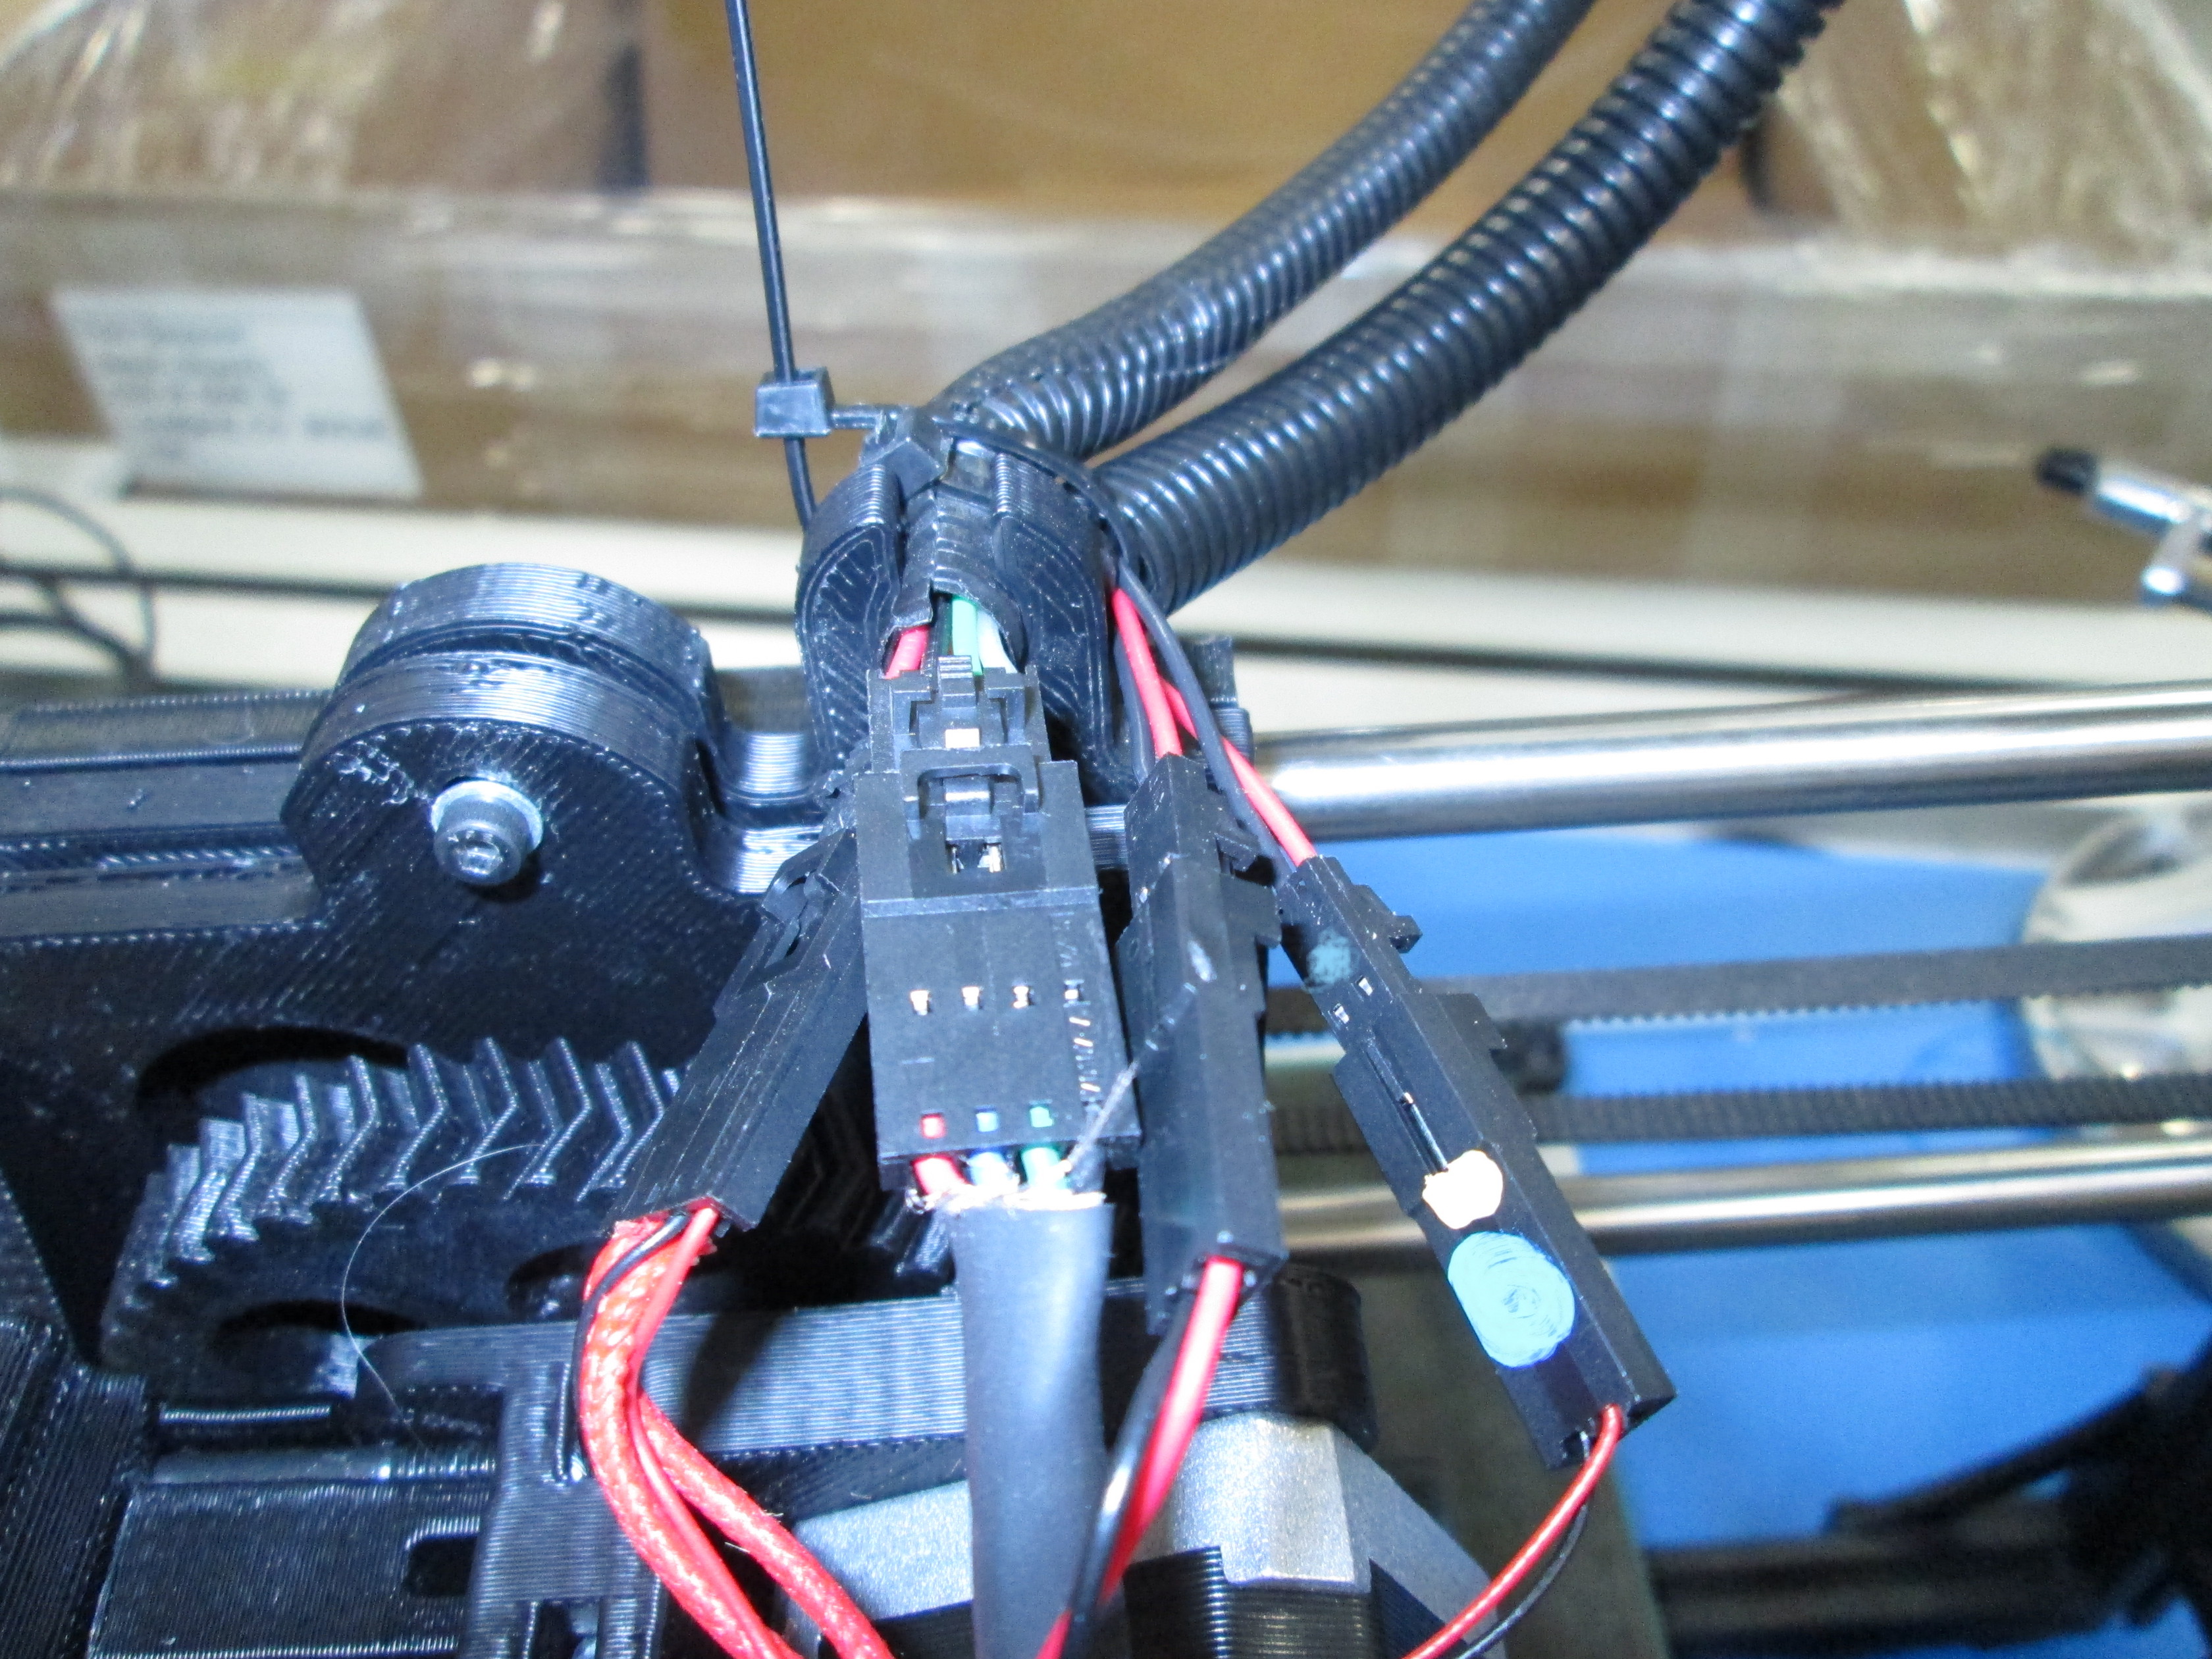
-Plug in the connectors(color coated).
-Connectors with blue paint go together,
-Connectors with red, blue, green, black go together
-Connectors with red and black go together(without blue paint)
-Connector with red, red, red, black and connector with red, red, orange, orange go together.

Visit LulzBot.com/Cura to update your Cura LulzBot Edition to the latest version.
Use Cura LulzBot Edition to change your tool head. After selecting the Hexagon Hot End you will be prompted to update your firmware.