Open HardwareAssembly Instructions
Guides for installation and assembly of the LulzBot line of products made by FAME 3D LLC.
Guides for installation and assembly of the LulzBot line of products made by FAME 3D LLC.
Note: The TAZ 8 3D Printer has the tramming calibrated during the assembly process.
This procedure is only necessary if the printer is continuously tramming prior to each print.
Materials required:
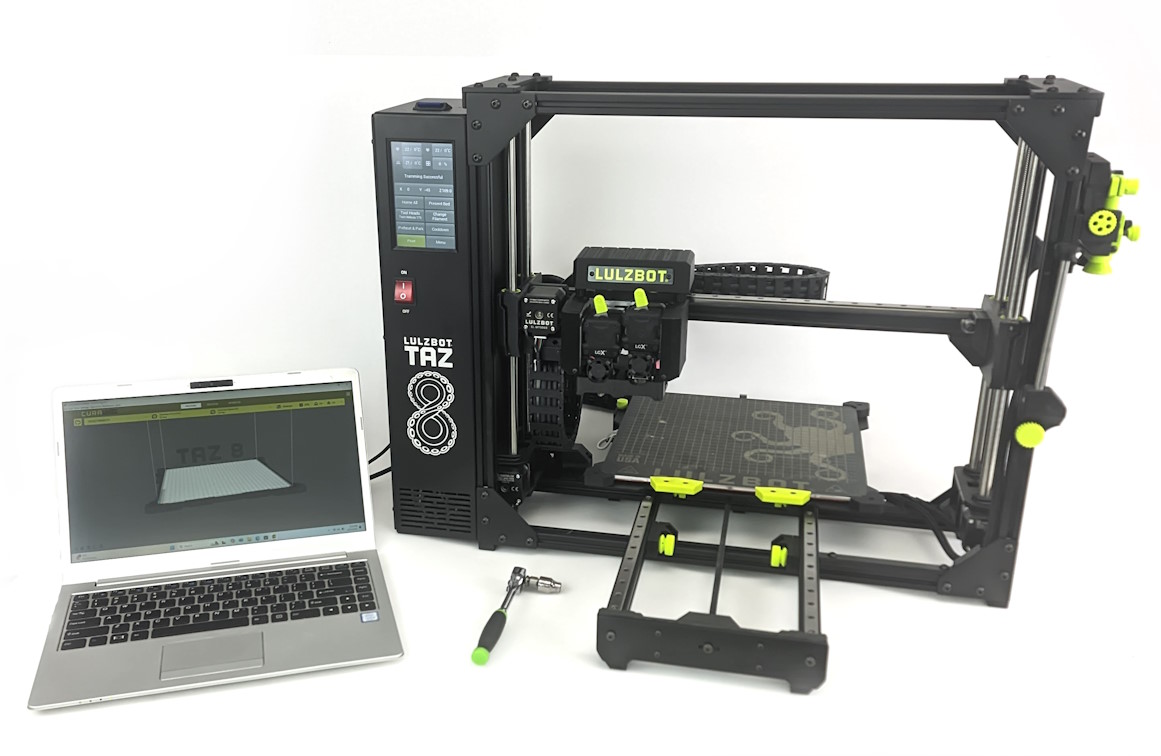
- TAZ 8 3D Printer
- Computer with Cura LE installed
- 7mm Socket
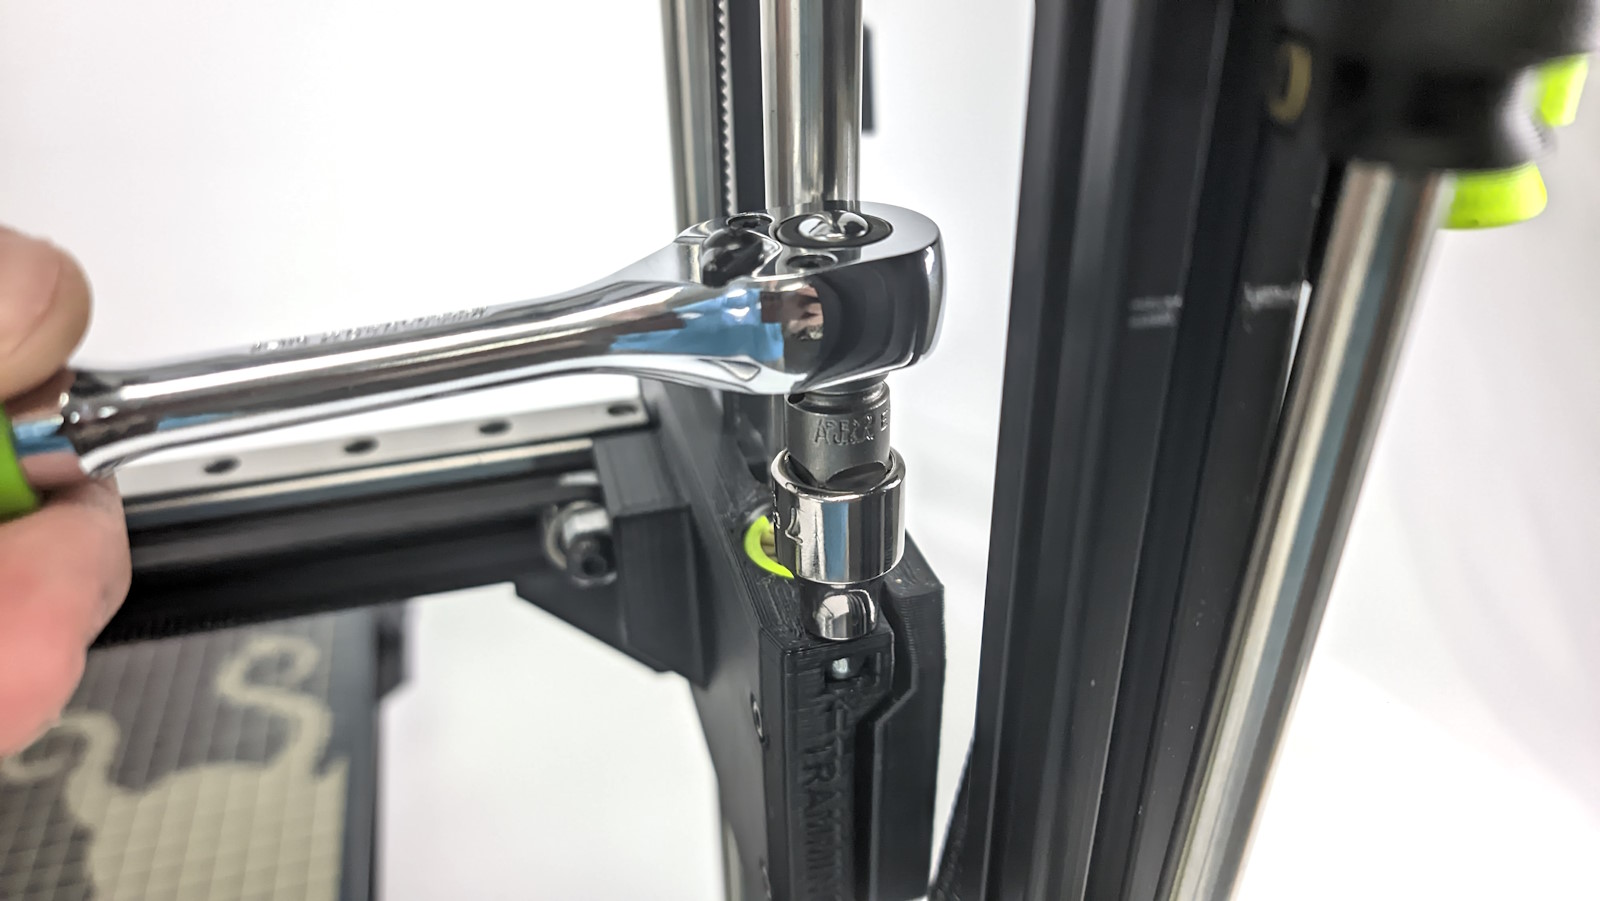
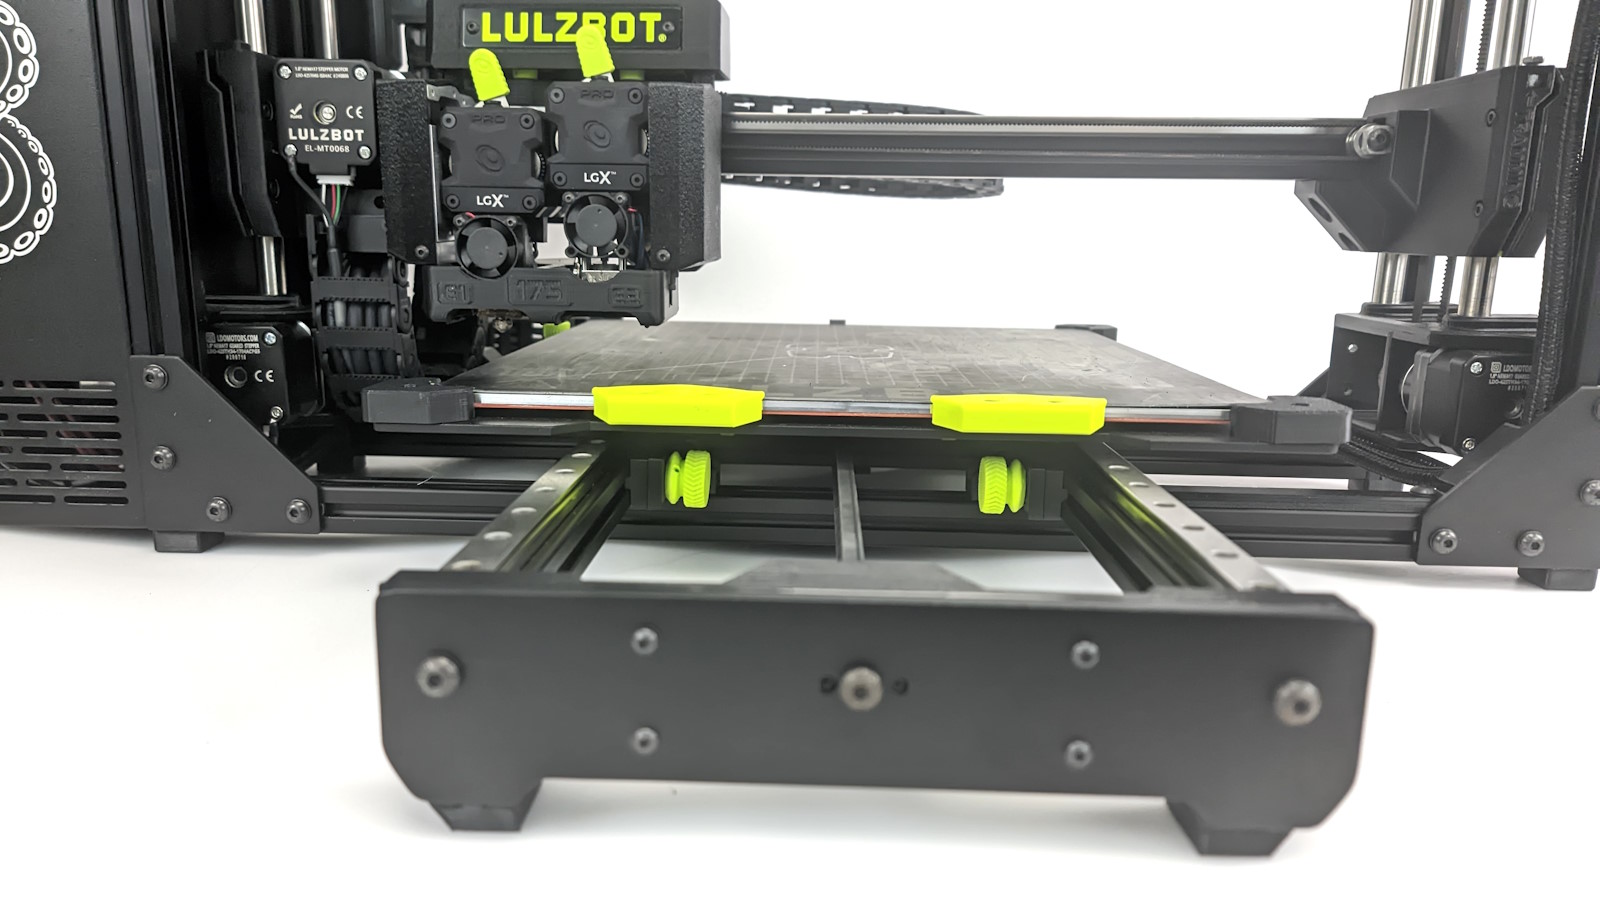
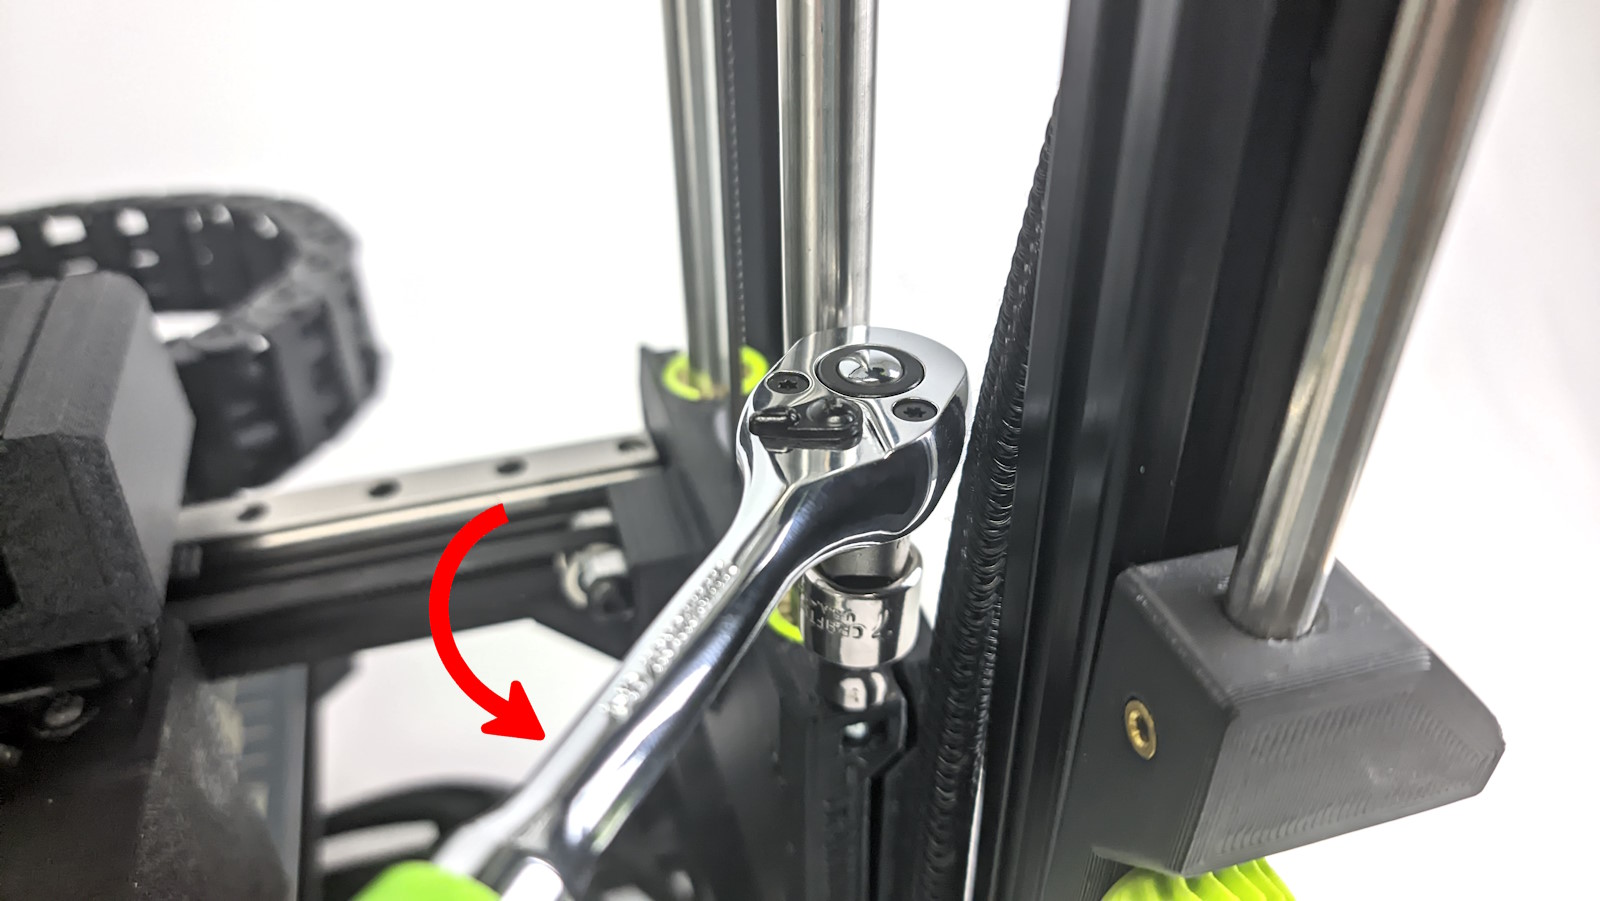
Locate the silver bolt on the right side of the x-axis.
Tighten this bolt using the the 7mm socket by turning it clockwise.
Warning! Do not tighten this bolt down all the way tight as doing so may crack the printed part it is installed on.

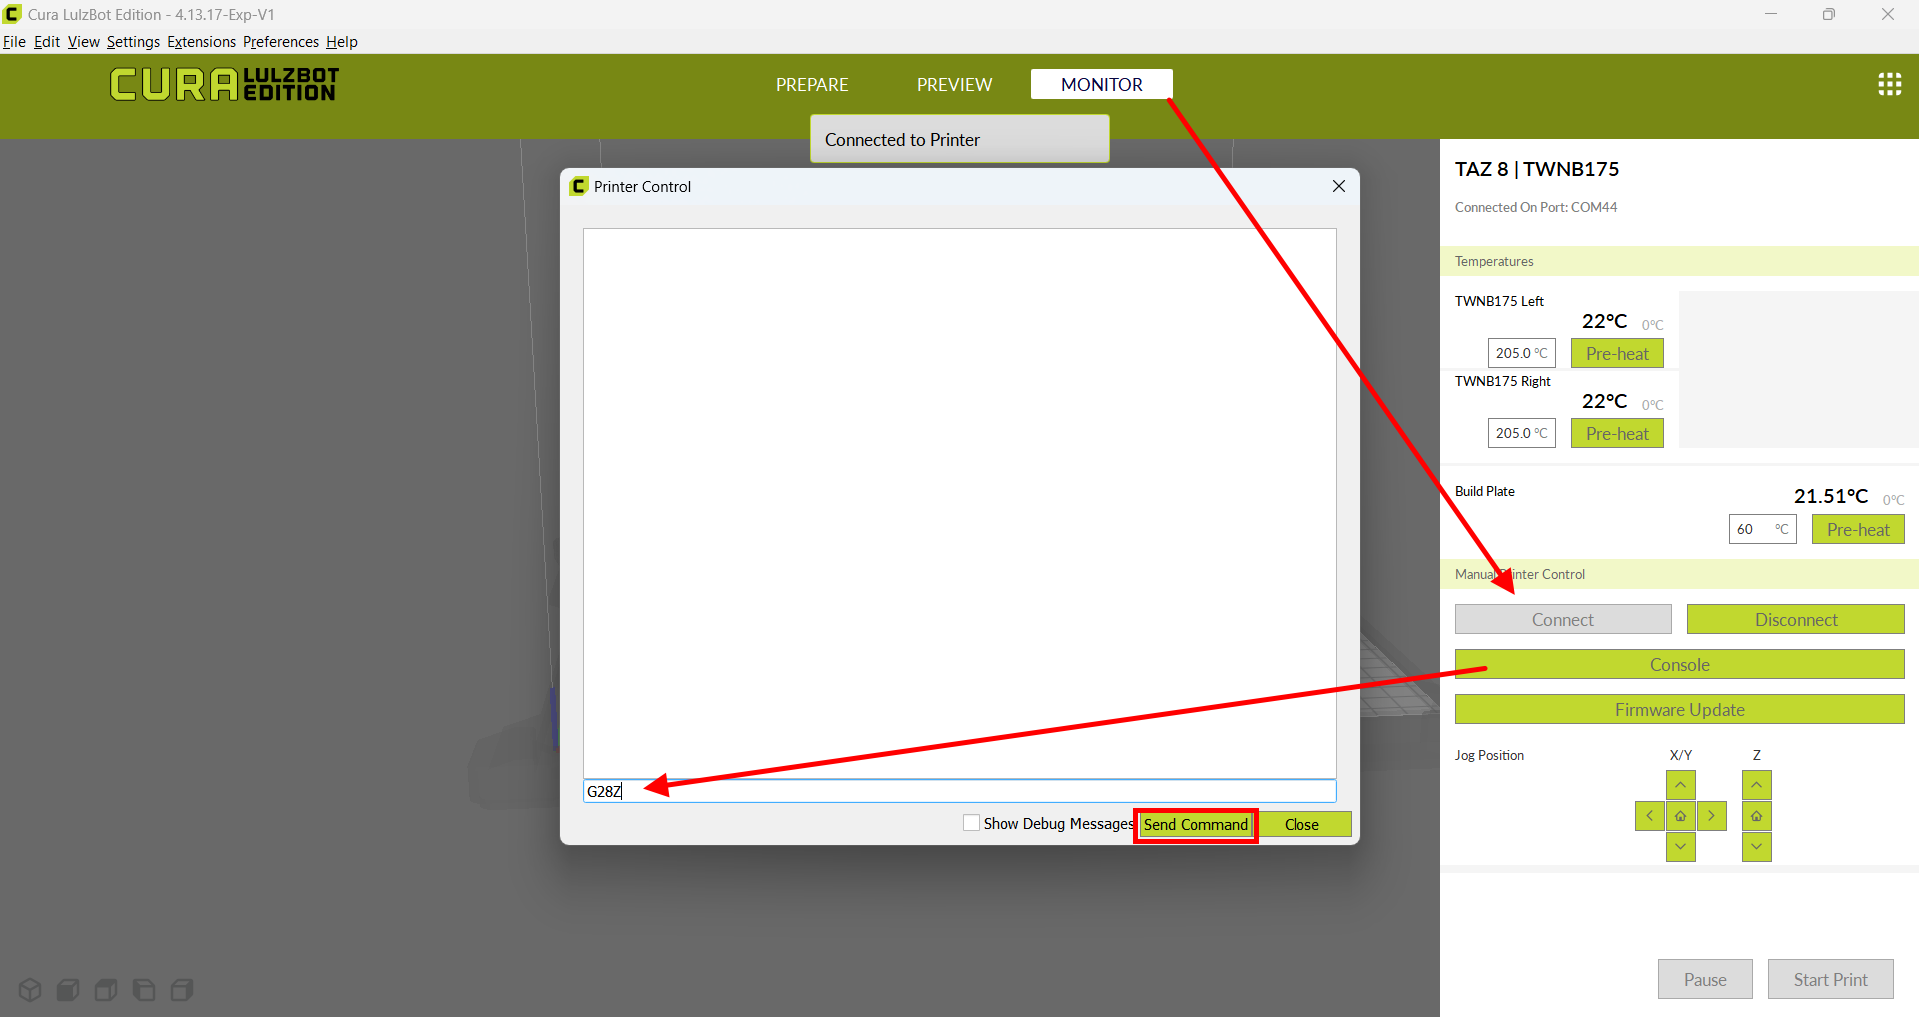
Connect the printer to a computer and open Cura LE
Connect the printer in Cura and open the console.
Enter the command "G28Z" and press ENTER.
The printer will now home the Z axis.
Enter the command G34 and the tramming test will begin.
The Printer will contact the bed on the left and right side, possibly multiple times while sensing the left and right probe distance to the bed.
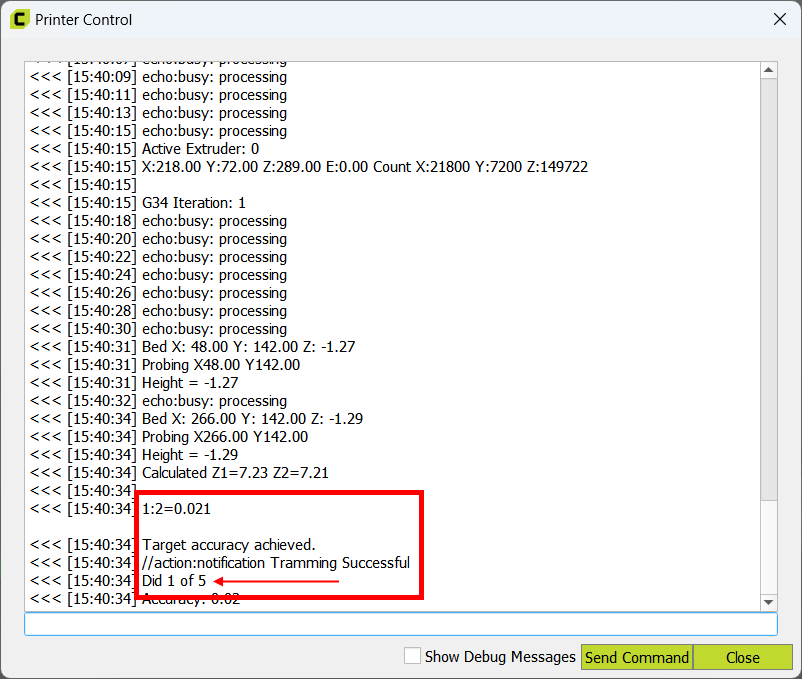
Once done, find the first probe value in the console which says 1:2=[value]
That value is the different between the left and right side of the print bed to the probe.
We are aiming to get the tramming process to contact the left and right side only a single time.
This will bring that value to as close to 0 as reasonably possible.


With the first value noted, use the 7mm socket and turn the tramming bolt counter-clockwise a few turns.
If the 1:2 value is positive, turn counter-clockwise.
If the 1:2 value us negative, turn clockwise.
Run the "G28Z" and "G34" commands again and check the 1:2 value and continue to adjust until the tramming process only contacts the left and right side a single time.
Note that the console will show Tramming Successful after each attempt, but you want to ensure that the success is after 1 of 5 tramming probes. See image for example.