Open HardwareAssembly Instructions
Guides for installation and assembly of the LulzBot line of products made by FAME 3D LLC.
Guides for installation and assembly of the LulzBot line of products made by FAME 3D LLC.
Remove the original PET surface, taking care not to damage the glass, heated bed or wiring. Start in one corner or at a tear and peel off the PET sheet. Make sure that the glass surface is clean and free of debris, smudges or oils.
Lay the glass bed on the large cloth so the bed doesn't slide around. Using the spray bottle filled with water, lightly mist the glass surface.
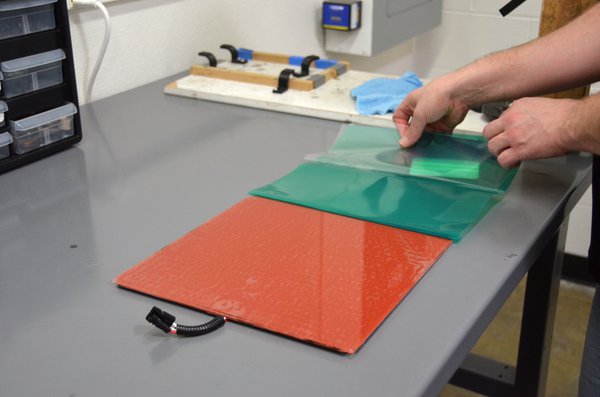
Peel the backing off the PET tape/sheet and hold by the edges. Allow the center of the sheet to droop into a "U" shape.
Slowly lower the bottom portion of the "U" shaped PET sheet onto the middle of the glass surface.
Continue to lower the PET sheet onto the glass bed. As the sheet is lowered, the liquid in between should minimize any bubbles formed.
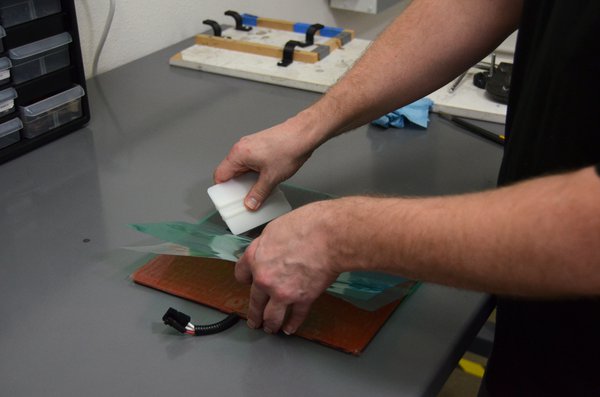
Once the sheet has been lowered, use the rubber squeegee/spatula to drive out the bubbles starting from the center, outward.
If you have stubborn bubbles, use the hair dryer to soften the PET sheet/tape. It should allow you to drive out the bubble.
Any small bubbles will be eliminated as the heated bed is used. Try to resist popping any bubbles. If you have any stubborn bubbles you can usually lift off the PET sheet, re-mist and try again.
Once you are happy with the PET surface, use the razor to carefully trim off the excess tape/sheet. Then remount your glass bed to your printer, connect the heated bed to the bed wiring harness and power on the printer. You may want to level the bed, following the Quick Start Guide for your printer.
