Open HardwareAssembly Instructions
Guides for installation and assembly of the LulzBot line of products made by FAME 3D LLC.
Guides for installation and assembly of the LulzBot line of products made by FAME 3D LLC.
Access Mainsail: Ensure you can access the printer’s Mainsail web interface through a web browser. You'll need this for the software setup.
Save Your Files: If there are any gcode files on the printer, download them via Mainsail.
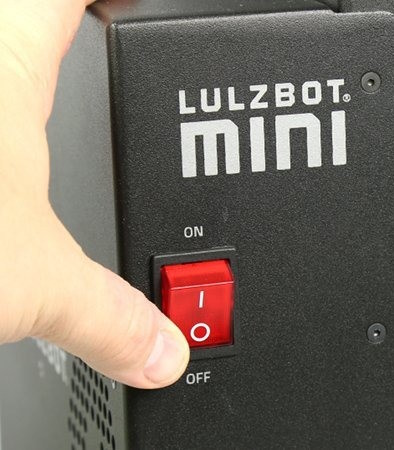
Turn Off the Printer: Power off the printer before proceeding.
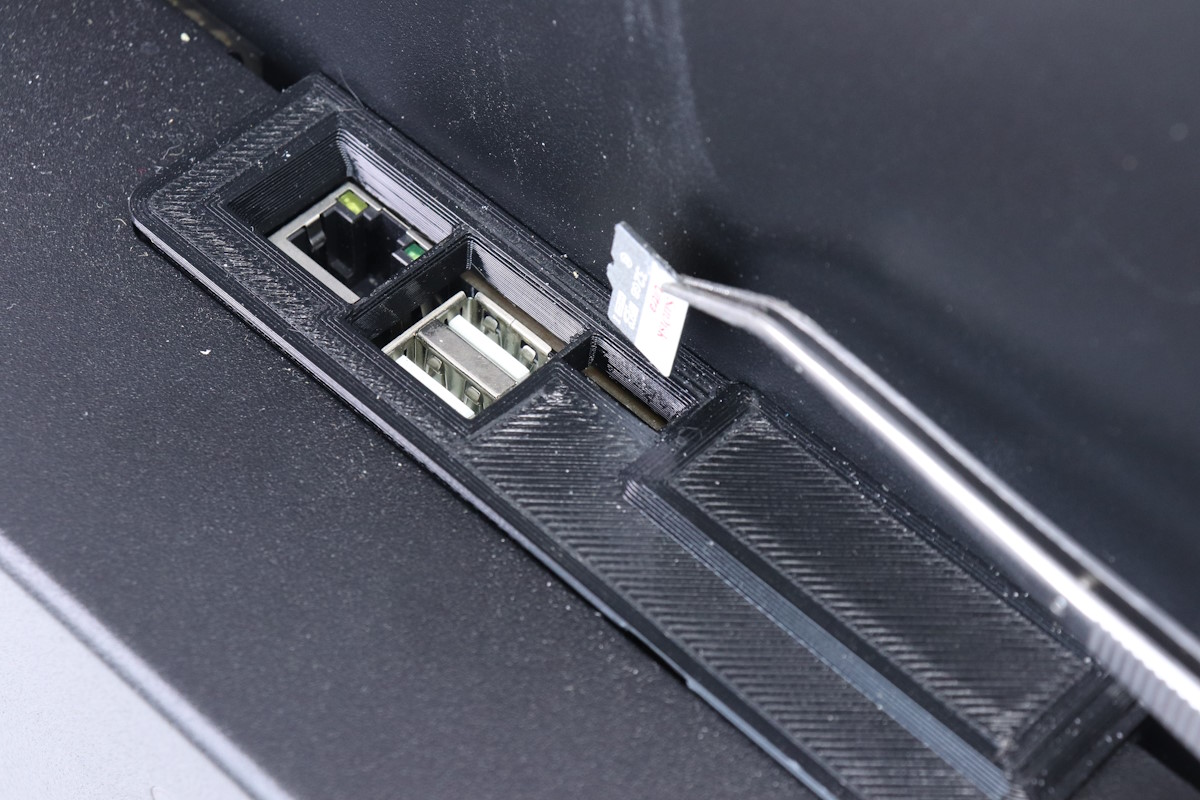
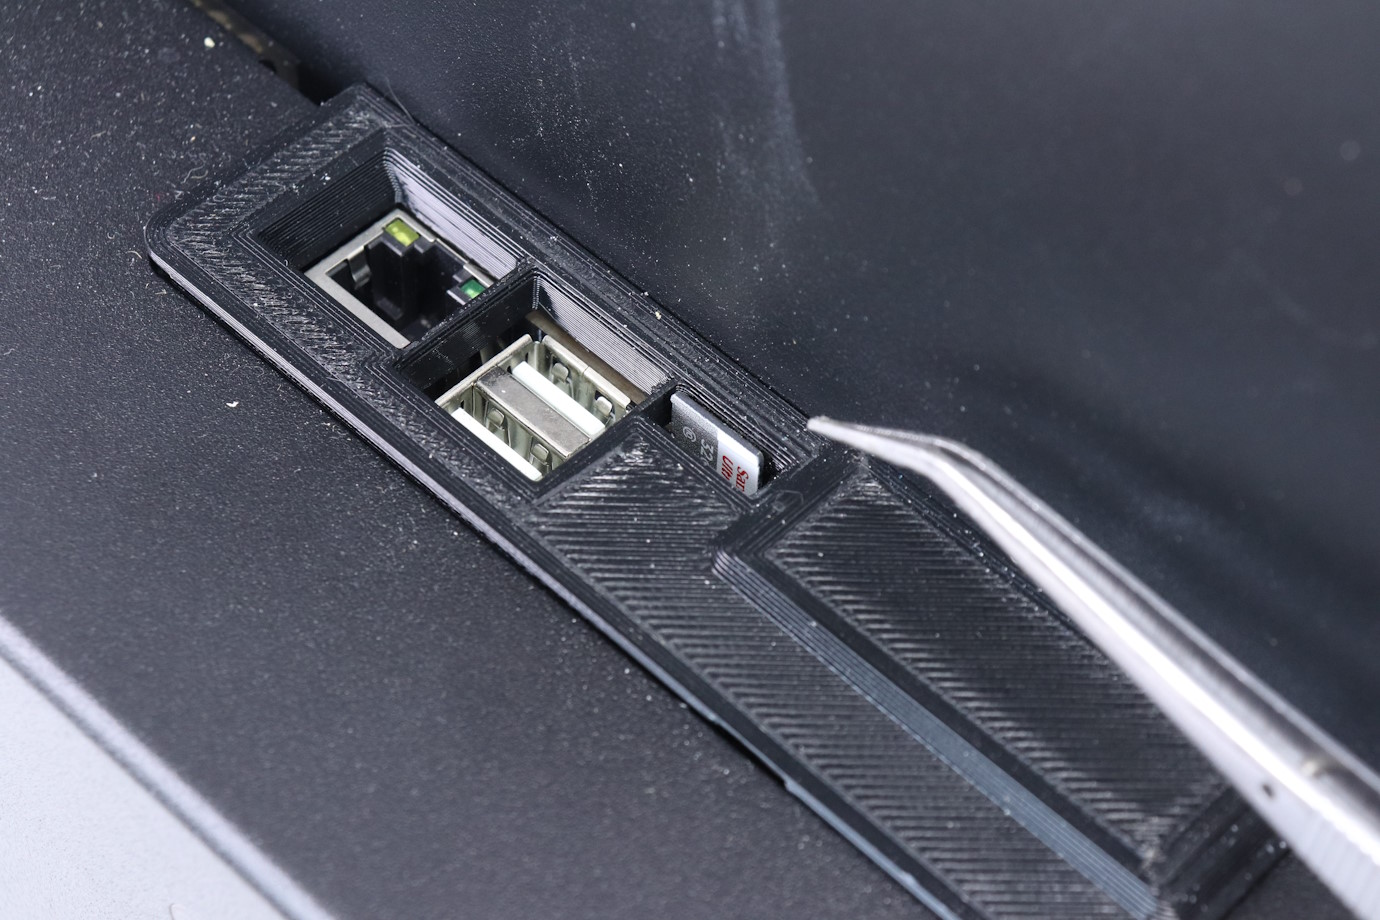
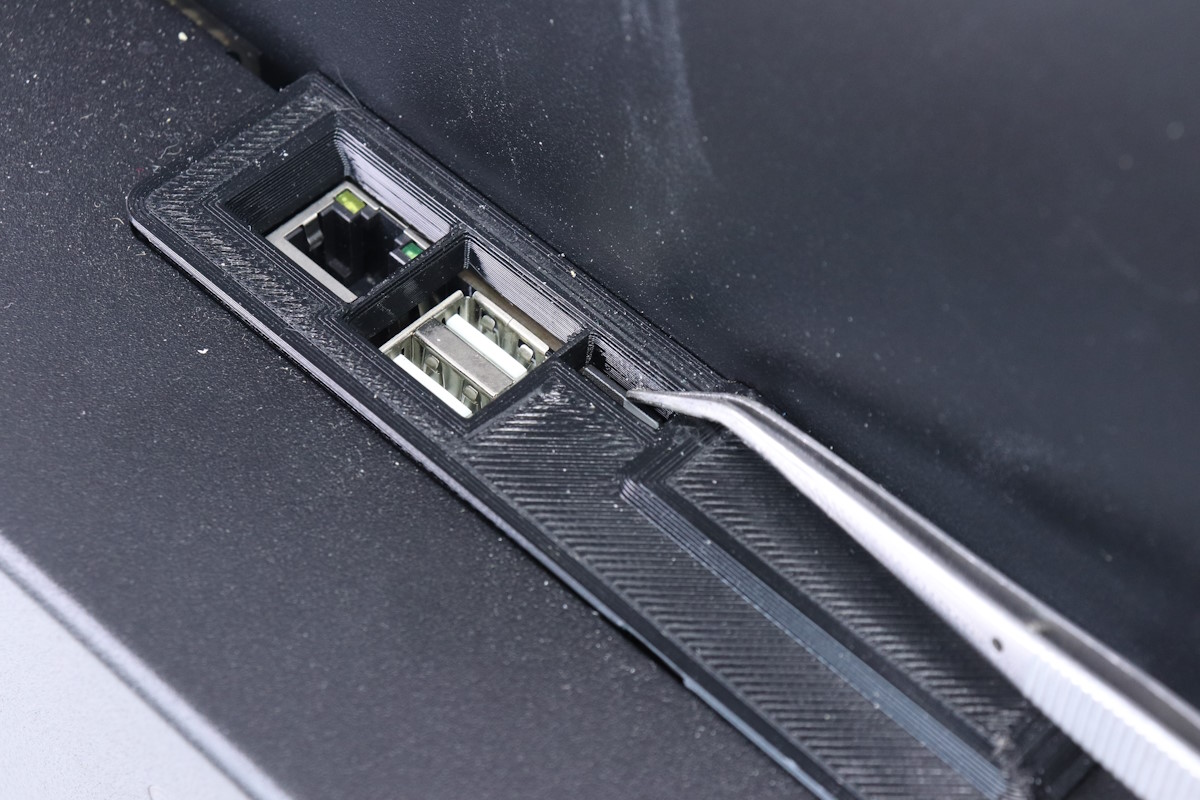
Good Lighting: Move the printer to a well-lit area to clearly see the SD card slot.
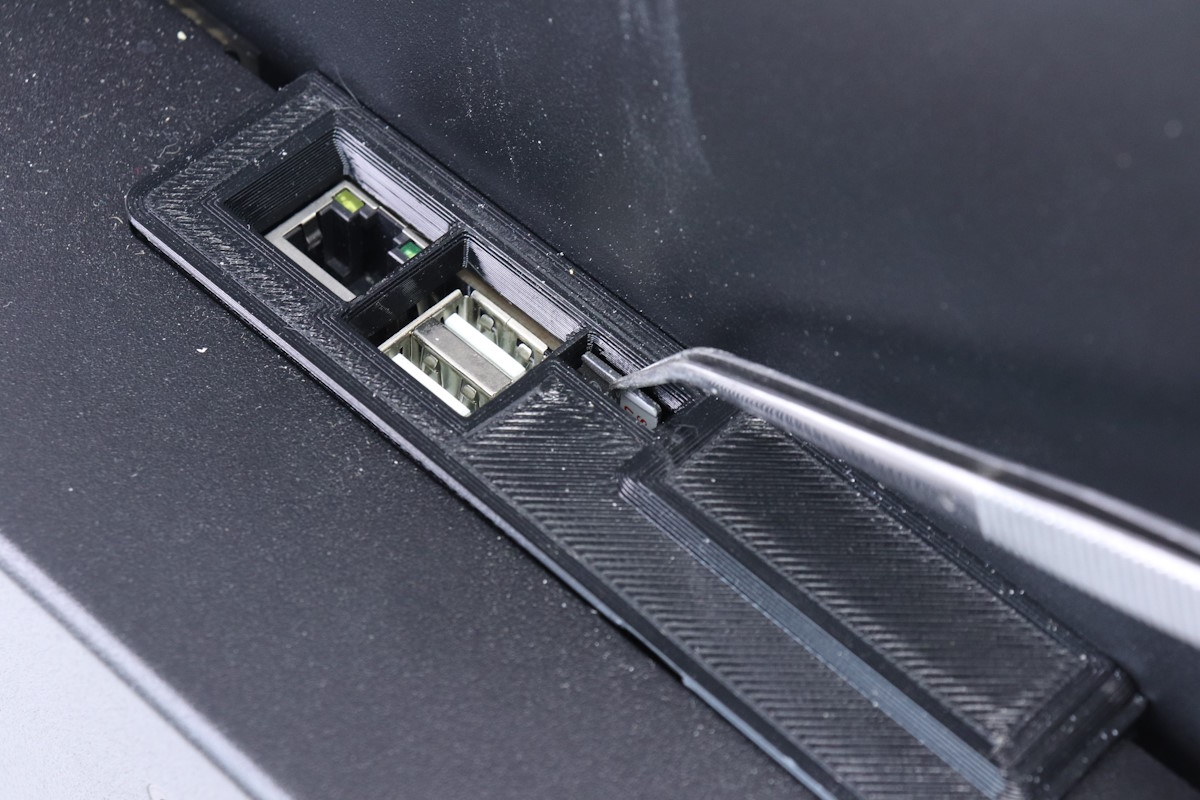
Lift the Card: Use a small tool, like the edge of a metal ruler, to lift the SD card slightly.
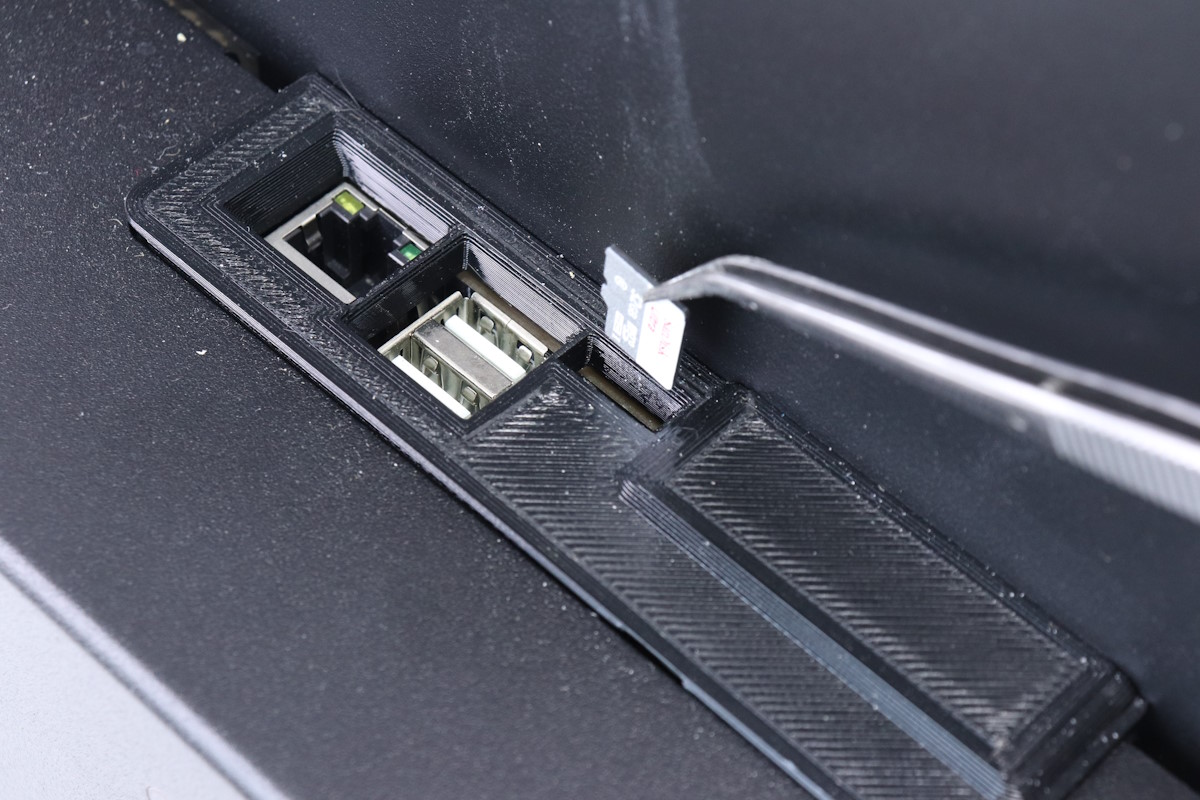
Remove the Card: Once lifted, use tweezers to pull the card out completely.
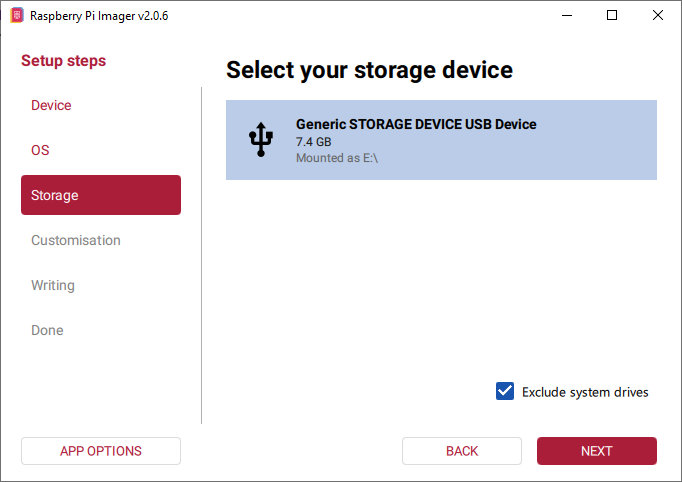
Insert SD card into your computer, using an adapter if needed.
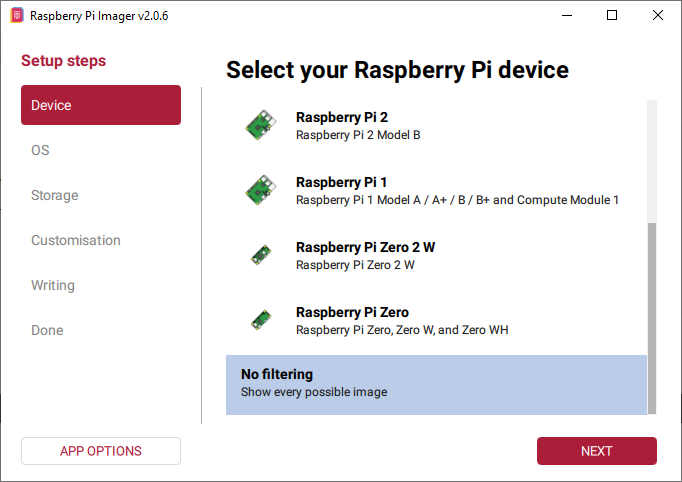
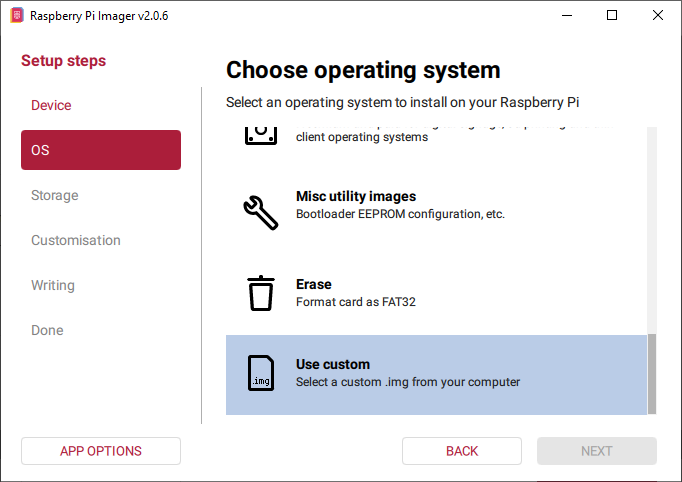
Download the Raspberry Pi Imager software from raspberrypi.com and install the software.
Download the firmware zip from the firmware.lulzbot.com page and extract the .img contents to your computer.
Use the following instructions to select and flash the firmware to your micro SD card.
Note that the Pi imager software may update from time to time, but the process will largely be the same.
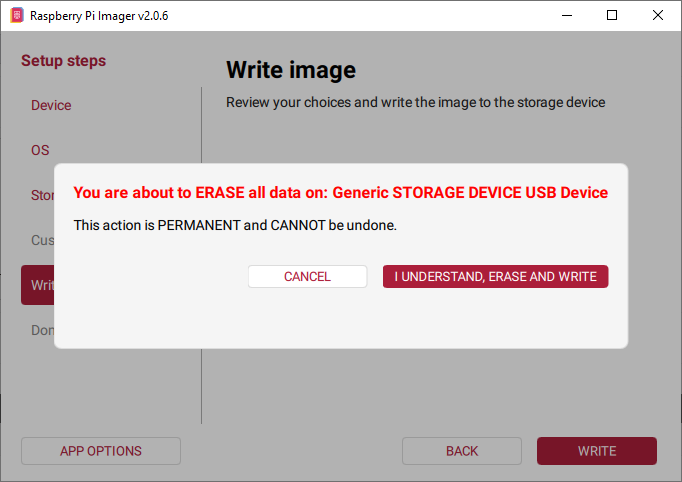
A prompt will appear warning you that proceeding will erase all data from the selected drive.
- Click "I UNDERSTAND, ERASE AND WRITE"
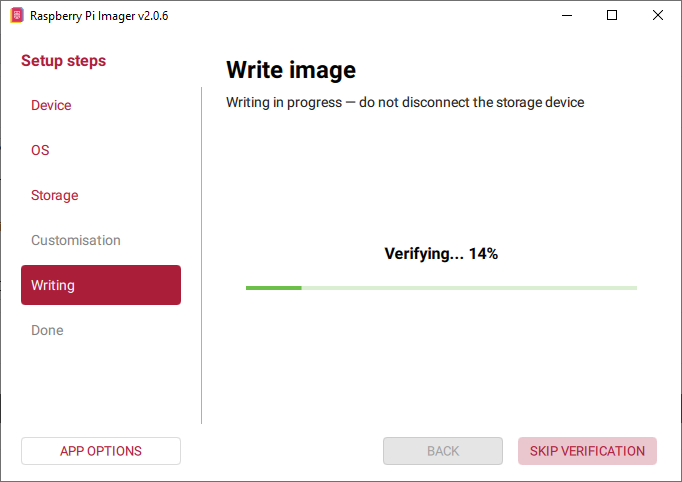
The firmware will begin to write to the SD card then run through a verification process.
Once complete, click FINISH and remove the SD card from your computer.


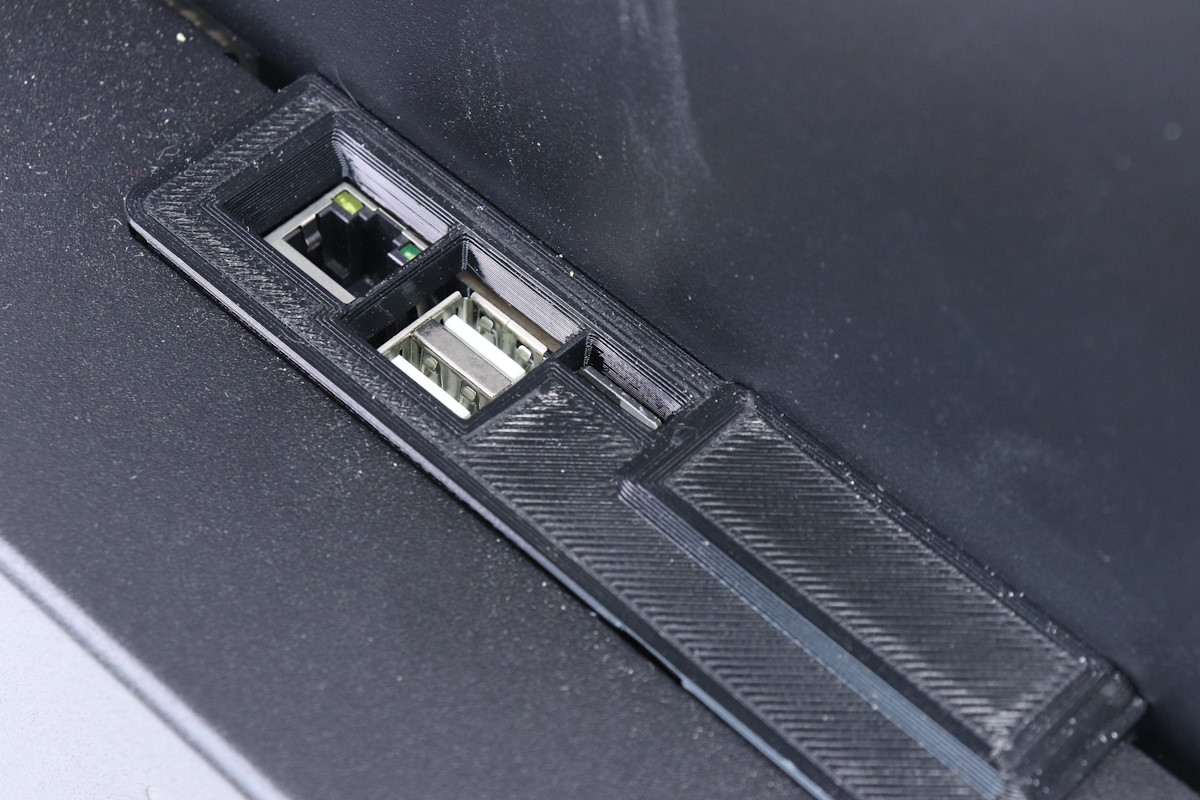
Locate the Slot: Ensure the SD card slot on the circuit board is visible. Be careful not to drop the card into the control box.
Insert the New/Flashed Card: Insert the card with the gold contacts facing down and to the right. Push it into the slot until it touches the bottom.
Power On the Printer: Turn the printer back on.
Reconnect Wi-Fi: If you were using Wi-Fi, reconnect by selecting your network and entering your password.
Note the IP Address: When the IP address appears, use it in a web browser to access the Mainsail interface.
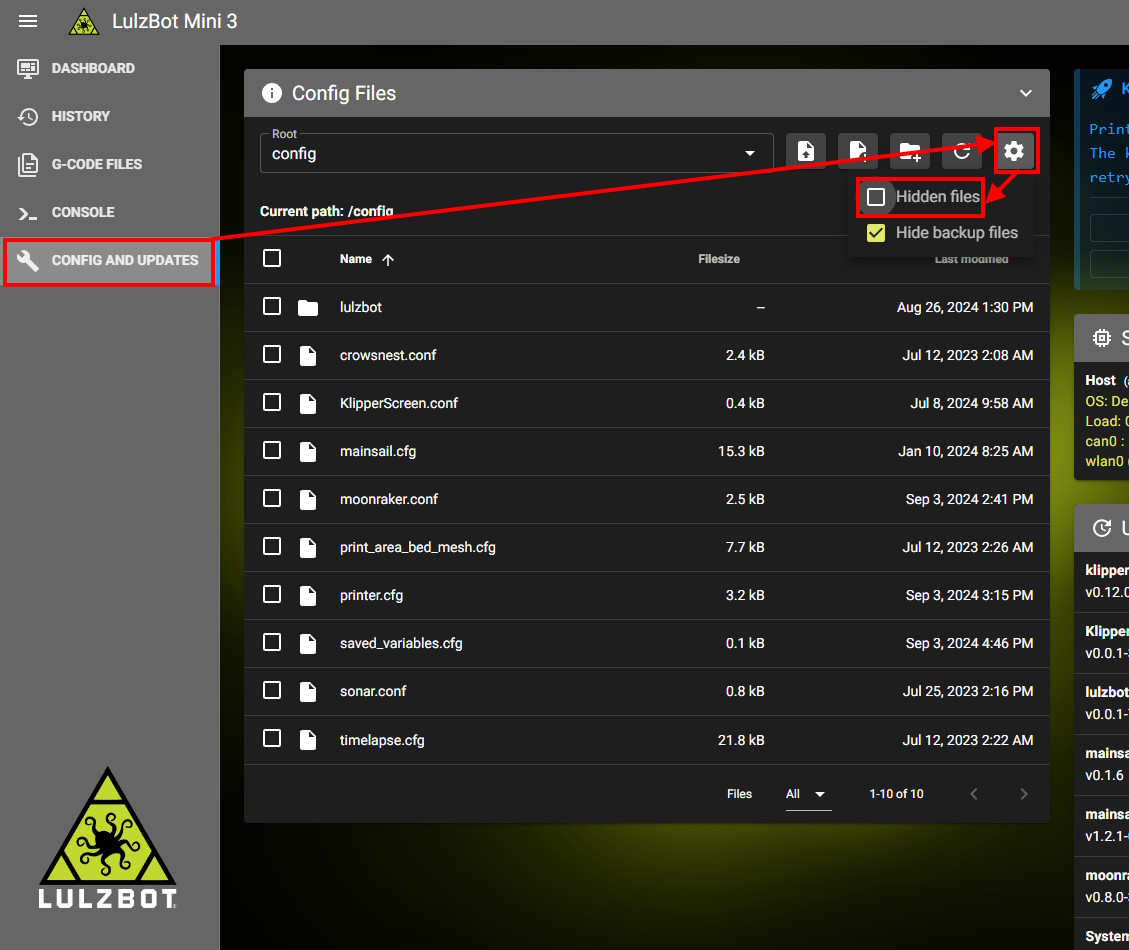
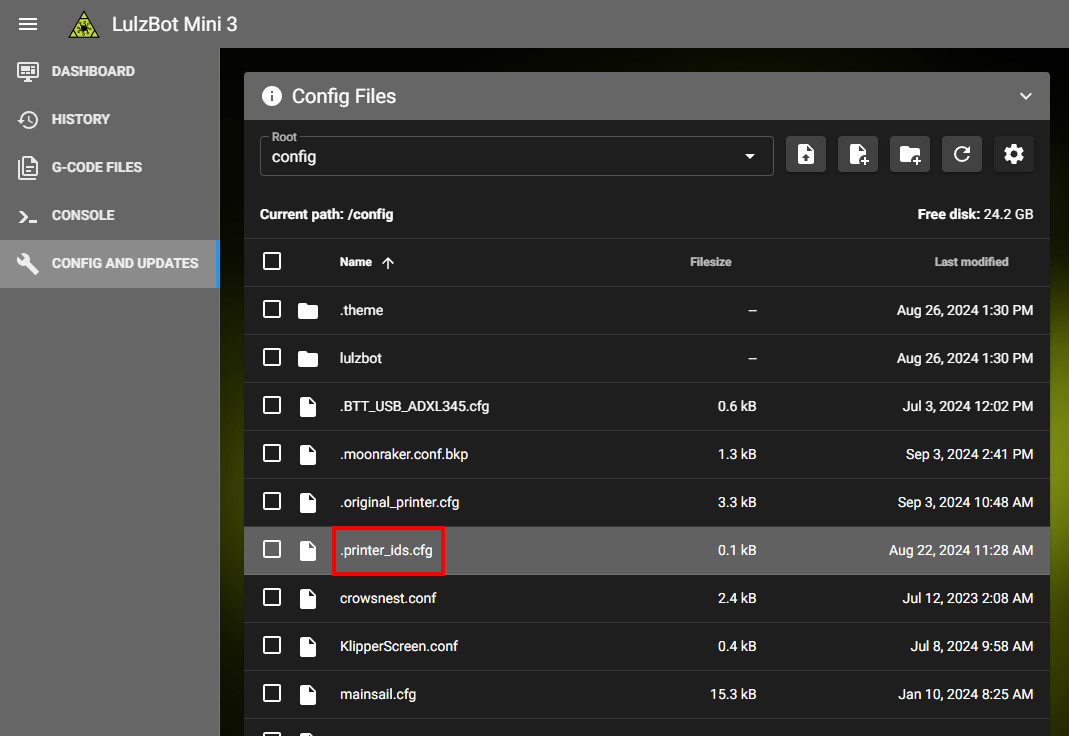
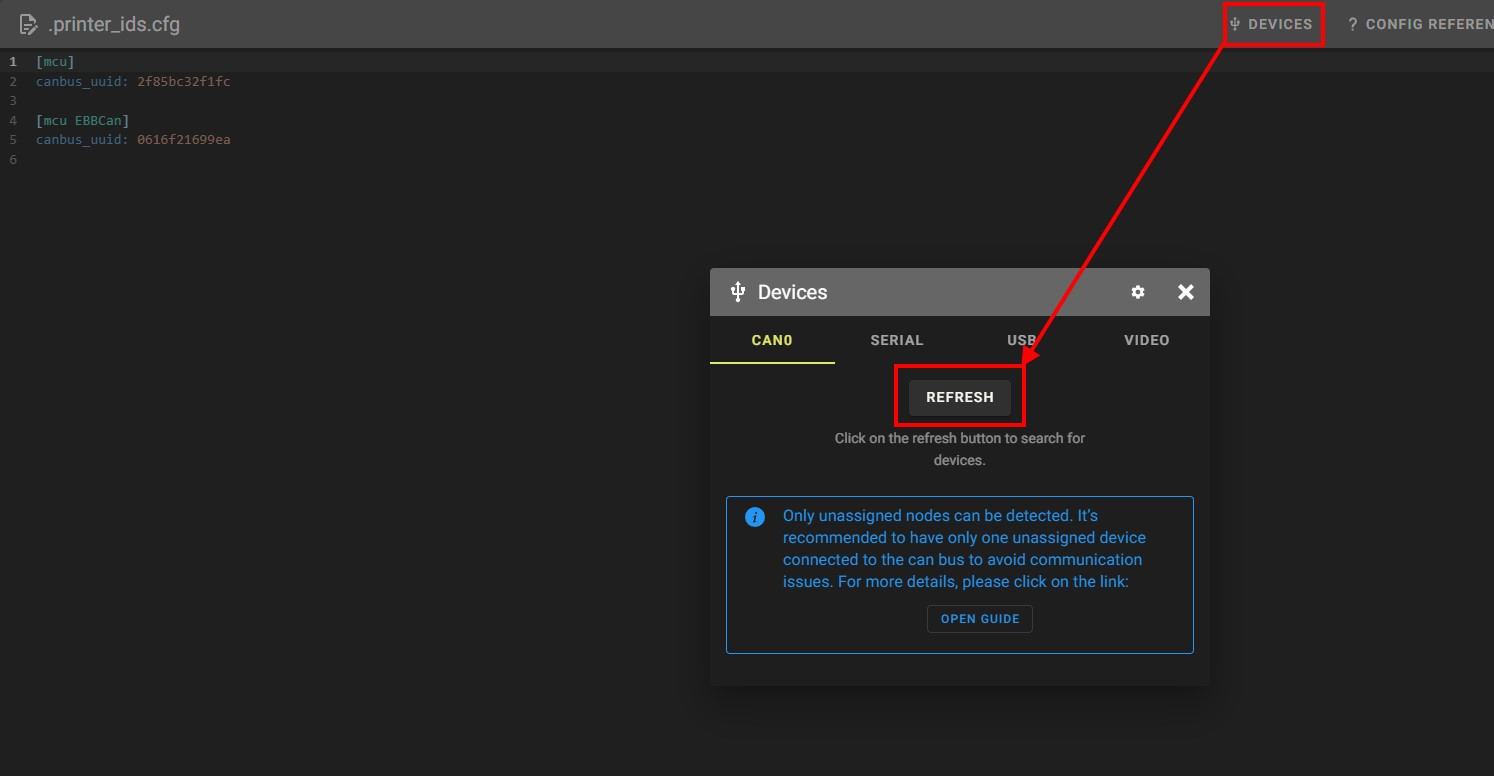
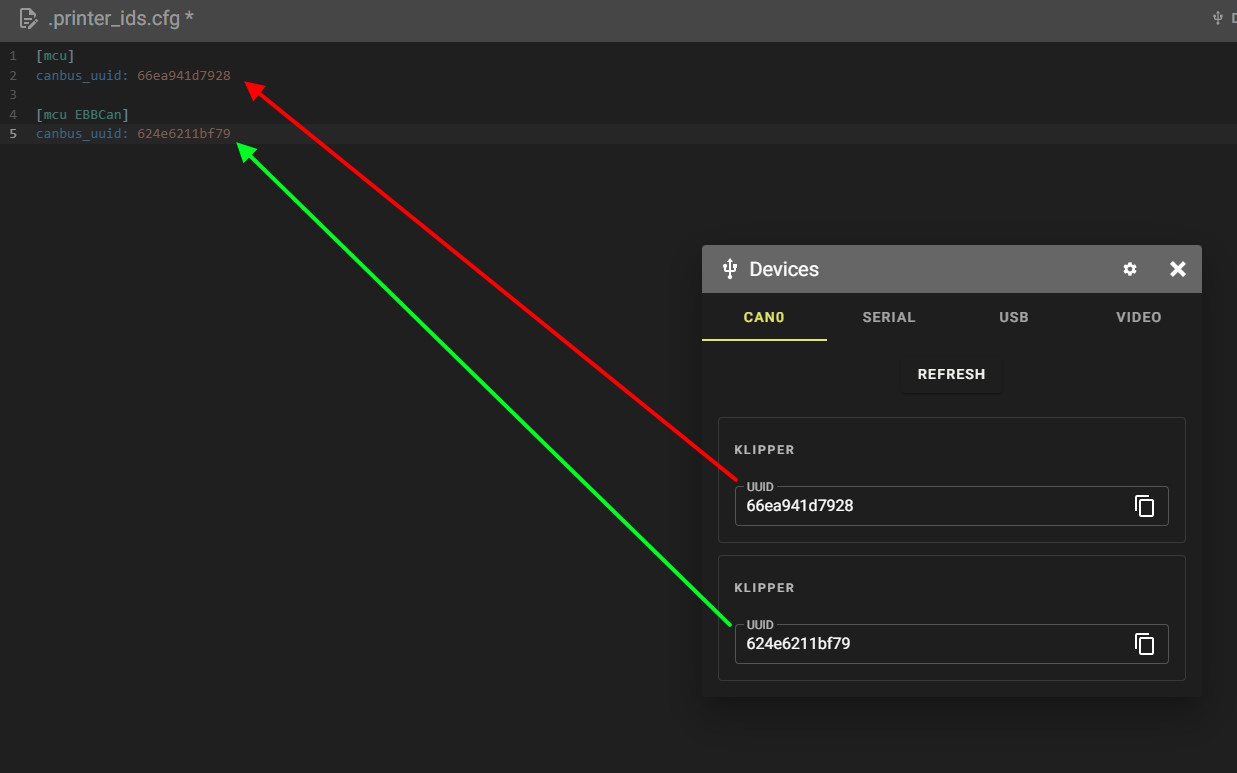
Configure Printer:
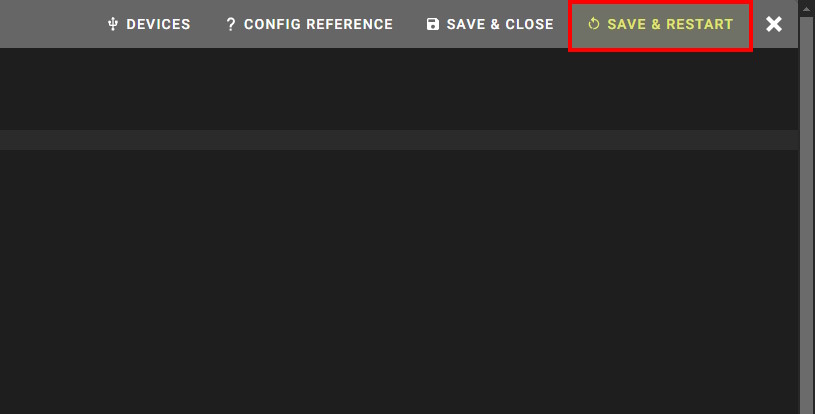
.printer_ids.cfg file. .printer_ids.cfg file. Save and Restart: After updating the IDs, save and restart the printer.

BLTouch Probe Calibration:
Z-Endstop Calibration:
Run a test print using the "5_Circles" print.
Adjust the Z-offset if necessary and save any changes using the Save Z-Endstop button.