Open HardwareAssembly Instructions
Guides for installation and assembly of the LulzBot line of products made by FAME 3D LLC.
Guides for installation and assembly of the LulzBot line of products made by FAME 3D LLC.
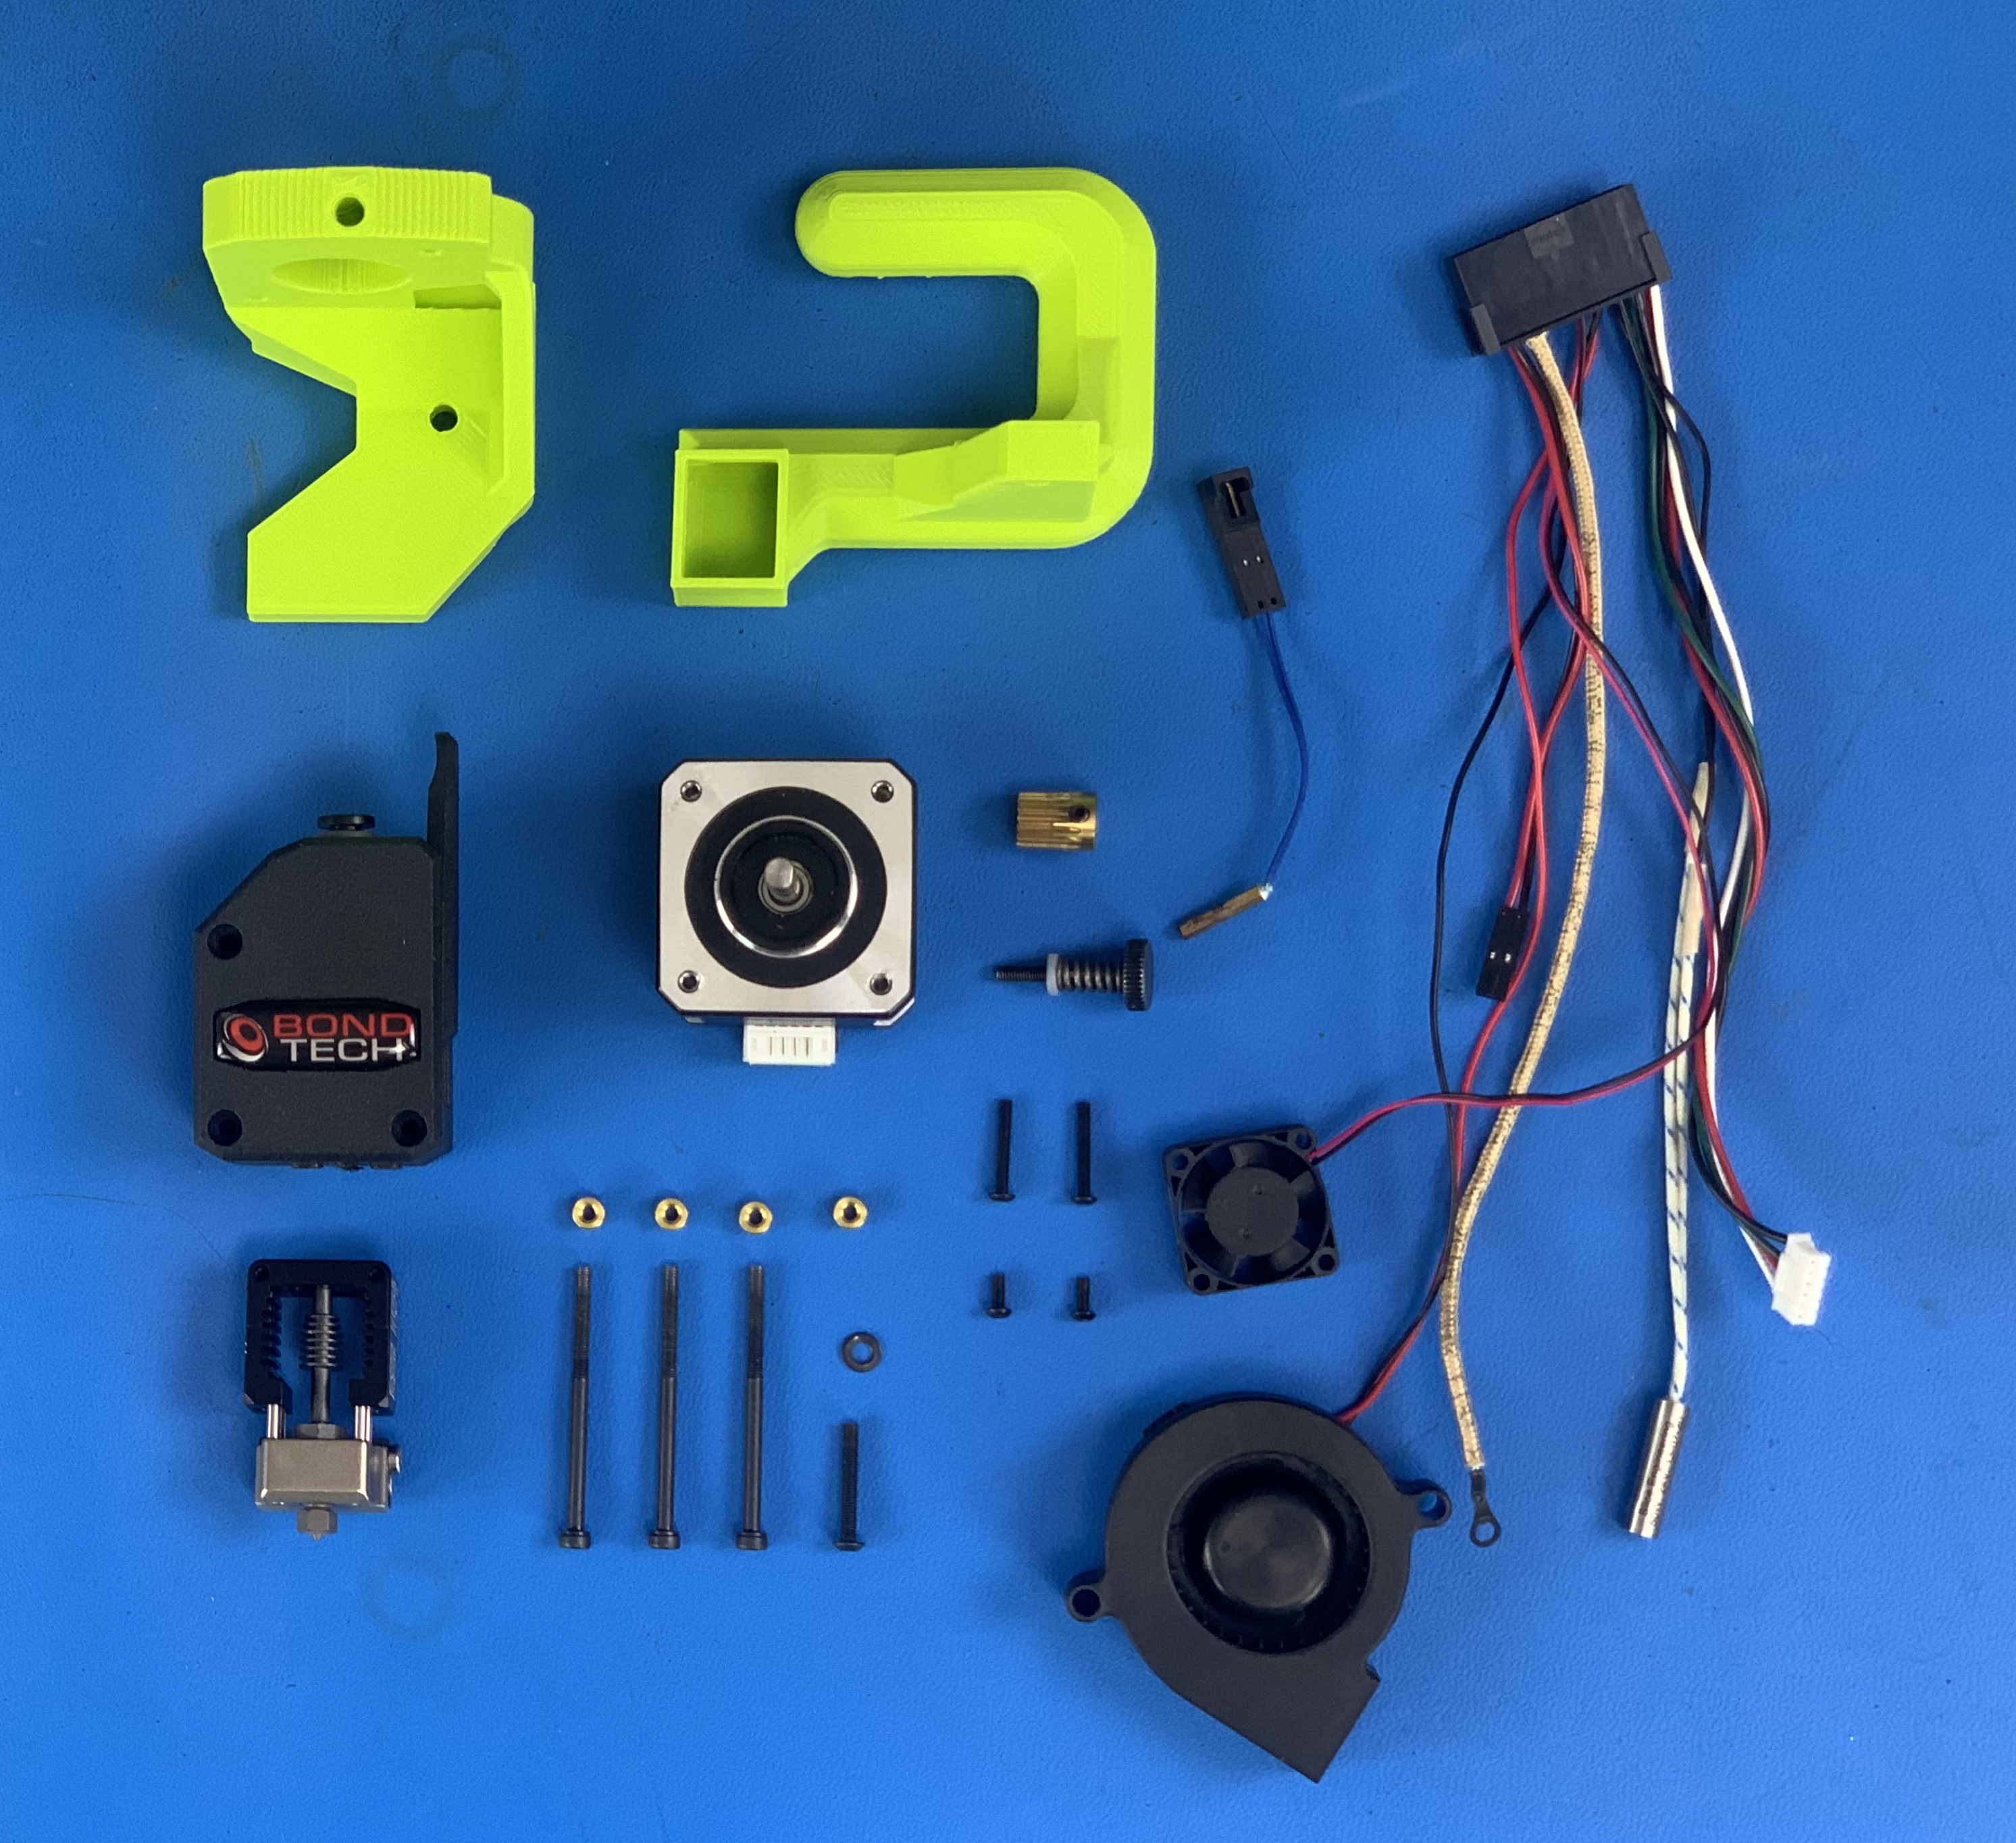
1x- [AS-CB0105] M175 Extruder Harness
1x- [AS-HE0044] M175 Hot End
1x- [EL-MT0069] NEMA 17 Half Height Stepper Motor, LDO
1x- [EL-TH0012] Cartridge Style Thermistor with Molex Connector
3x- [HD-BT0154] M3x45 SHCS, Black-Oxide
1x- [HD-BT0171] M3x20 BHCS, Black-Oxide
2x- [HD-BT0261] M2.5x16 BHCS, Black-Oxide
2x- [HD-BT0262] M2.5x6 BHCS, Black-Oxide
1x- [HD-WA0038] M3 Washer
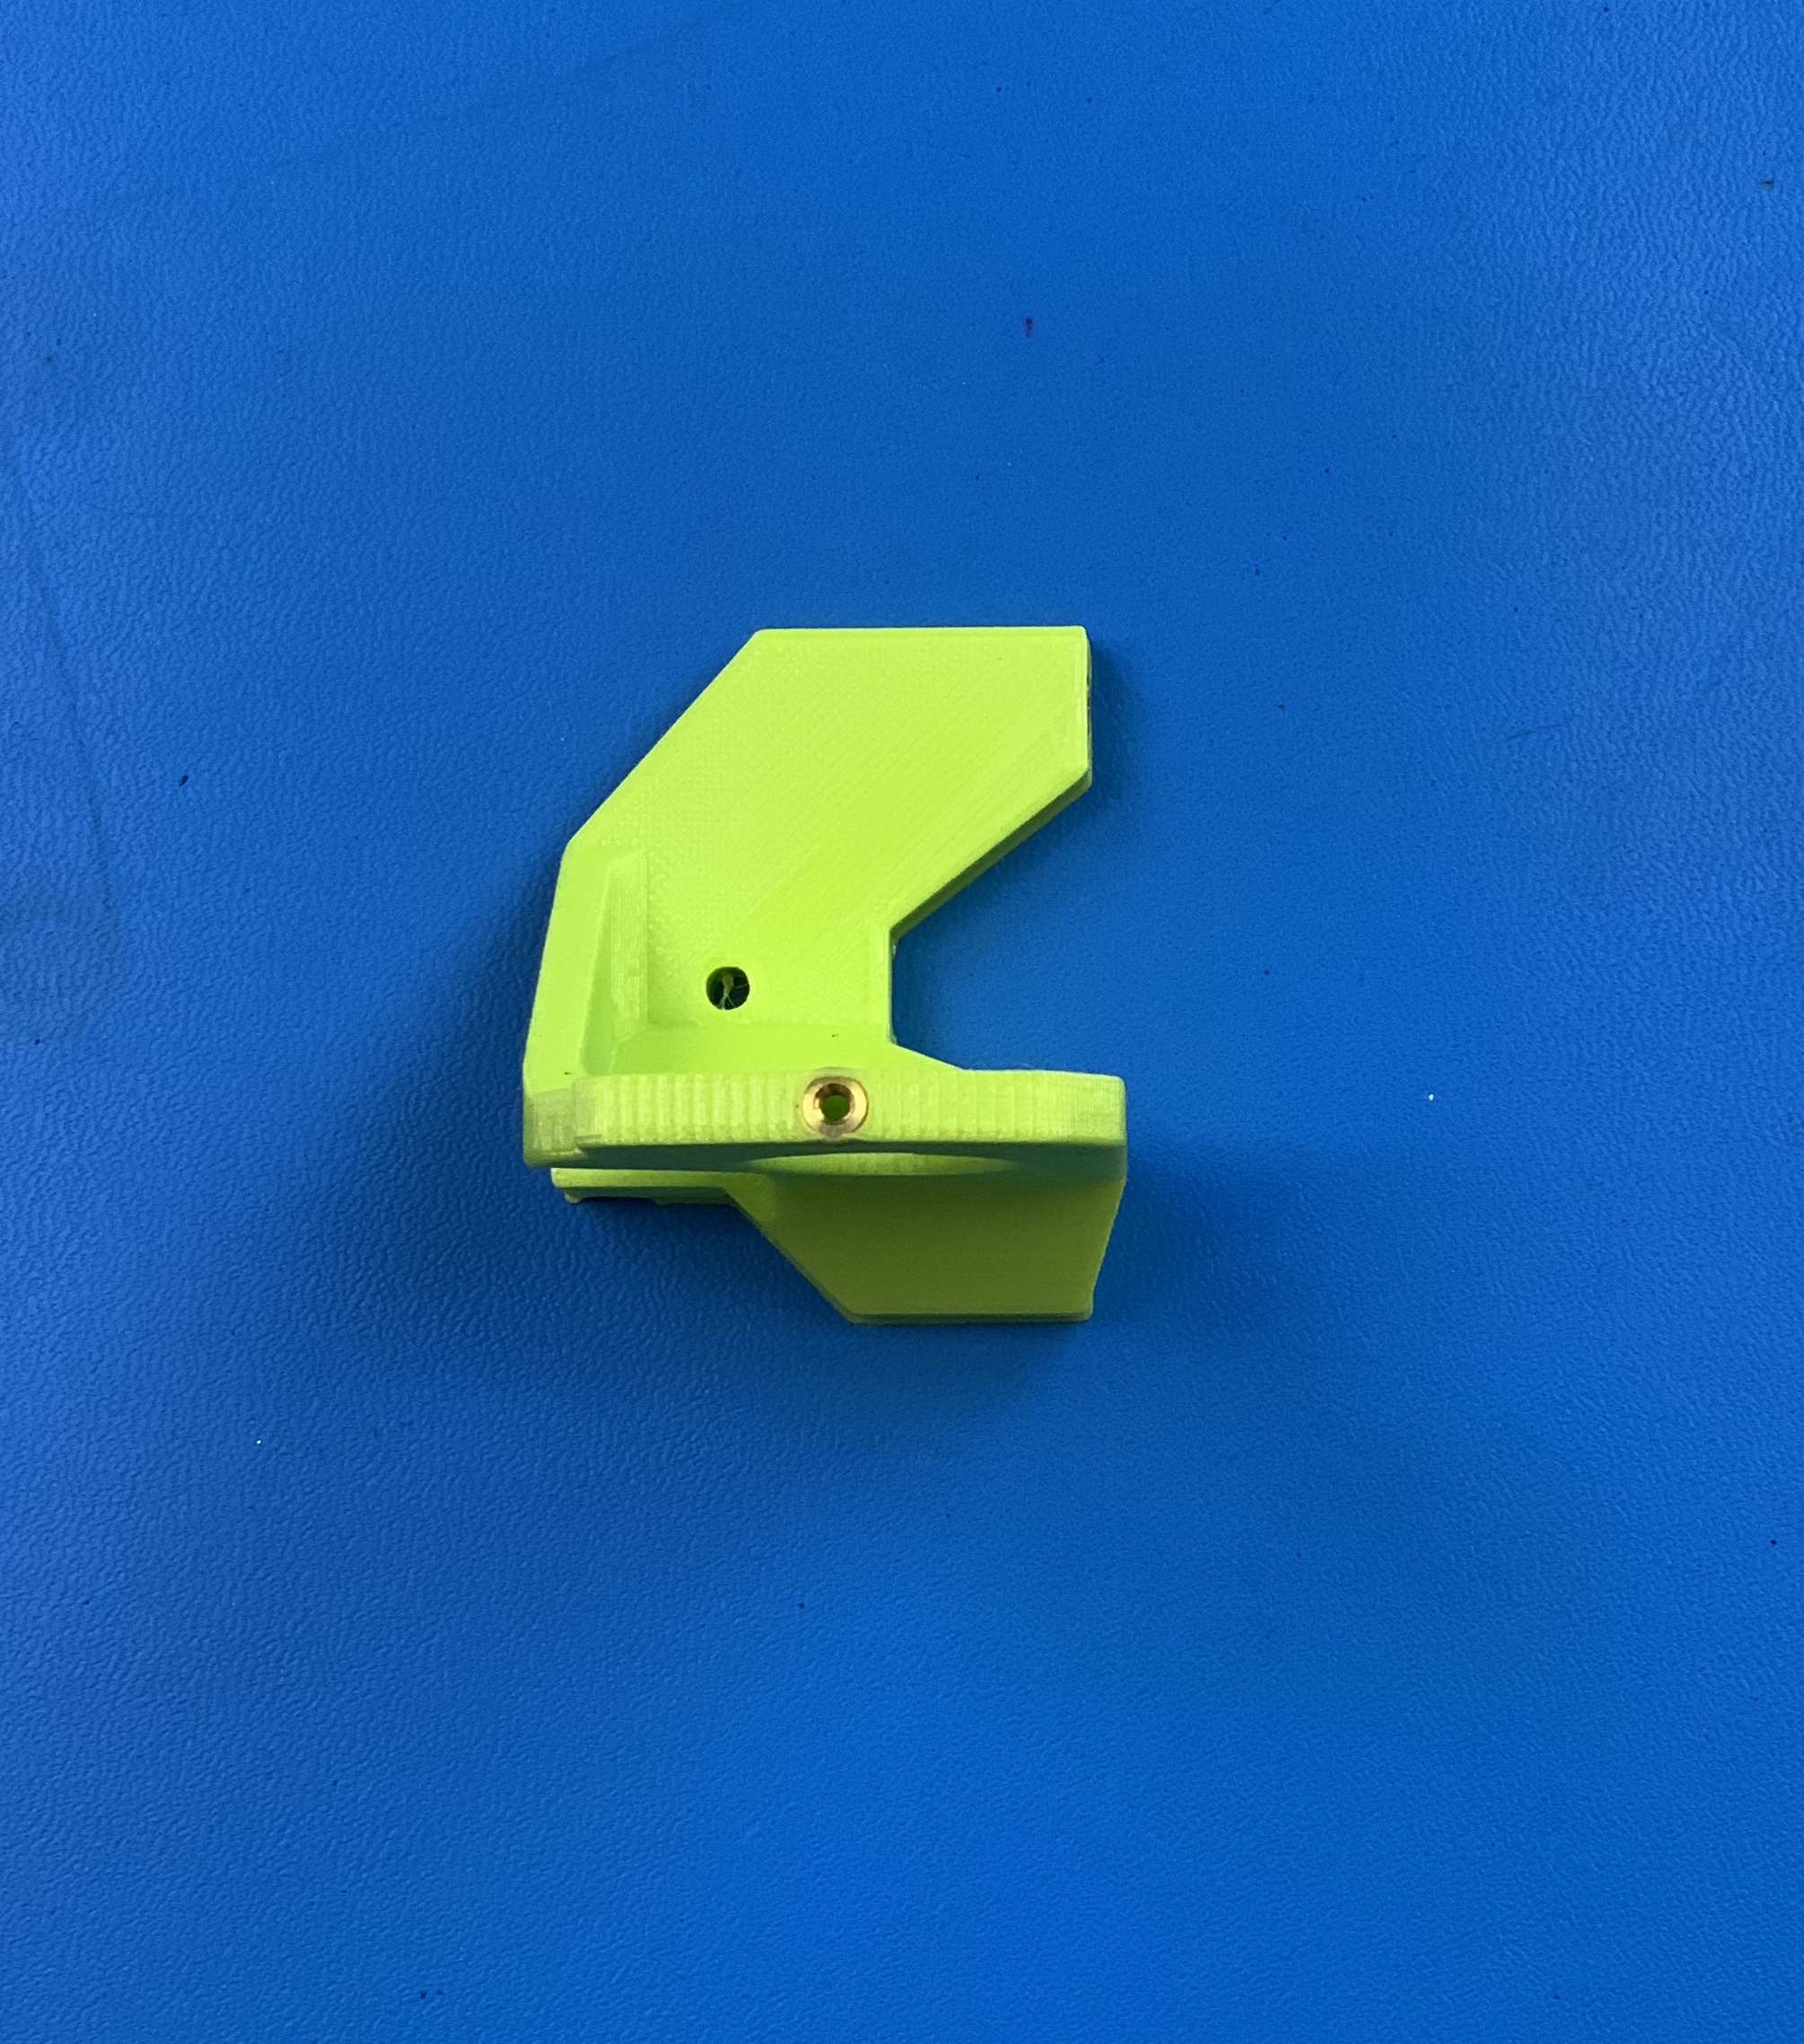
1x- [PP-GP0491] M175 Extruder Mount
1x- [PP-GP0492] M175 Blower Shroud
1x- [PP-MP0290] M175 Bondtech Extruder
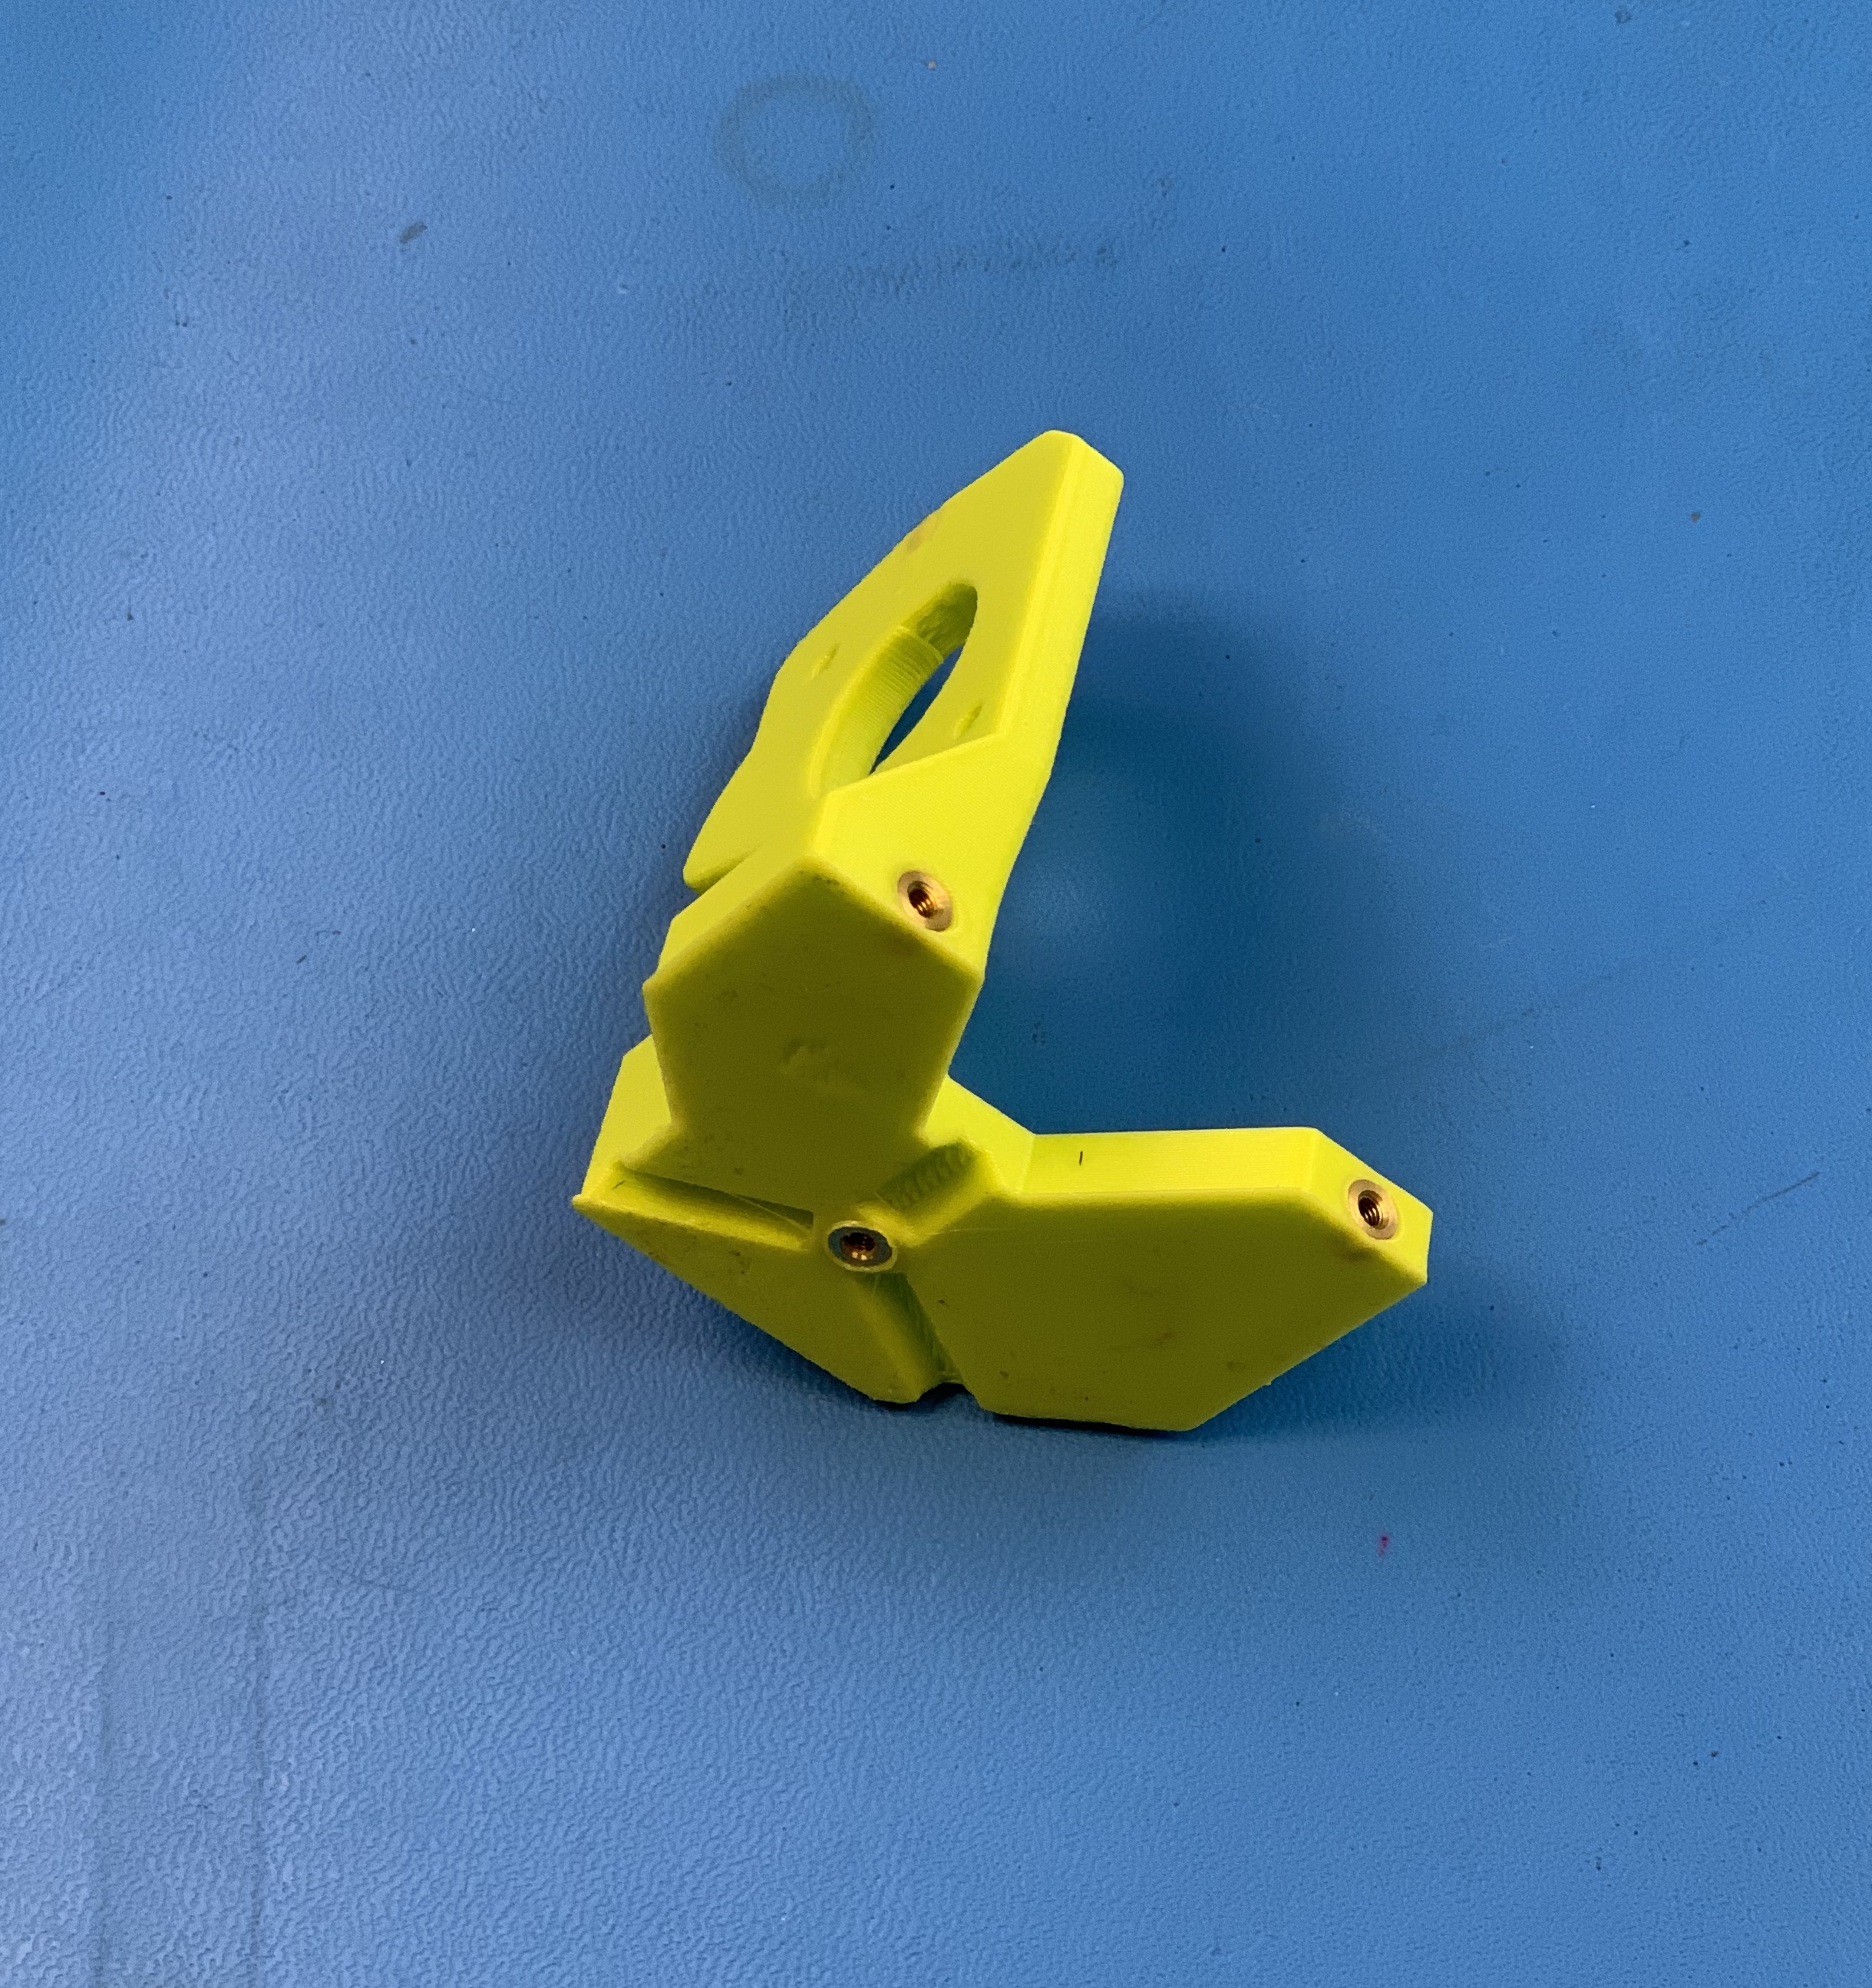
Install four M3-.5 brass heat-set inserts [HD-MS0030] into the locations shown.
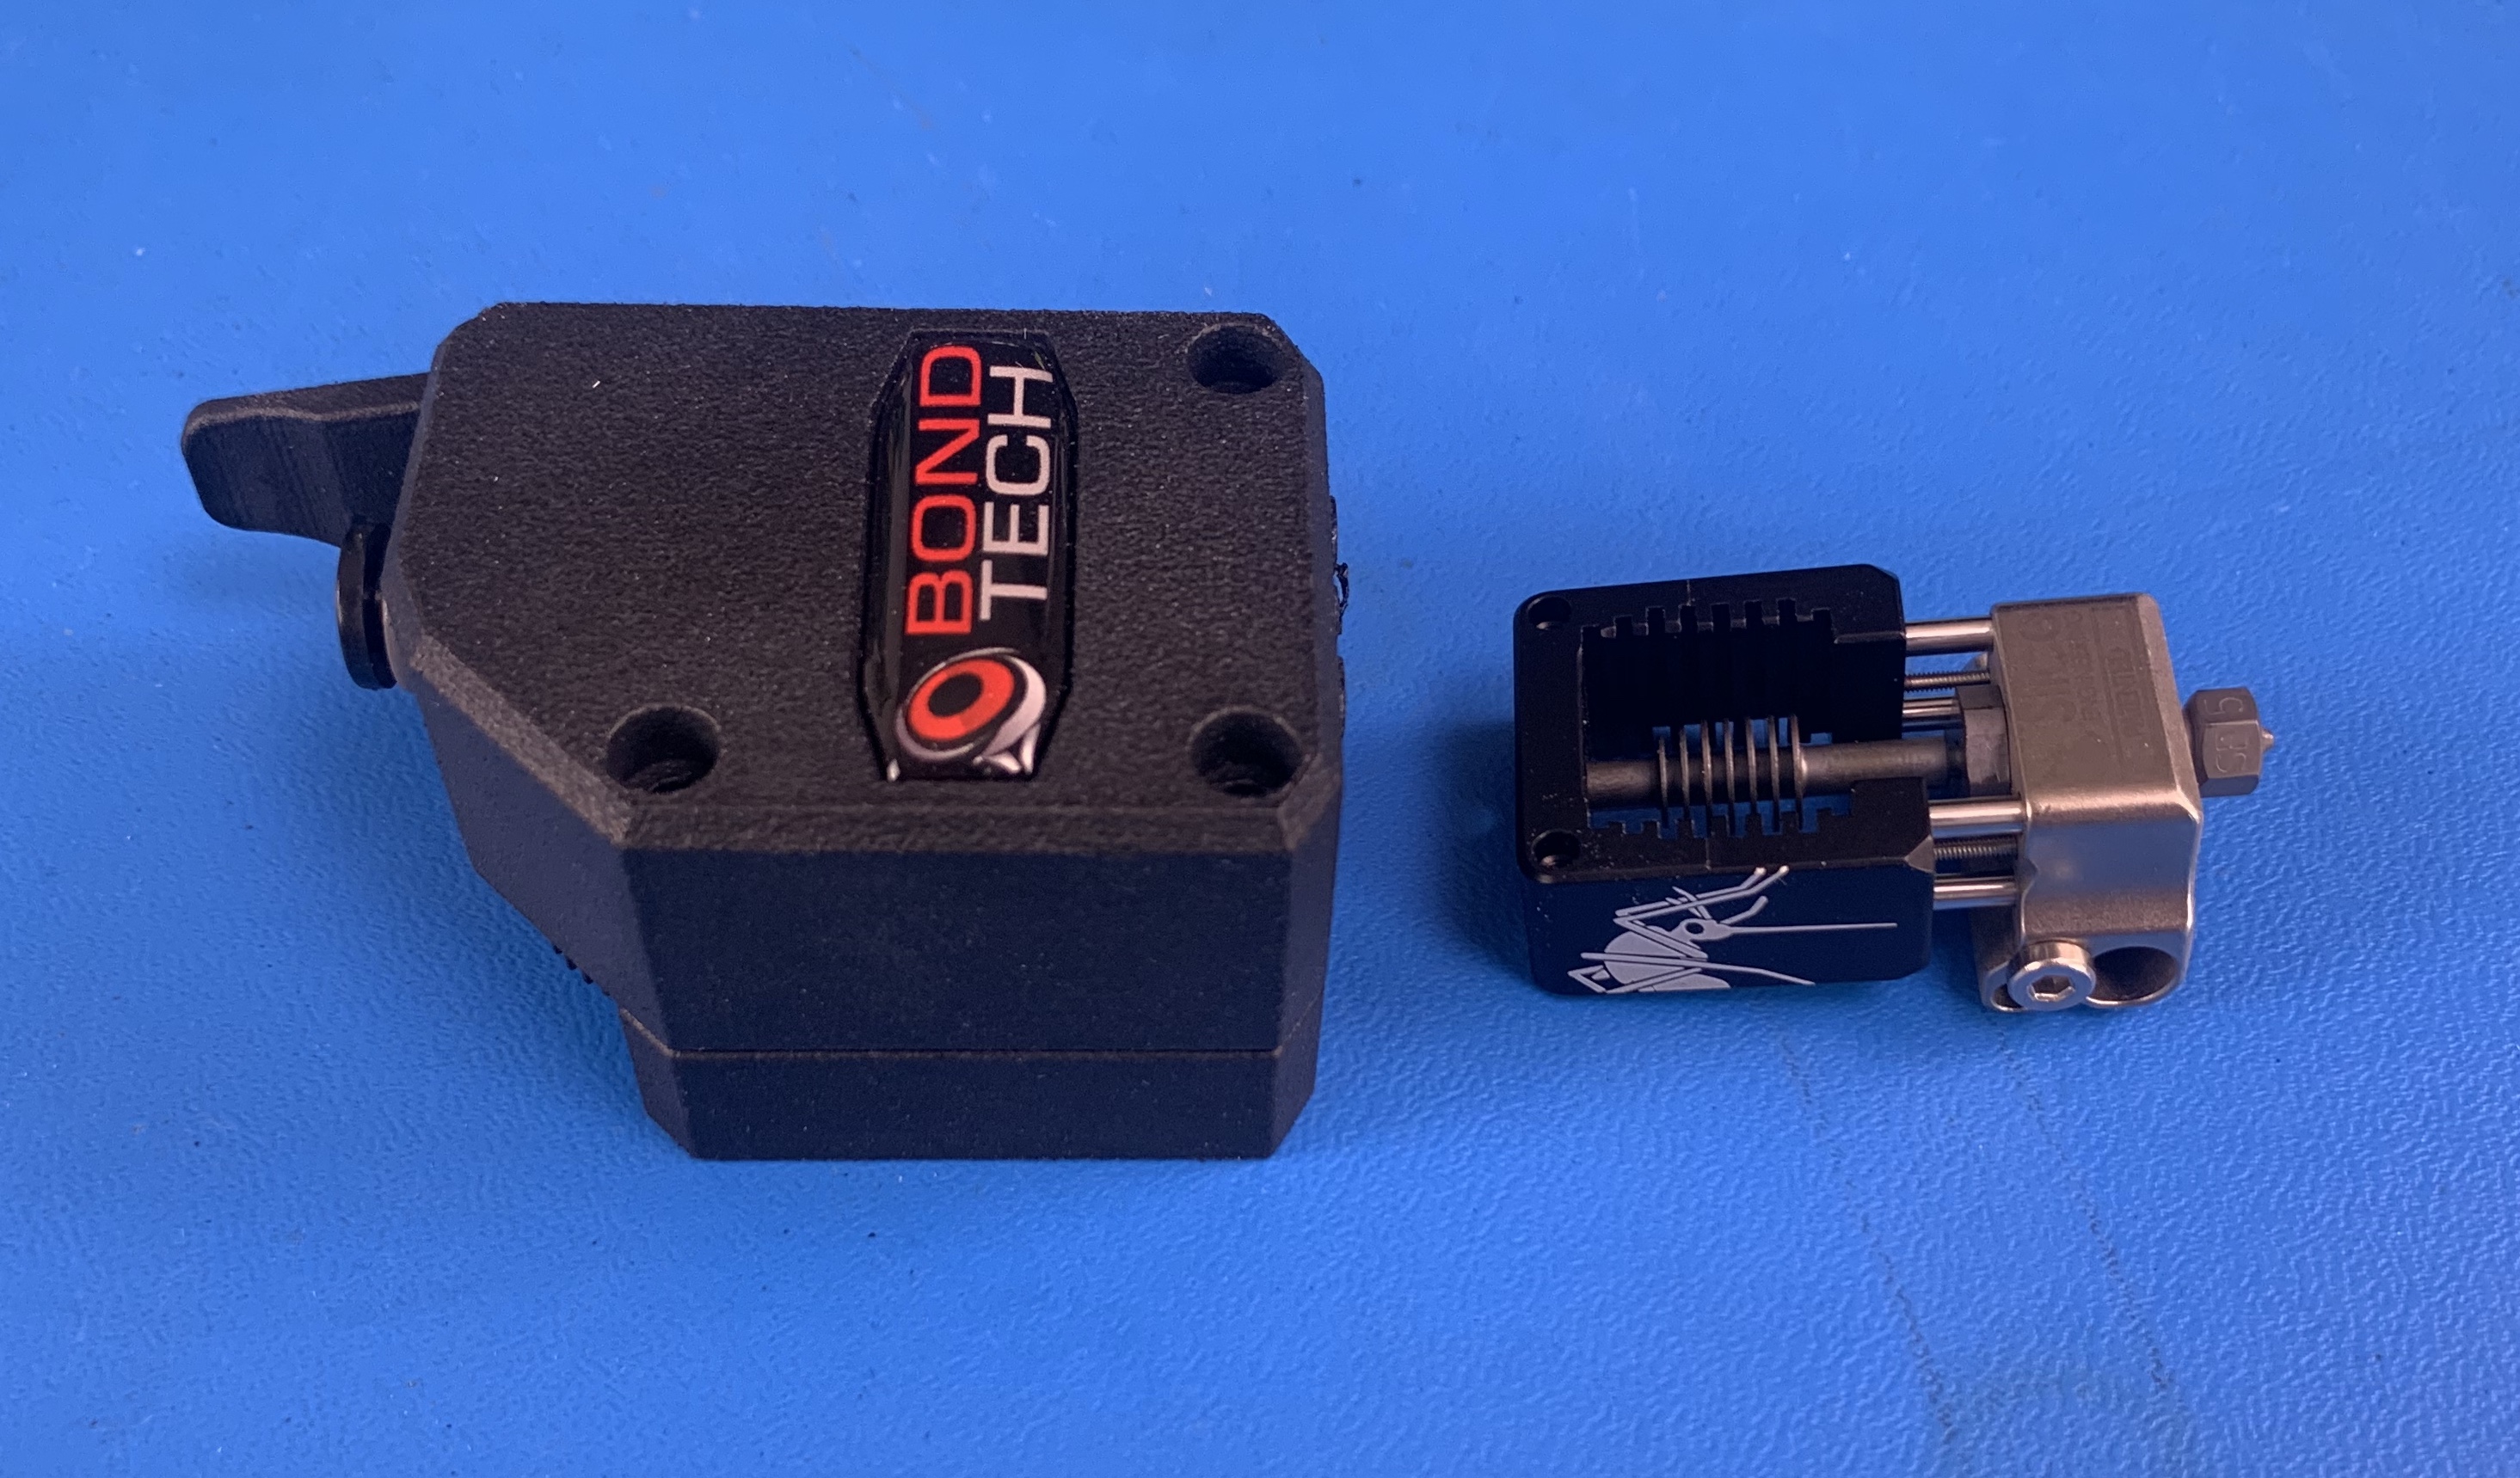
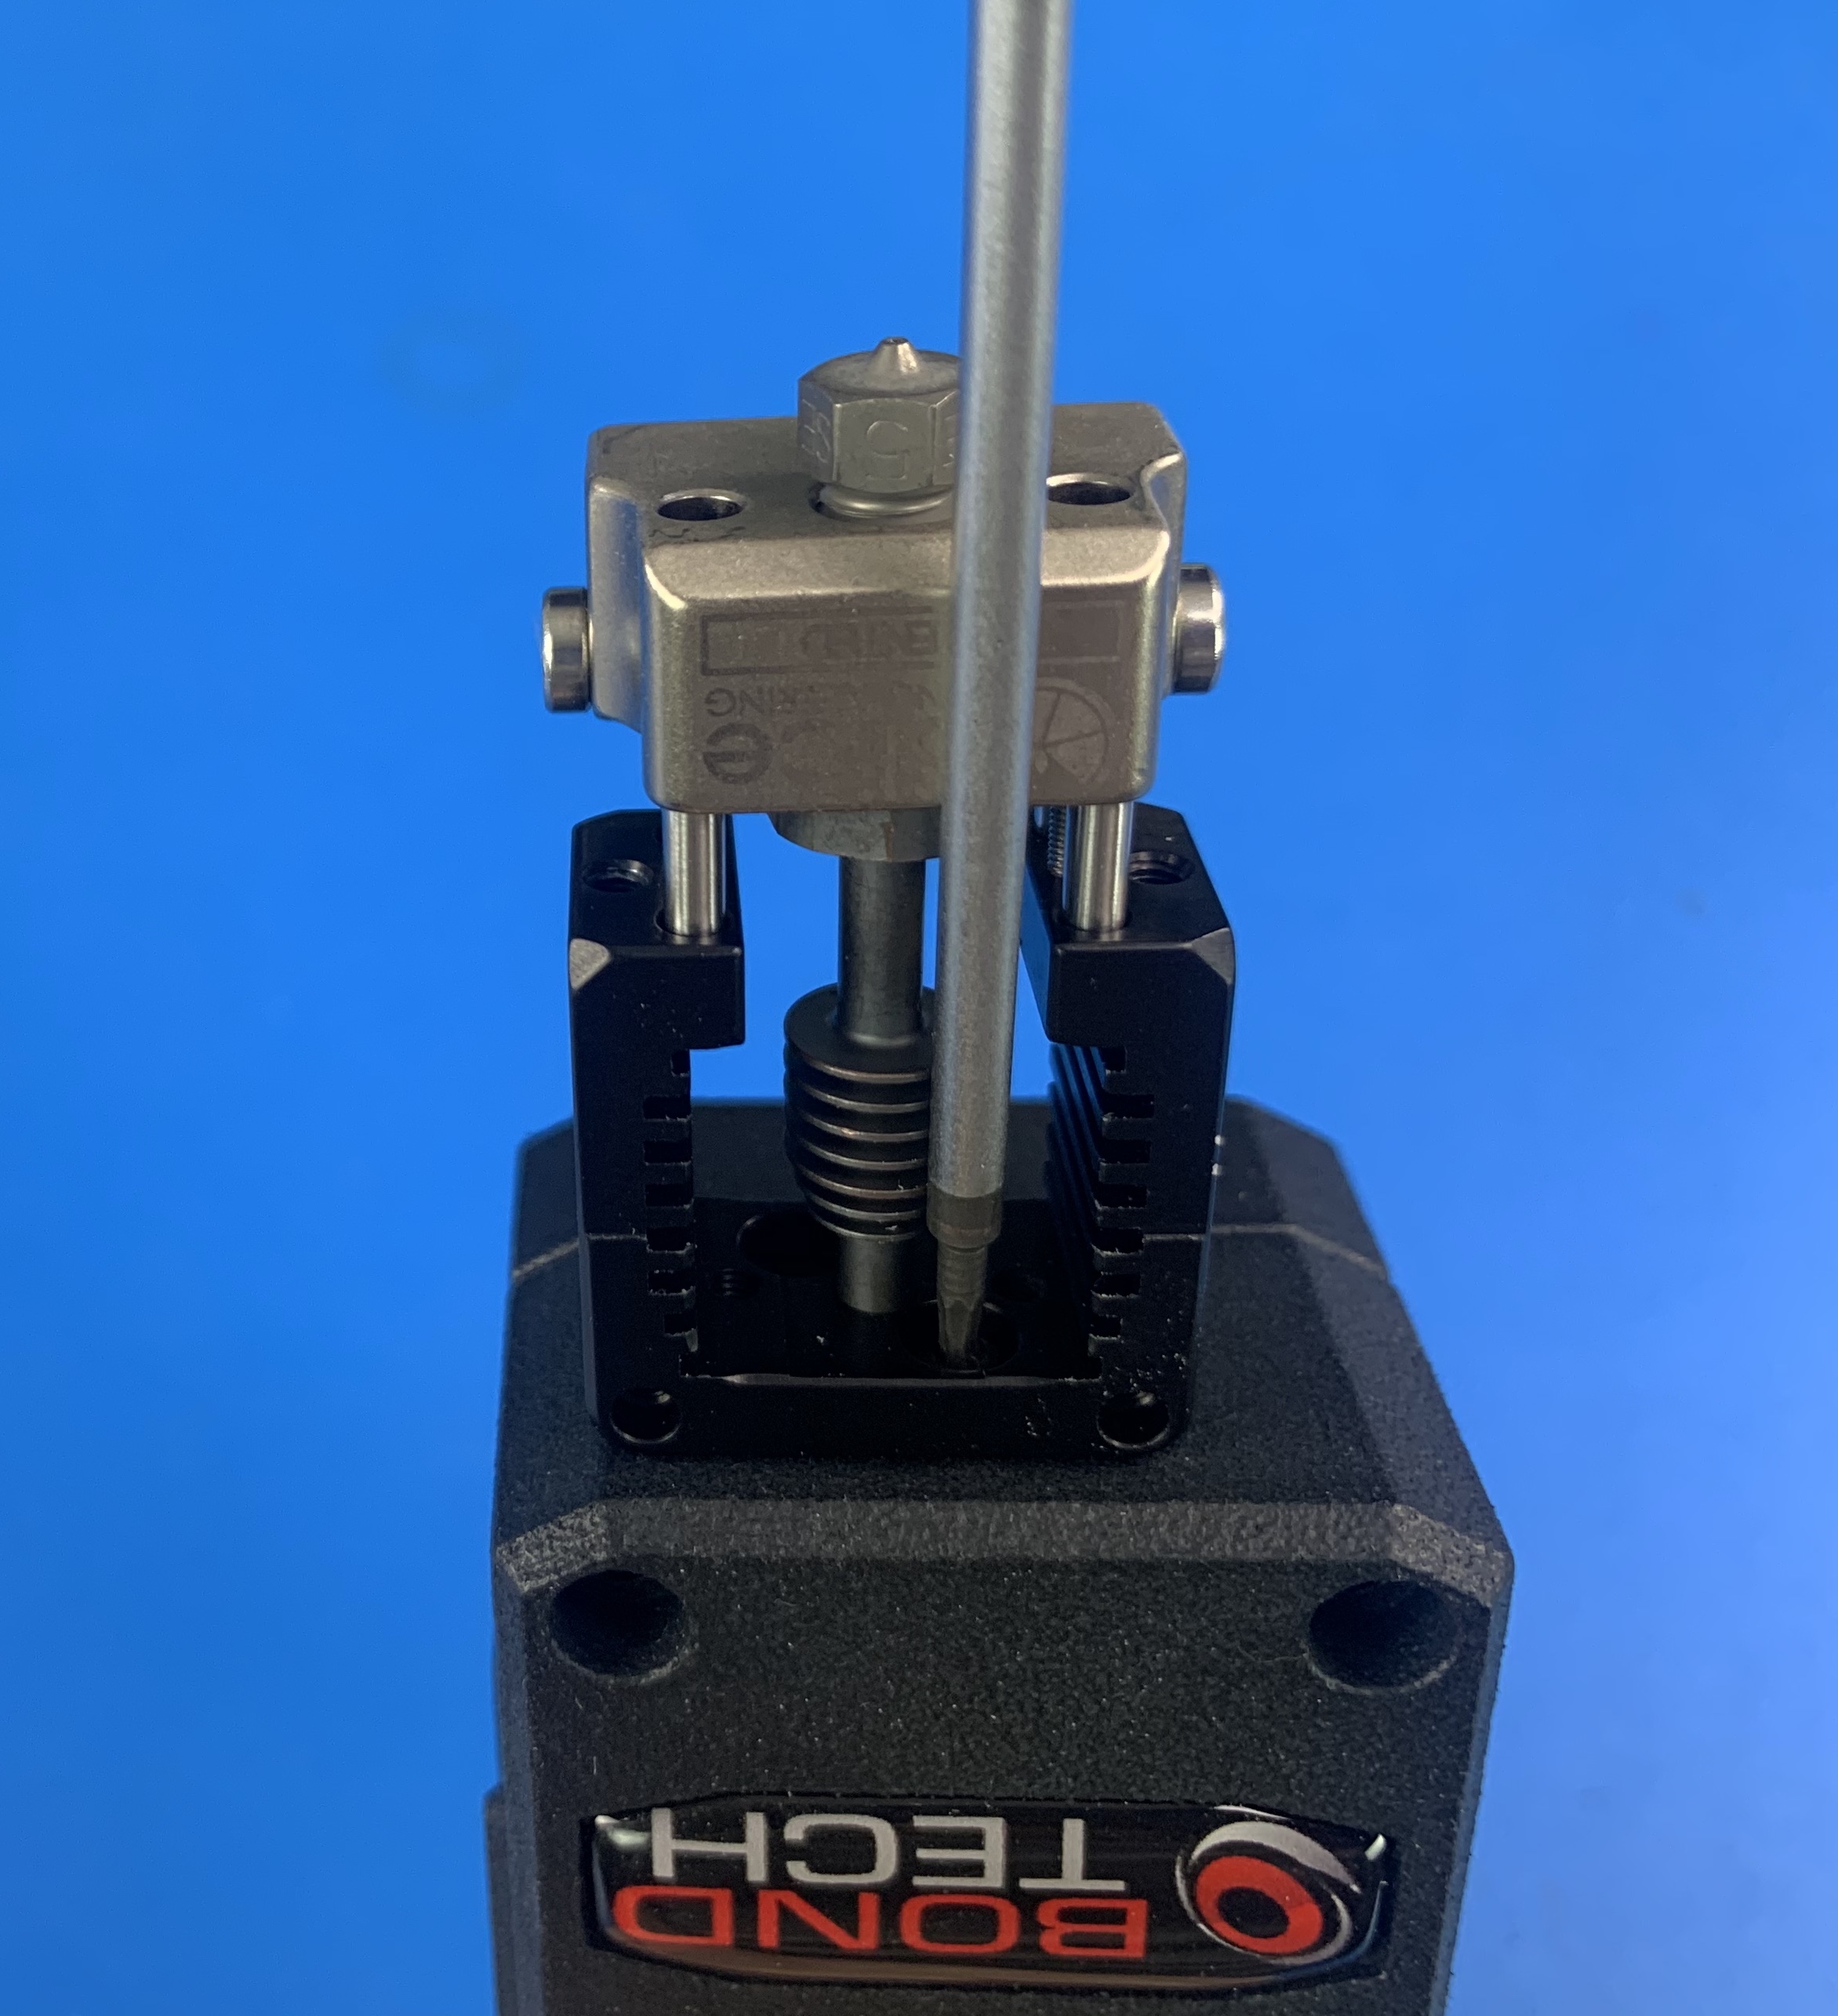
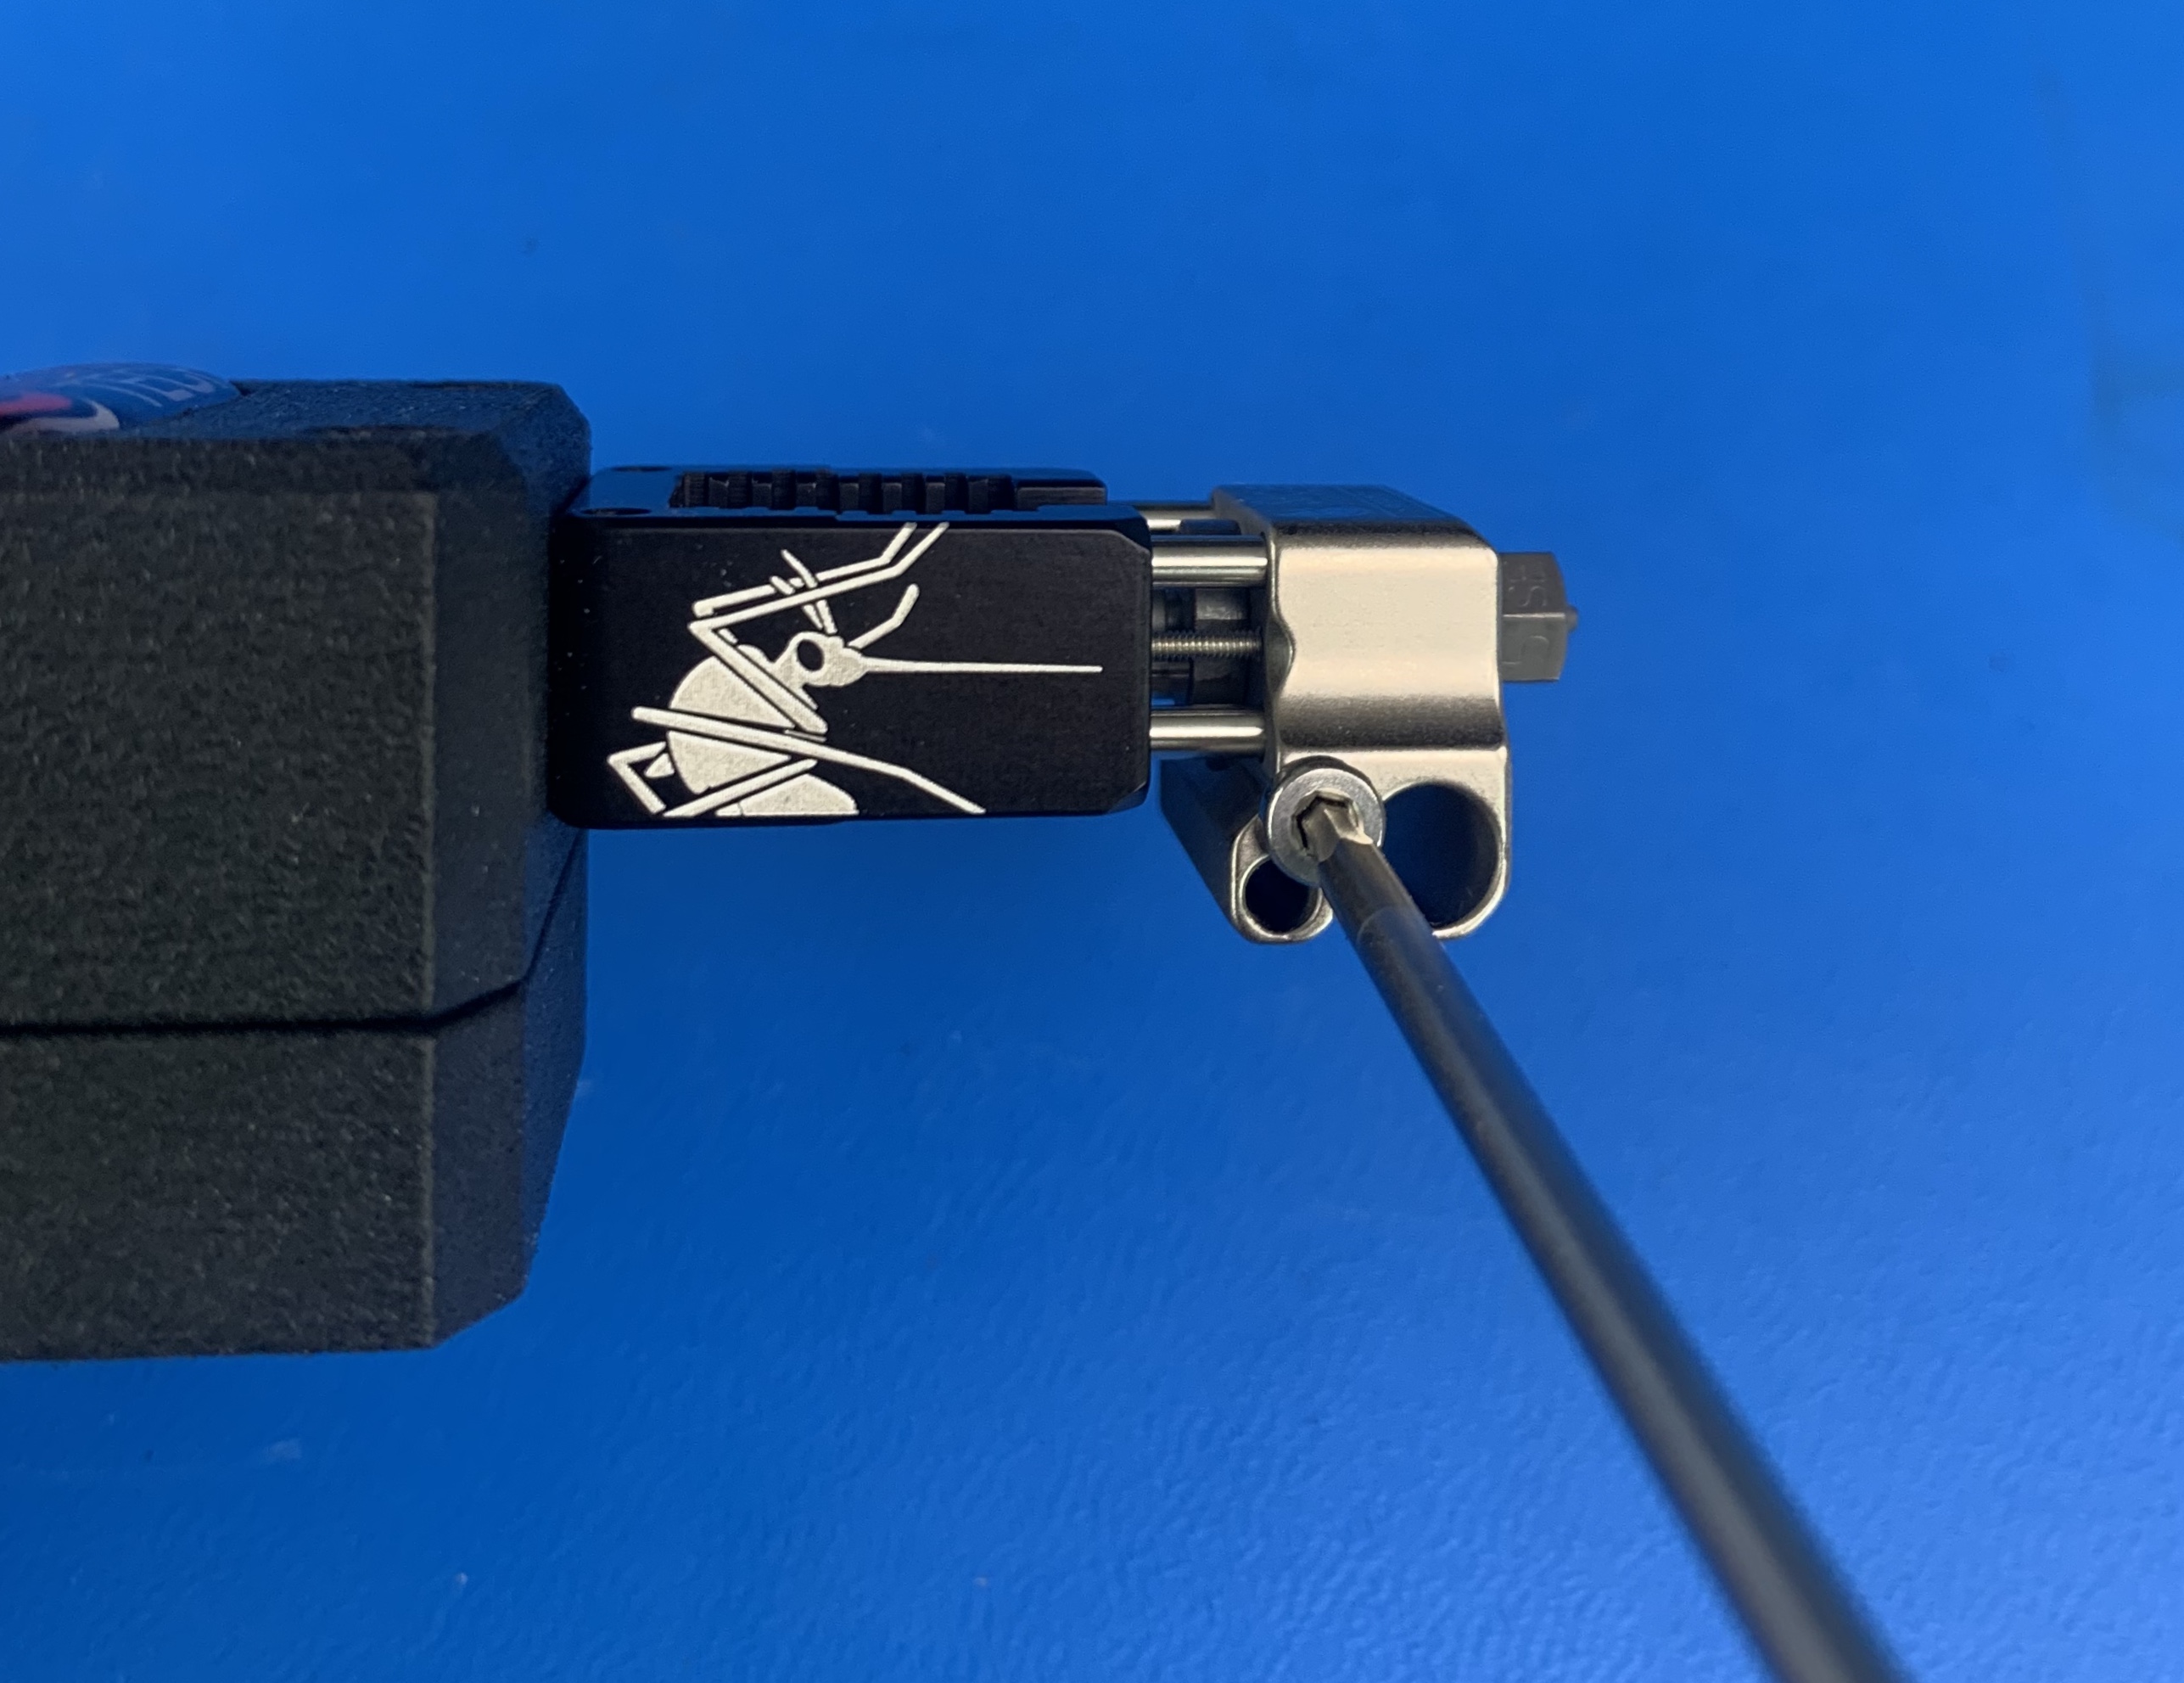
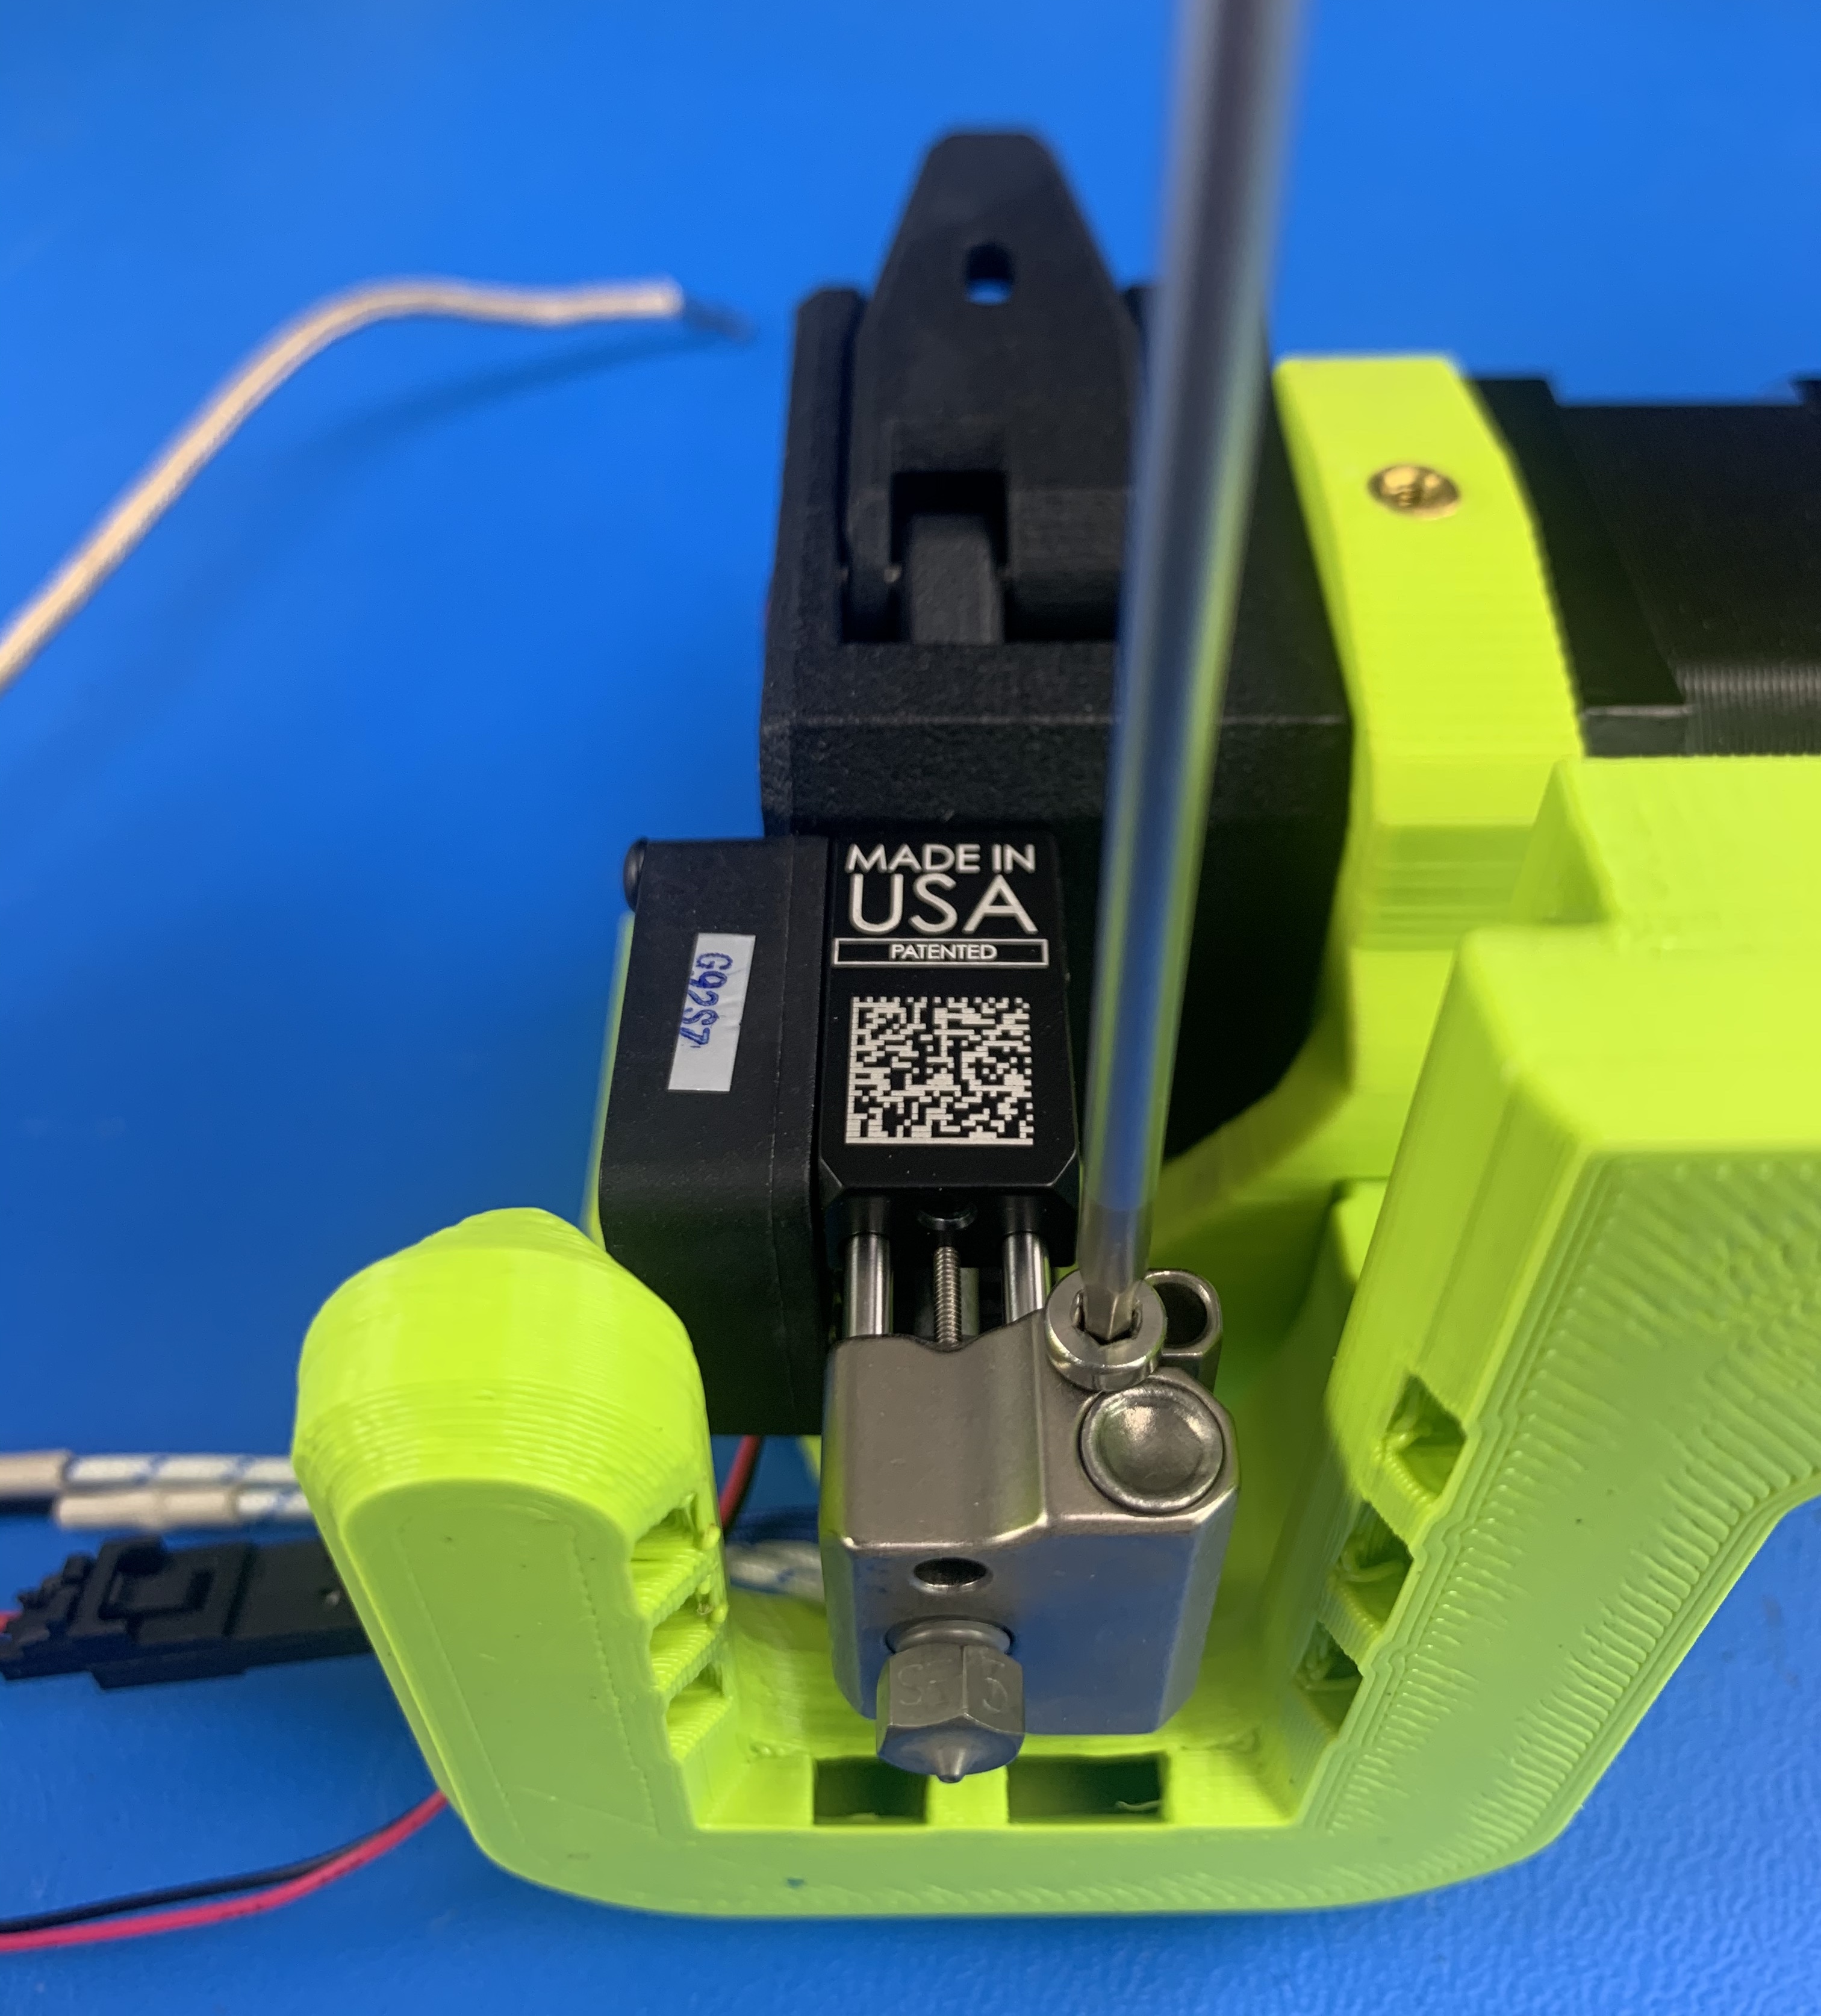
Using 2x [HD-BT0262] M2.5 x 6mm screws, fasten the Hotend [AS-HE0044] to the Extruder Body [PP-MP0292]. A 1.5mm allen wrench may be required to secure the screws.
Remove the retaining screw from the hot block. Place [EL-TH0012] Cartridge Style Thermistor and [AS-CB0108] Heater Cartridge Harness into the holes in the heater block as shown. Secure both with the removed retaining screw.
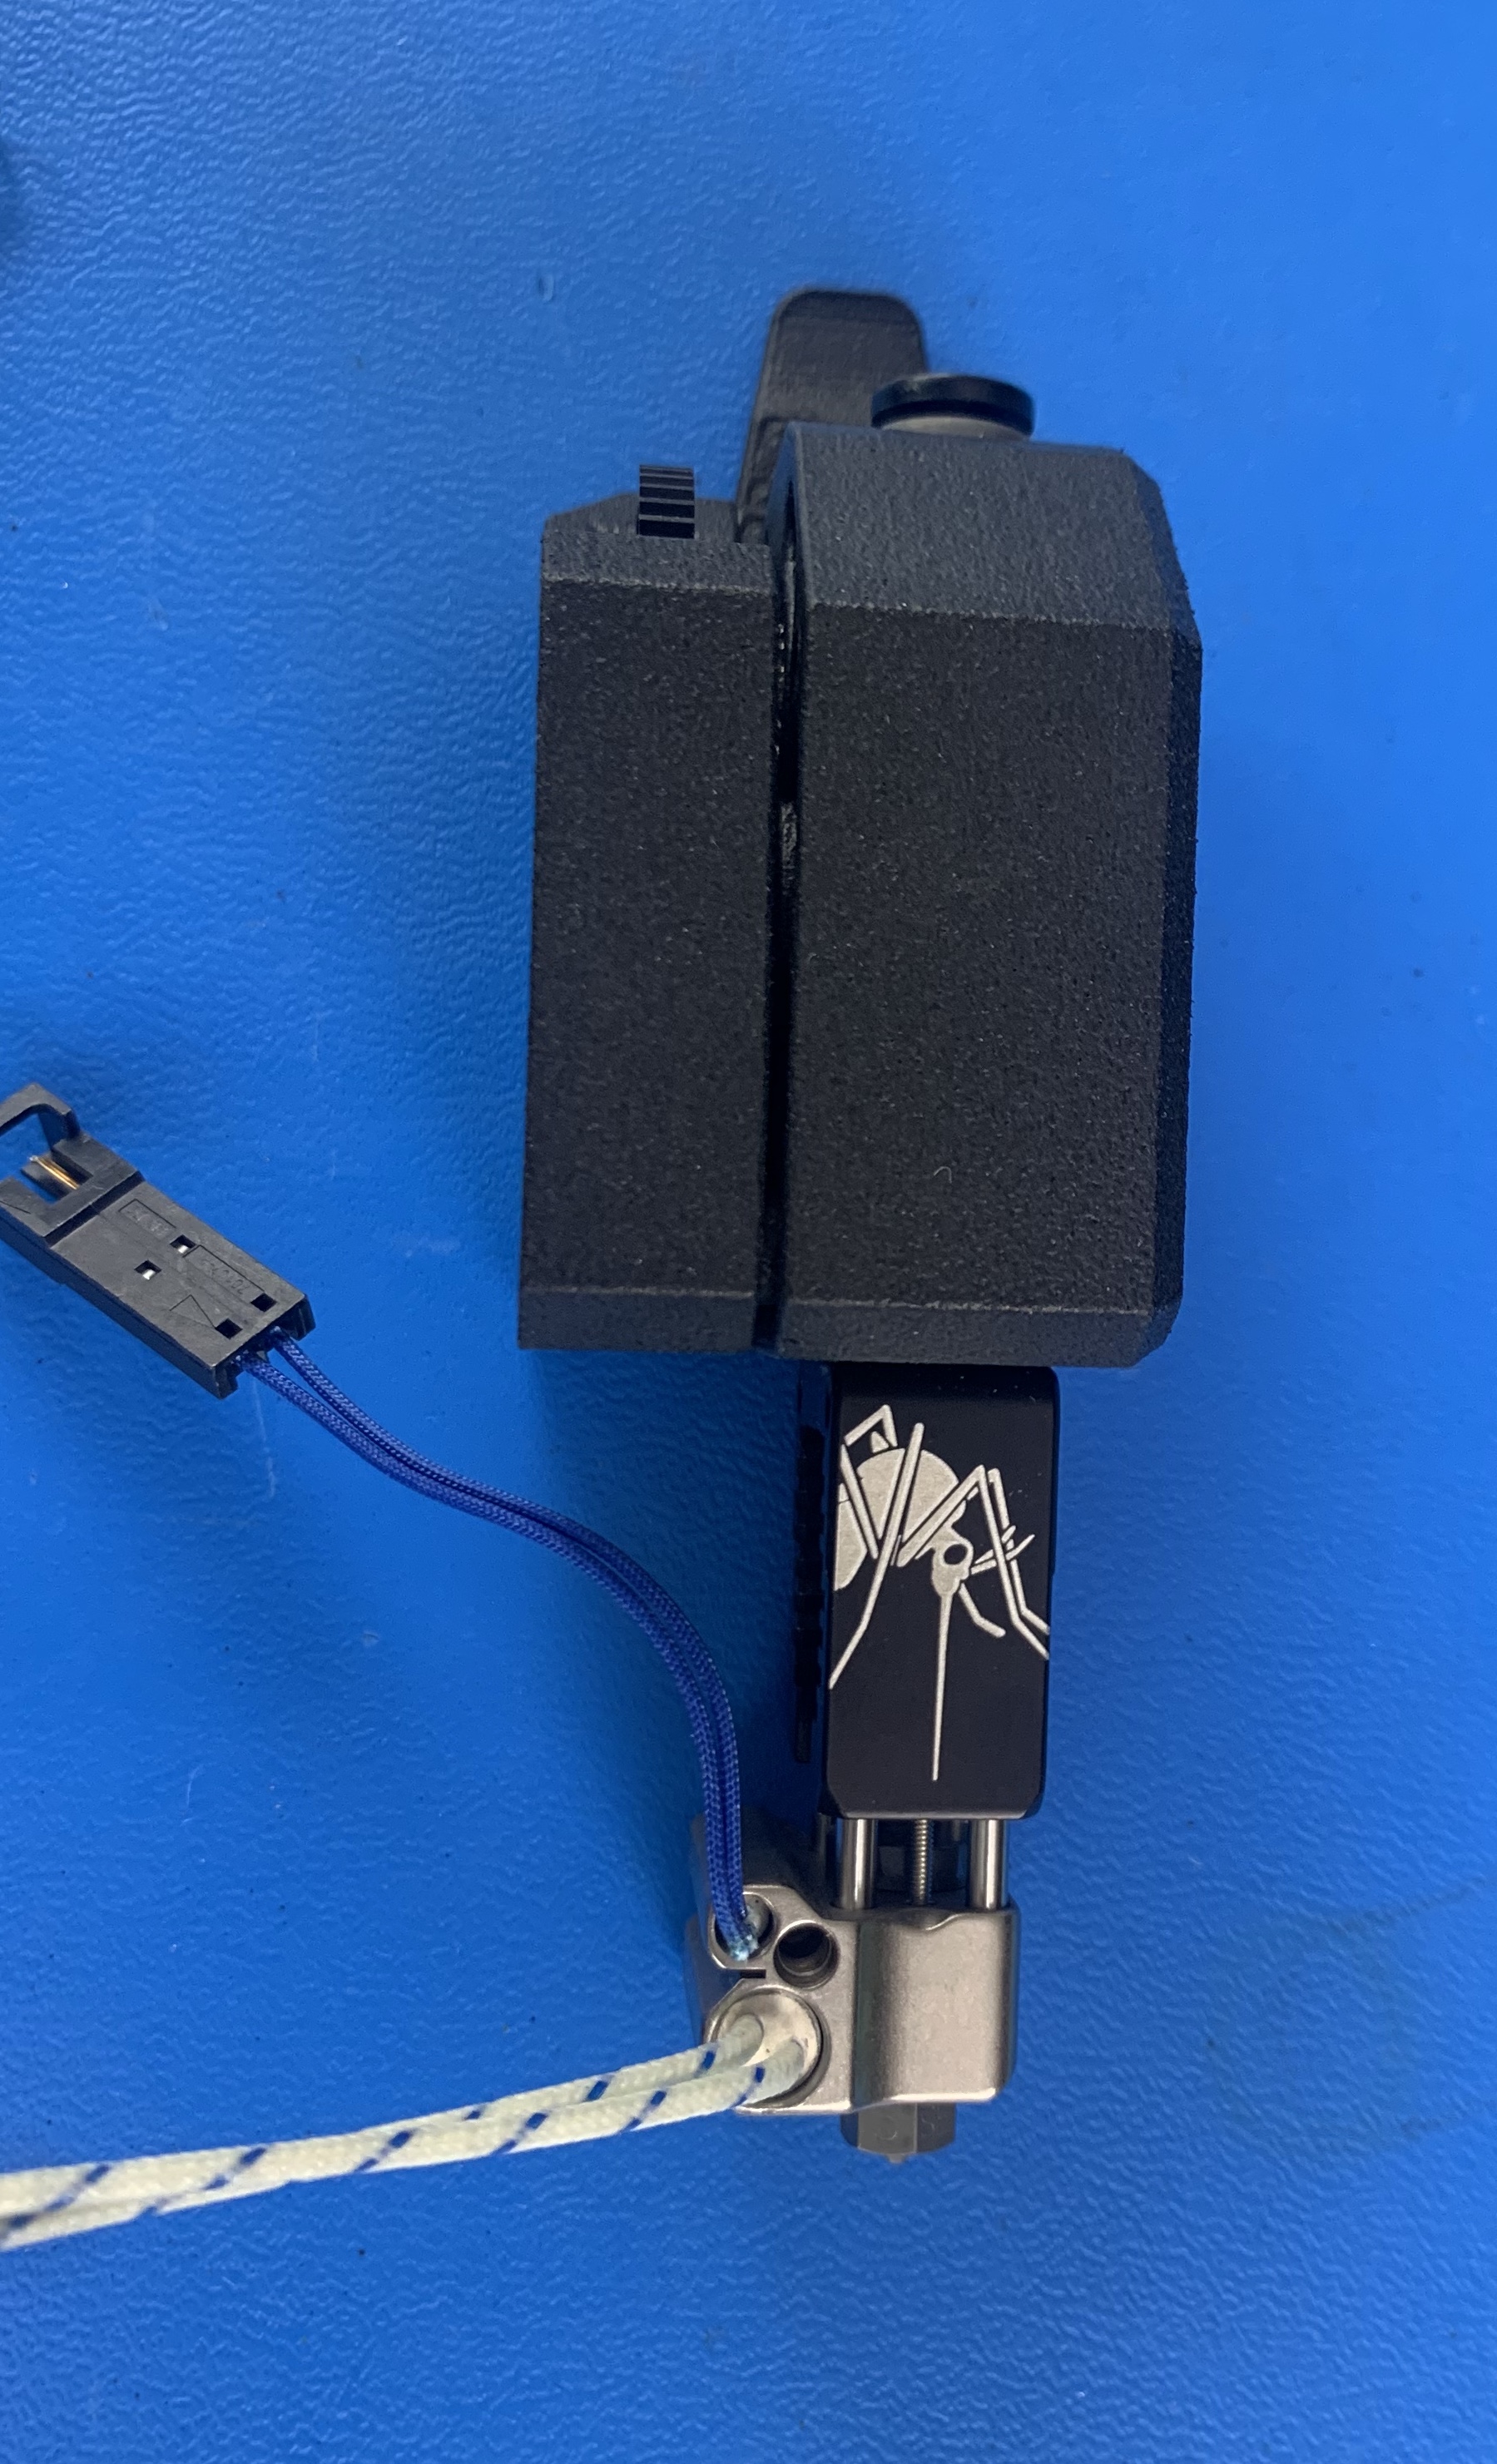
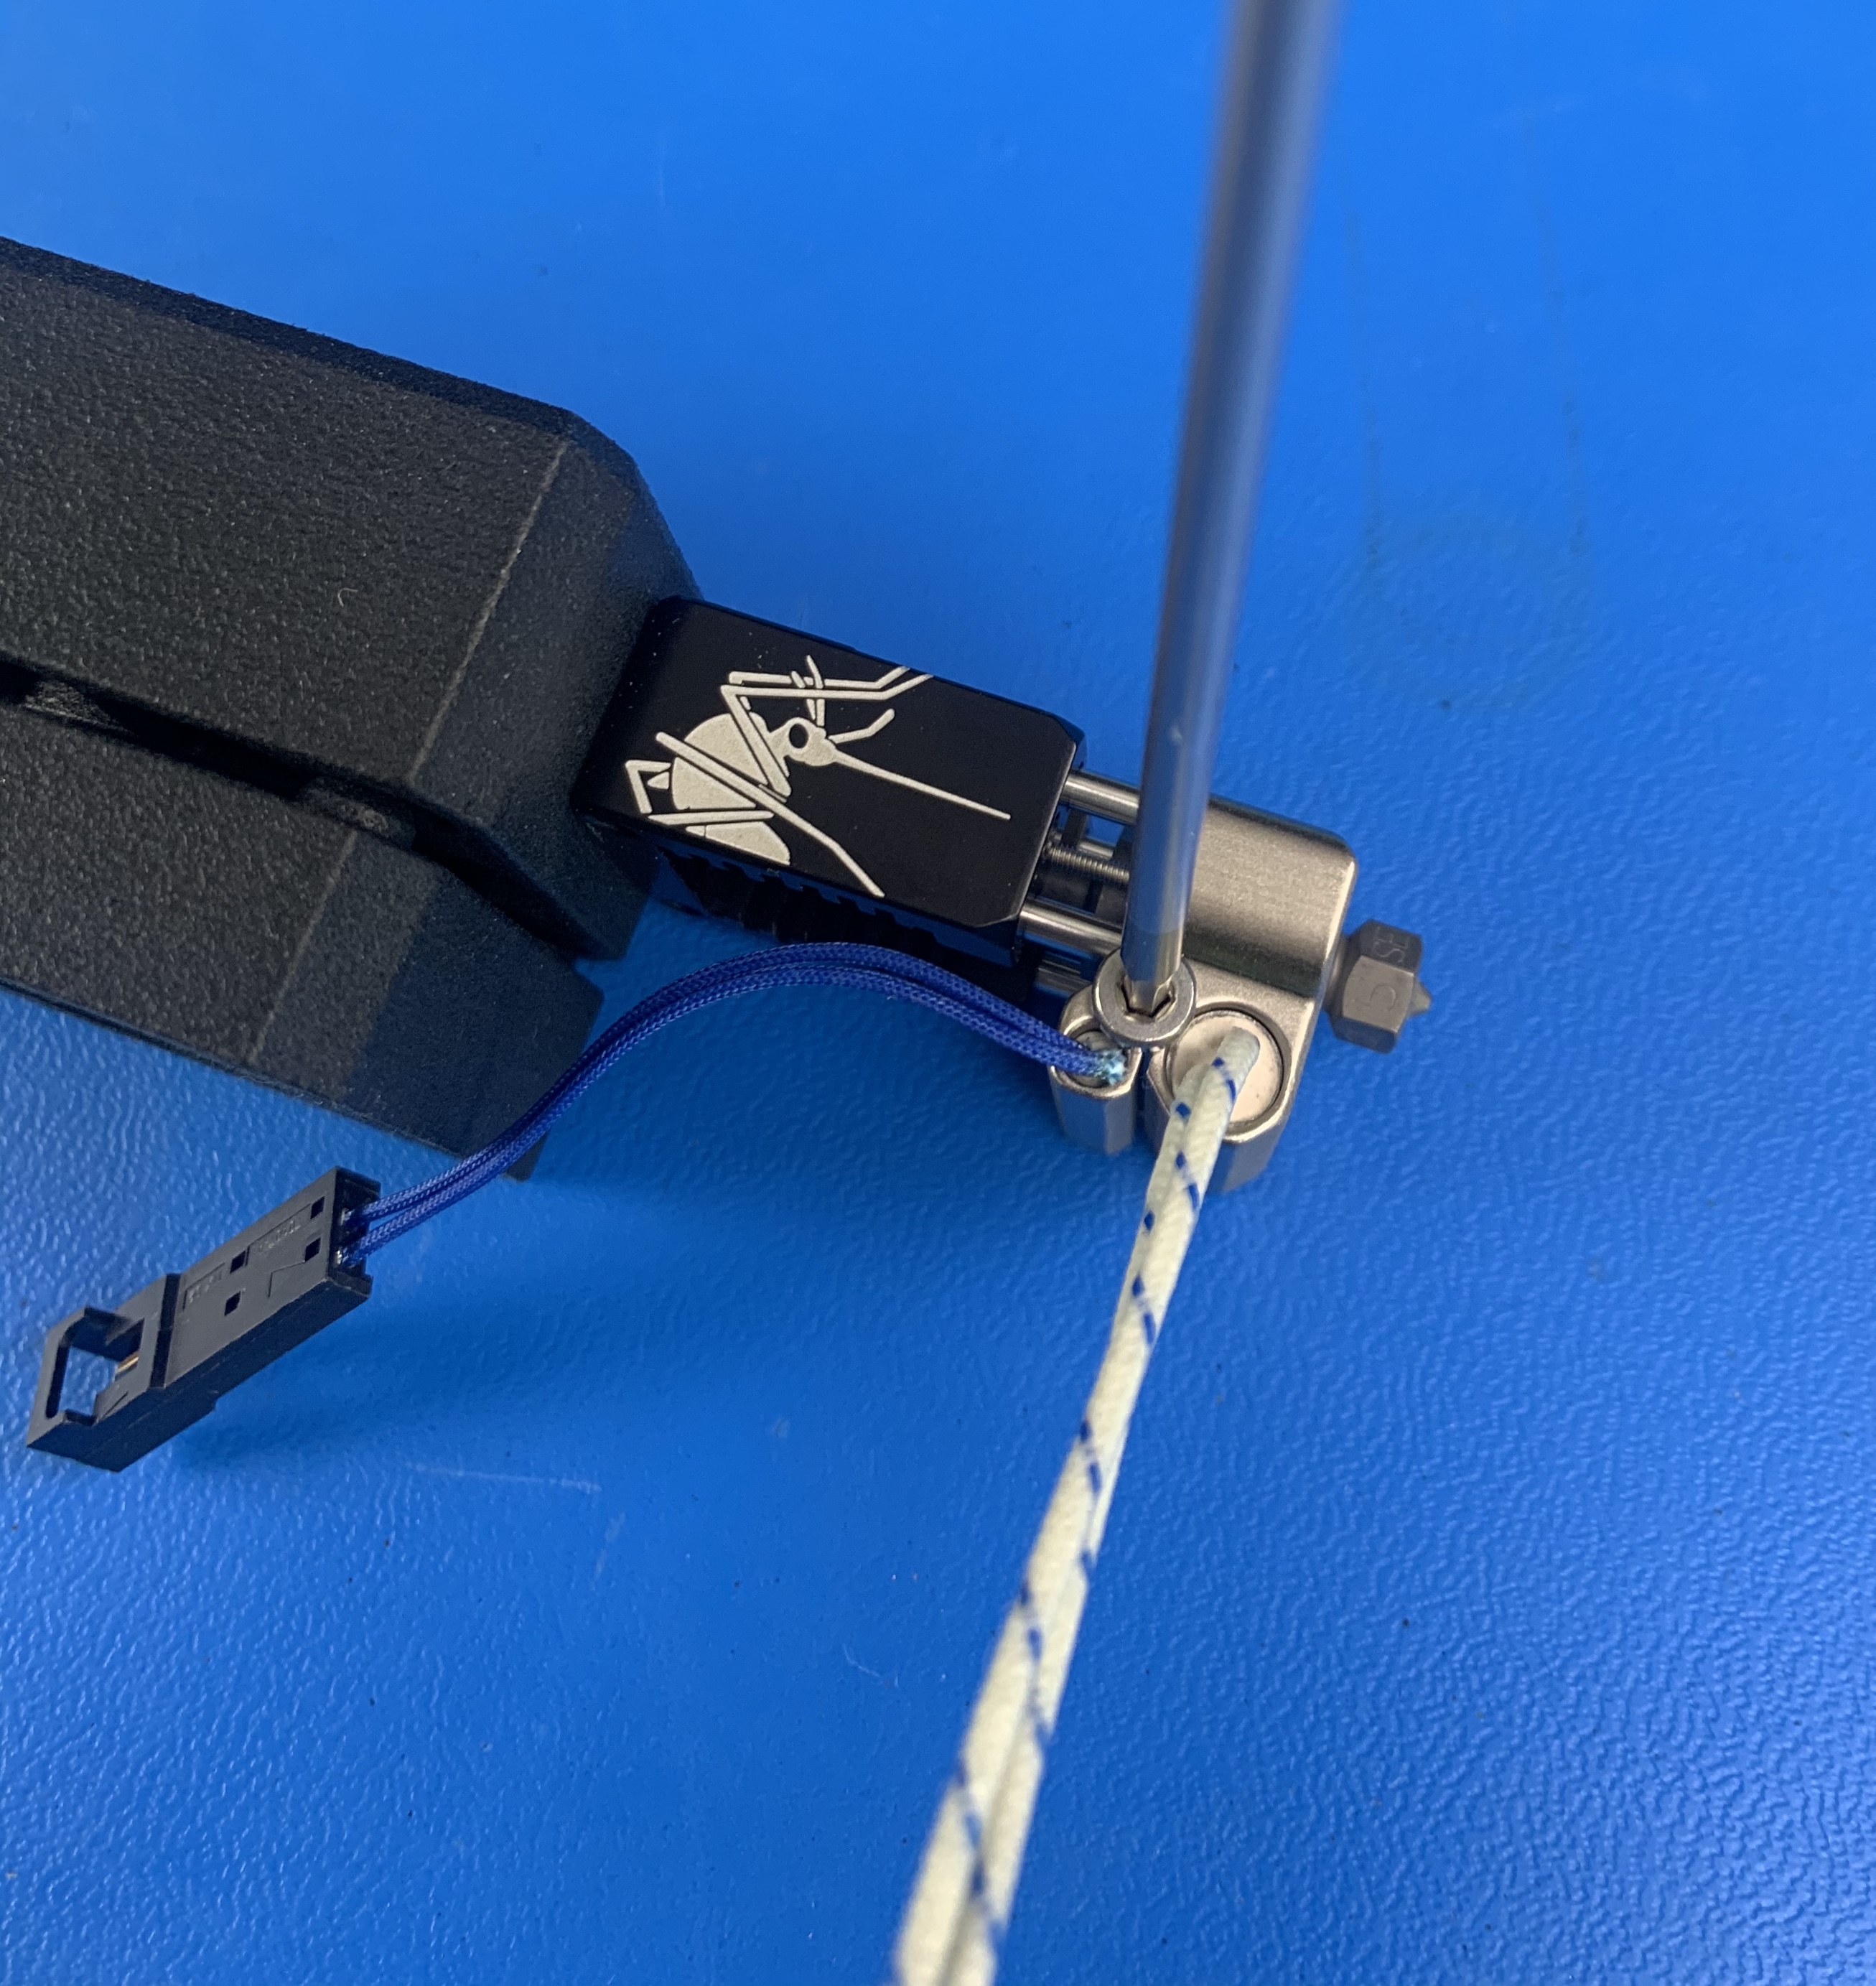
Remove the retaining screw from the hot block. Install the zero sense wire [AS-CB0100] and fasten the retaining screw back into place until it is hand tight. Be sure that the zero sense wire is routed behind the heatsink as shown.

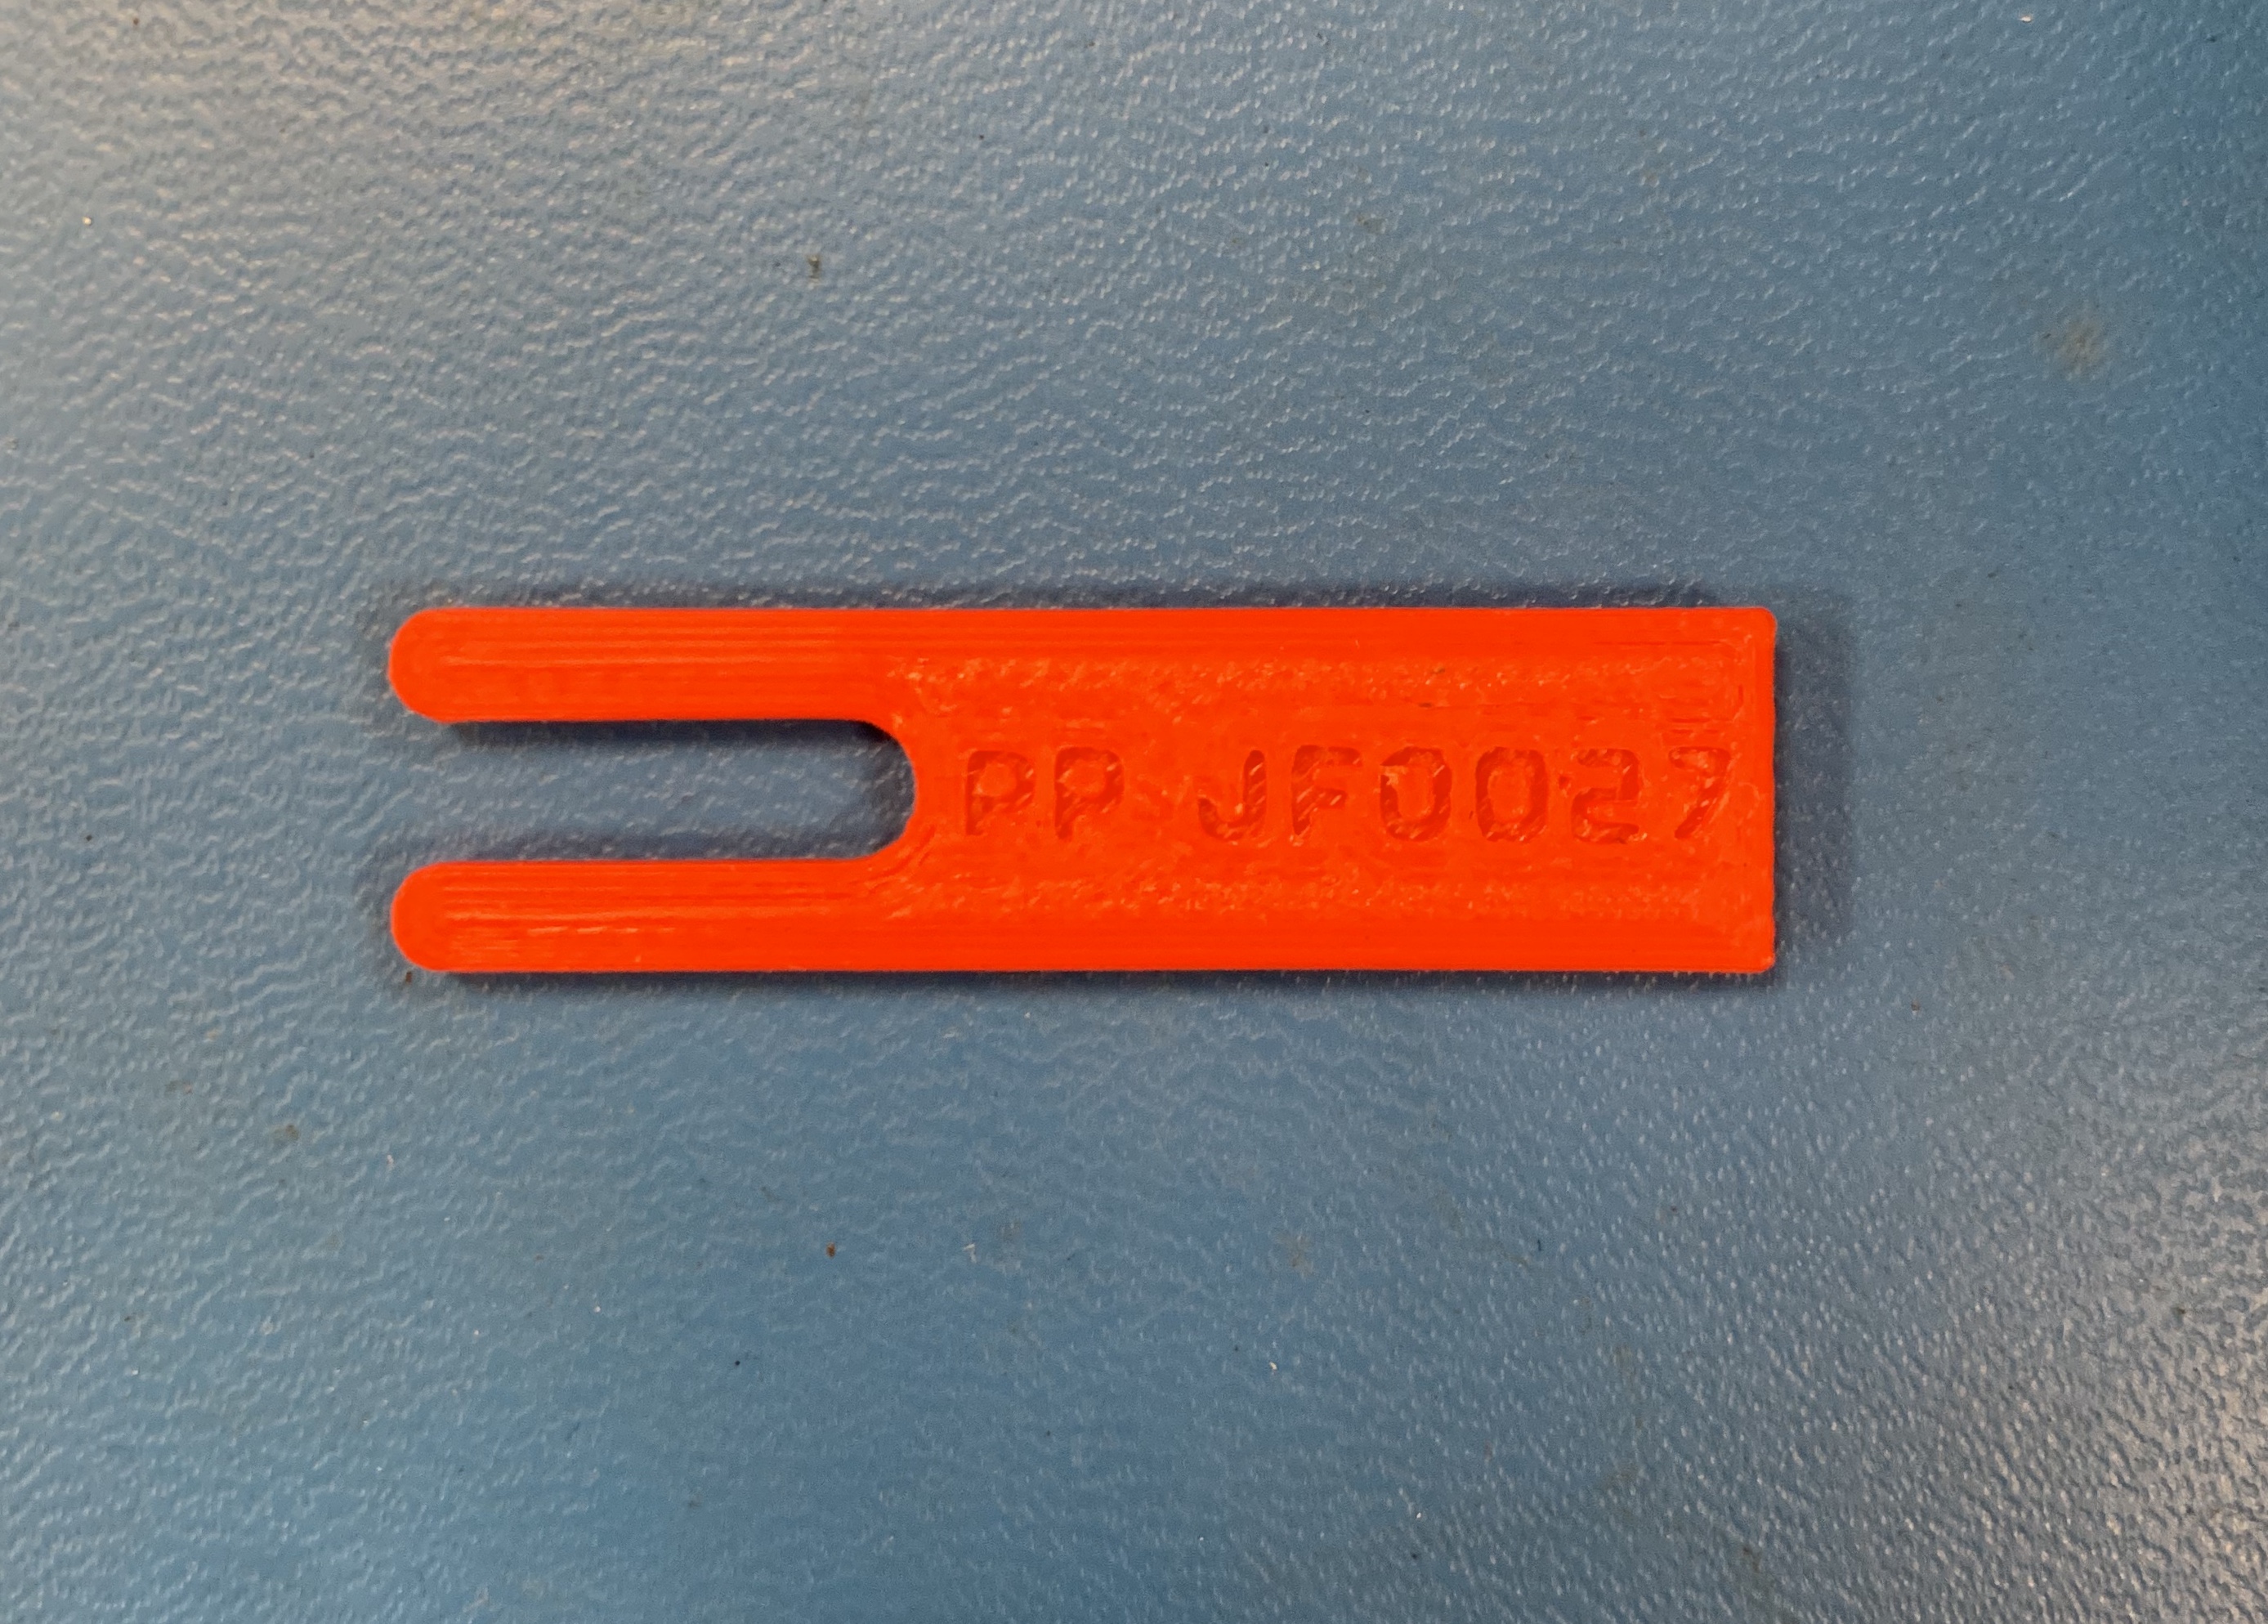
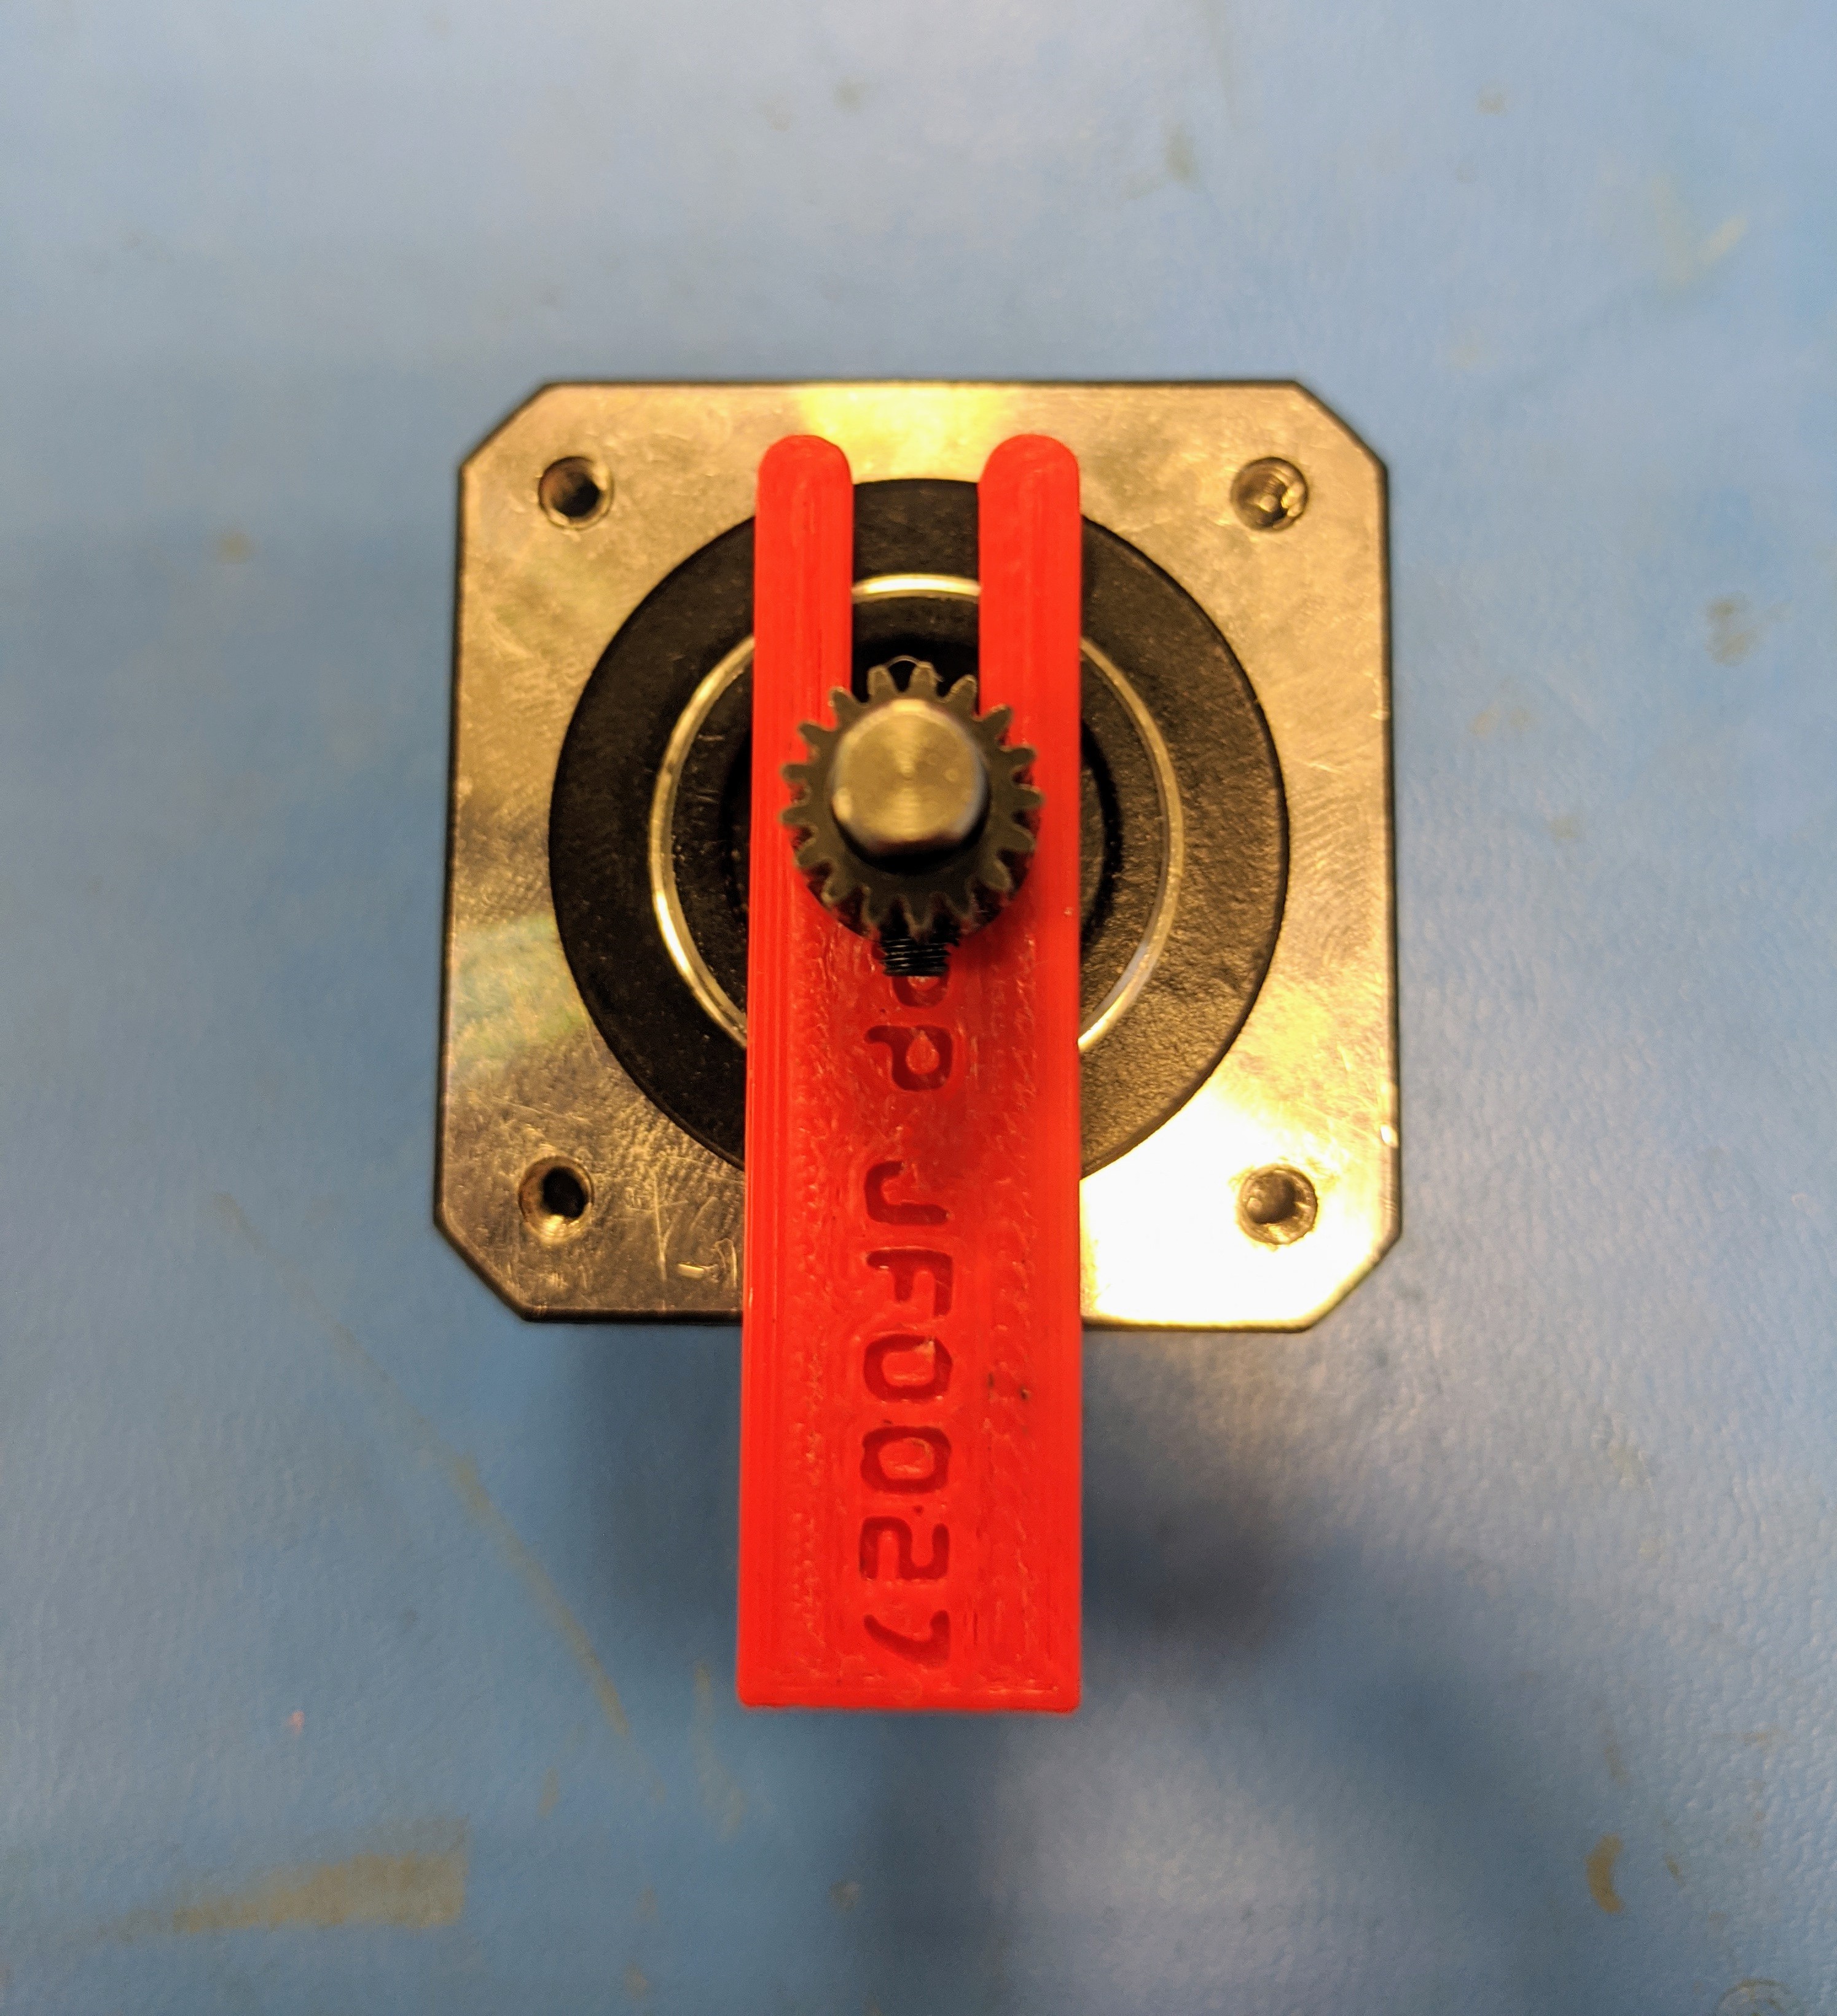
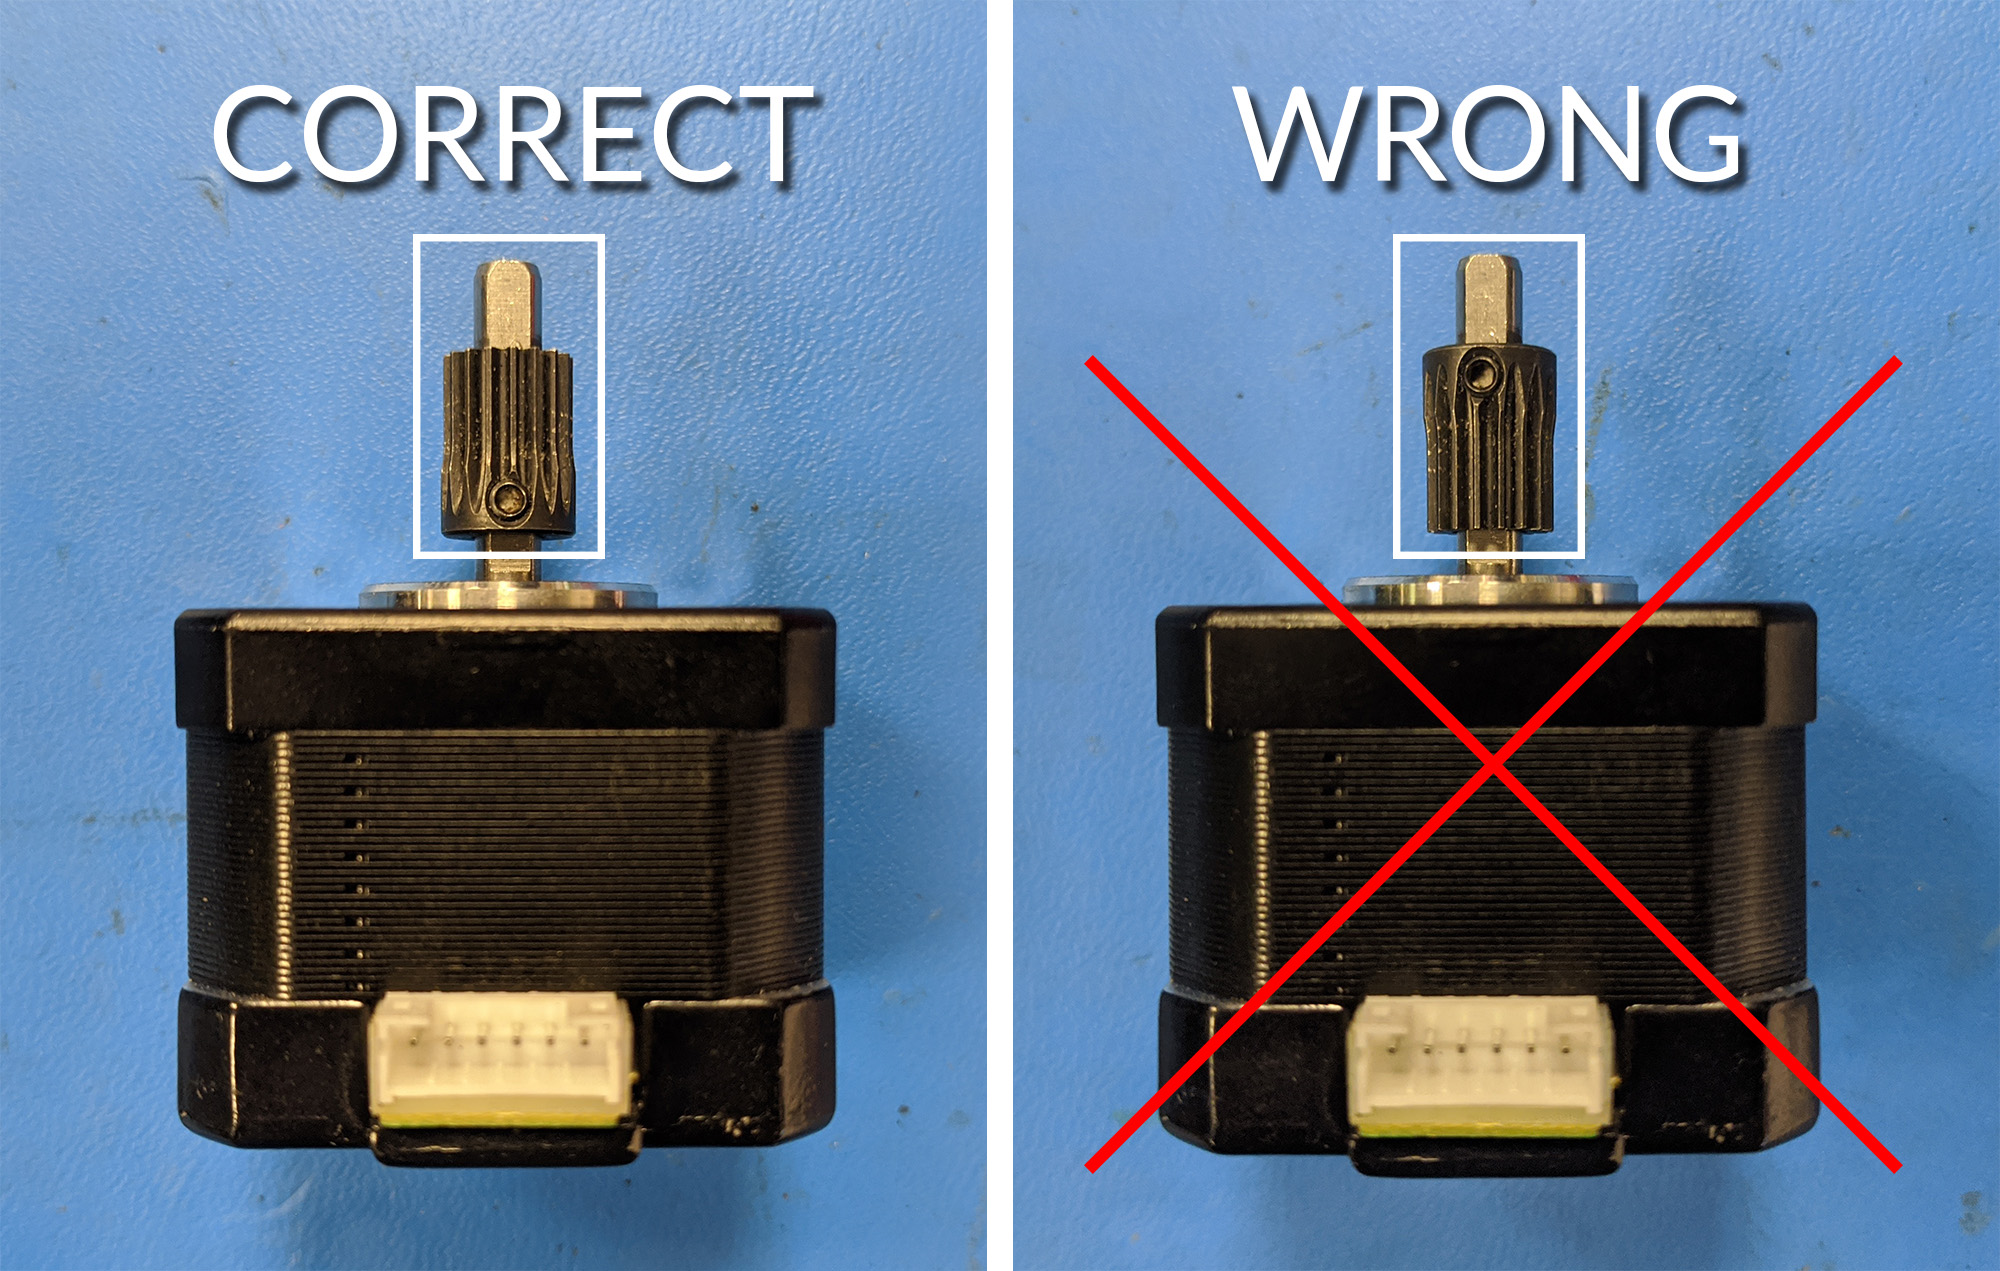
Place M175 Extruder Gear Spacing Jig [PP-JF0027] on the face of the stepper motor. Then, place the Drive Gear [HD-MS0576] onto the shaft of the motor. It is important that the set screw is on the flat side of the shaft, and directed away from the motor as shown. Apply Blue Loctite and torque the set screw to 3 in*lbs
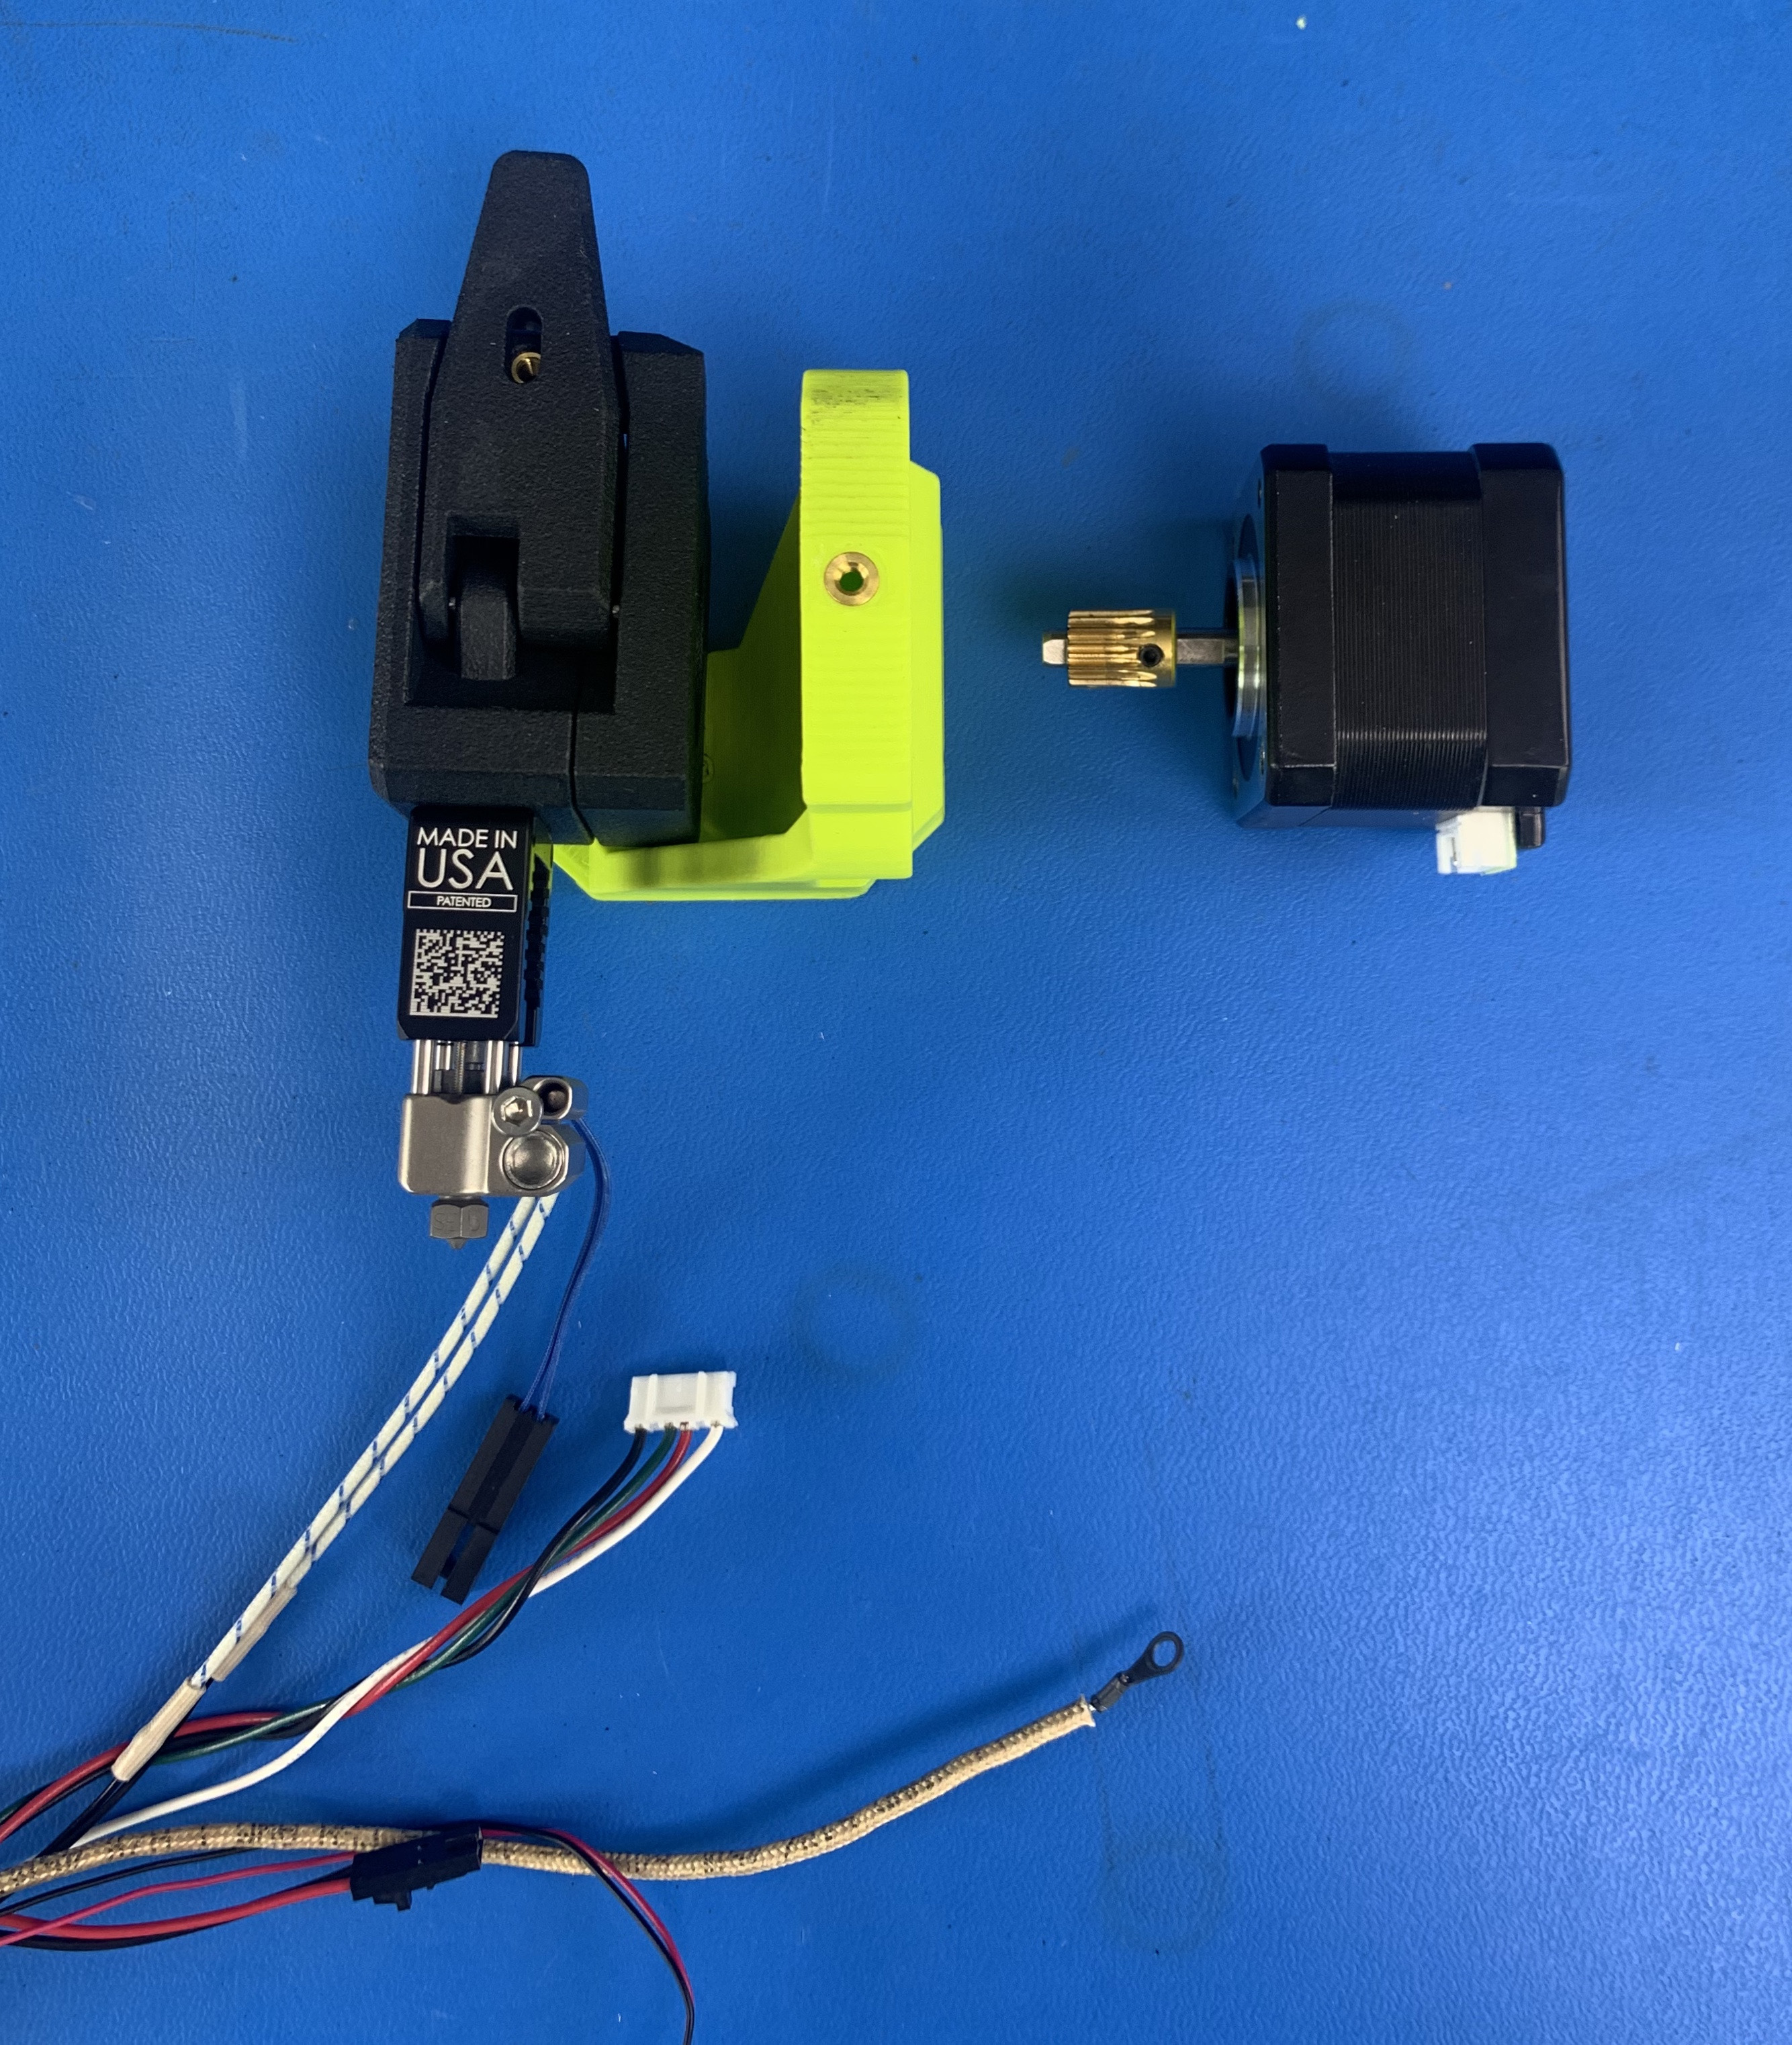
Place the Hotend Assembly [PP-MP0290], the M175 Extruder Mount [PP-GP0491], and the Stepper Motor [EL-MT0069] with Drive Gear [HD-MS0576] in the order and orientation shown. Fit the extruder gear through the extruder mount and into the hotend assembly.
Install two M3 thread 45mm long screws [HD-BT0154] into the holes shown. Tighten screws to 5 in*lbs.
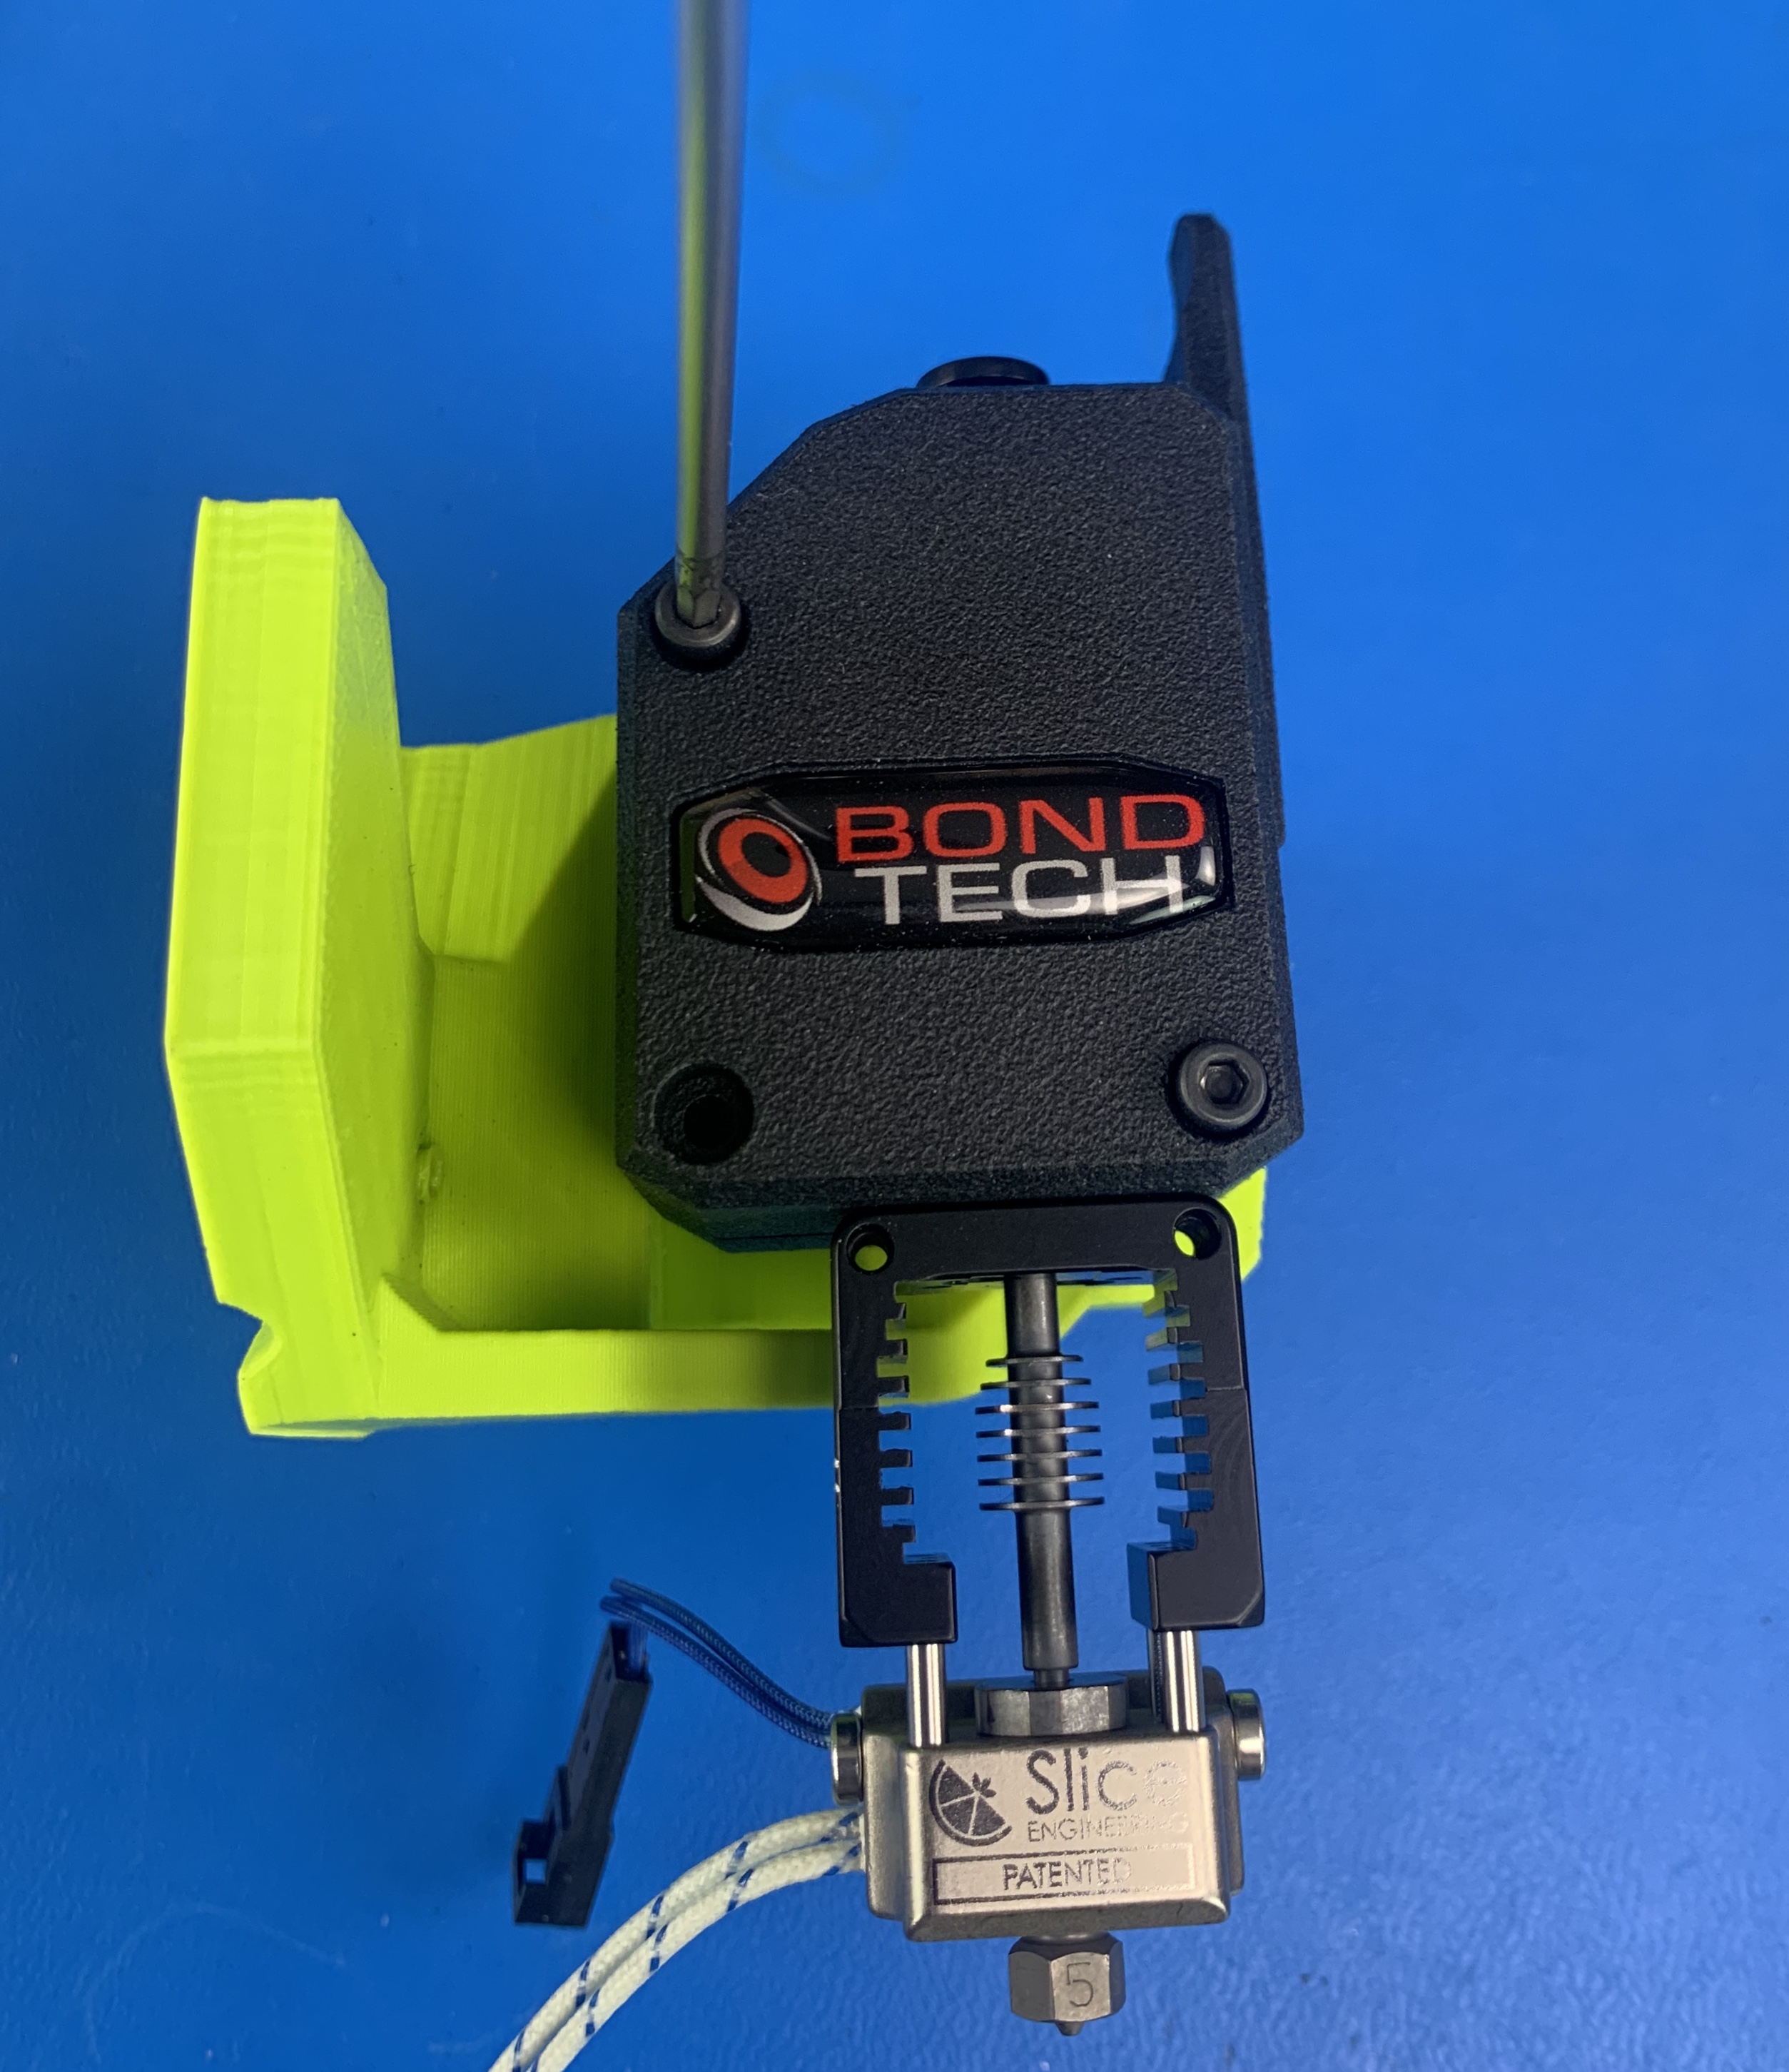
Place blower shroud [PP-GP0492] into the slot on the extruder mount.


Install one M3 thread 45mm long screw [HD-BT0154] into the hole shown. Tighten screw to 5 in*lbs.
Place two [HD-BT0261] M1.5 thread 16mm long screws through the heatsink fan in the orientation shown. Tighten the screws until they are hand tight.
Be sure the fan is in the correct orientation. The label should not be visible.
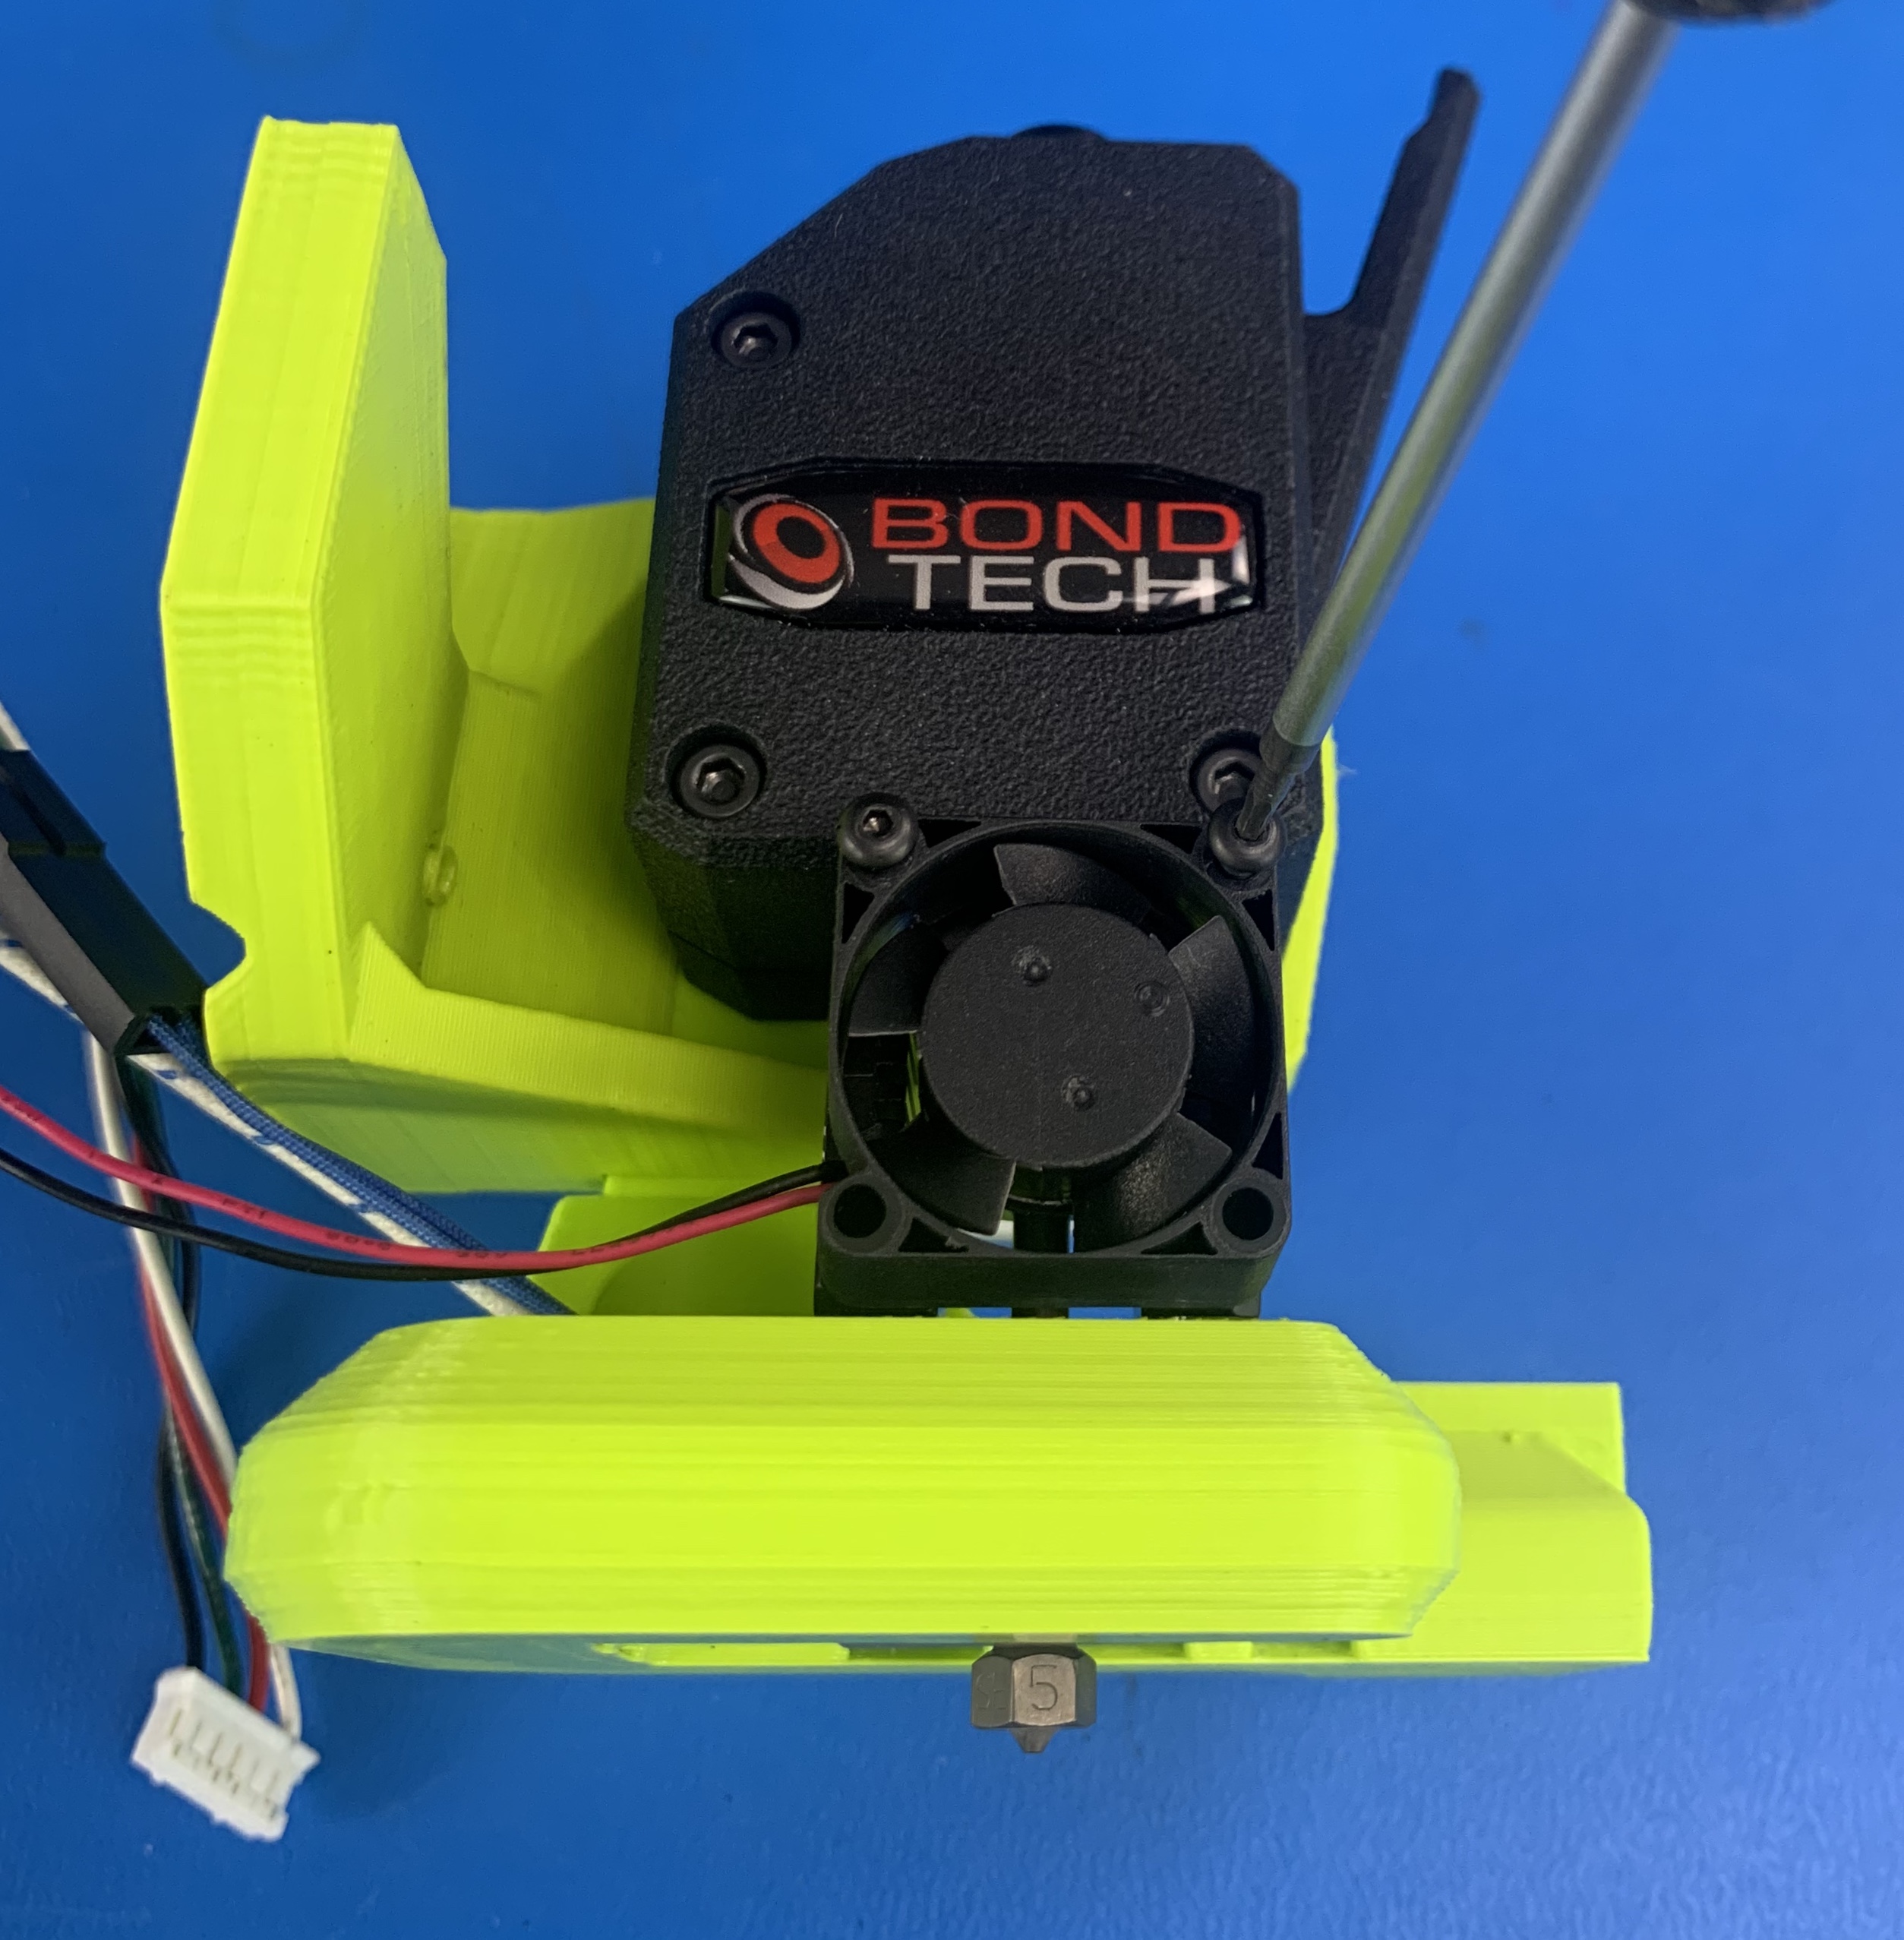
Connect the Thermistor harness [AS-CB0101] and the Thermistor [EL-TH0012] as shown

Using one M3 x20mm BHCS [HD-BT0171] and one M3 washer [HD-WA0038], install the blower fan as shown. Route the wires along the motor connection.
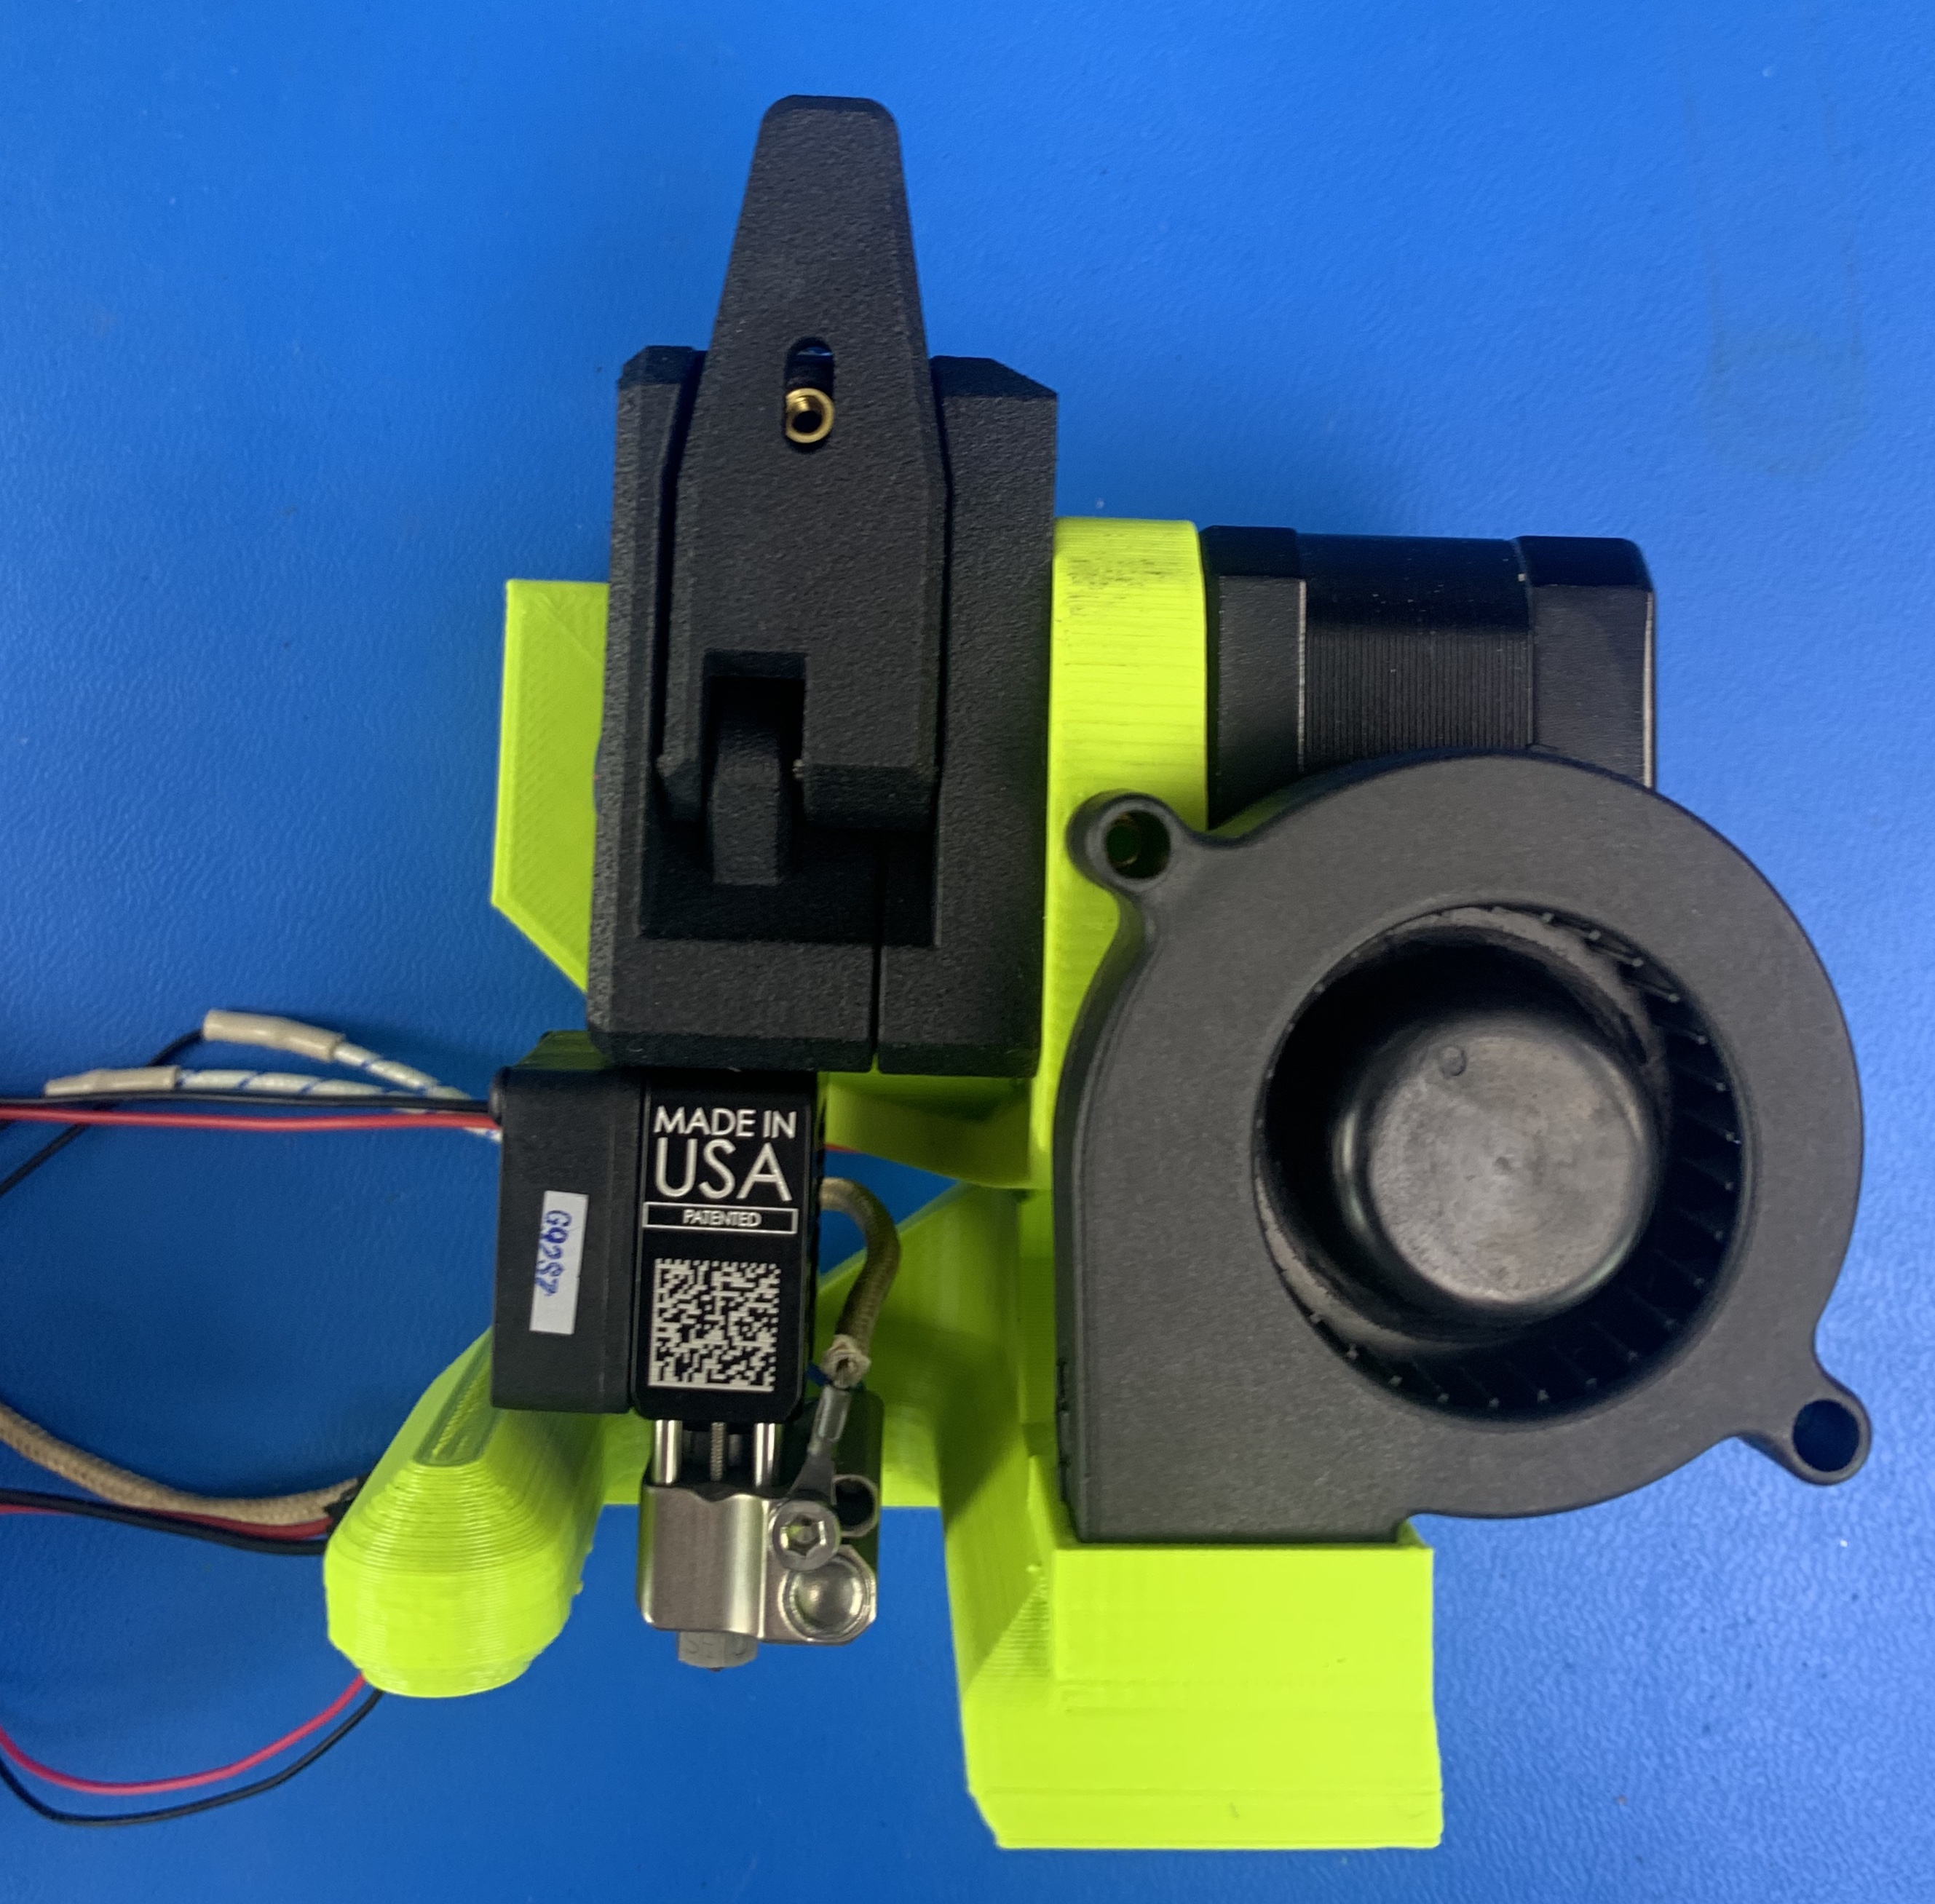

Connect the Extruder Motor Harness [AS-CB0106] to the Stepper Motor [EL-MT0069] as shown.

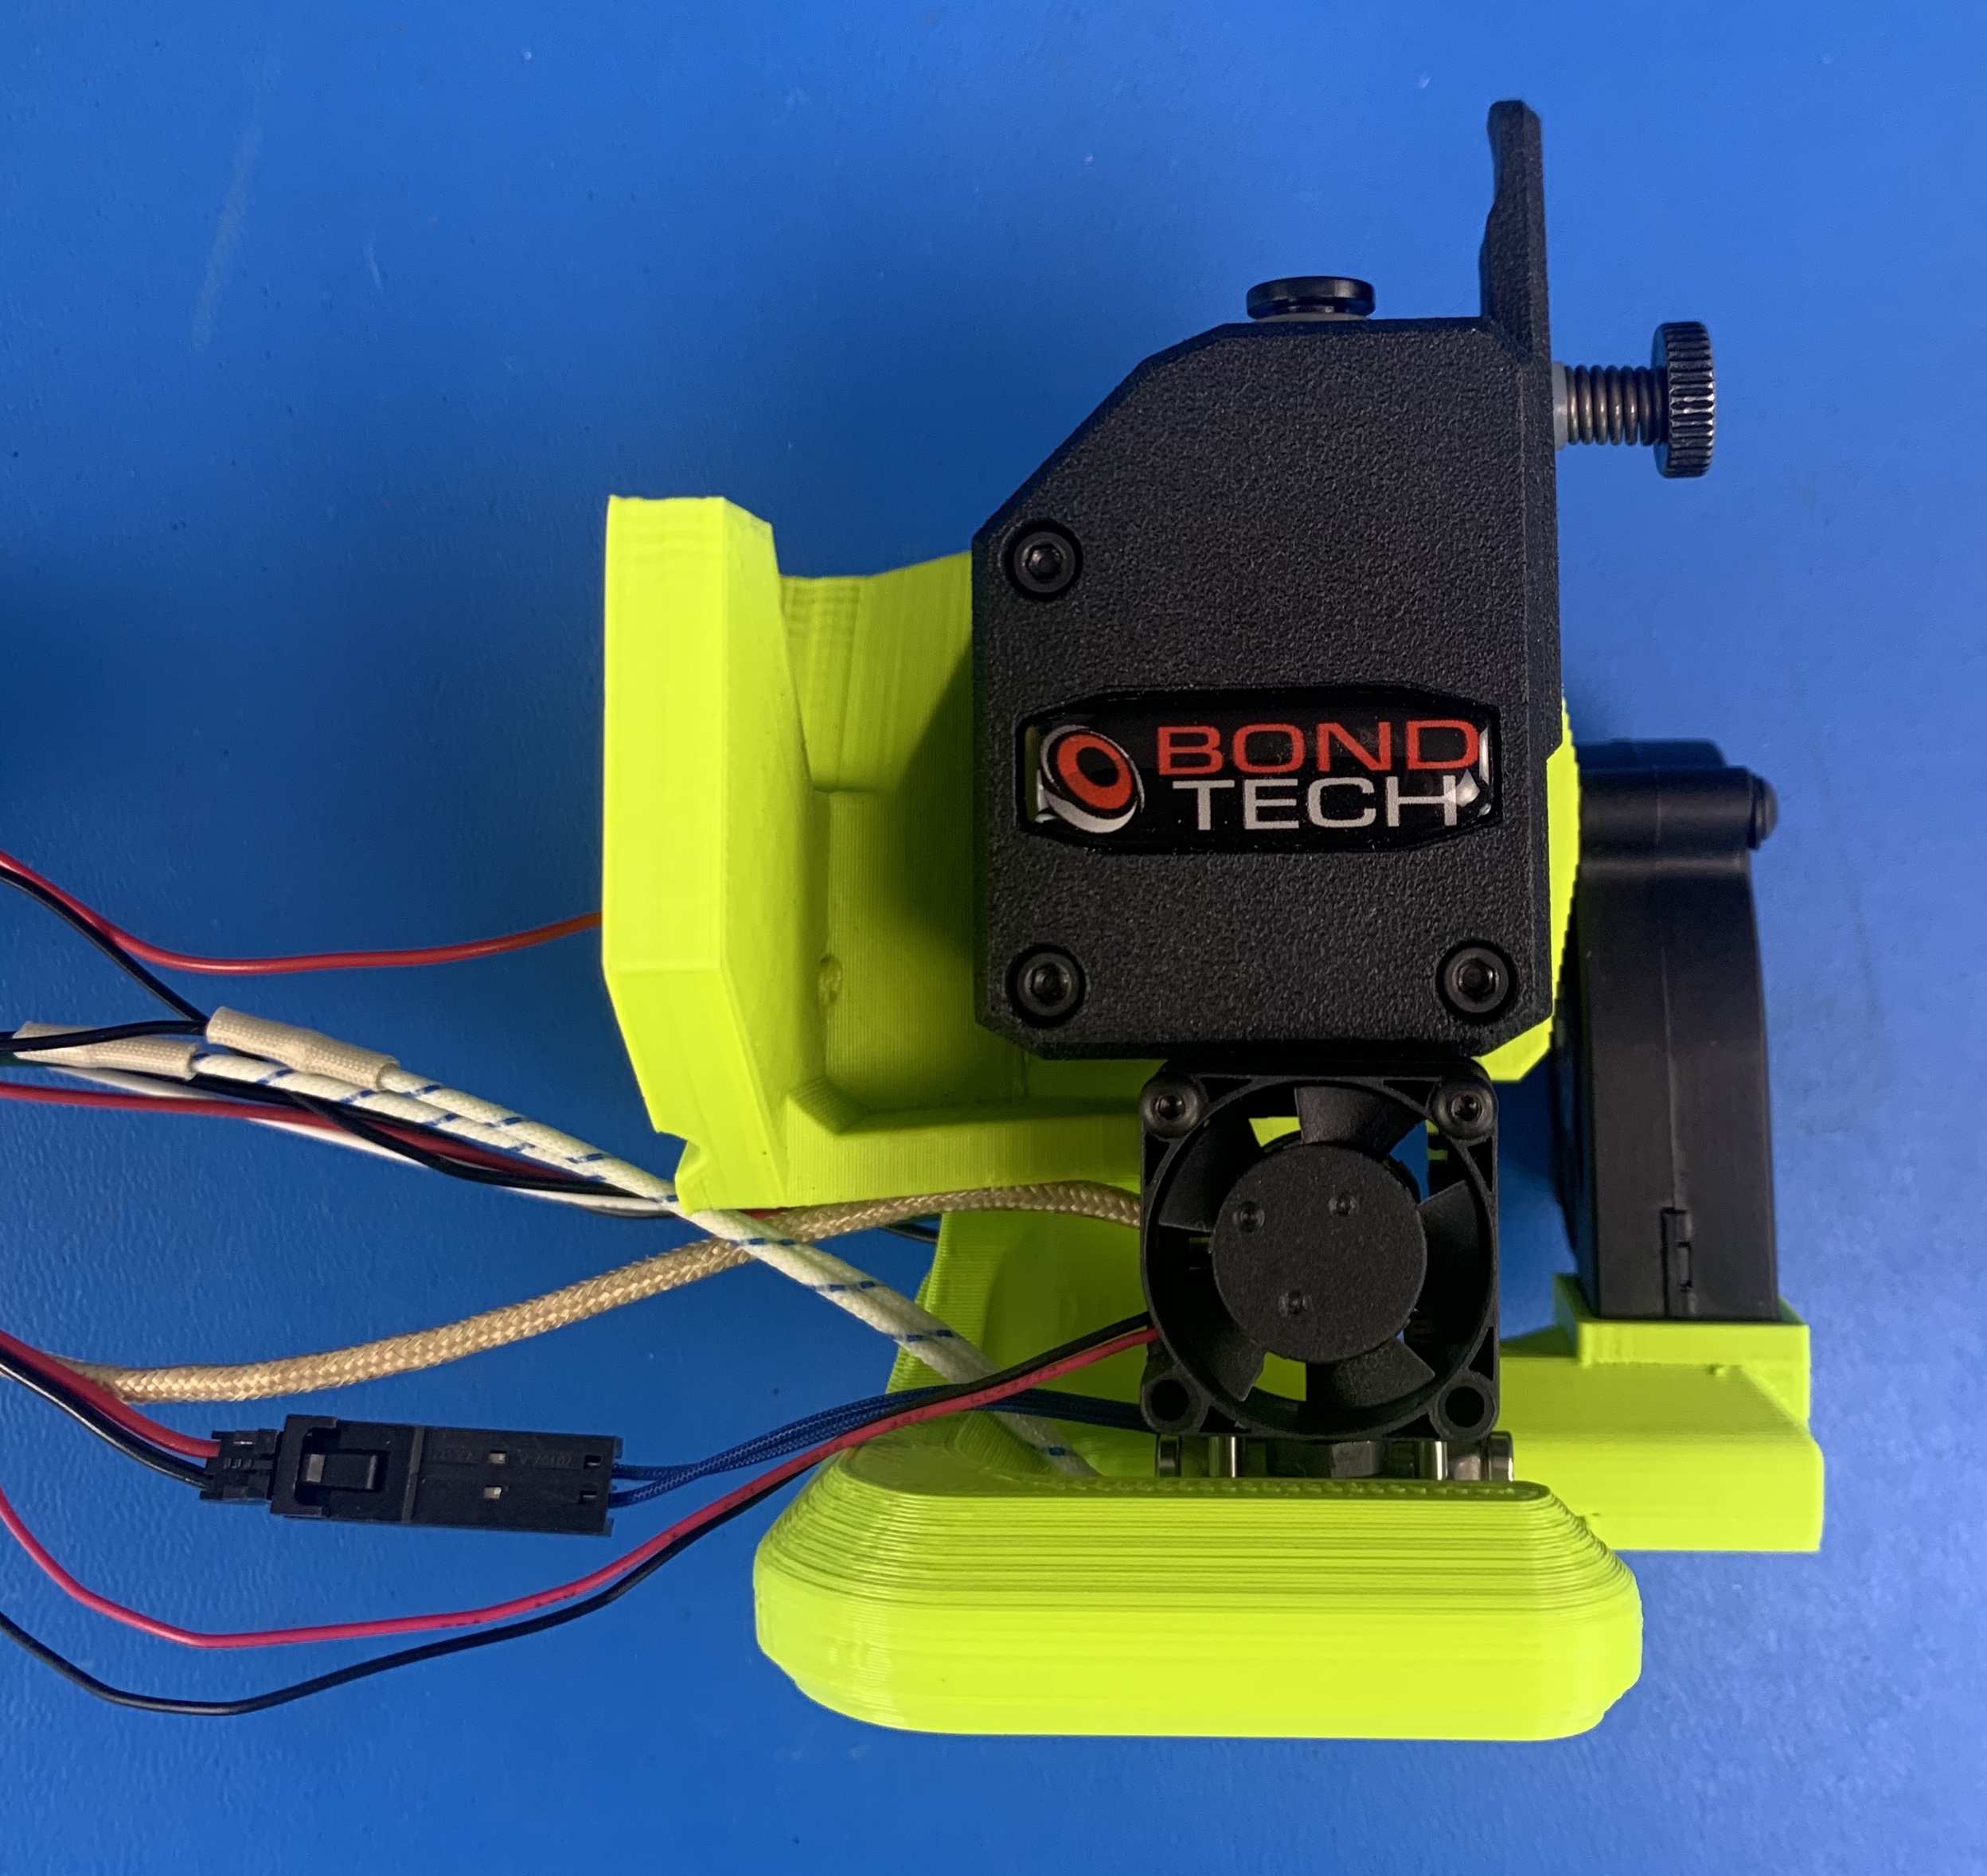
Secure Thumbscrew Assembly [HD-MS0575] until spring is compressed as shown in the picture.
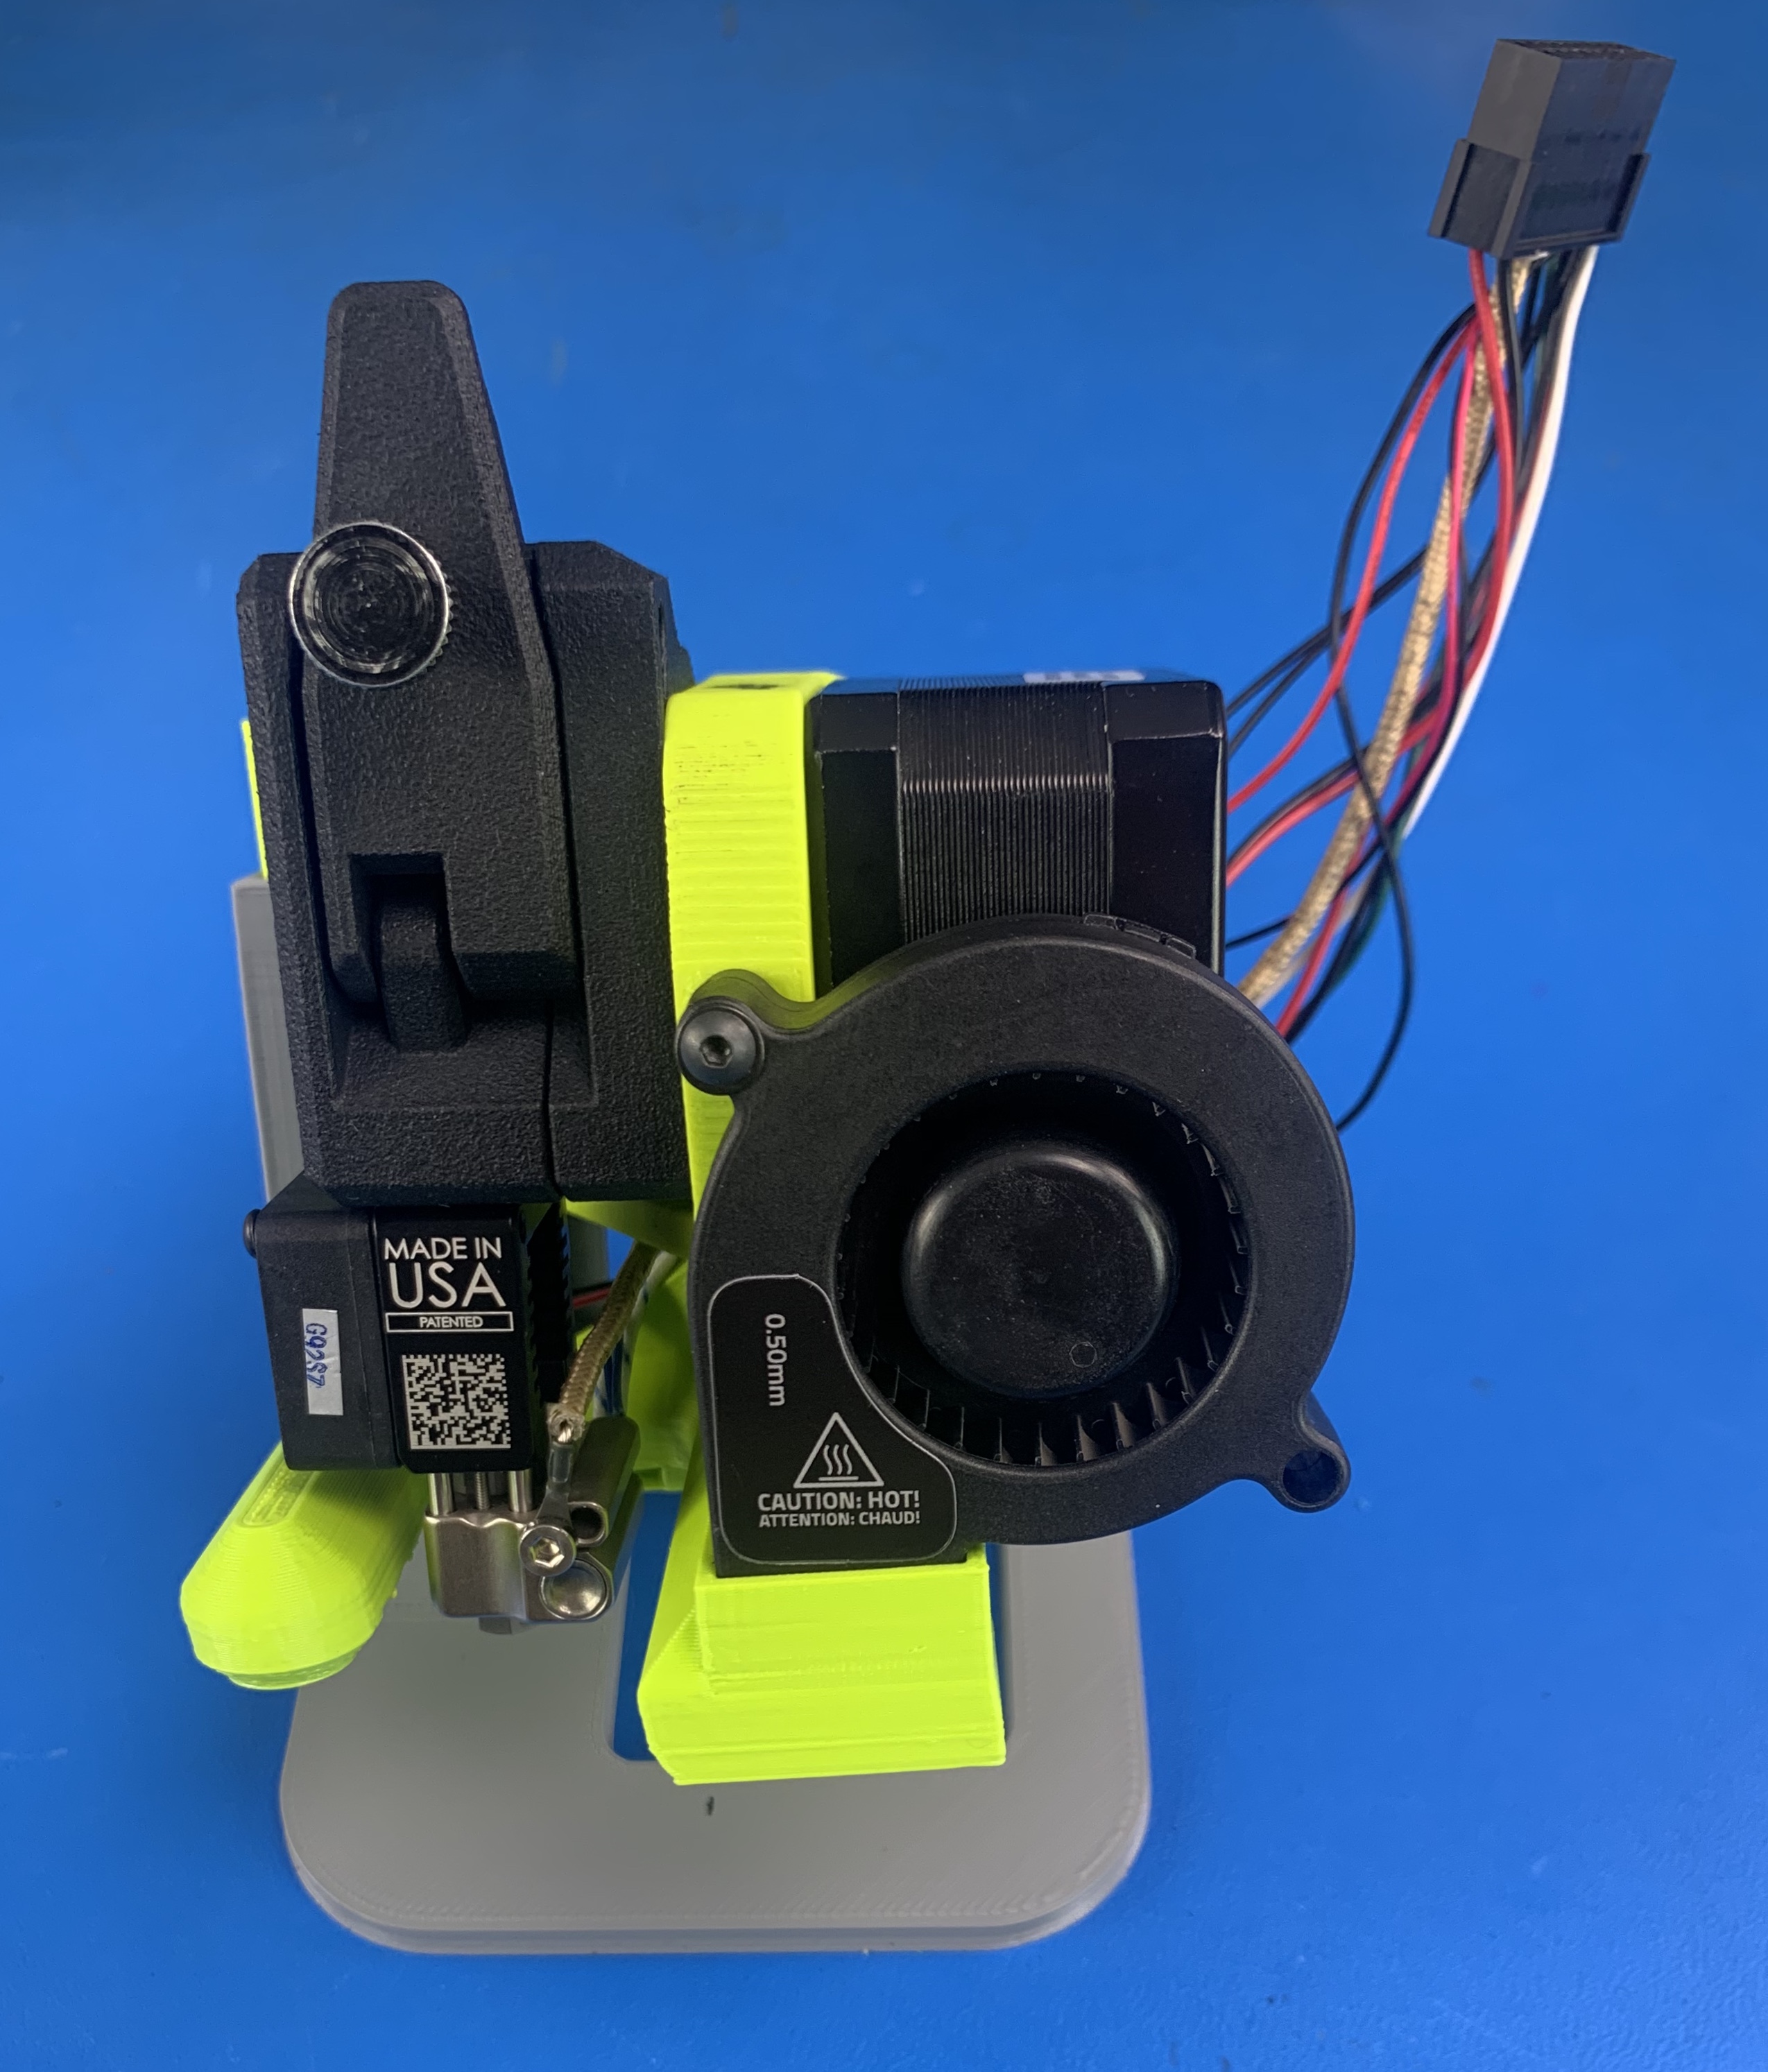
Apply 1x- [DC-LB0155] 0.5mm "Hot" Warning Sticker to the blower fan as pictured.
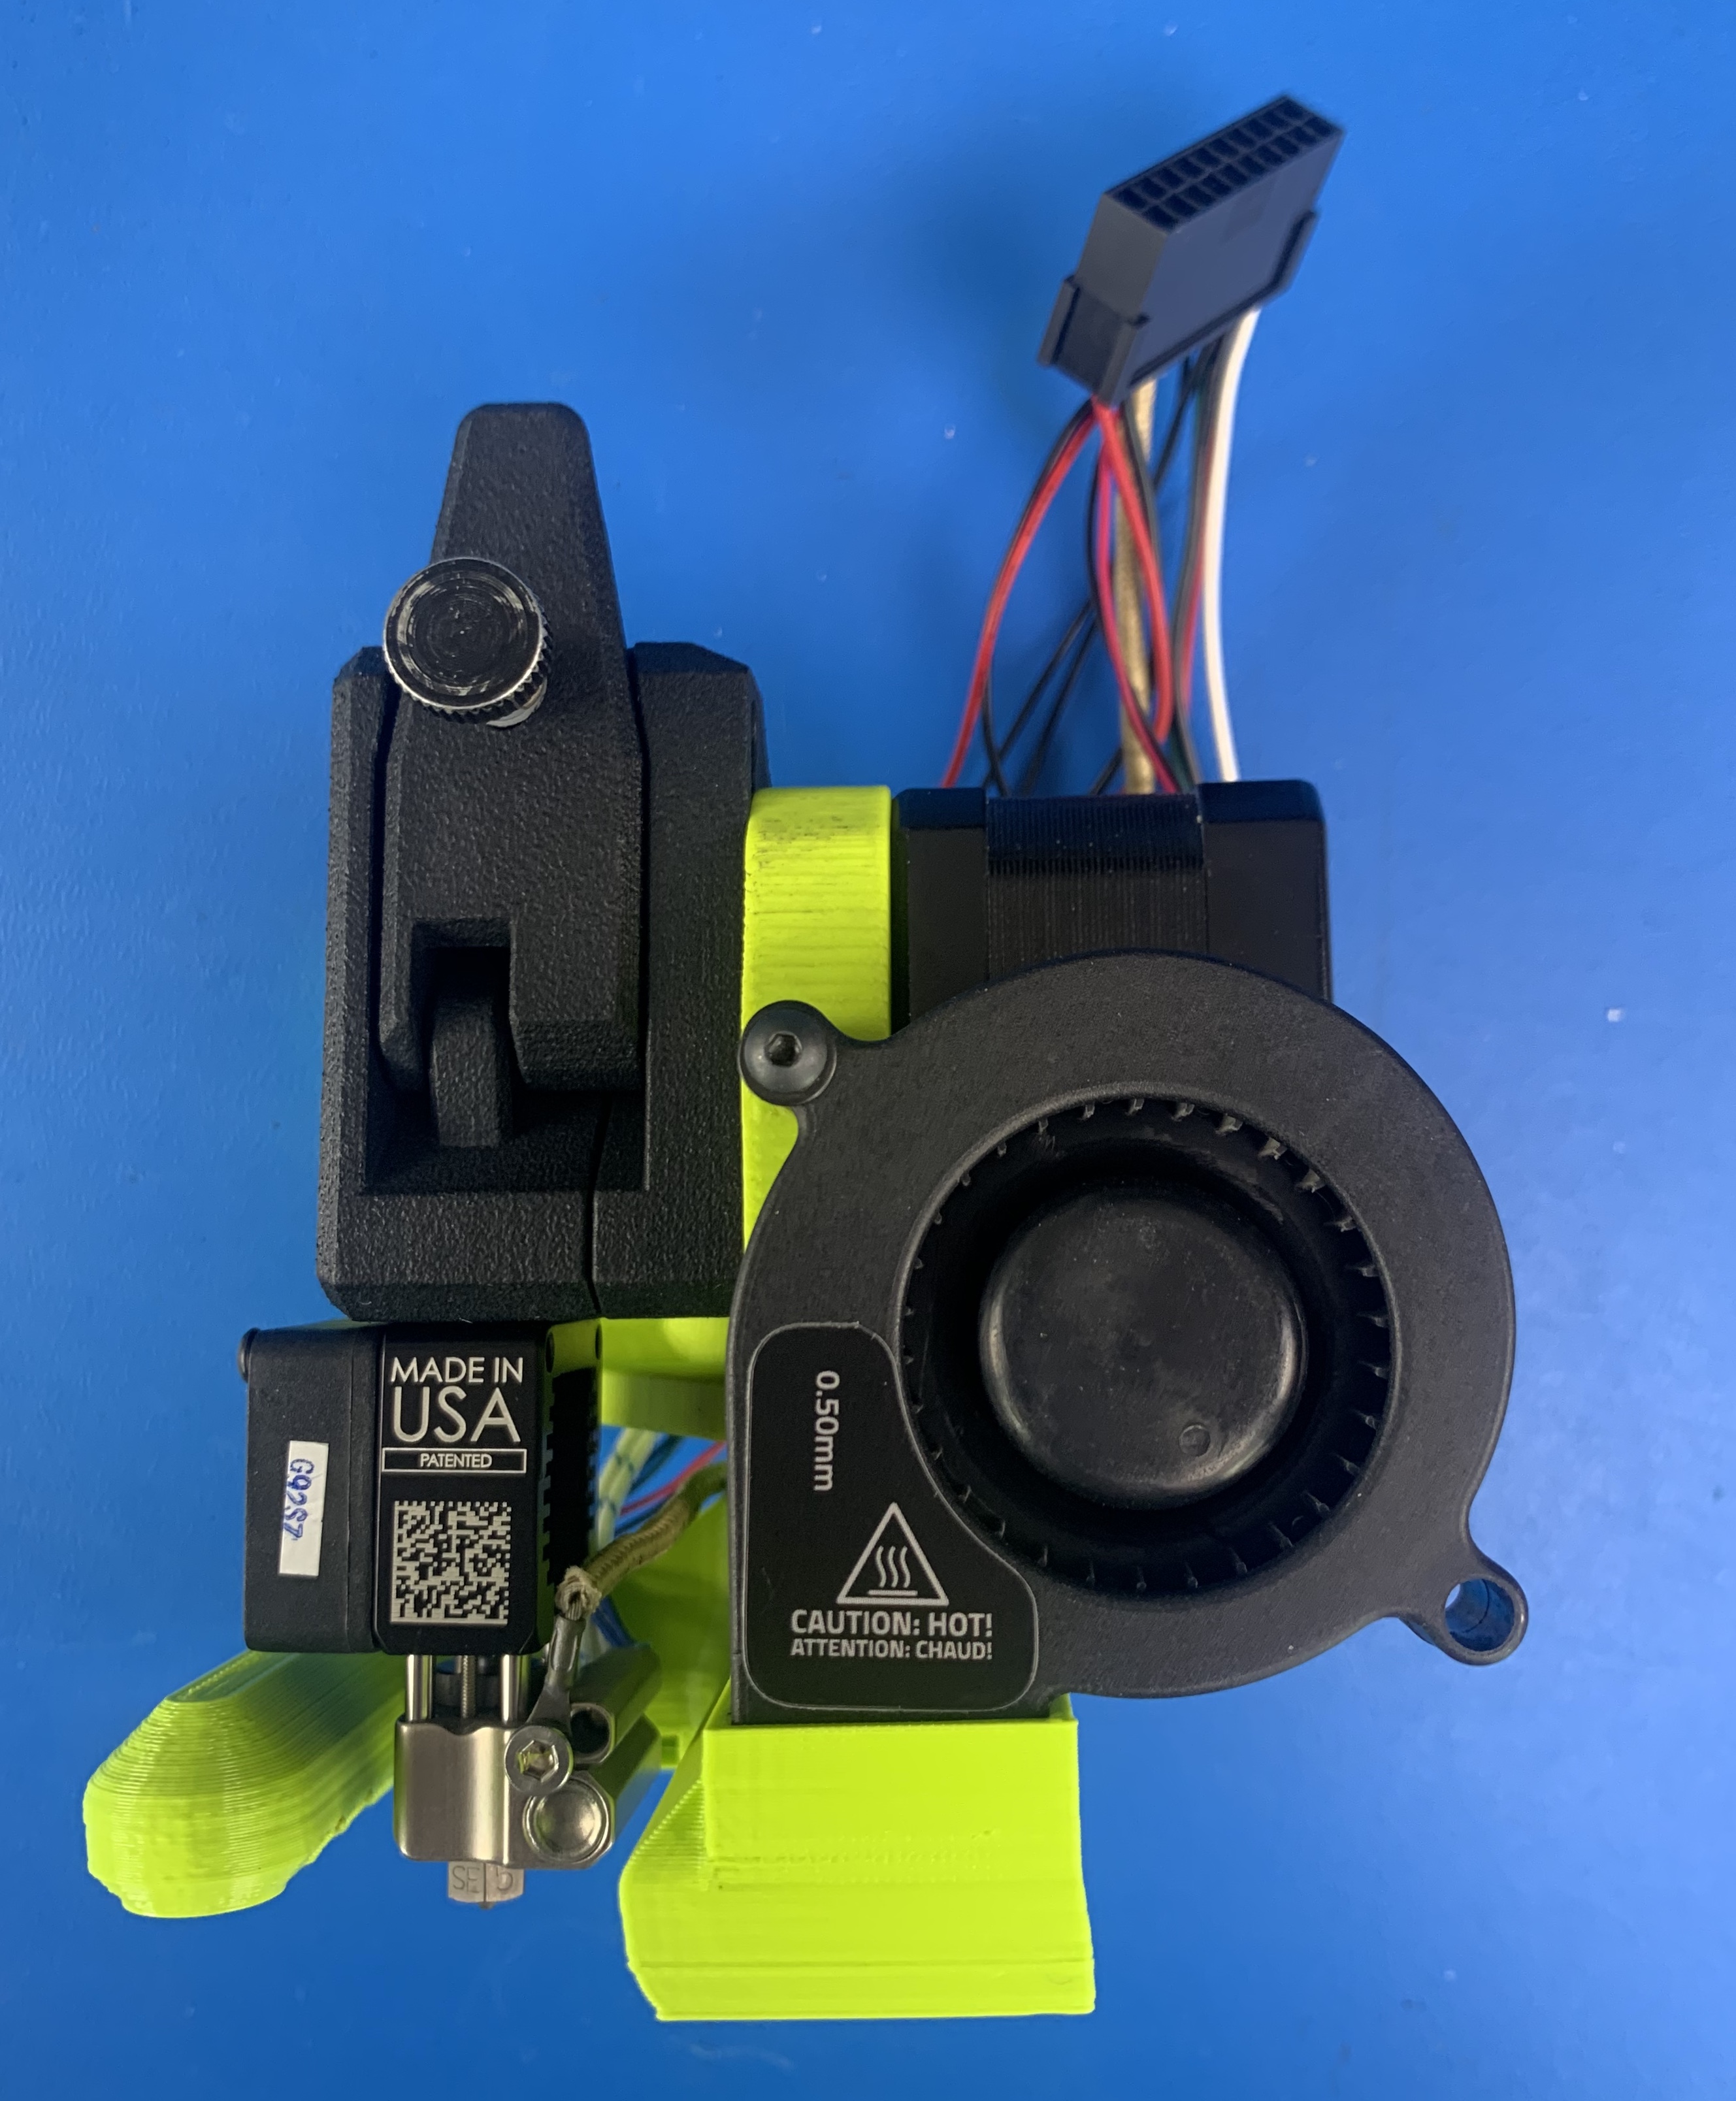
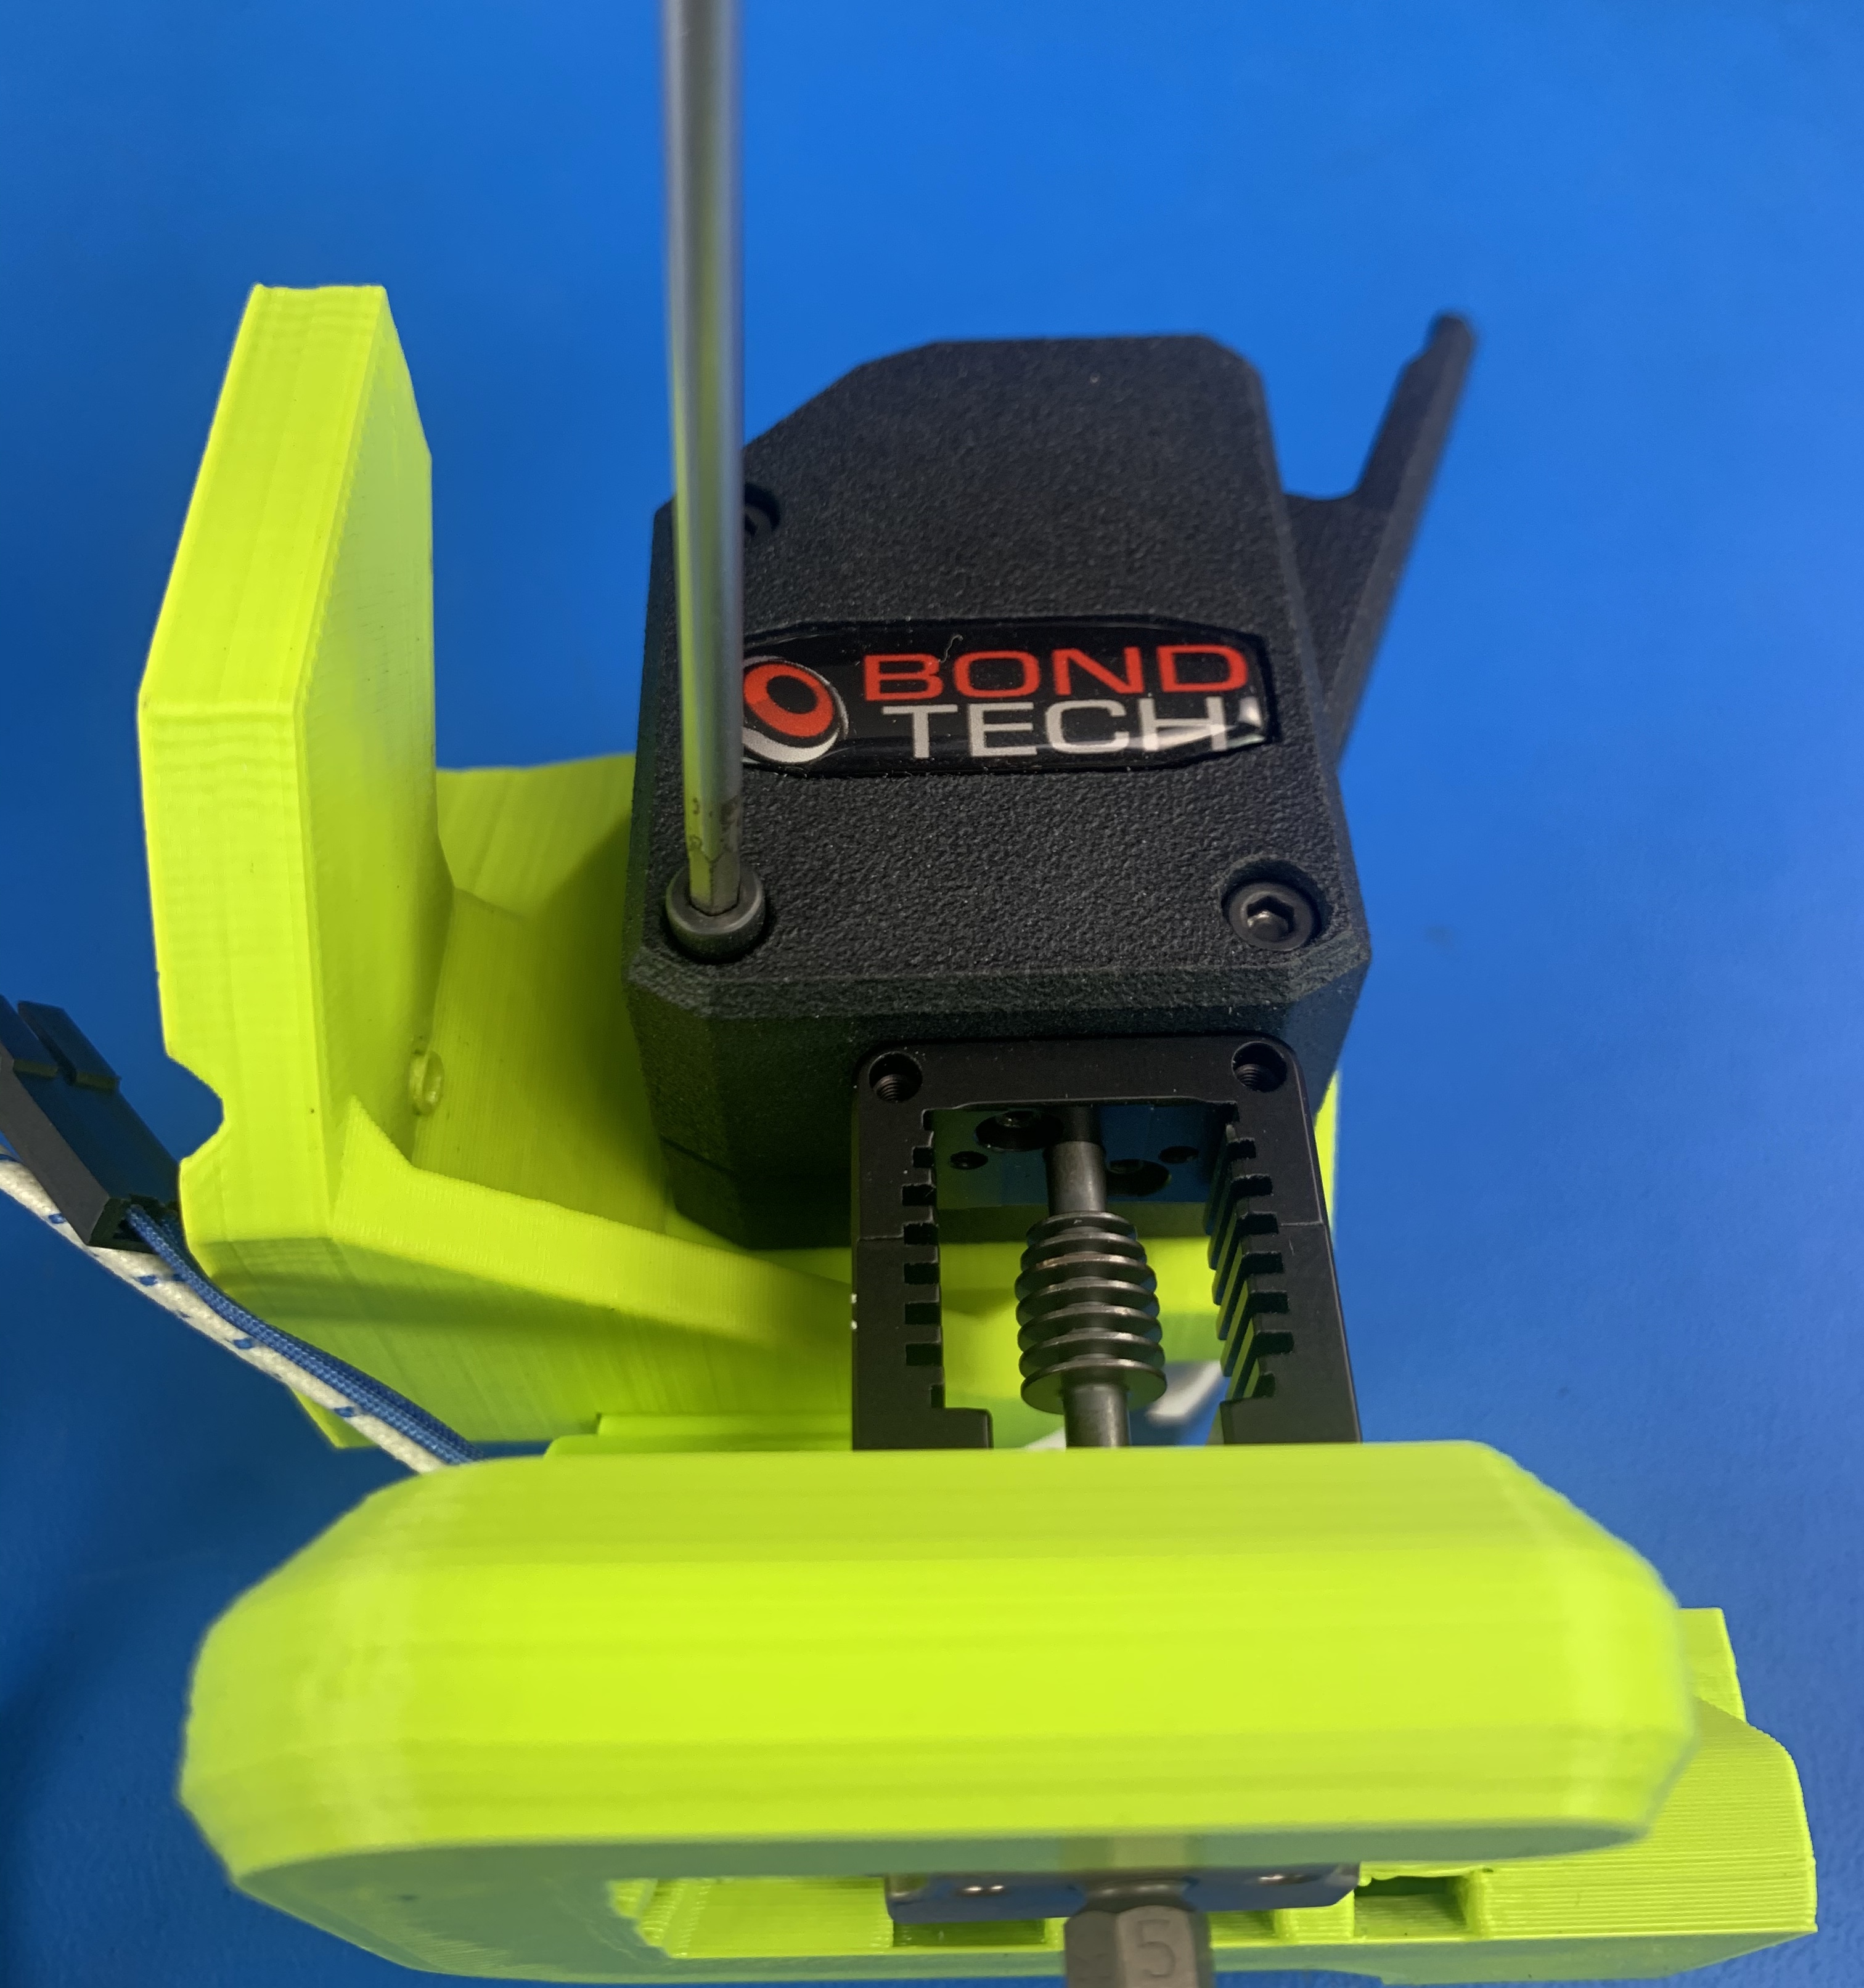
Ensure your finished M175 toolhead looks like the picture shown