Open HardwareAssembly Instructions
Guides for installation and assembly of the LulzBot line of products made by FAME 3D LLC.
Guides for installation and assembly of the LulzBot line of products made by FAME 3D LLC.
The LulzBot TAZ Workhorse/ TAZ 6 Filament Runout Sensor will catch the moment your print runs out of filament during a 3D print. This option will stop your print automatically until you can return to add more filament.
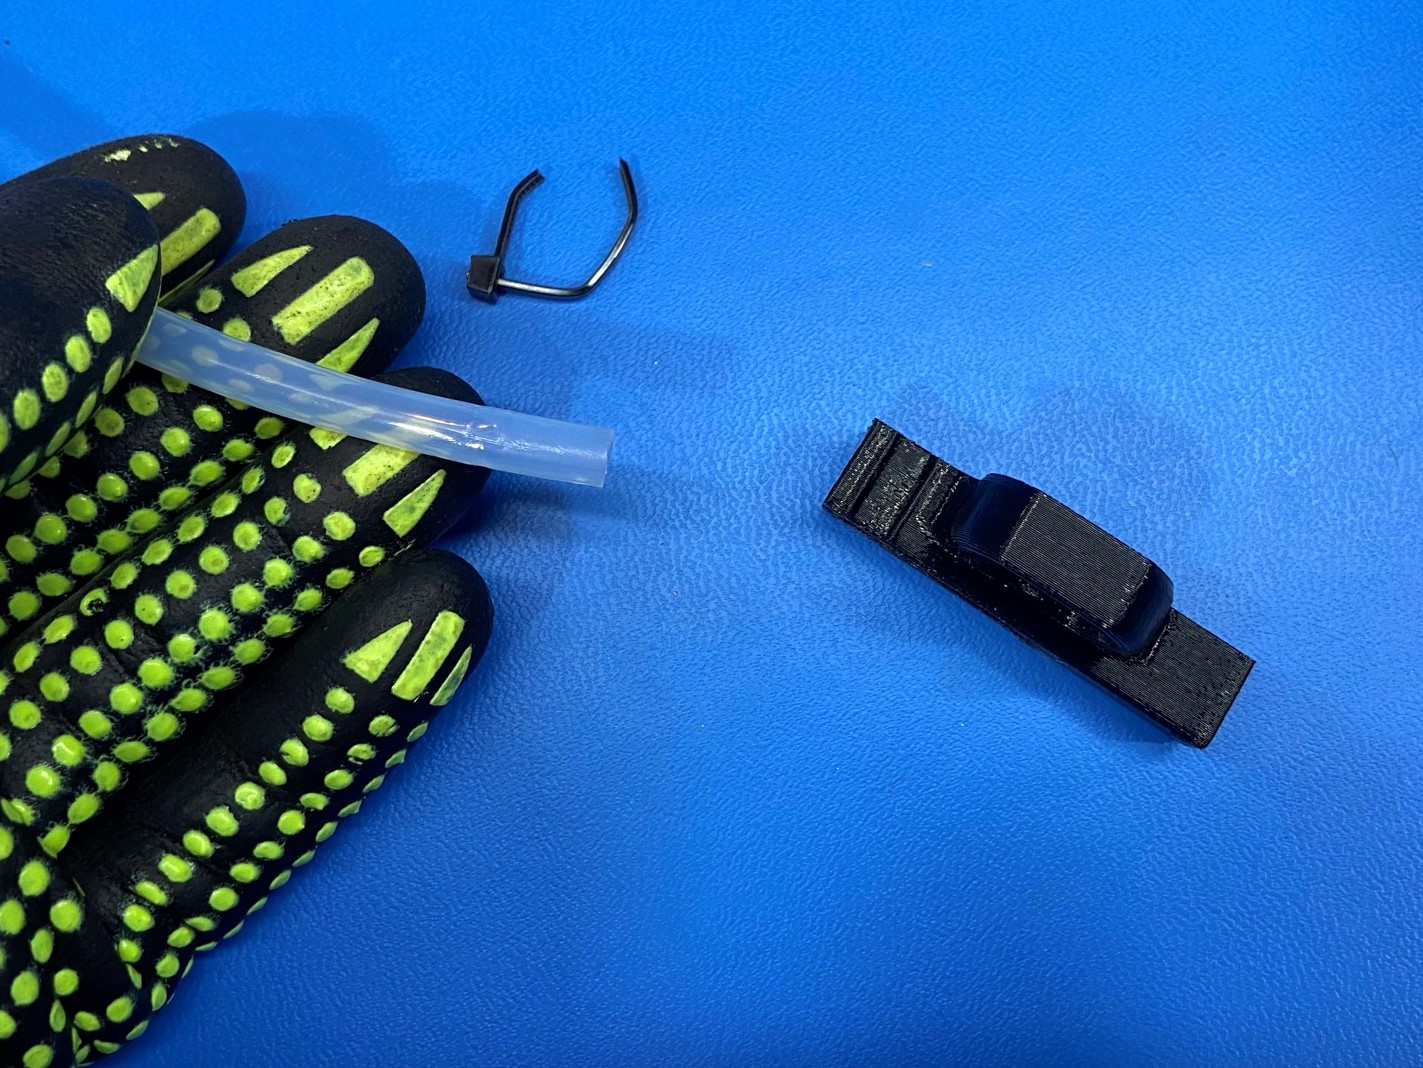
The items included for the installation of the TAZ 6/Workhorse Filament Runout Sensor:
Tools needed for the installation:
Note that you will need Cura LE version 3.6.33 or later to install the firmware required to enable the runout sensor.
See step 8.

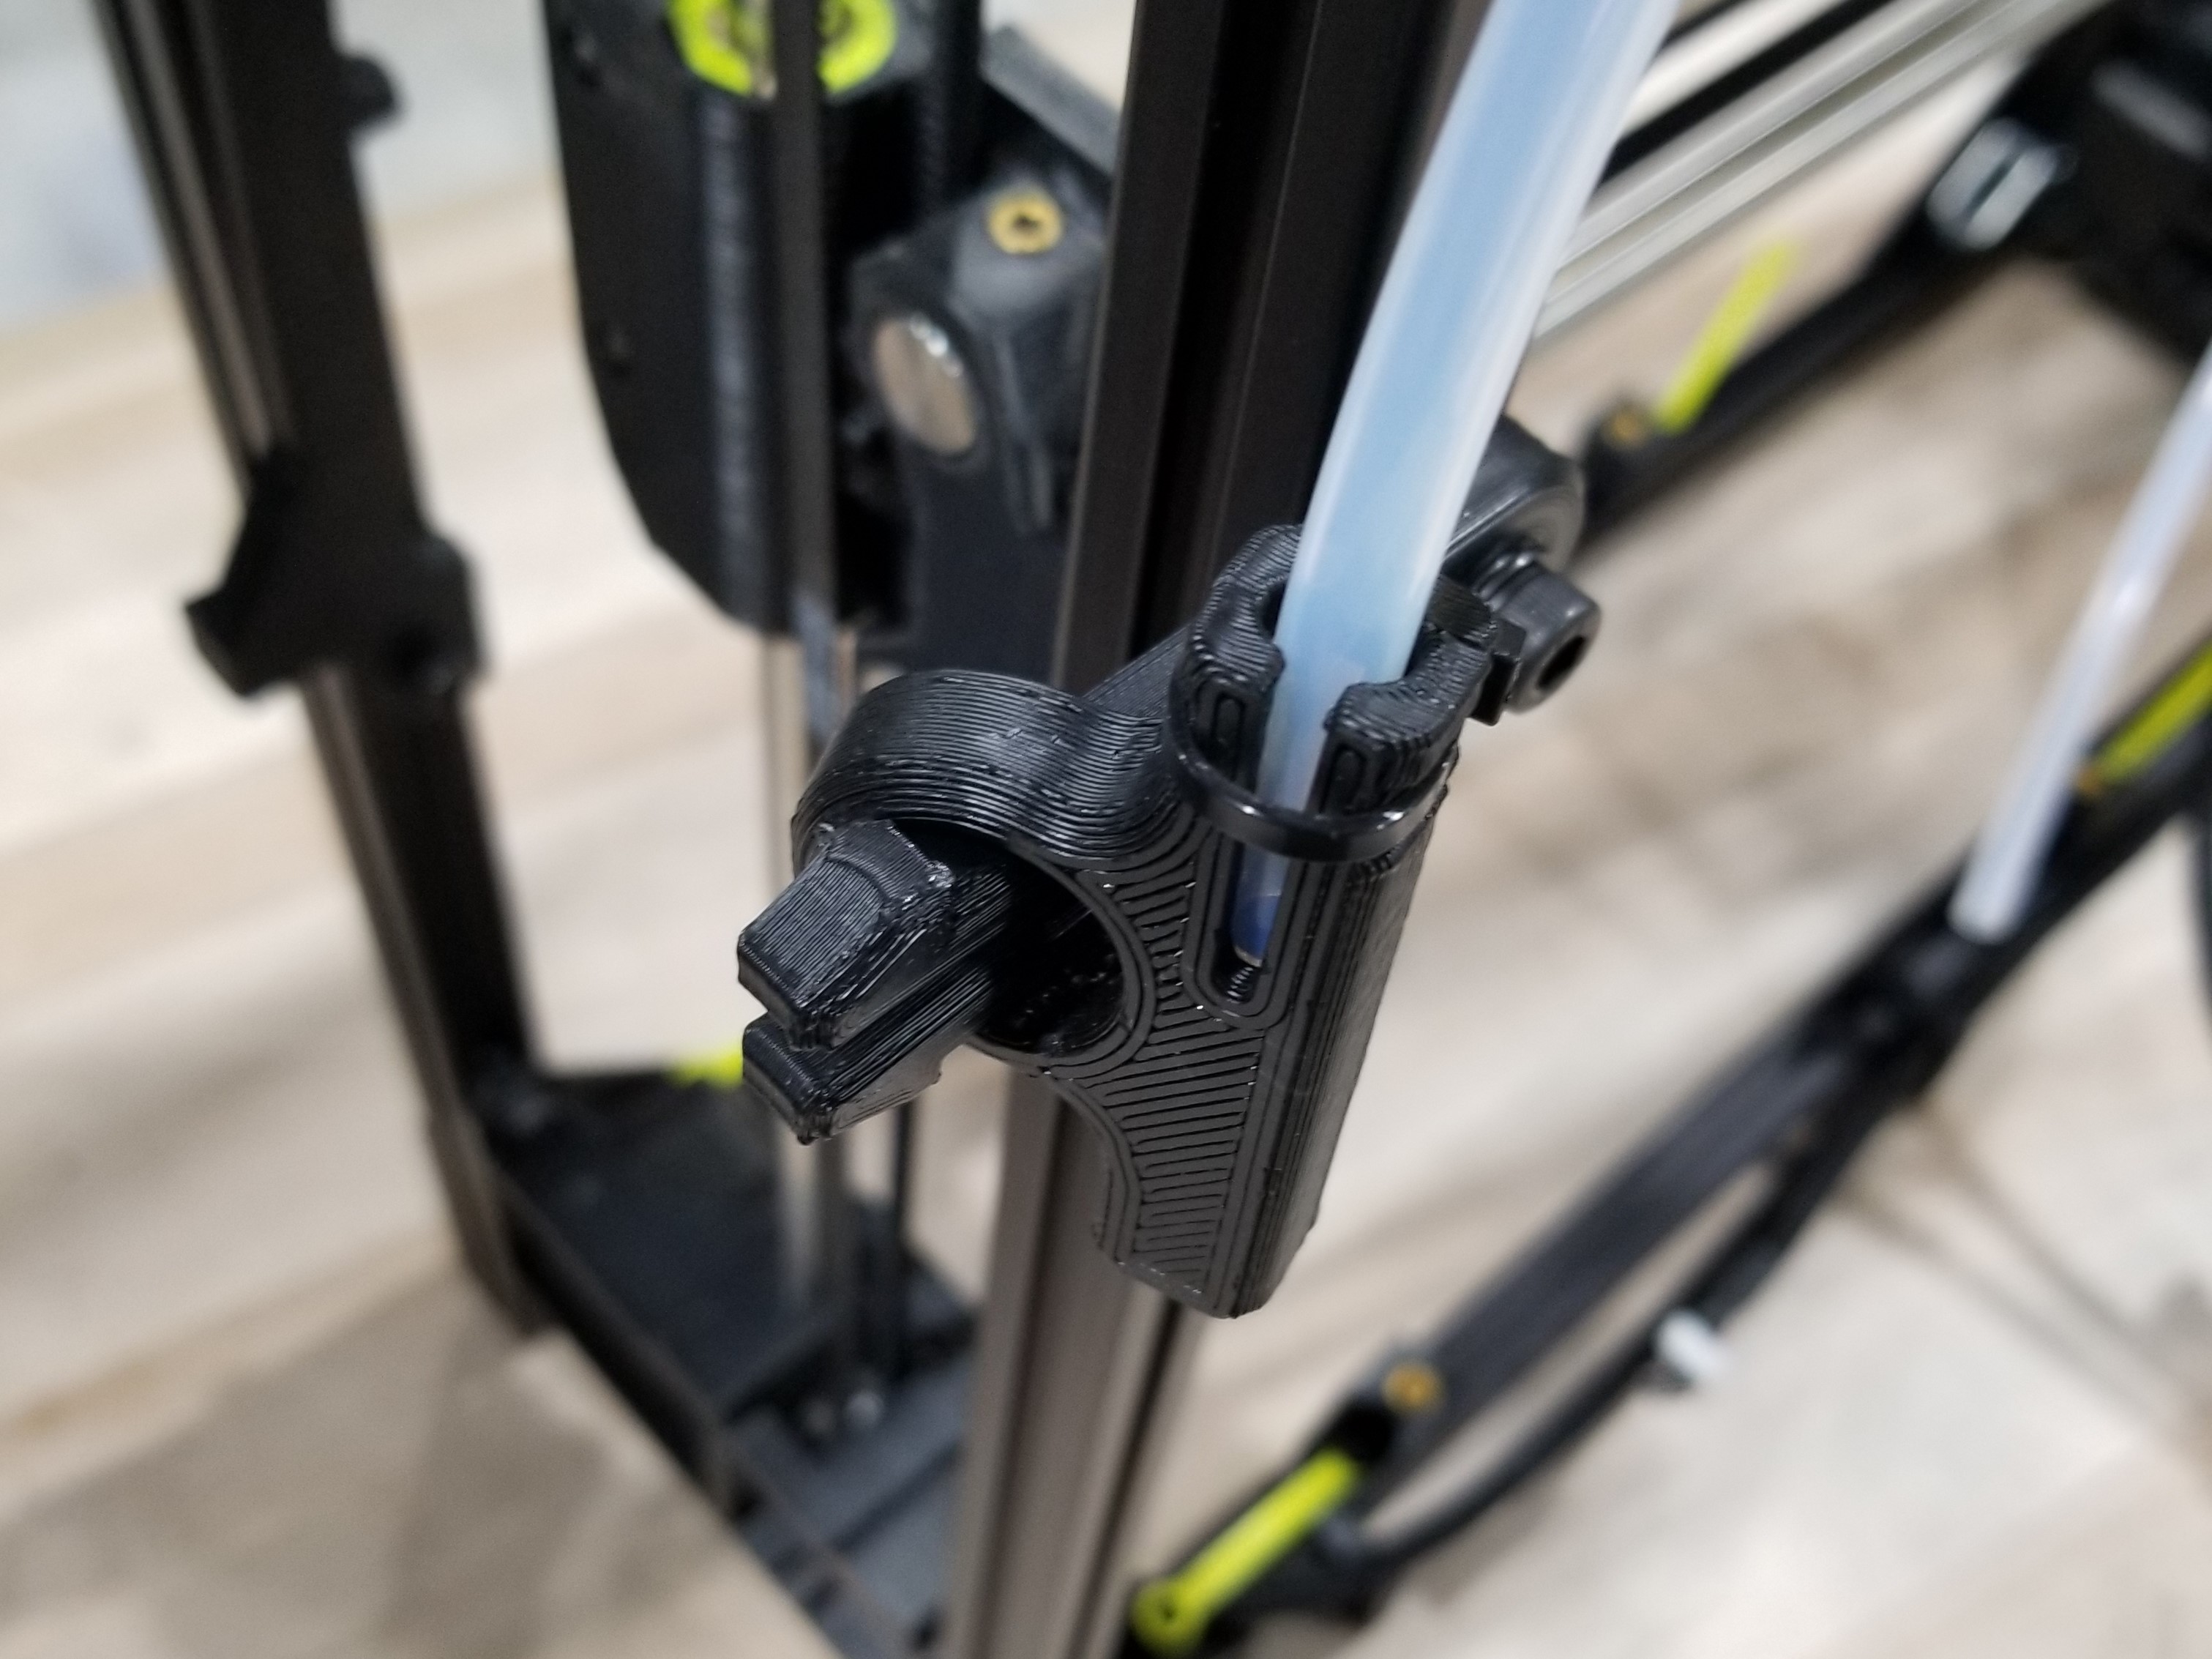
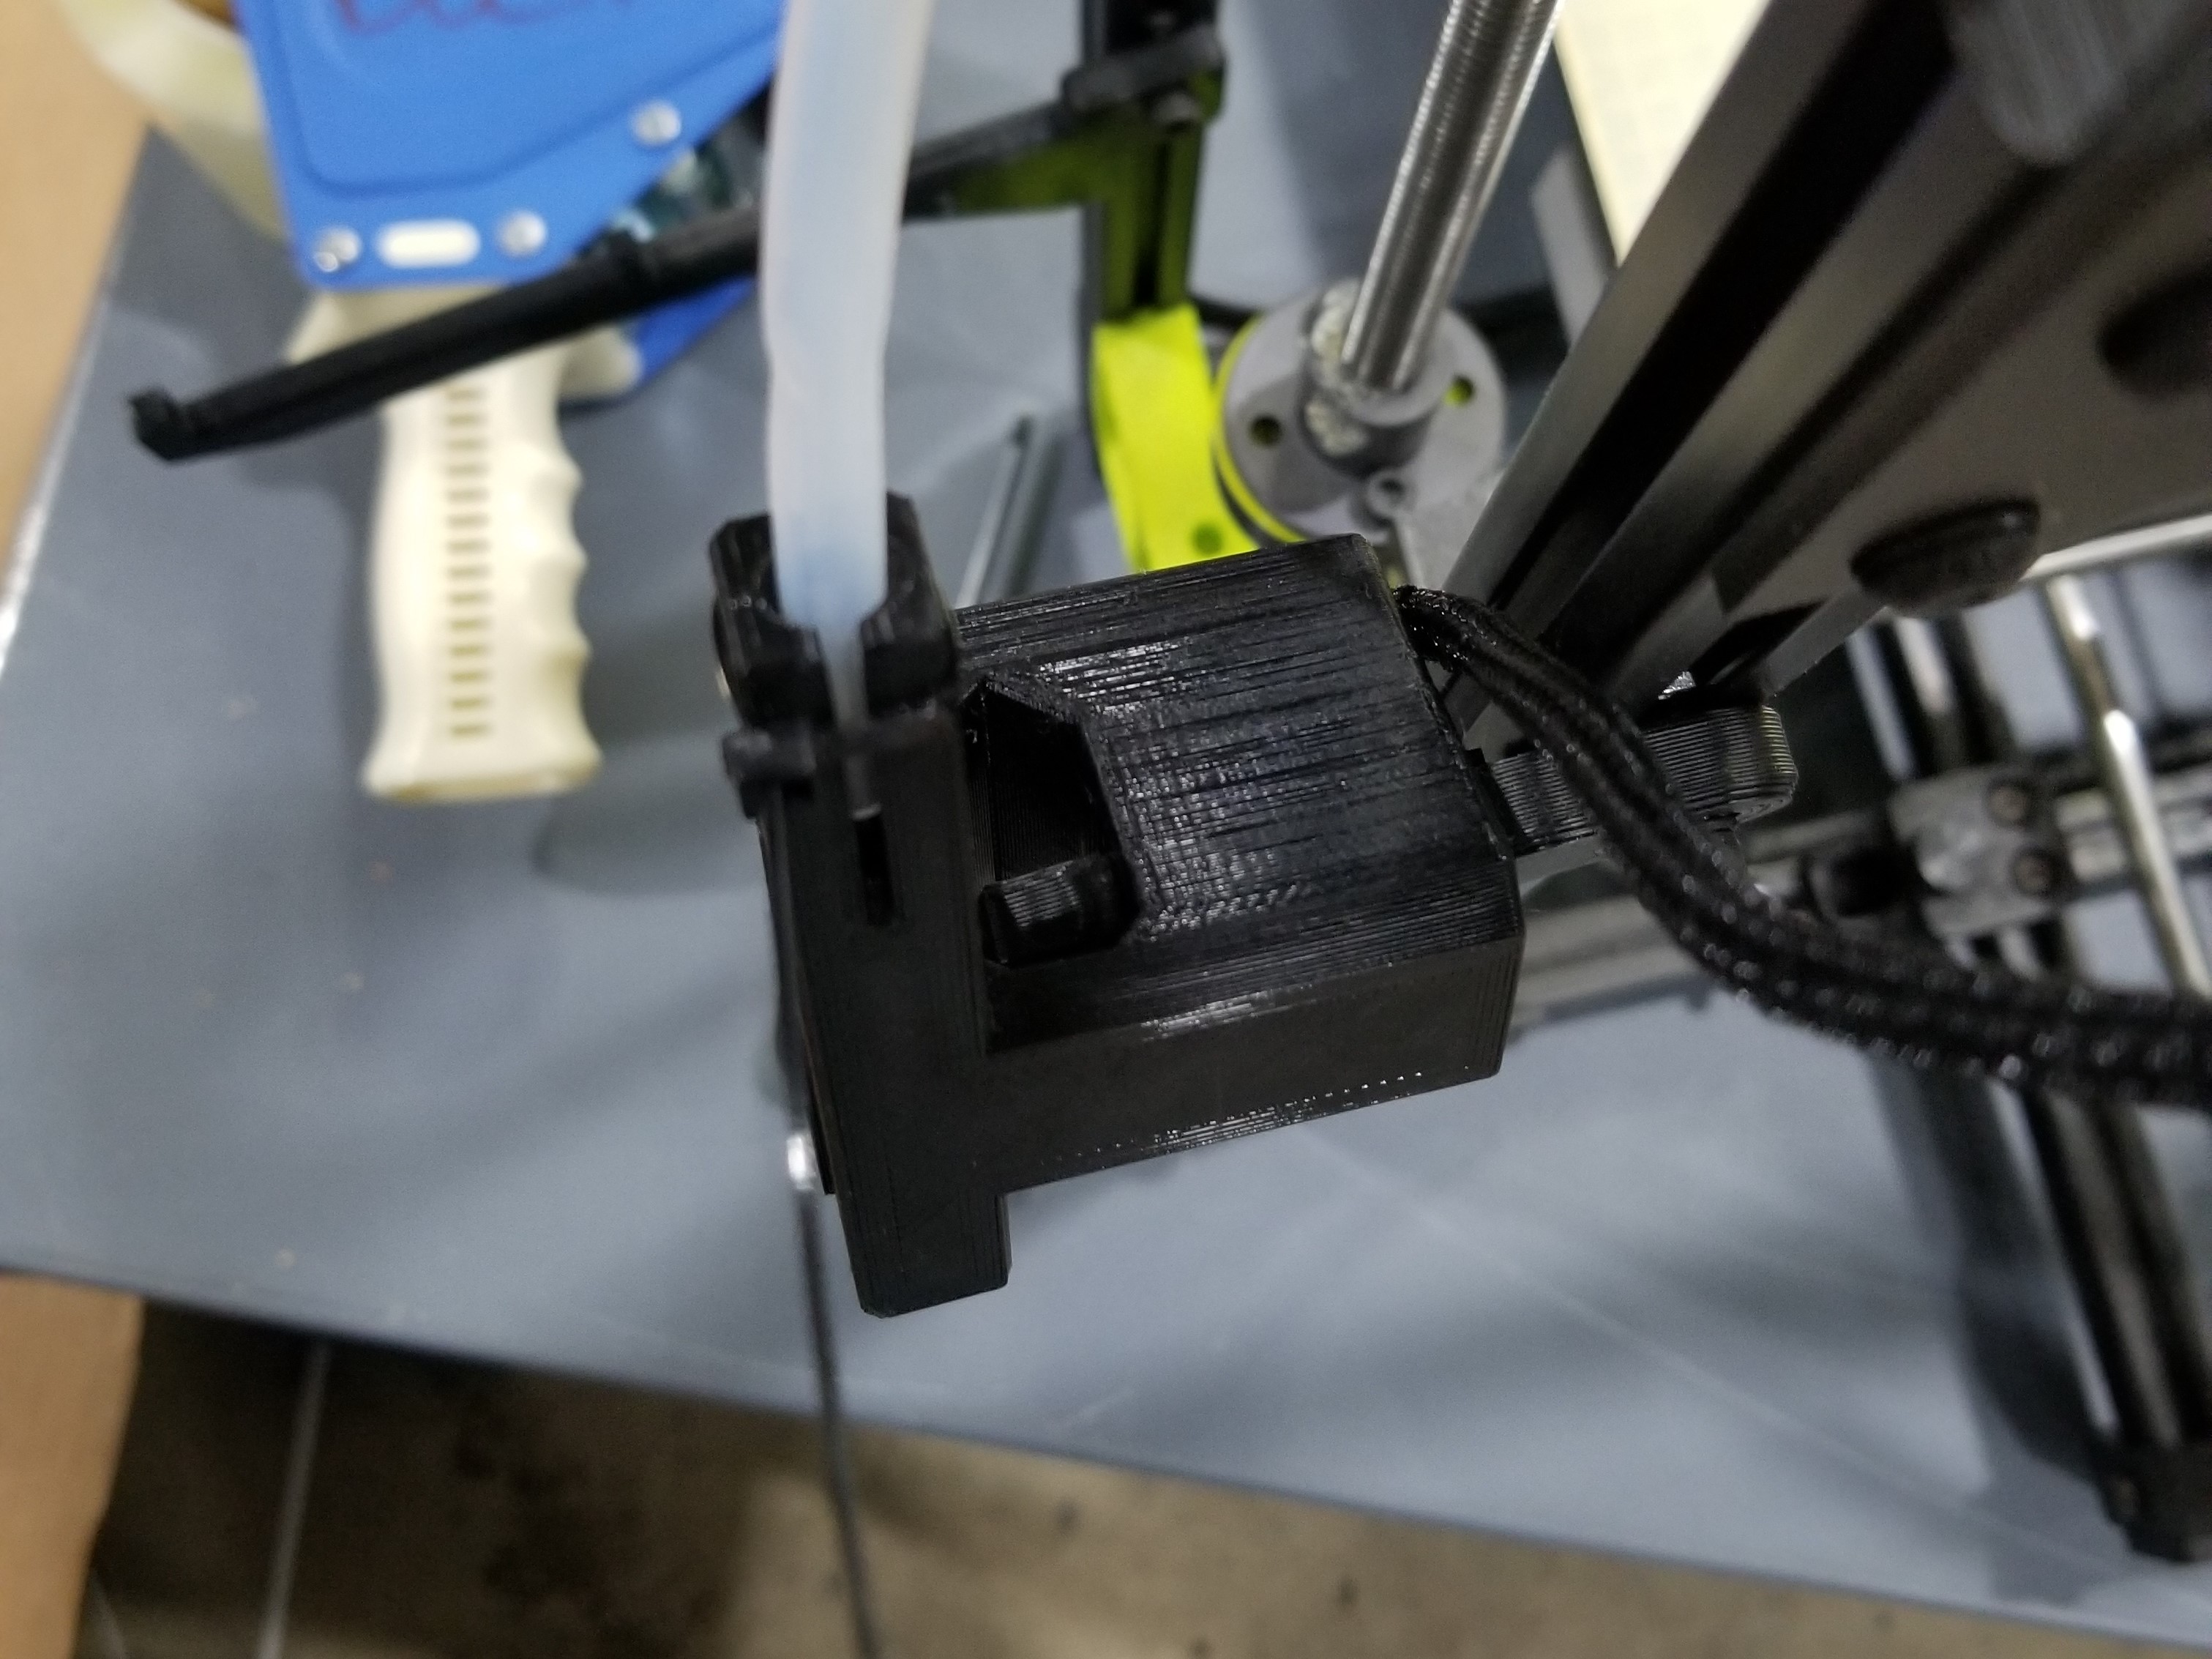
Remove the feed tube spinner from the feed tube holder.
Then take the filament runout sensor and slide it onto the feed tube holder, make sure the longer arm is facing up.

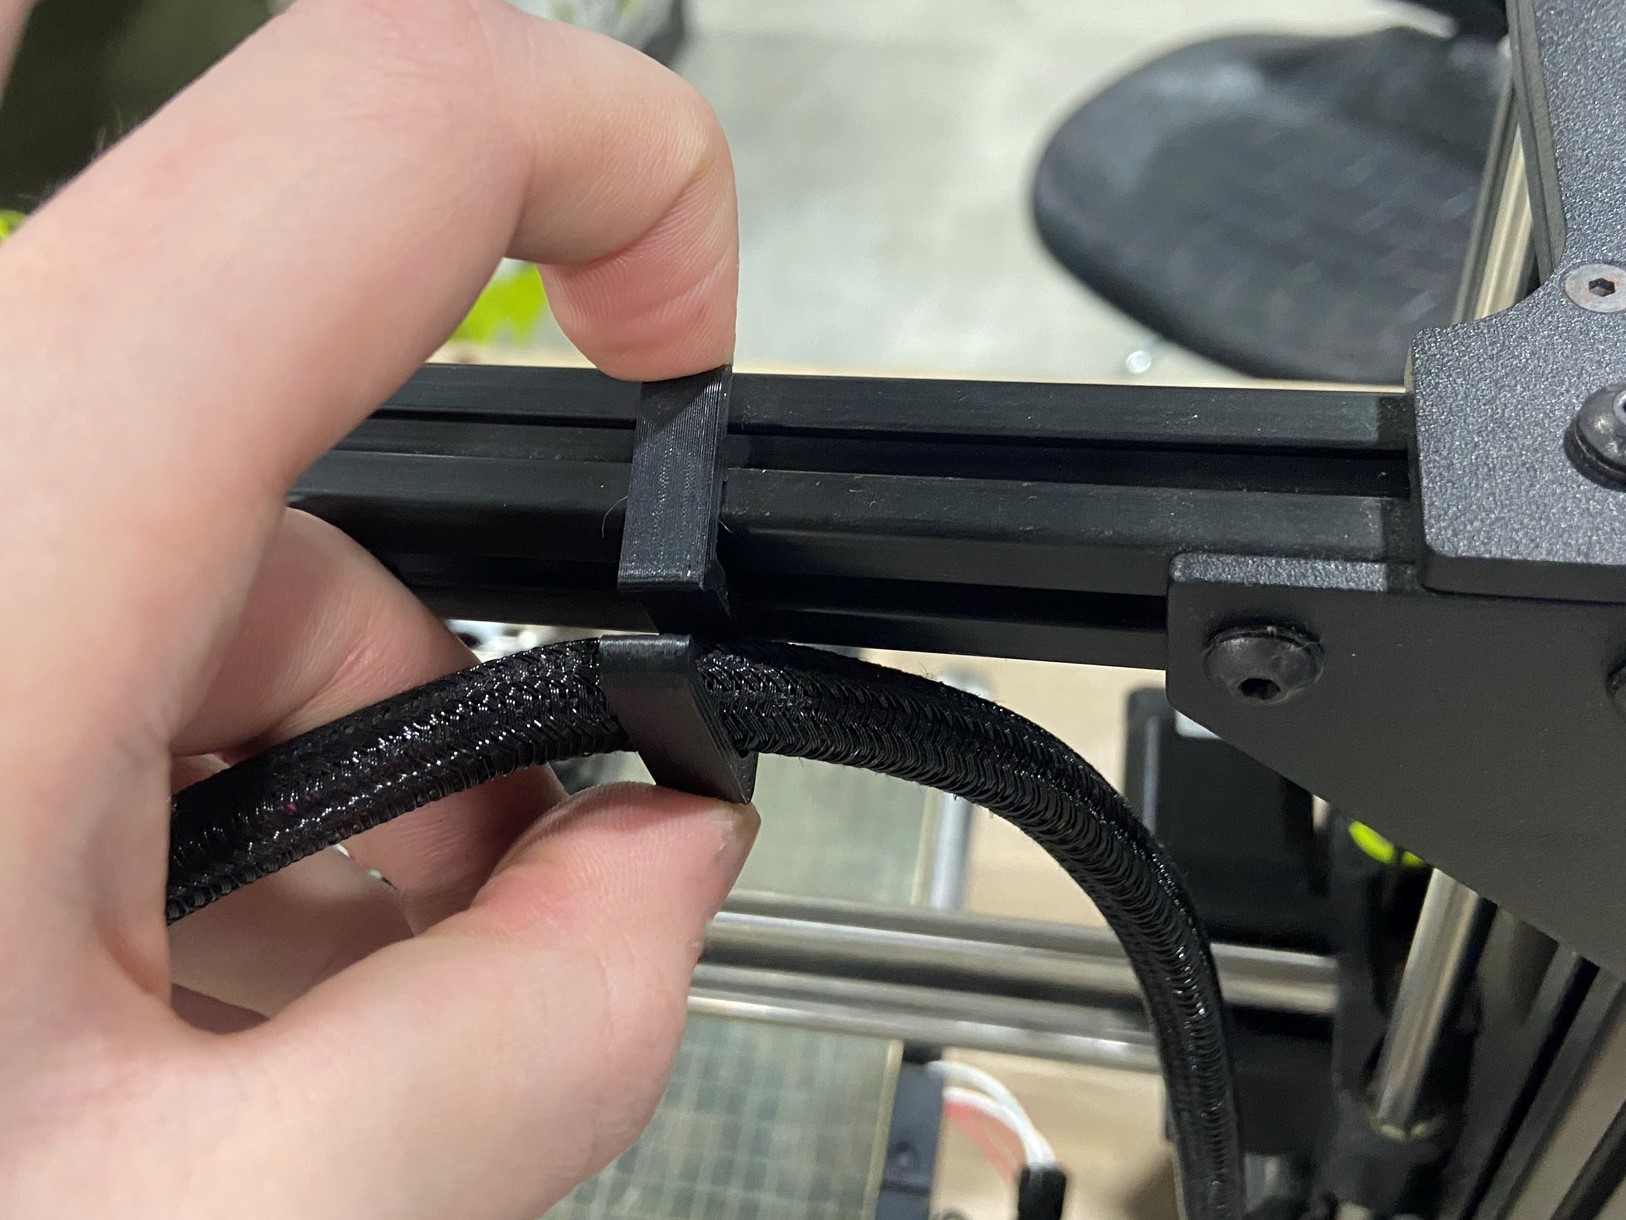
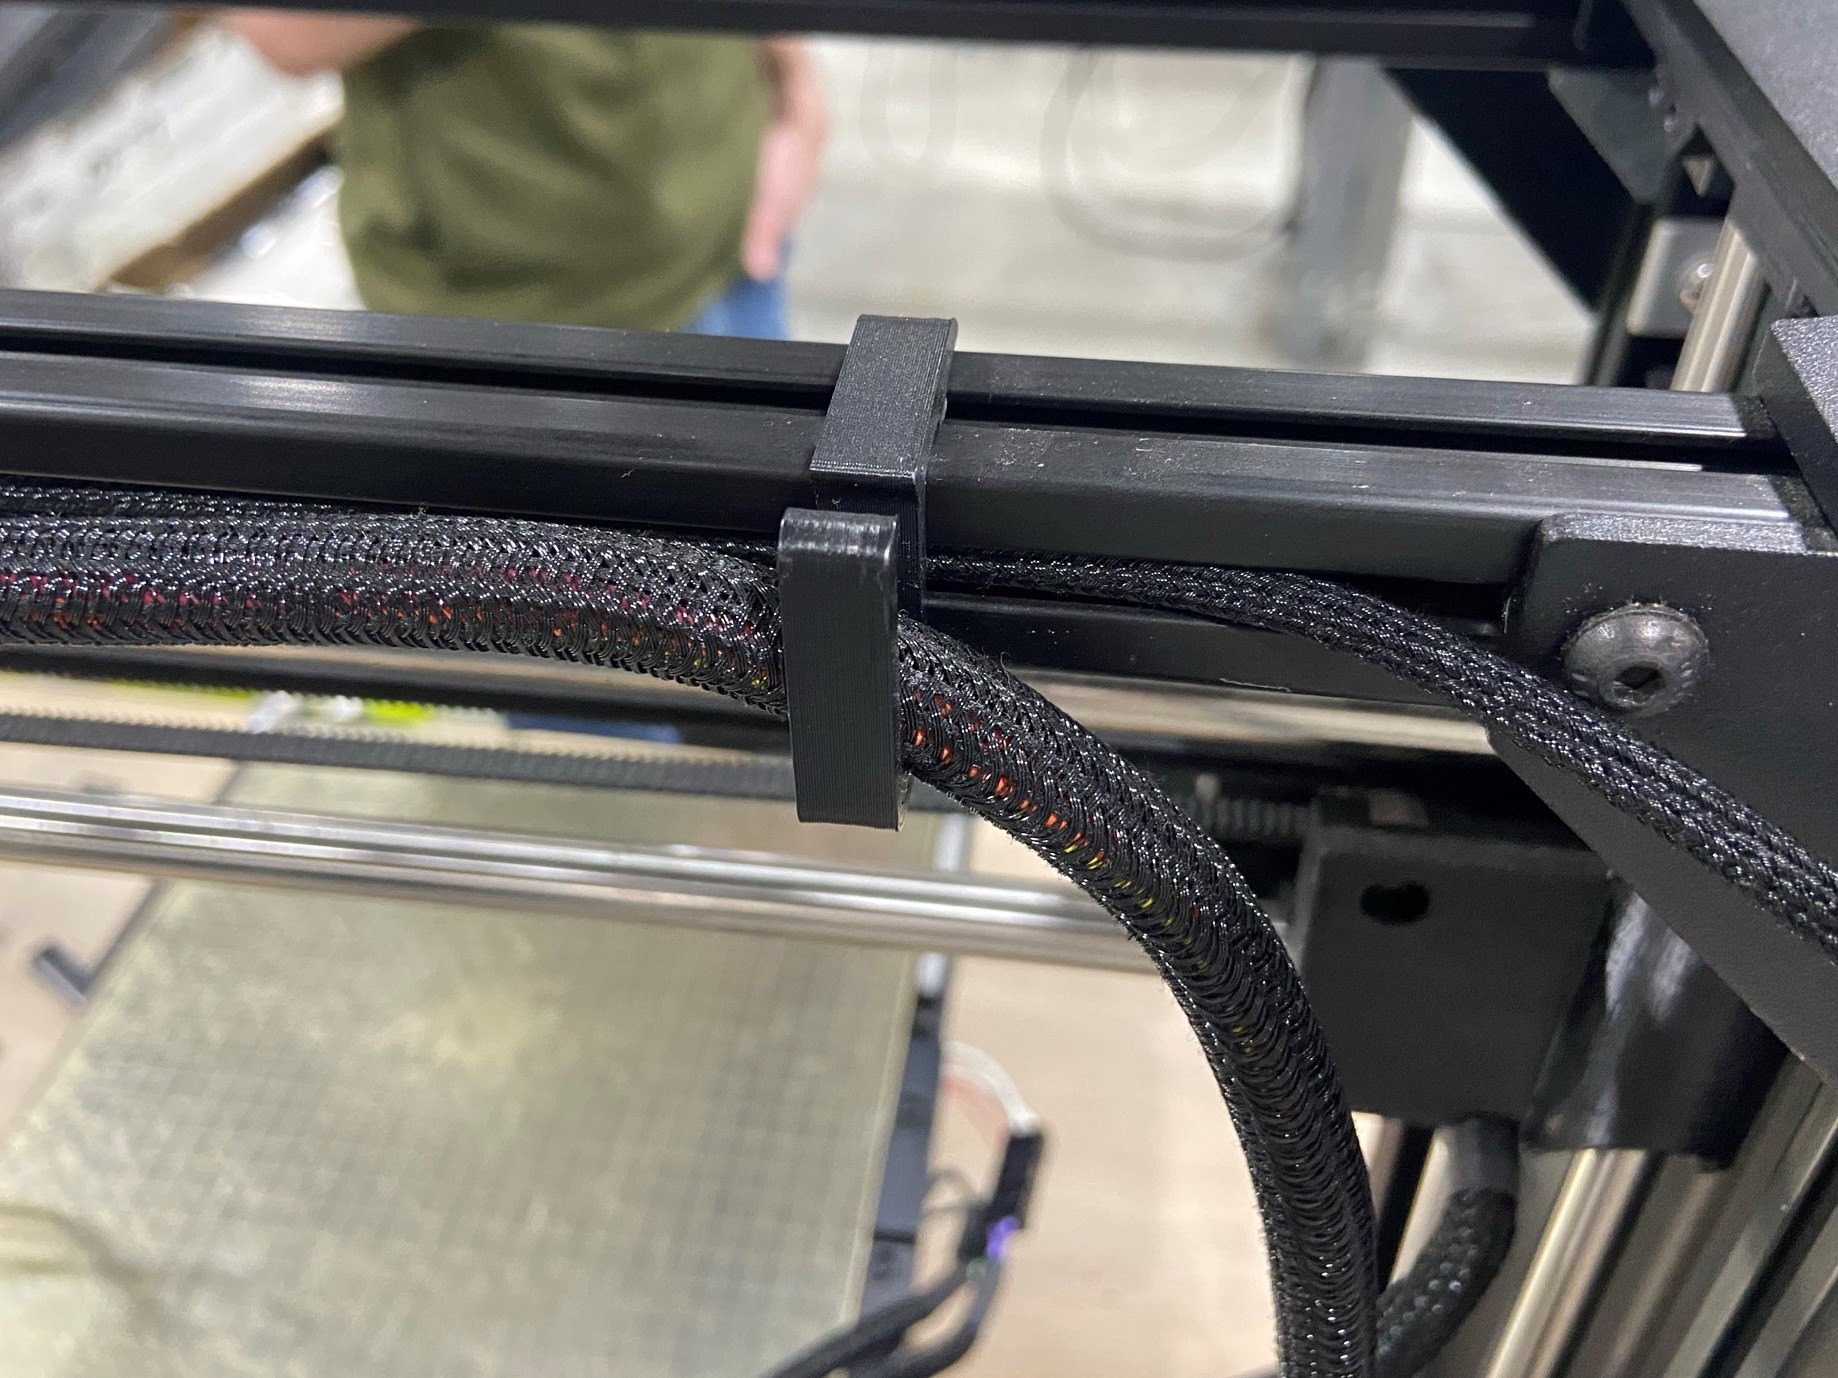
Remove the two wire clips that are on the top extrusion.
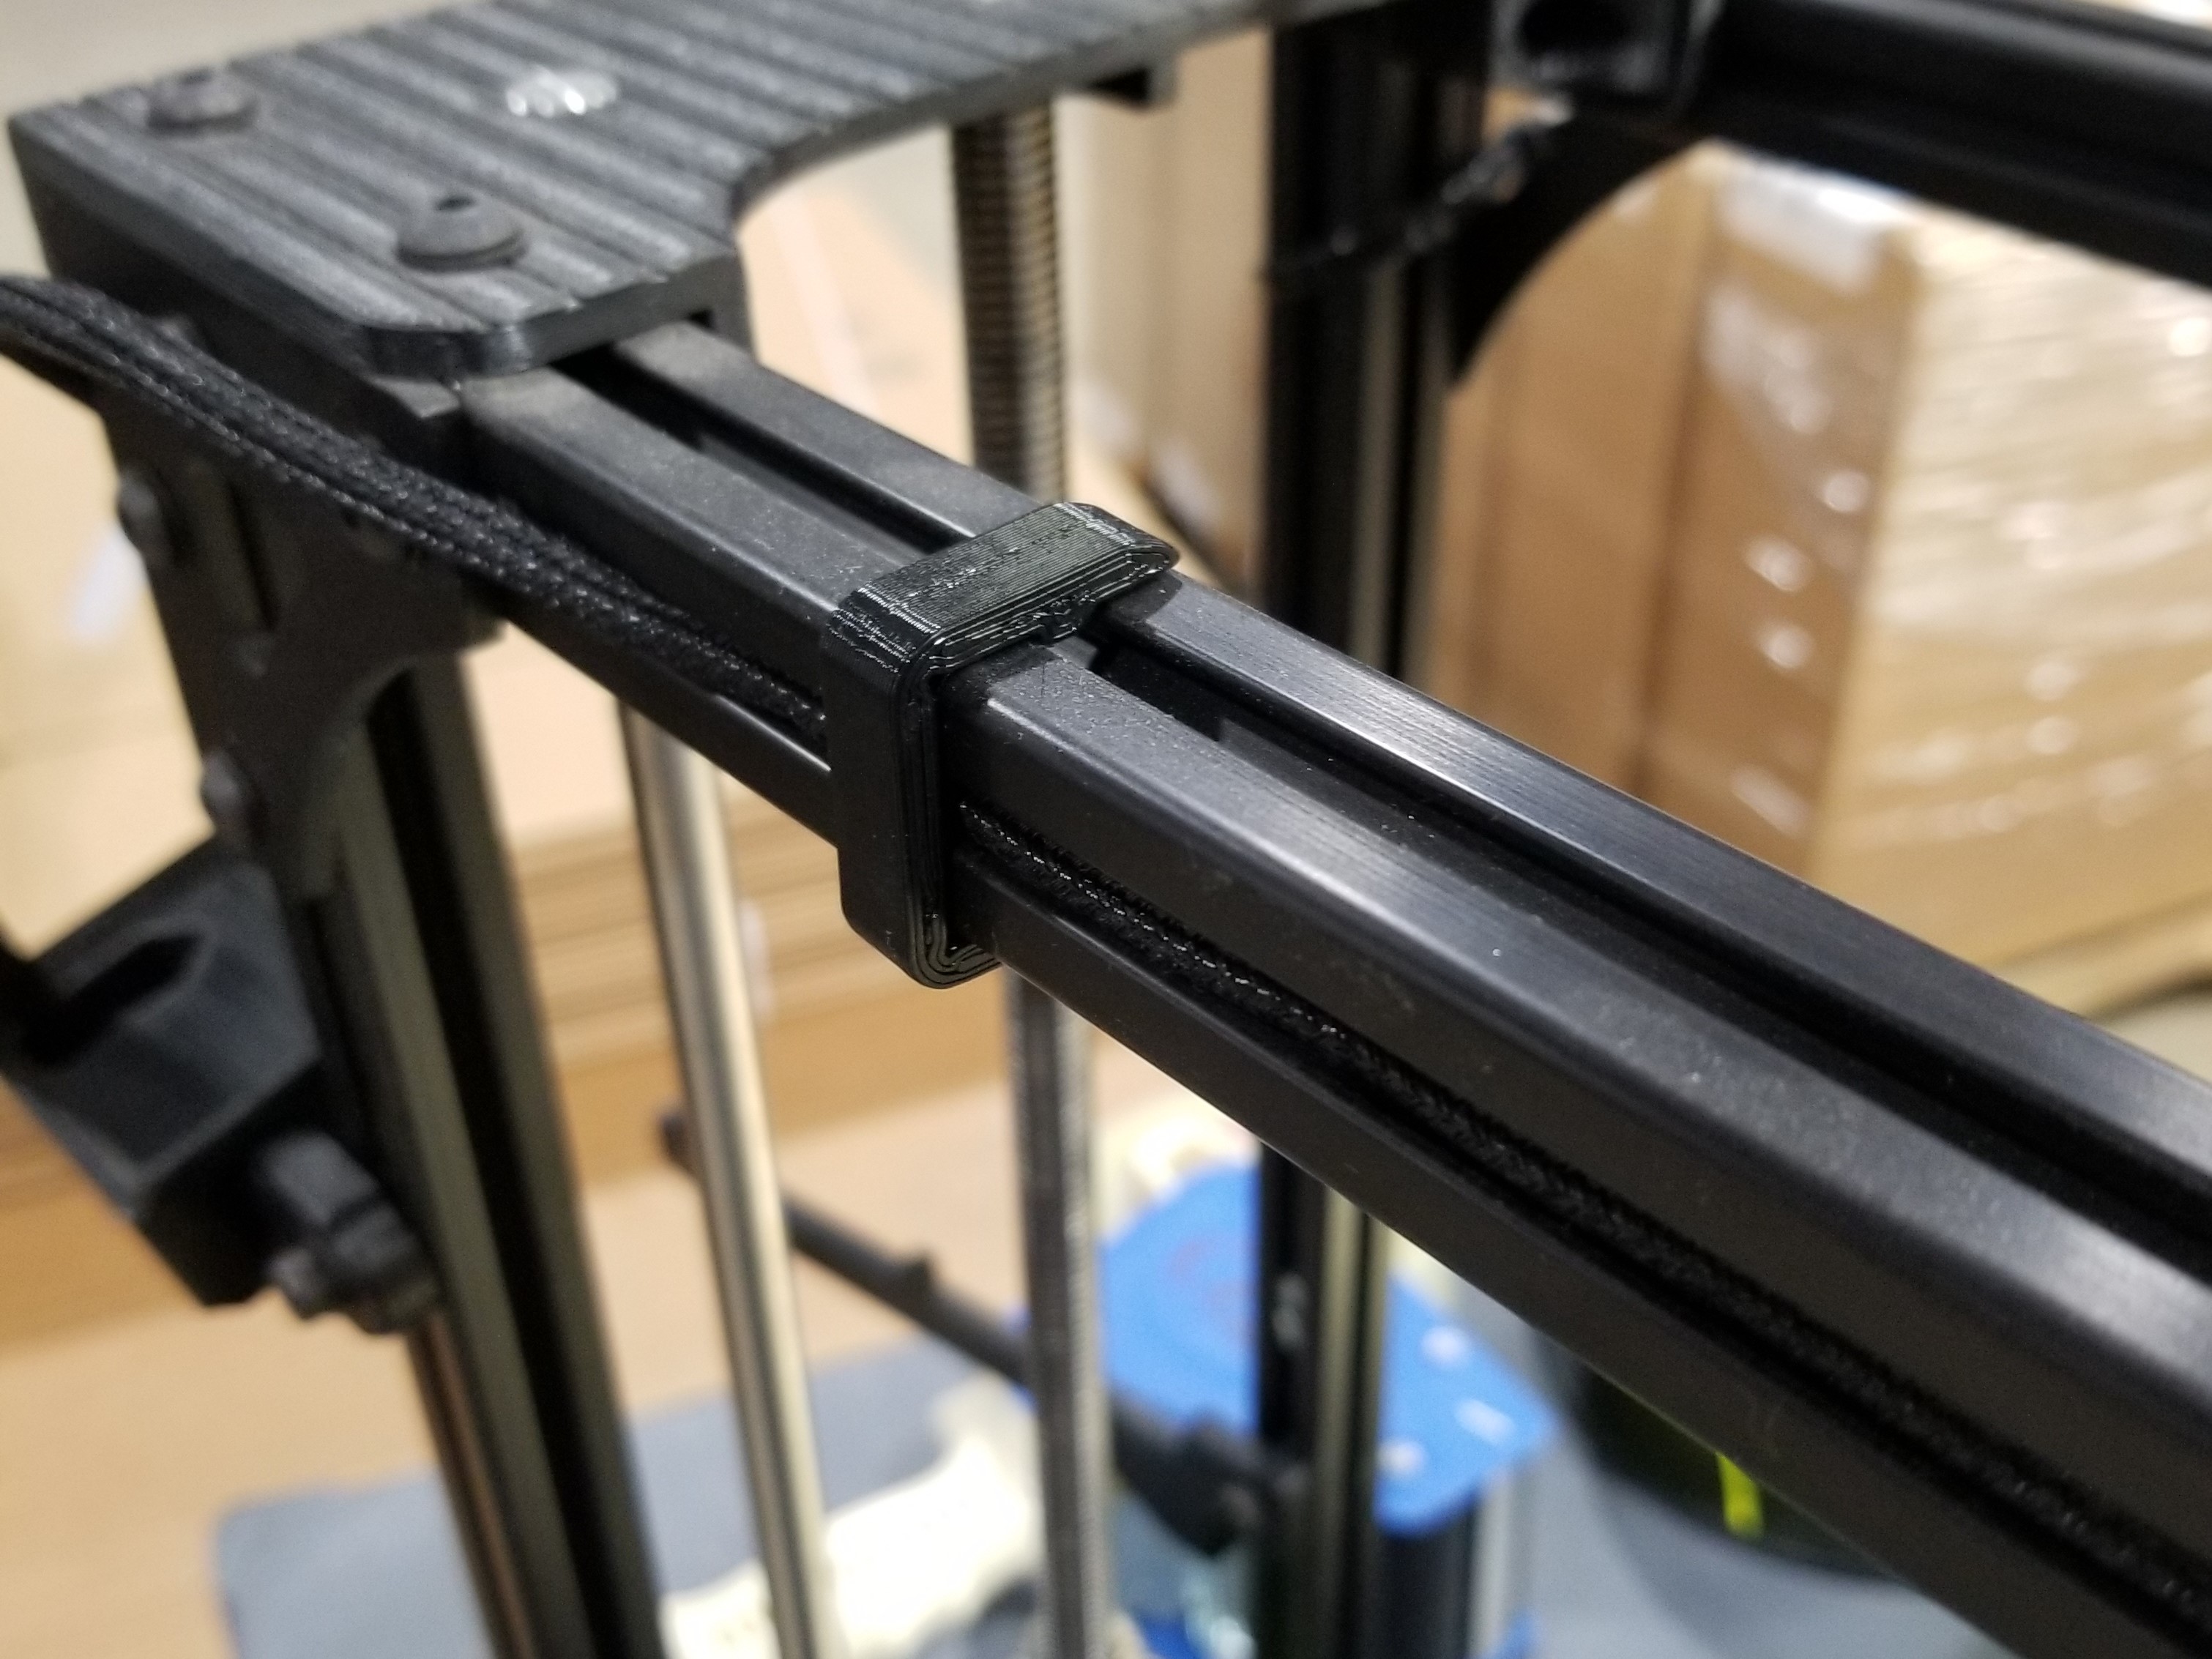
Now take the wire harness from the runout sensor and route it up the backside of the extrusion up to the top extrusion. Then push it inside the extrusion channel then place the clip that came inside the kit and snap it onto the top extrusion.
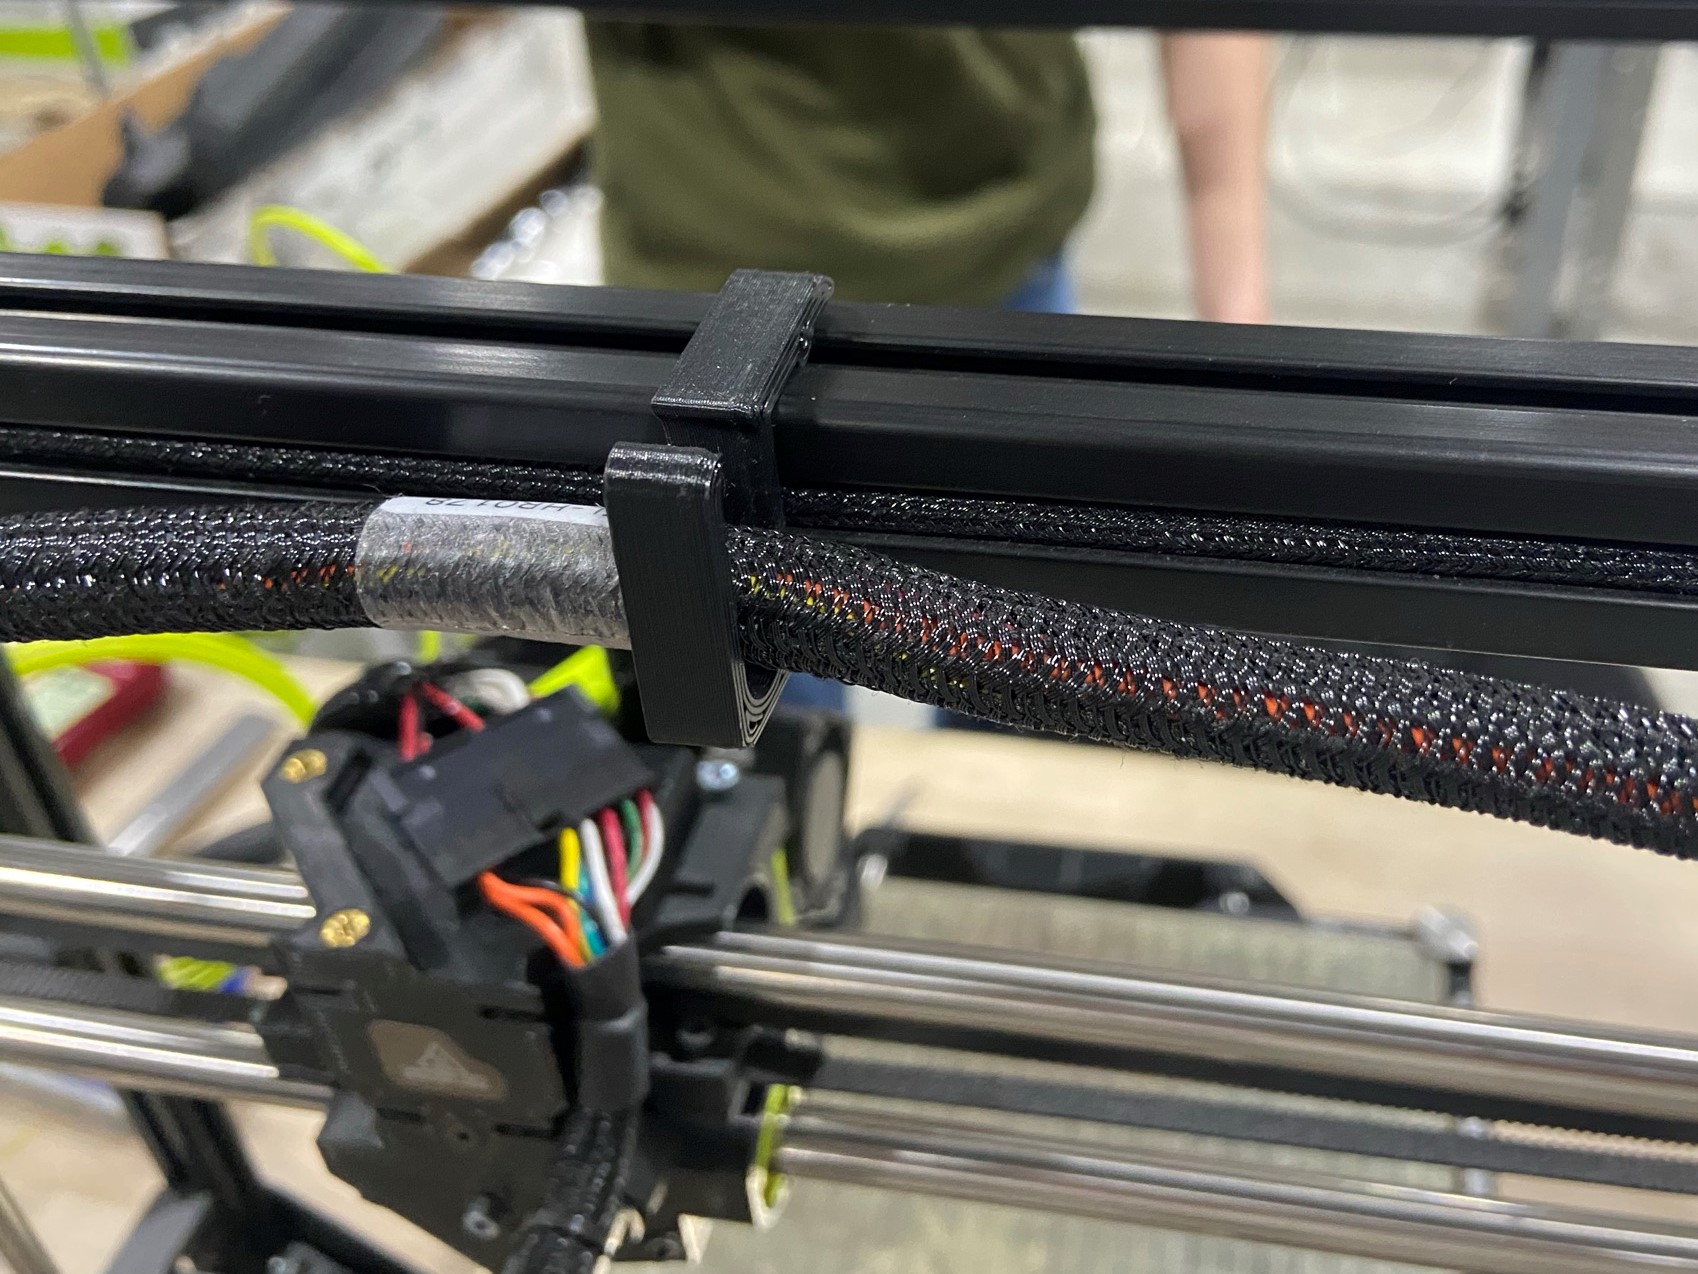
Make sure the harness is inside the extrusion then attach the runout sensor wire clip to the top extrusion near the corner and reattach the two wire clips to secure the wire harness to the extrusion.


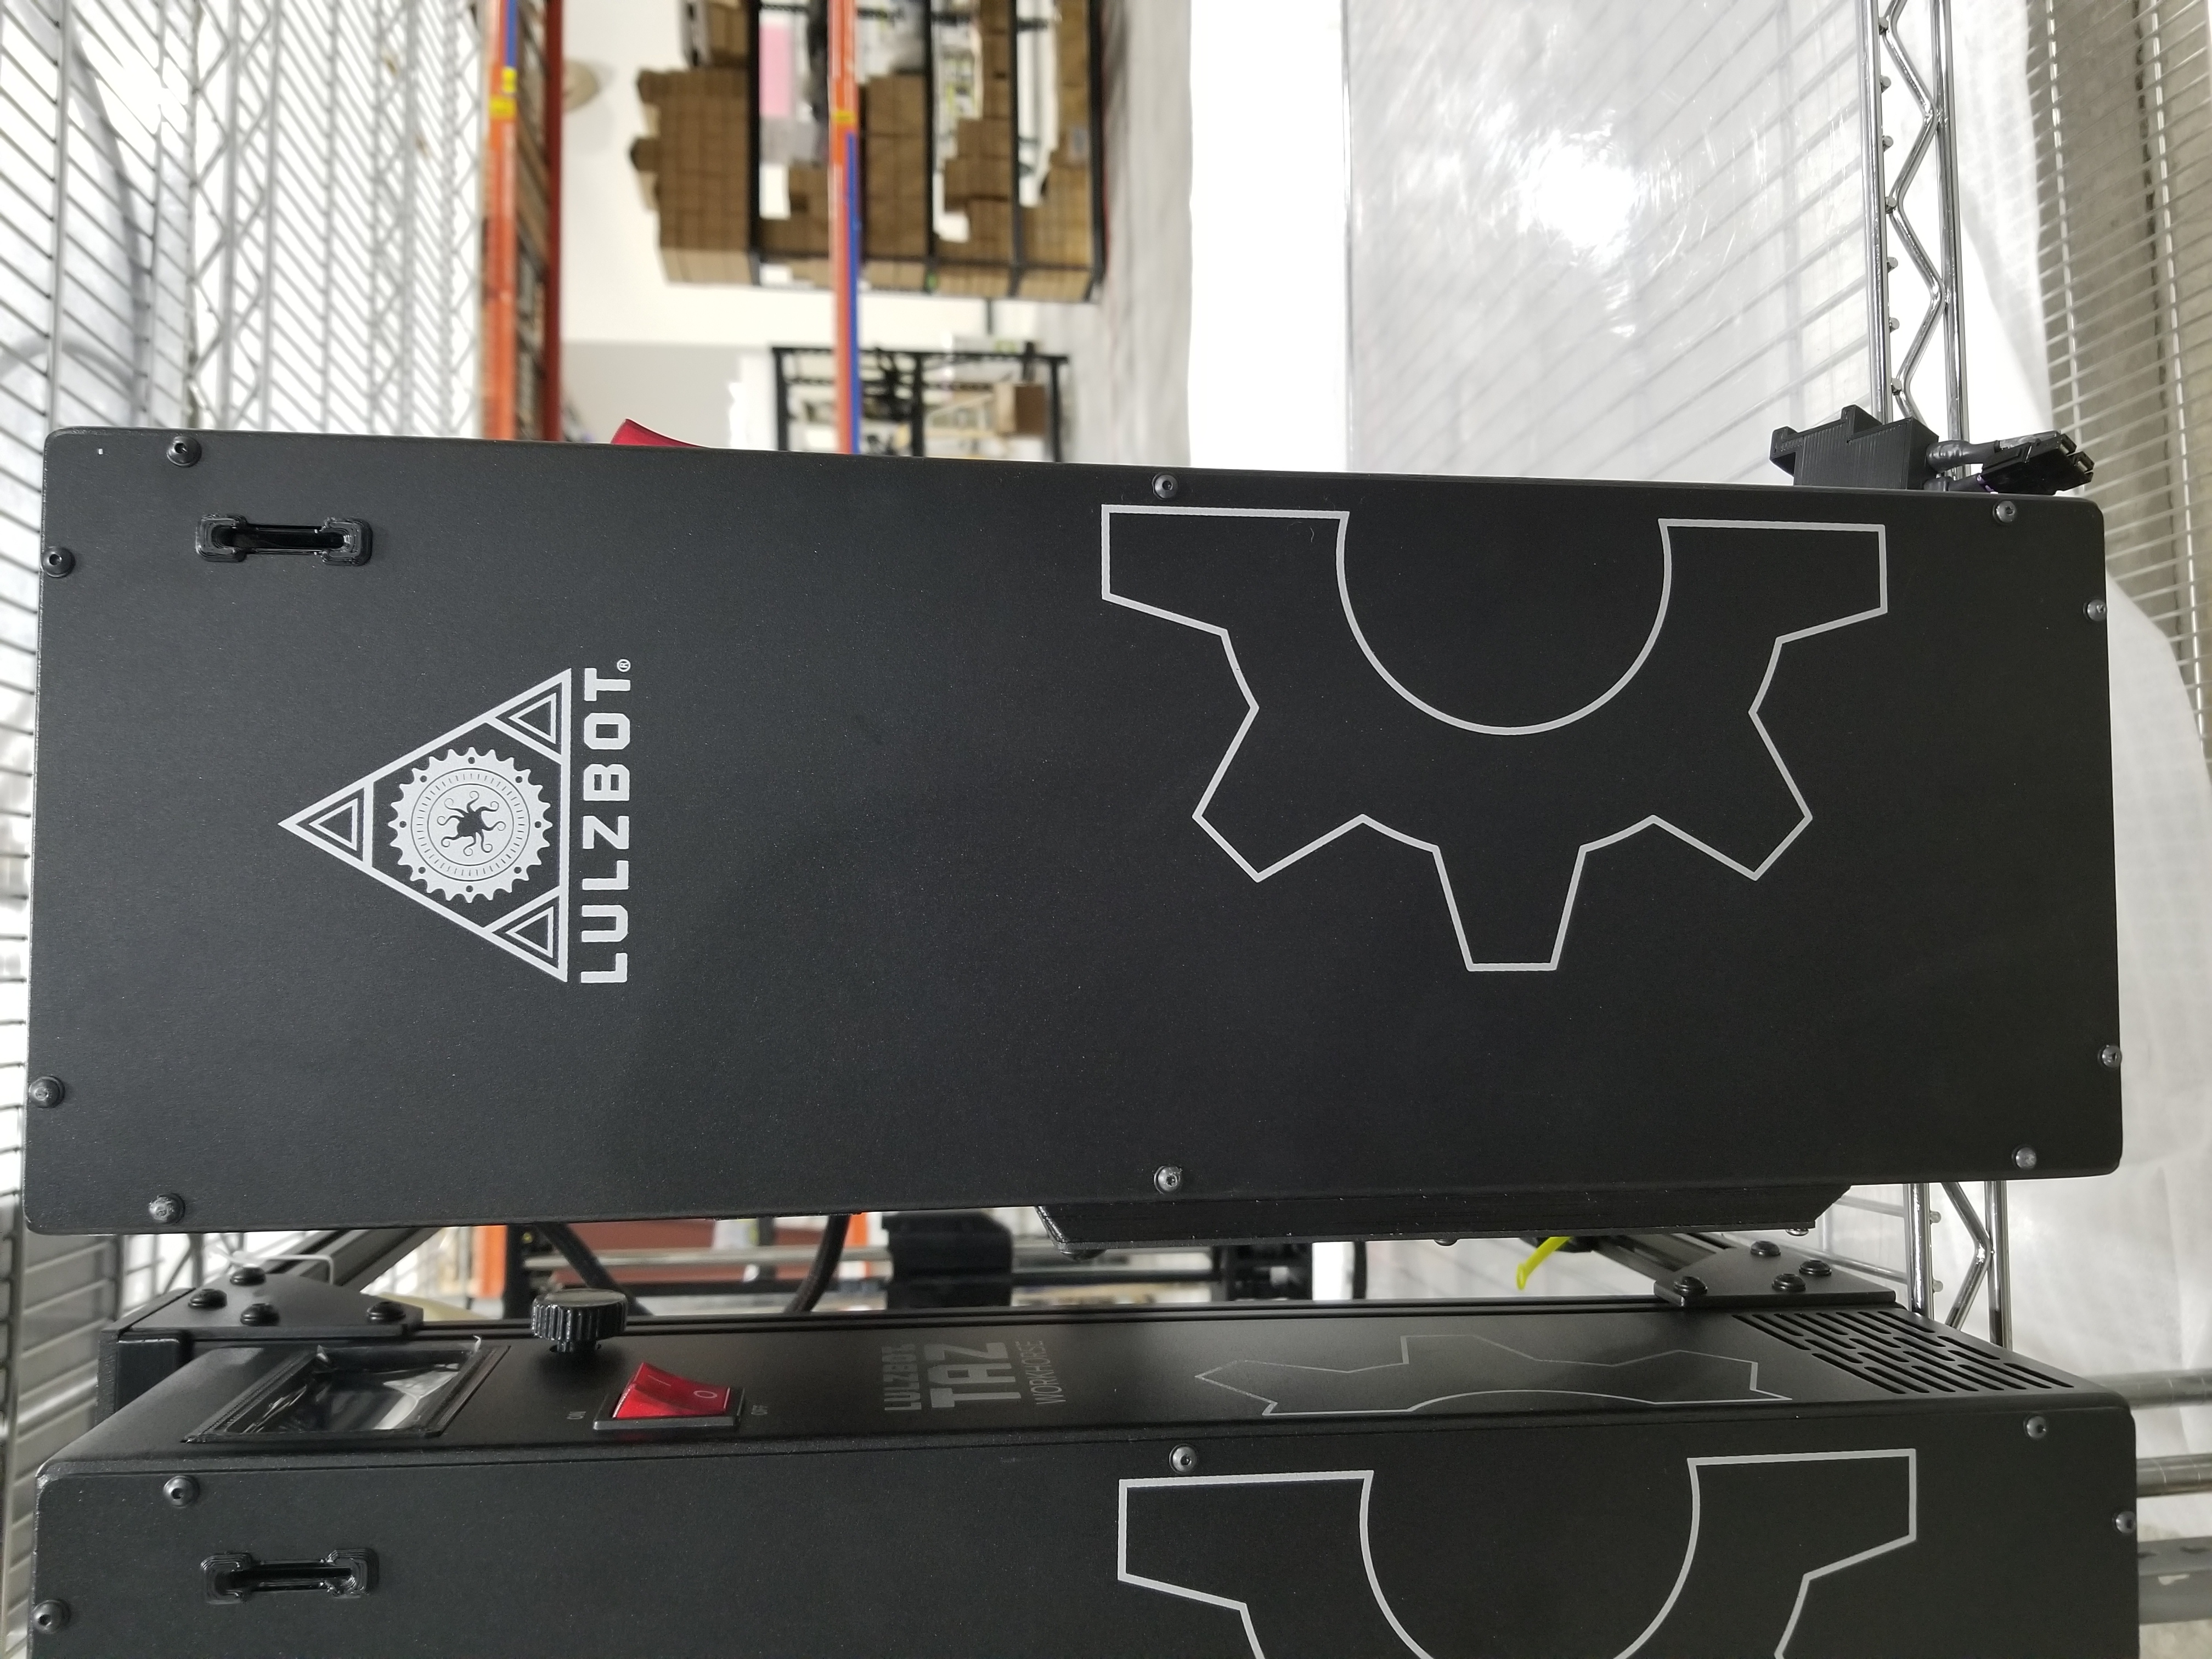
TAZ Workhorse: Use a 2mm hex screwdriver to remove the 10 M3 x 6mm BHCS that hold the electronics cover to the frame. Make sure to set these in a safe location because they will be used in a later step.
TAZ 6: Use a 2mm hex screwdriver to remove the 14 M3 x 6mm BHCS that hold the electronics cover to the frame. Make sure to set these in a safe location because they will be used in a later step.


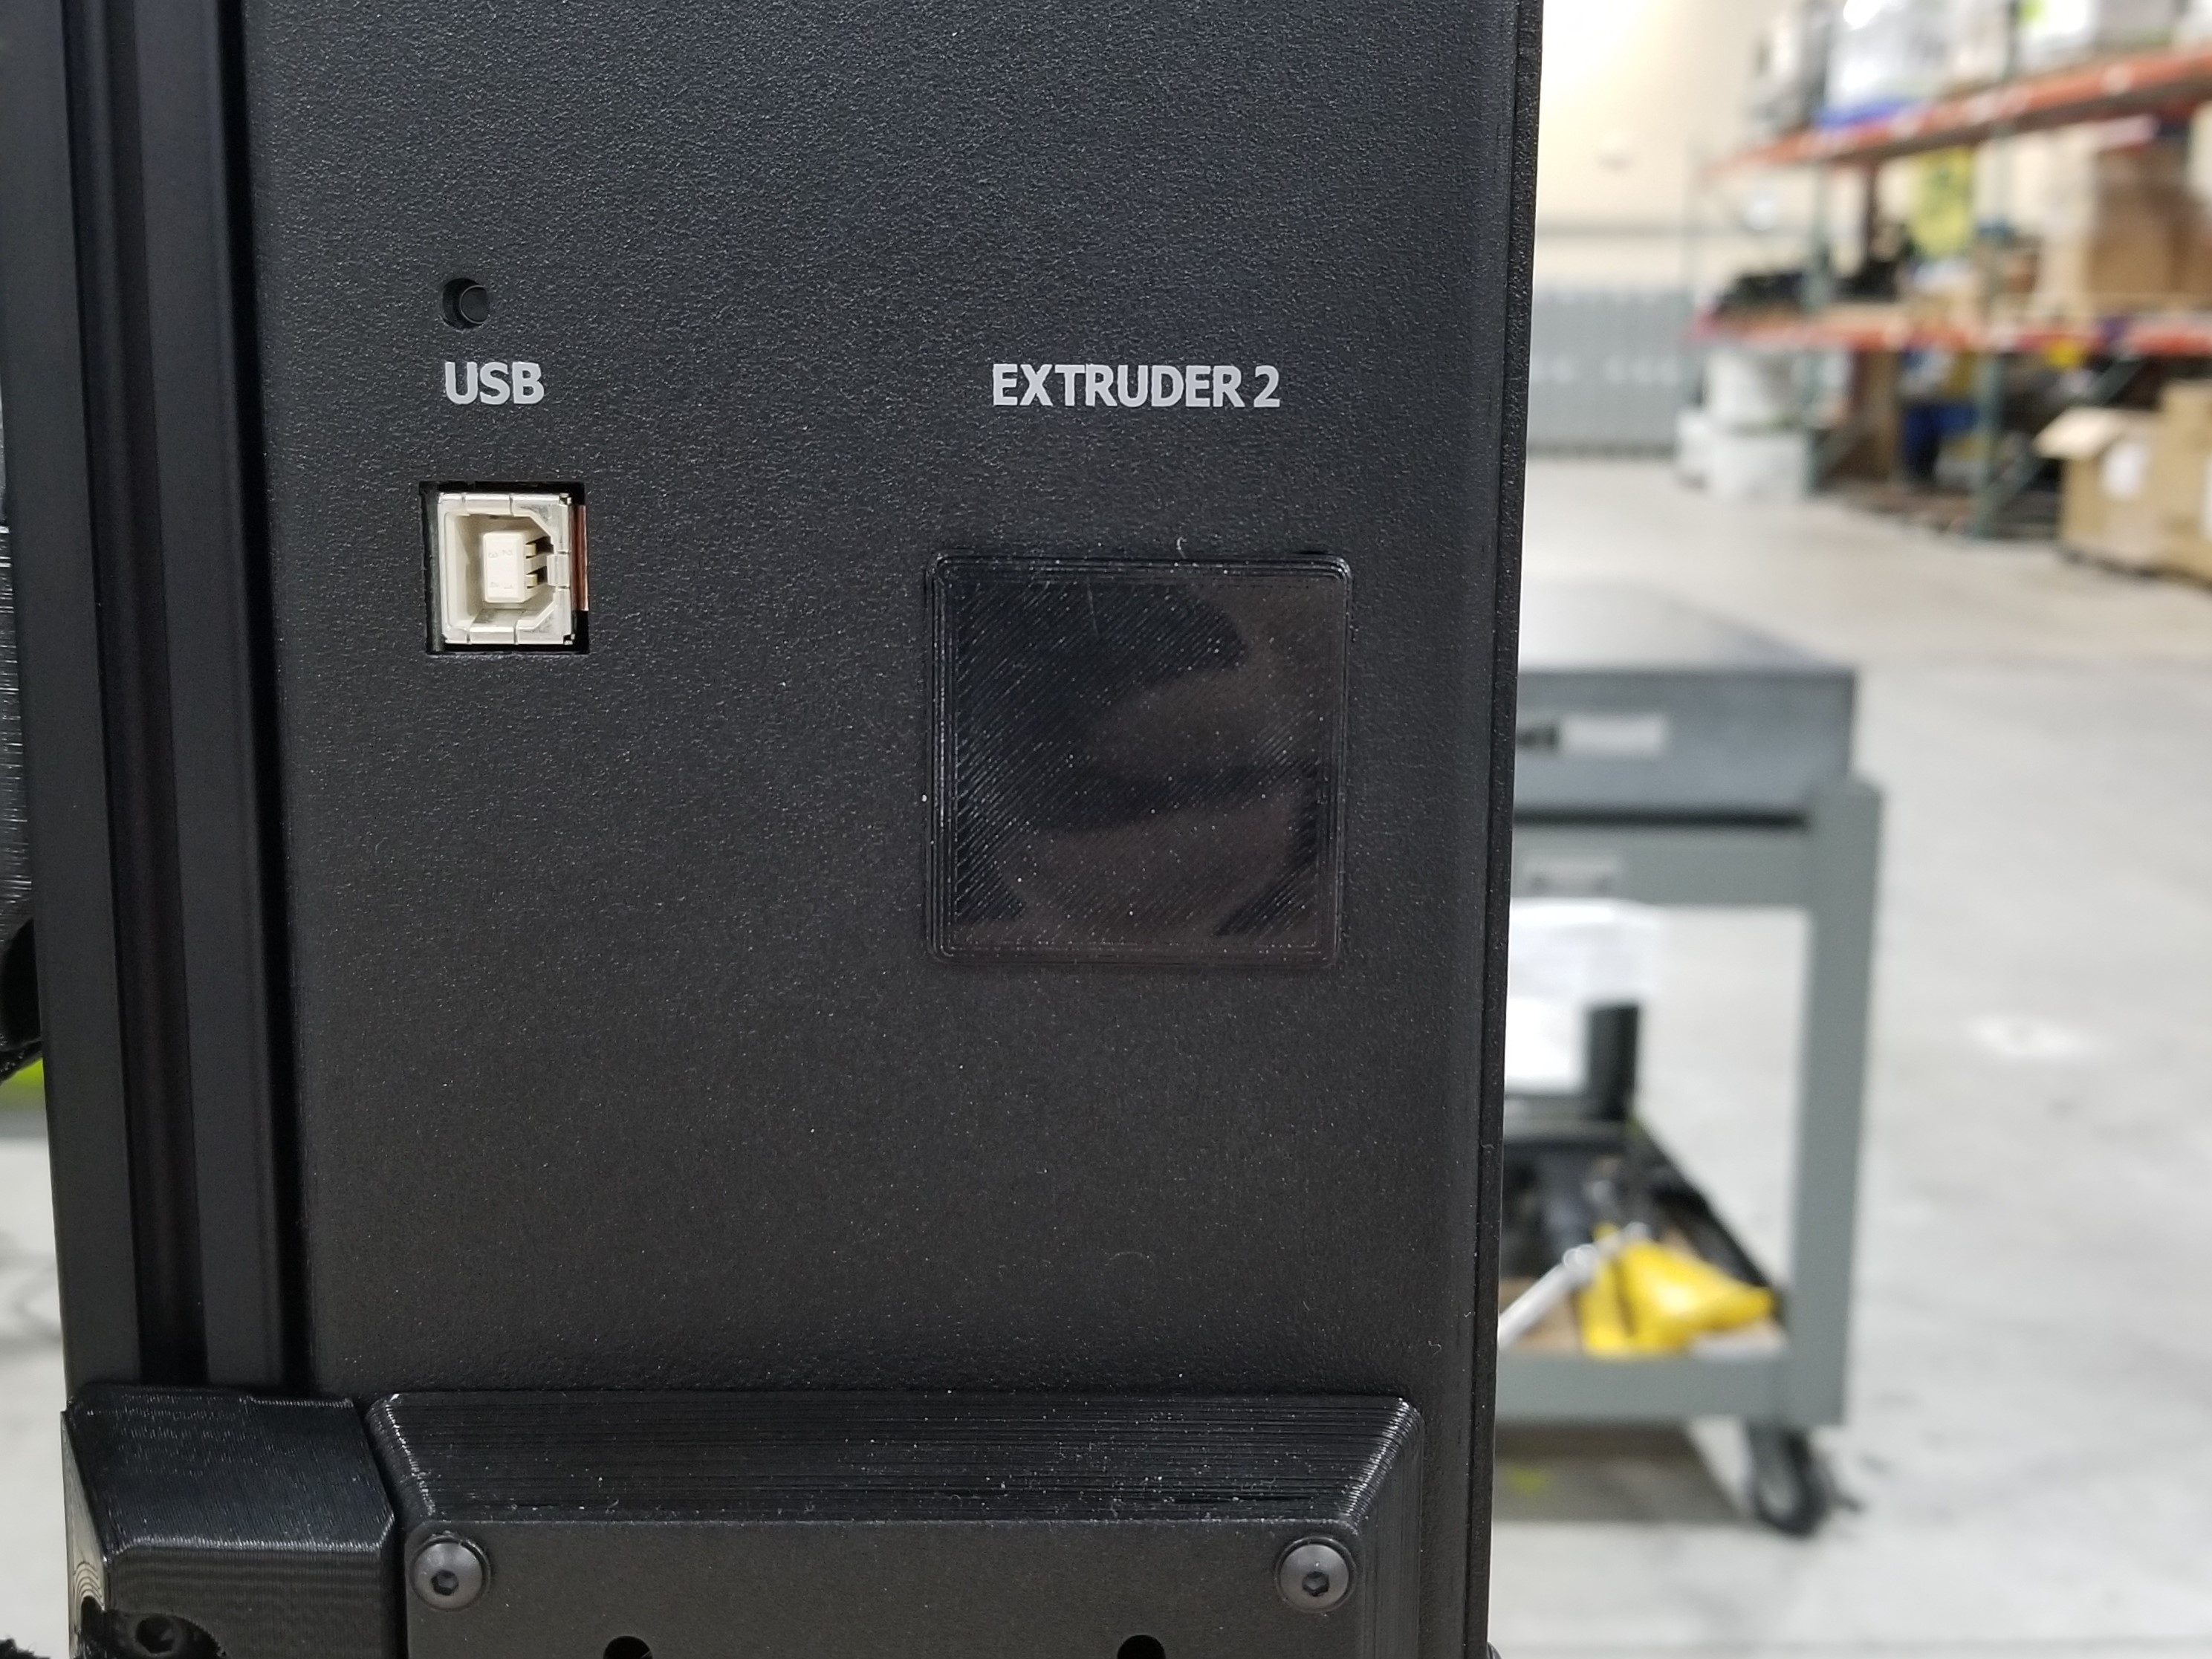
TAZ Workhorse: Remove the black flexy plug that is covering the extruder 2 hole. Then place the grommet that came with the runout sensor inside the extruder 2 hole.
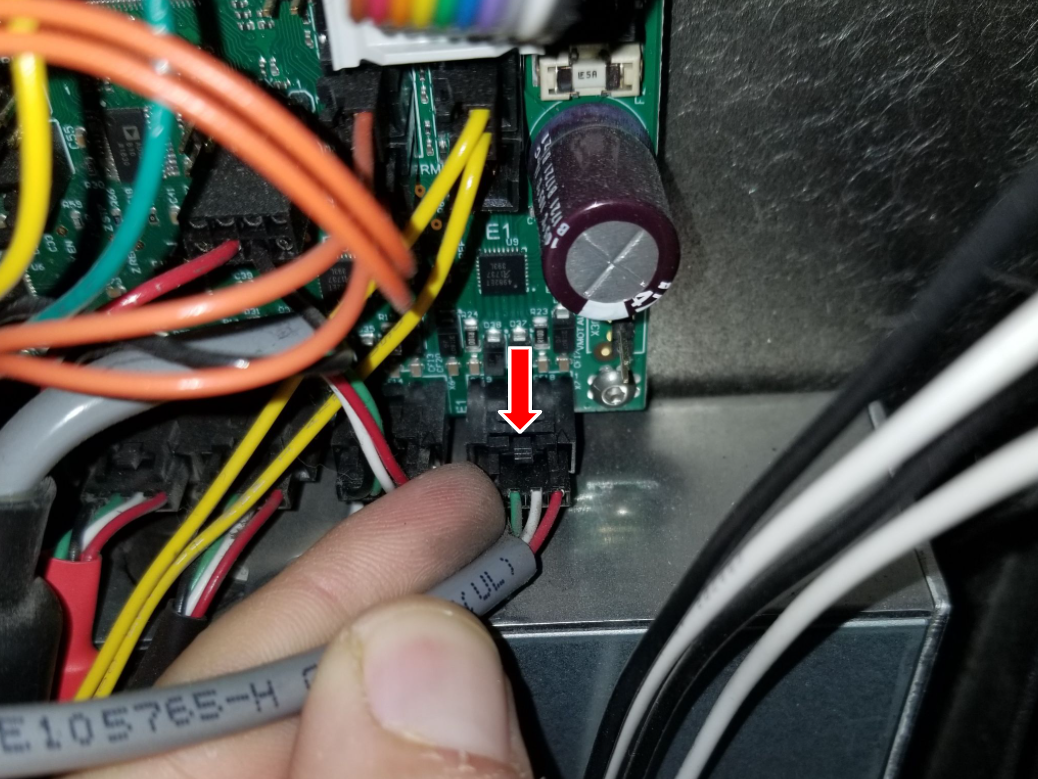
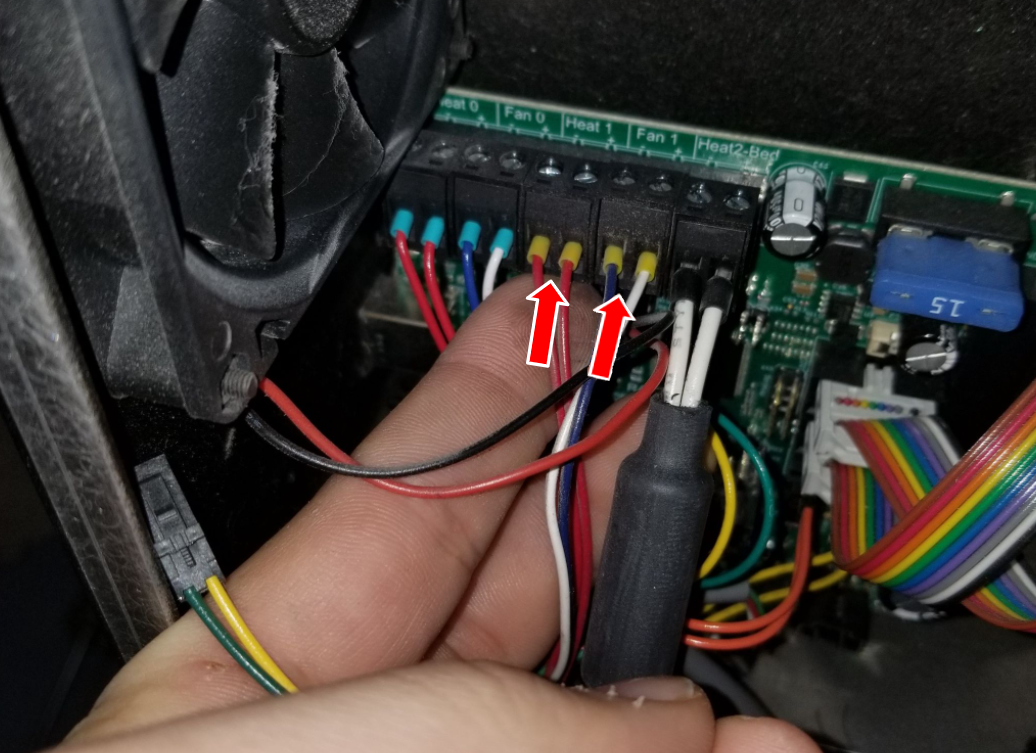
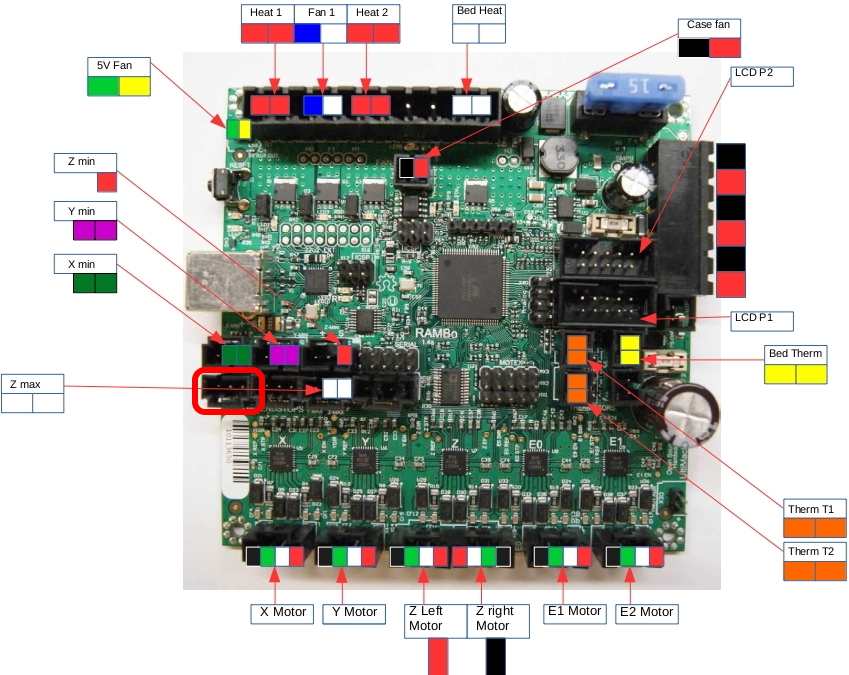
TAZ 6 and some TAZ Workhorses: Follow the picture below to remove three wire connectors and one ground screw to disconnect the extruder 2 harness. Start at the extruder 2 connector and trace the wires back to the board to help find them.
Start by removing the red, white, green, and black harness from the bottom right port.
Then find the red/orange harnesses that have two wires each, and remove the bottom connector. They should be next to the yellow harnesses.
Then look at the top row of connectors and find the ports that says Heat 1 and Fan 1 and remove both harnesses. It should have red wires with yellow ends for the Heat 1 and Blue/white with yellow ends for Fan1.
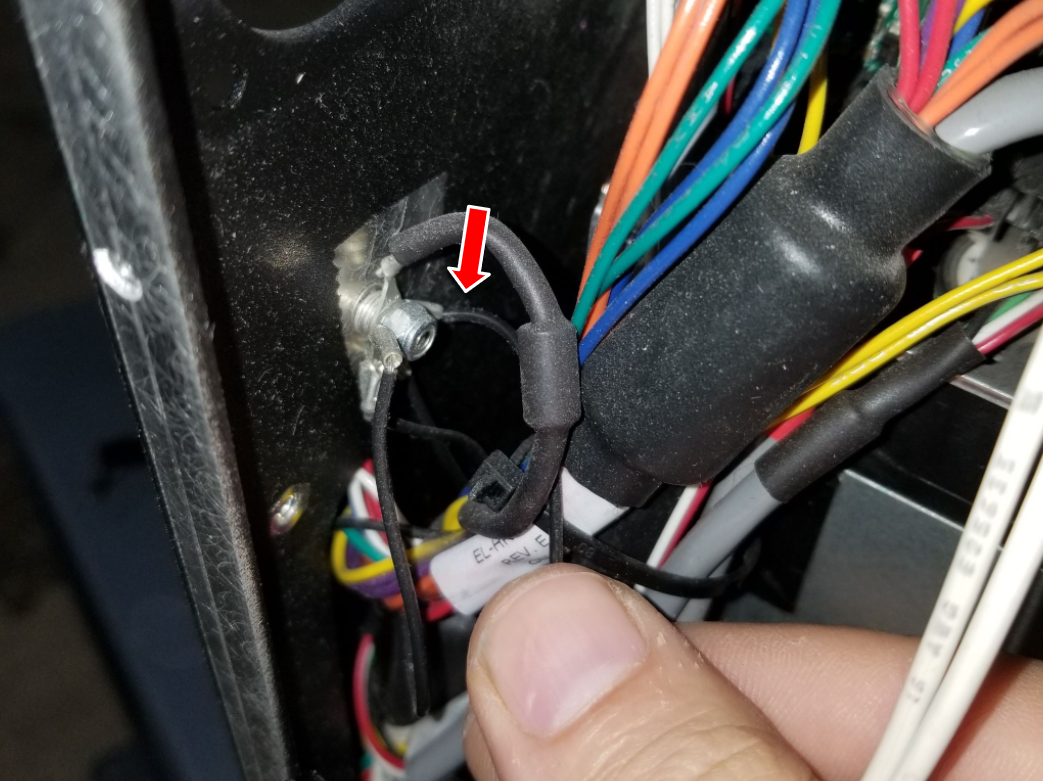
Find the extruder 2 ground wire and using a cutting pliers, cut the ground wire.
Now remove the four phillips screws that hold the extruder 2 connector to the electronics case to the frame and remove the extruder 2 connector.
Note: There should be one purple harness that is still connected to the board, this will be used in the next step.
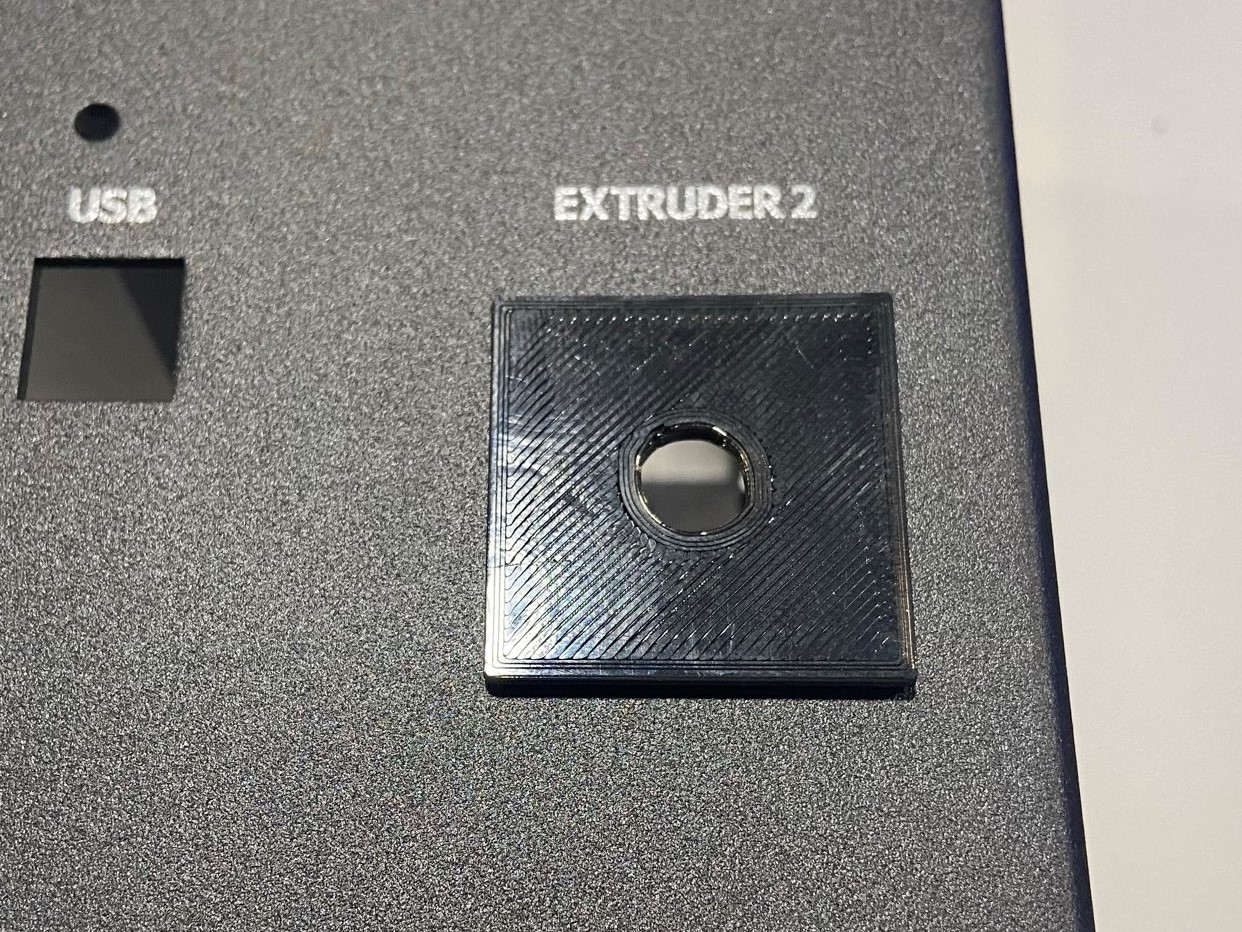
Then place the new flexy grommet inside the extruder 2 hole.
Route the runout sensor harness through the hole in the new flexy grommet.


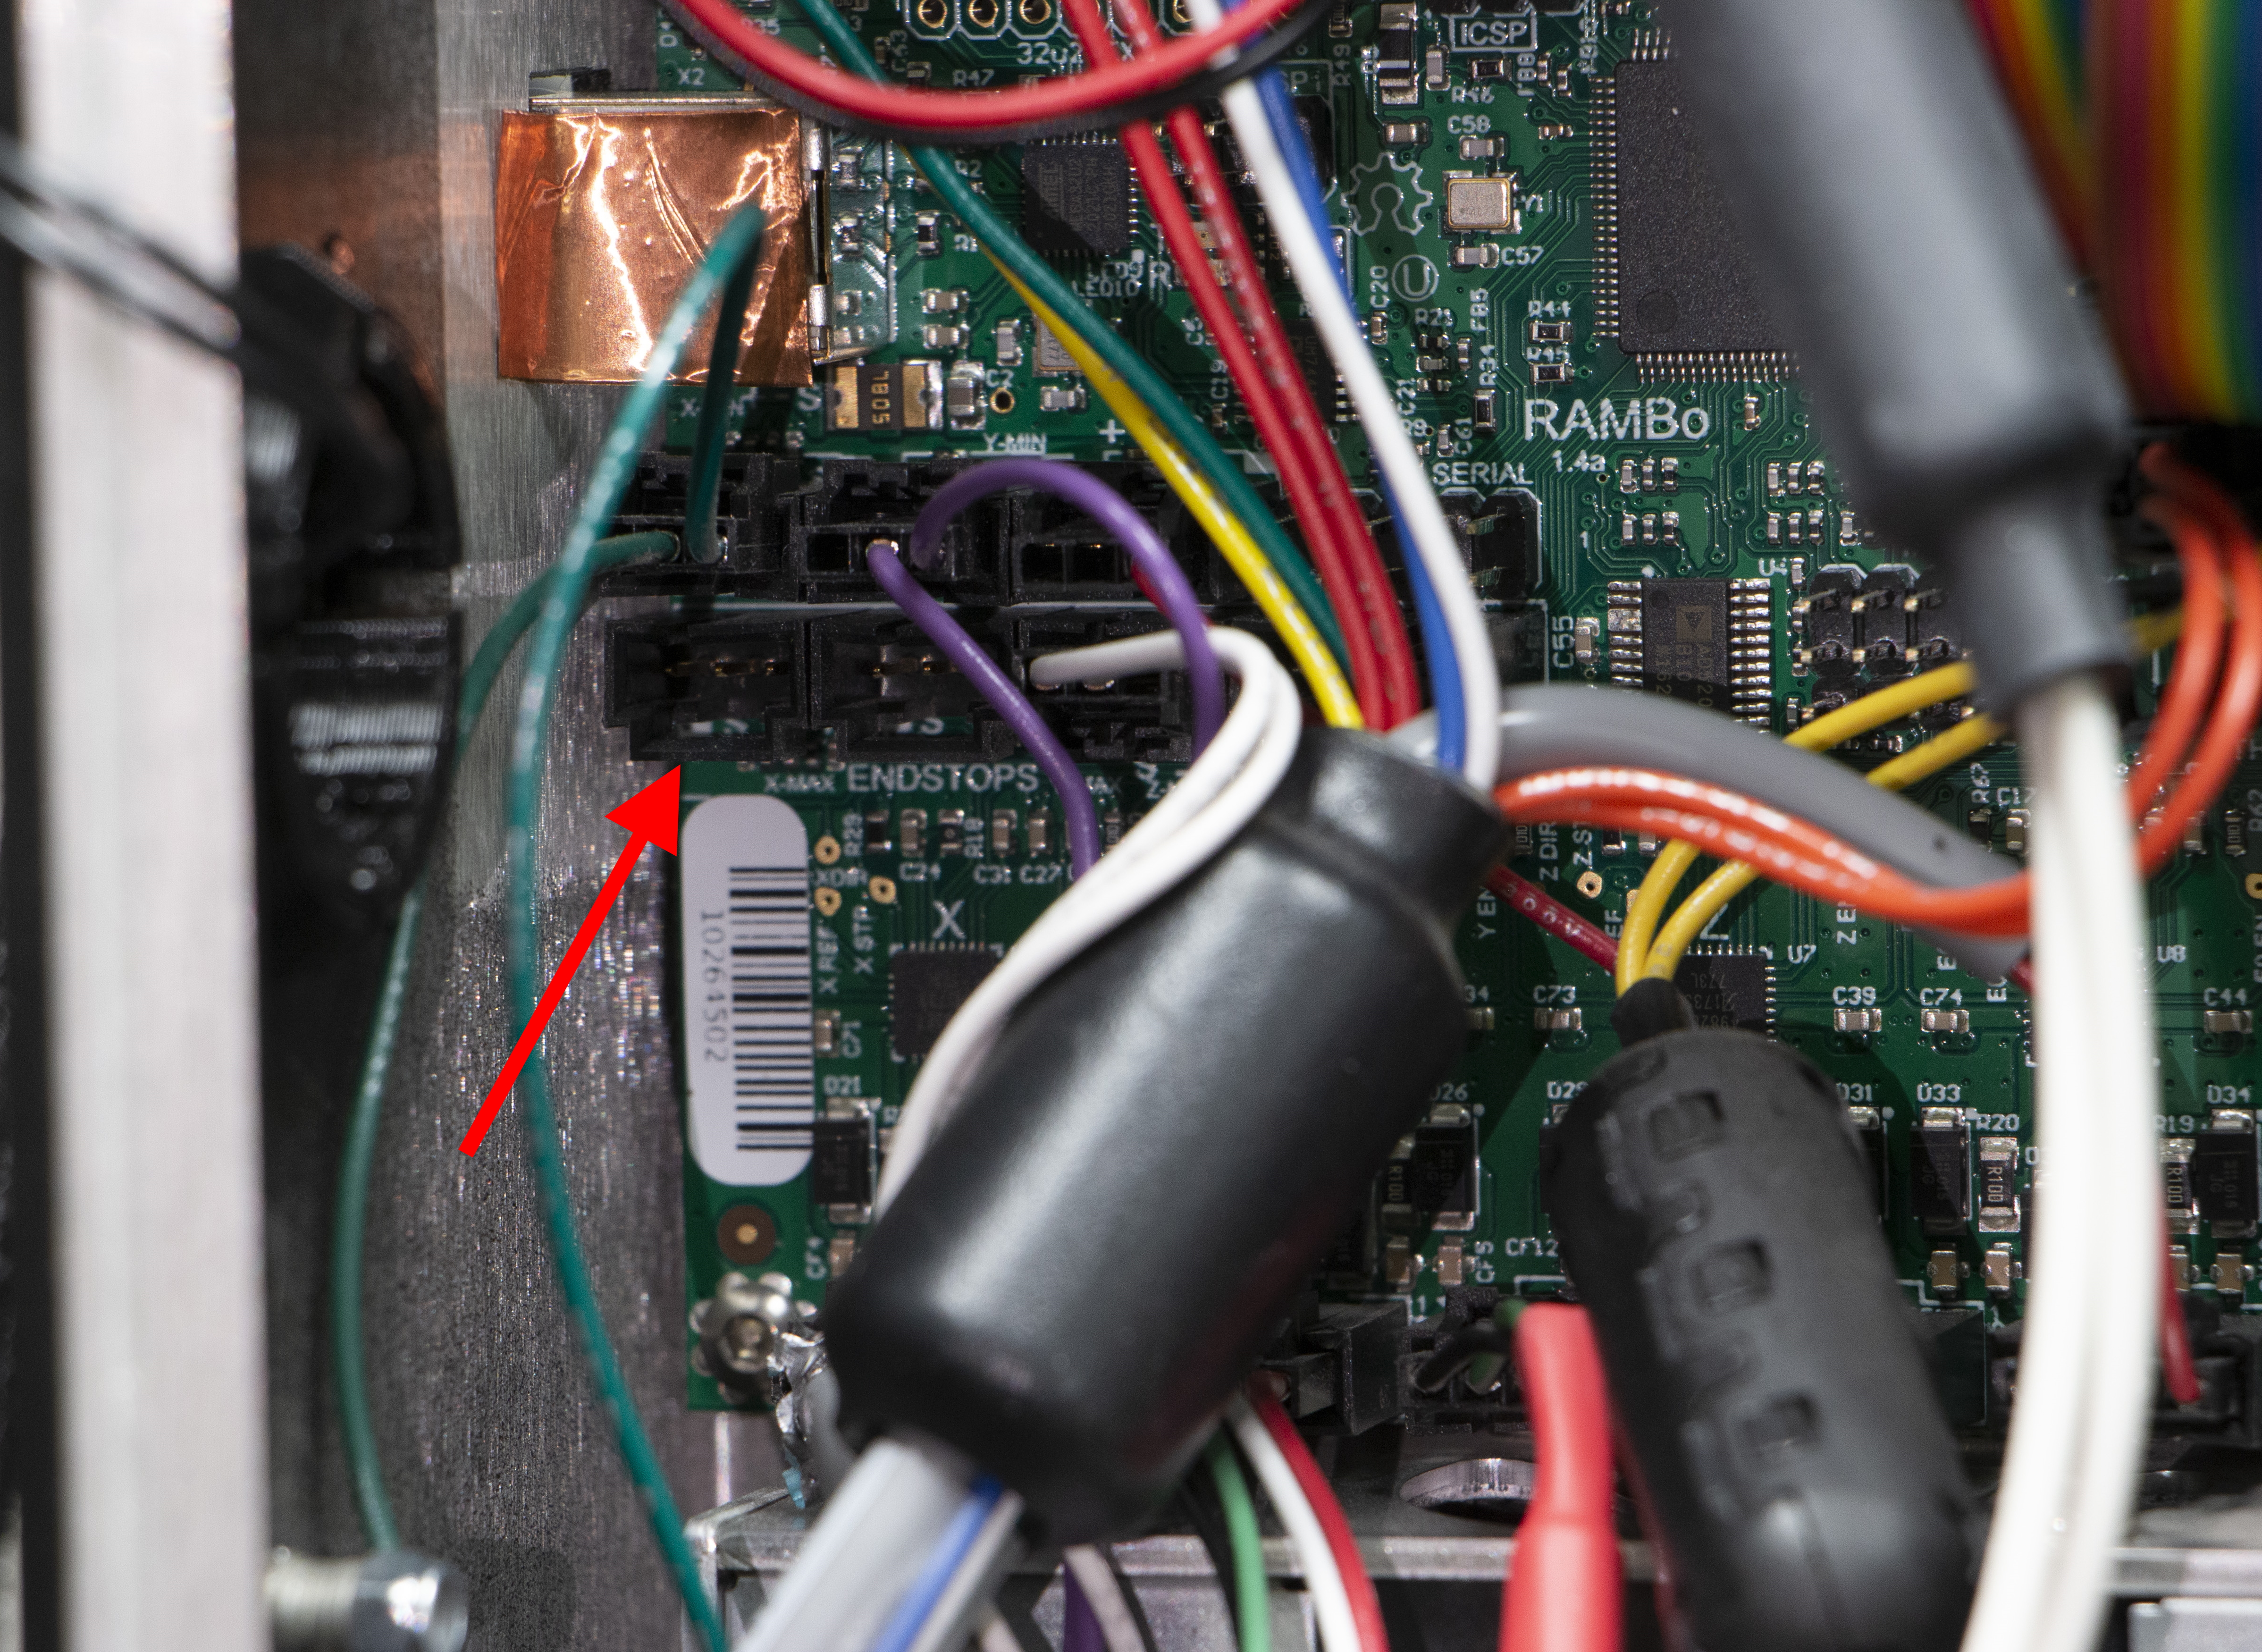
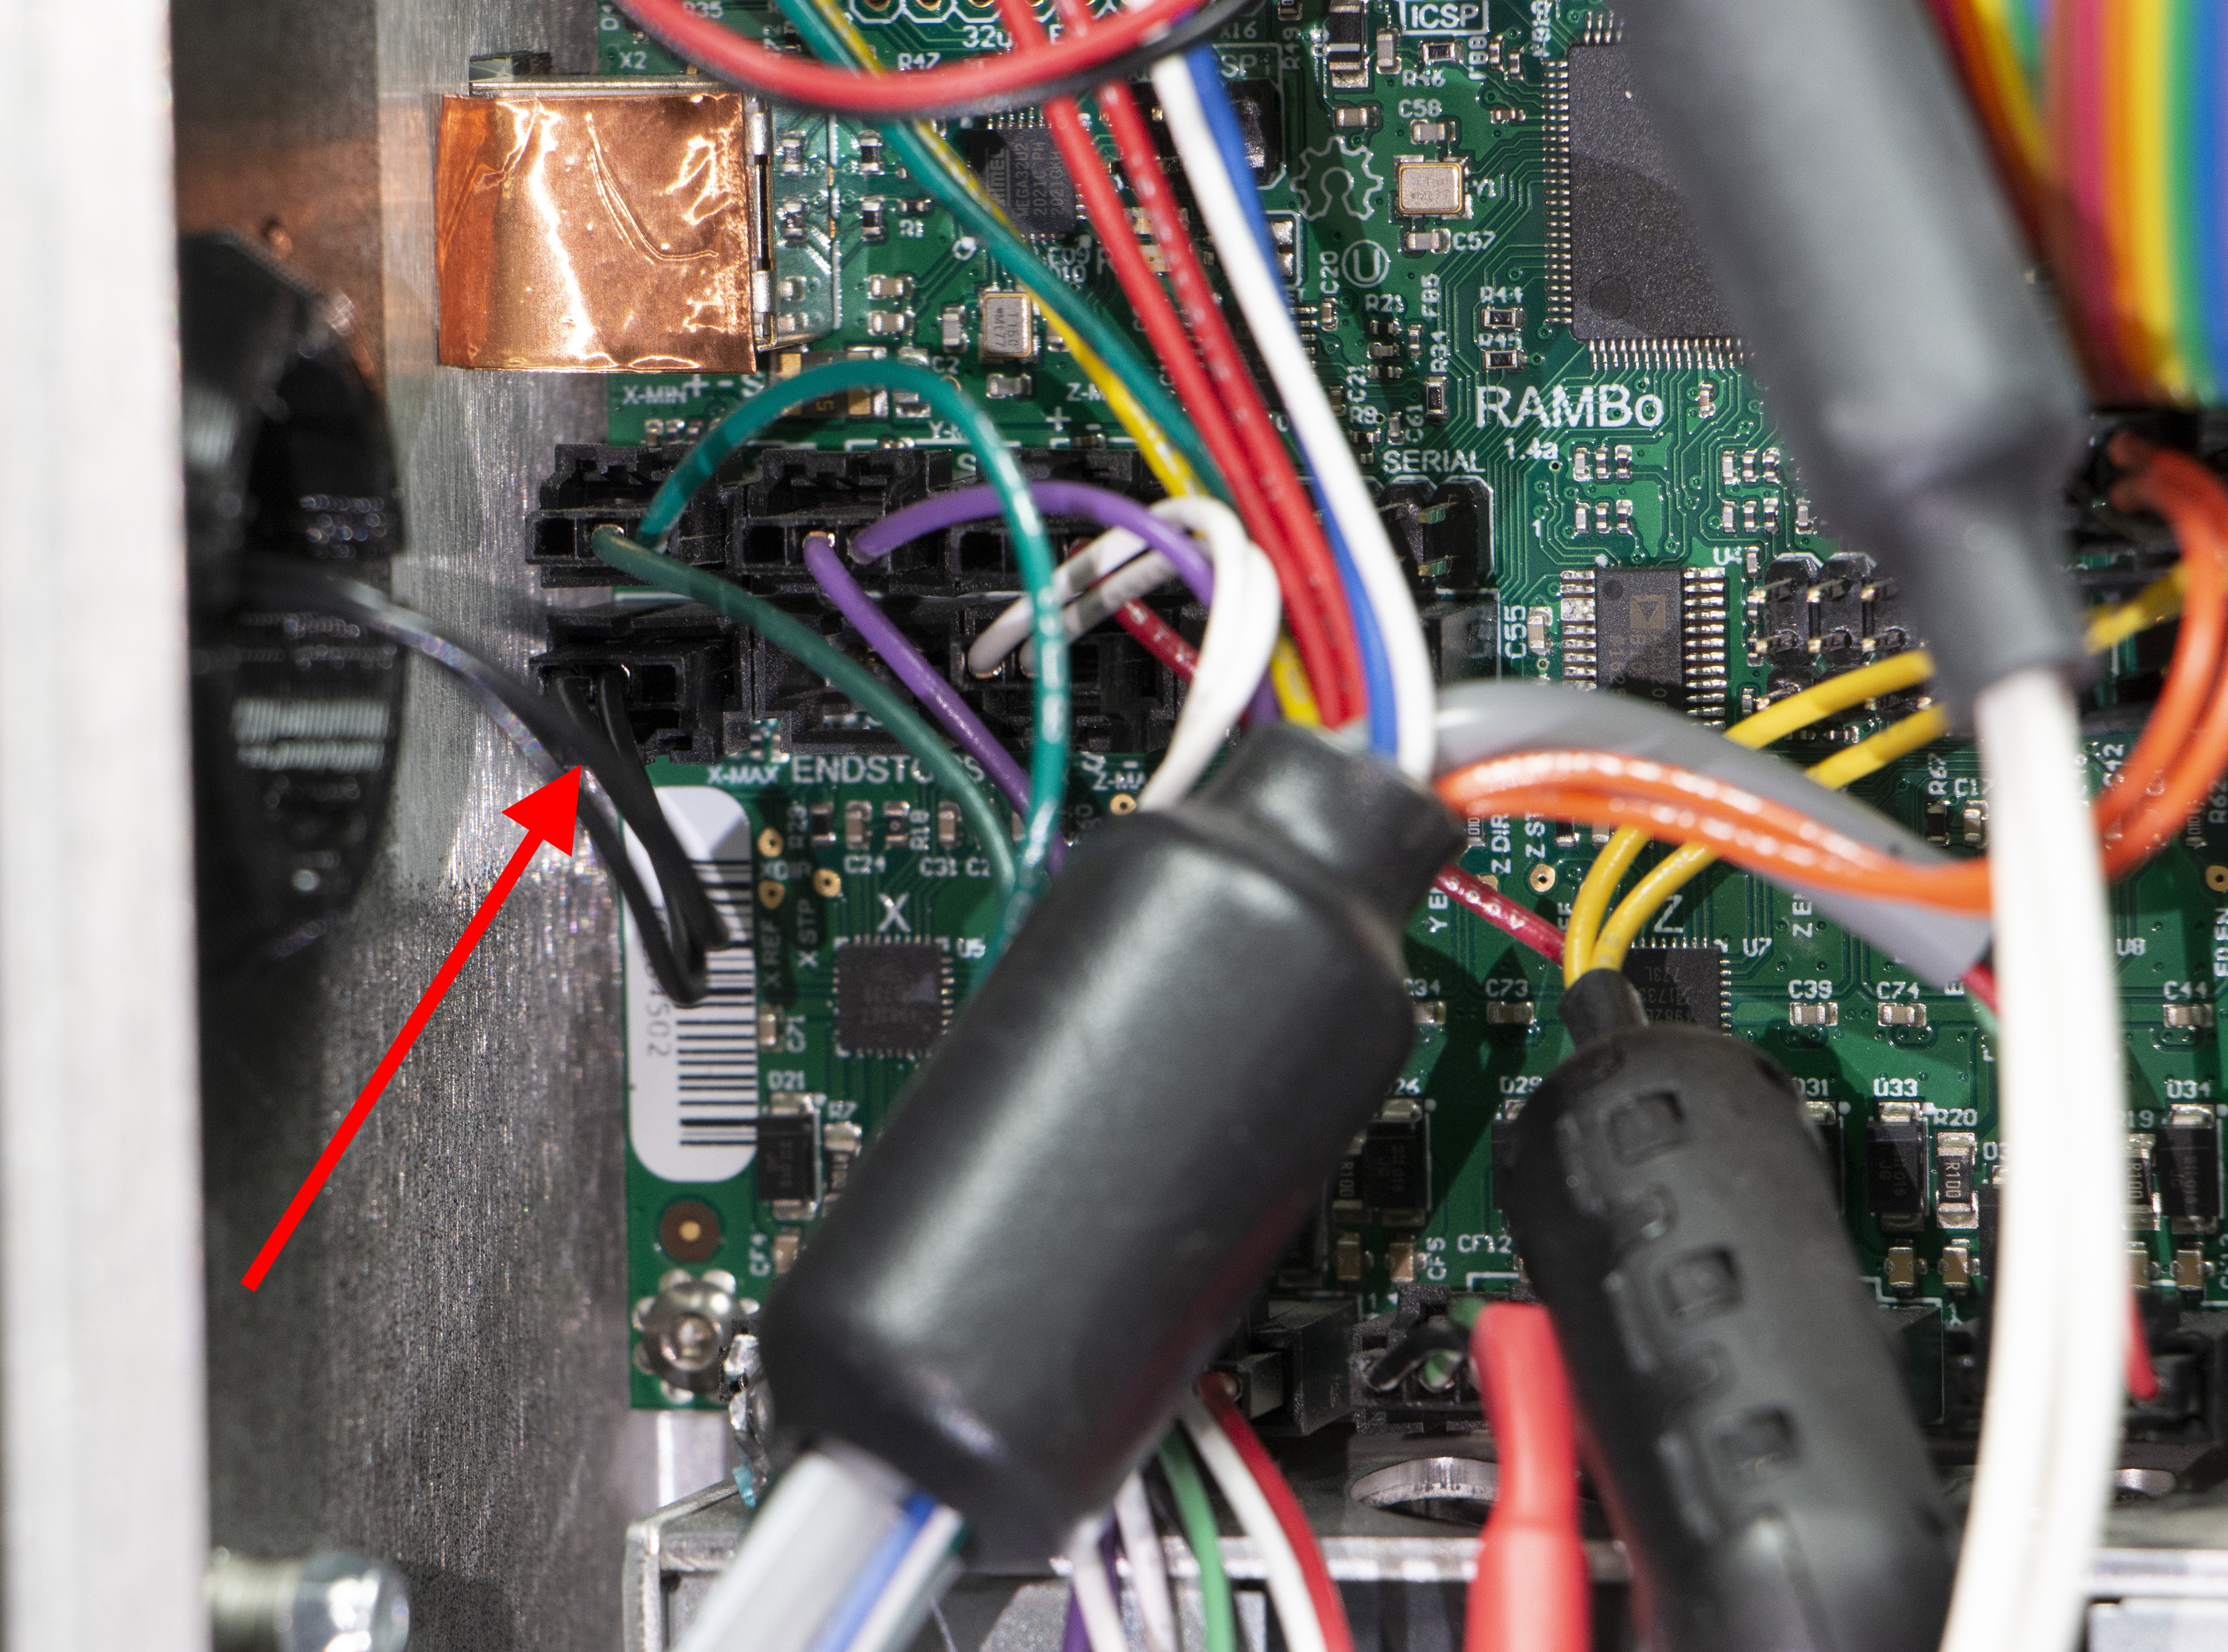
There should be one purple extruder 2 harness that is still connected to the board, remove the harness and connect the runout sensor to that port. It should be X-max.
Replace the electronics cover using the same screws that were removed earlier.
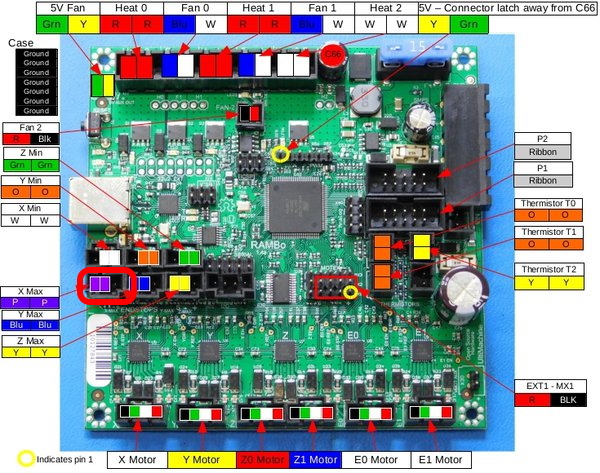


Find the port that say X-max, it should be under a pair of green wires, and connect the runout sensor harness to the board.
Replace the electronics cover using the same screws that were removed earlier.
Remove the feed tube from the feed tube spinner by cutting the cable tie holding the feed tube in place.
Then slide the feed tube inside the runout sensor and secure with the cable tie provided in the filament runout sensor kit.
Once the runout sensor is install, plug the printer in and then turn the printer on.
If you have not done so already, ensure that you install Cura LE version 3.6.33 or later.
Flash your printers firmware by using the upgrade firmware button under manage printers in Cura.
The minimum required firmware version is:
- Workhorse - 2.0.9.0.11.hex
- Taz 6 – 2.0.9.0.11.hex
Navigate to the runout sensor setting on your printers LCD and turn it on.
Configuration > Runout Sensor > ON
Be sure to click store settings in the configuration menu to save this change.