Open HardwareAssembly Instructions
Guides for installation and assembly of the LulzBot line of products made by FAME 3D LLC.
Guides for installation and assembly of the LulzBot line of products made by FAME 3D LLC.
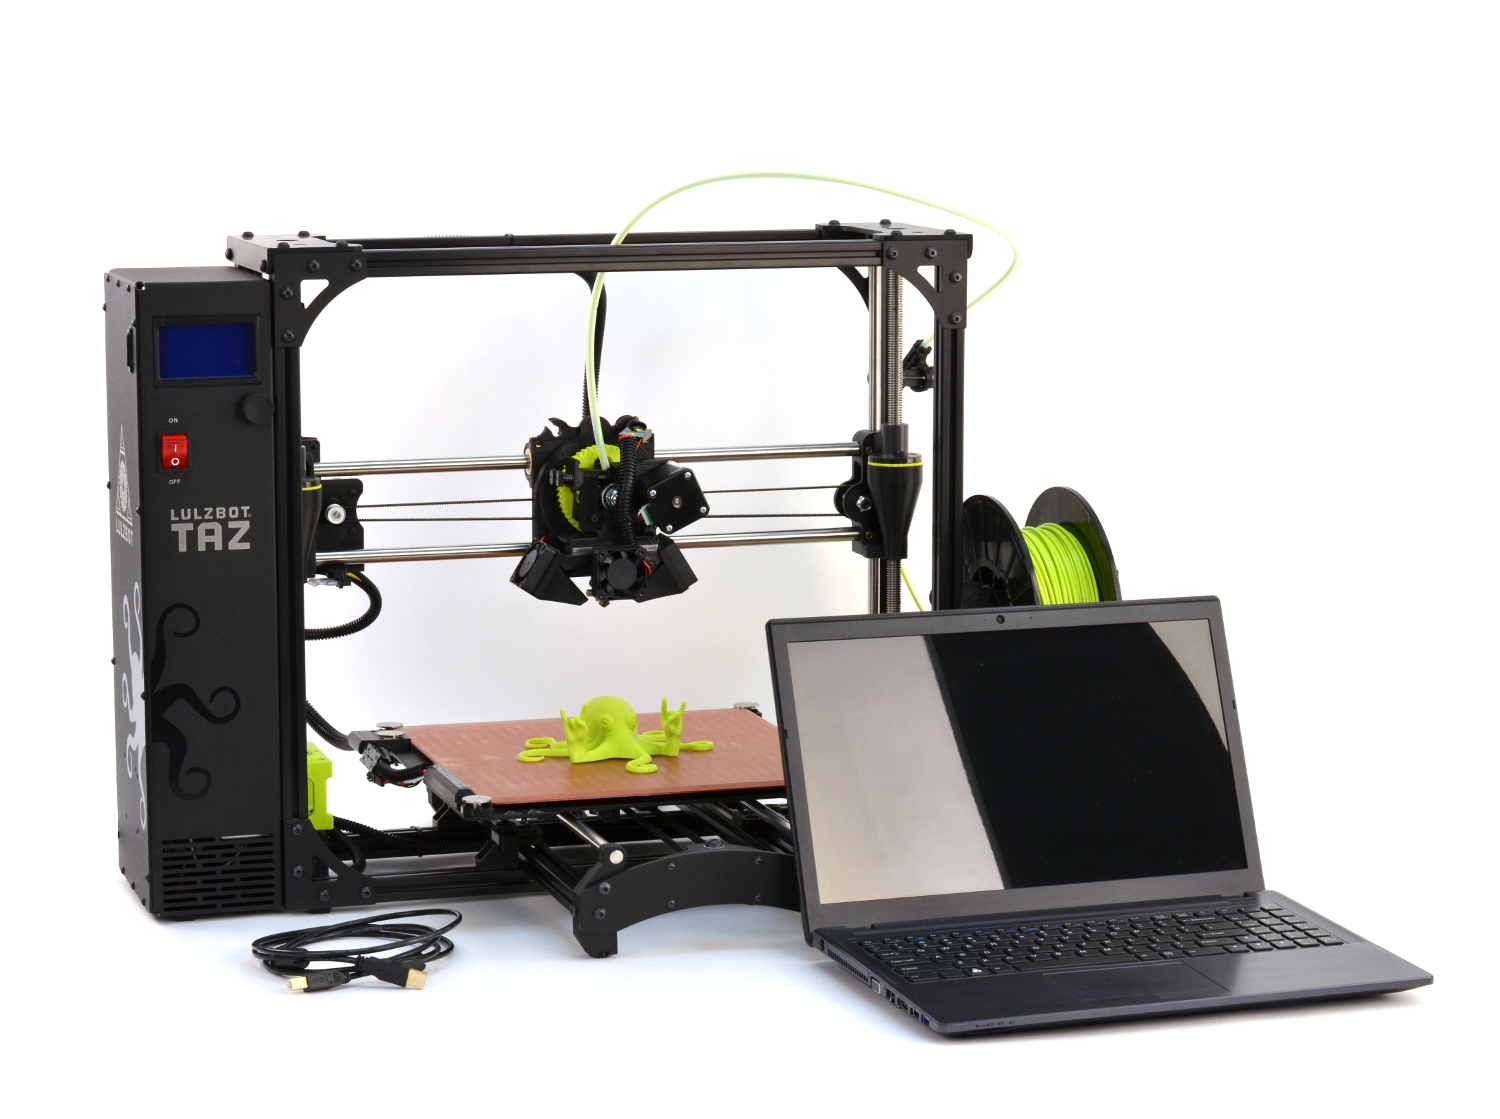
After following this Quick Start Guide, your LulzBot 3D printer will be MOAR capable than ever.

Note: Do not cut the clear plastic wrap.
Unfold the cardboard insert to remove the tool head.
Save the packaging for future storage and shipping needs.

You will also need
Let's get started!
4A
Power on your LulzBot TAZ 3D printer.
4B
Home the TAZ 3D printer by using the Graphical LCD Controller by navigating to: Movement > Auto Home.
4C
Raise the Z-axis up by using the Graphical LCD controller by navigating to: Movement > Move Axis > Move 1mm > Move Z
4D
Change the value to at least 200.

Completely power off your LulzBot 3D Printer and unplug the power cord and USB cable (if used) before proceeding.

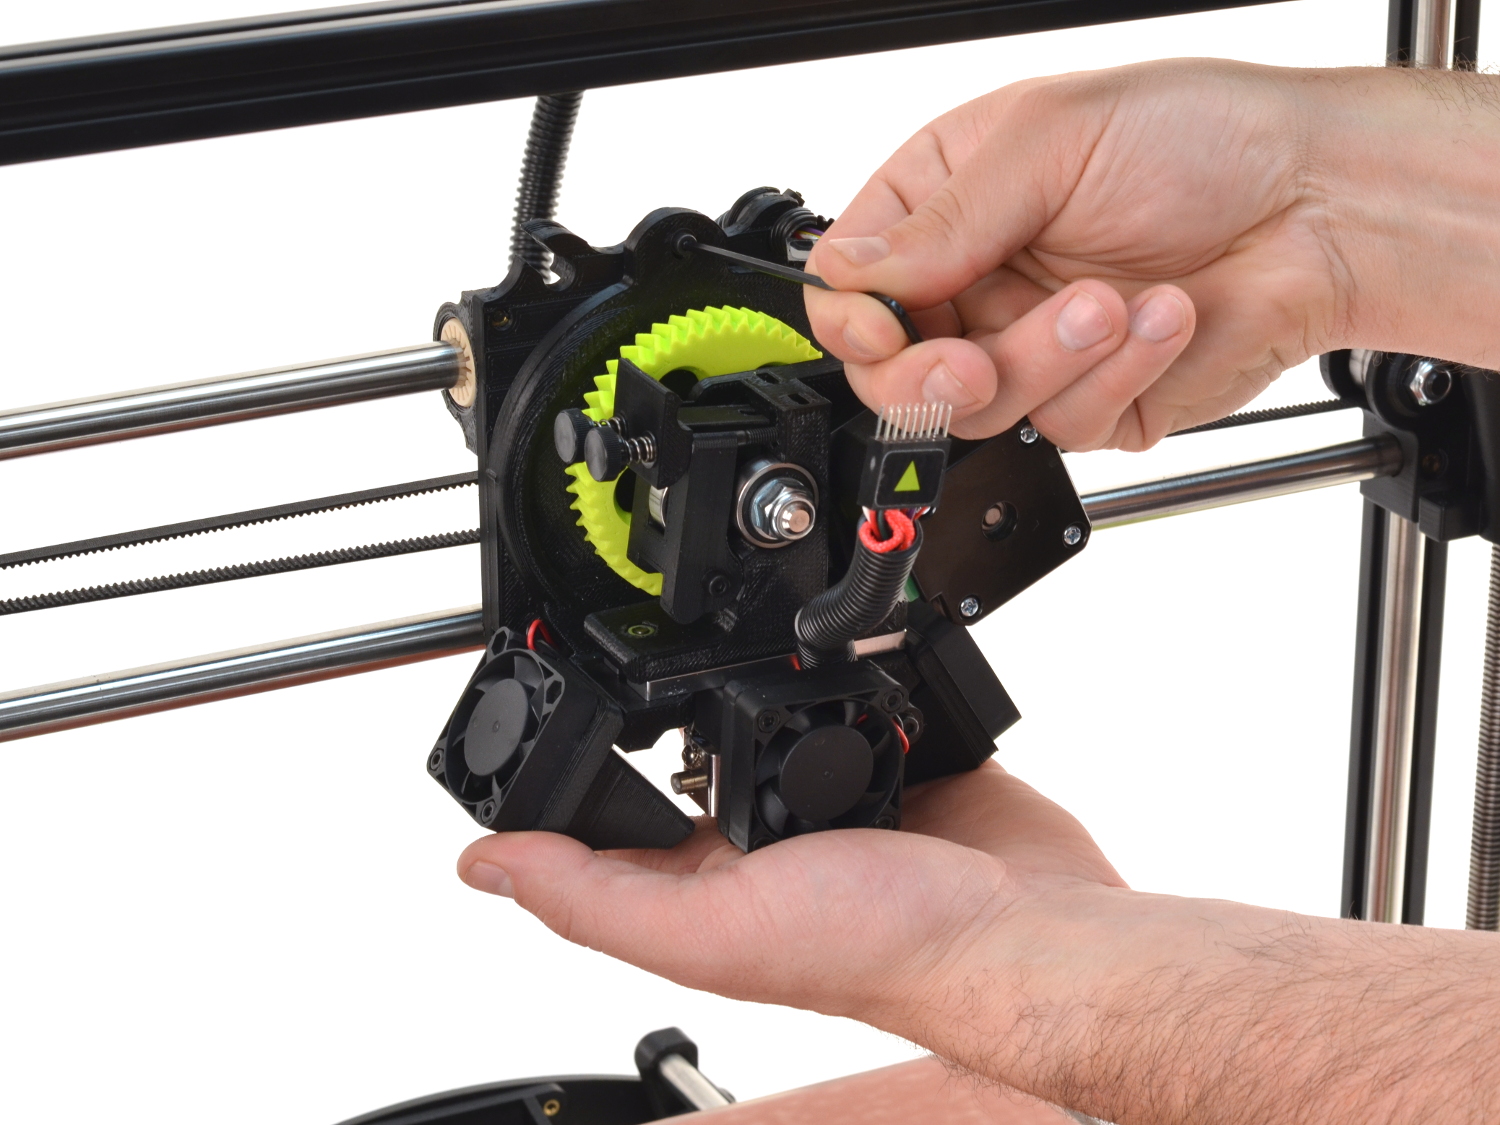
6A
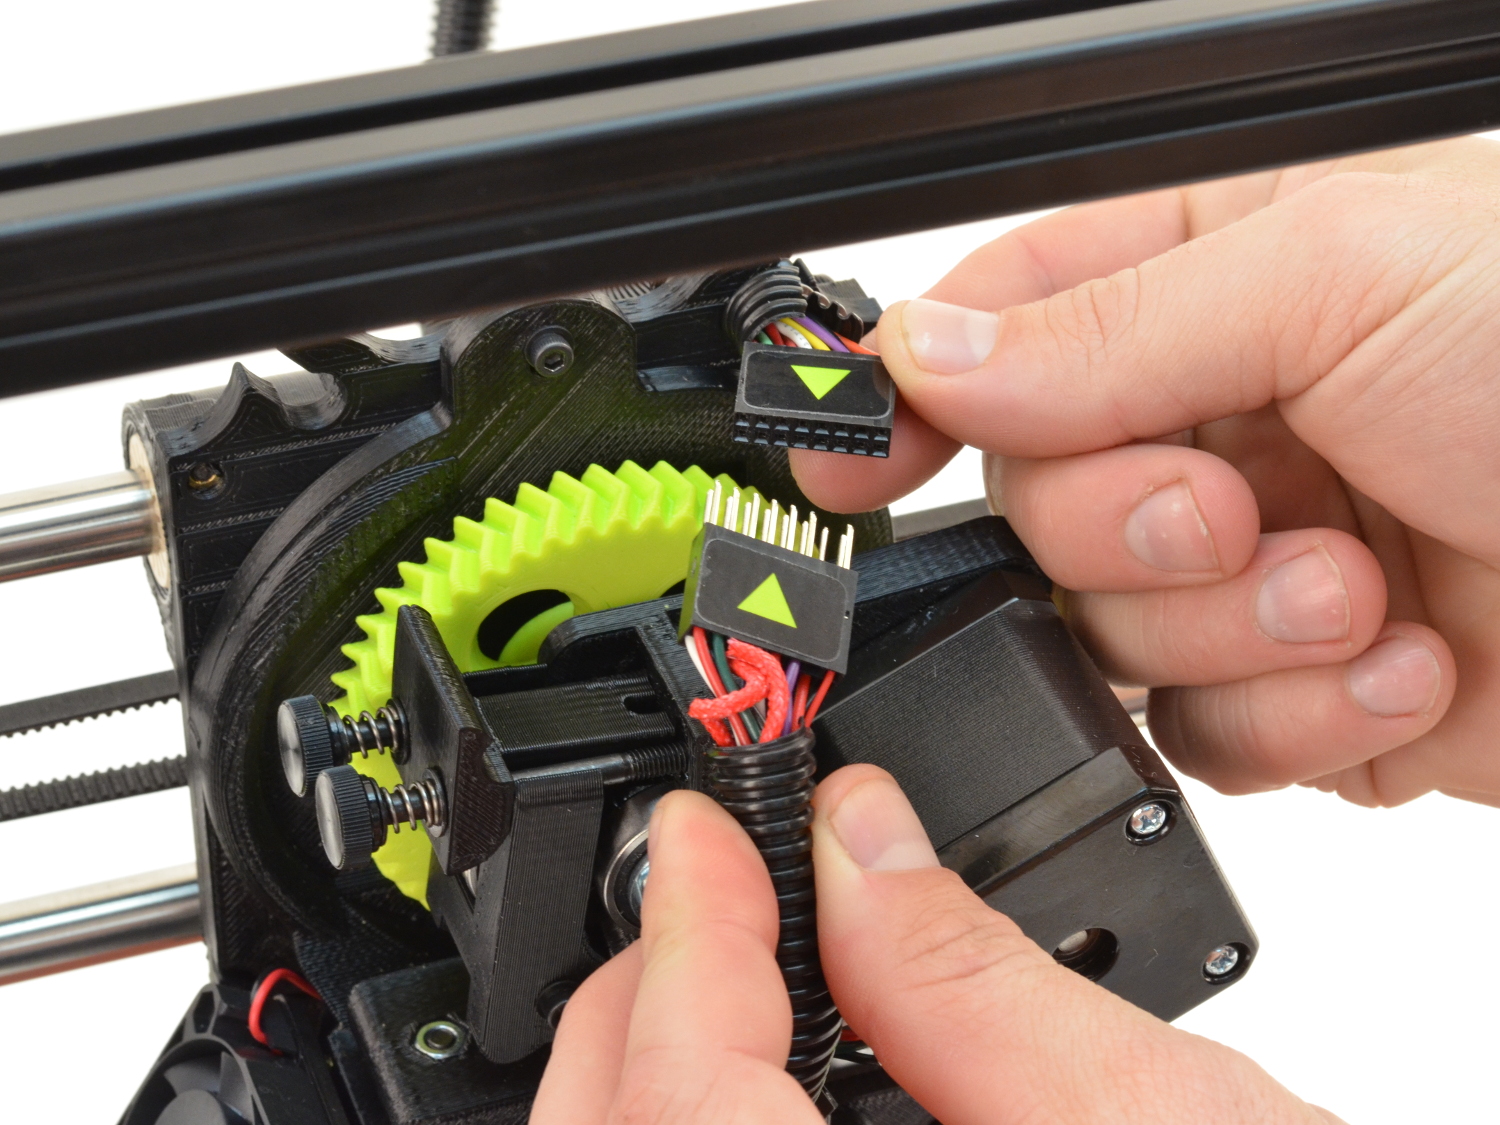
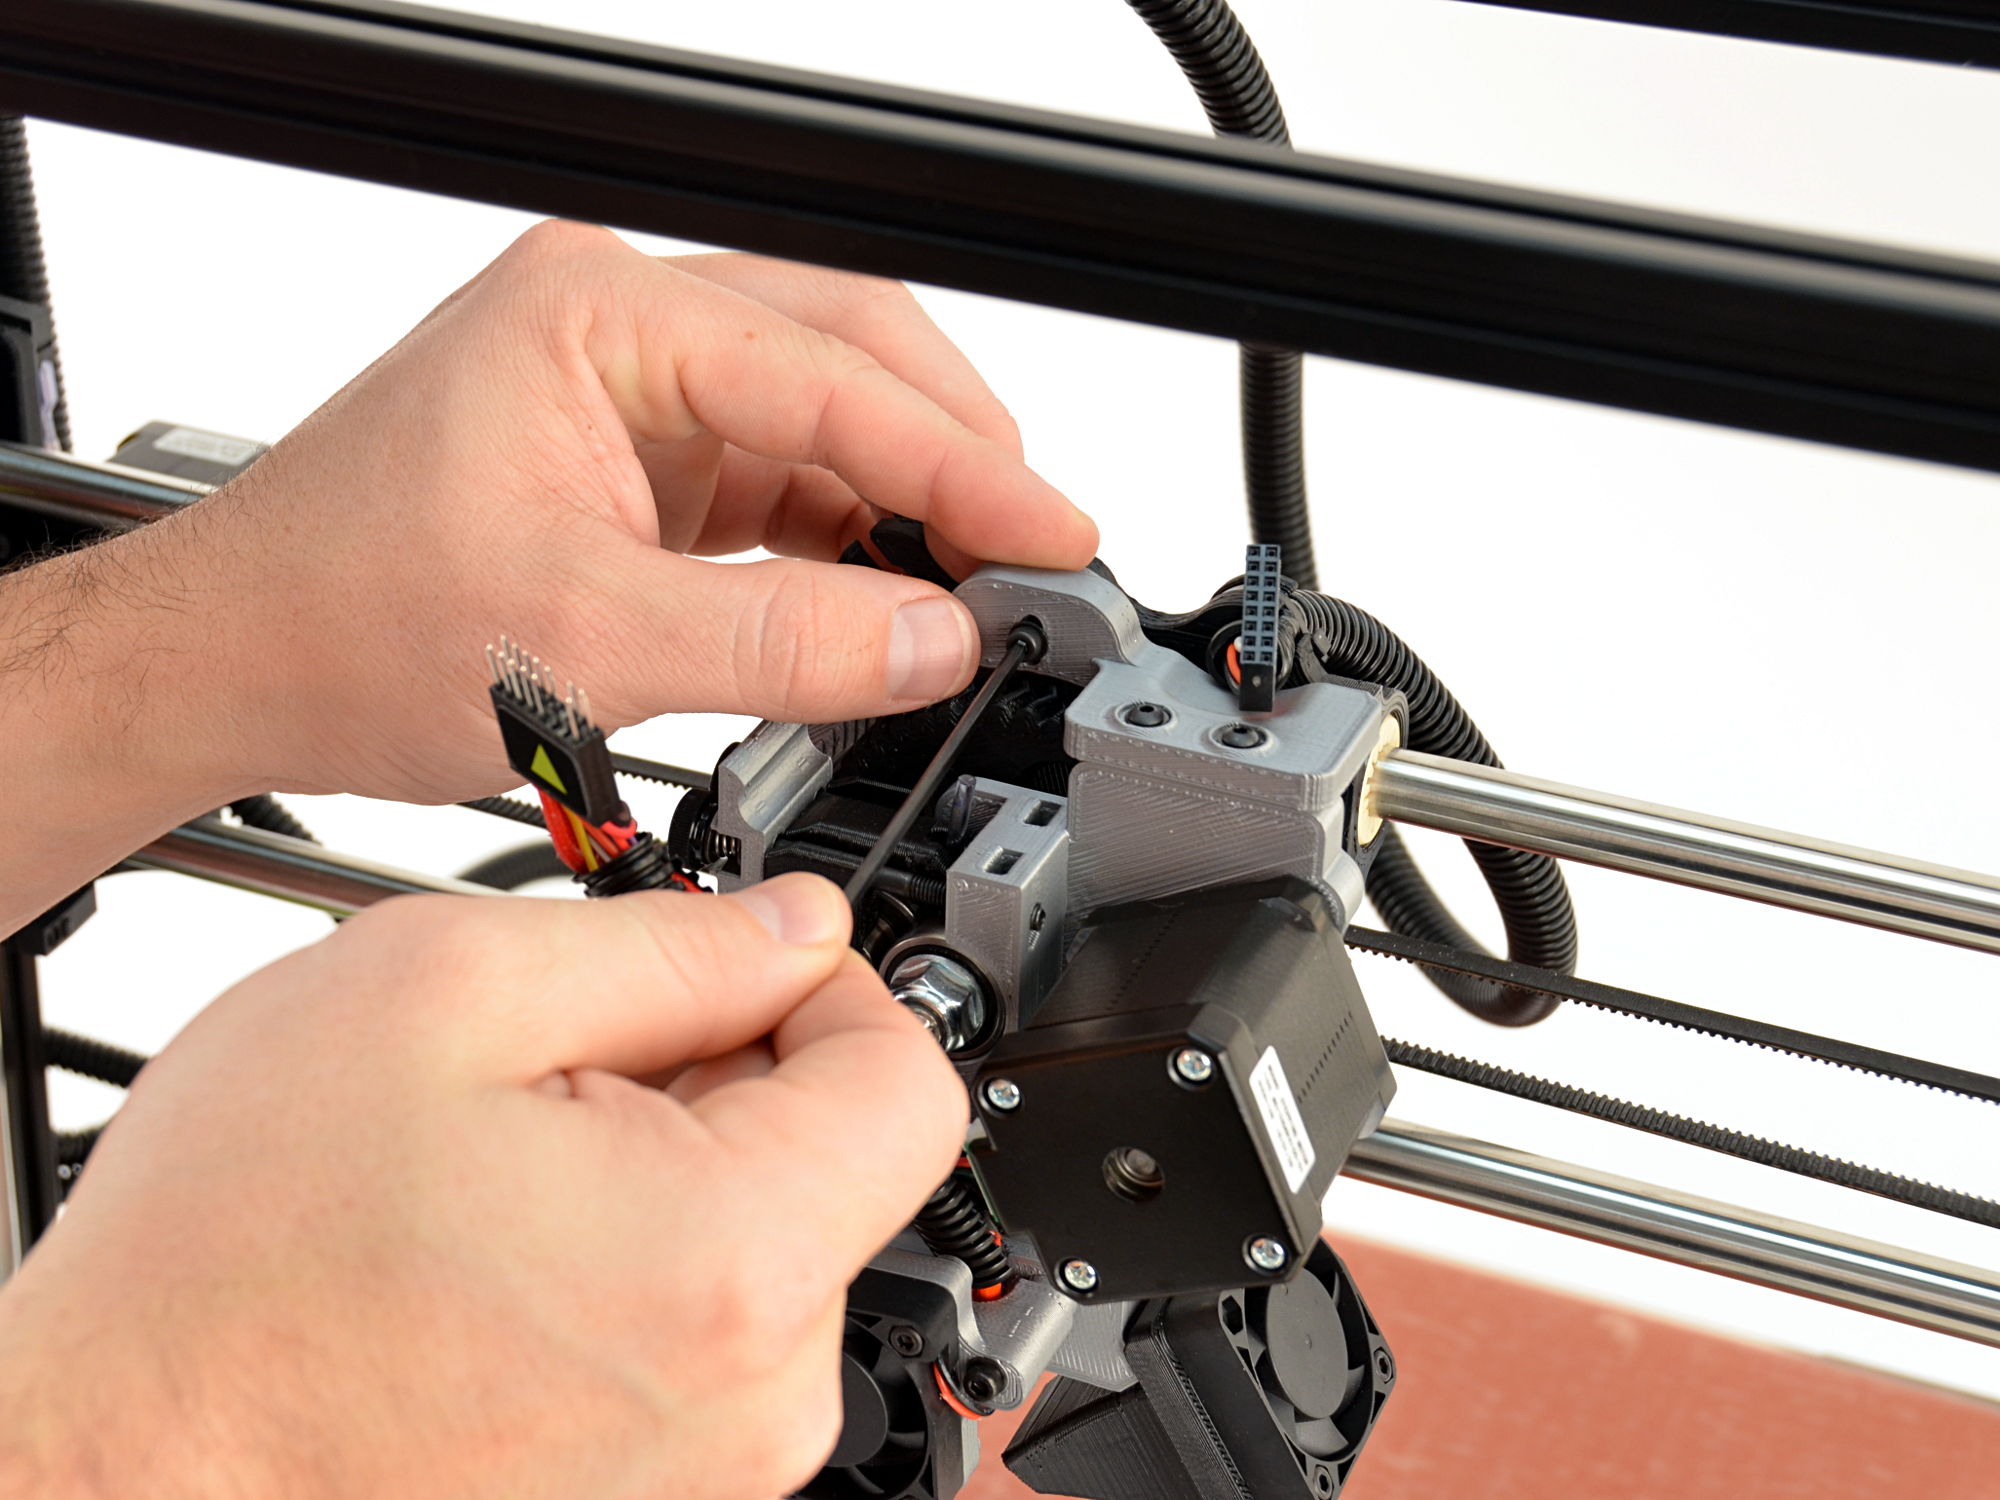
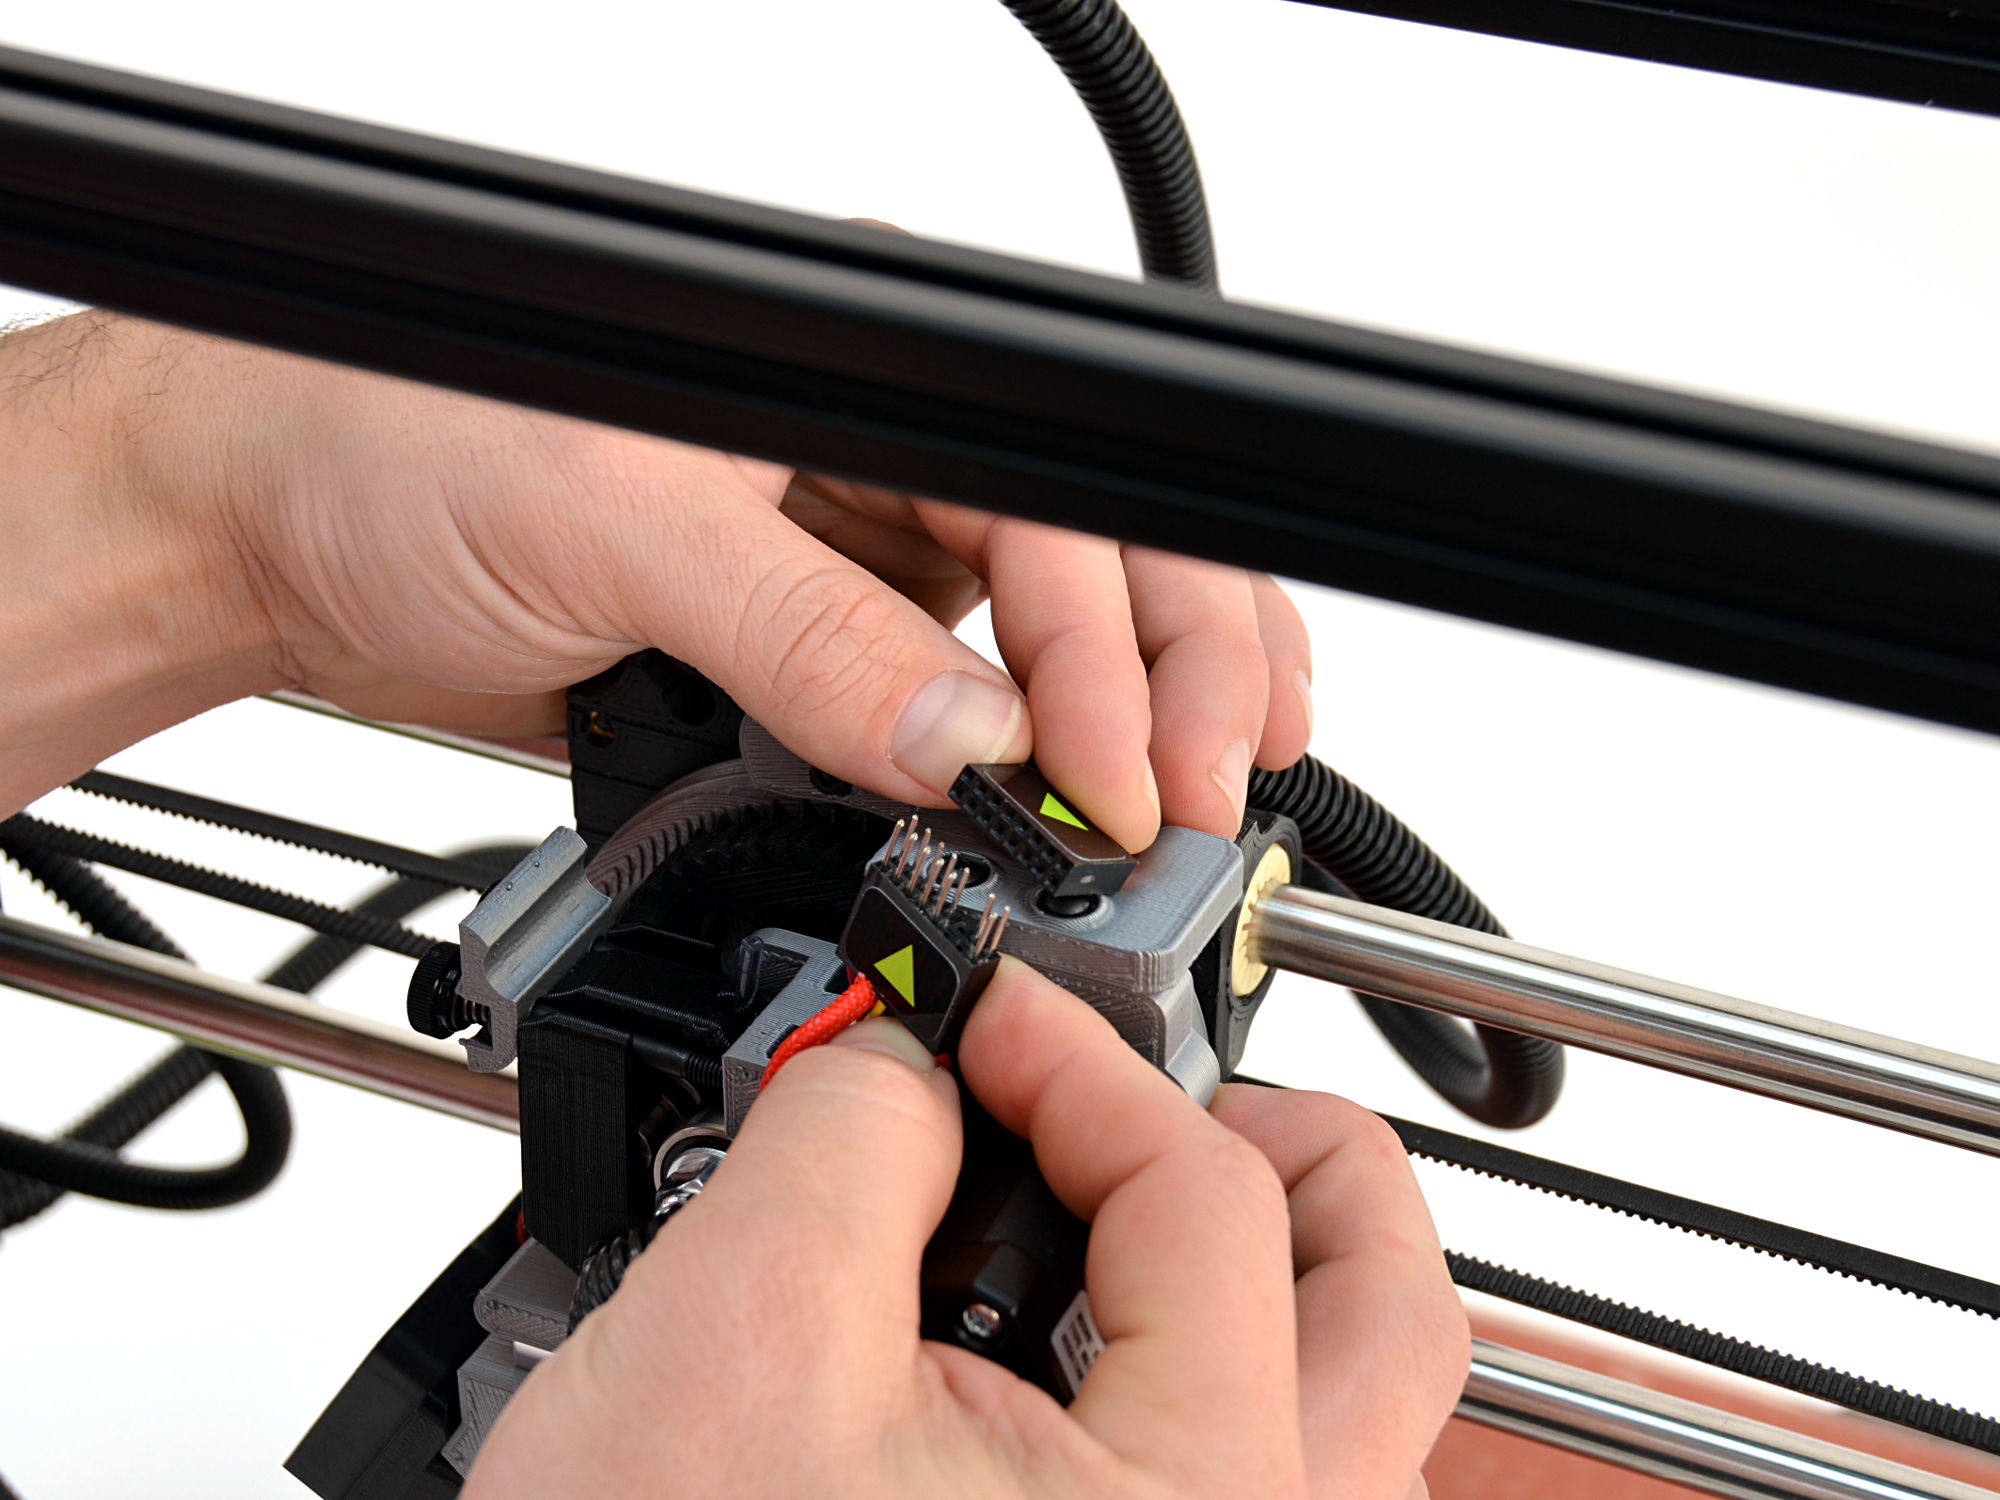
Gently unplug the connectors for your current tool head taking care to not bend any pins.
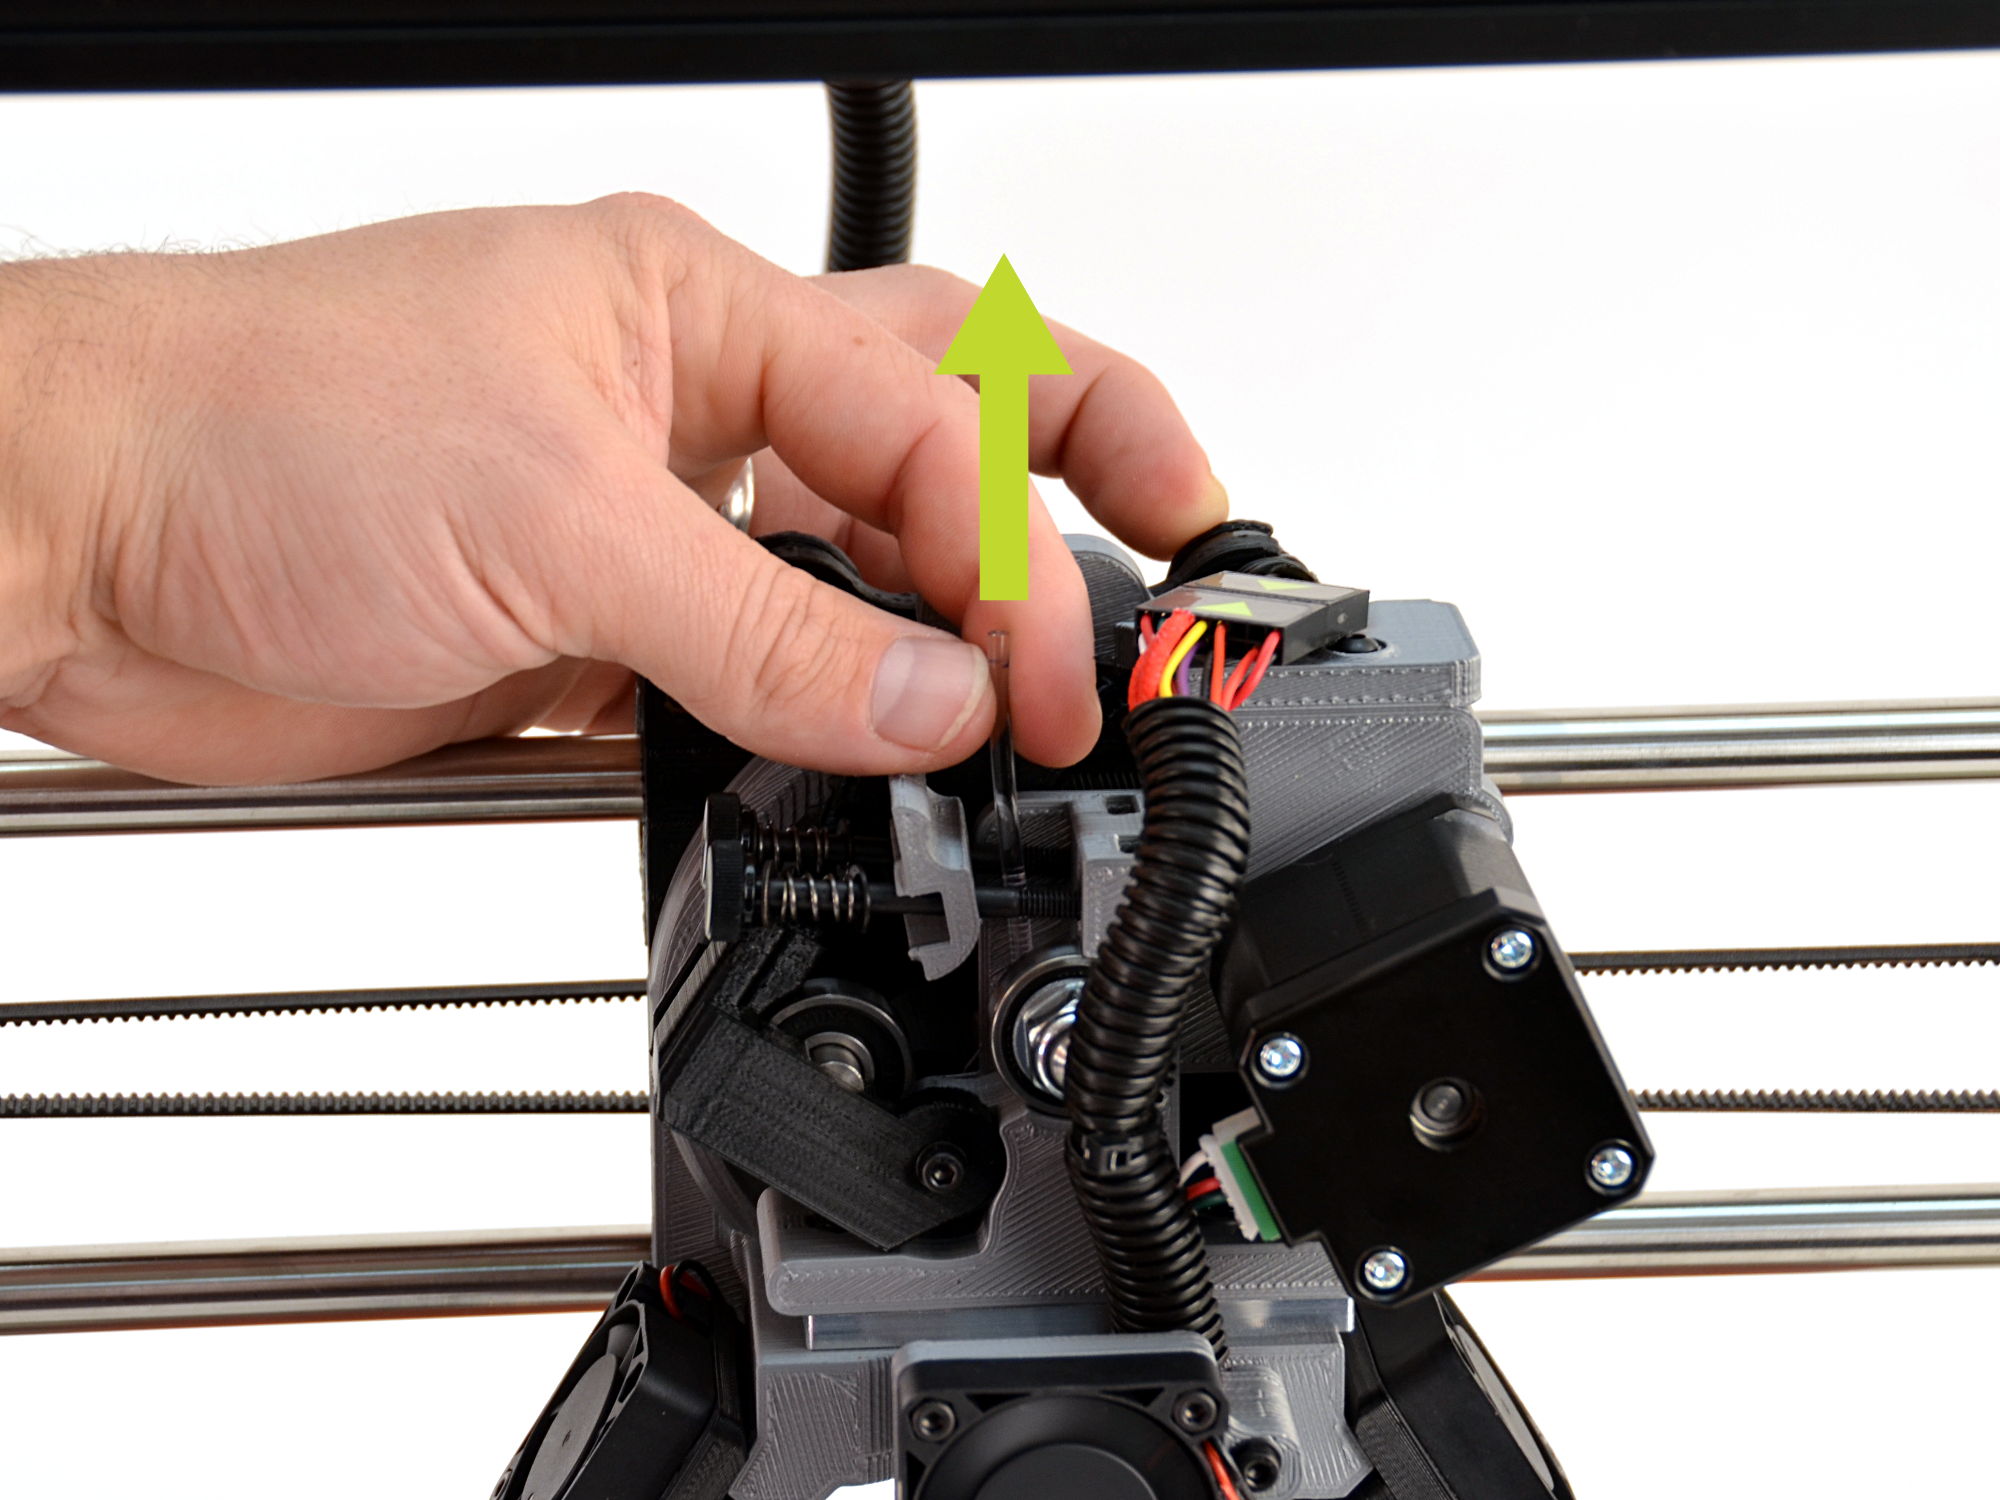
6B
With one hand support the tool head and unscrew the single M3 screw securing it to the X-axis carriage, and remove it by lifting the tool head up.
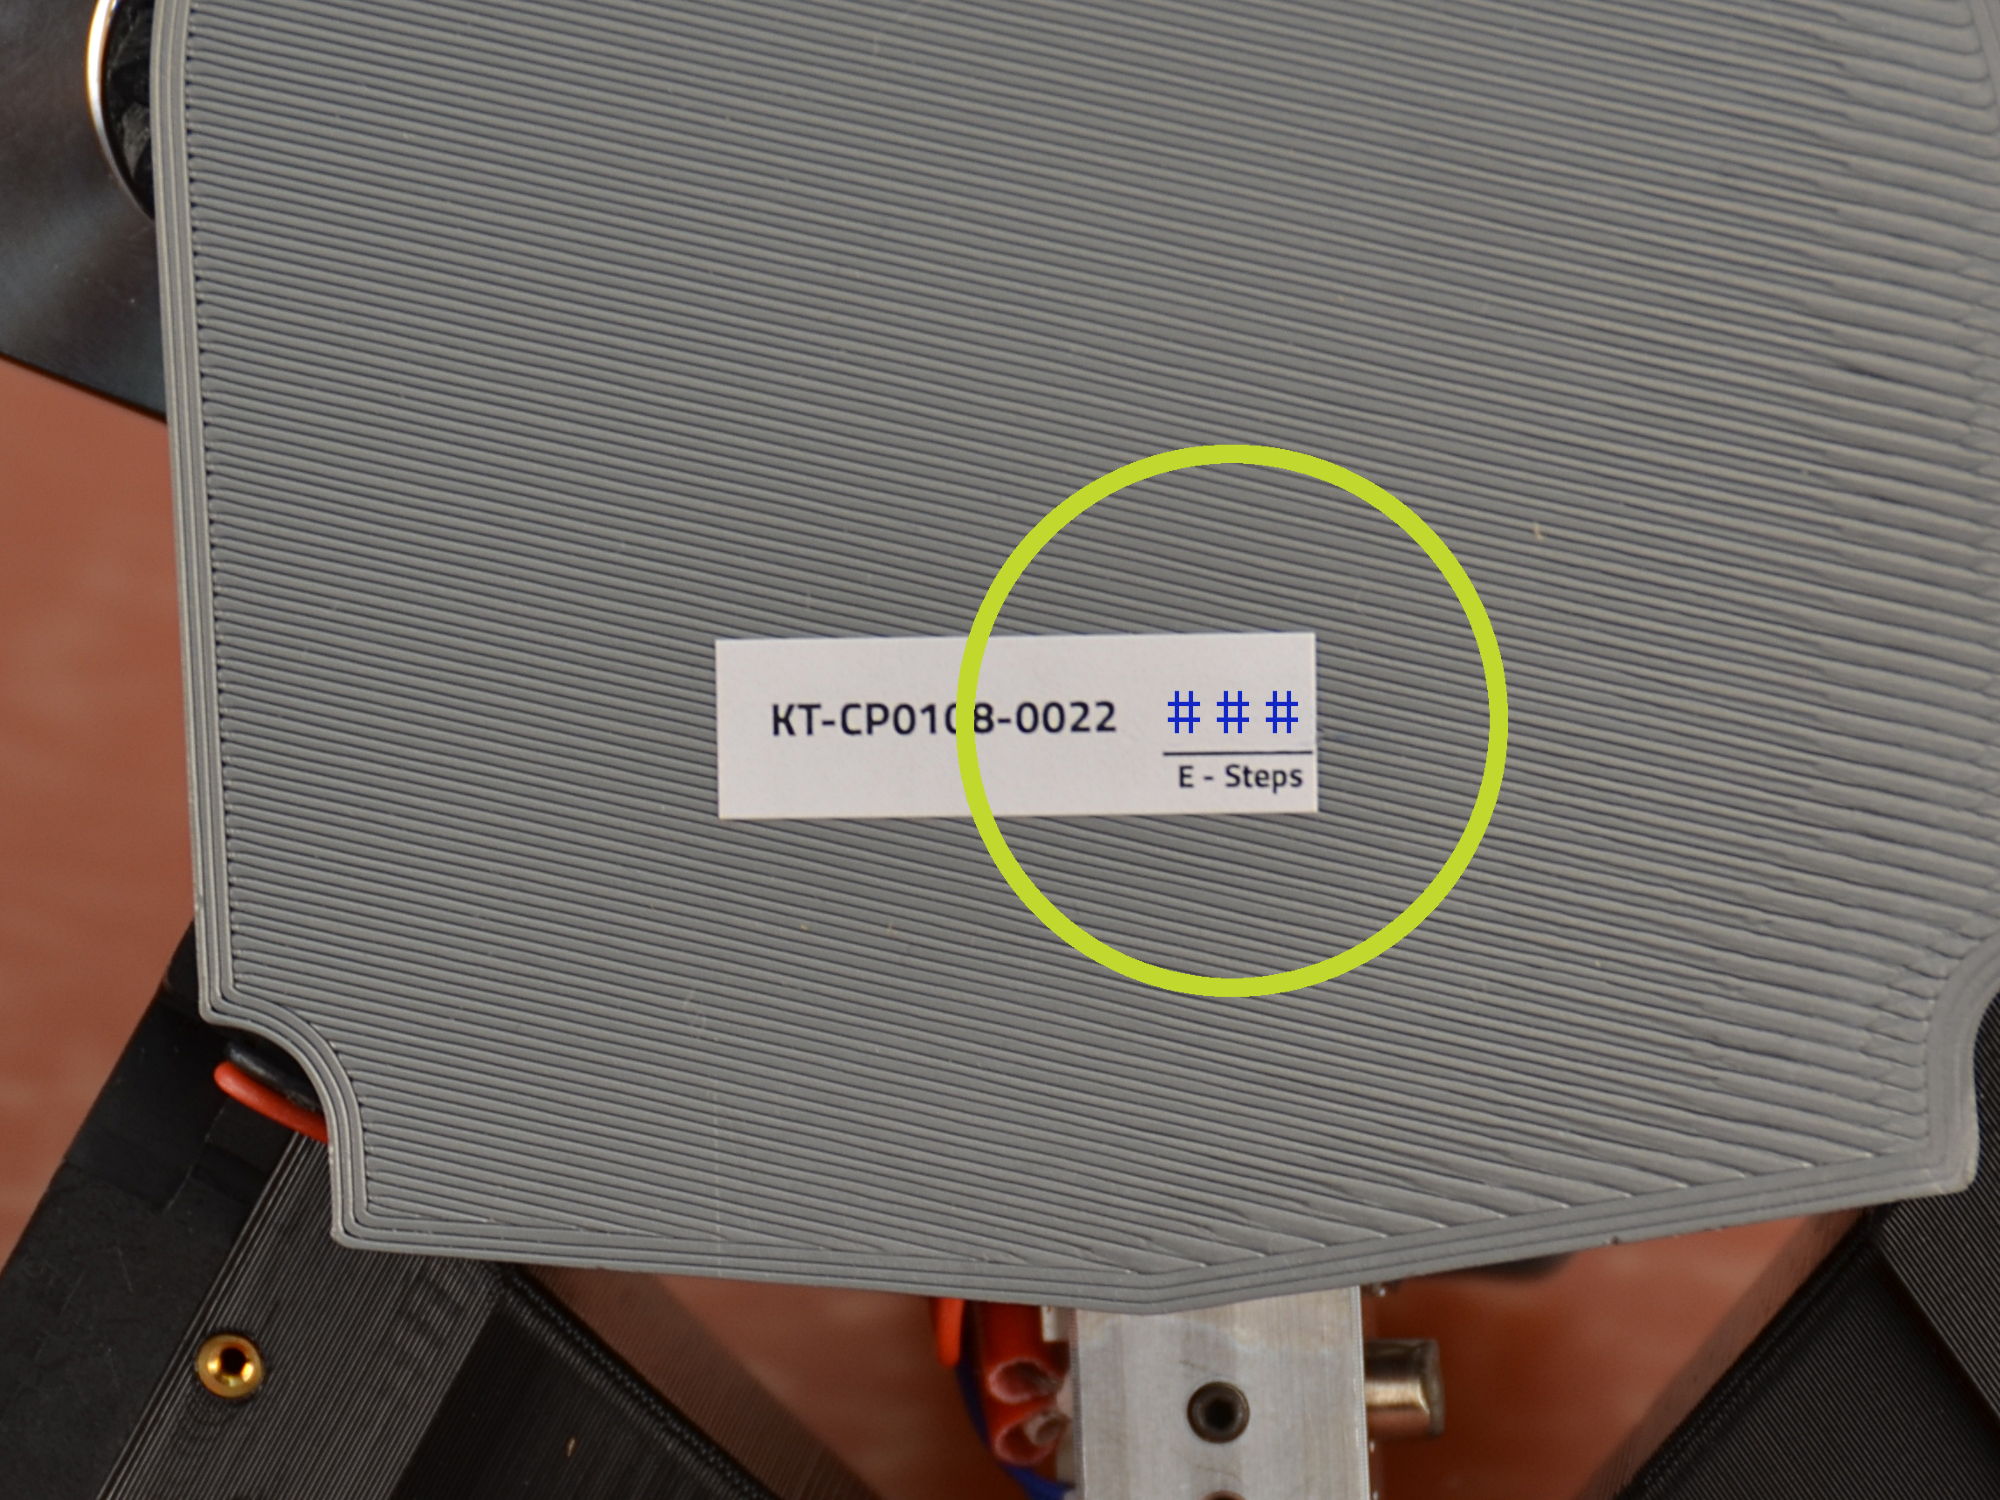
Your new MOARstruder has a different Extruder Steps Per Unit (ESteps) value than the standard TAZ tool head. This important new value can be found on a sticker on the back of the extruder.
Record this value before continuing.
8A
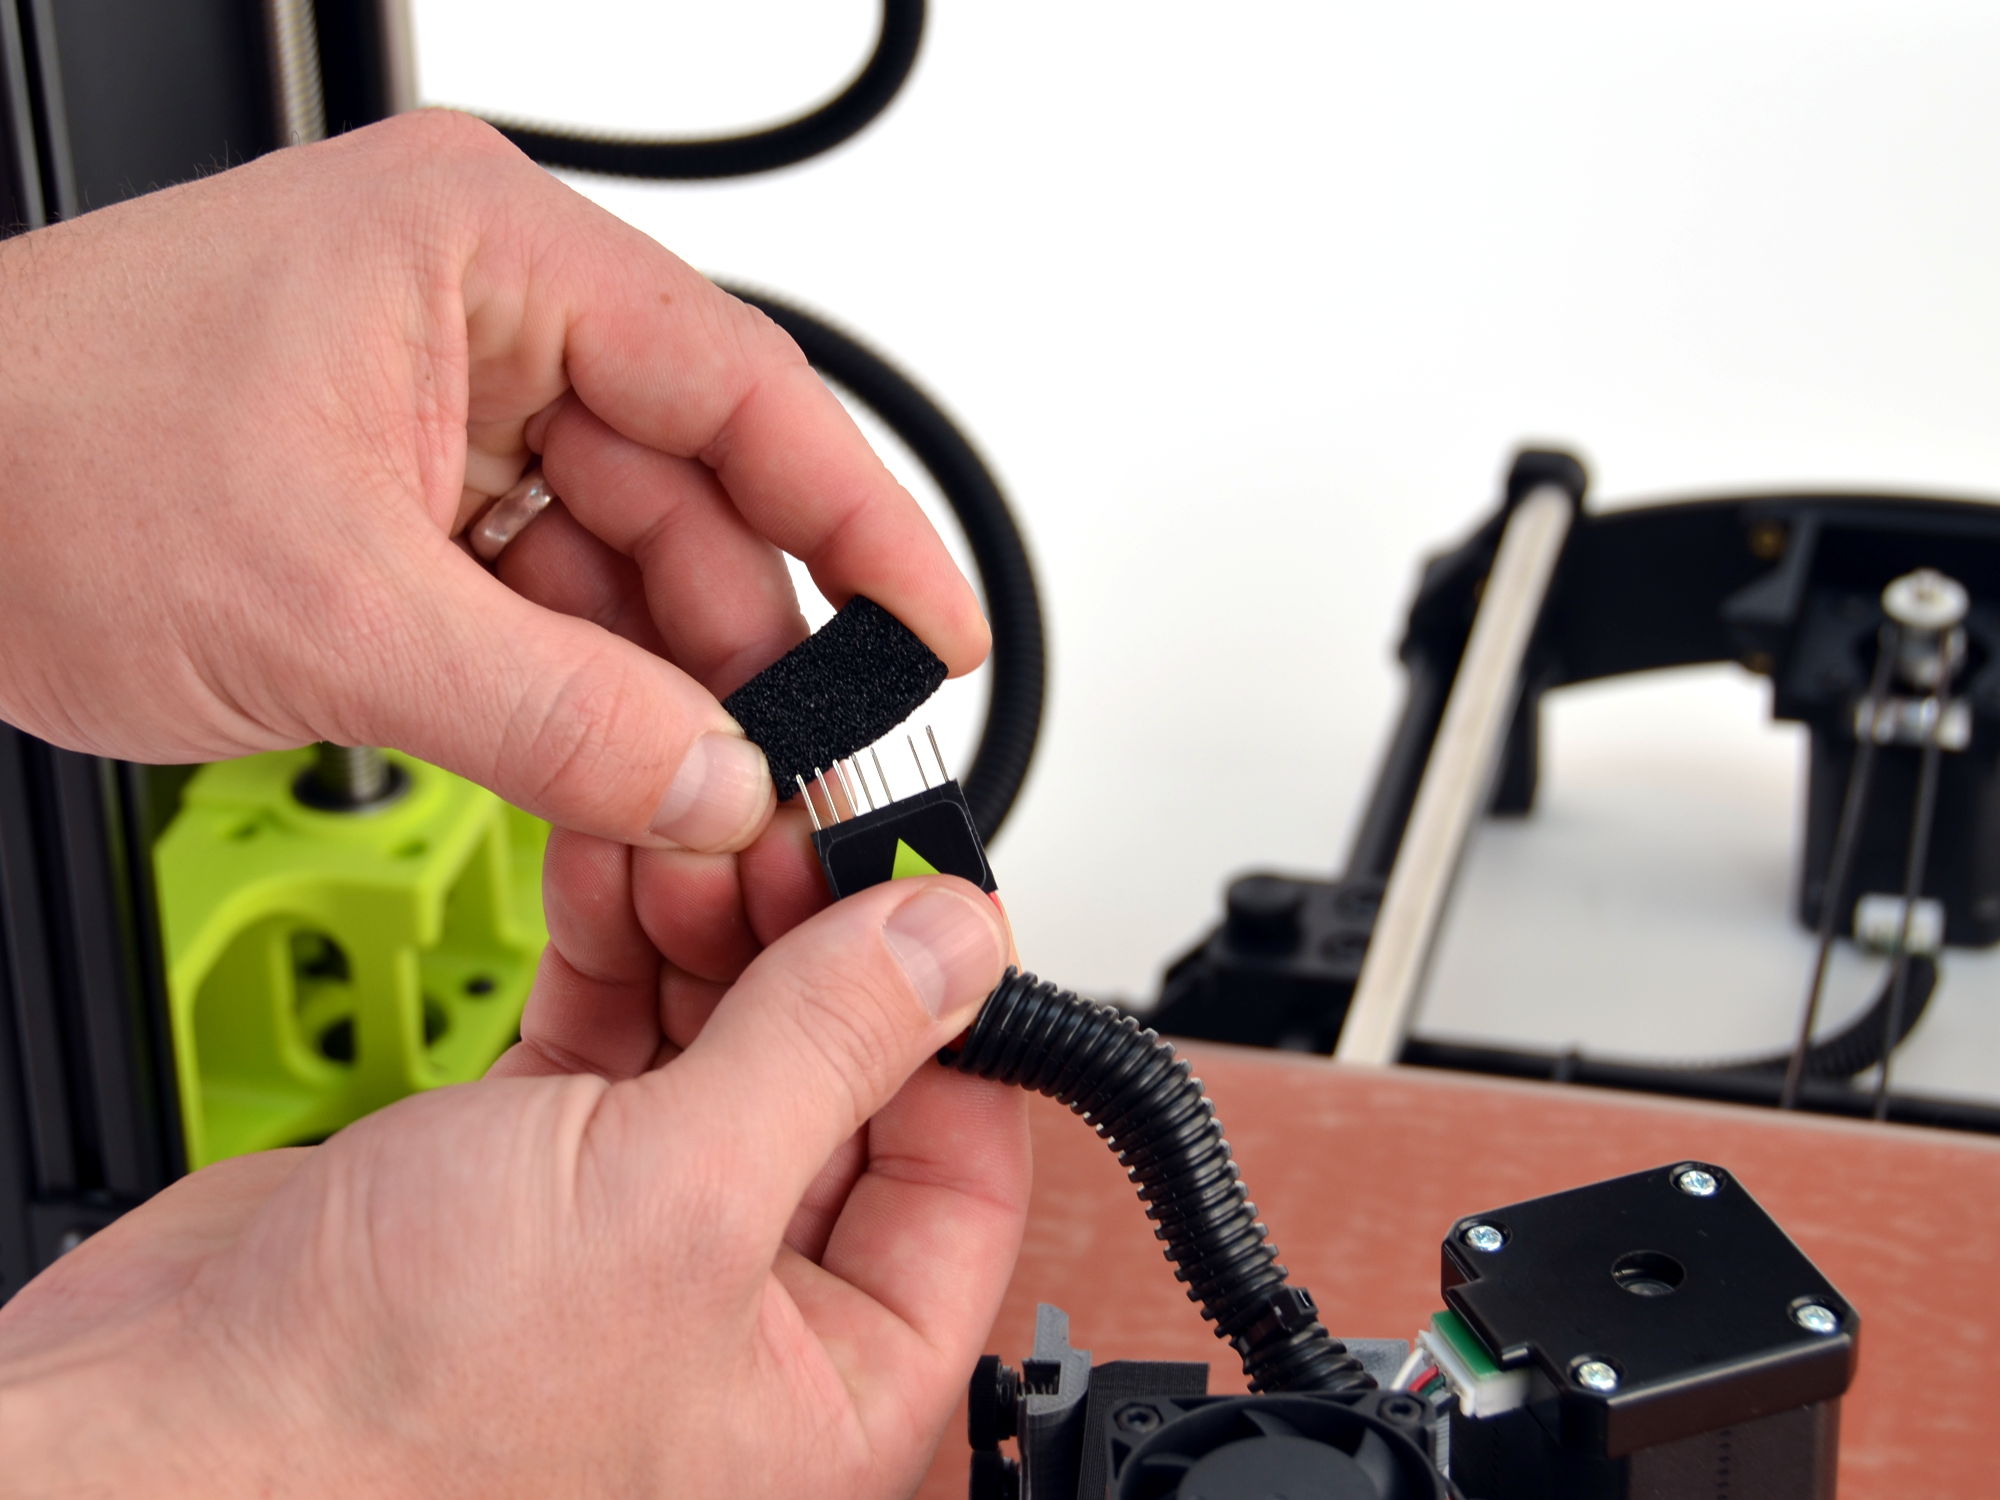
Remove the protective foam from the tool head connector.
8B
Place the tool head onto the X-axis carriage by firmly but gently seating it while supporting the tool head with your other hand.
8C
Secure the tool head to the X-axis carriage with the included M3 screw. Tighten until finger tight.
DO NOT OVER-TIGHTEN
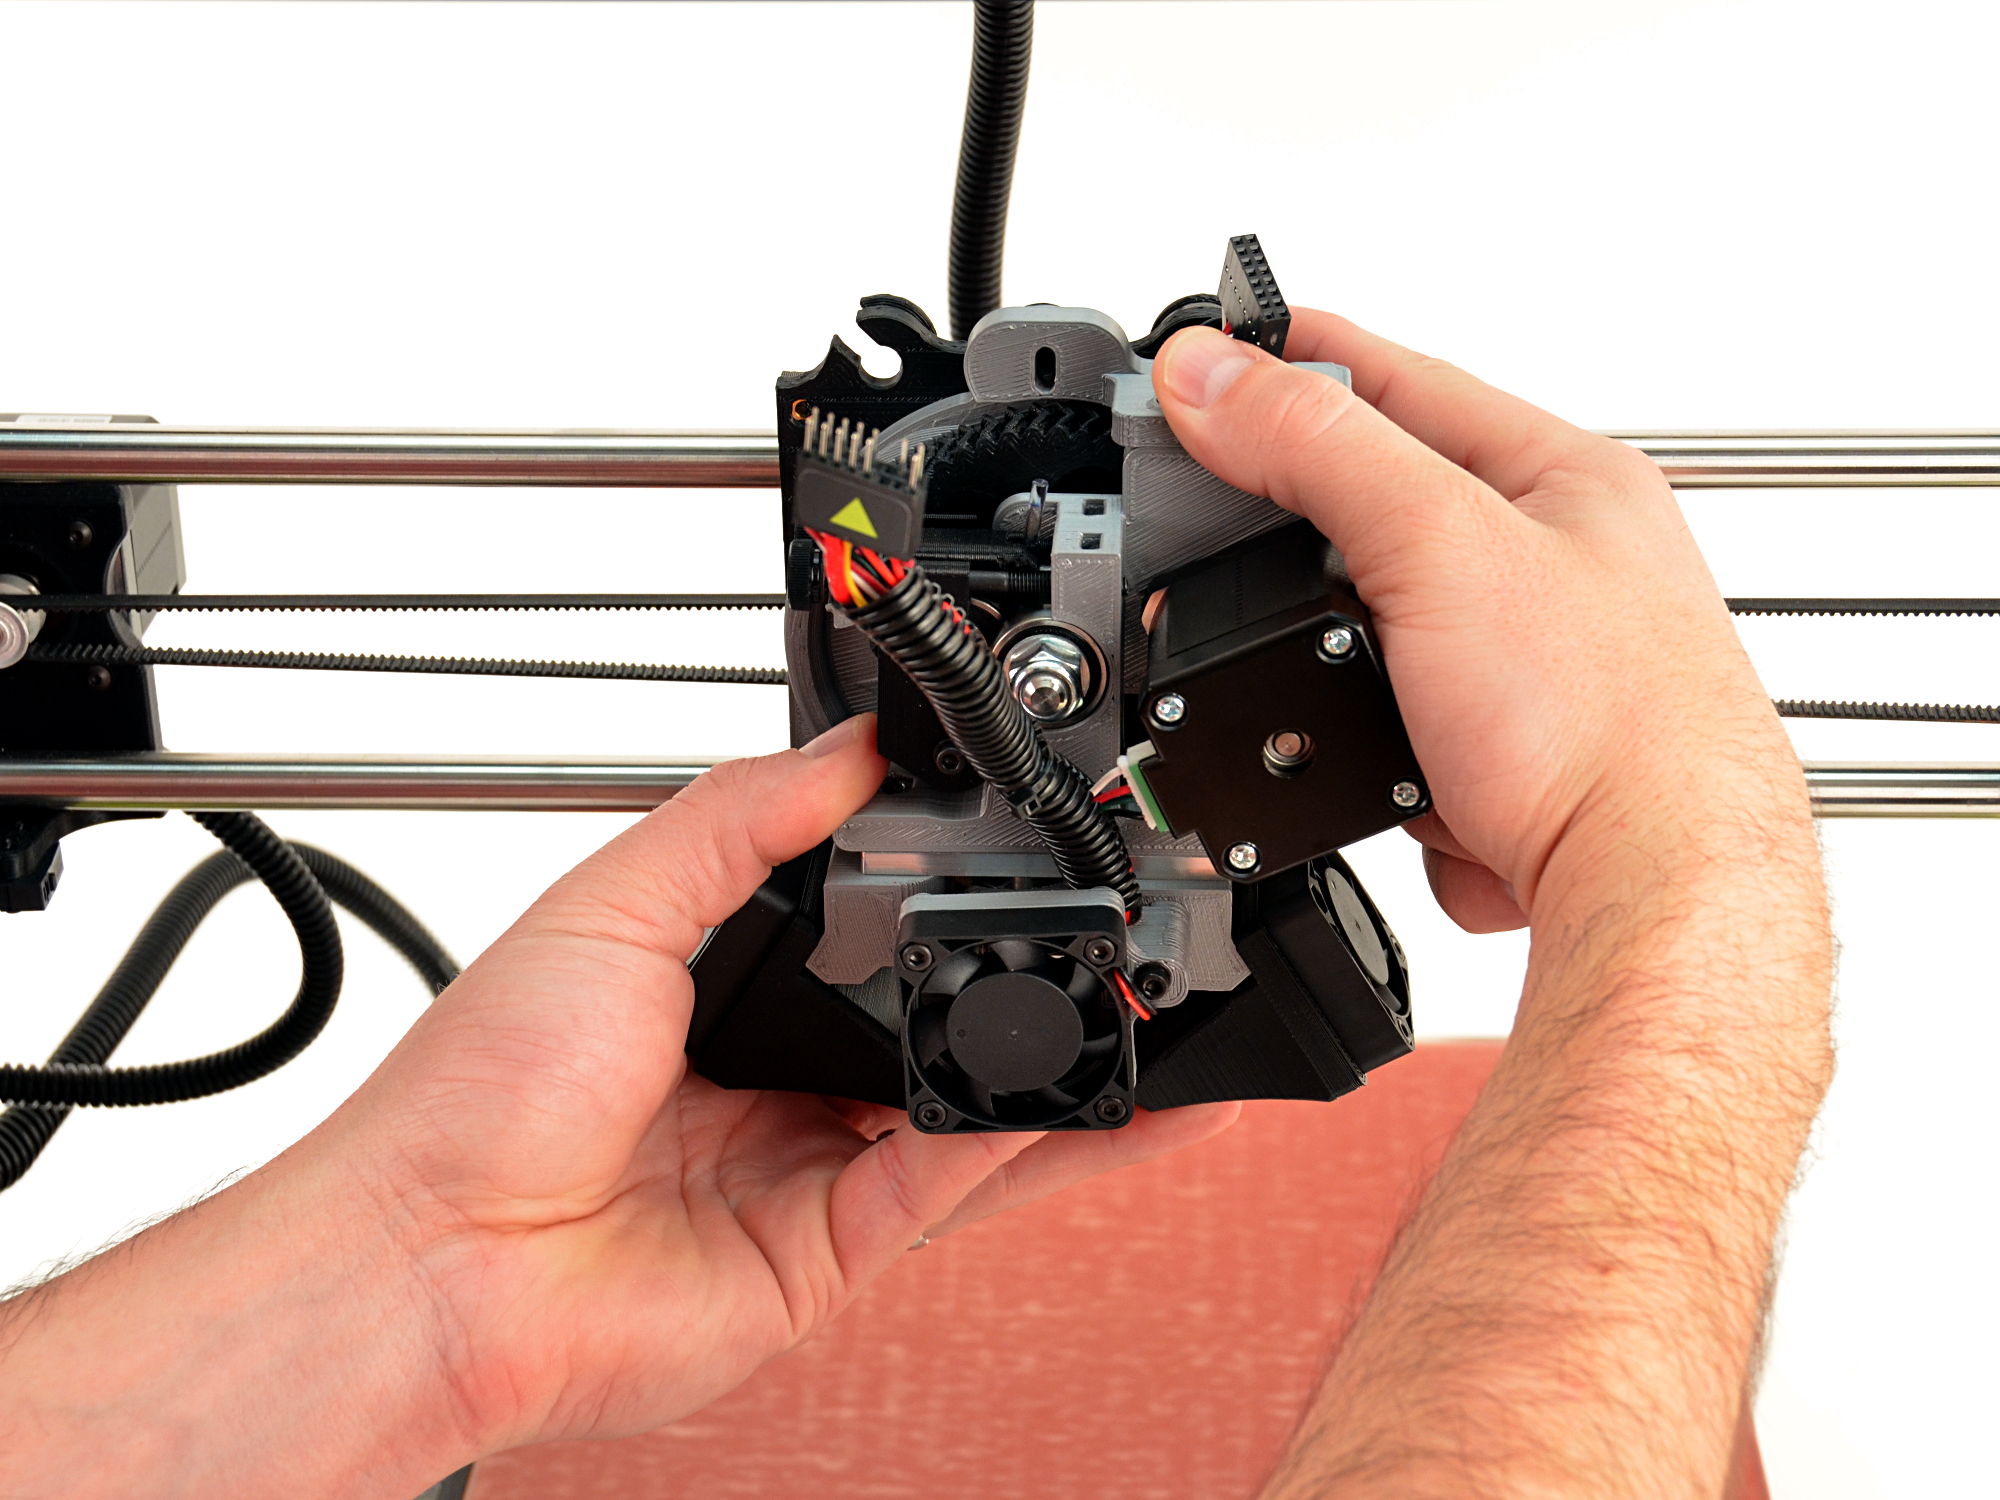
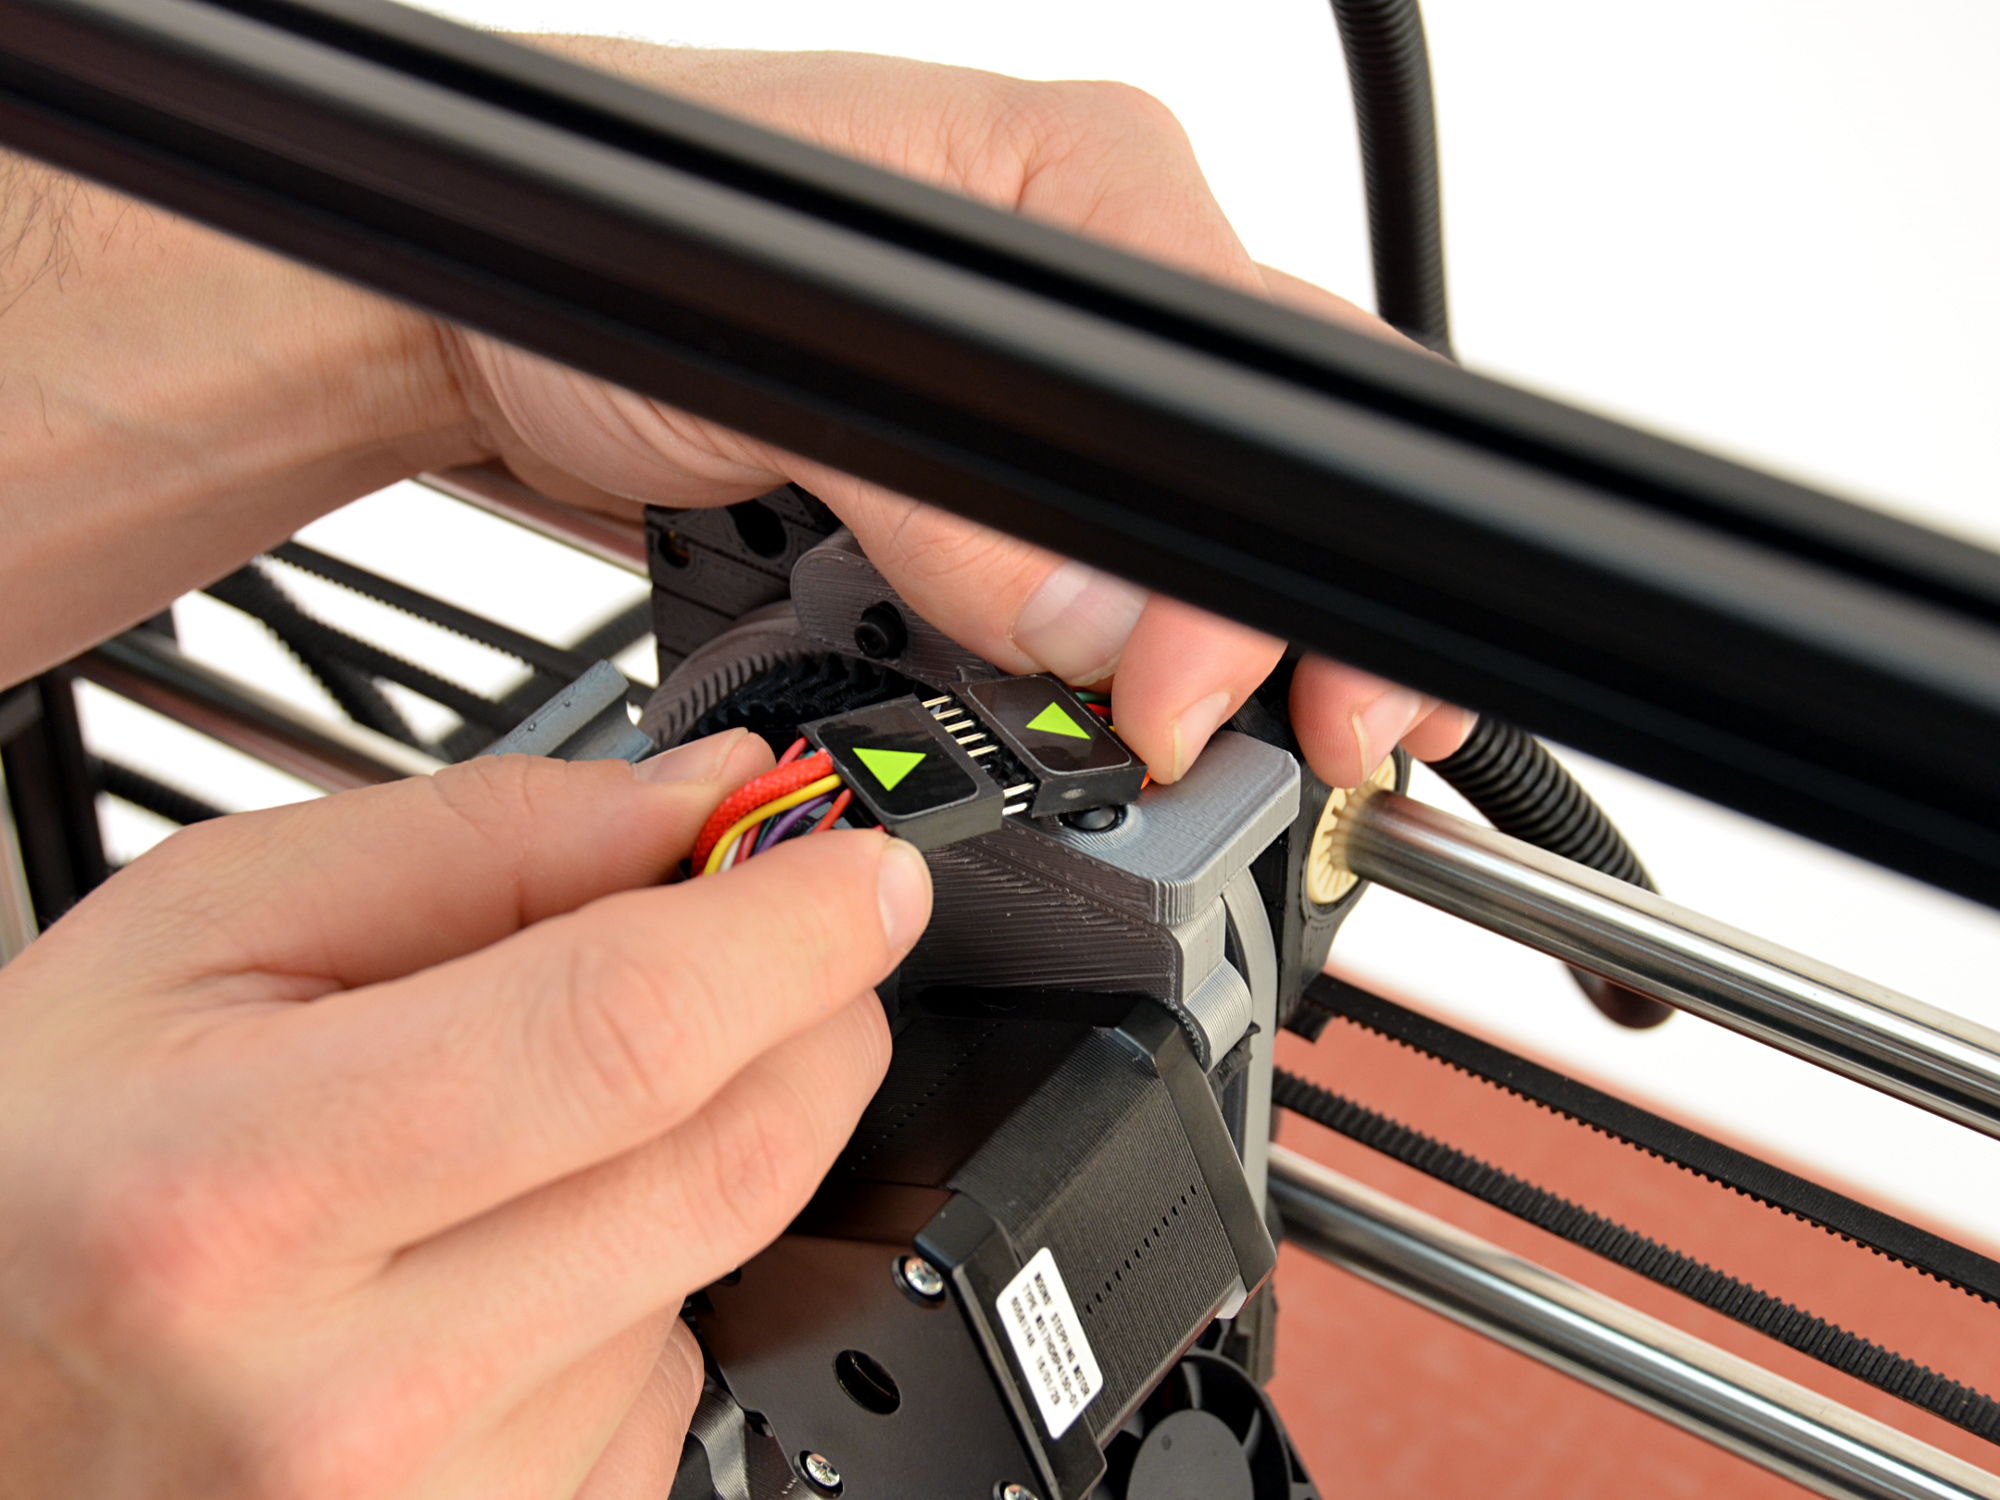
Connect the two 16 pin connectors, matching pin orientation, sticker-side up.
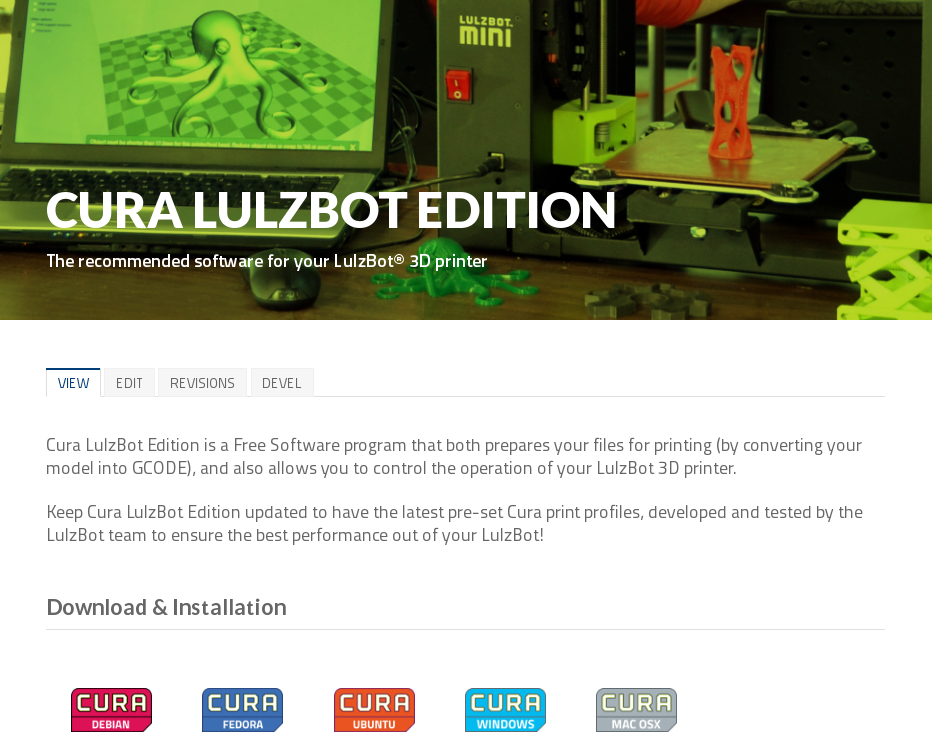
Cura LulzBot Edition is available from:
10A
Install Cura LulzBot Edition if not already installed on your computer.
Note: If Cura has already been installed, update to the latest version by installing it from the link above, as it has preset machine configuration profiles and the required firmware updates included.
10B
Plug in your LulzBot TAZ 3D printer to the power supply and power on your 3D printer.
10C
Once powered on, connect your 3D printer to your computer using the USB cable.
10D
Open Cura LulzBot Edition.
In Cura:
11A
Select Machine > LulzBot TAZ 6
11B
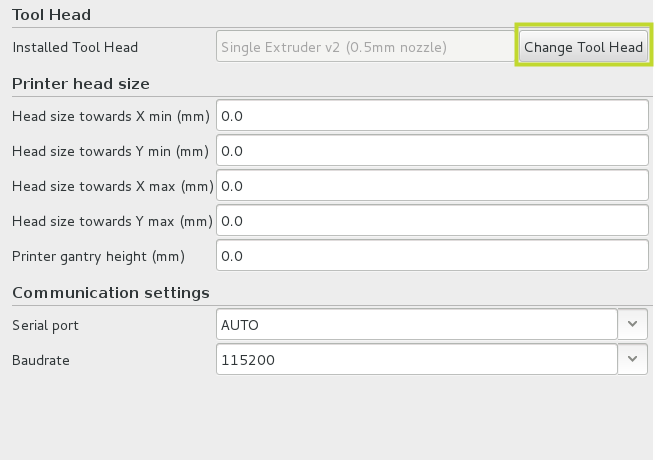
Select Machine > Machine settings
In the Machine settings window:
11C
Select Change Tool Head


12A
Select Single Extruder.
12B
Press the Next button.
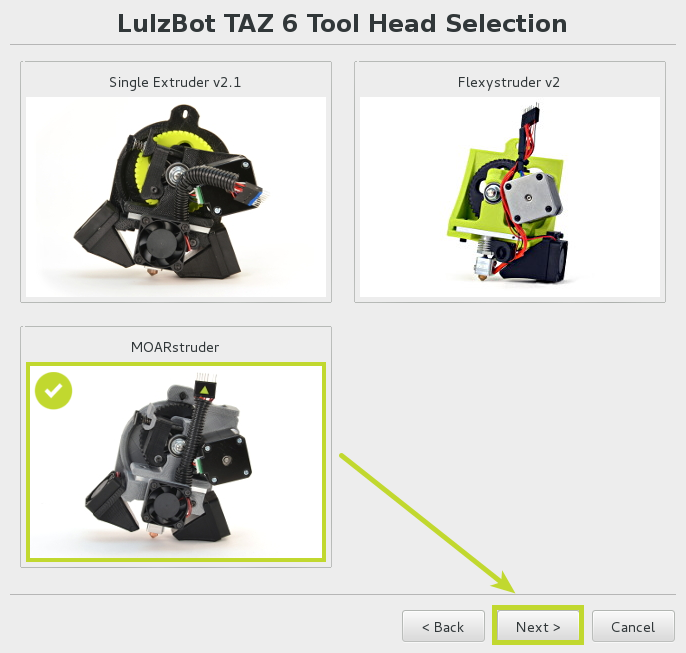
12C
Select MOARstruder.
12D
Press the Next button.
You will flash the firmware in the next step.

13A
Press Flash the firmware.
13B
Press Start to load the MOARstruder firmware.
13C
Press the OK button.
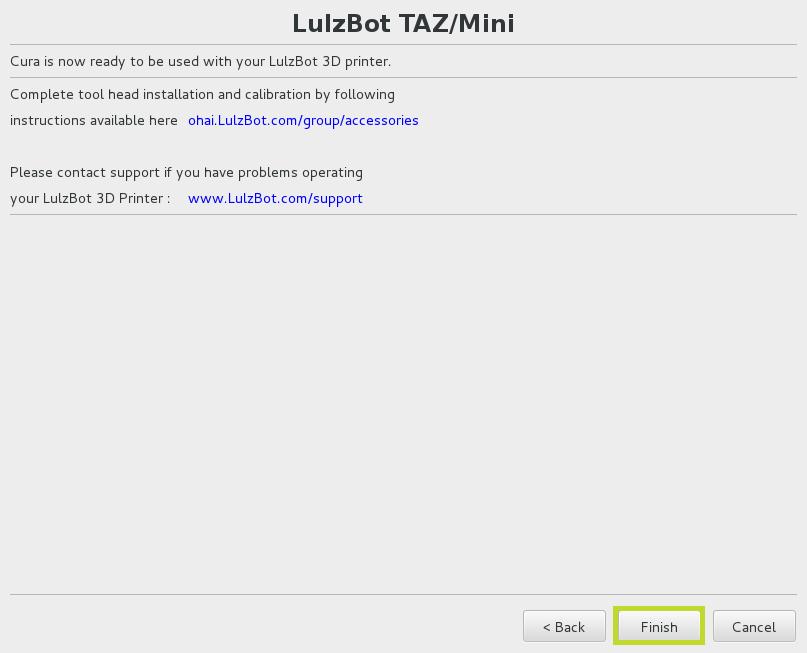
13D
Select Finish and the tool head wizard will close.
13E
Press the OK button to close the Machine settings window.
13F
Unplug the USB cable.

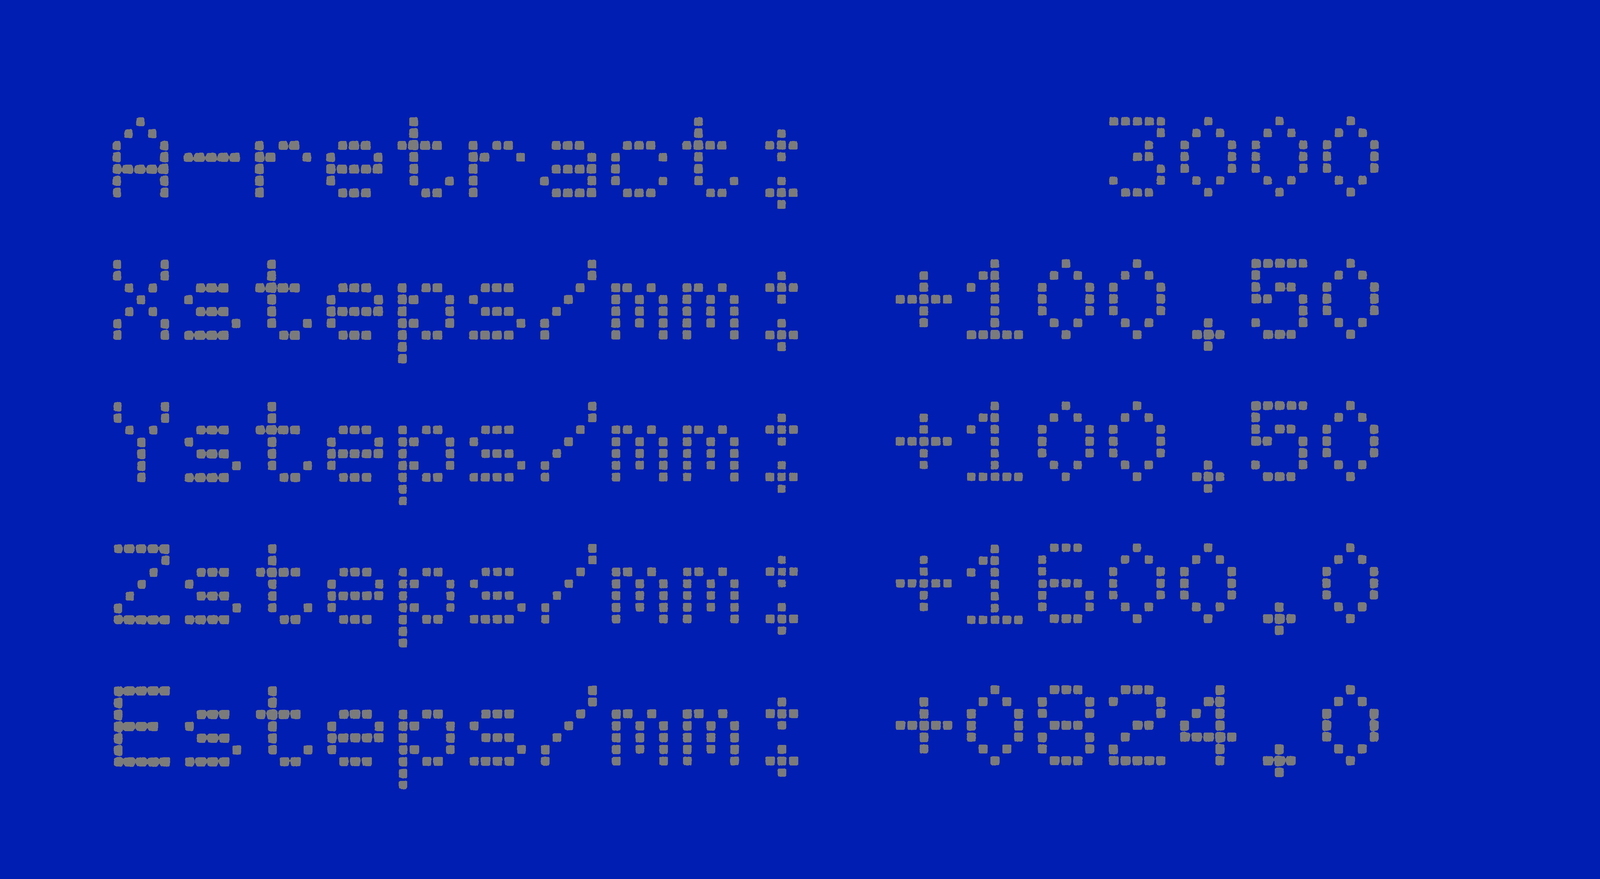
Update the extruder steps per unit (E-steps or esteps) to get the best performance from your MOARstruder Tool Head.
14A
Use the Graphical LCD controller and navigate to: Configuration > Advanced settings > Esteps/mm.
14B
Select Esteps/mm and update the value with the Esteps recorded in Step 7.
14C
Scroll up and select Configuration > Save settings to store the updated values.
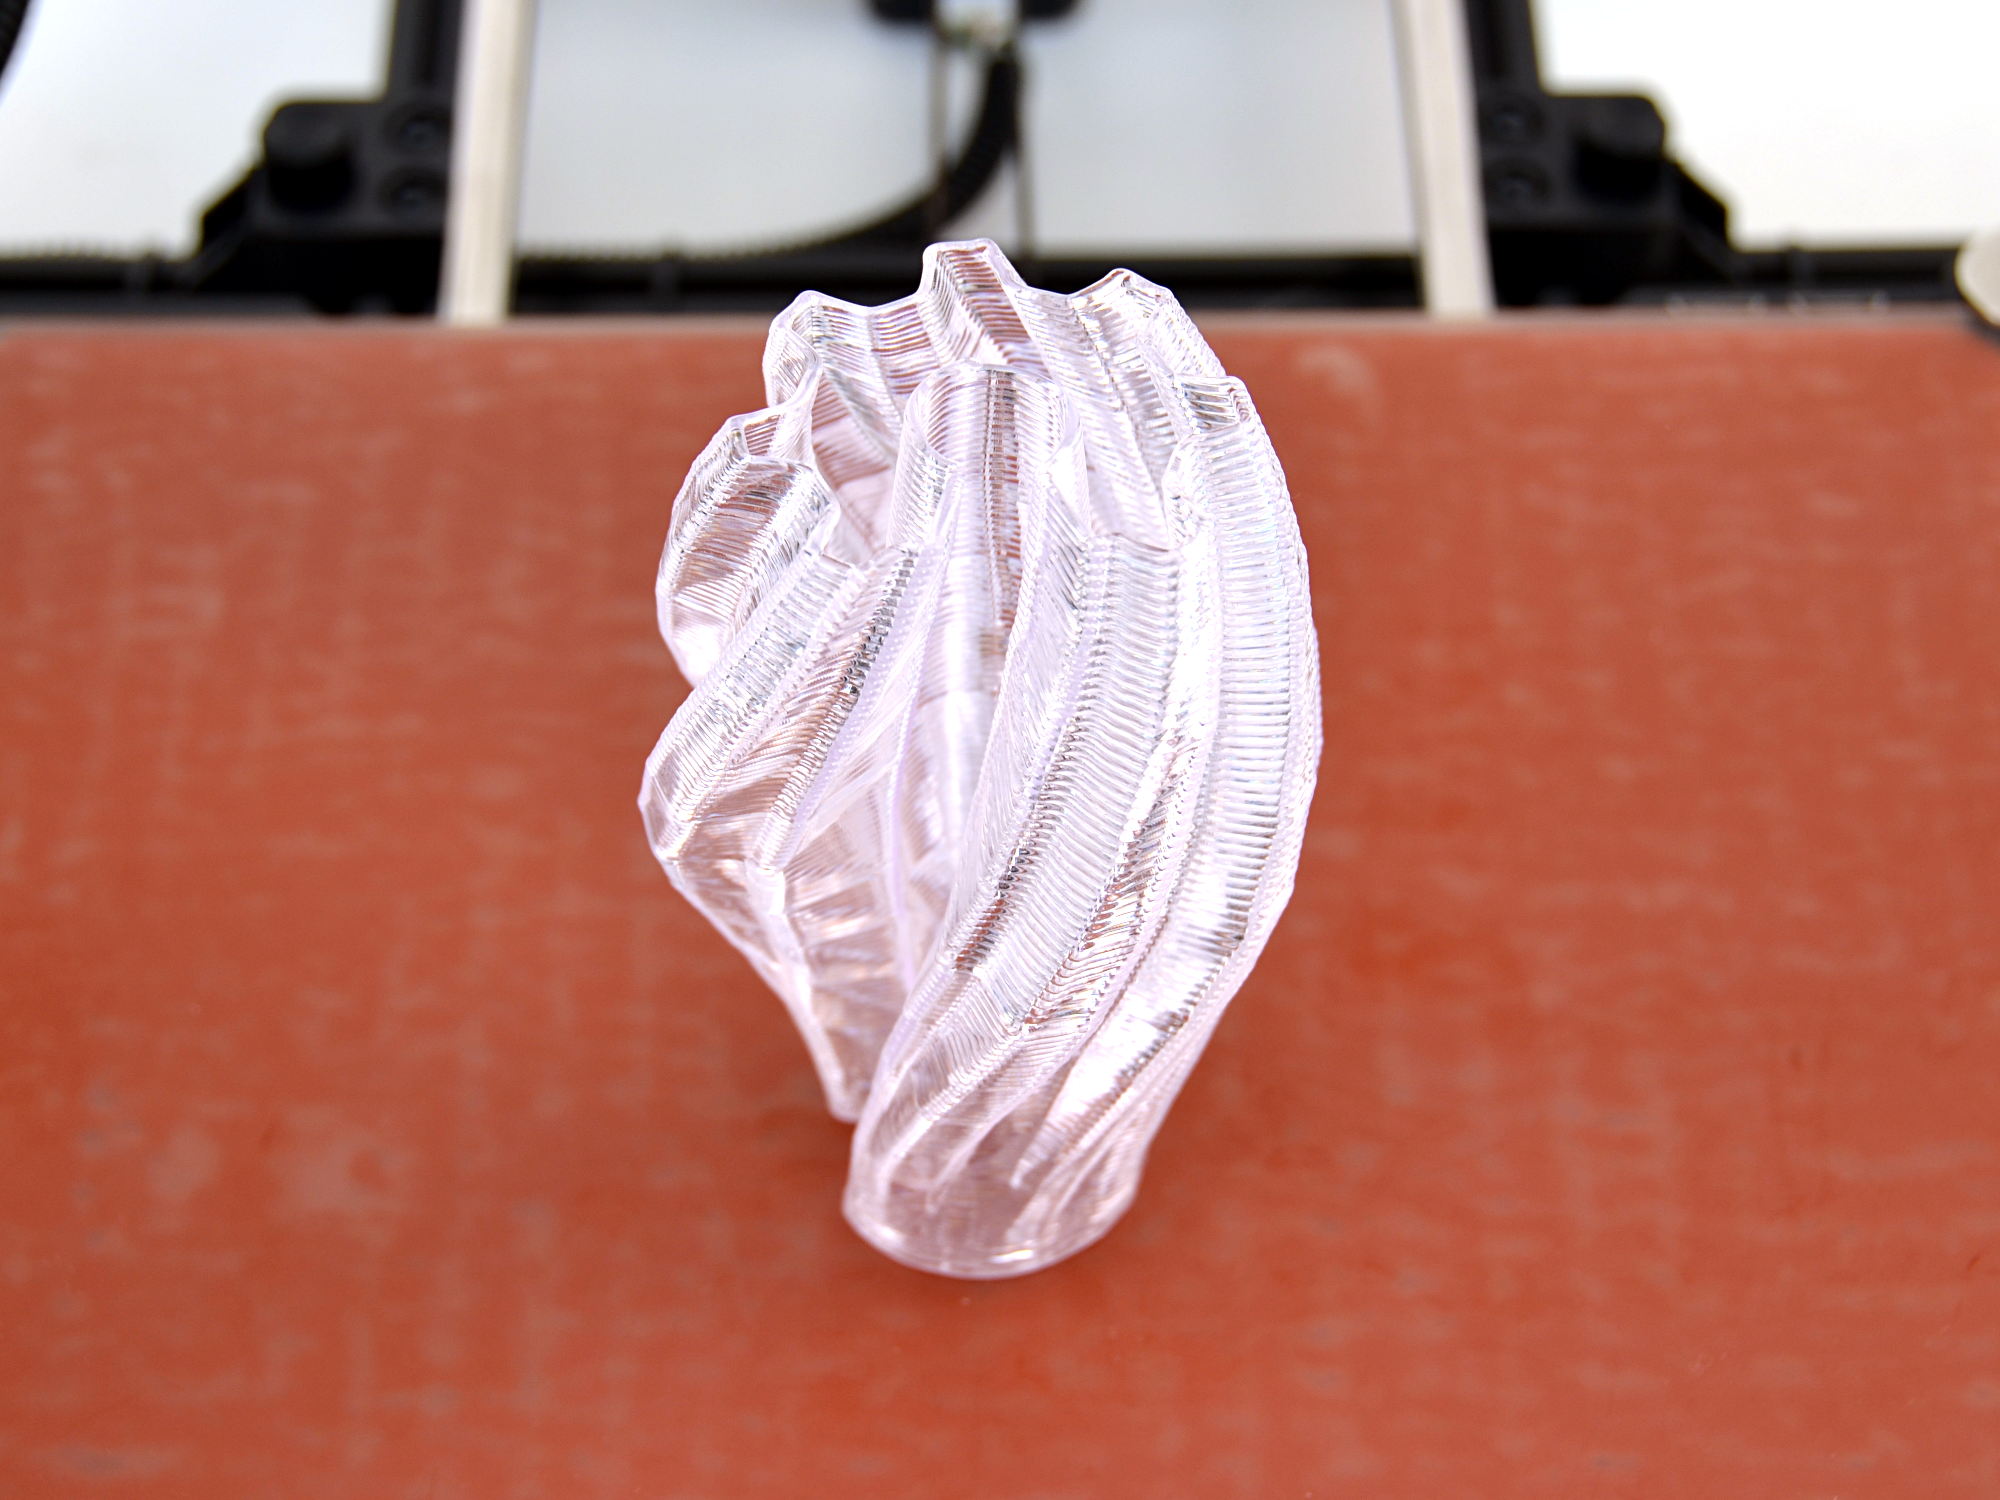
15A
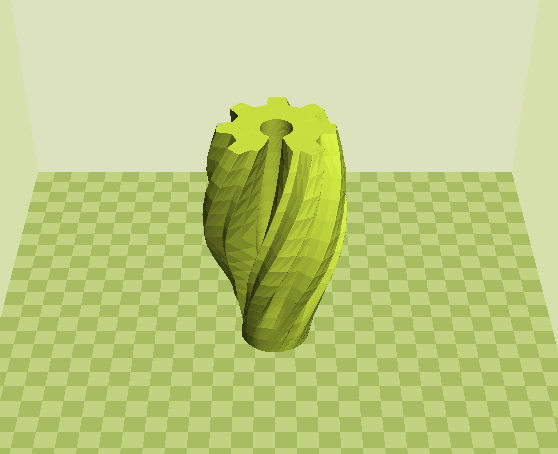
Download this file: OSHWA_vase_MOARstruder_first_print.stl
Save the file by right clicking and selecting Save as or Save link as.
15B
Load the OSHWA_vase_MOARstruder_first_print.stl into Cura LulzBot Edition
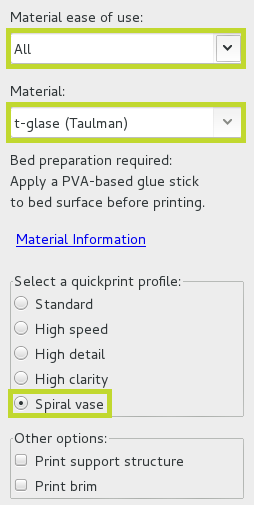
16A
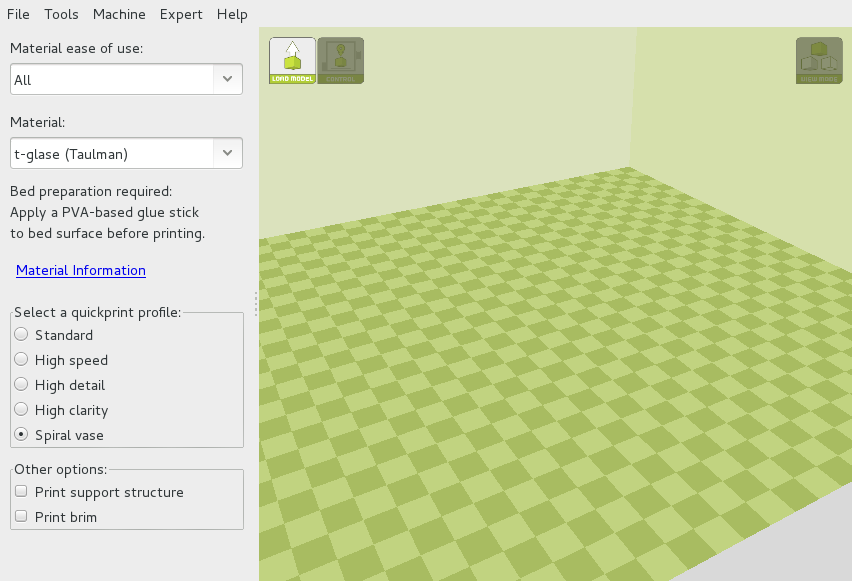
Under Material ease of use select All.
16B
Under Material select t-glase (Taulman).
16C
Choose the Spiral vase quickprint profile.
16D
Remove the SD Card from the TAZ 6 Control Box and install it into your computer.
16E
Save the sliced model to the SD Card by pressing the Save GCode button.
16F
Remove the SD card and place it back into the SD card slot on the TAZ 6 Control Box.
Note: Large or time-consuming 3D prints are more reliable when initiated and controlled through the Graphical LCD Controller.
17A
Locate the included glue stick.
17B
Most polyester-based filament like t-glase will adhere exceedingly well to the print surface. To aid part removal, evenly apply glue stick to the print surface.
Failure to do so may cause the printed object to bond too well to the PEI print surface.
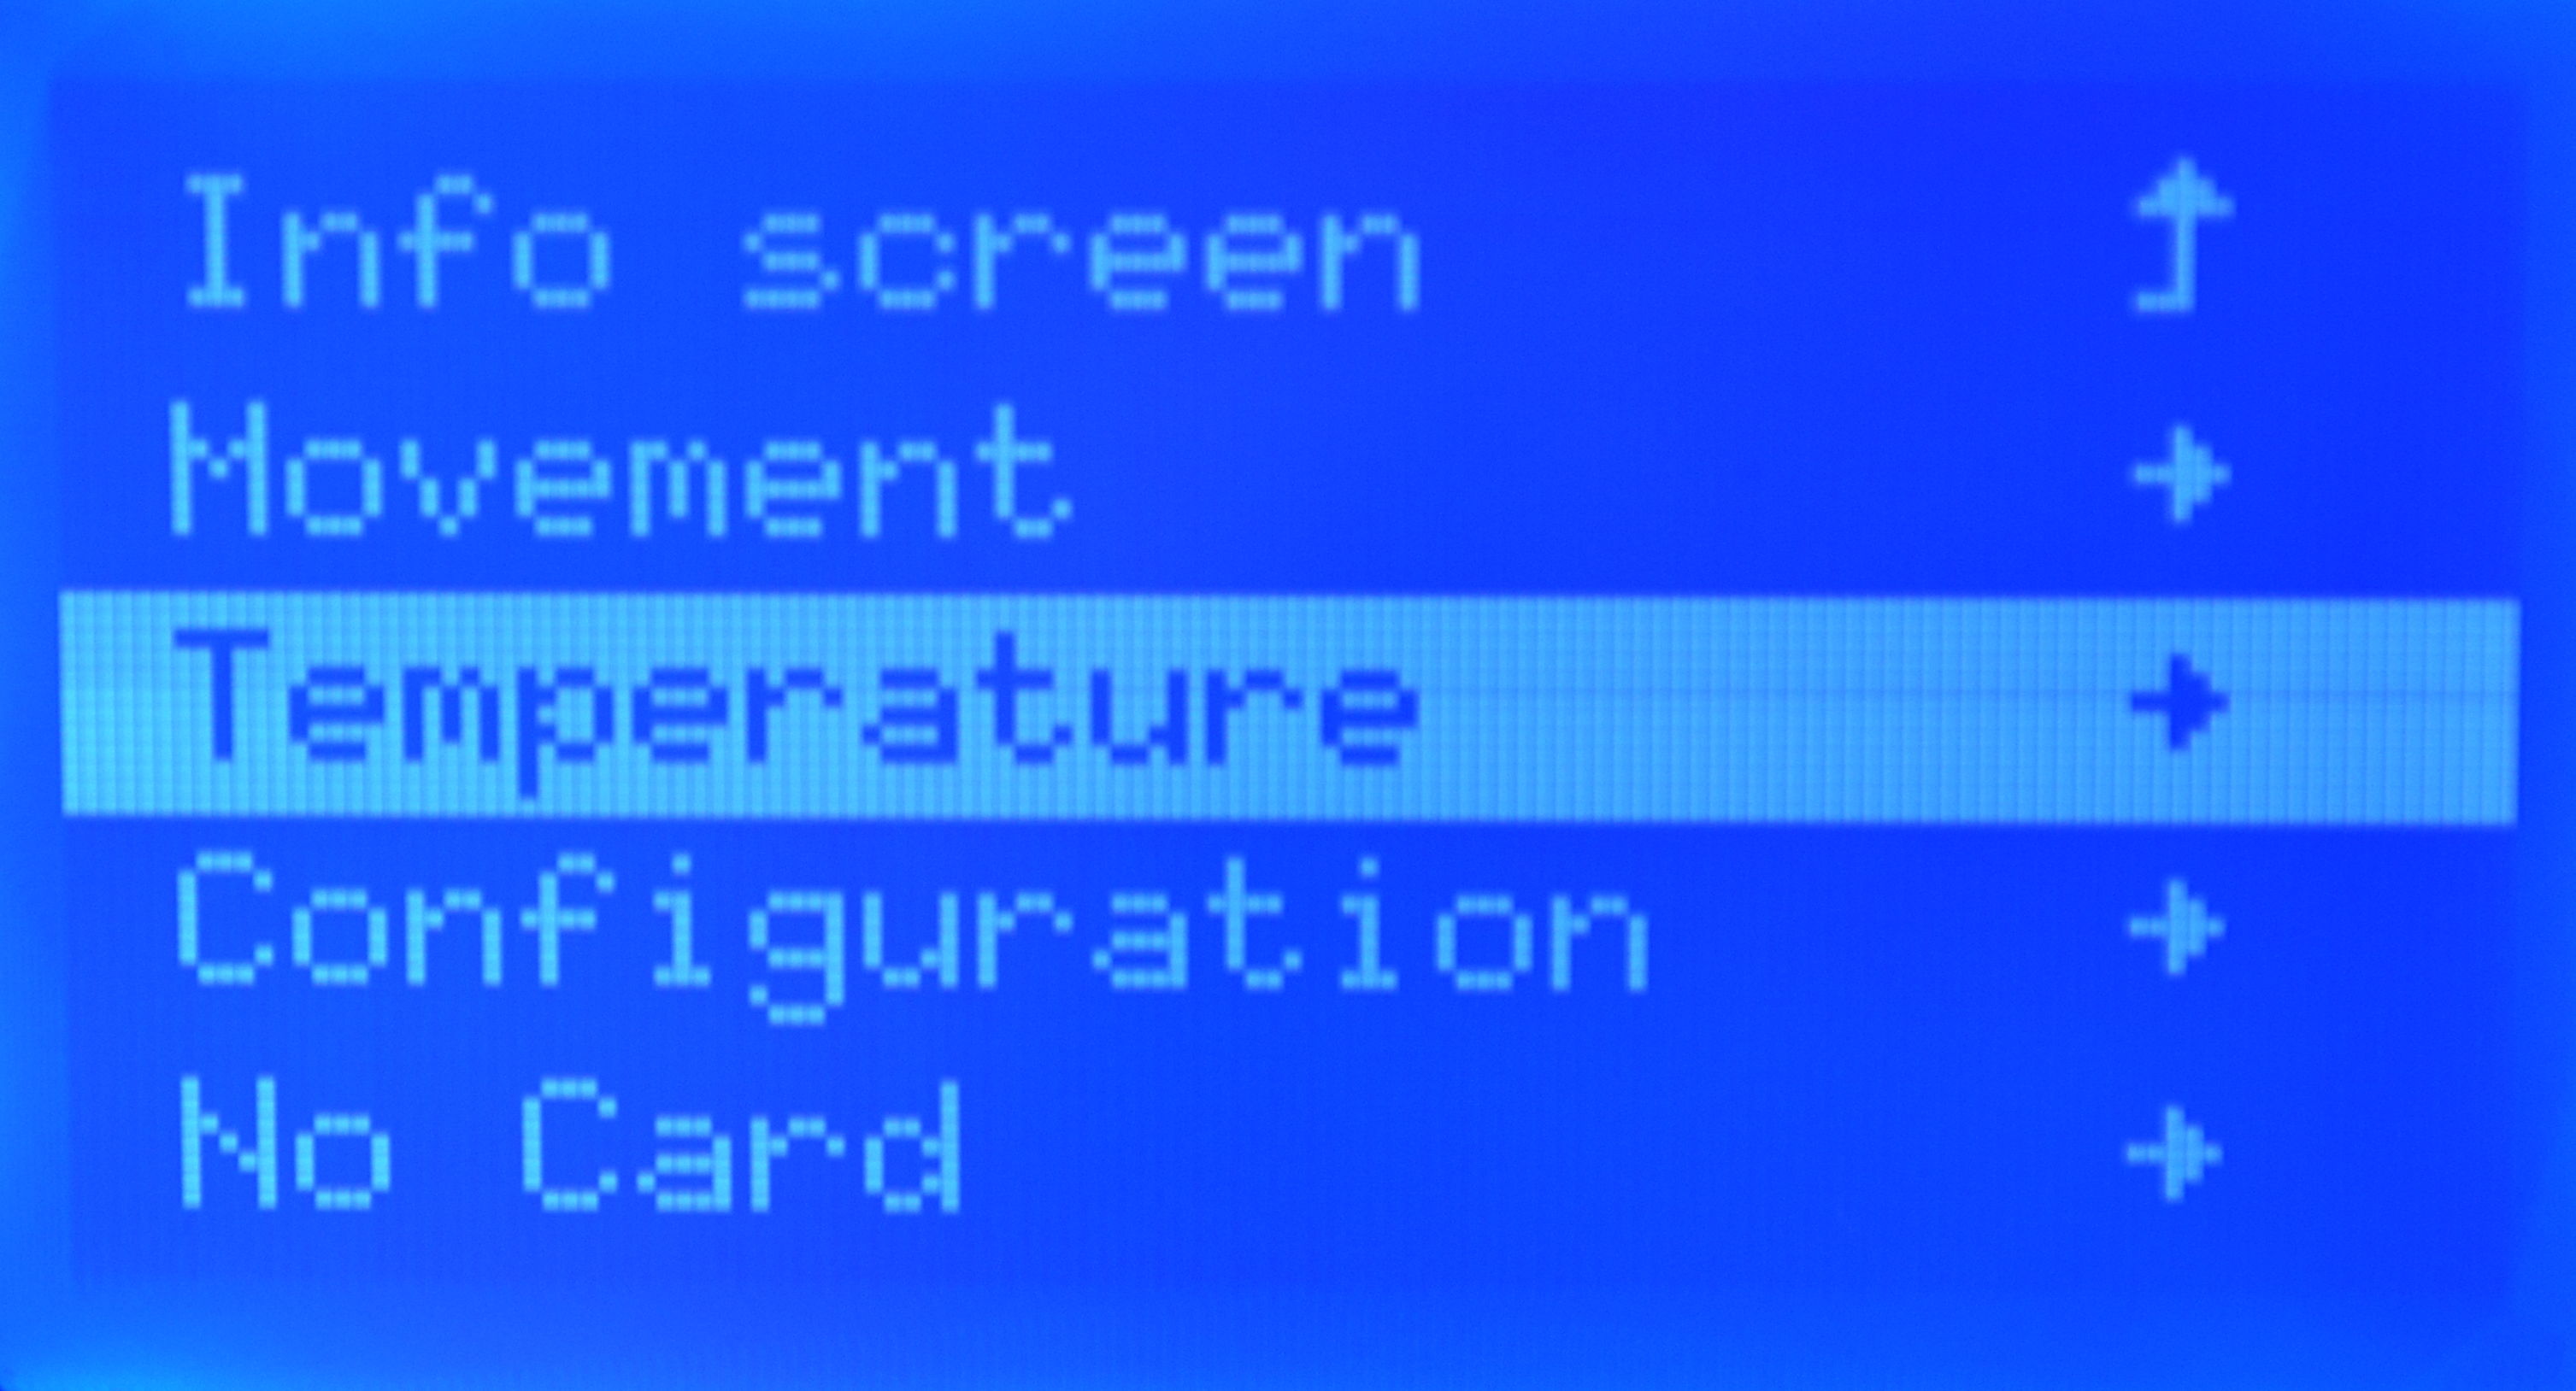
17C
Turn on the hot end through the Graphical LCD by navigating to Temperature > Nozzle > 230.

Your tool head was calibrated before leaving our Colorado, USA factory. This filament will need to be removed and purged.
18A
Wait until the TAZ 6 hot end displays a temperature greater than 170°C.
18B
Using the idler retainer, compress the springs and slide up, allowing the hinged idler to to rotate into the open position.
18C
Remove the calibration filament from the tool head.
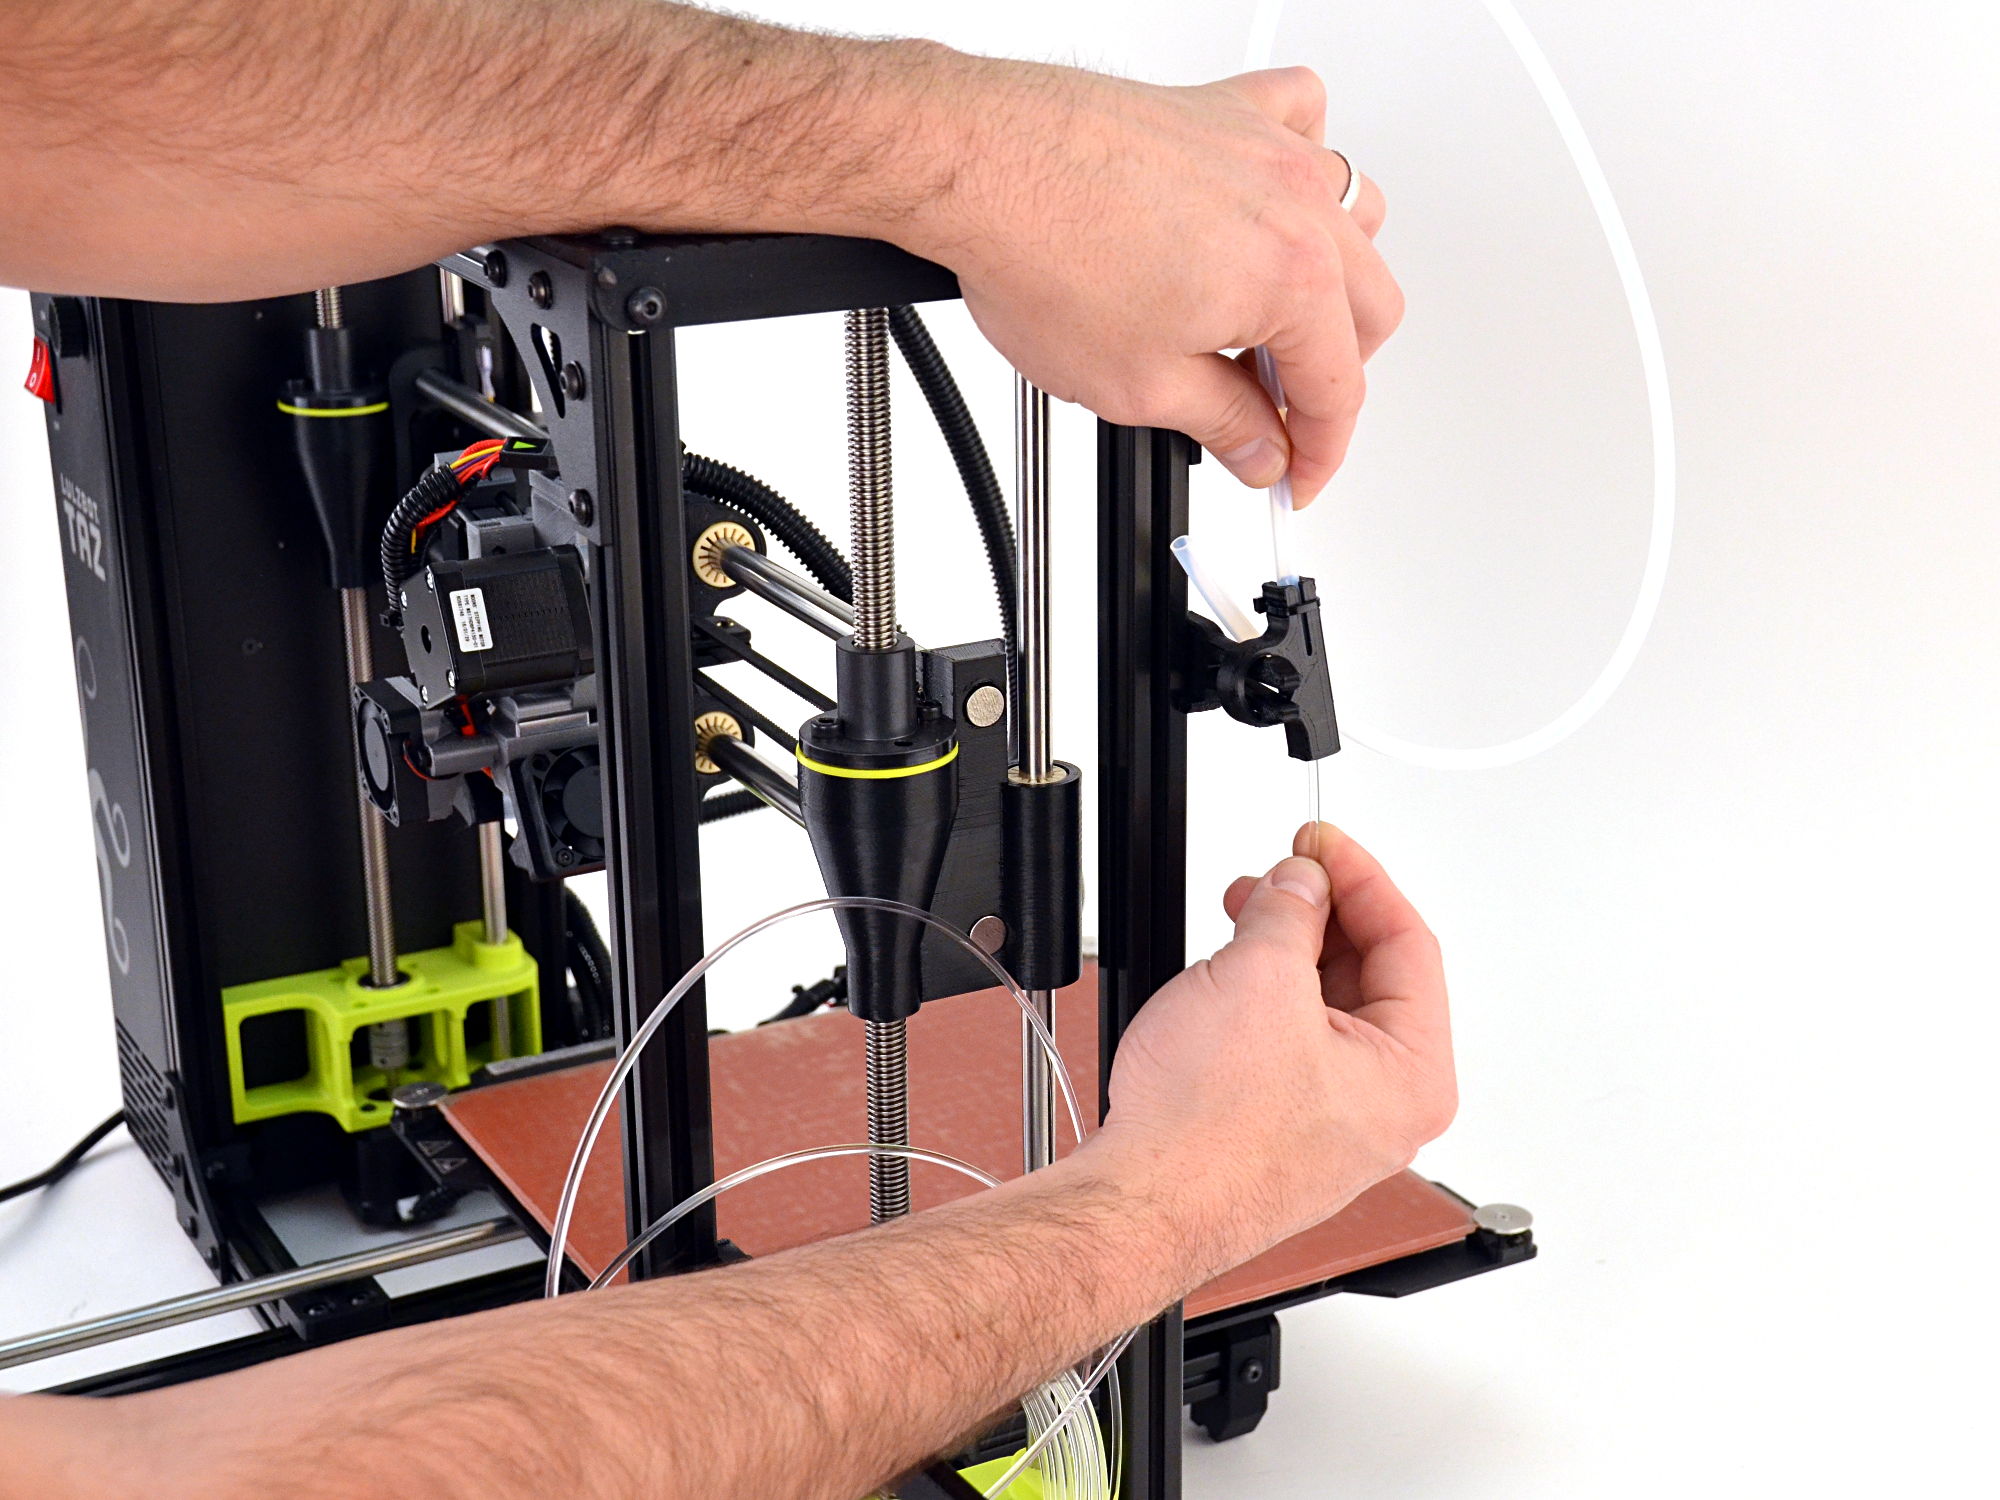
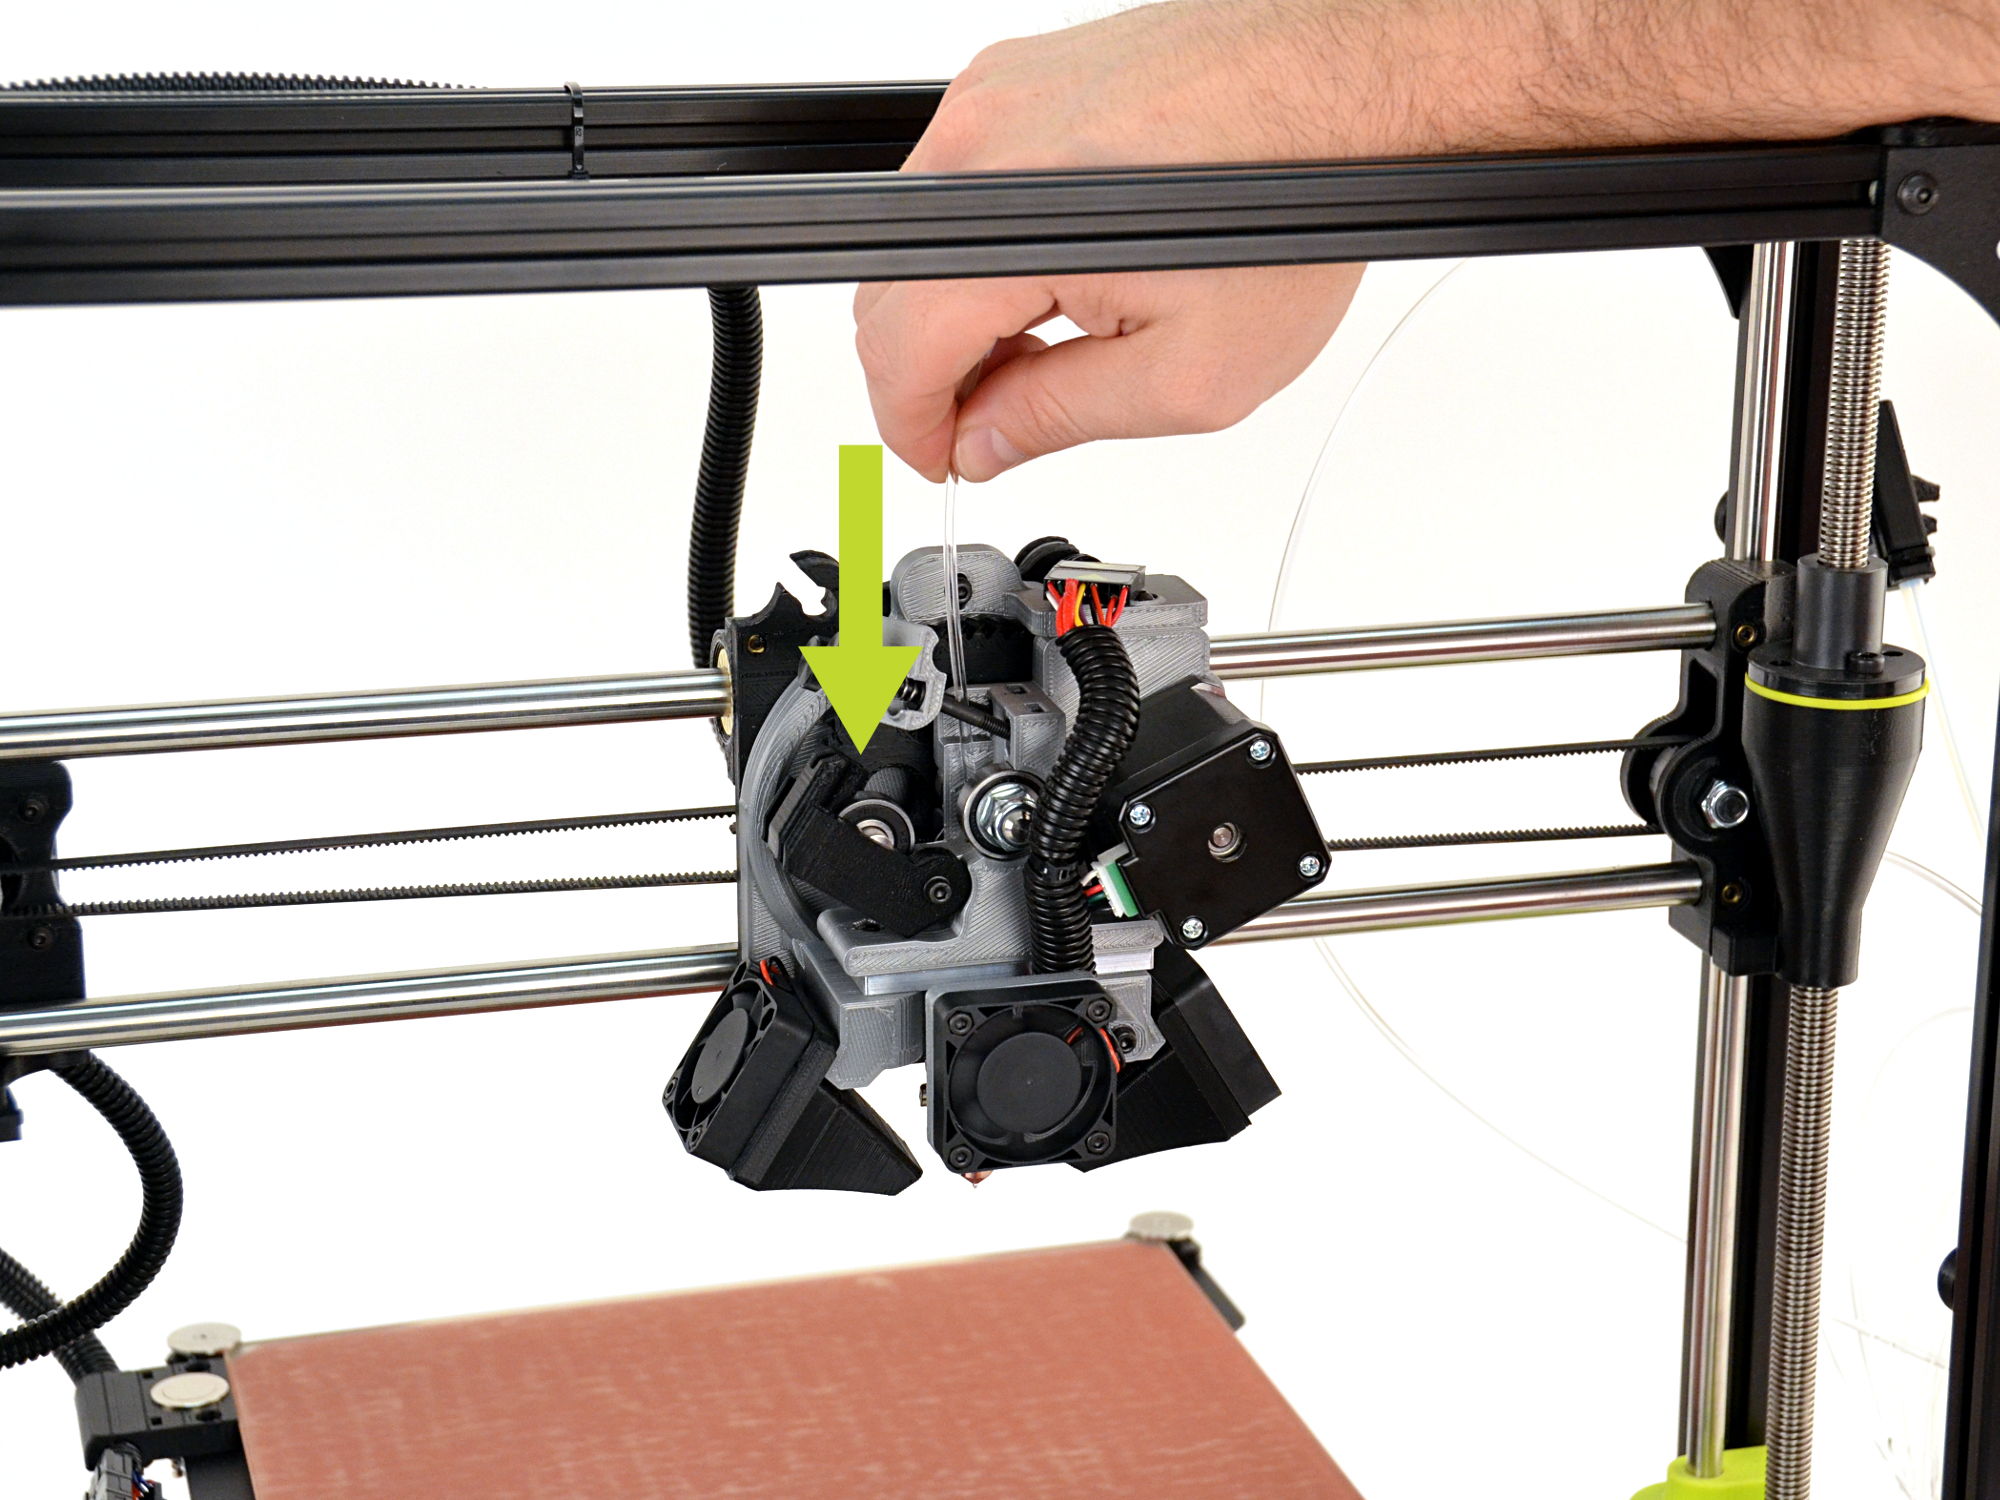
19A
Feed the t-glase filament sample through the filament guide tube and into the feed hole in the extruder body and through the hot end, until a small amount of filament comes out of the tip of the nozzle.
19B
Compress the springs with the idler retainer and rotate the hinged idler clockwise into
an upright position. Lock the hinged idler into place by sliding the idler retainer back
down into the locked position.
19C
Once your 3D printer is at the appropriate extrusion temperature of 230°C, purge the calibration filament by rotating the large gear counter-clockwise until the extruded filament underneath the hot end nozzle runs clear.
19D
Wait ten seconds for the filament to cool, then remove the extruded filament with
the included tweezers.

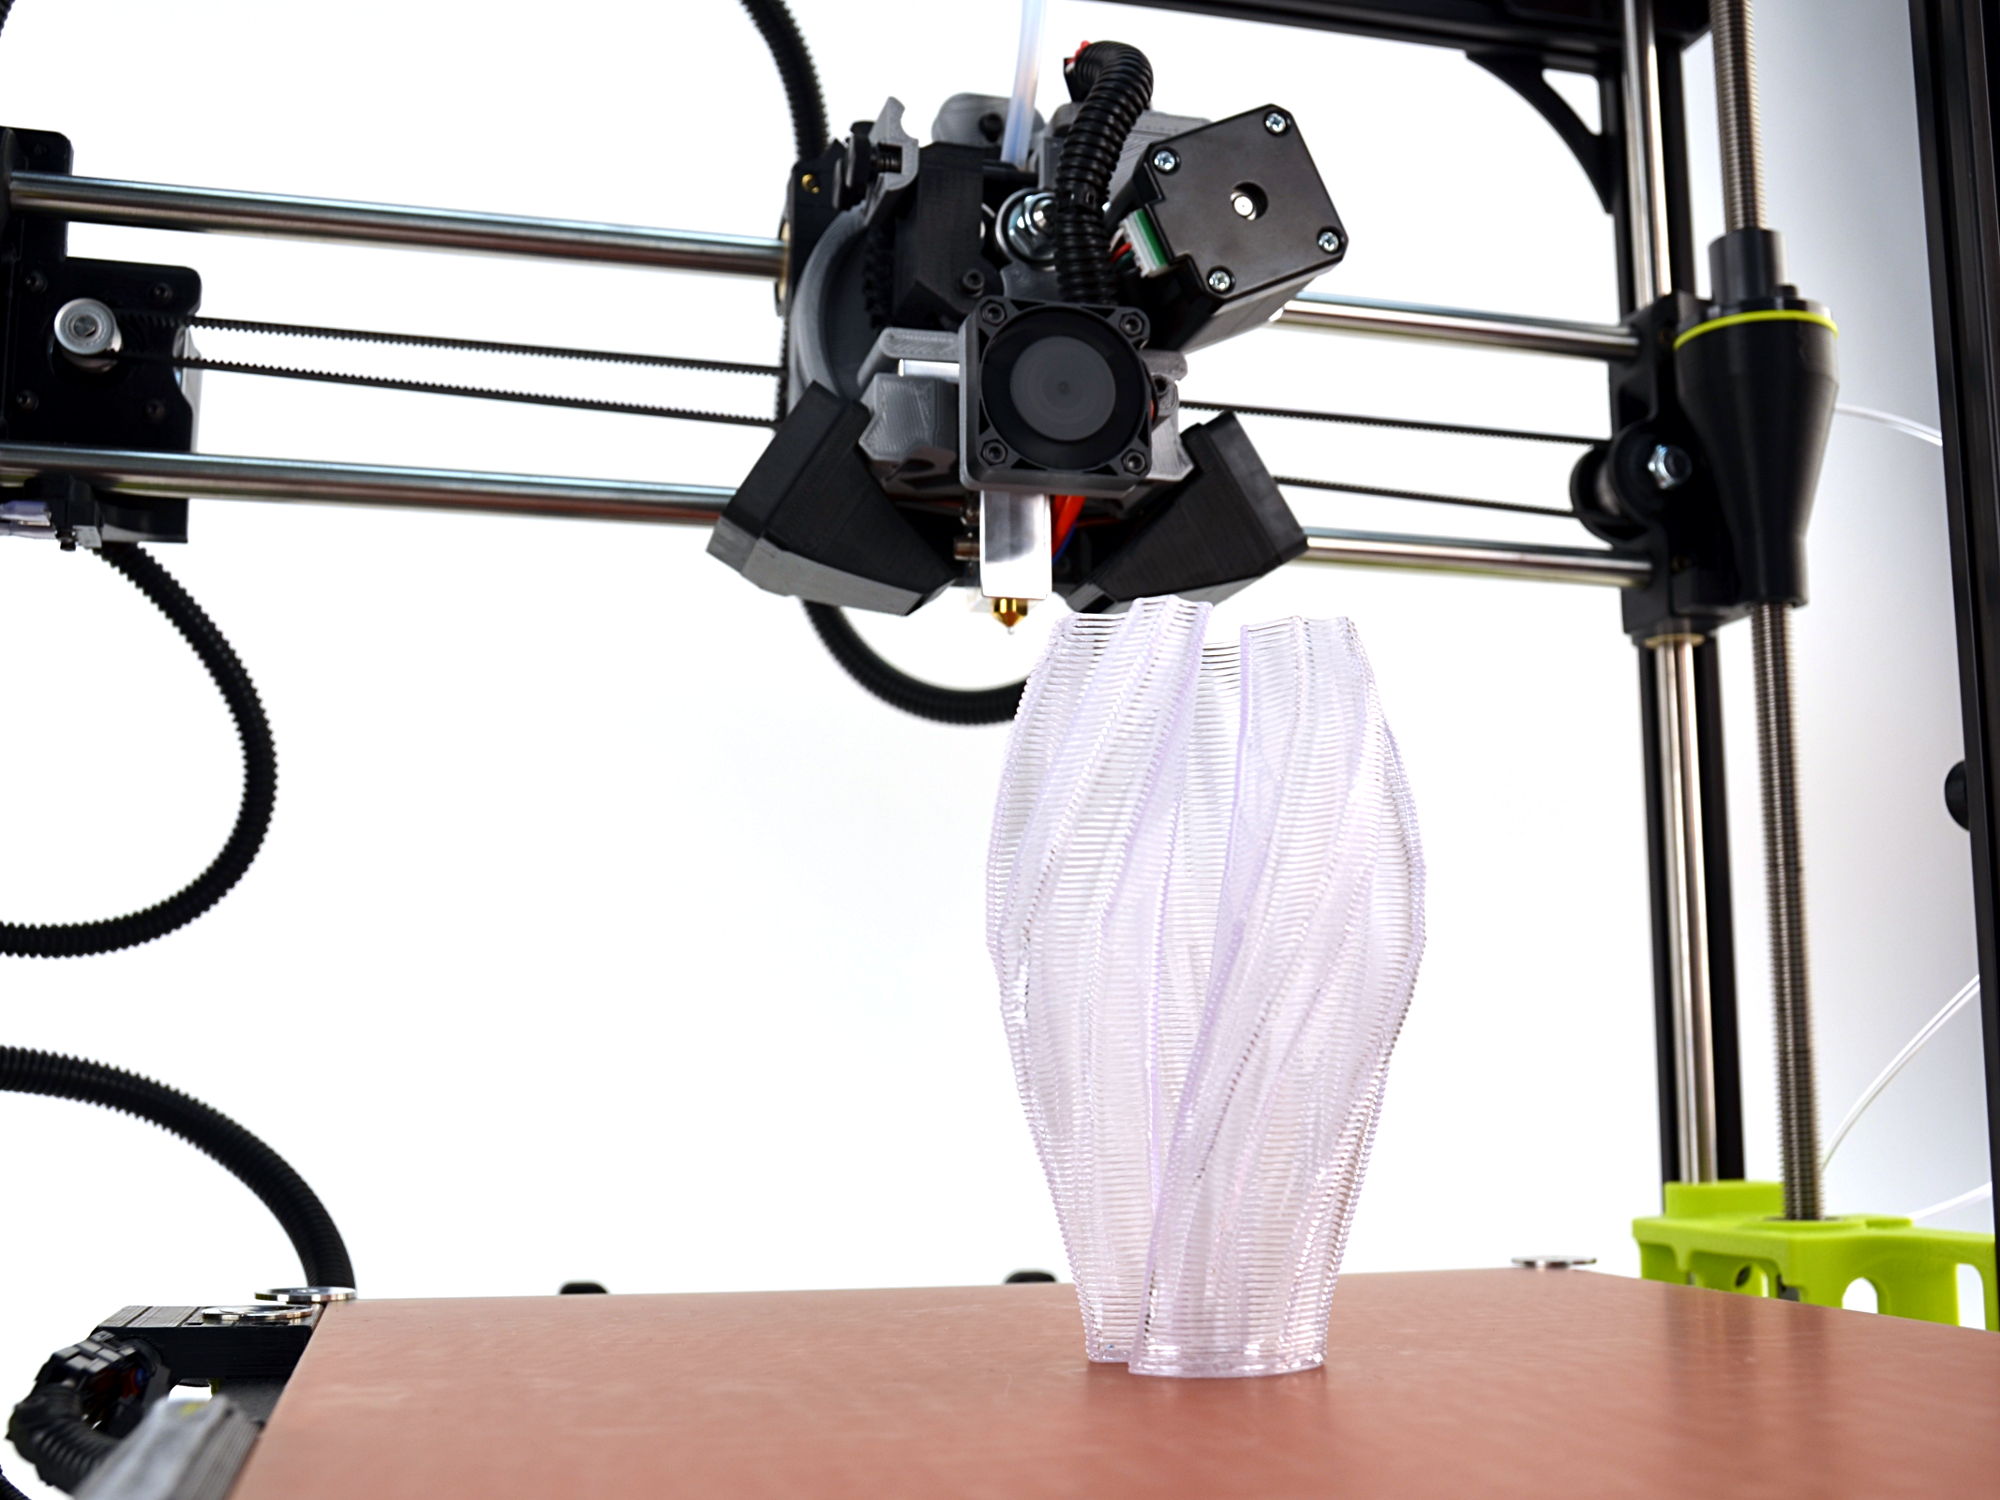
On the Graphical LCD controller, select Print from SD and navigate to the OSHWA_vase_MOARstruder_first_print.gcode file. Select the file to begin the 3D print.
Your LulzBot TAZ 3D printer will automatically do the following:
Take your time!
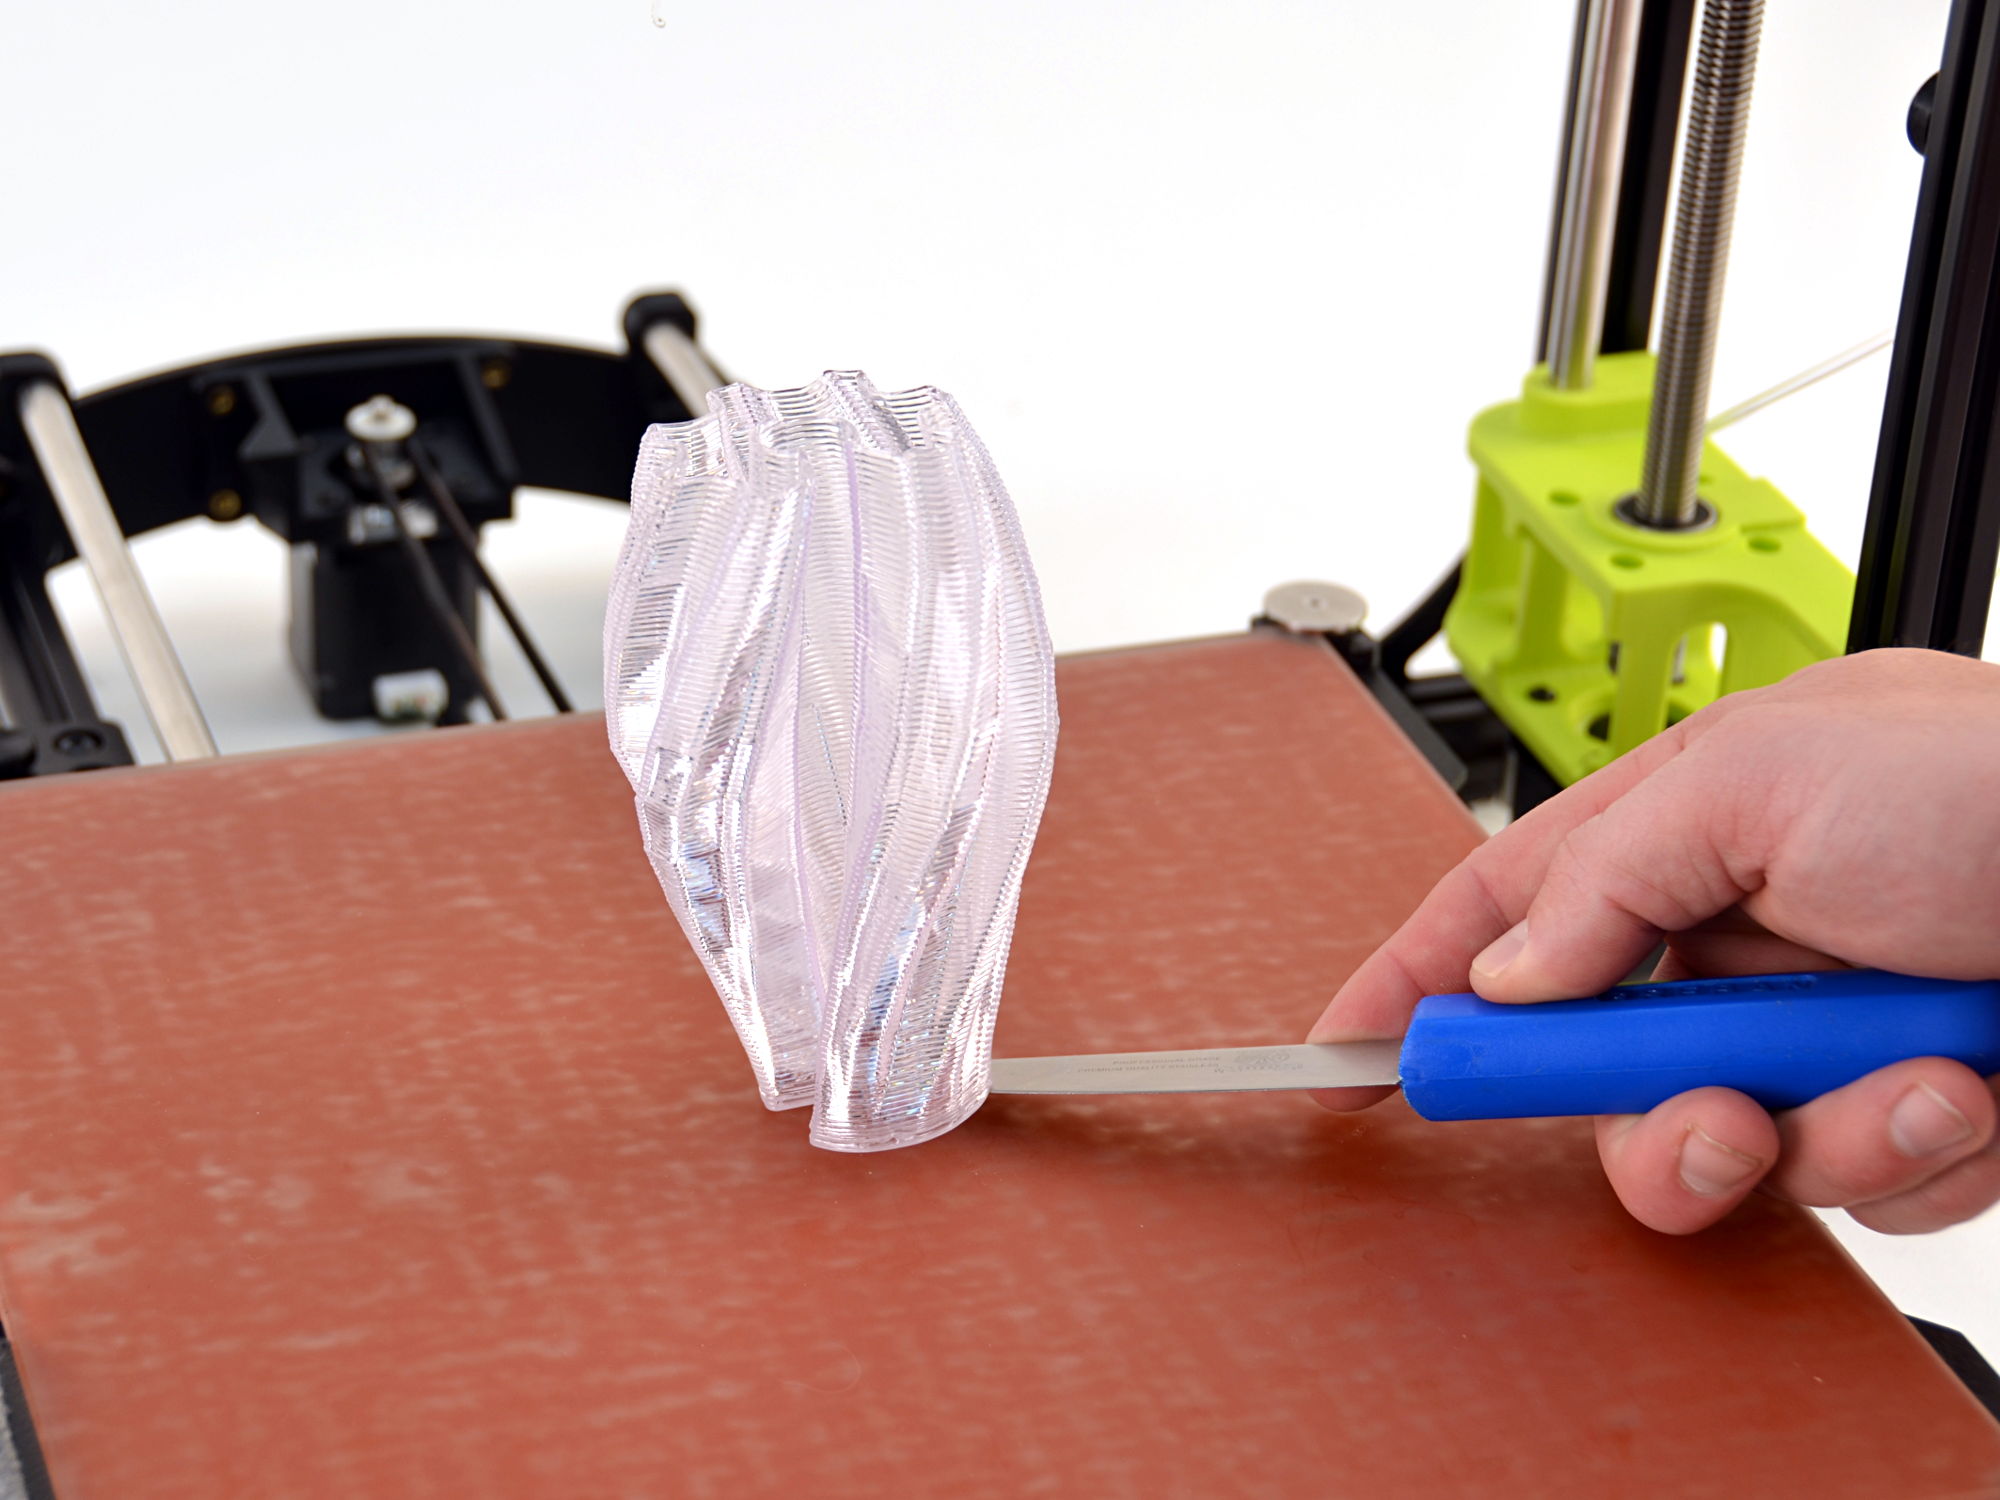
Your 3D printed object will be adhered rather well to the PEI print surface. Gently use the blue-handled part removal tool to probe around the edge of the printed object until you find a gap. Do not force the printed object off the print surface.
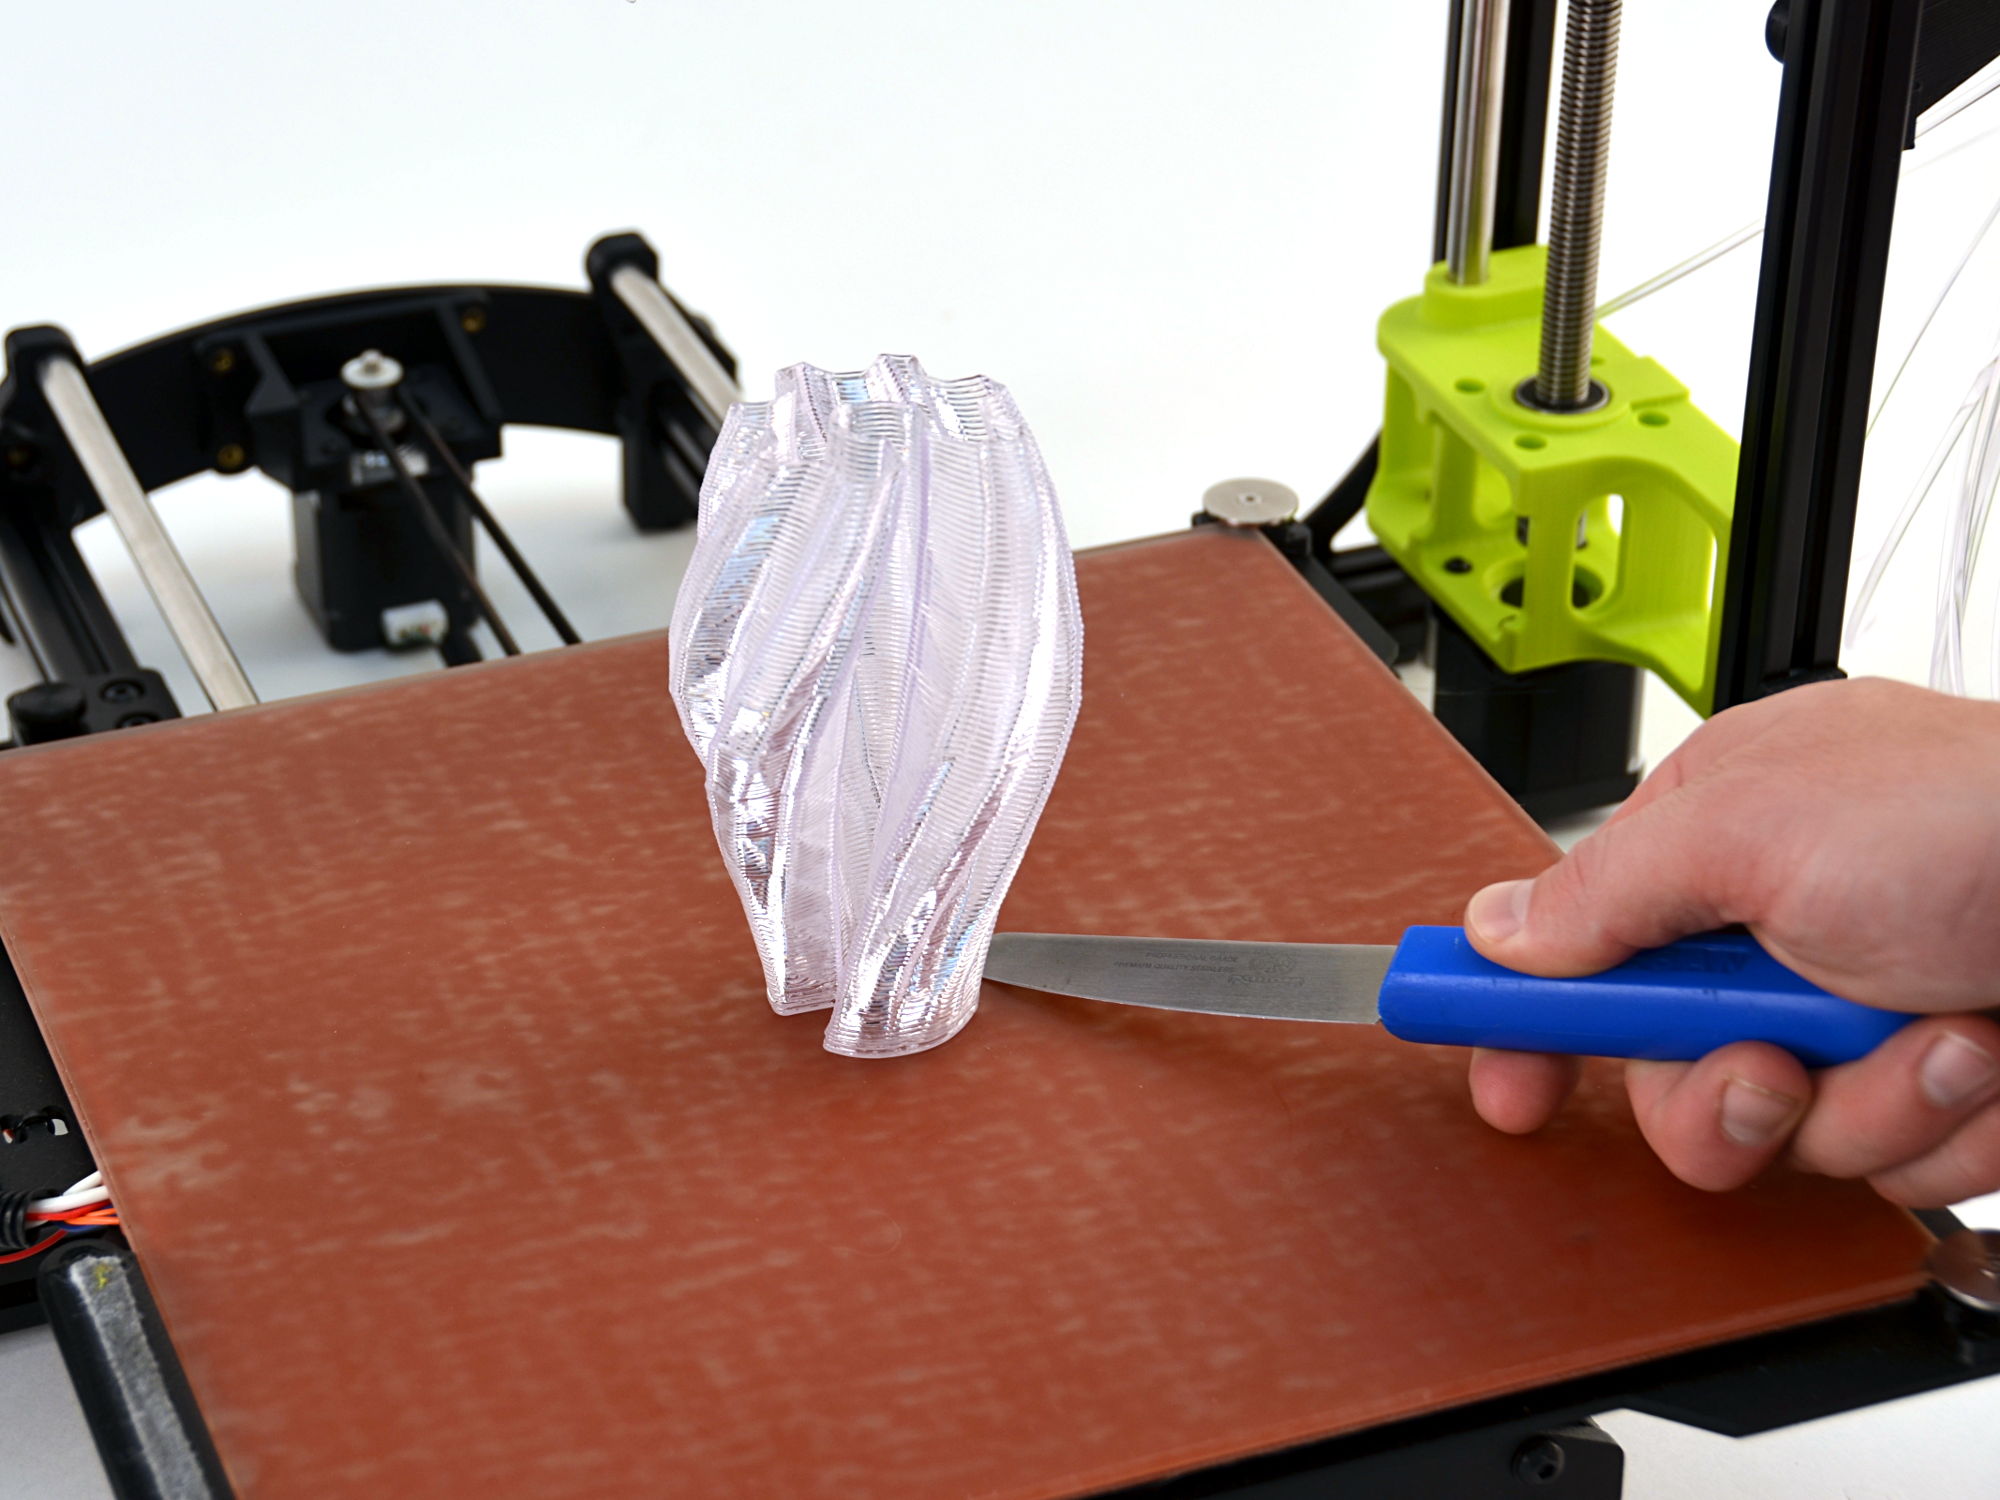

The bed will move forward once the printer cools to the recommended object removal temperature.
Remove your print by using the blue-handled part removal tool to separate the part from the bed.
To switch back to the original tool head, follow the same steps outlined in this guide, except this time, select the Standard LulzBot TAZ 2.1 tool head and options instead.
Store the MOARstruder in the original packaging, taking care to slowly fold over the cardboard insert flaps to secure the tool head.
Have questions, or ideas? Share them with community by joining our user forum at Forum.LulzBot.com