Open HardwareAssembly Instructions
Guides for installation and assembly of the LulzBot line of products made by FAME 3D LLC.
Guides for installation and assembly of the LulzBot line of products made by FAME 3D LLC.
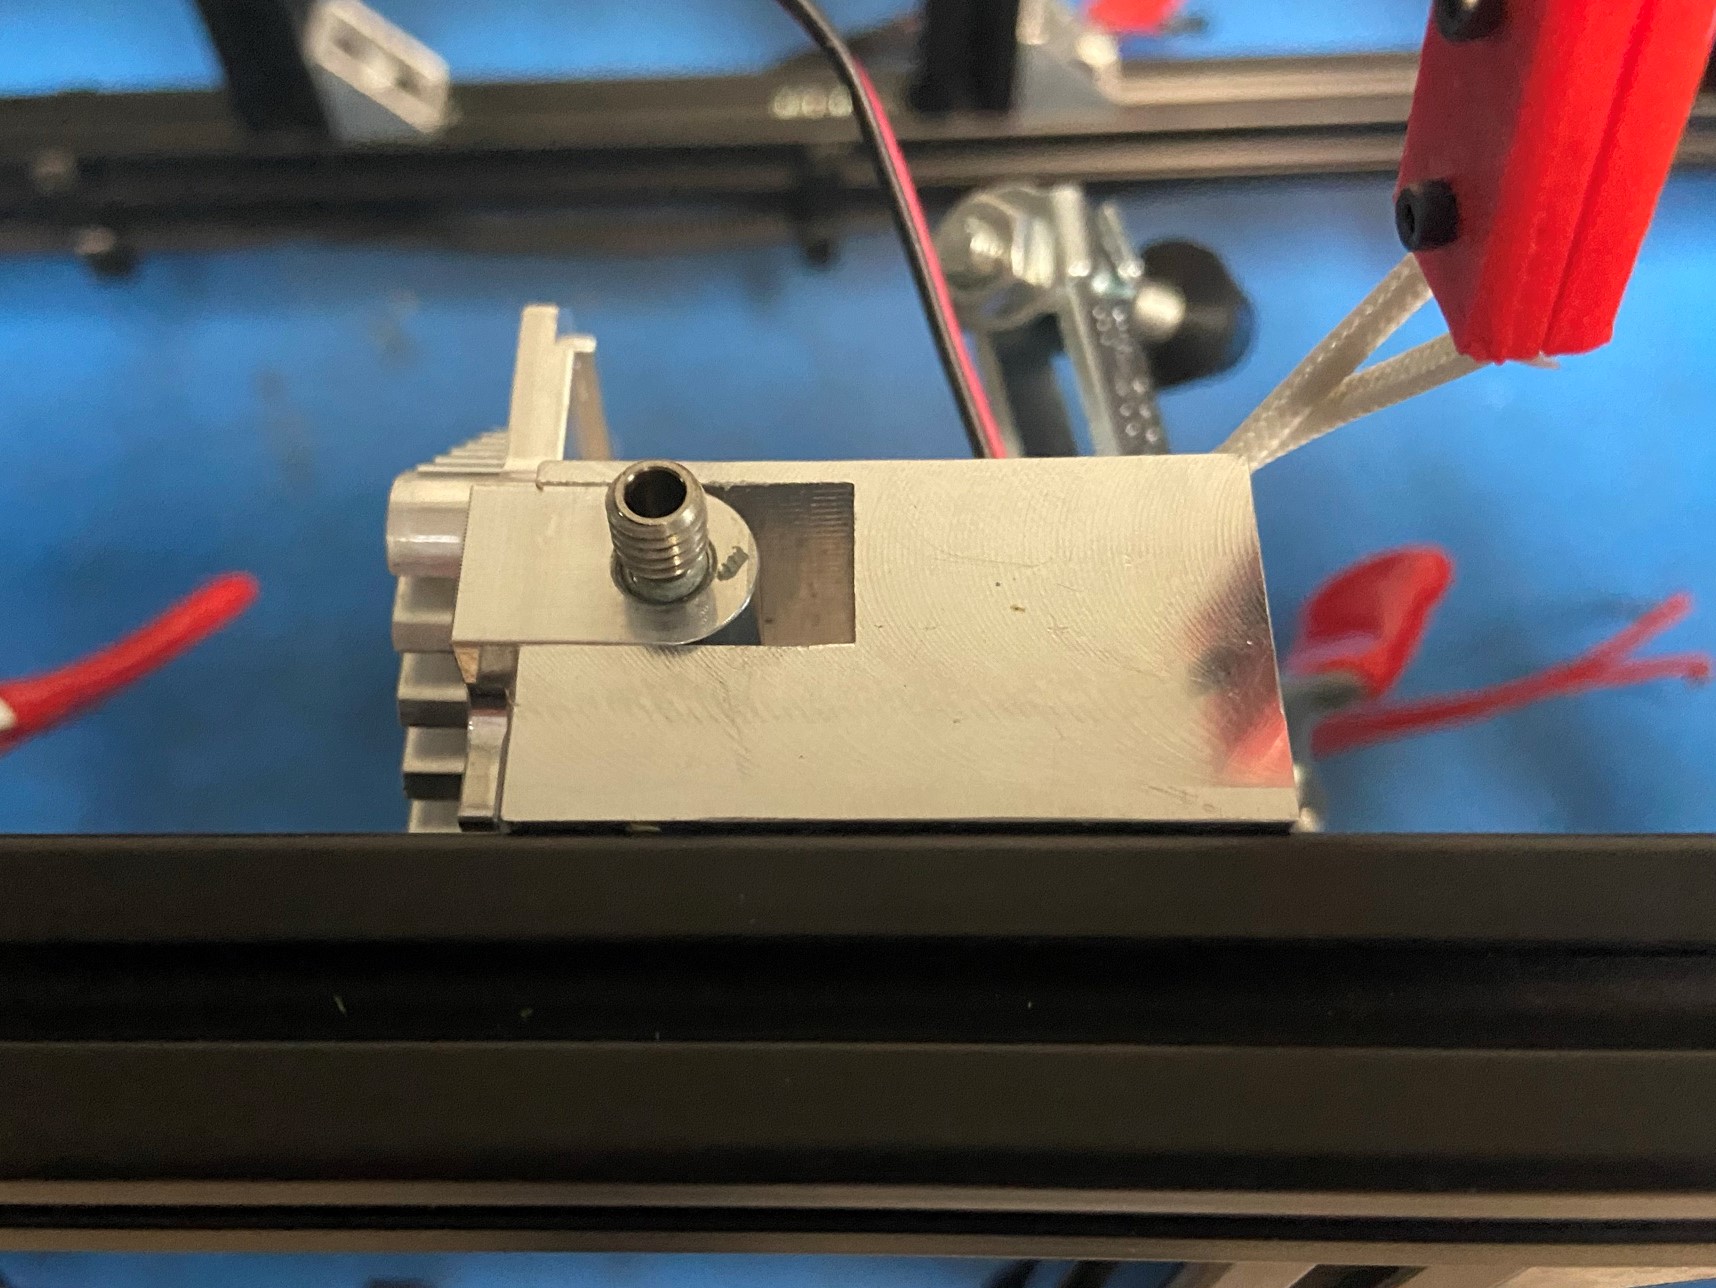
Place the heat sink in one of the 6 machined slots and lock it into place once the top of the heat sink is flush with the machined slot. [reference#1]
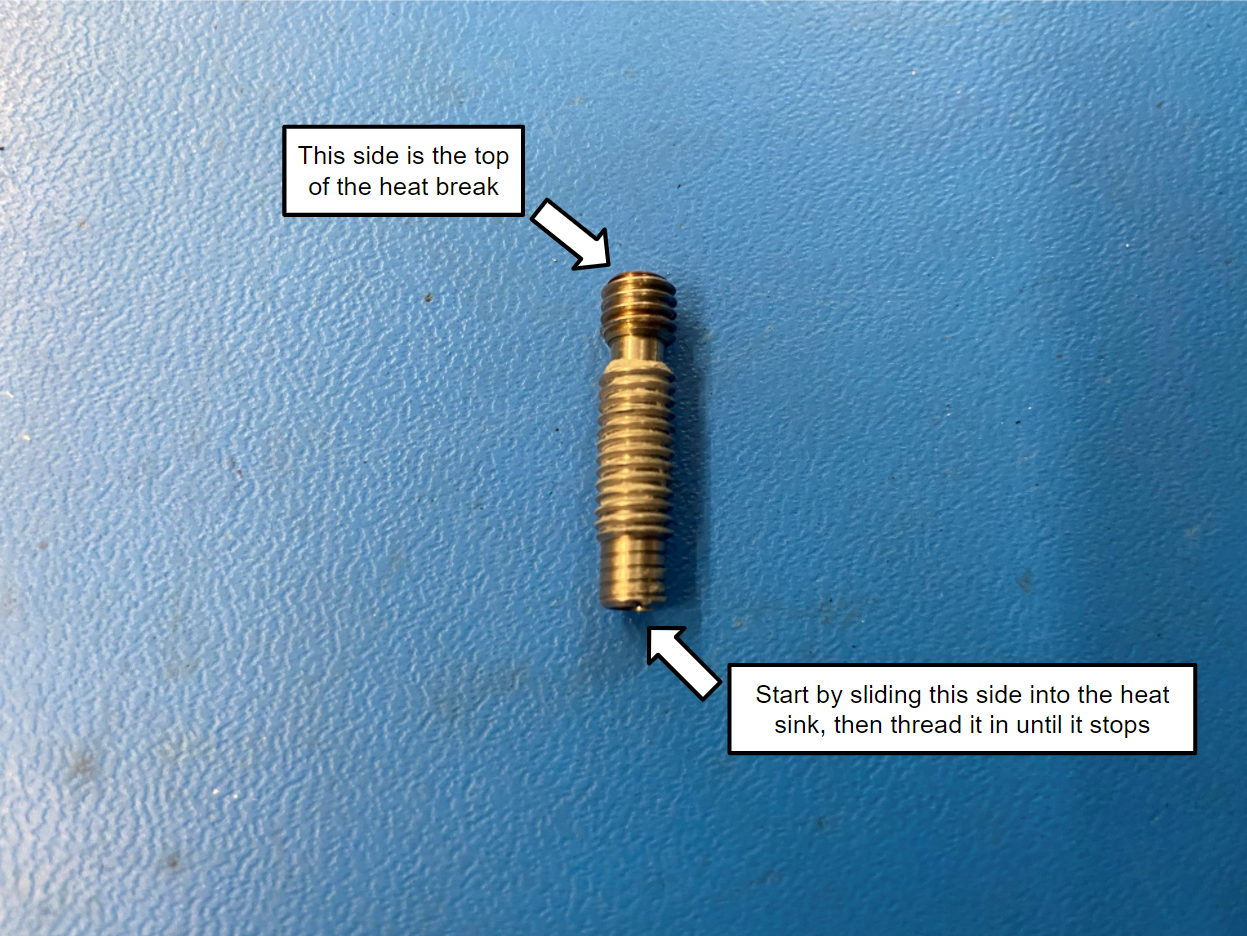
Then take the heat break and thread it into the heat sink make sure to thread it all the way
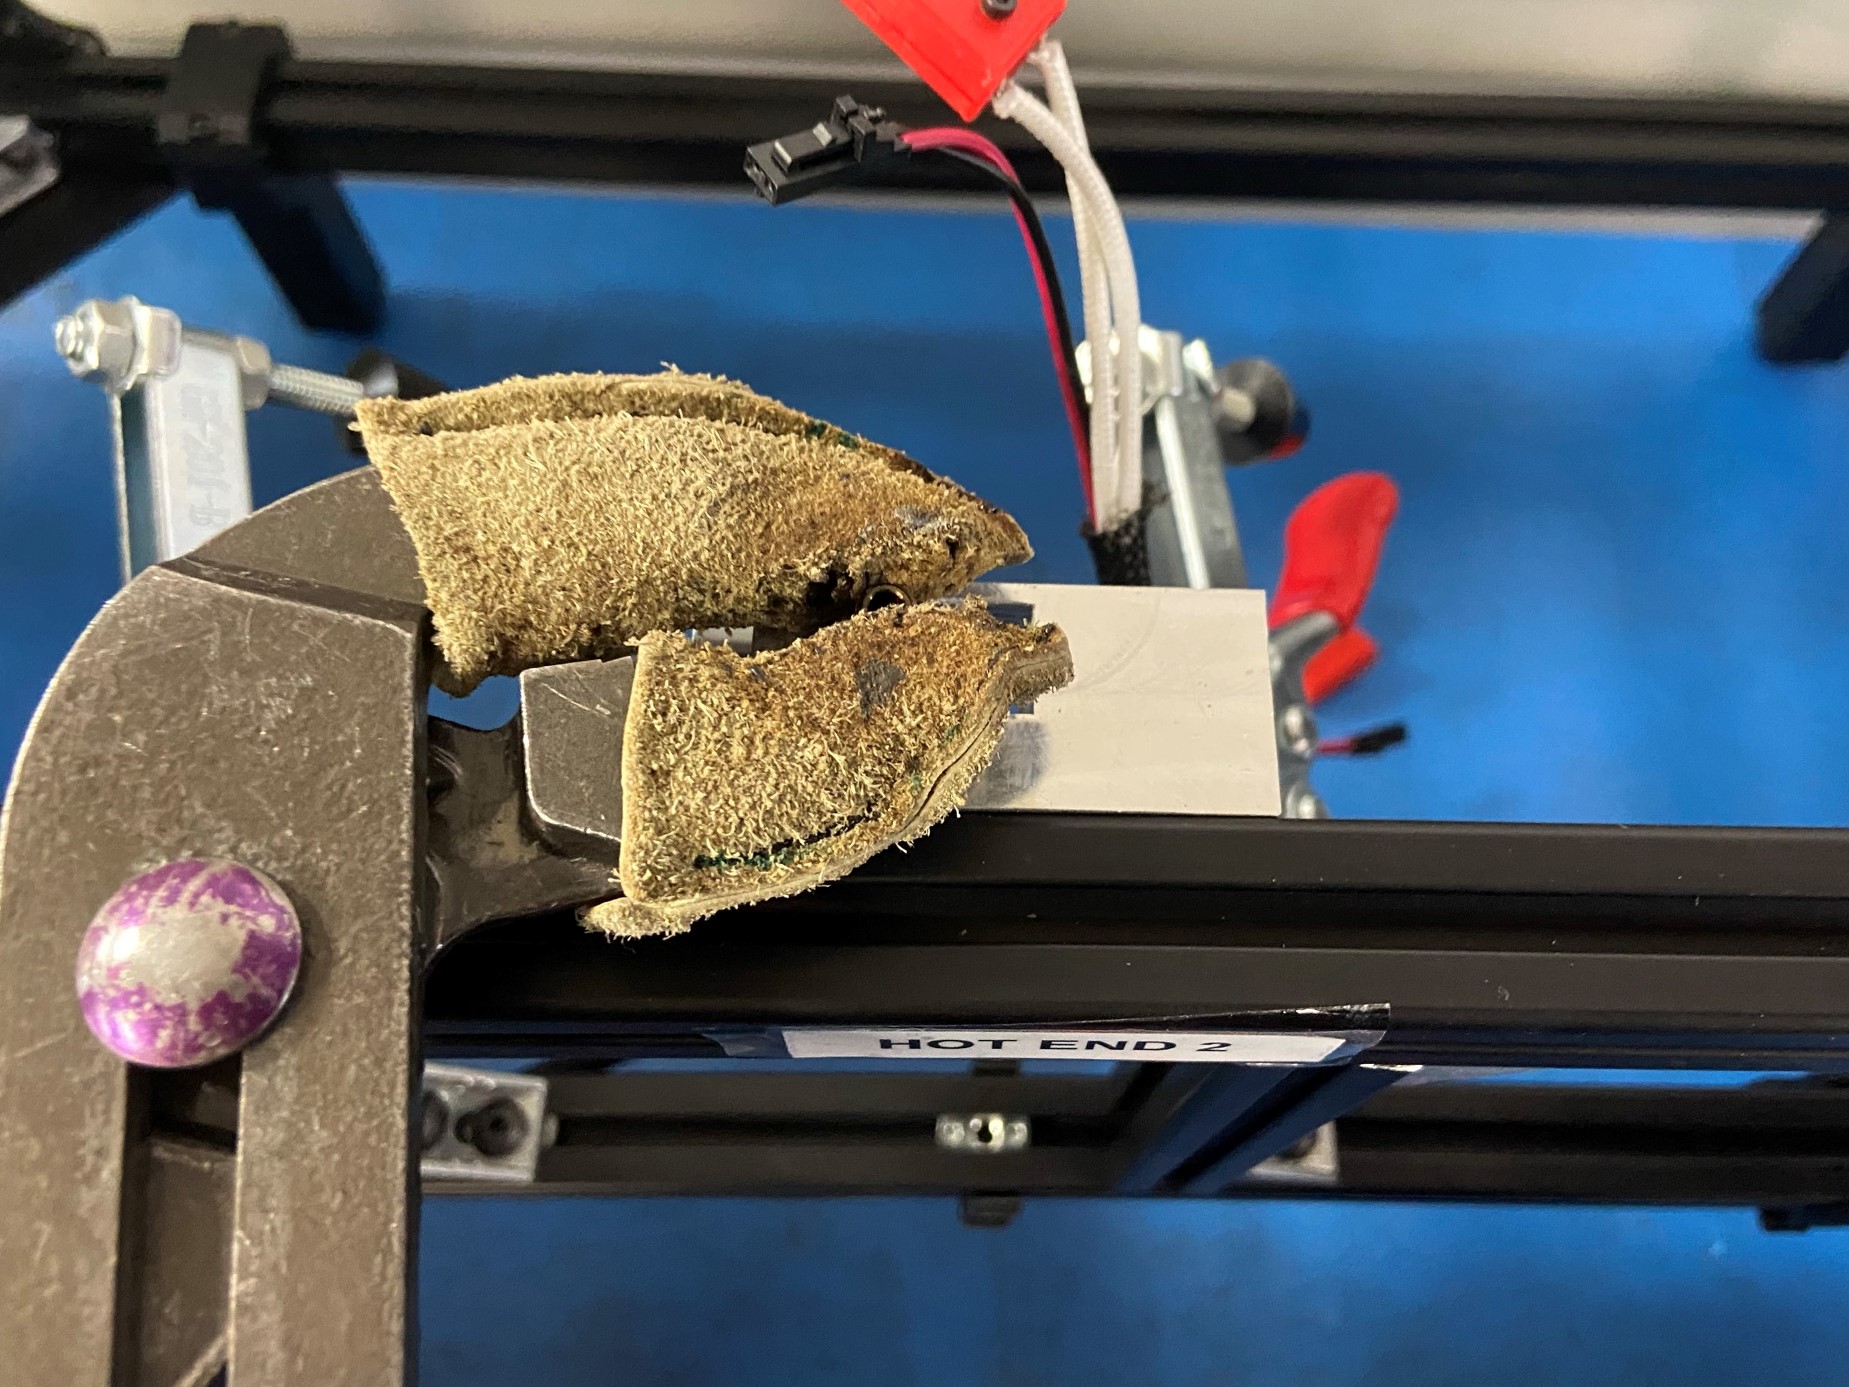
Then using a channel lock with leather sleeves tighten the heat break
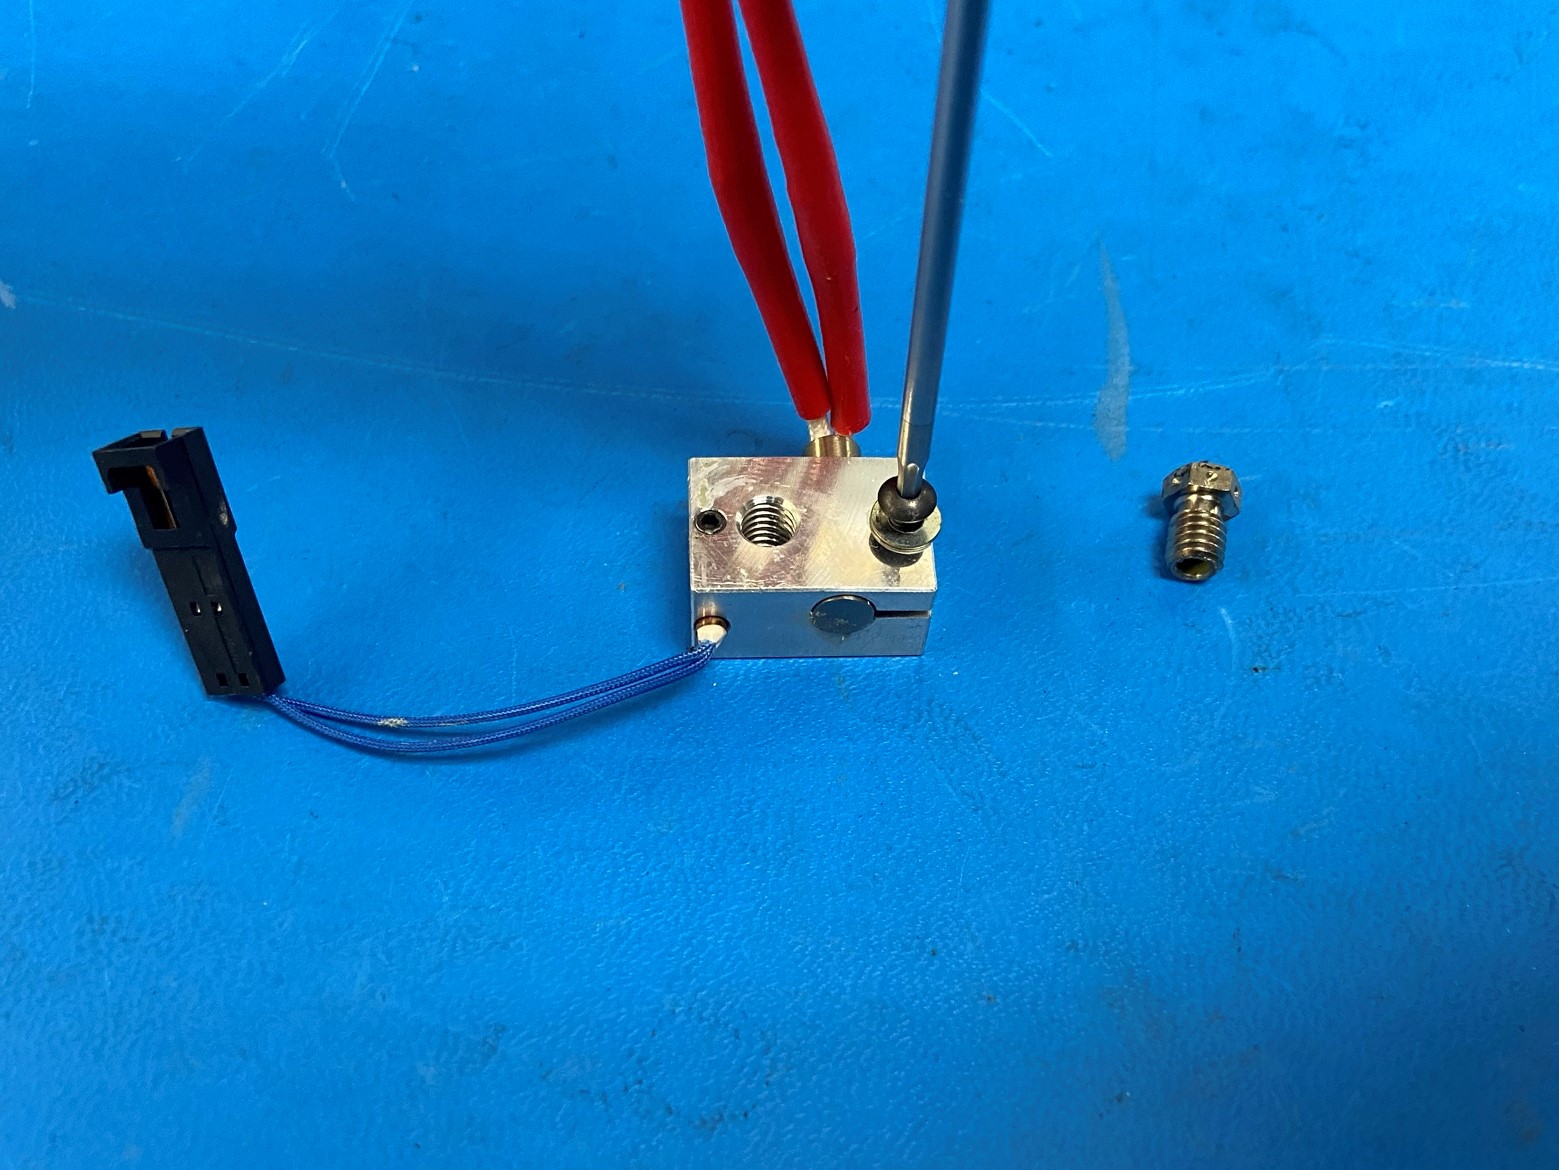
Remove the blue and red wires, these will be installed in a later step
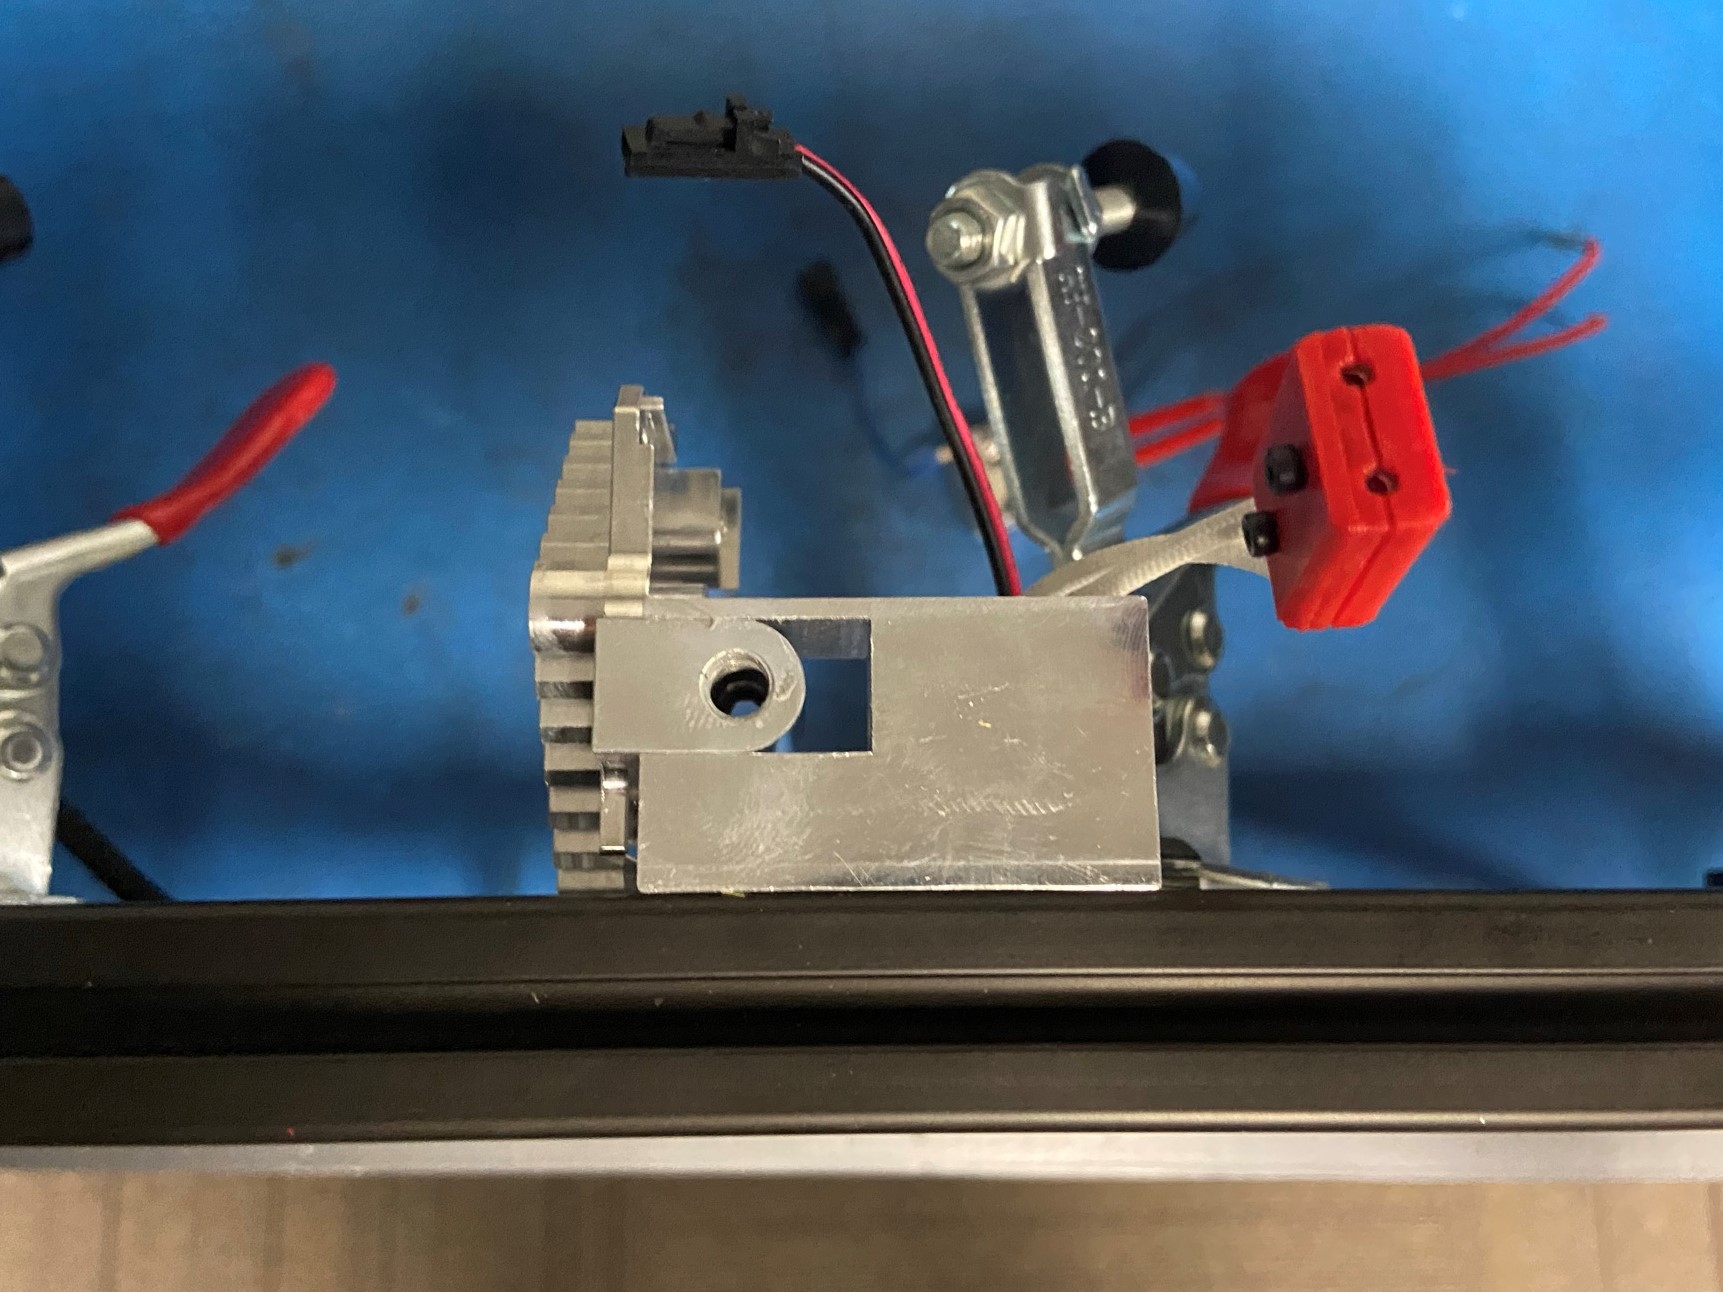
Place the heat block on the table with the head of the screw facing up [reference#2]
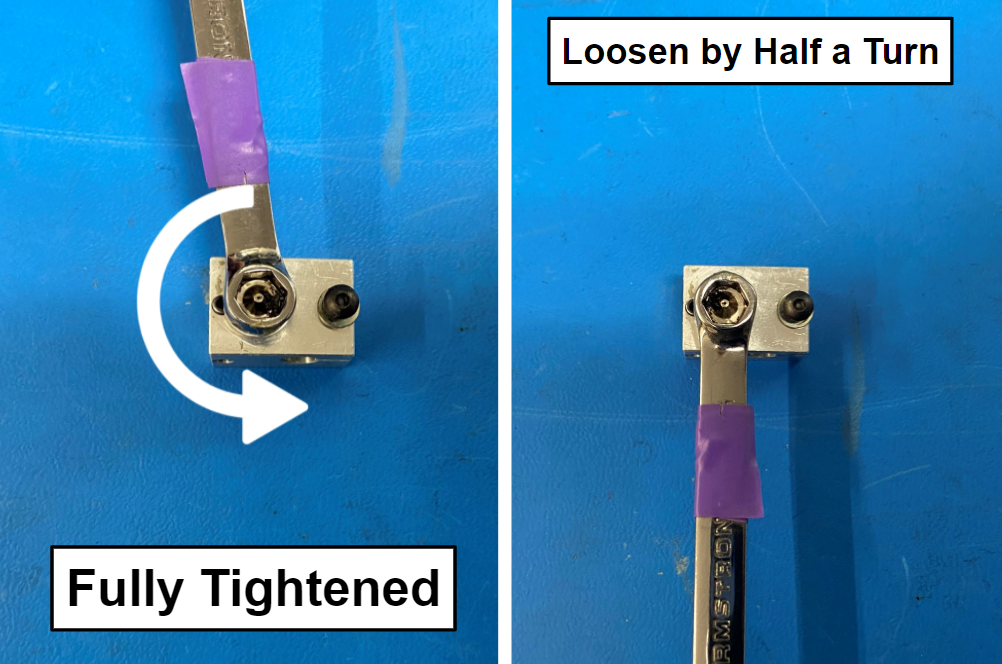
Then thread the nozzle into the heat block once the nozzle is fully threaded in loosen it by half a turn.

Take the heat block with the nozzle and thread it on to the heat break, if the heat break goes past the correct orientation [reference#3] then twist it back to the correct orientation and leave the heat block loose. This will be fix when you tighten the nozzle
Make sure the heat block is parallel with the support extrusion
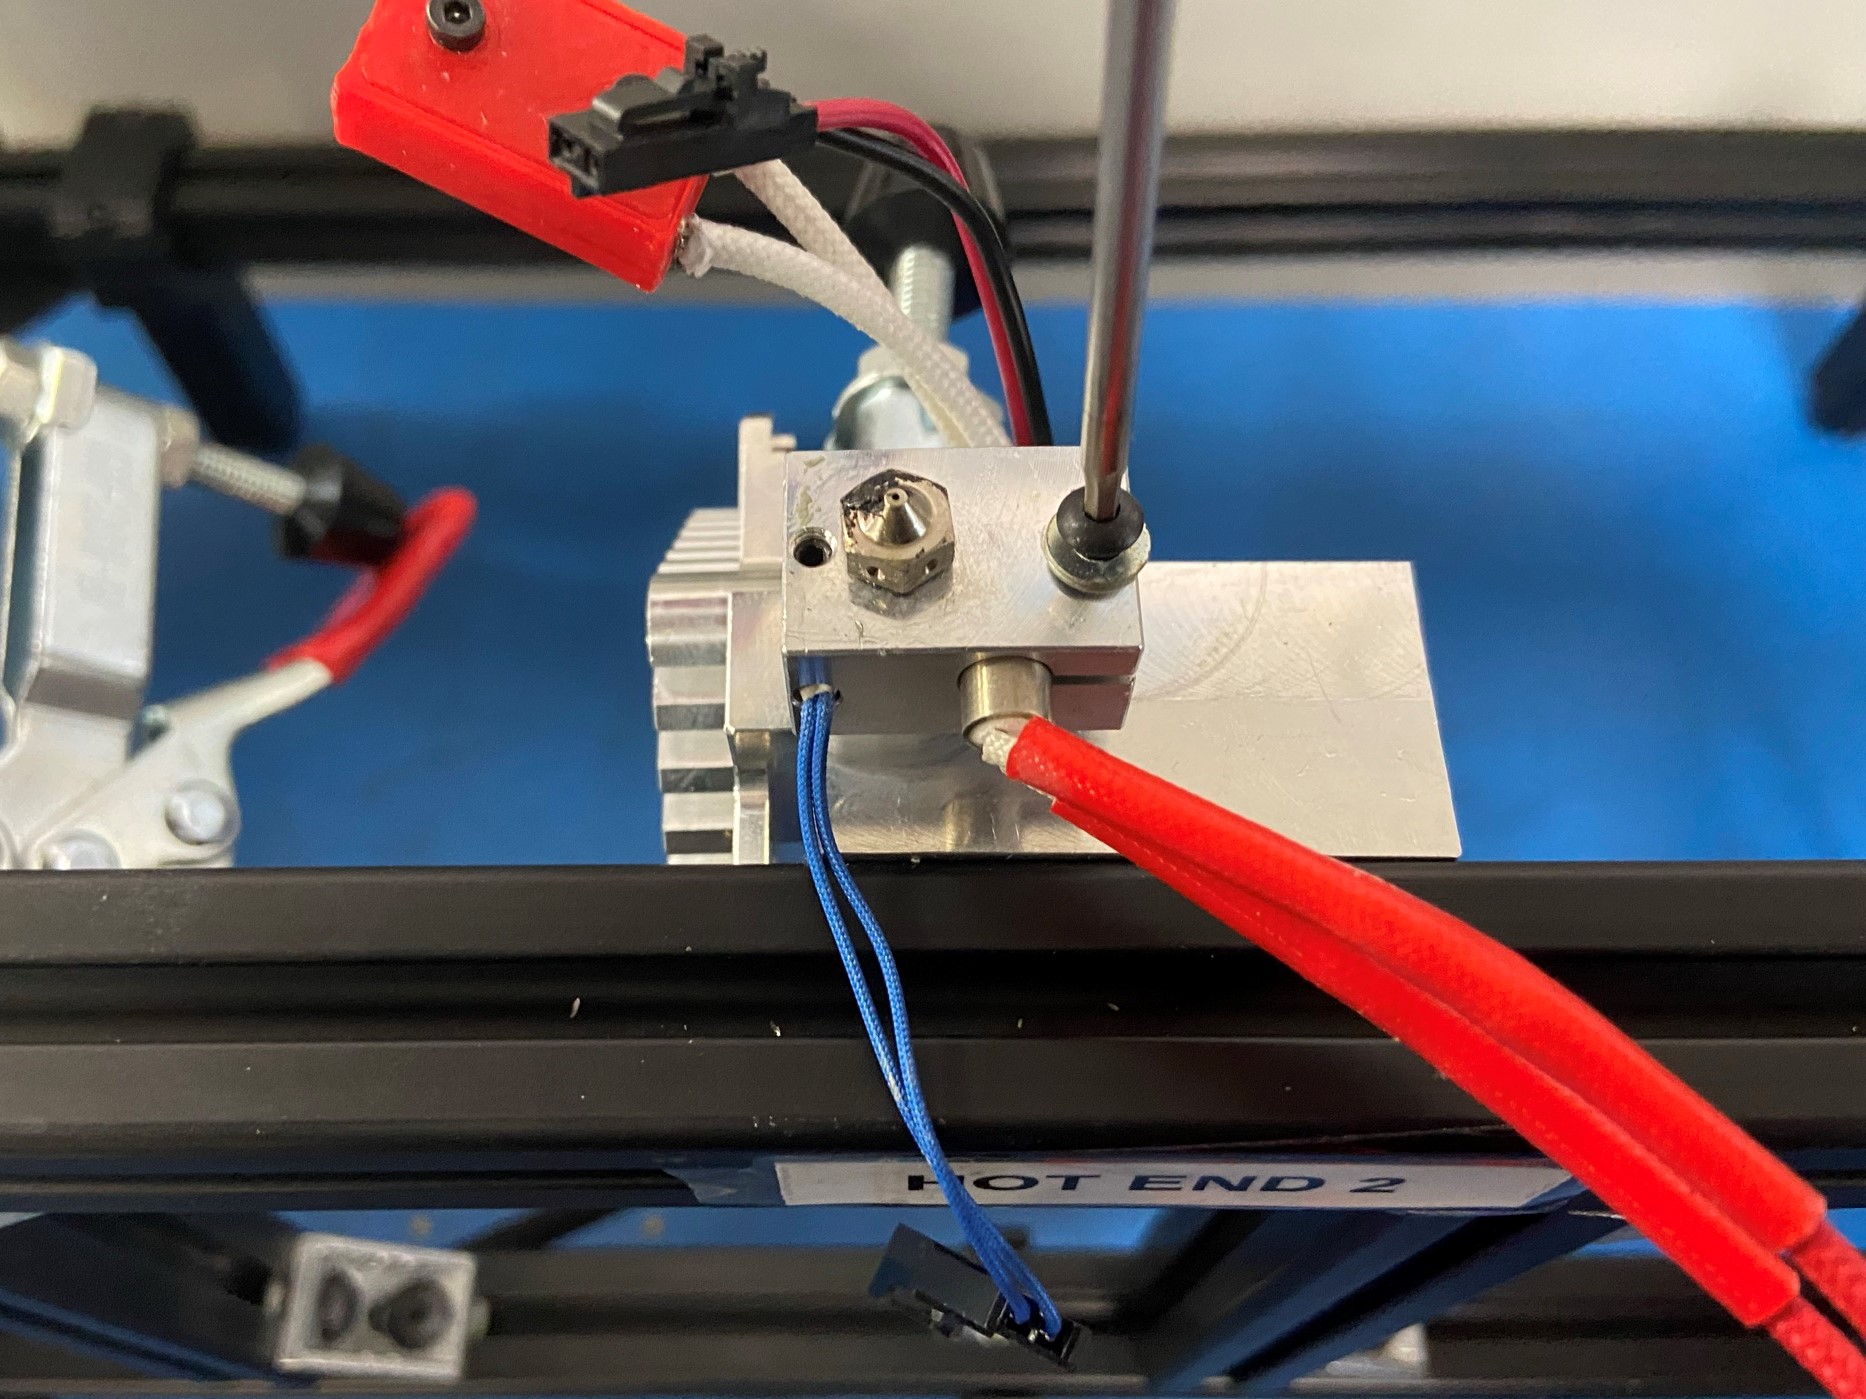
Then attach the red and blue wires make sure the nozzle is on the left and the wire are pointing to you [reference#4] then tighten the set screw and screw
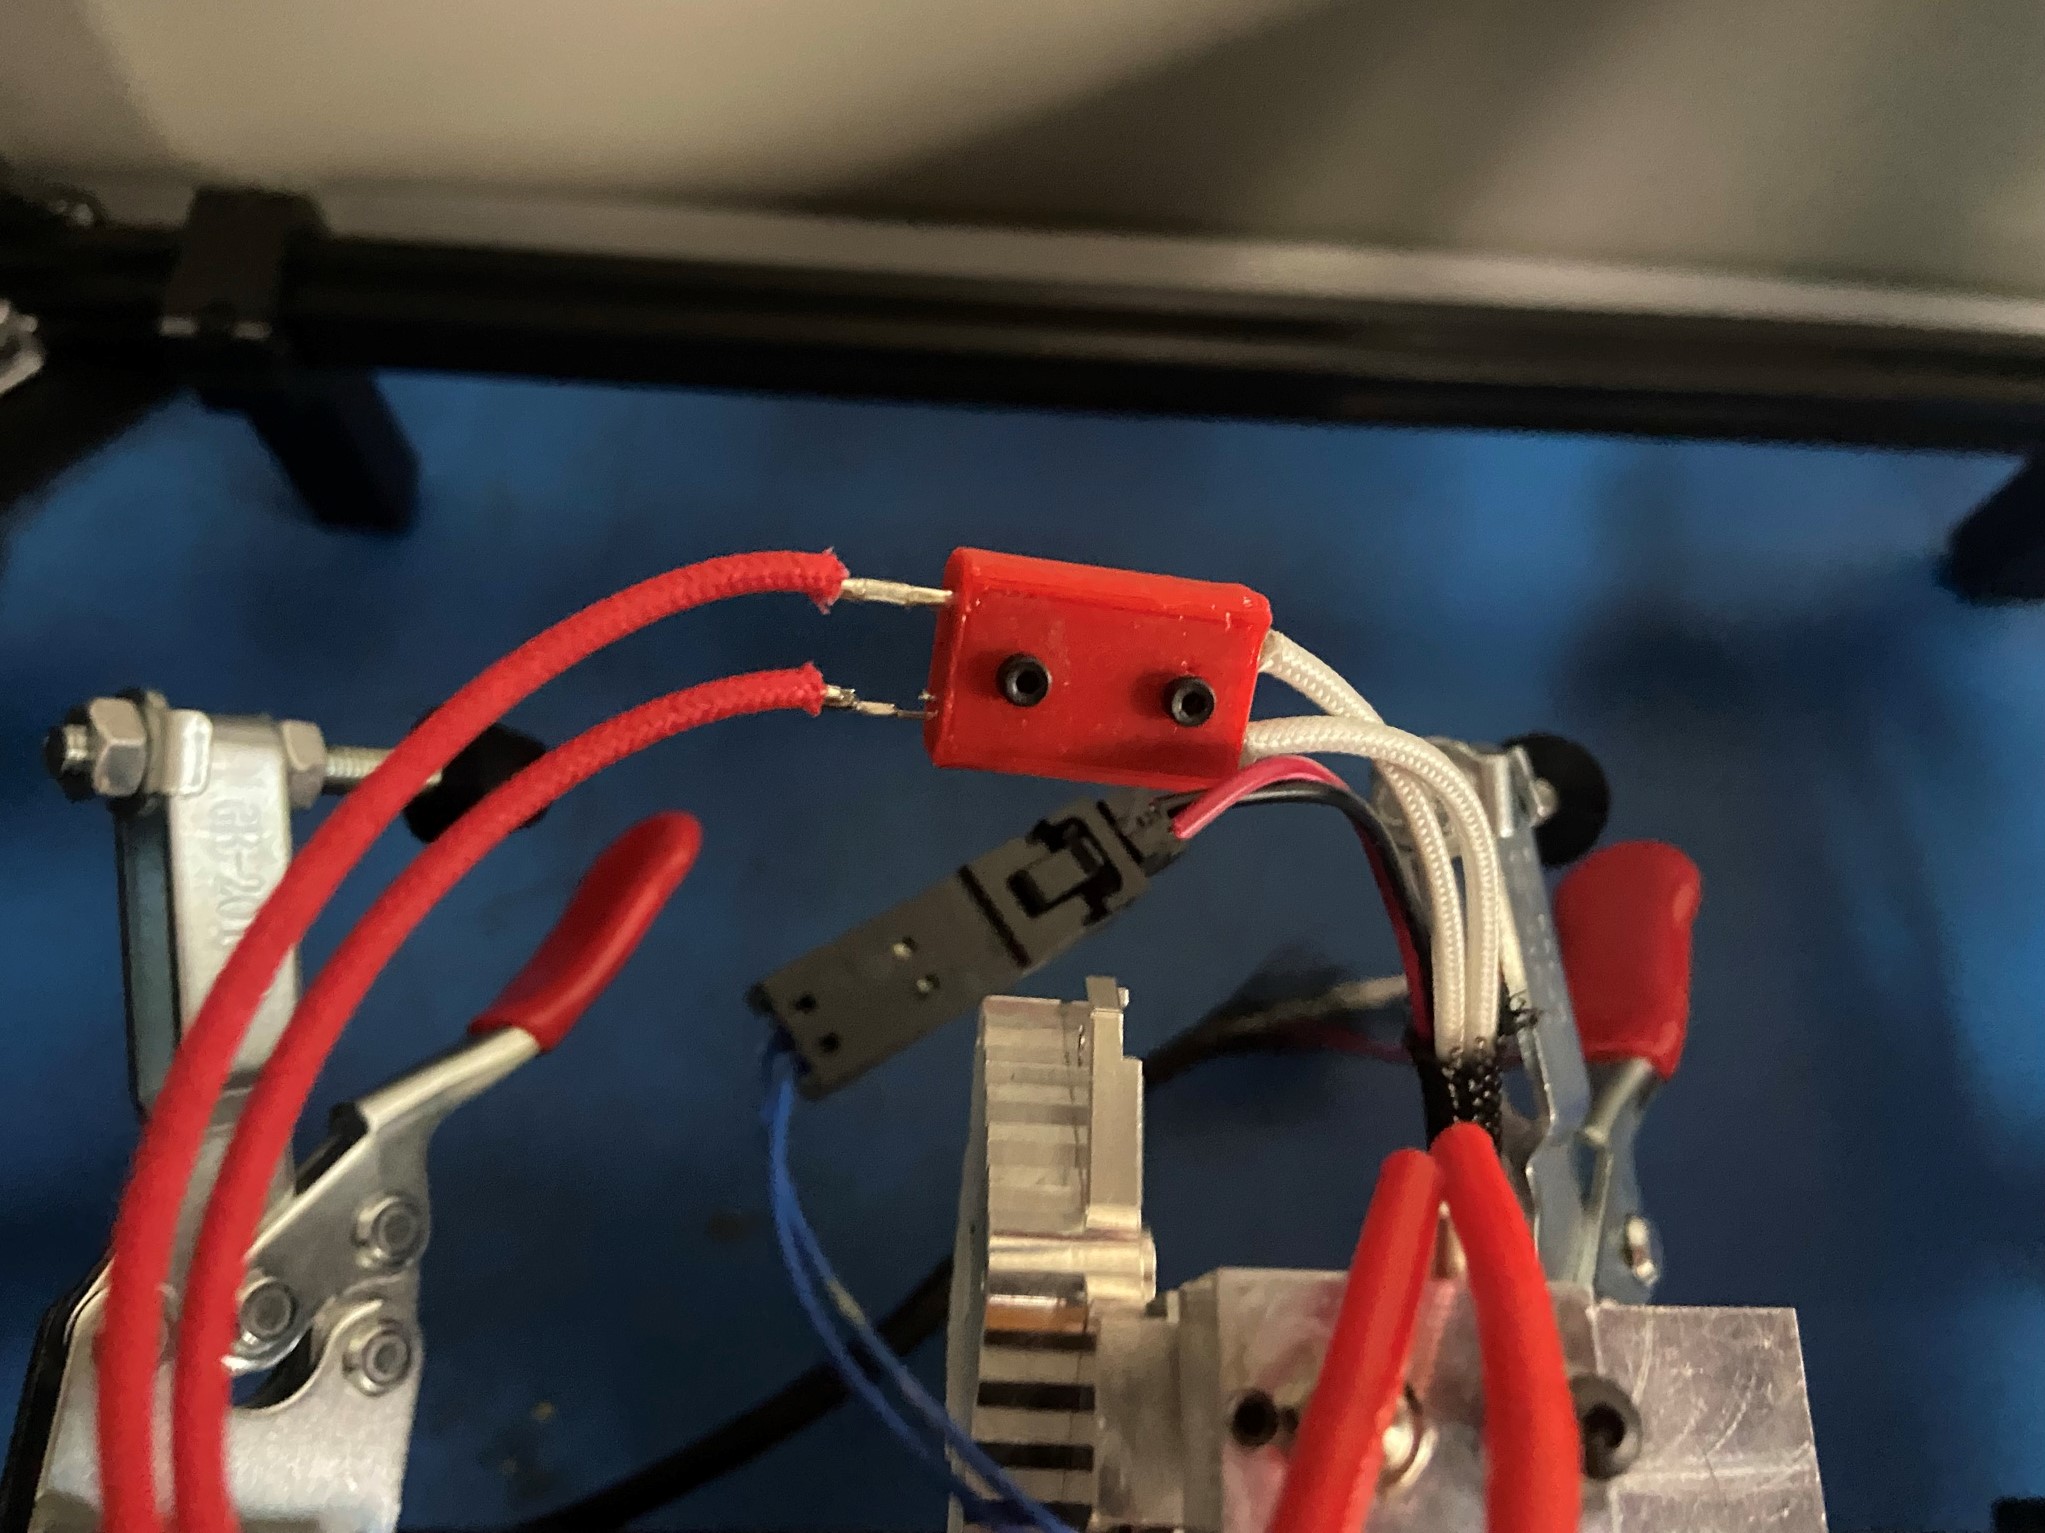
Connect the two red wires to the red 3D printed connector (order doesn't matter)
Keep the leads away from any metal to prevent an electrical arc
Then connect the blue wires to the red and black wire
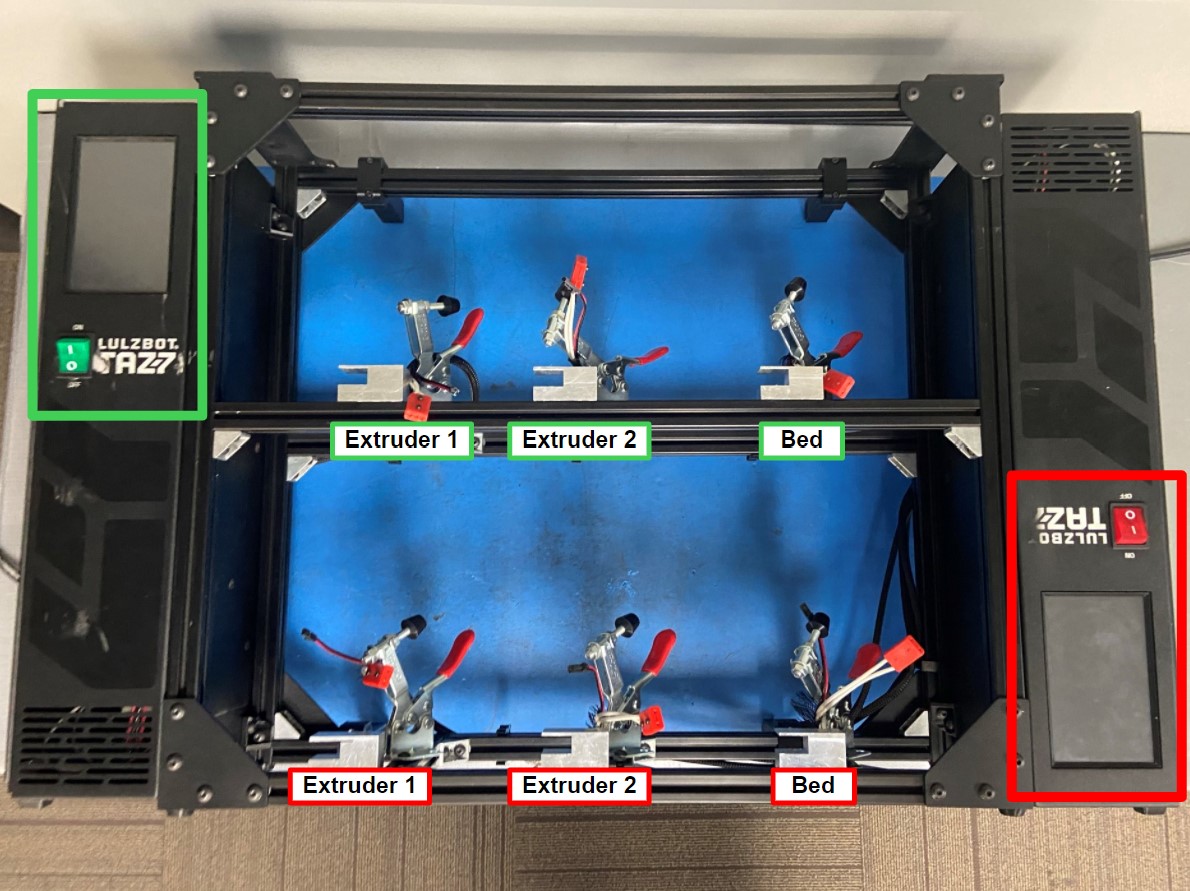
There are two touch screens that control the 6 stations. The touch screen that has the green power switch controls the top three stations and the touch screen with the red power switch control the three bottom stations. The top and bottom stations are labeled Extruder 1, Extruder 2, and Bed respectively starting on the left
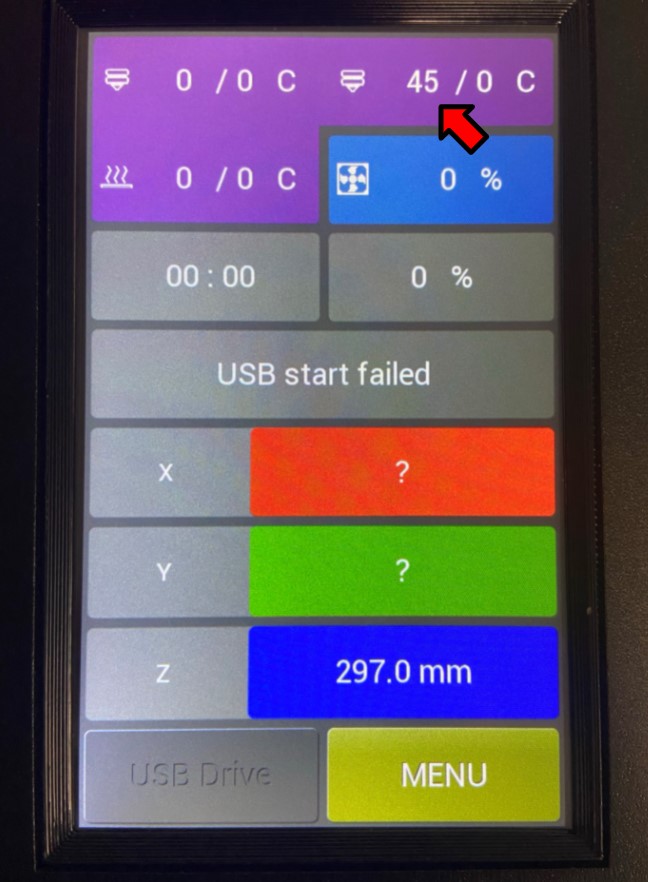
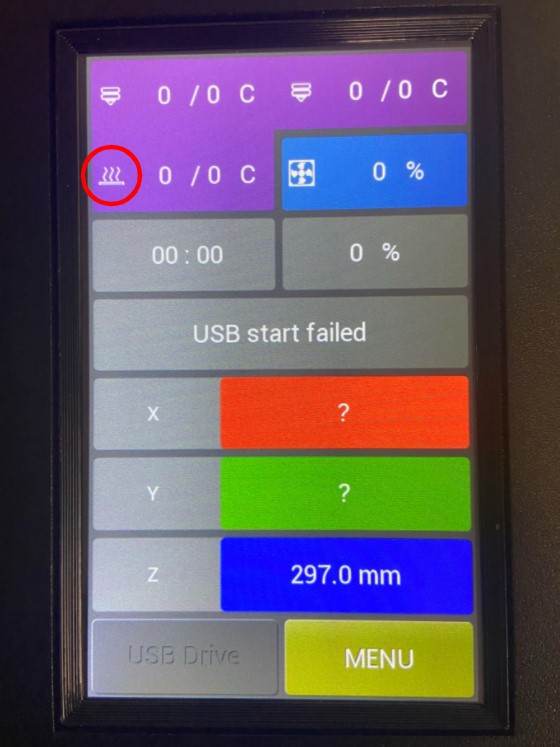
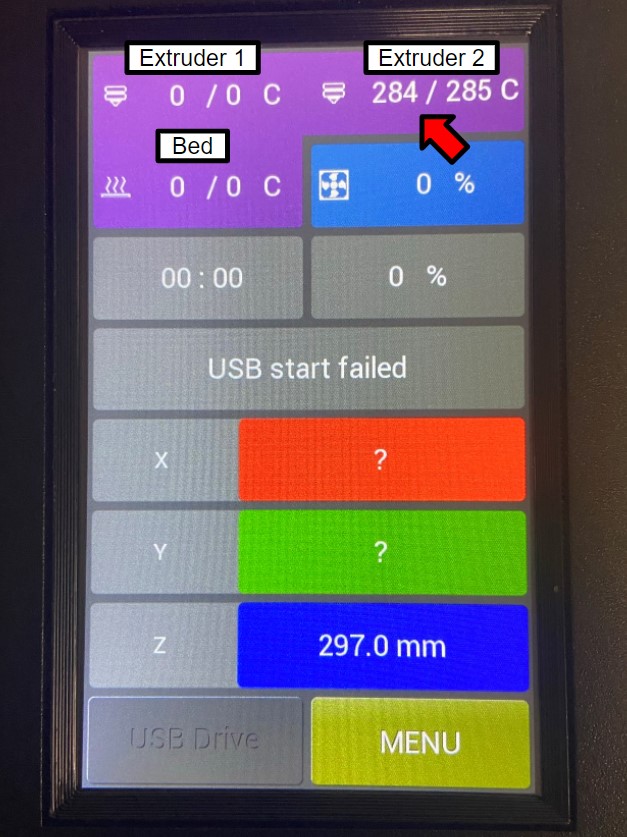
Turn on the corresponding touch screen then select the temperature settings then depending on what station you want to heat set the temperature to 285 degrees C.
DO NOT TOUCH THE HEAT BLOCK IF THE TEMP IS OVER 45 DEGREES

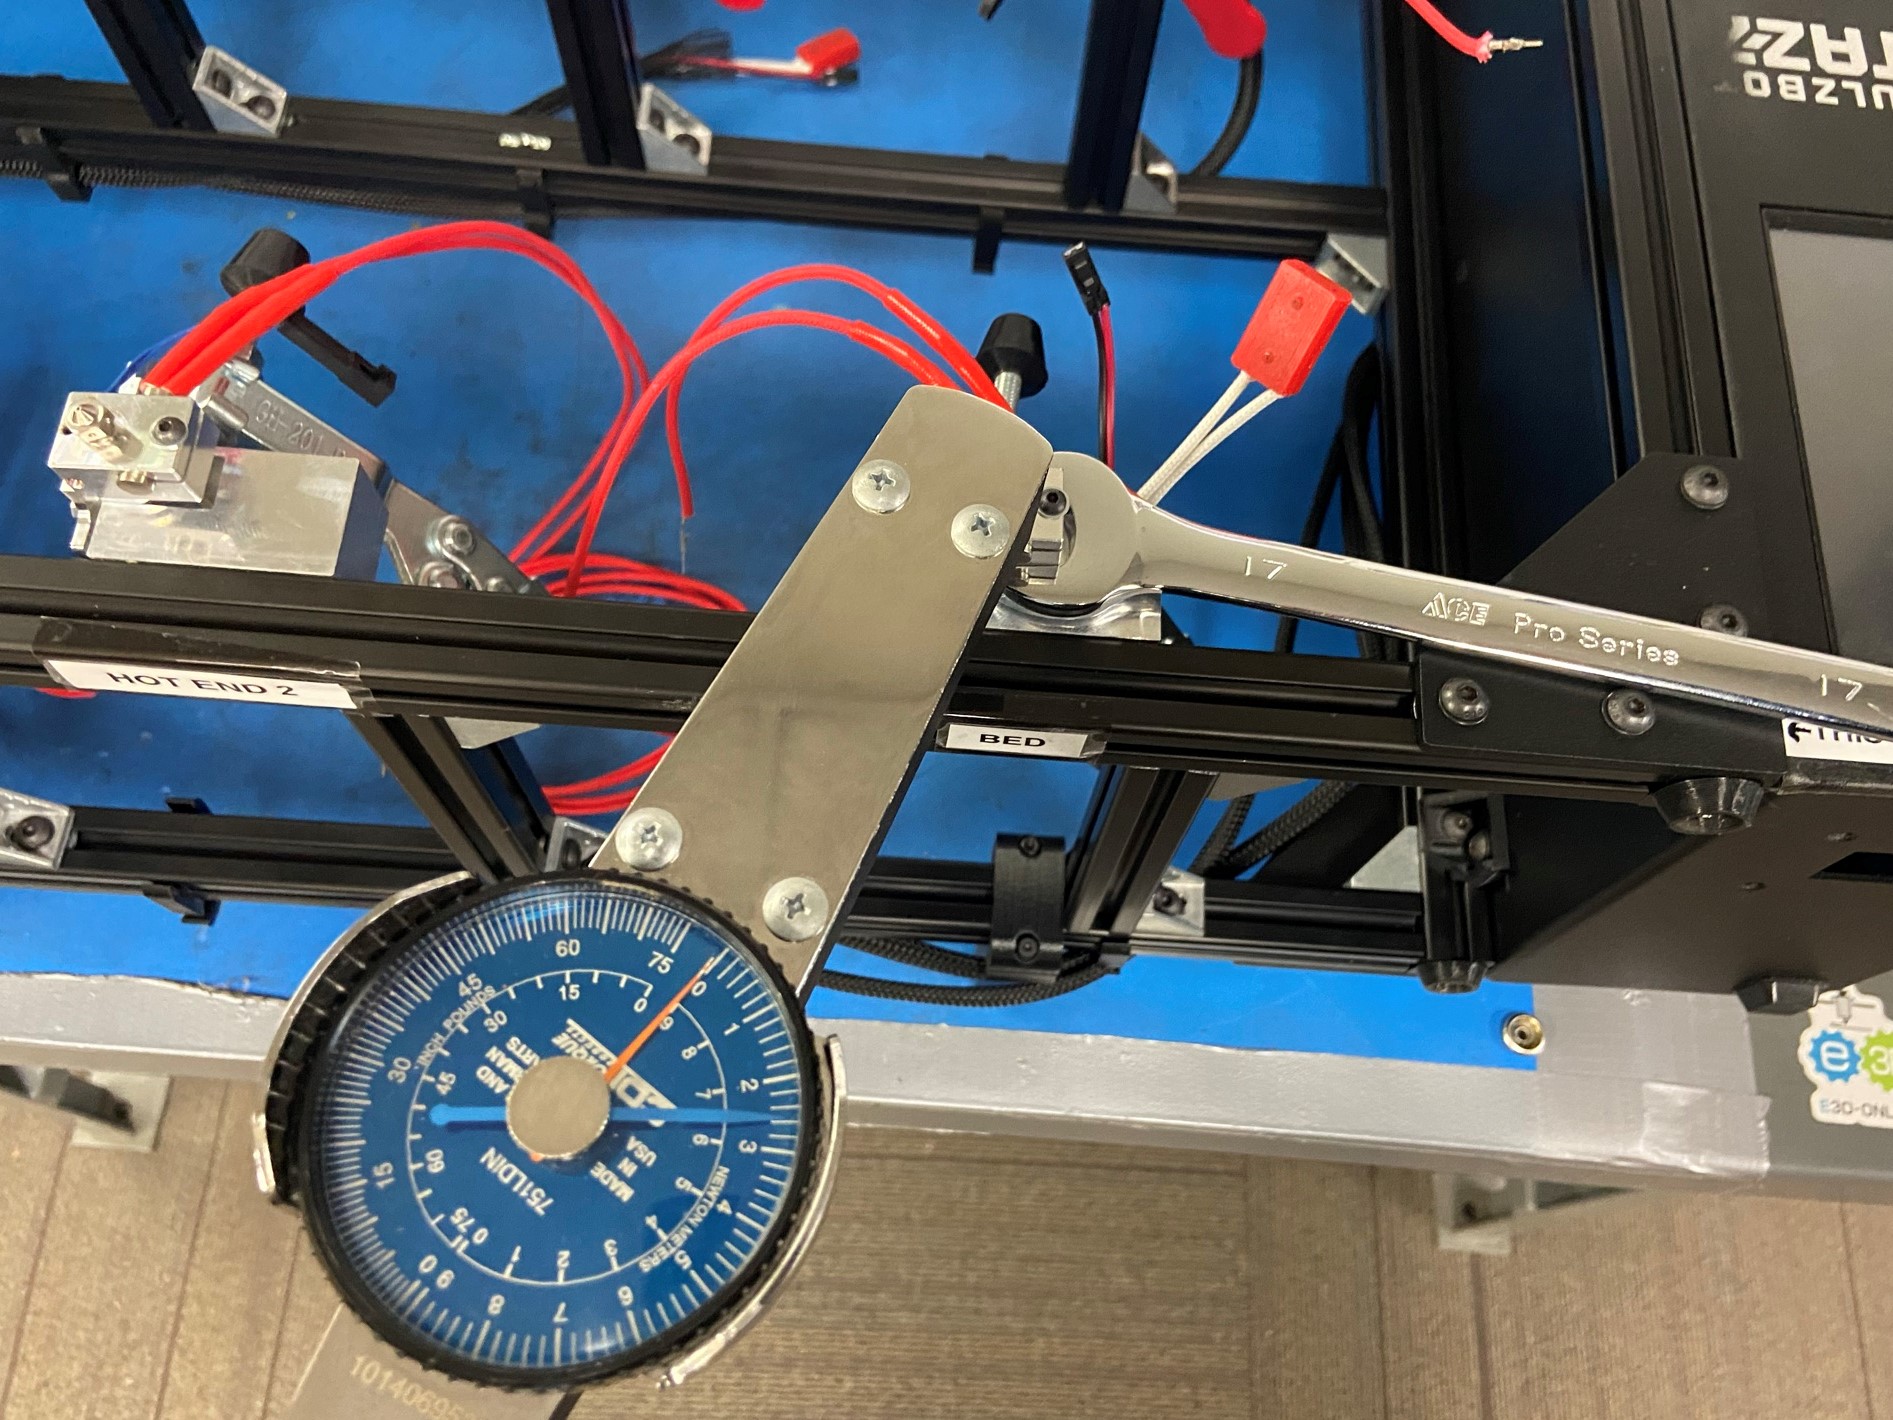
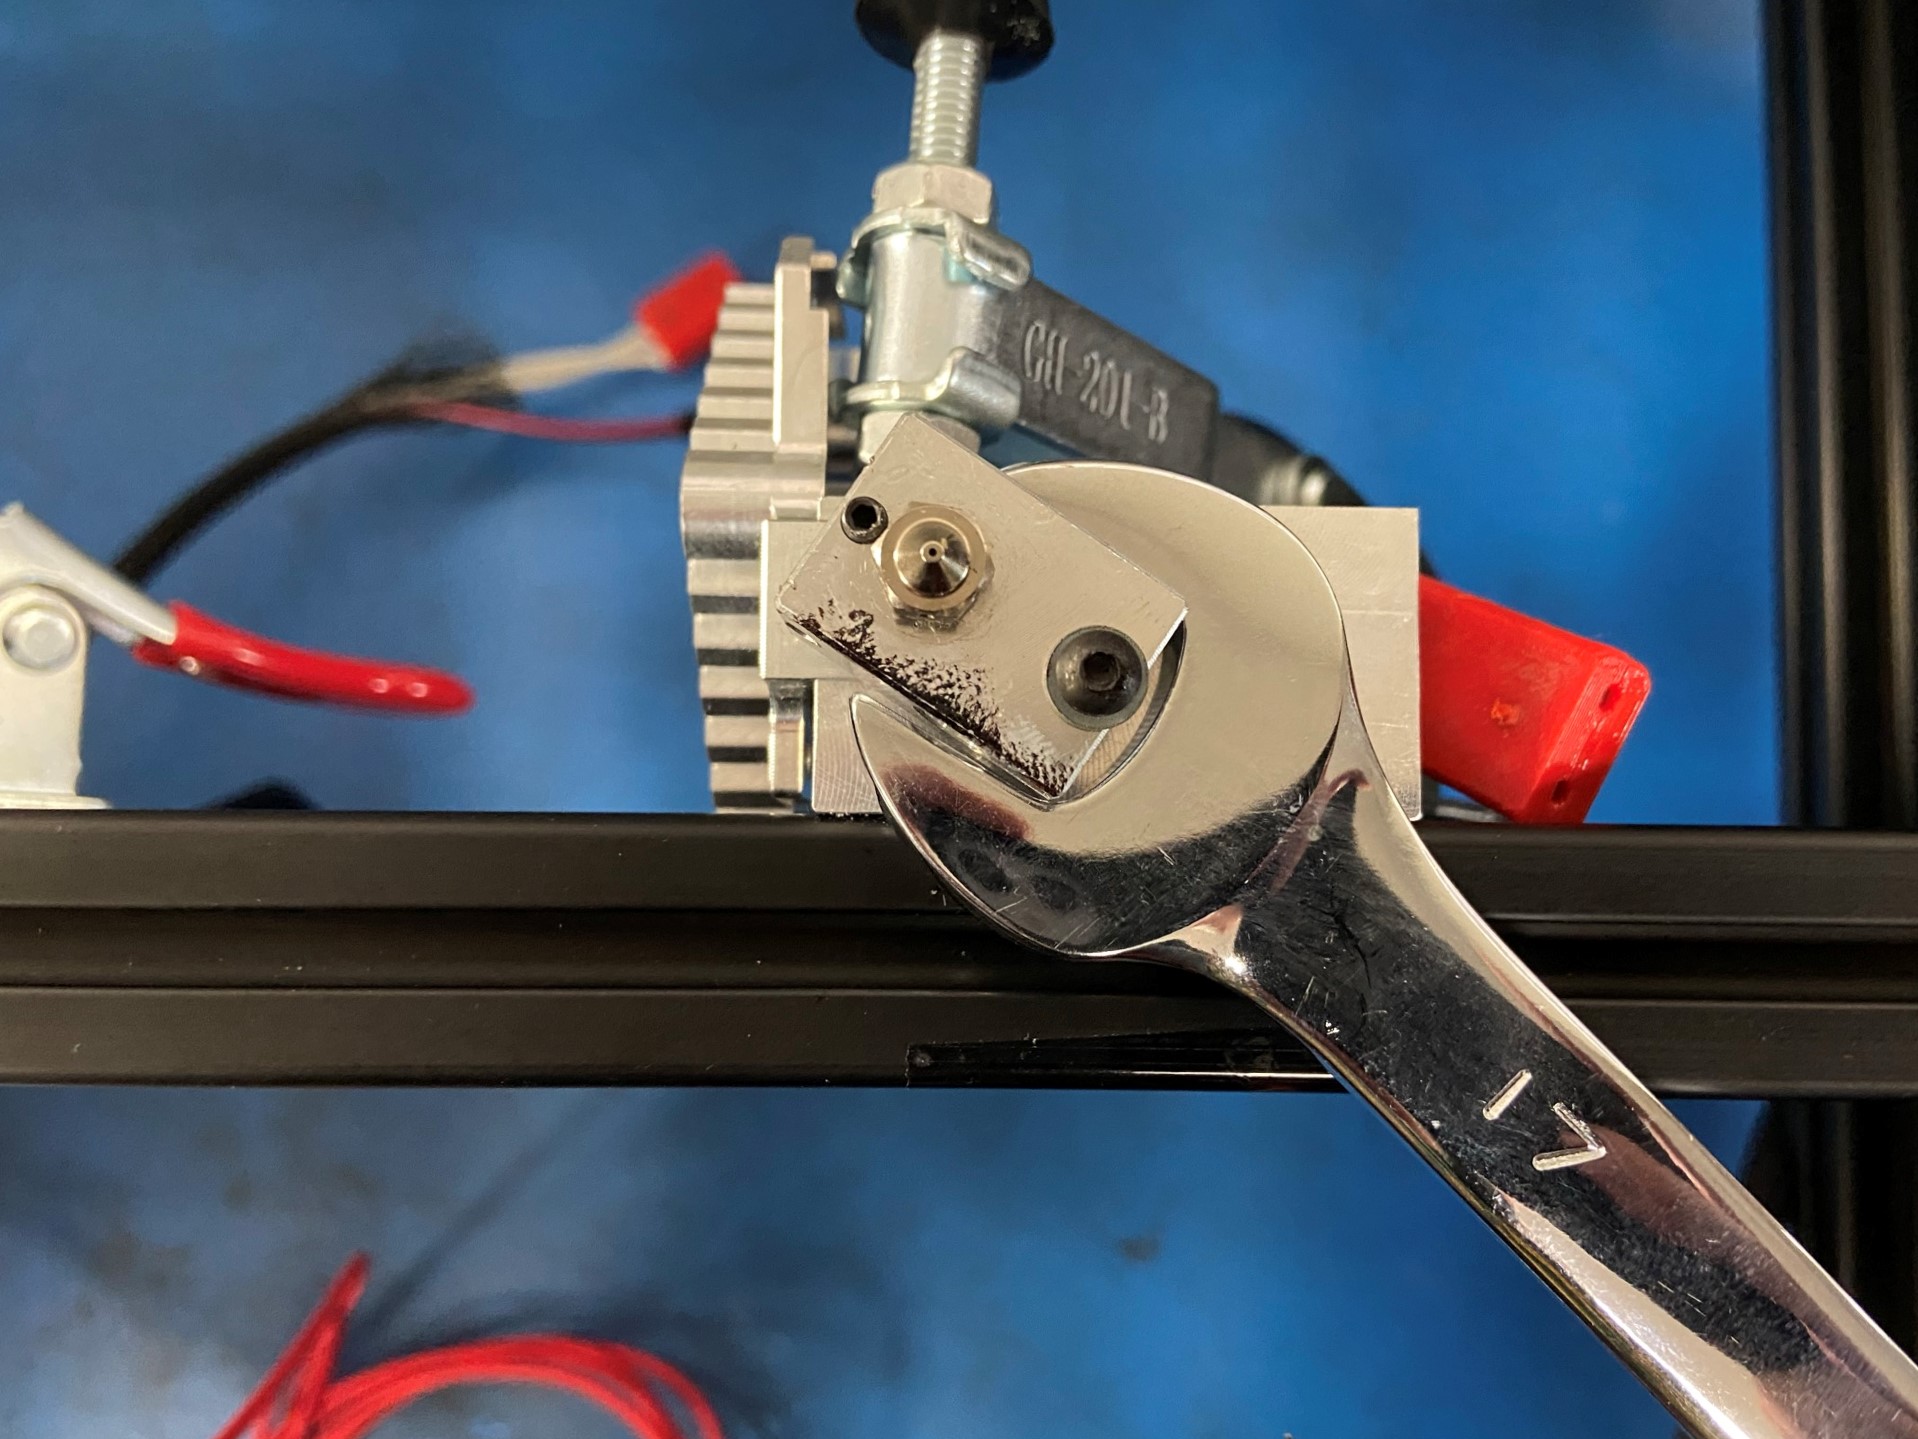
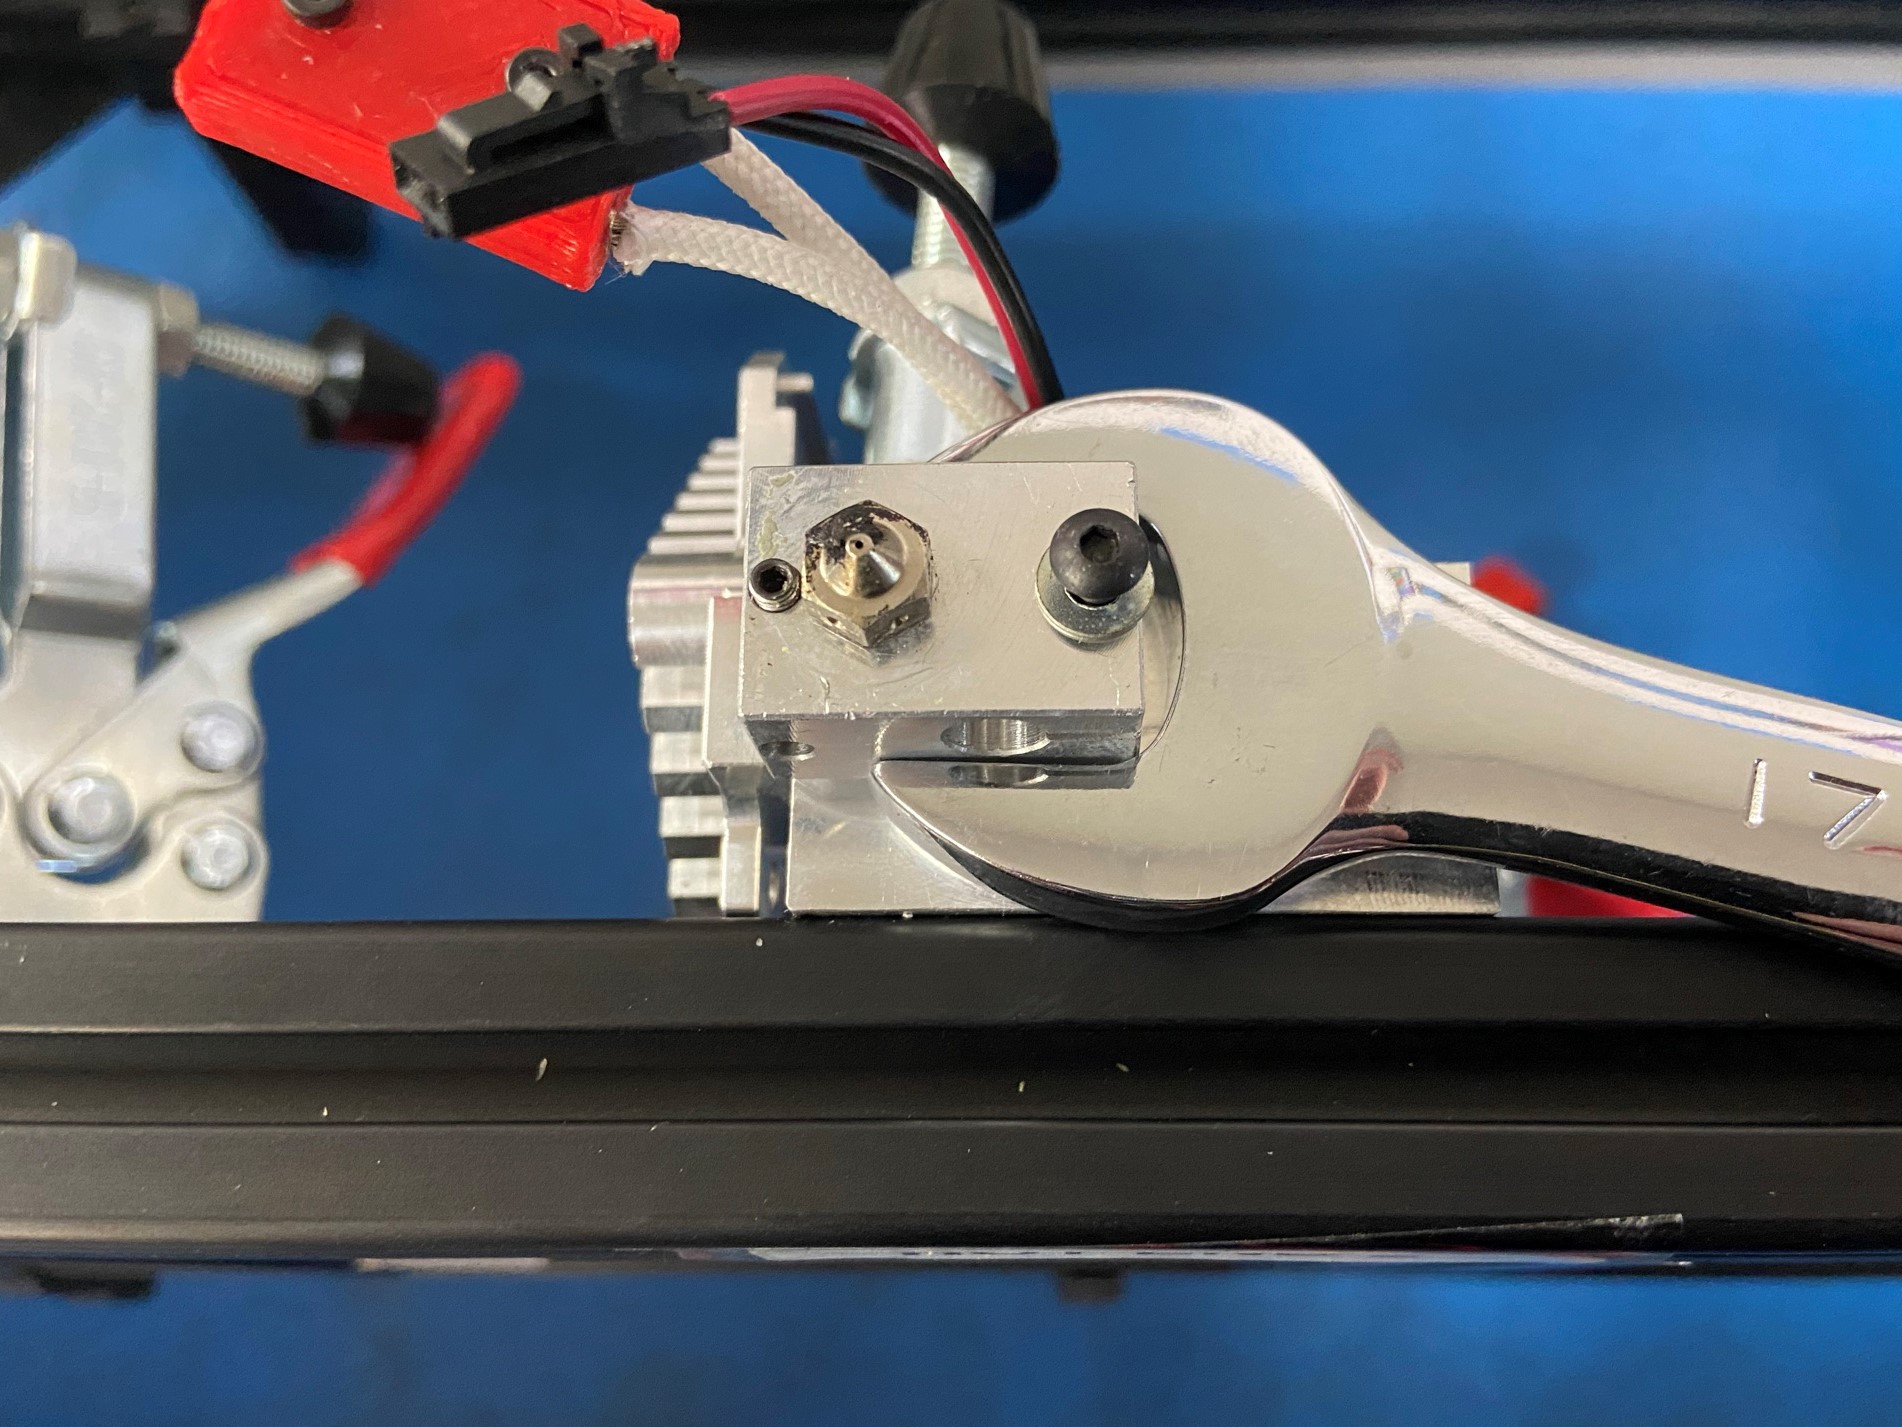
Then using torque wrench and the 17 mm wrench tighten the nozzle to 2.5 newtonmeter or 22.13 inlbs
Make sure not to touch the end of the wrench that was touching the heat block or nozzle
Once the nozzle is tight then go back into the temperature settings and set the temp to 0 degrees C
Wait till the temp is below 45 degrees before touching or moving the heat block