Open HardwareAssembly Instructions
Guides for installation and assembly of the LulzBot line of products made by FAME 3D LLC.
Guides for installation and assembly of the LulzBot line of products made by FAME 3D LLC.
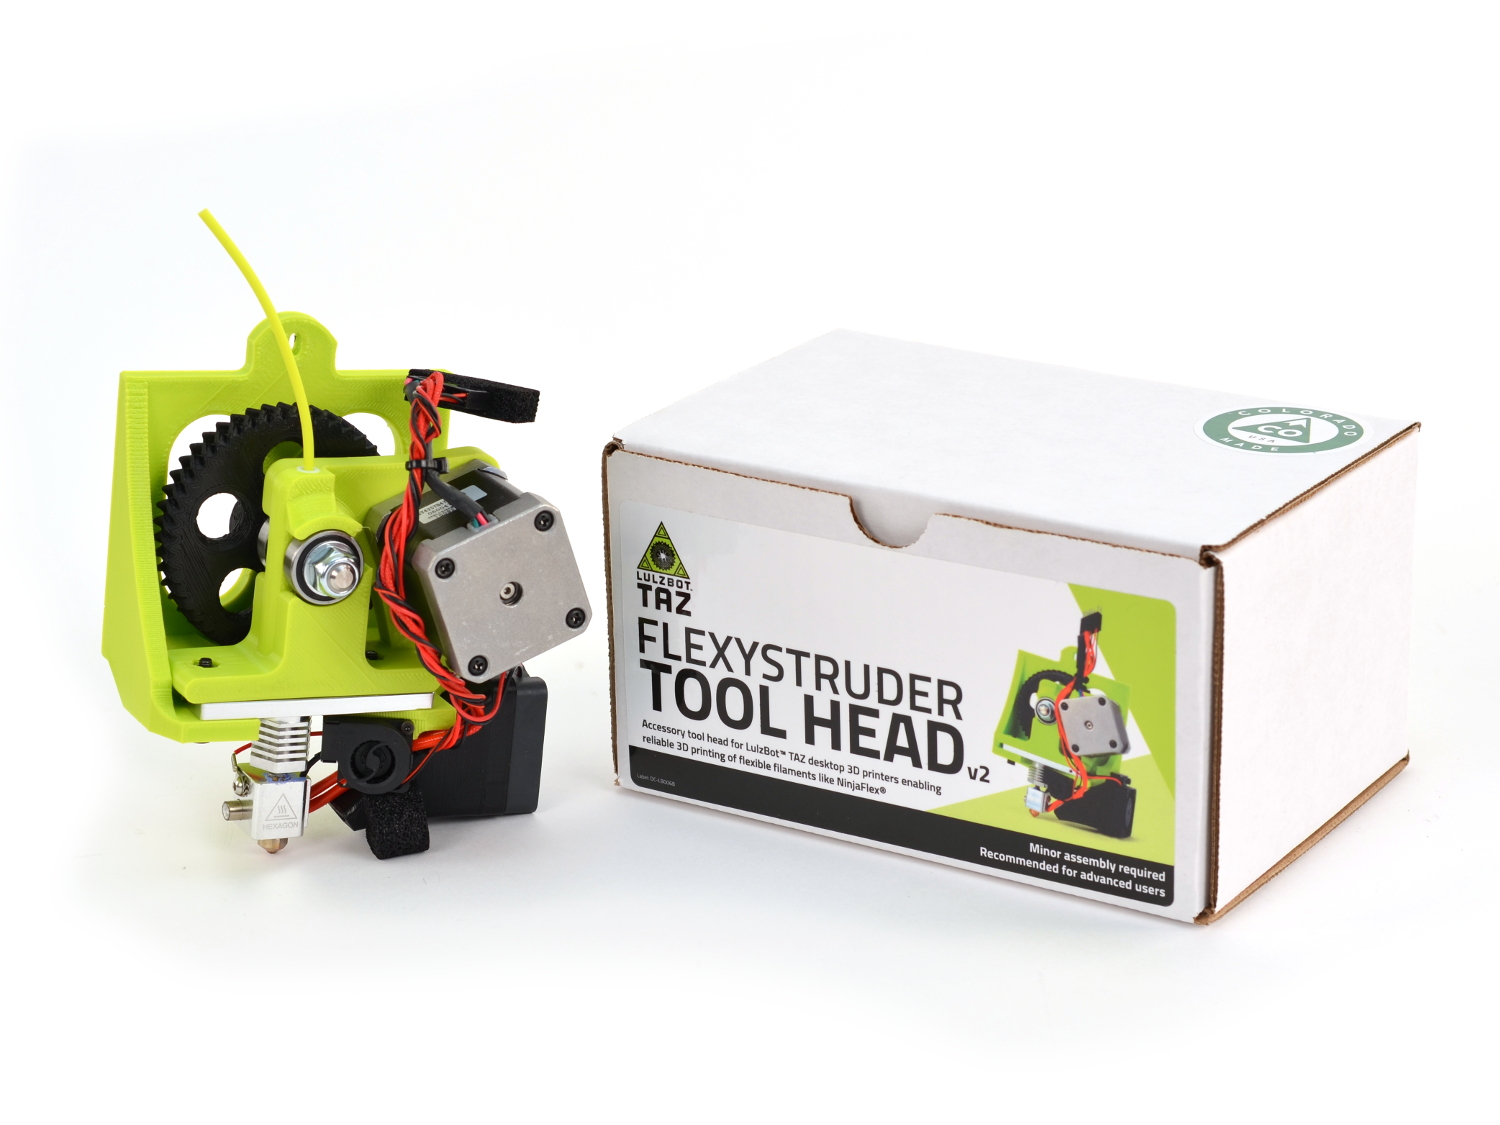
Thank you for your purchase of a Flexystruder Tool Head v2. After following this Quick Start Guide, your LulzBot 3D printer will be more capable than ever. Let's get started!

You will also need

Let's get started!
Power on your LulzBot TAZ 3D printer.
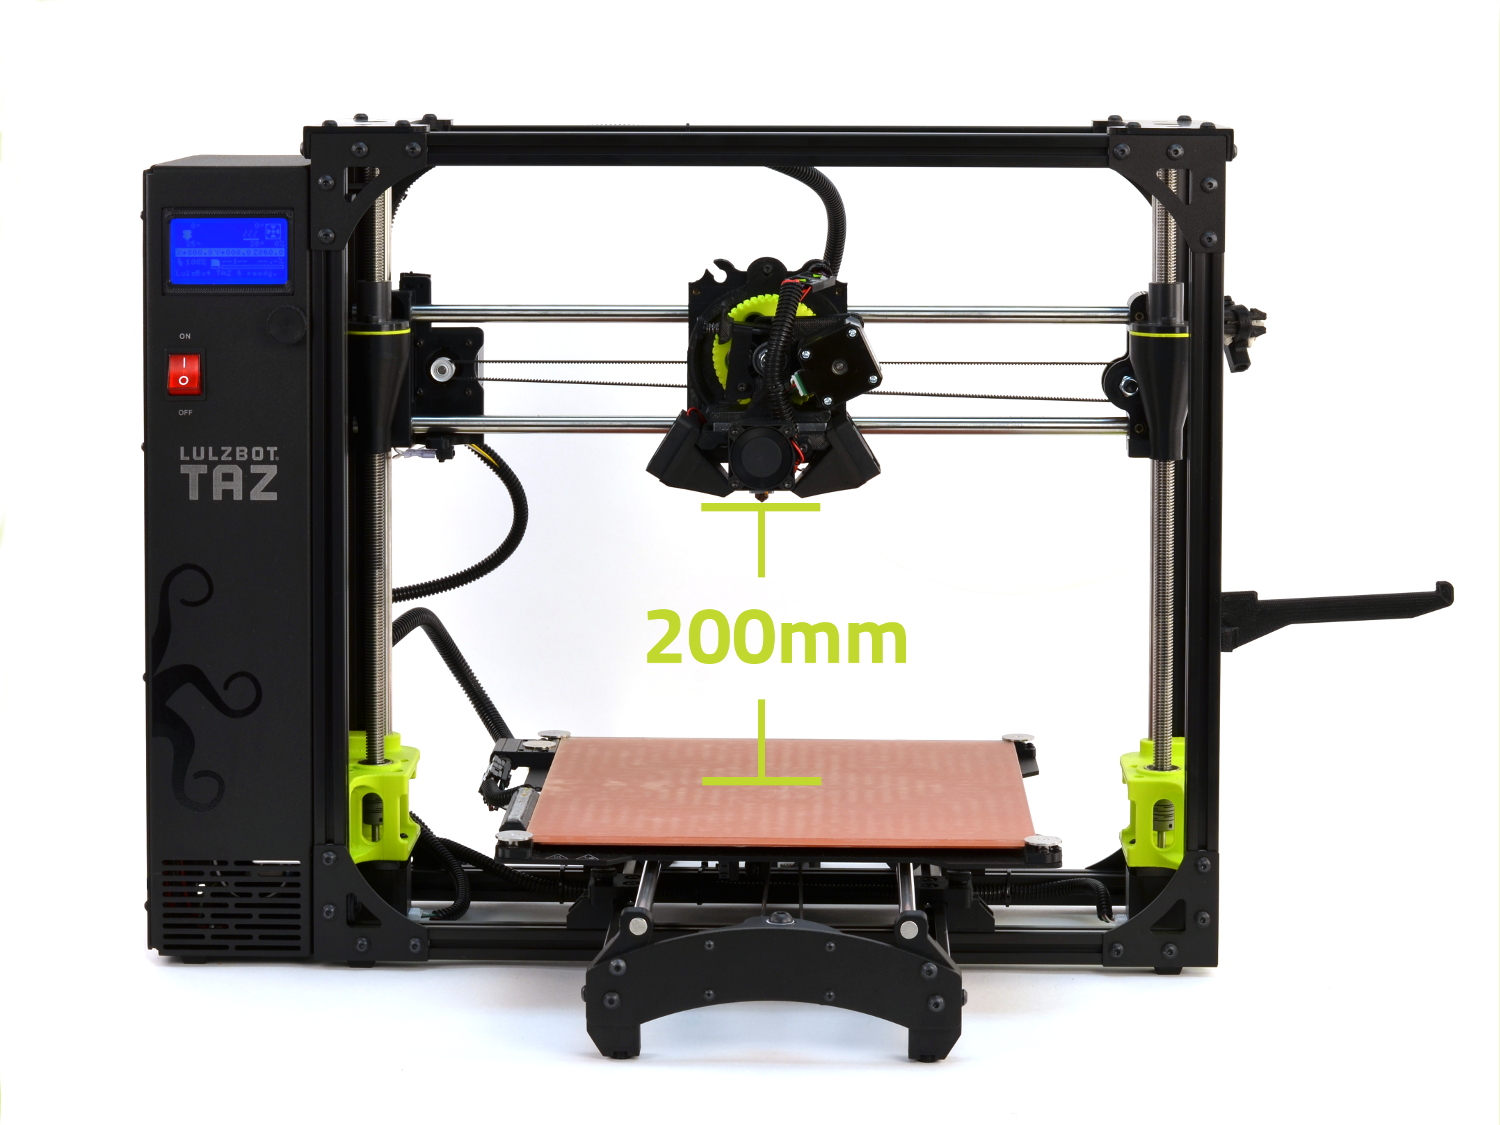
Raise the Z axis by using the Graphical LCD controller to print the calibration/z_shipping_245.gcode file found on the SD card included with your LulzBot 3D printer. The file can also be downloaded from here. To save the file, right click on the link and select Save as or Save target as.
Alternatively, you can also manually move the Z axis up by using the Graphical LCD controller by navigating to: Prepare > Move Axis > 1.0 > Z axis > Change the value to at least 200.
Completely power off your LulzBot 3D printer and unplug the power cord and USB cable before proceeding.

Unplug the connectors for your current tool head. With one hand support the tool head and unscrew the single M3 screw securing it to the X axis carriage, and remove it from the printer by lifting the tool head up.


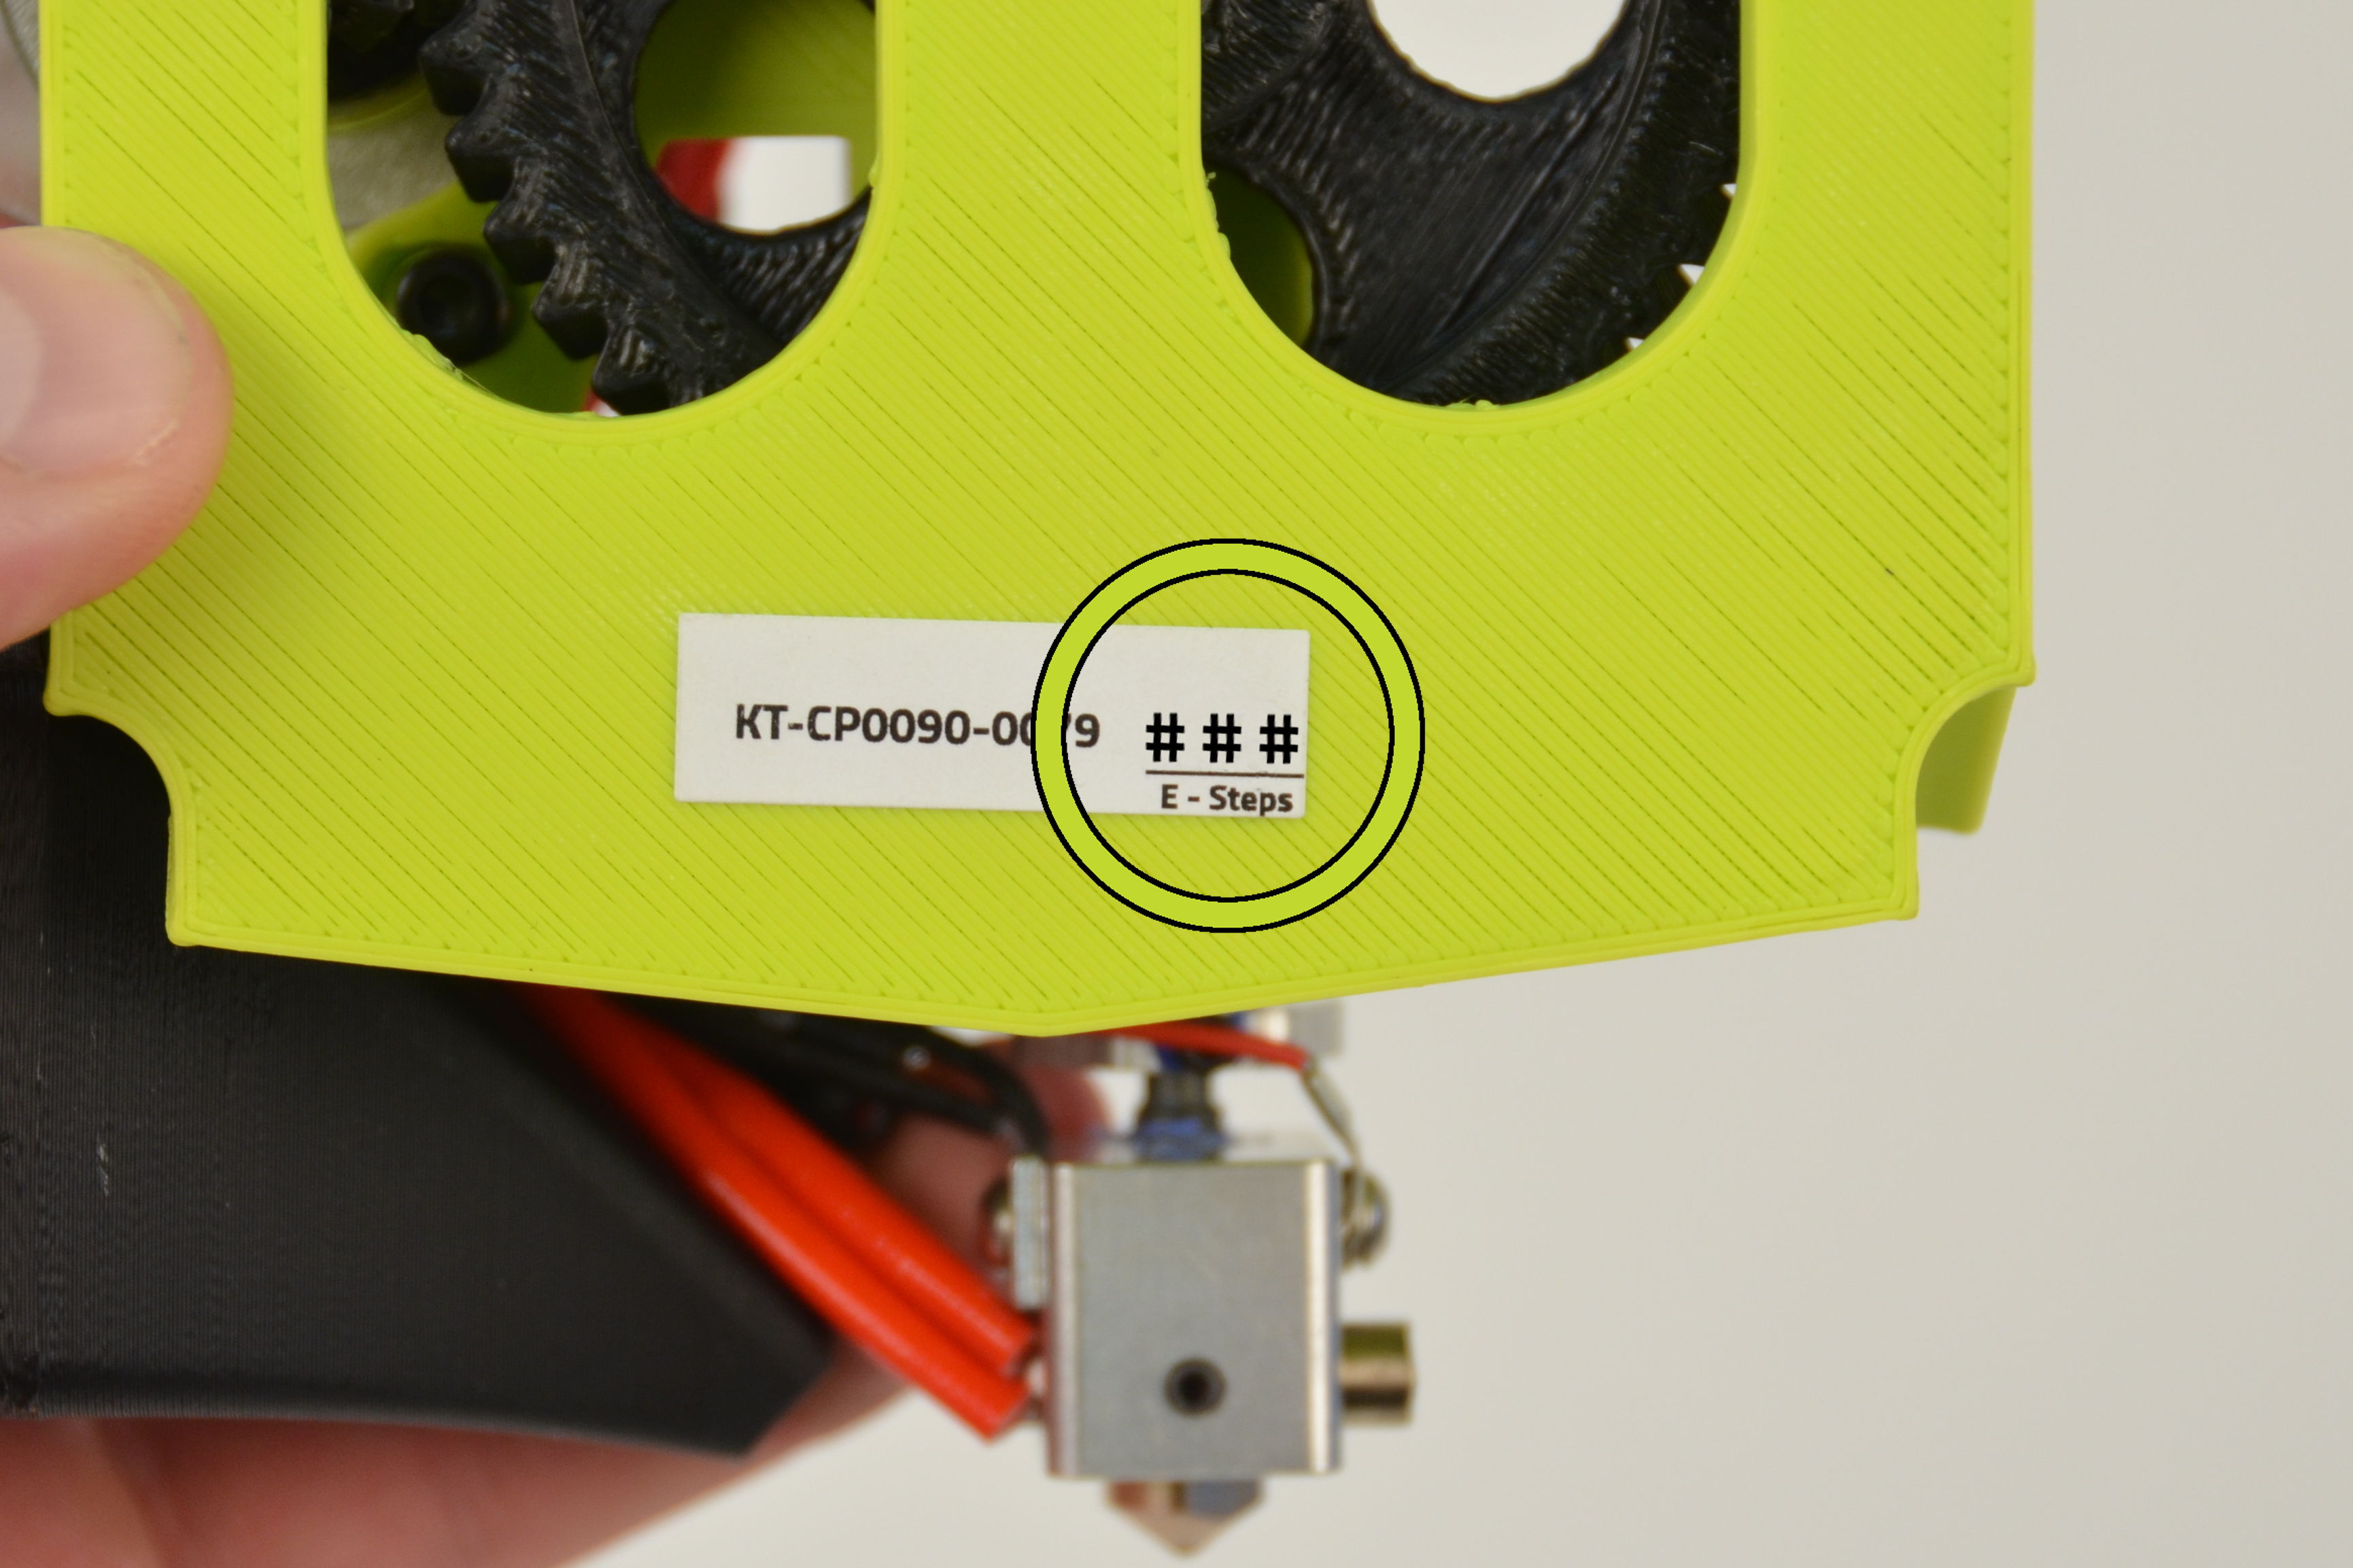
Your new Flexystruder has a different Extruder Steps Per Unit (ESteps) value than the standard TAZ tool head. This important new value can be found on a sticker on the back of the extruder.
Record this value before continuing.
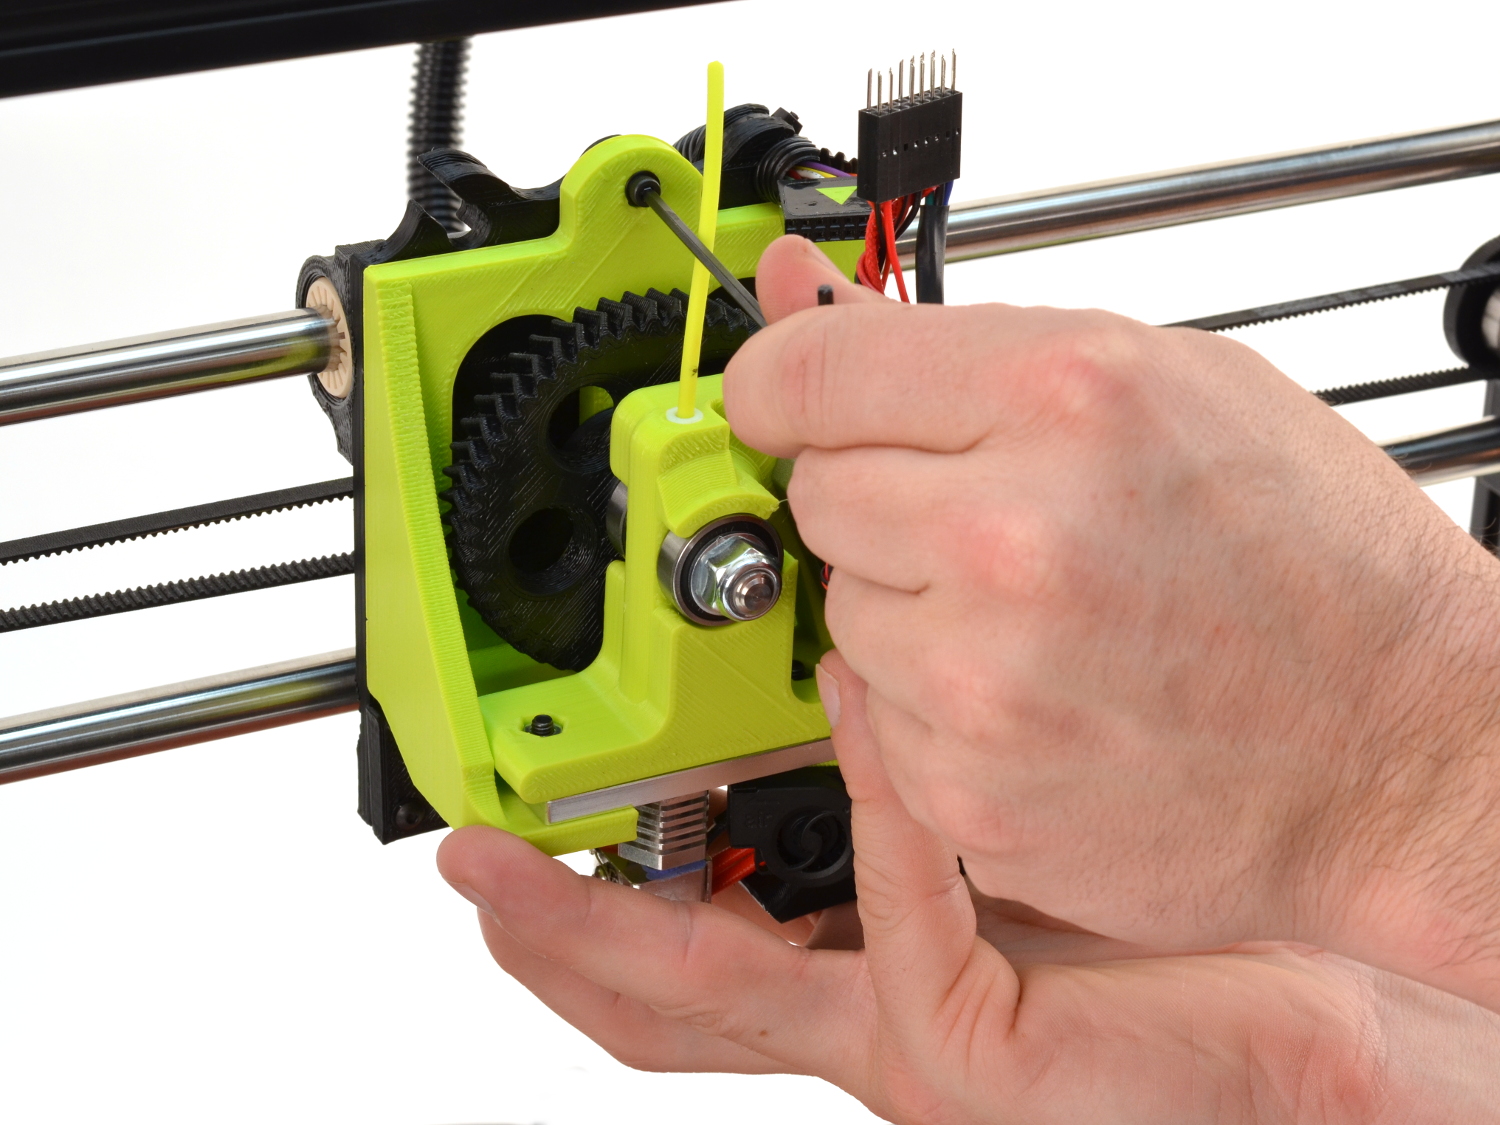
Install the Flexystruder Tool Head v2 by seating it on the X axis carriage and secure it with the M3 screw that you removed in the previous step while supporting the tool head with your other hand.
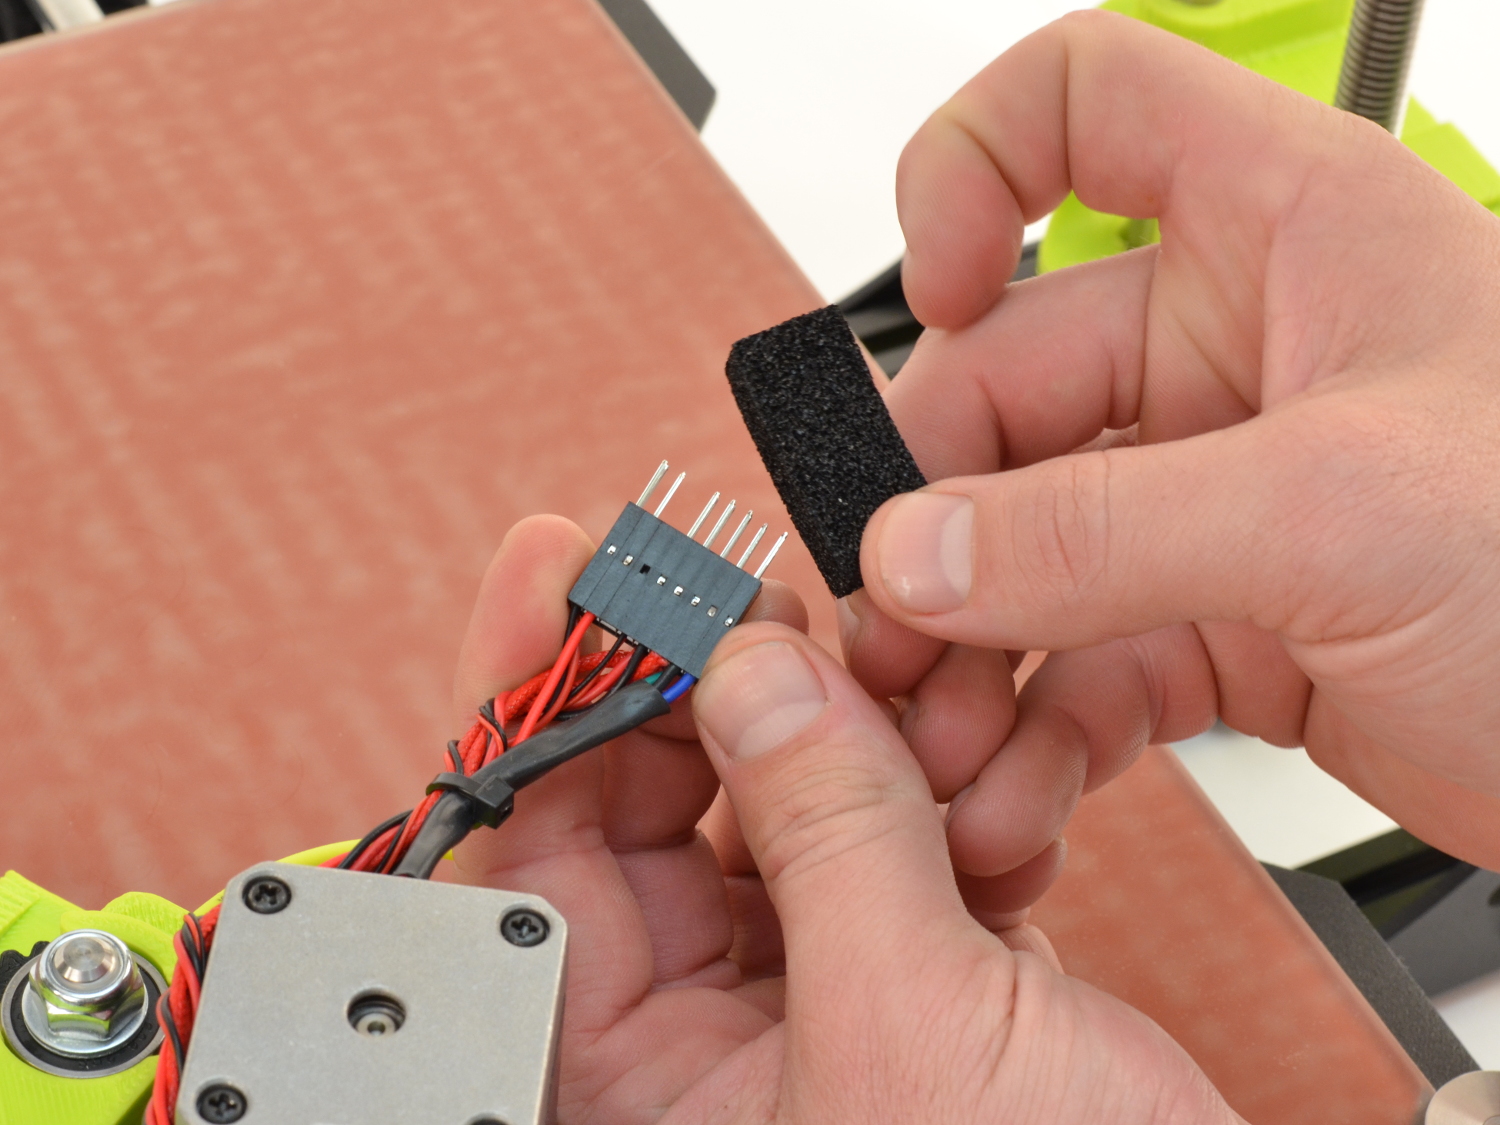
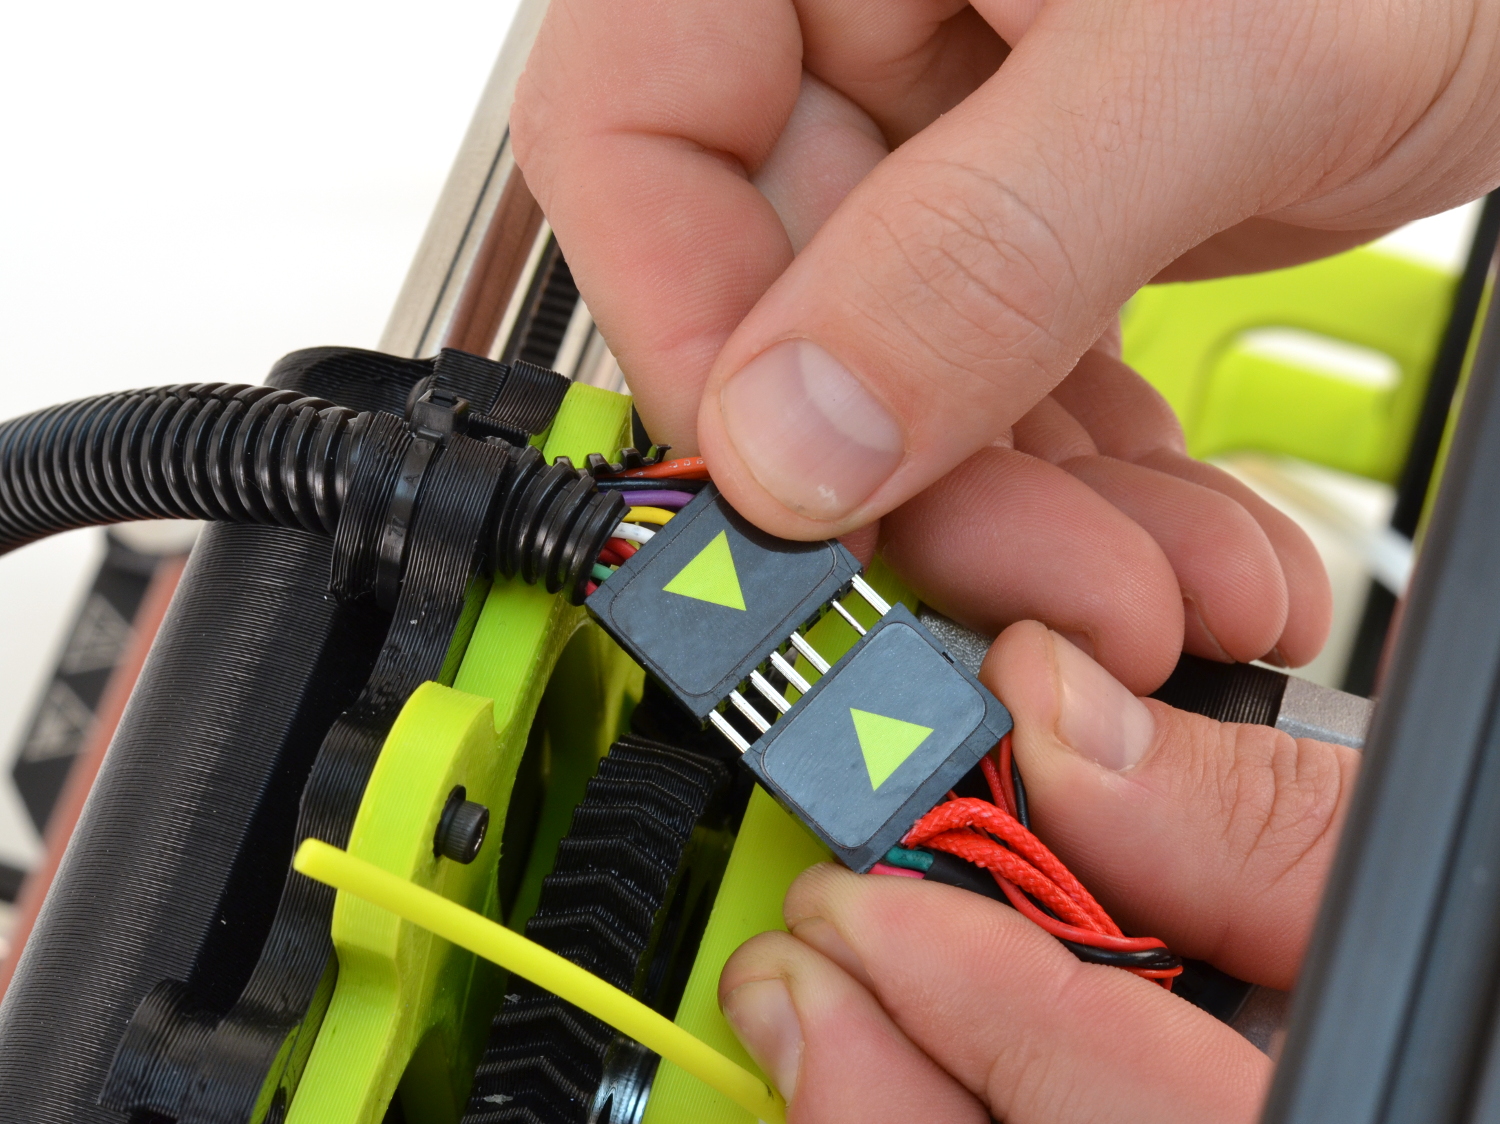
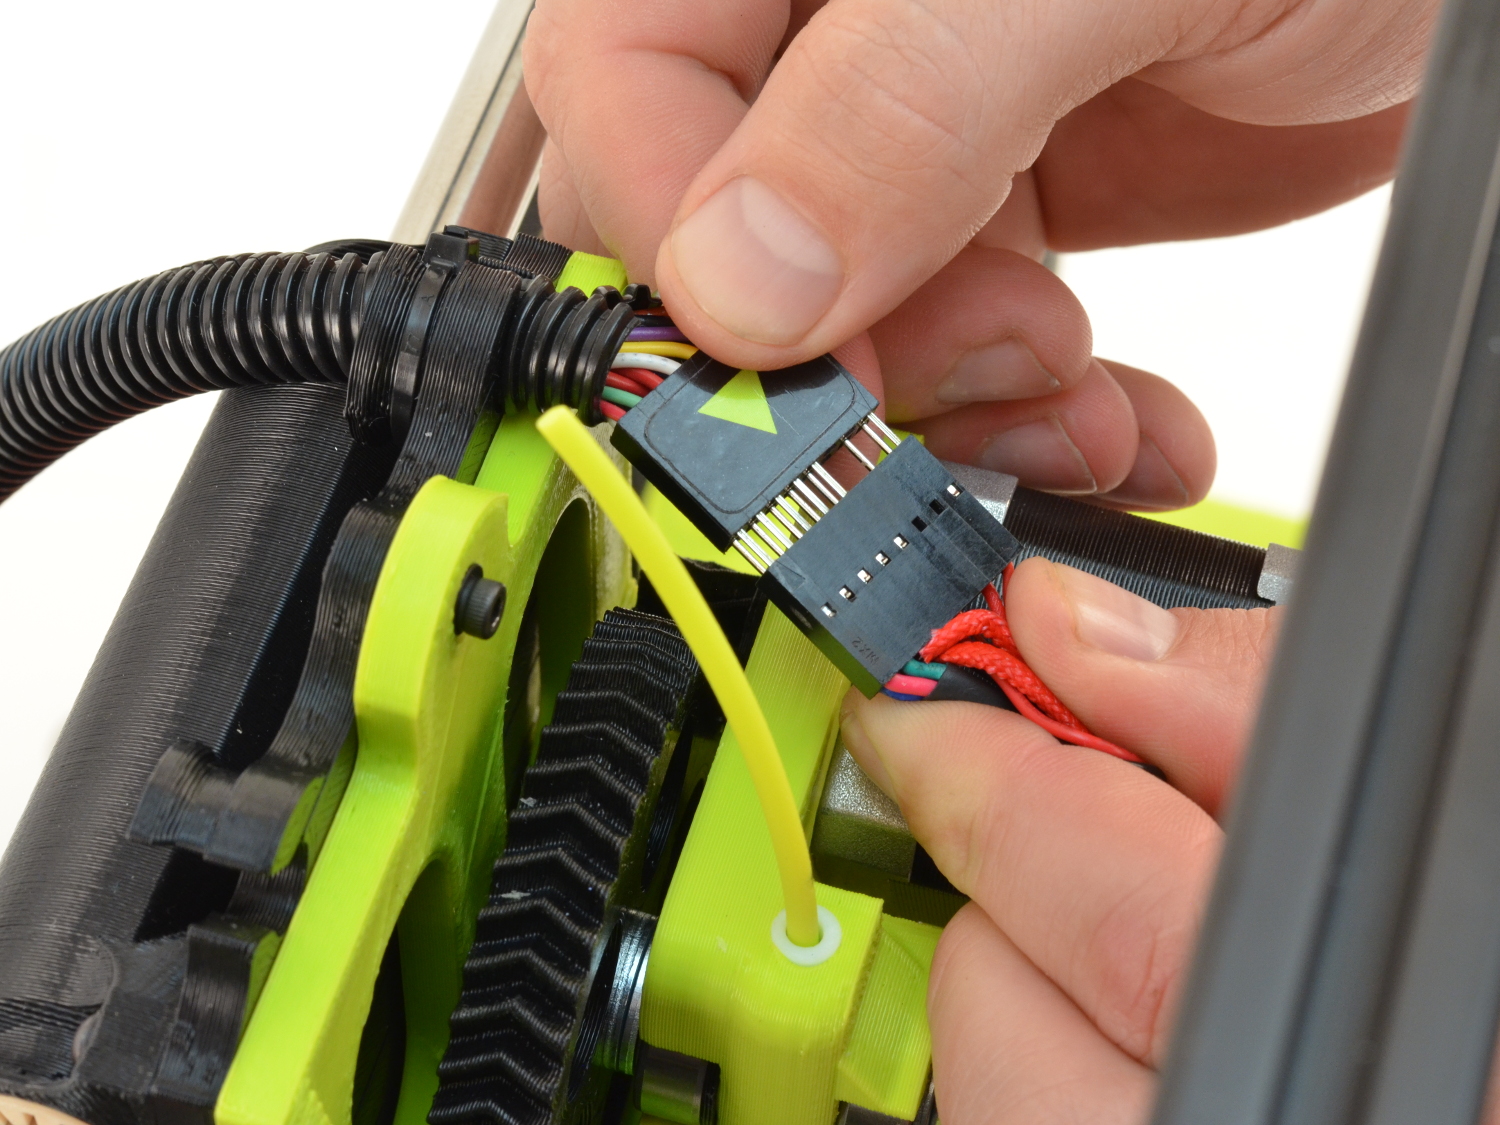
Connect the two 16 pin connectors, making sure to match them based on the pins in the connector.
Cura LulzBot Edition is available from:
Install Cura LulzBot Edition if not already installed on your computer.
If Cura has already been installed, update to the latest version by installing it from the link above, as it has preset machine configuration profiles.
Plug in your LulzBot TAZ 3D printer to the power supply and power on your 3D printer.
Once powered on, connect your 3D printer to your computer using the USB cable.
Open Cura LulzBot Edition.
In Cura:
Select Machine > LulzBot TAZ 6
Select Machine > Machine settings
In the Machine settings window:


Select Flexystruder v2.
Select Finish and the window will close.

Note: Make sure that your TAZ 3D printer is plugged into your computer with the USB cable provided with your 3D printer.
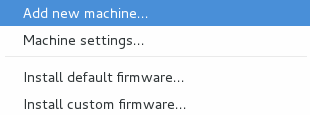
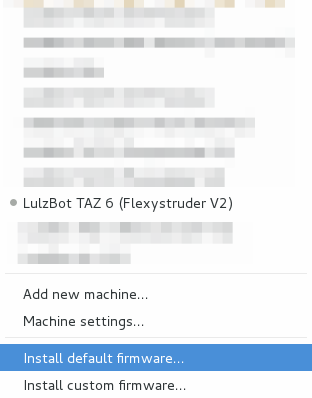
In the upper left-hand side of the Cura LulzBot Edition window select Machine > Install default firmware.
Continue to the next step after the firmware has flashed successfully.
Press the Finish button to exit the tool head wizard.
In order to get the best performance from your Flexystruder Tool Head v2, update the extruder steps per unit (e-steps or esteps).
Update the e-steps with the recorded value found on your Flexystruder, recorded in step 7.
Use the Graphical LCD controller to clear the EEPROM settings from the previous firmware.
Navigate to: Configuration and select Restore to Factory.
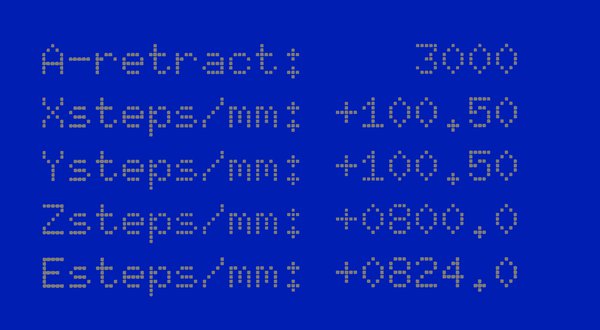
Scroll up and select Advanced settings > Esteps/mm to update the extruder steps per unit (E-steps or esteps) to get the best performance from your Flexystruder Tool Head.
Update the e-steps with the recorded value found on your Flexystruder, recorded in step 7.
Use the control knob on the Graphical LCD controller to adjust the value.
Once set, back out of the menu entries until you can select Store Memory.
Select Store Memory to save the adjusted Extruder Esteps/mm.
In Cura LulzBot Edition, load the key chain test print. The model can be downloaded here:
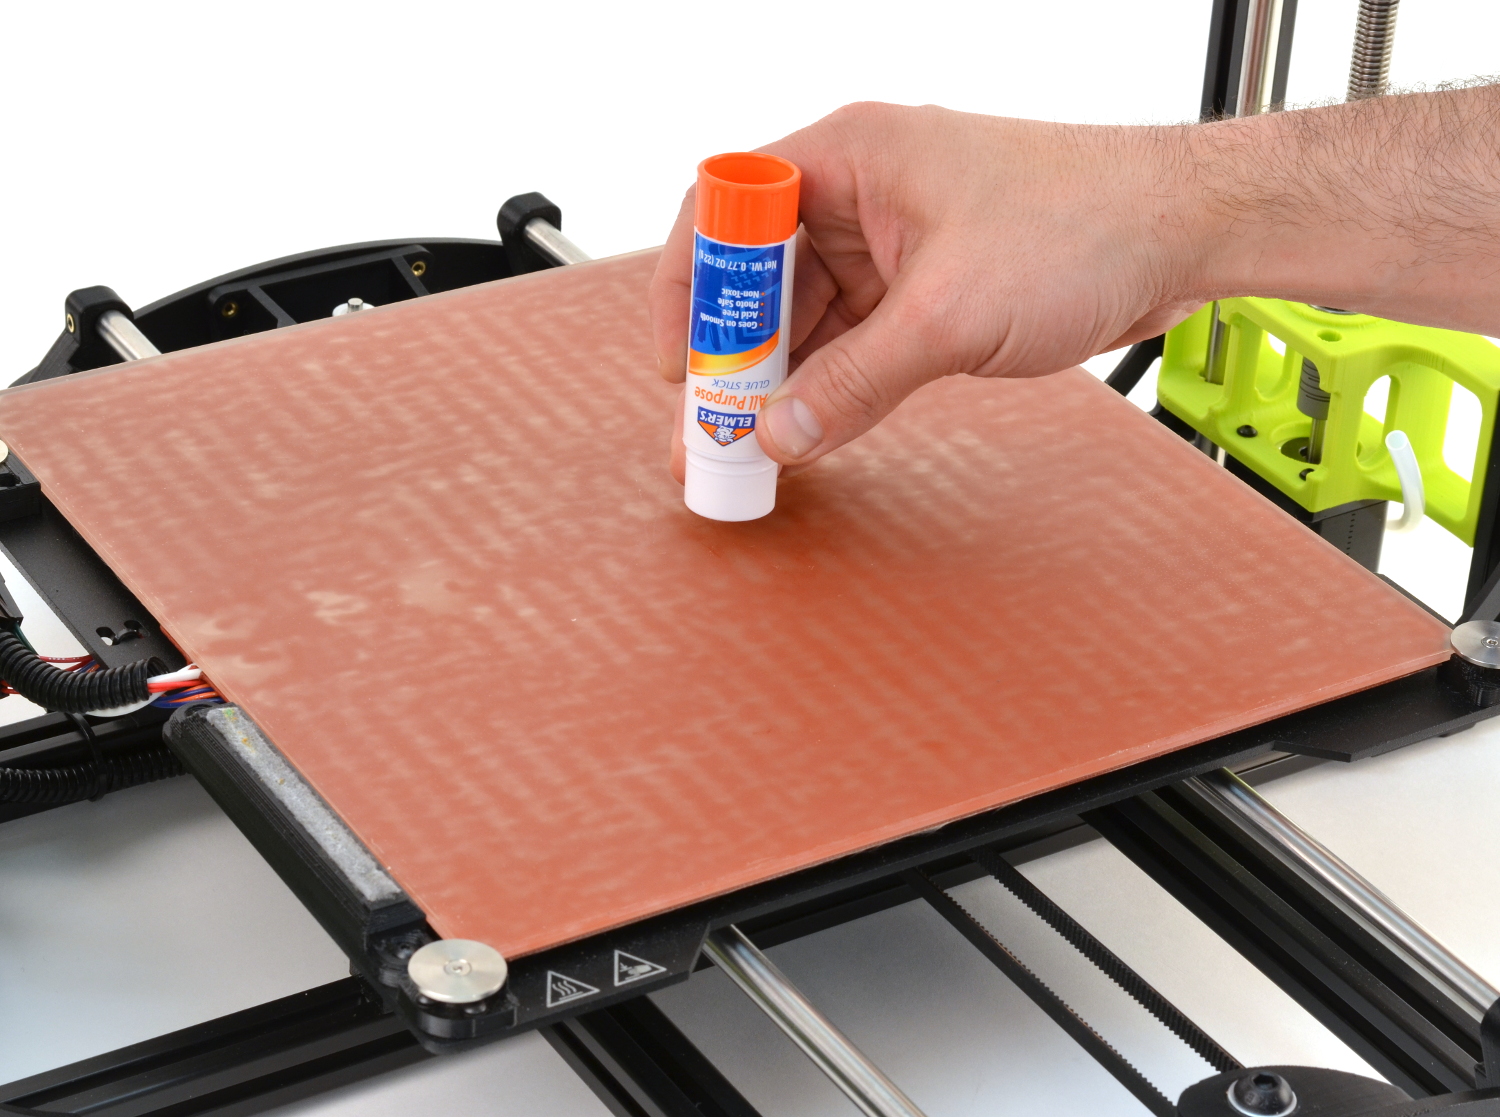
Locate the included glue stick.
SemiFlex and NinjaFlex will adhere exceedingly well to the print surface. To aid part removal, evenly apply glue stick to the print surface.
Failure to do so may cause the printed flexible part to bond permanently to the PEI print surface.
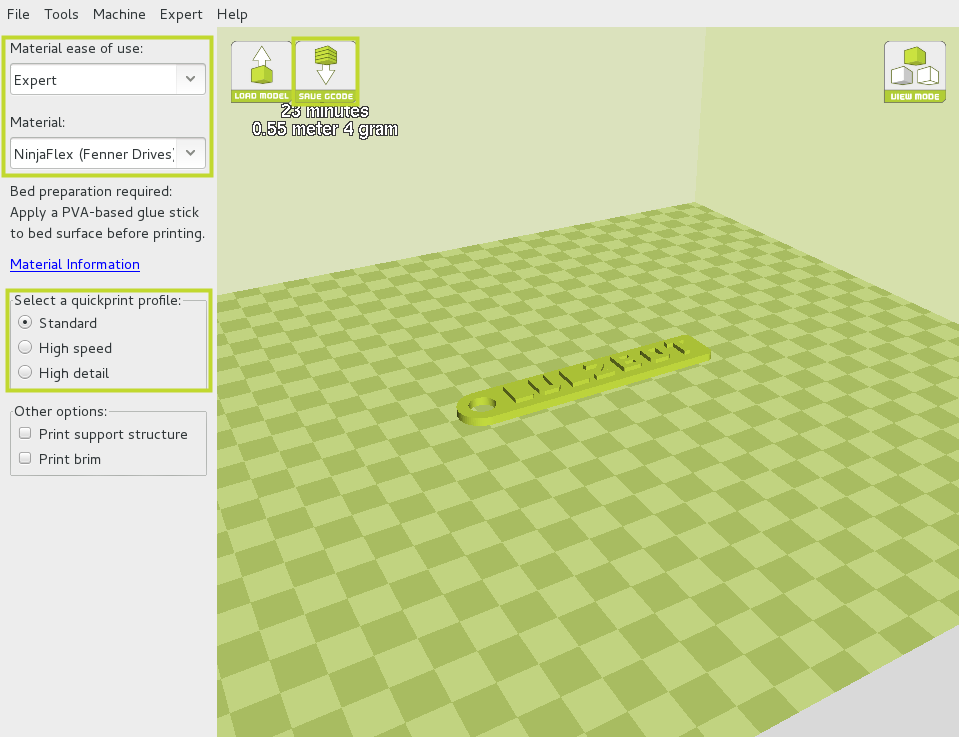
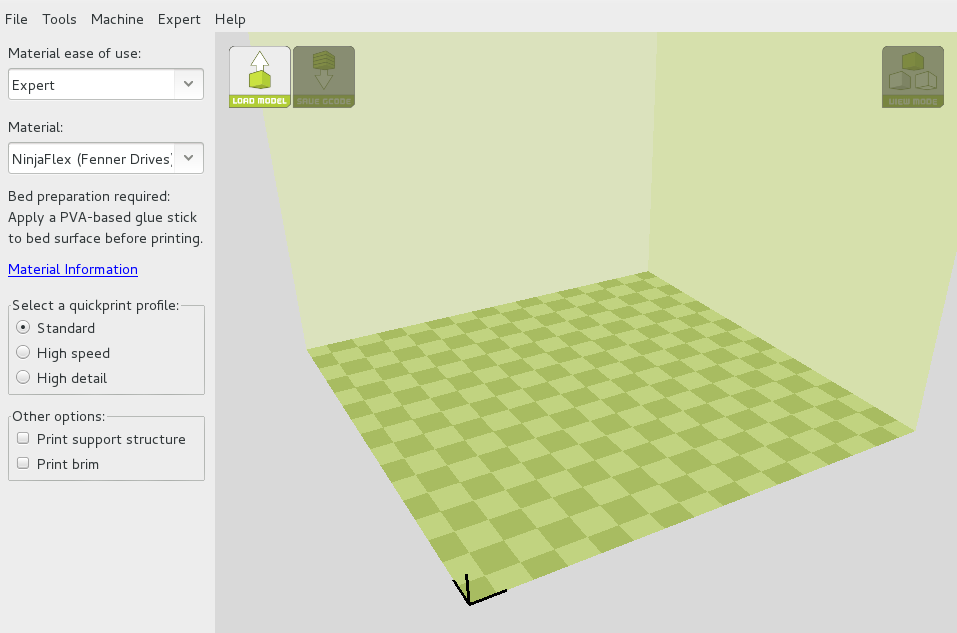
Under Material select NinjaFlex (Fenner Drives).
Choose the Standard quickprint profile.
Remove the SD Card from the TAZ 6 Control Box and install it into your computer.
Save the sliced model to the SD Card by pressing the Save GCODE button.

SemiFlex and NinjaFlex will adhere exceedingly well to the print surface. To aid part removal, evenly apply glue stick to the print surface.
Failure to do so may cause the printed flexible part to bond permanently to the PEI print surface.
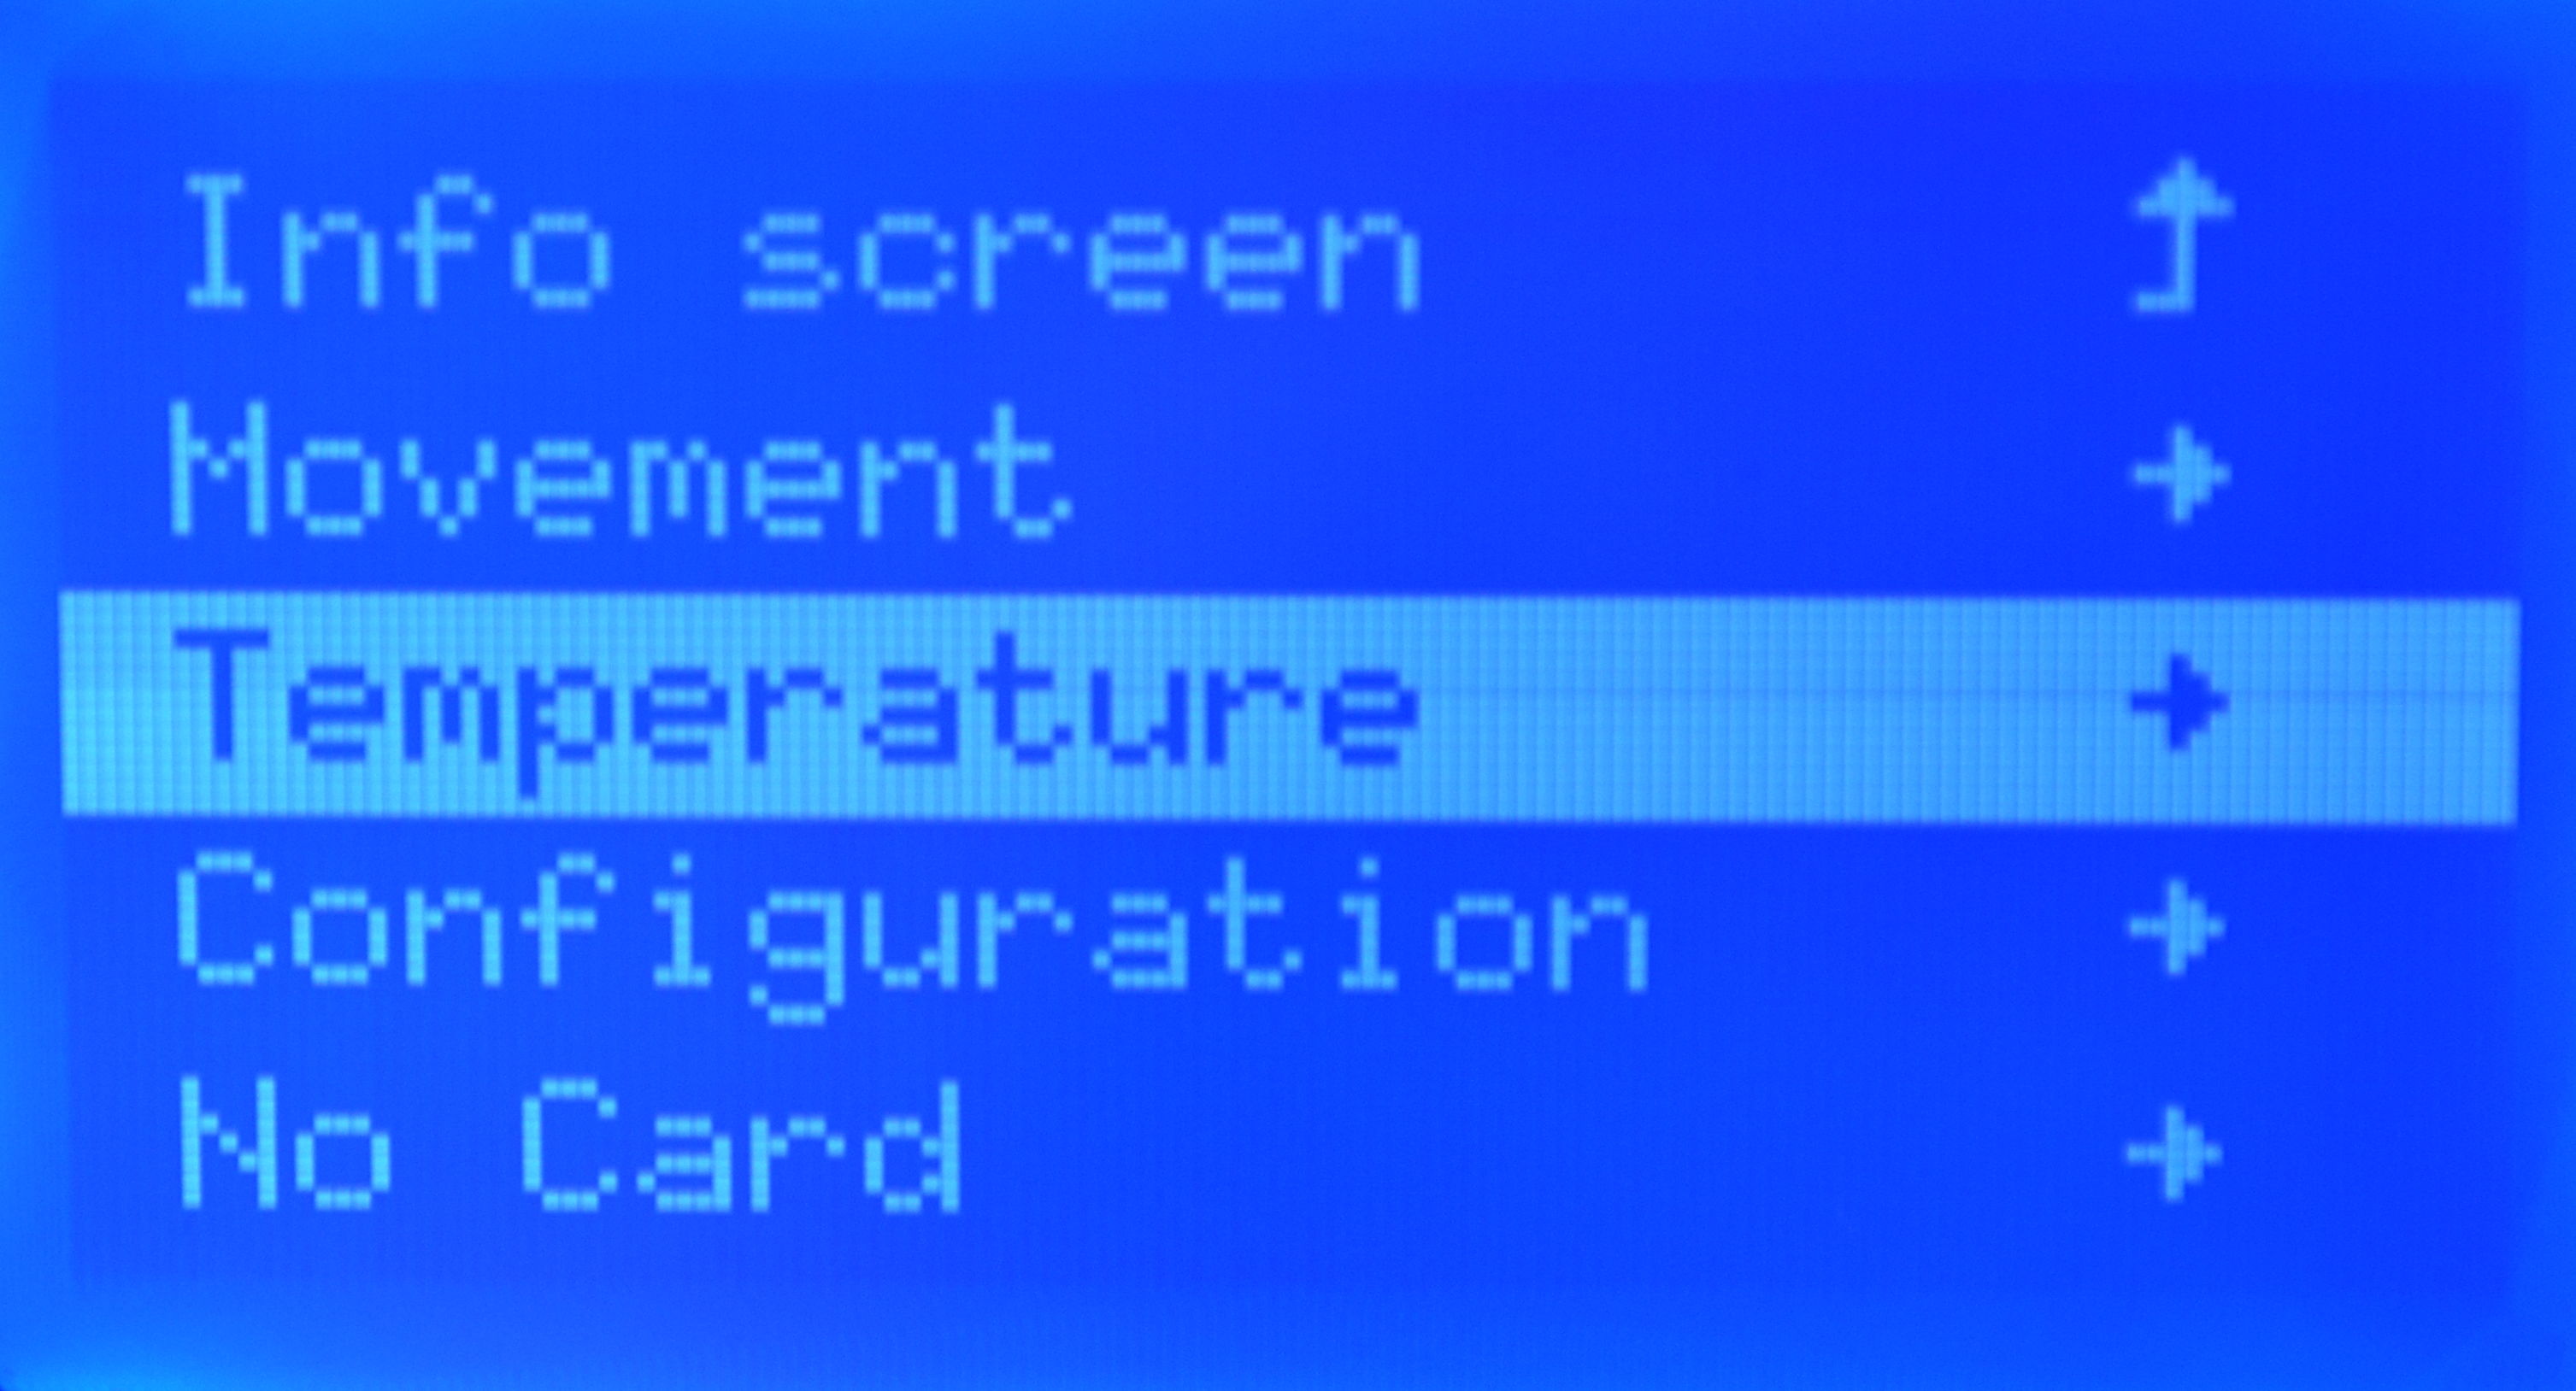
Turn on the hot end through the Graphical LCD by navigating to Temperature > Nozzle > 225.
You are almost ready to print!

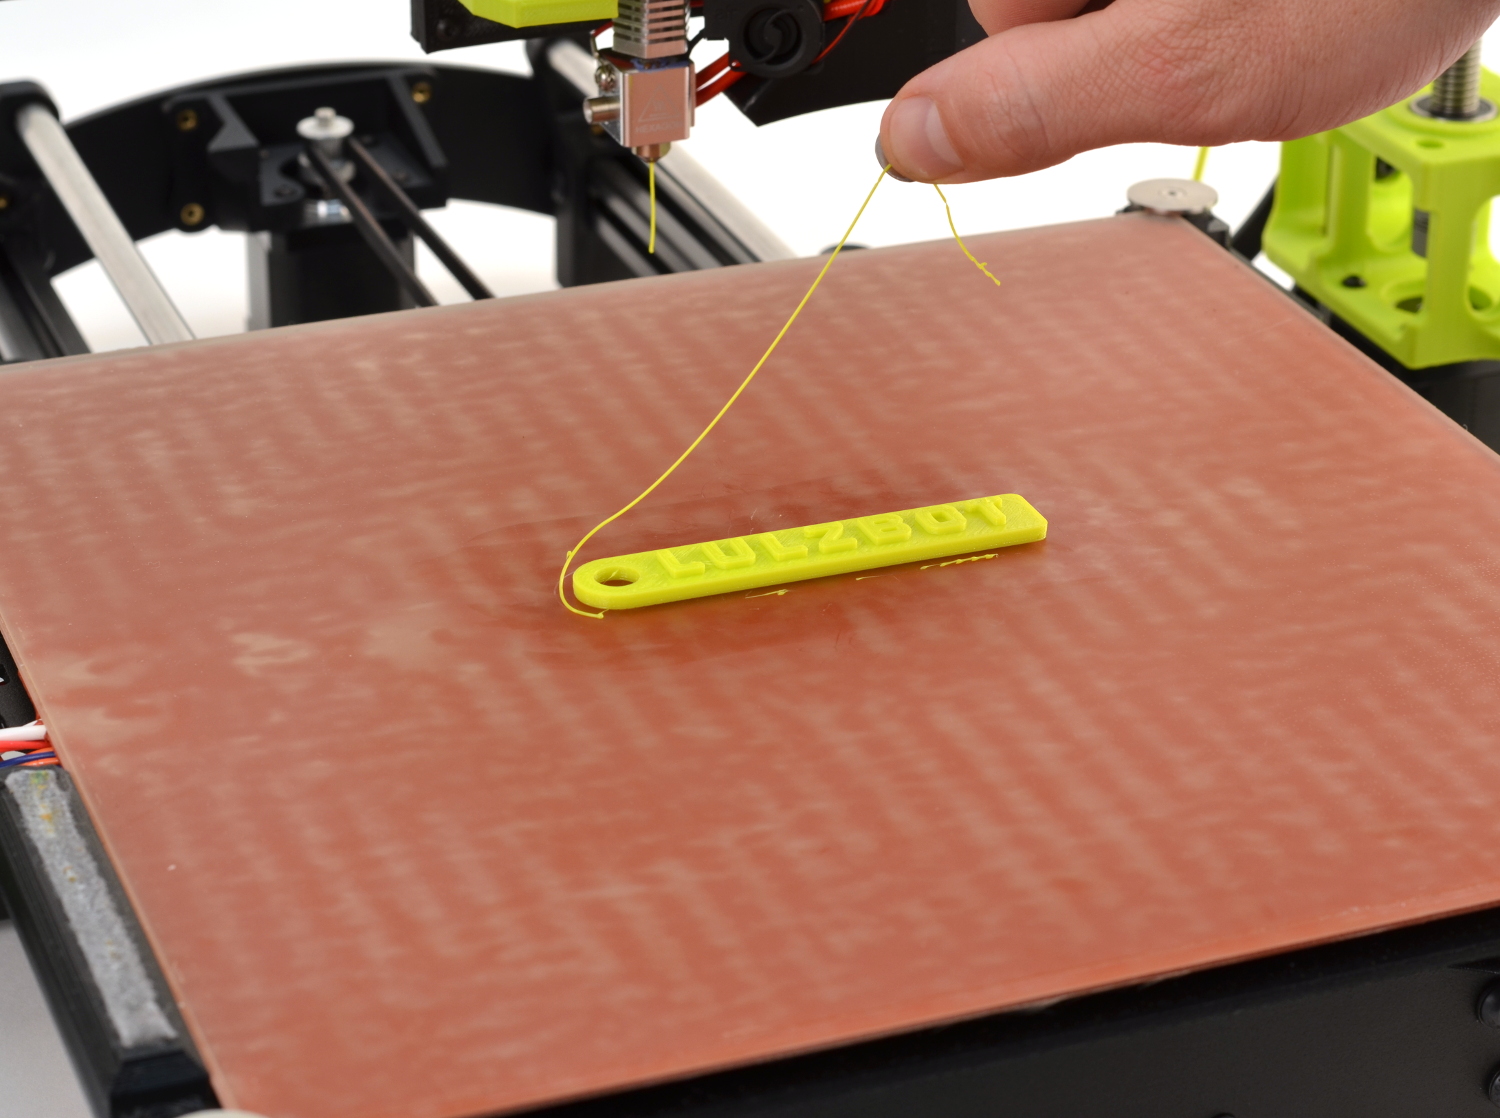
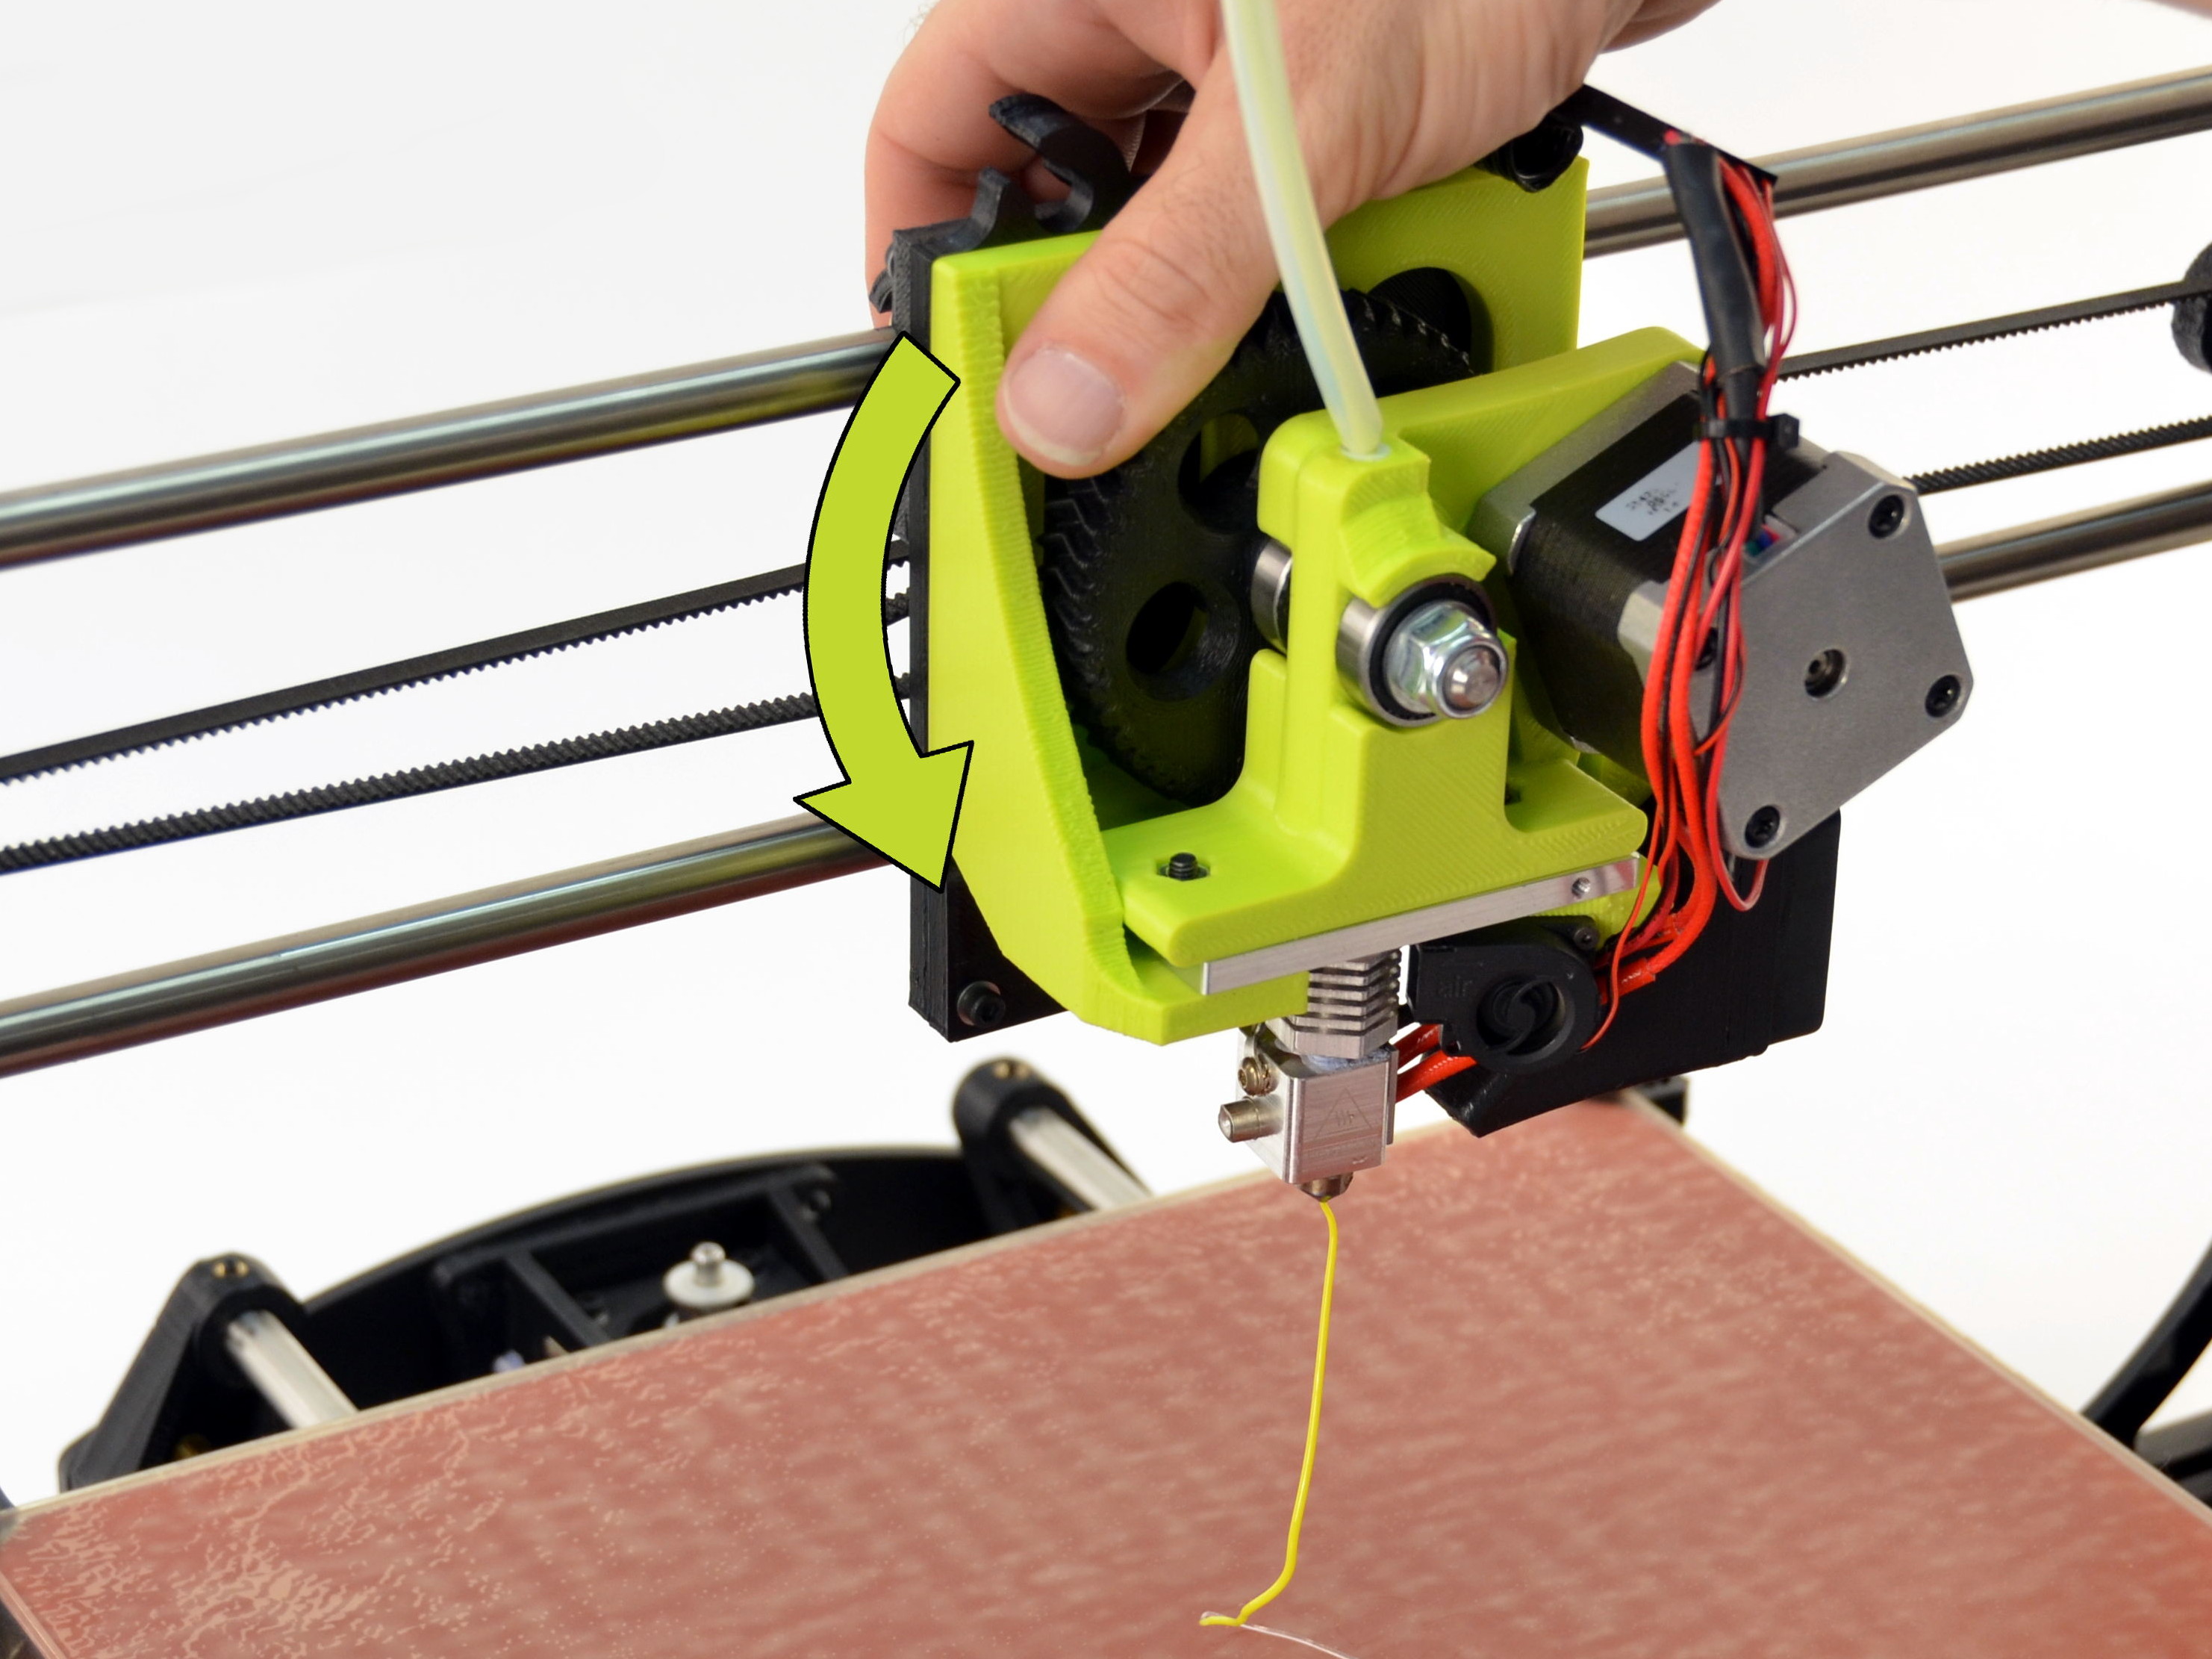
Your Flexystruder tool head was calibrated before leaving our factory. Once the printer is up to extrusion temperature of 225°C, remove the filament.
Through the Graphical LCD, navigate to Prepare and select Motors Off. Rotate the large gear by hand clockwise to remove the filament from the hot end.

Load the NinjaFlex filament sample into the extruder body.
Slowly rotate the large gear by hand, counter-clockwise, to feed the filament into the hot end.
Once your 3D printer is at the appropriate extrusion temperature of 225°C, finish loading the filament by rotating the large gear counter-clockwise until the extruded filament underneath the hot end nozzle transitions to LulzBot green.
On the Graphical LCD controller, select Print from SD and navigate to the keychain.gcode file. Select the file to begin the 3D print.
Your LulzBot TAZ 3D printer will automatically do the following:

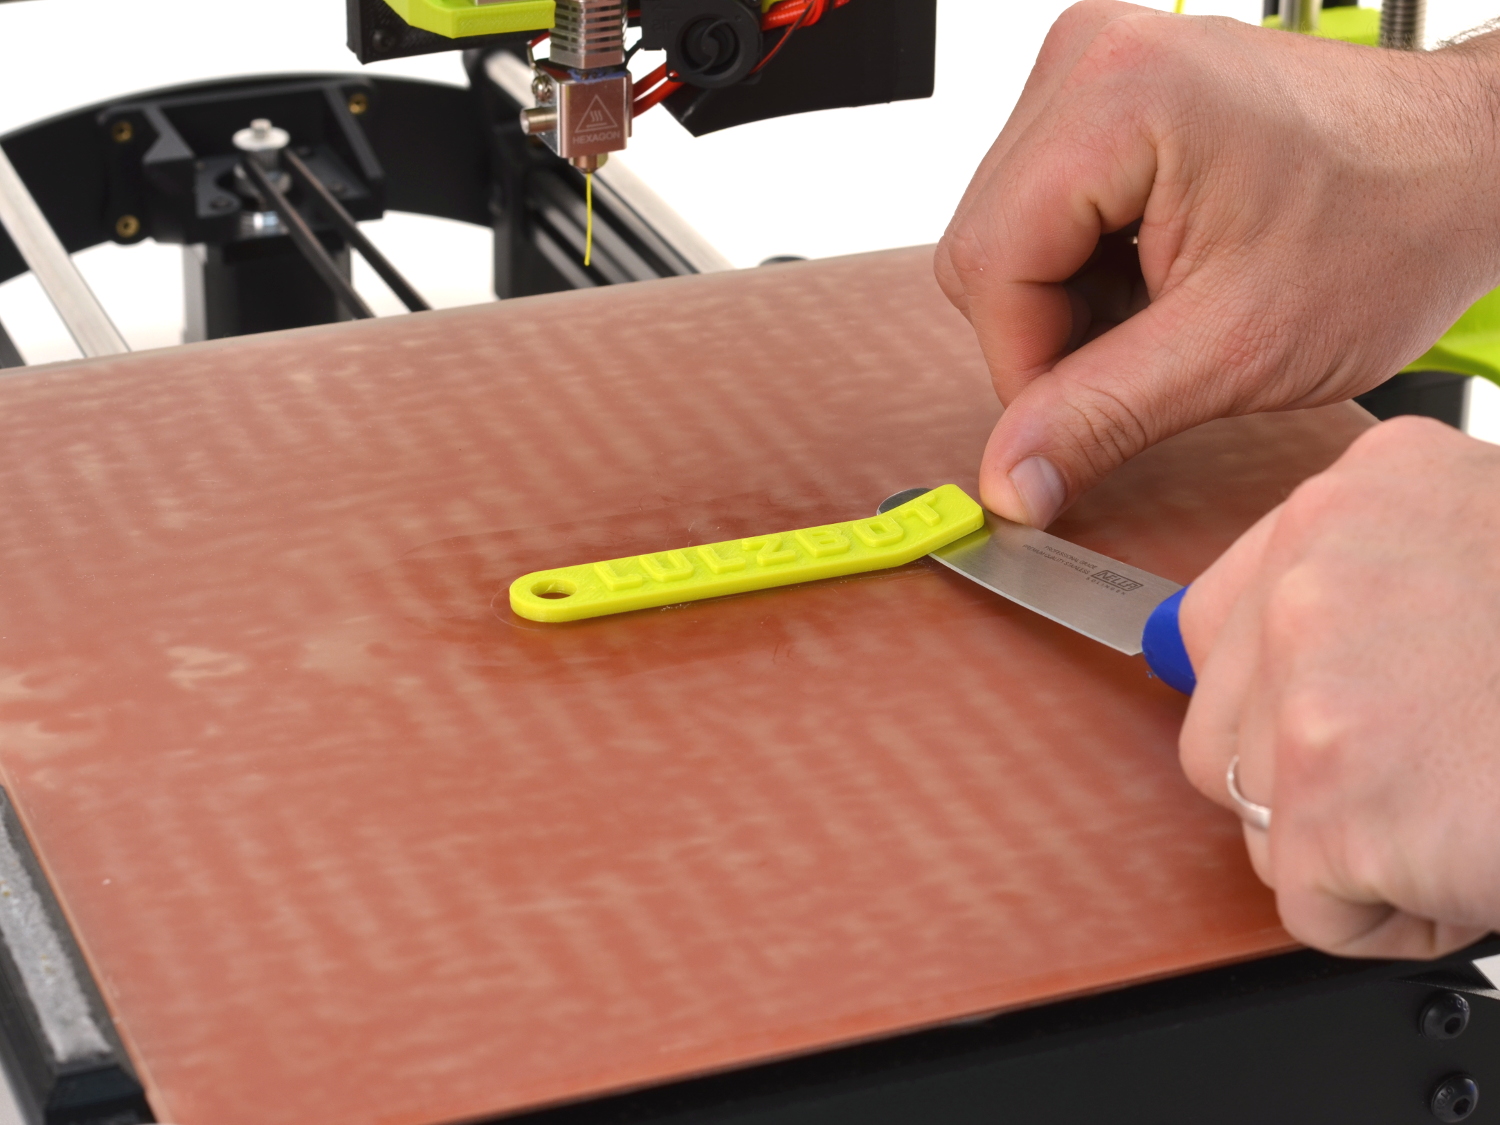
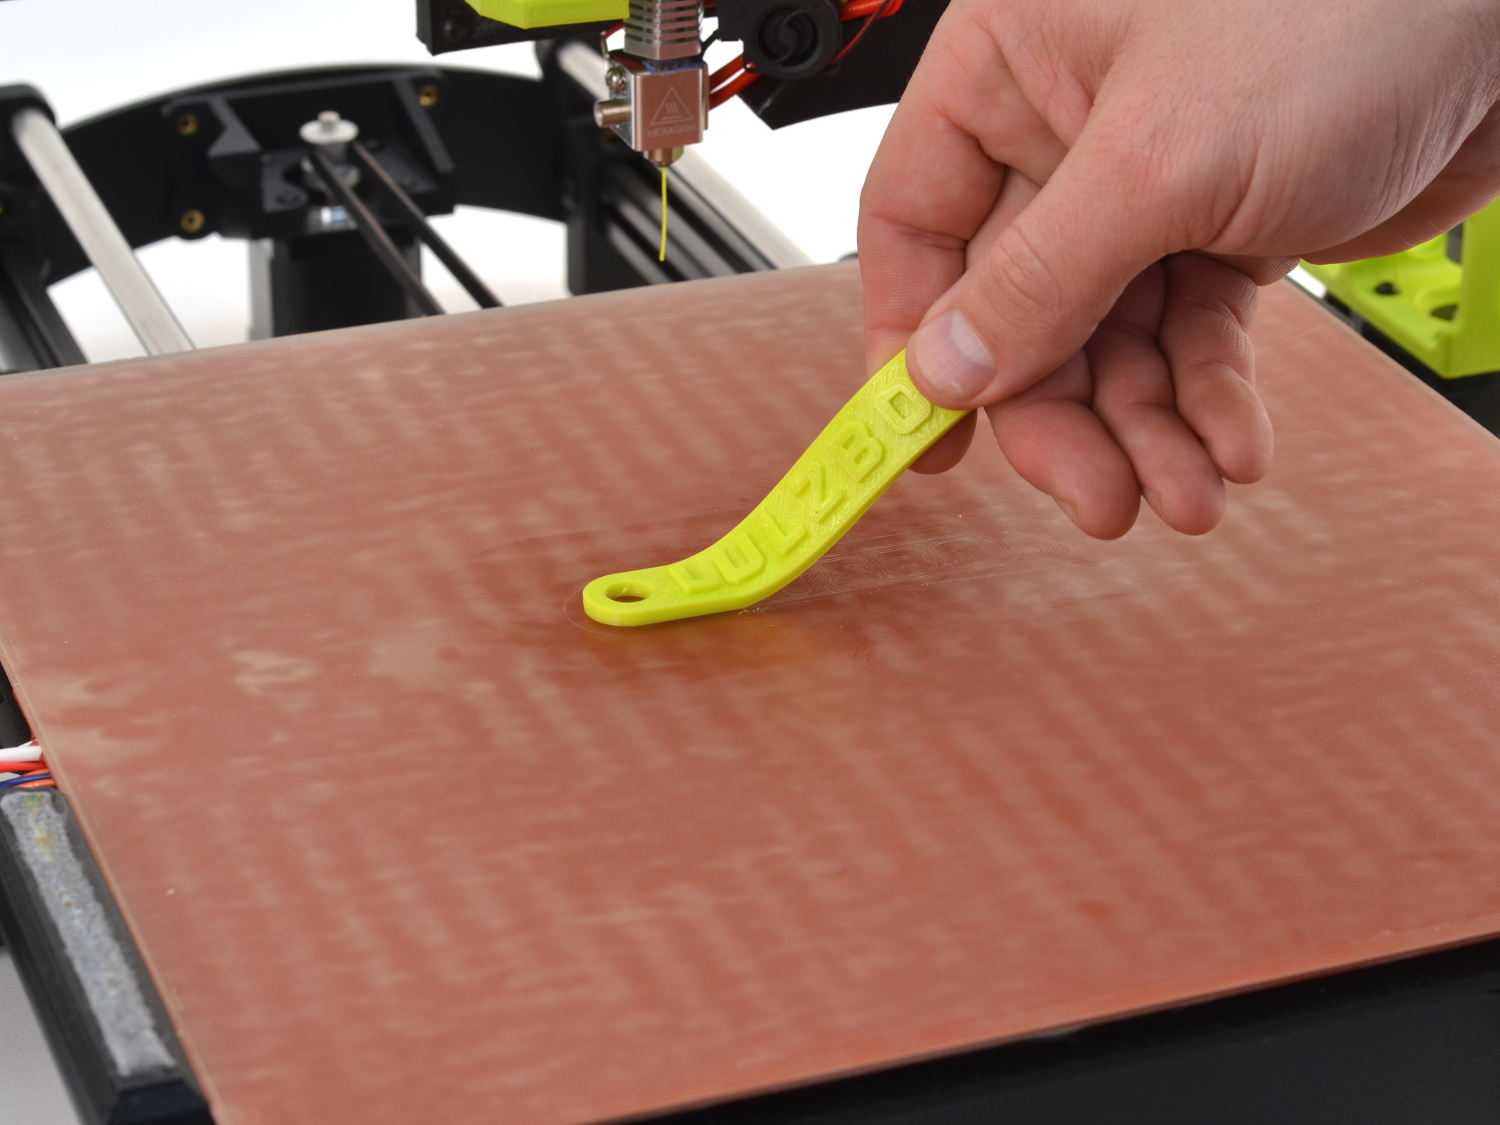
After the key chain has been printed the tool head will move away from the completed model. The bed will move forward once the printer cools to the recommended part removal temperature.
Remove your printed object by using the blue-handled pry tool to lift the part from the bed.
To switch back to the original tool head, follow the same steps outlined in this guide, except this time, select the Standard LulzBot TAZ 2.1 tool head and options.
Have questions, or ideas? Share them with community by joining our user forum at Forum.LulzBot.com