Open HardwareAssembly Instructions
Guides for installation and assembly of the LulzBot line of products made by FAME 3D LLC.
Guides for installation and assembly of the LulzBot line of products made by FAME 3D LLC.
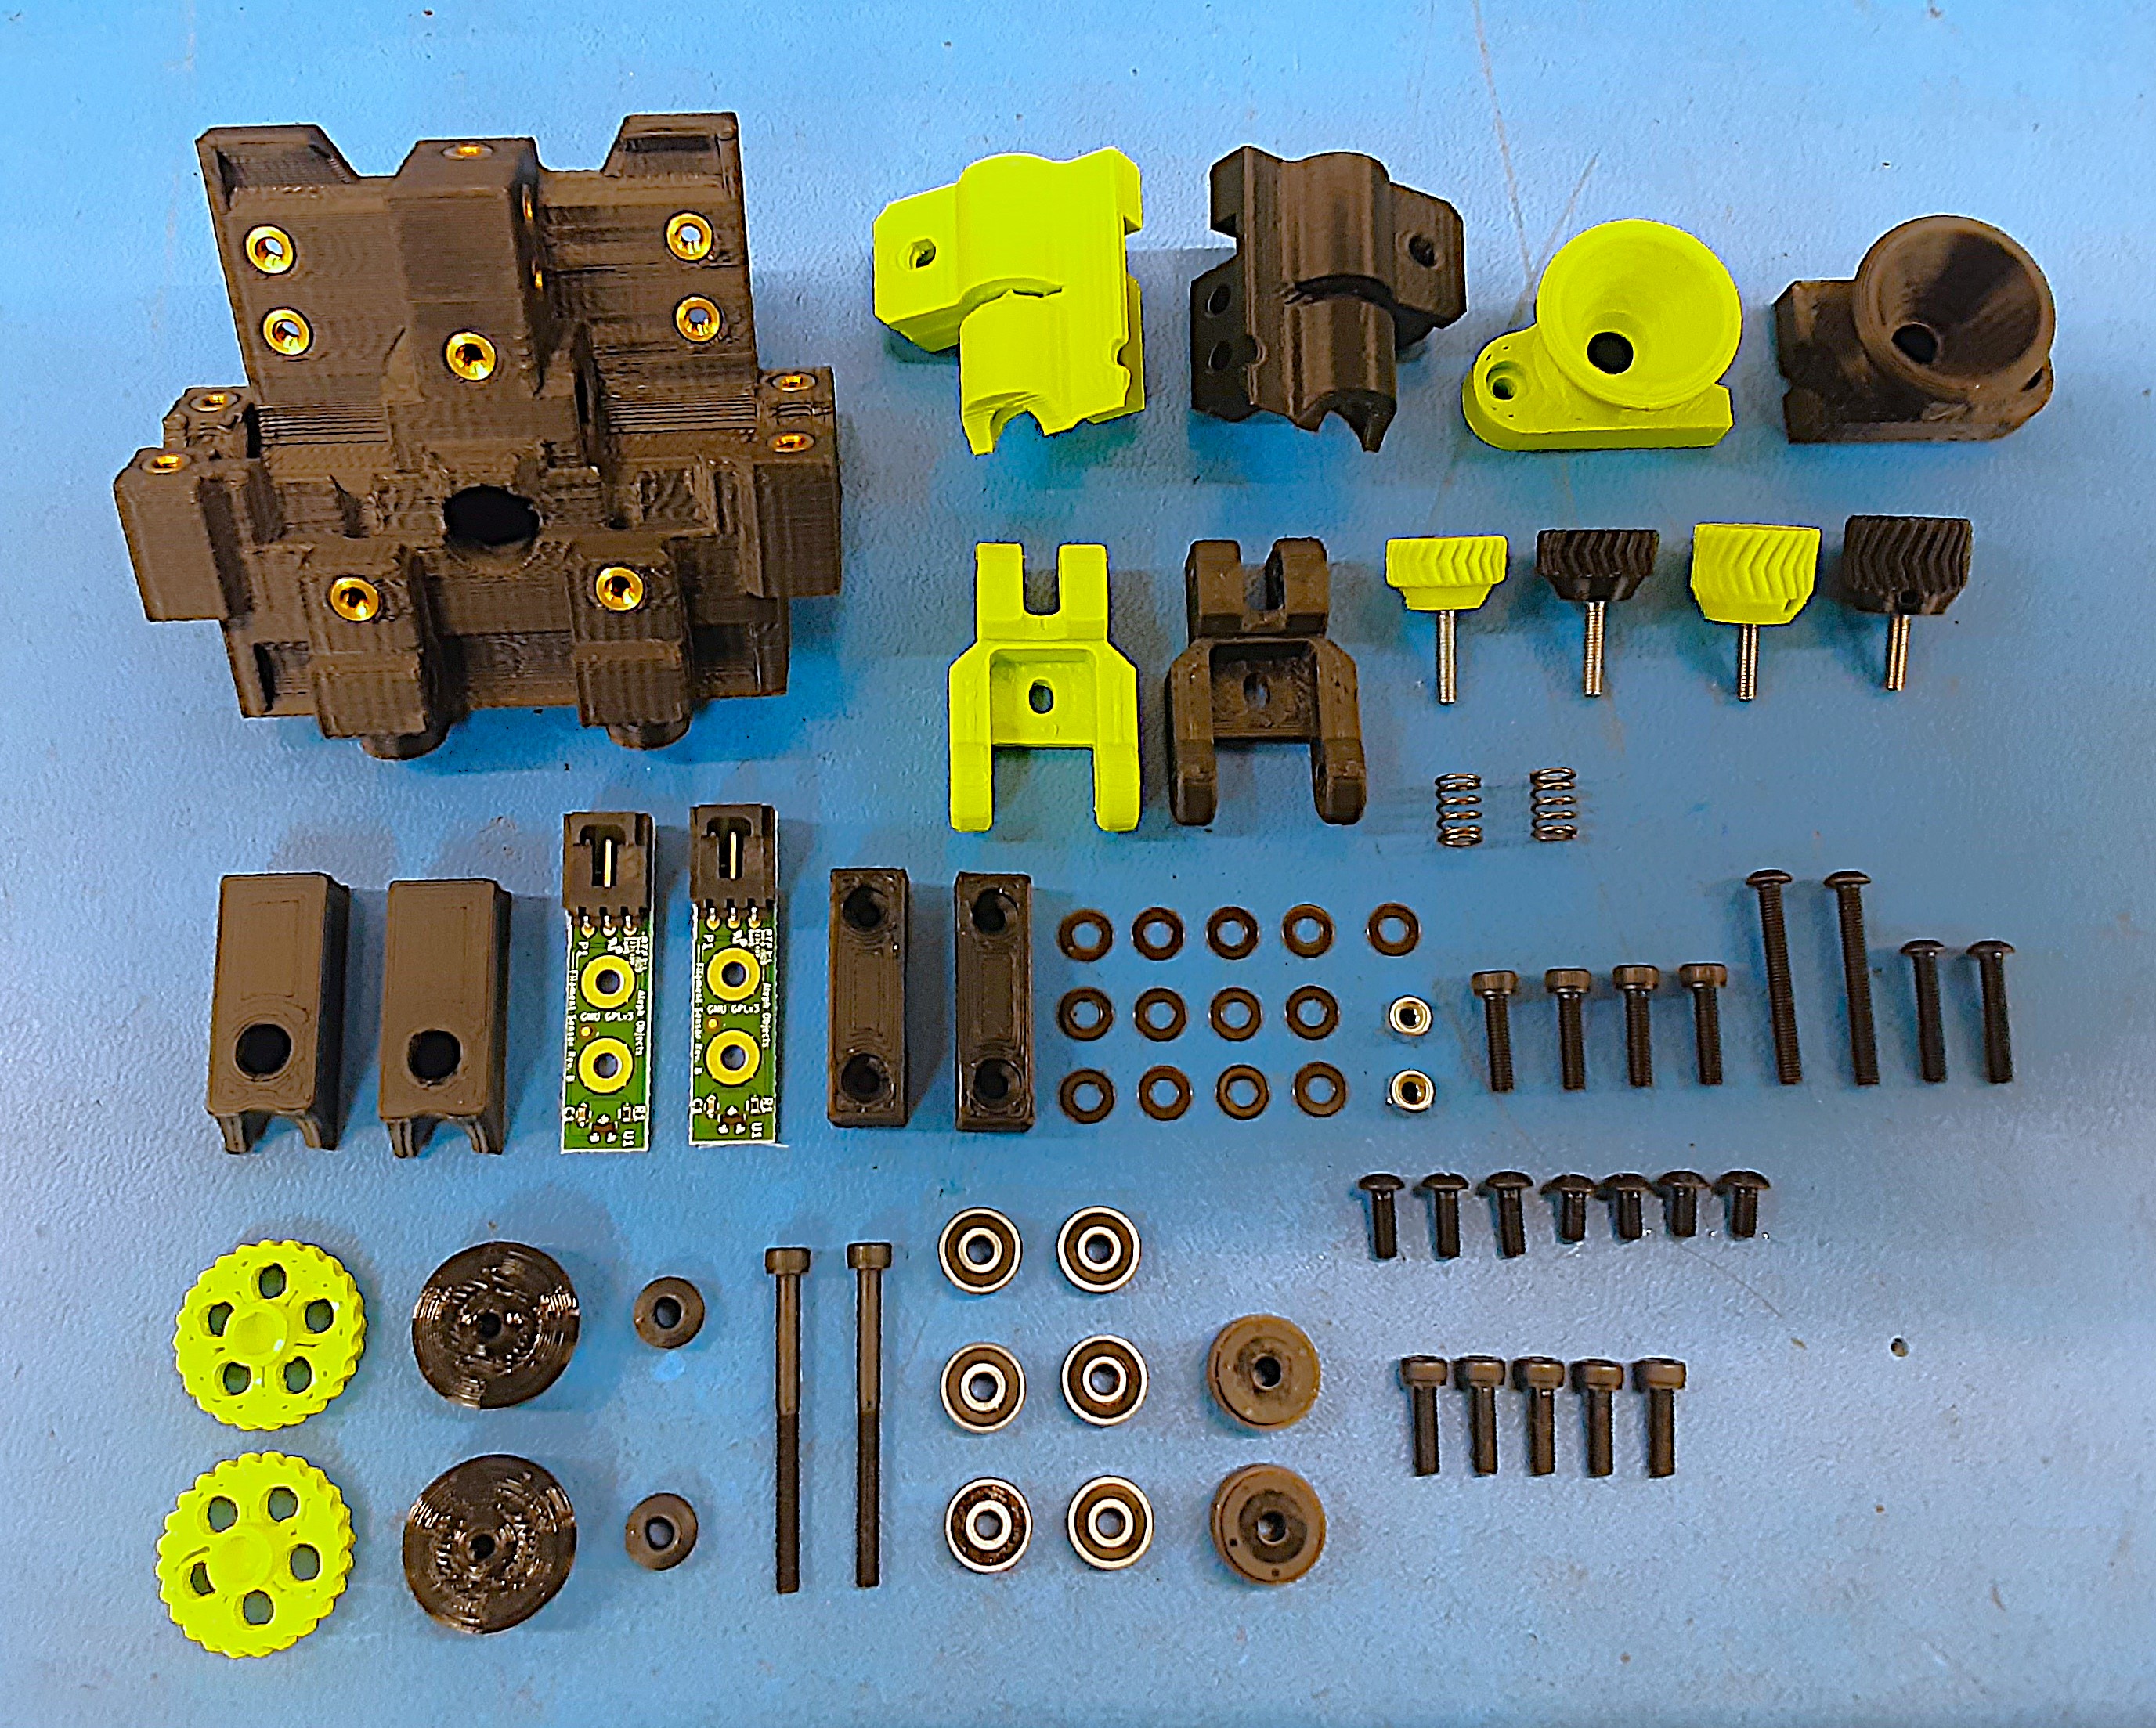
2x [EL-MS0531] G8 RADIAL MULTIPOLE RING - 1/2" 20 pole, G8-H-125-50-20
5x [HD-BT0005] M3 x 10 Bolt, SHCS Black-Oxide
4x [HD-BT0039] Metric Class 12.9 SHCS Alloy Steel, M3 x 12mm Length, 0.50mm Pitch
2x [HD-BT0043] Metric Class 12.9 SHCS Alloy Steel, M3 x 35mm Length, 0.50mm Pitch
2x [HD-BT0091] M3 x 10mm, SHCS, stainless steel
3x [HD-BT0137] M3 x 8 Bolt, BHCS, Black Oxide
4x [HD-BT0140] M3 x 6 Bolt, BHCS Black Oxide
2x [HD-BT0202] Black-Oxide Alloy Steel BHCS, M3 x 25mm Long, 0.5mm Thread
2x [HD-BT0256] Black-Oxide Alloy Steel BHCS, M3 x 16mm Long, 0.5mm Thread
2x [HD-BT0275] M3 x 12mm-0.5 SHCS, Clear Zinc Coated
6x [HD-MS0470] Two Side Rubber Seal Bearing, 623-2RS, ABEC1 grade
2x [HD-MS0471] Round Compression Spring .22OD 21lbs/in D11450
2x [HD-NT0001] Metric Zinc-Plated Steel Nylon-Insert Locknut, Class 8, M3 Size
13x [HD-WA0038] Black-Oxide 18-8 Steel Flat Washer, M3 Screw Size, 3.2mm ID, 7.0mm OD
2x [PC-BD0109] Filament Sensor PCBA Rev B
1x [PP-GP0647-BLK] Filament Tube Press Fit Knob (Black PETg)
1x [PP-GP0647-GRN] Filament Tube Press Fit Knob (LulzBot Green PETg)
1x [PP-GP0750] Dual Filament Sensor Base
1x [PP-GP0752] Dual Filament Sensor Left Tower
1x [PP-GP0753] Dual Filament Sensor Right Tower
1x [PP-GP0754] Dual Filament Sensor Left Idler
1x [PP-GP0755] Dual Filament Sensor Right Idler
1x [PP-GP0756] Dual Filament Left Thruster
1x [PP-GP0757] Dual Filament Right Thruster
2x [PP-GP0758] Filament Sensor Bearing Clamp
2x [PP-GP0759] Sensor Bearing Spacer
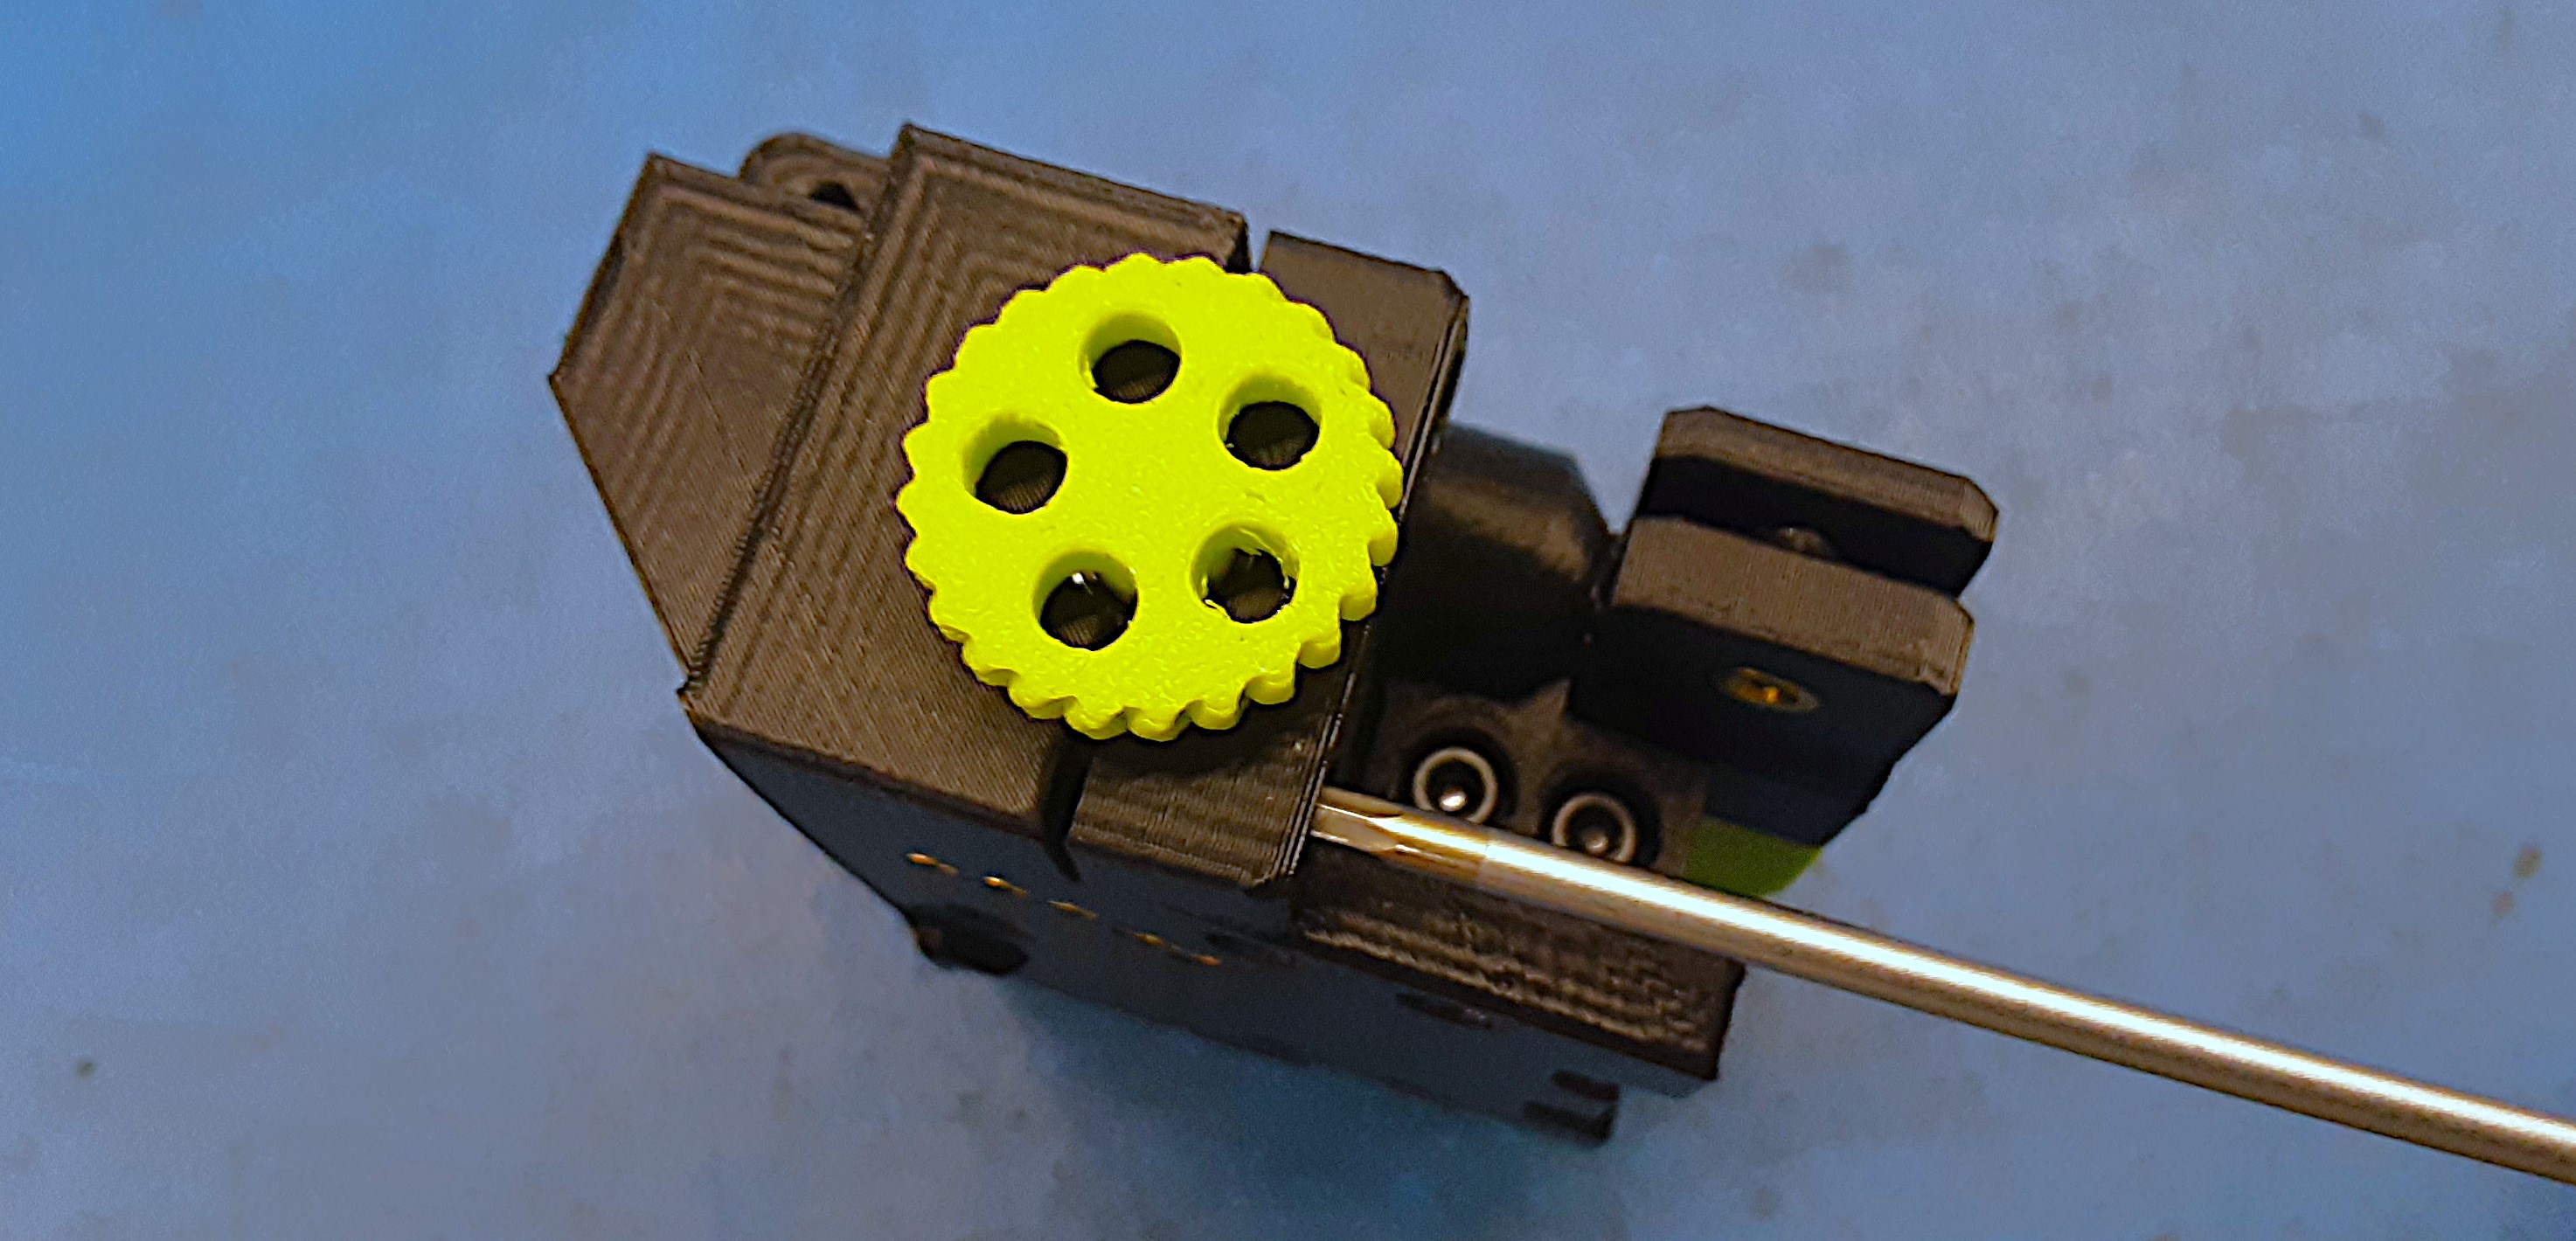
2x [PP-GP0760] Filament Wheel
1x [PP-GP0761] M3x12 Press Fit Knob LGN
1x [PP-GP0762] M3x12 Press Fit Knob BLK
2x [PP-GP0763] Circuit Board Cover
2x [PP-GP1011] JetPack Spinner
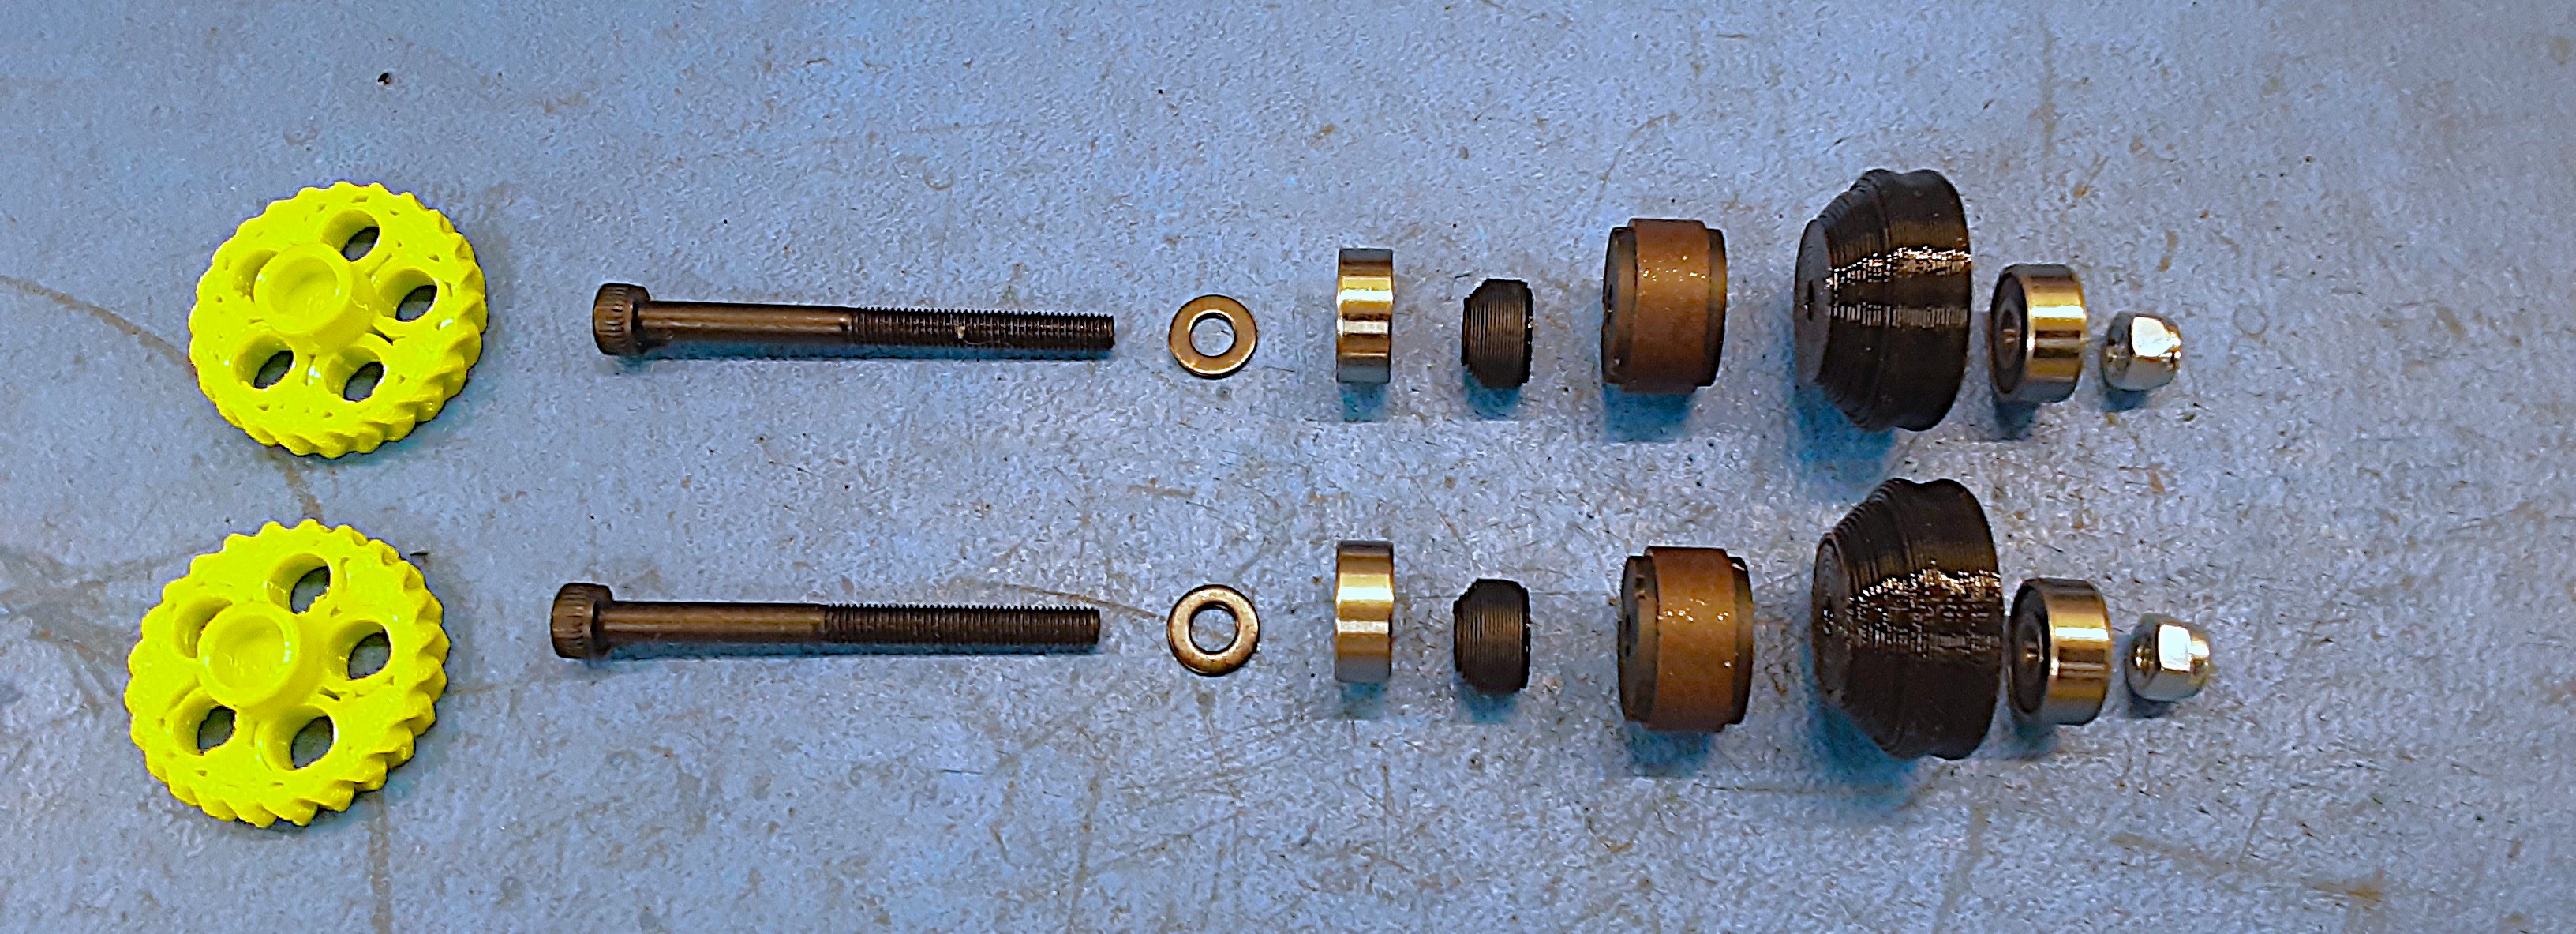
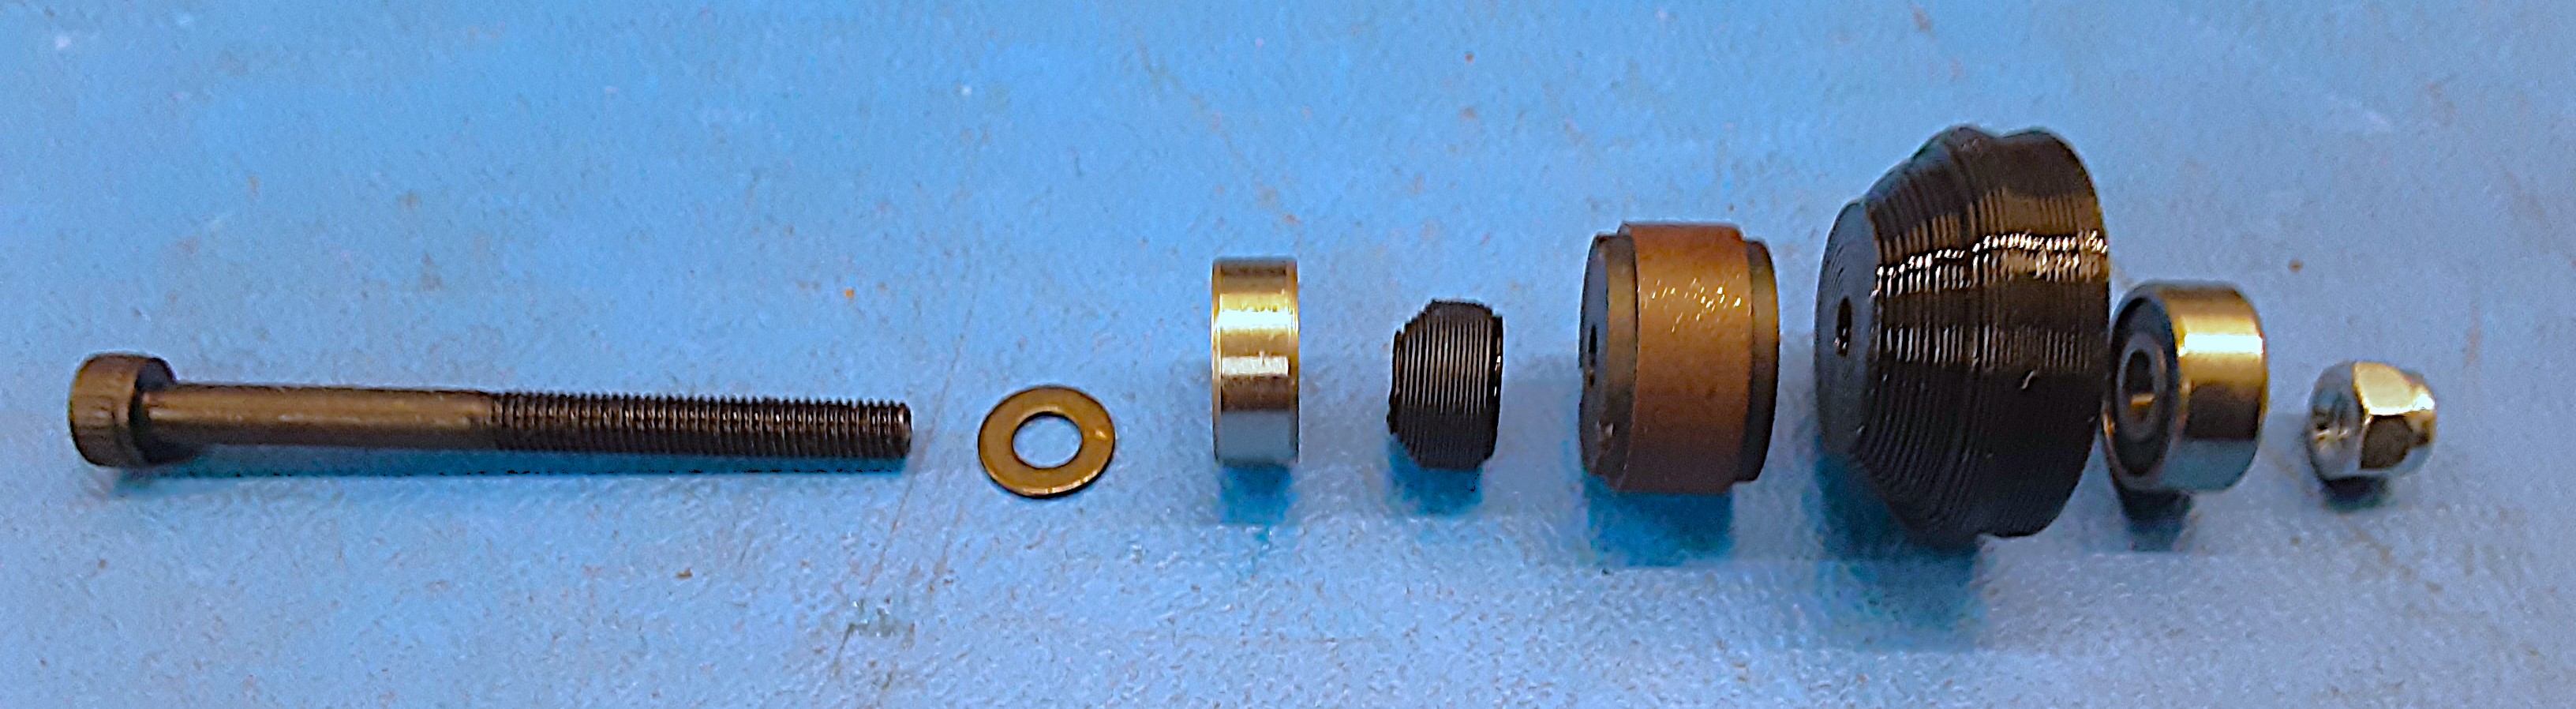
2A) Grab 2x HD-BT0043, 2x HD-WA0038, 4x HD-MS0470, 2x PP-GP0759, 2x EL-MS0531,
2x PP-GP0760, 2x HD-NT0001, and 2x PP-GP1011.
2B) Using HD-BT0043 place 1x HD-WA0038 (check to make sure the flat side of the washer will face the bearing), then 1x HD-MS0470, then 1x PP-GP0759, then 1x EL-MS0531, then 1x PP-GP0760, then
1x HD-MS0470, then 1x HD-NT0001 on the bolt. Make 2 of these.
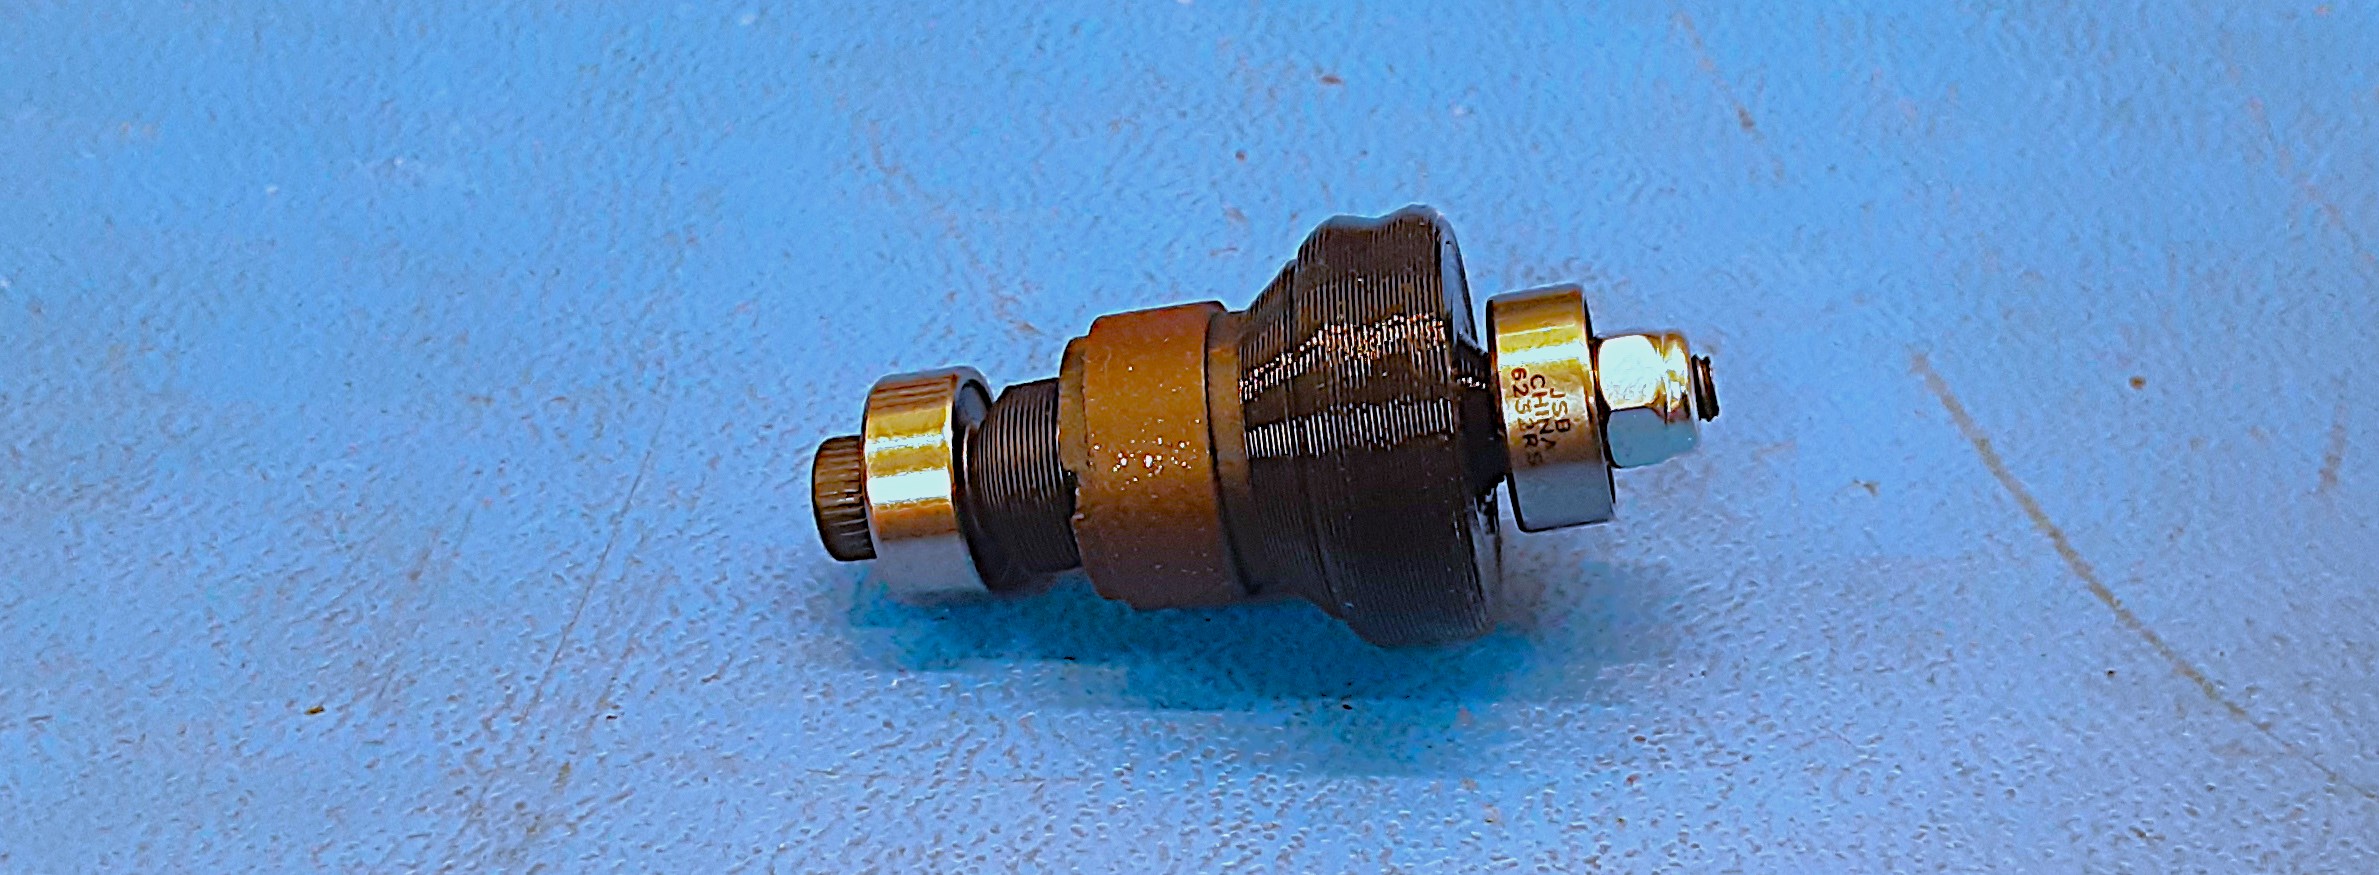
2C) Tighten the nuts on the bolts. The bolts should have about one thread sticking out past the nuts. The magnet wheel and filament wheel should not move easily separate from each other.
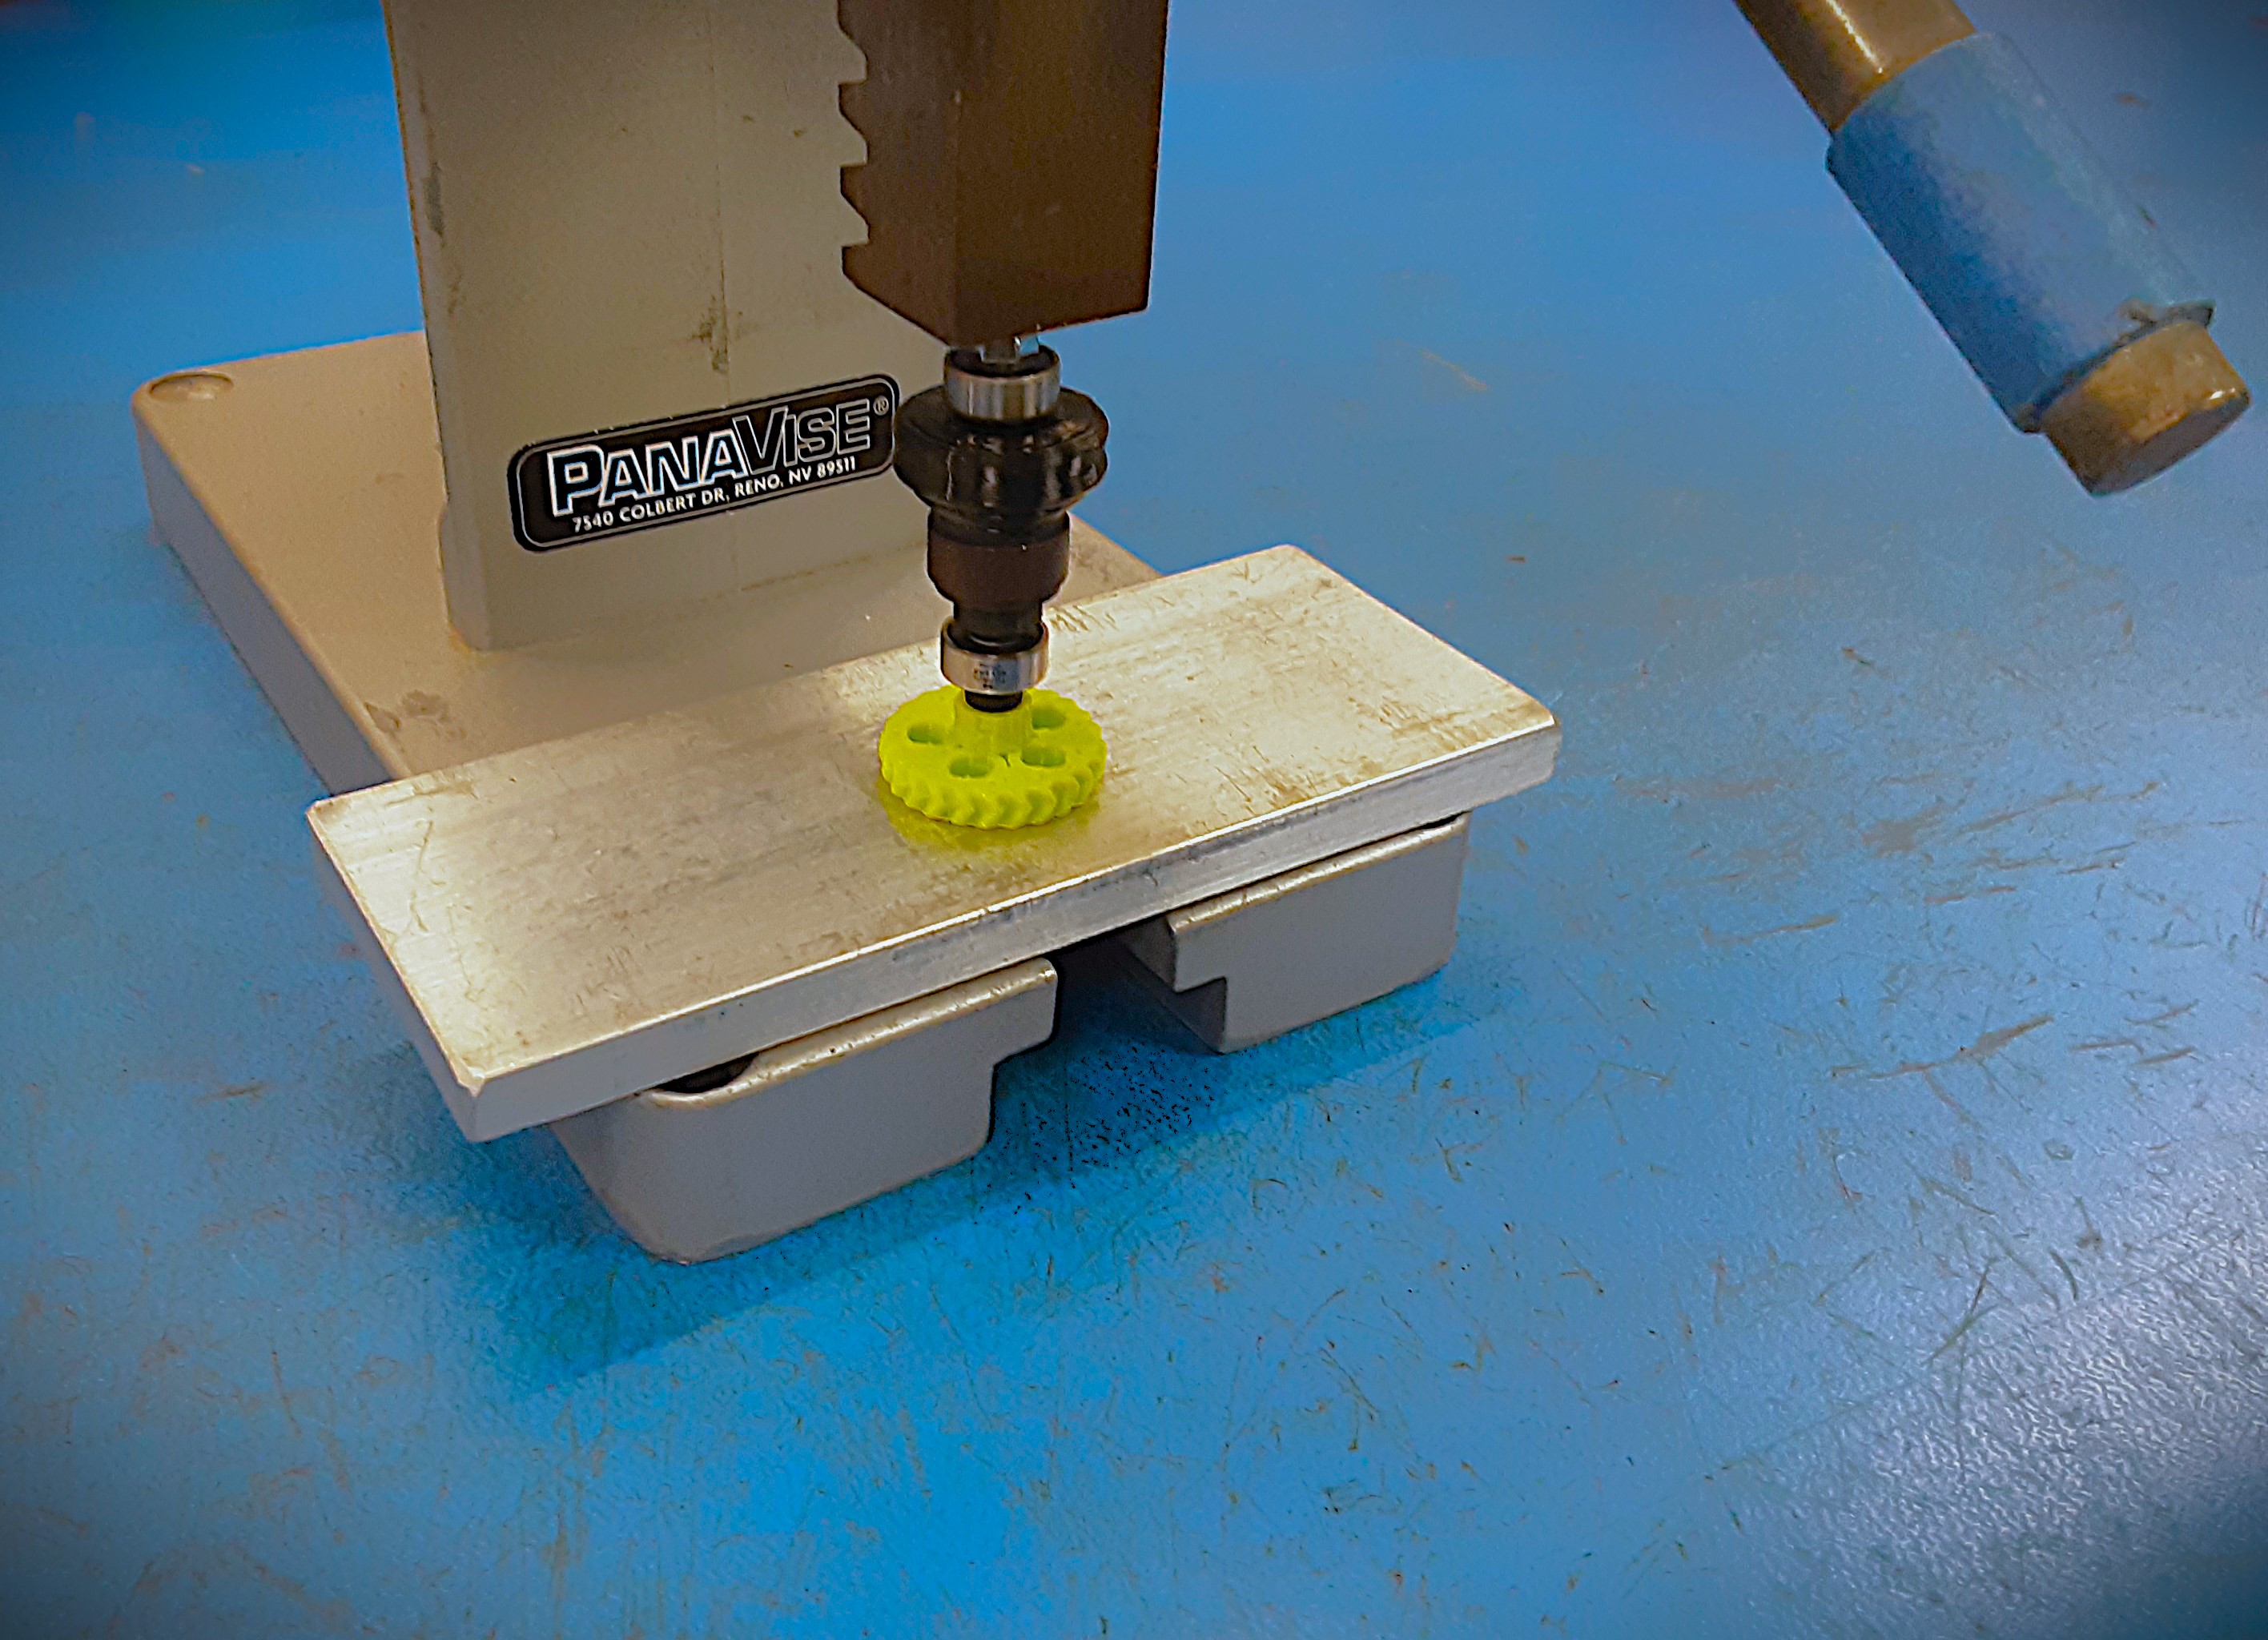
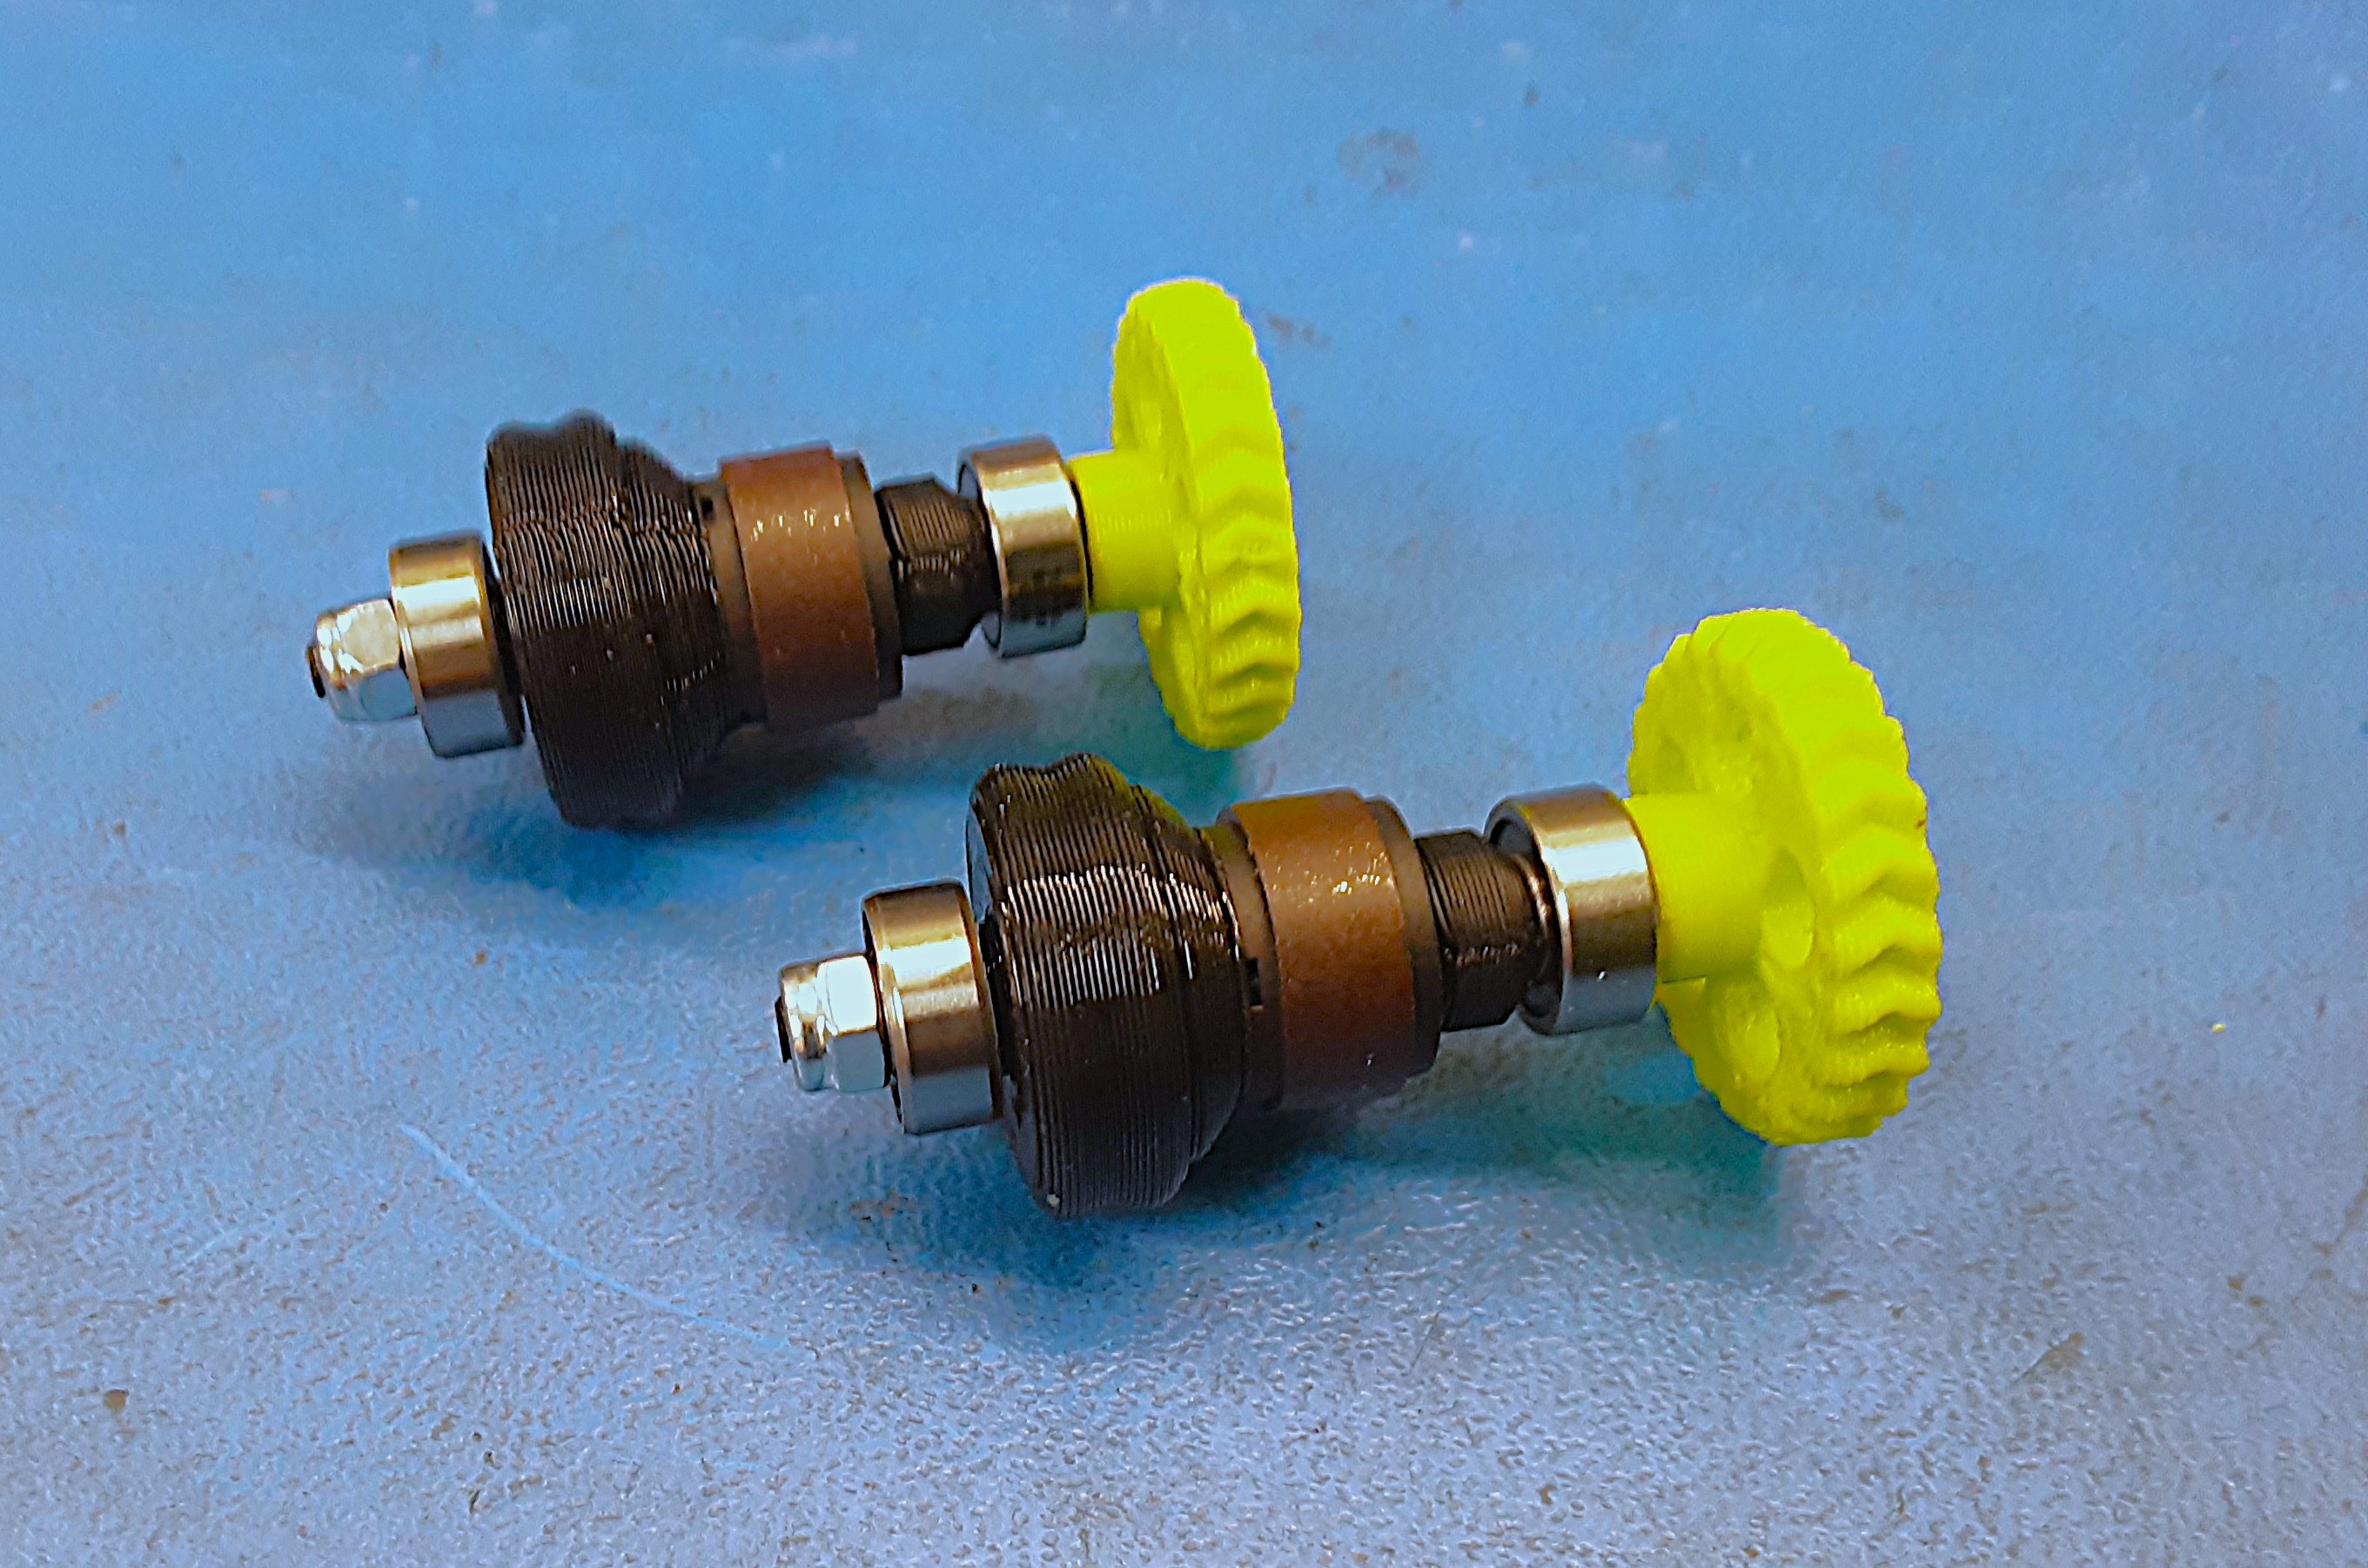
2D) Using the arbor press push the filament wheel assemblies into the 2x PP-GP1011.
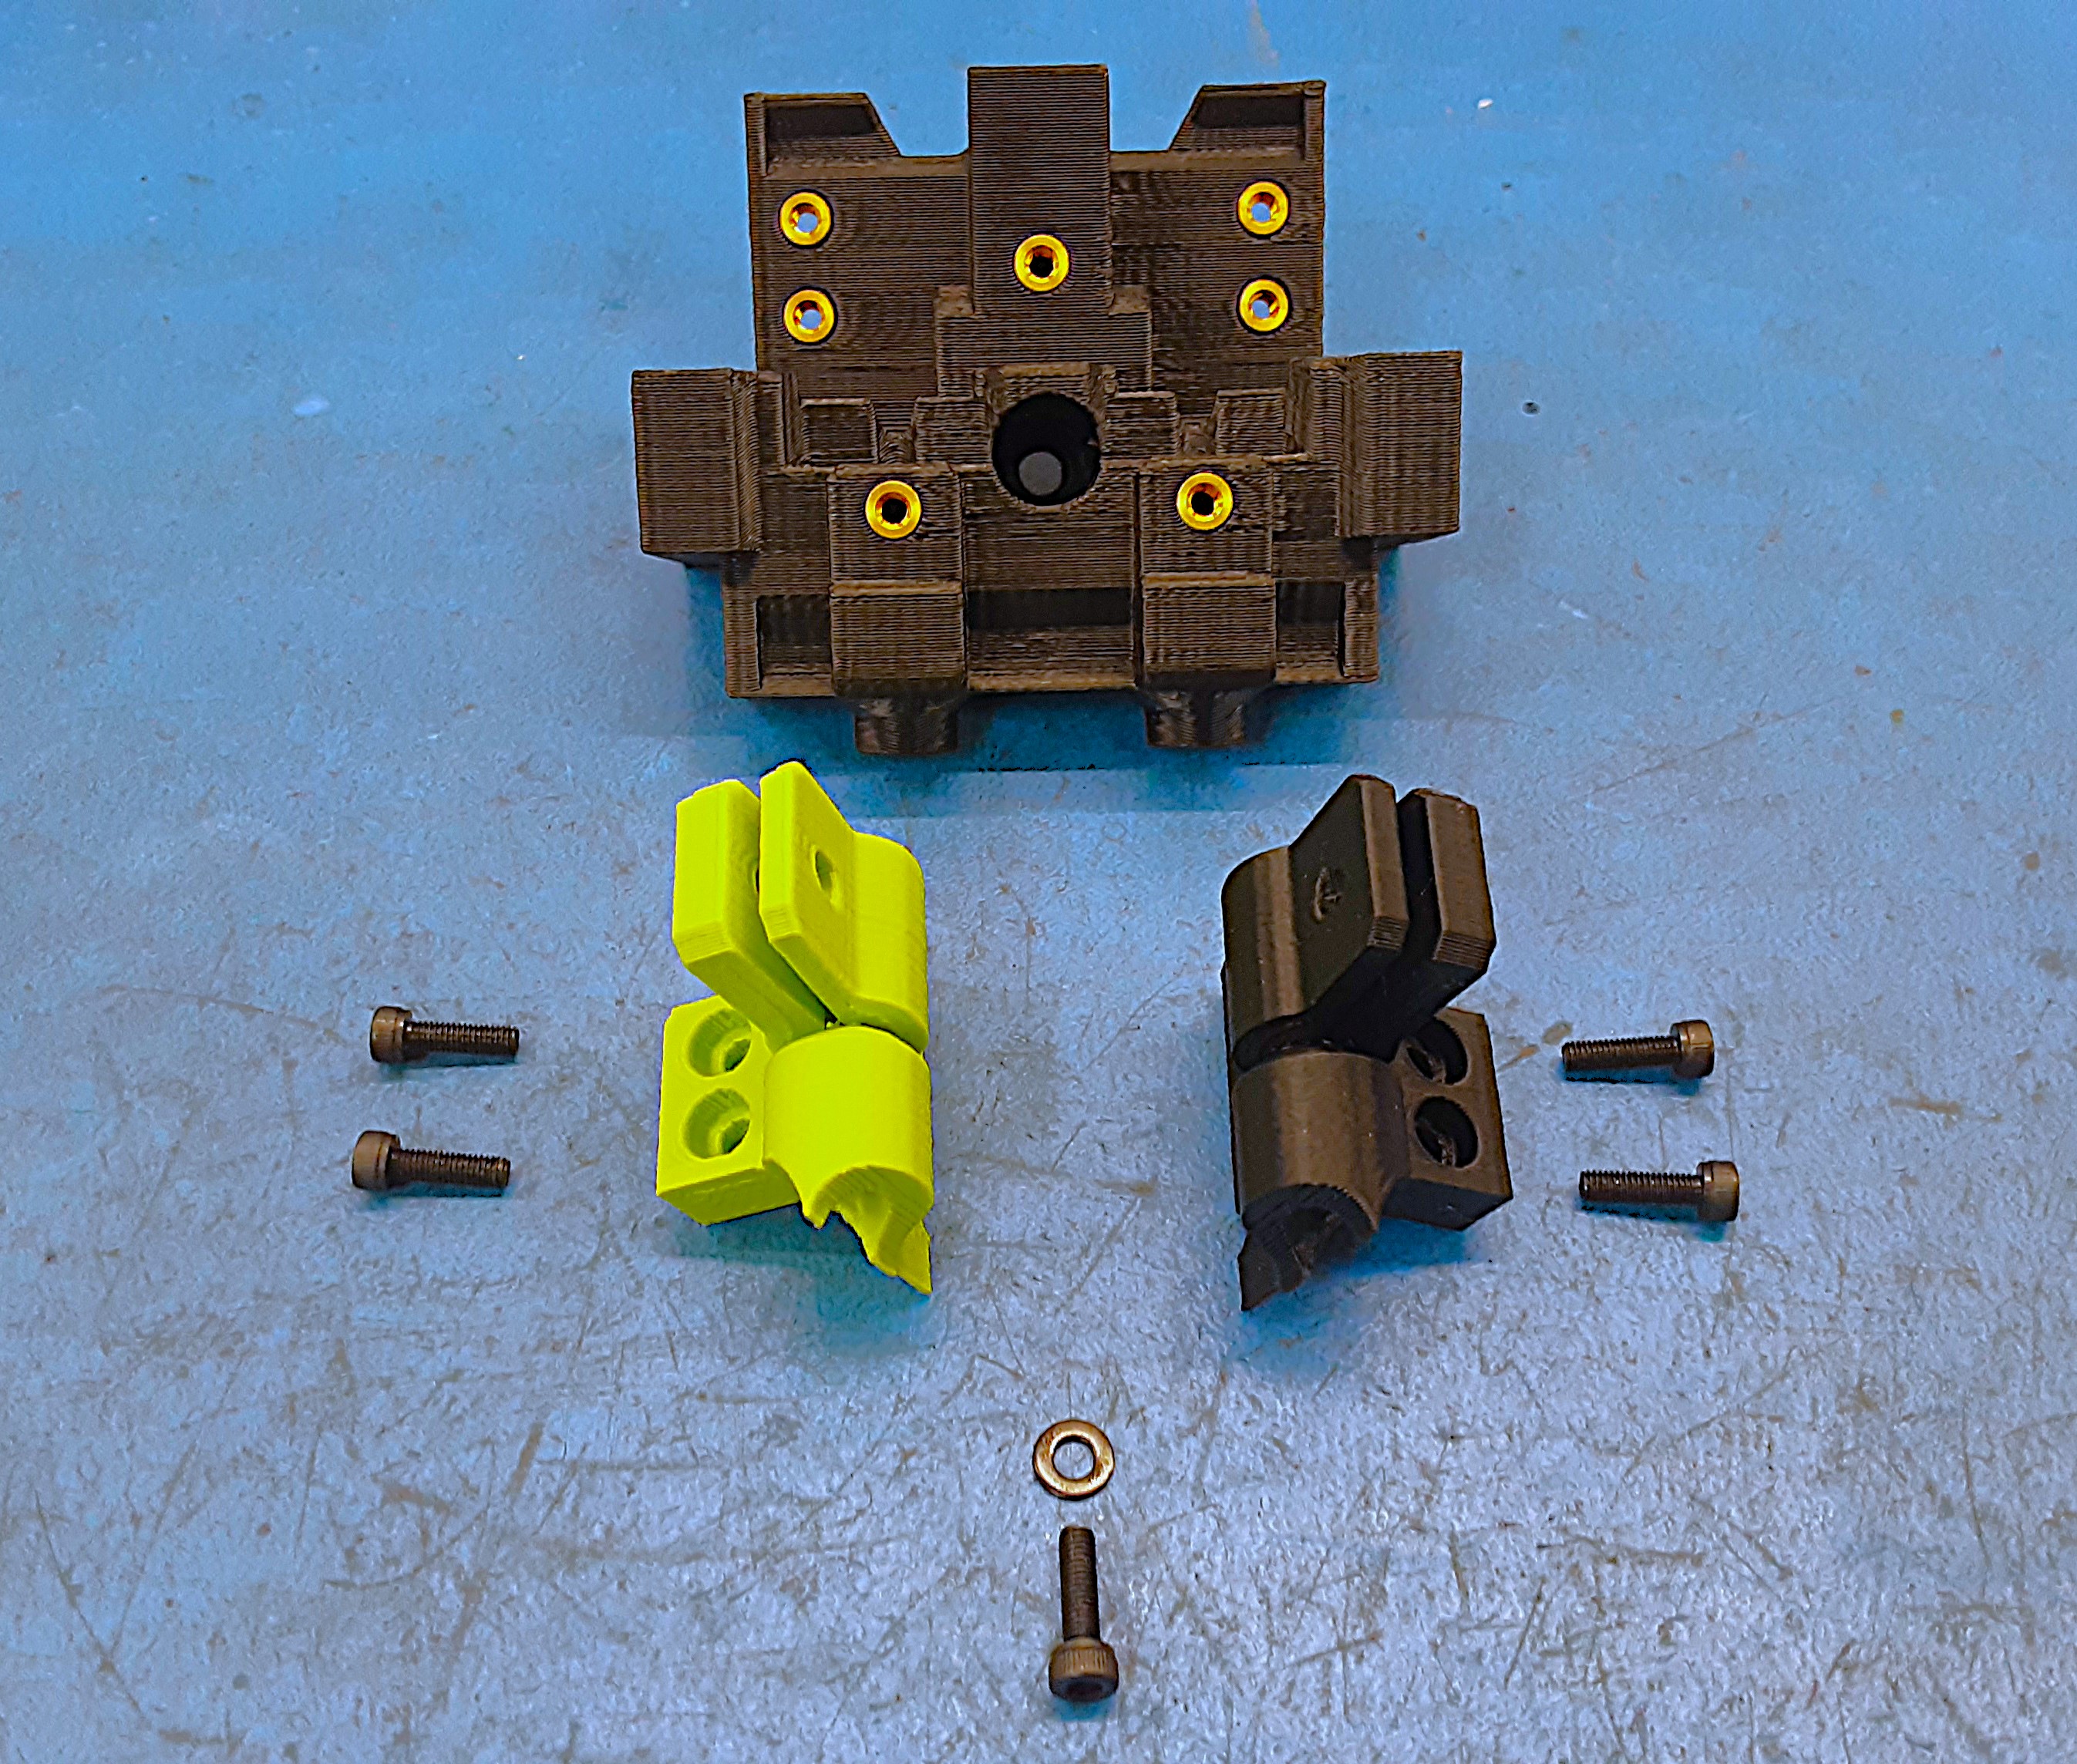
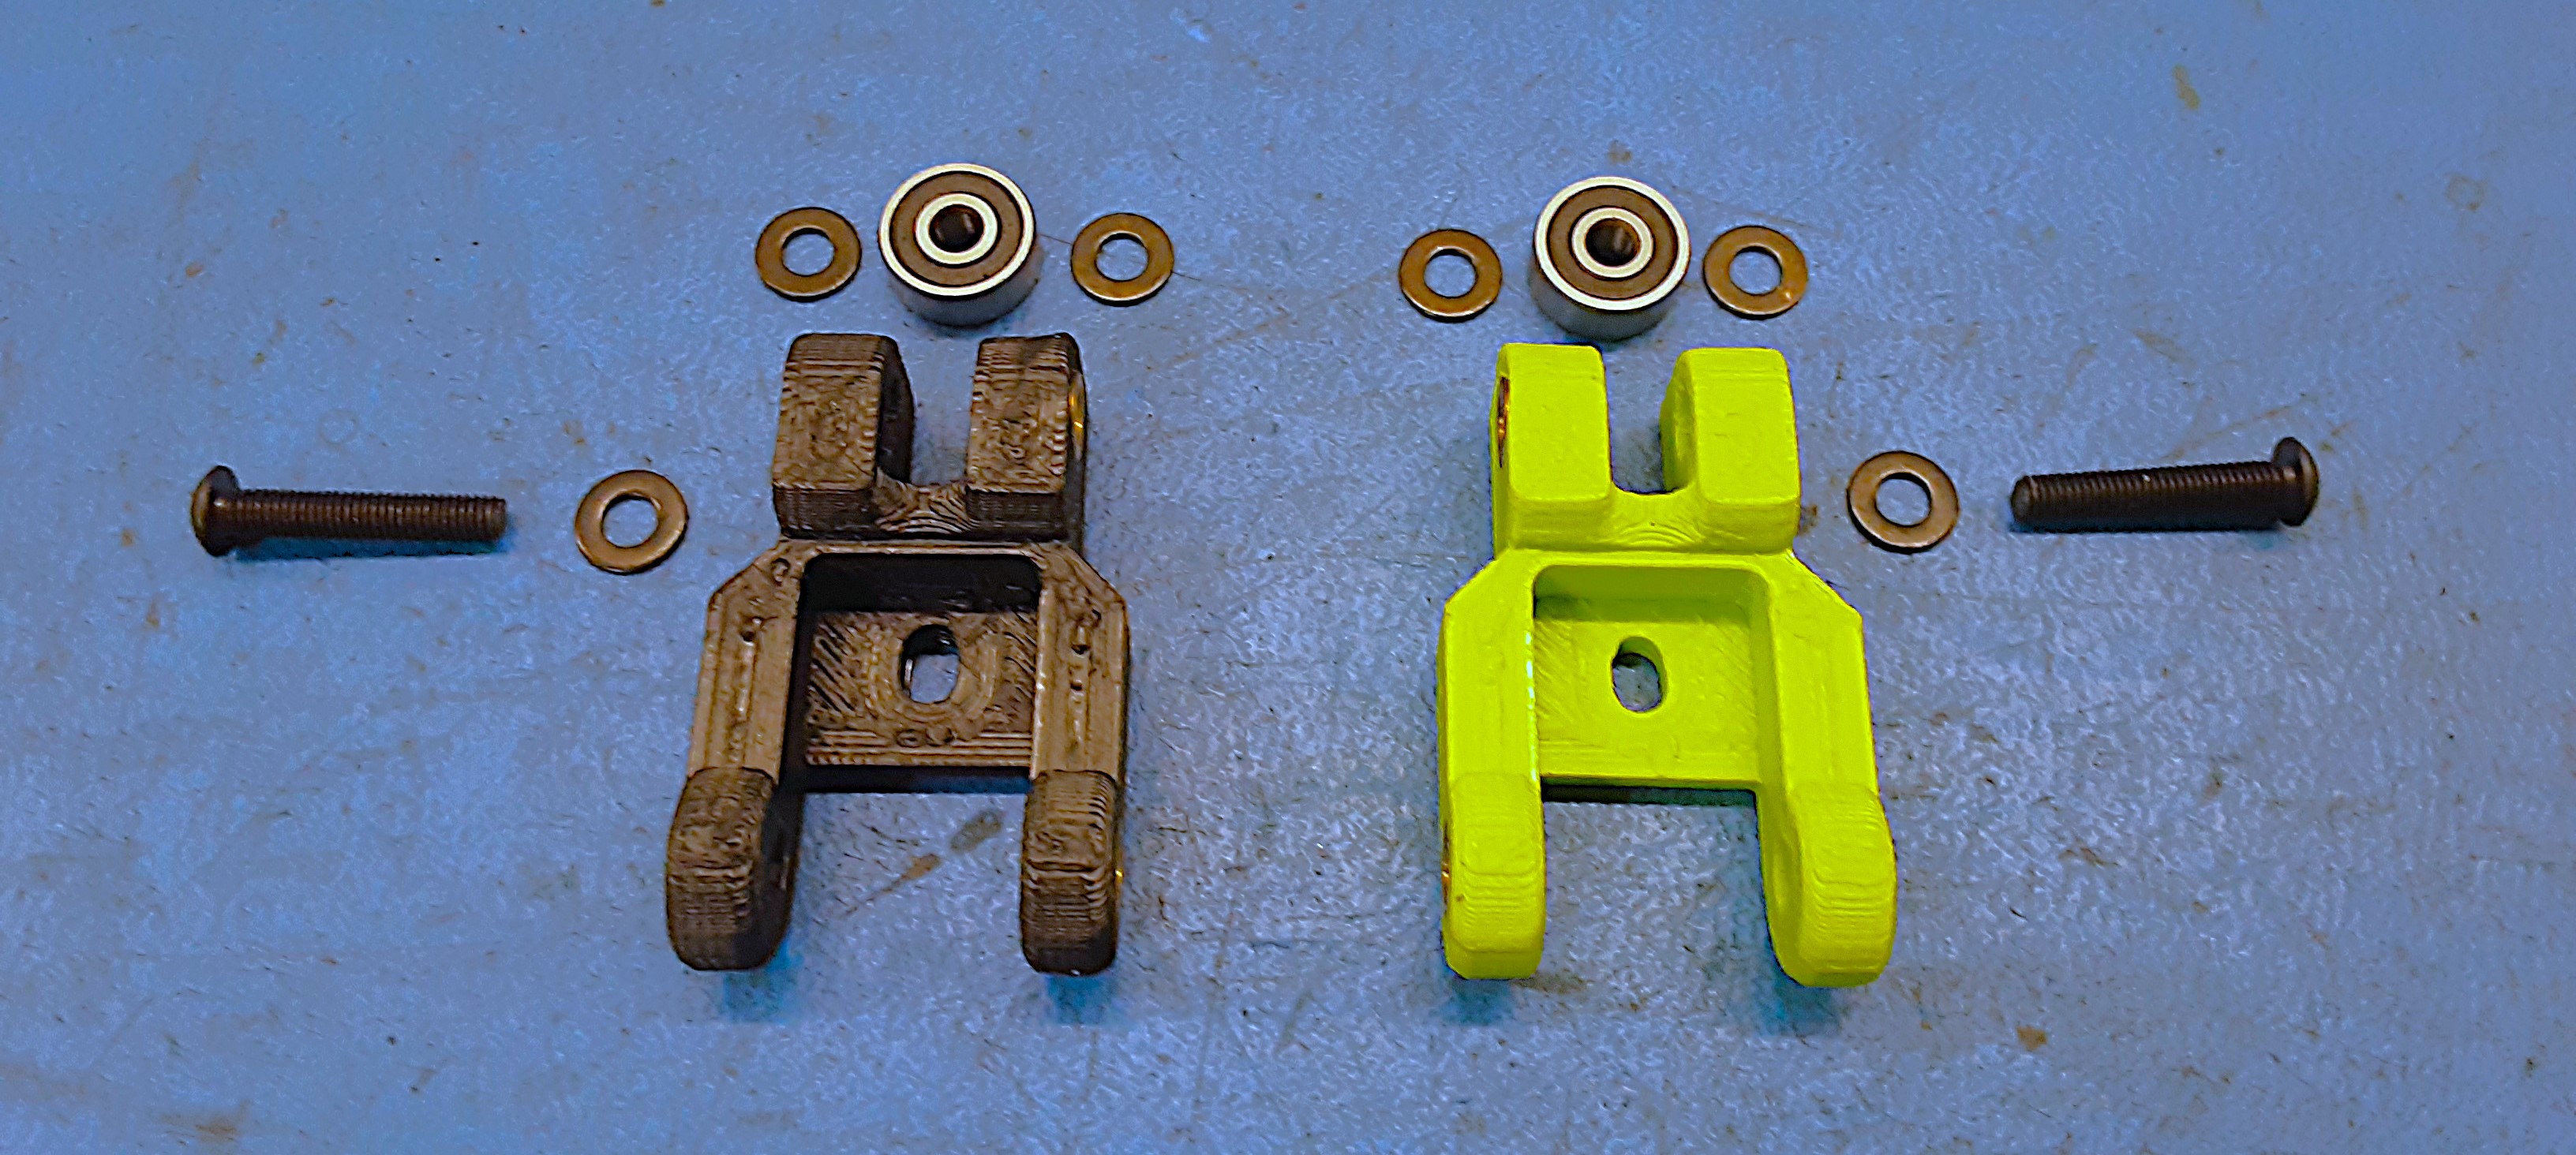
3A) Grab 1x PP-GP0750, 1x PP-GP0752, 1x PP-GP0753, 1x HD-WA0038, and 5x HD-BT0005.
3B) Attach PP-GP0752 to PP-GP0750 using 2x HD-BT0005.
3C) Attach PP-GP0753 to PP-GP0750 using 2x HD-BT0005. Line up the two towers to be flush across the top.
3D) Install 1x HD-BT005 with 1x HD-WA0038 in between the towers into PP-GP0750.
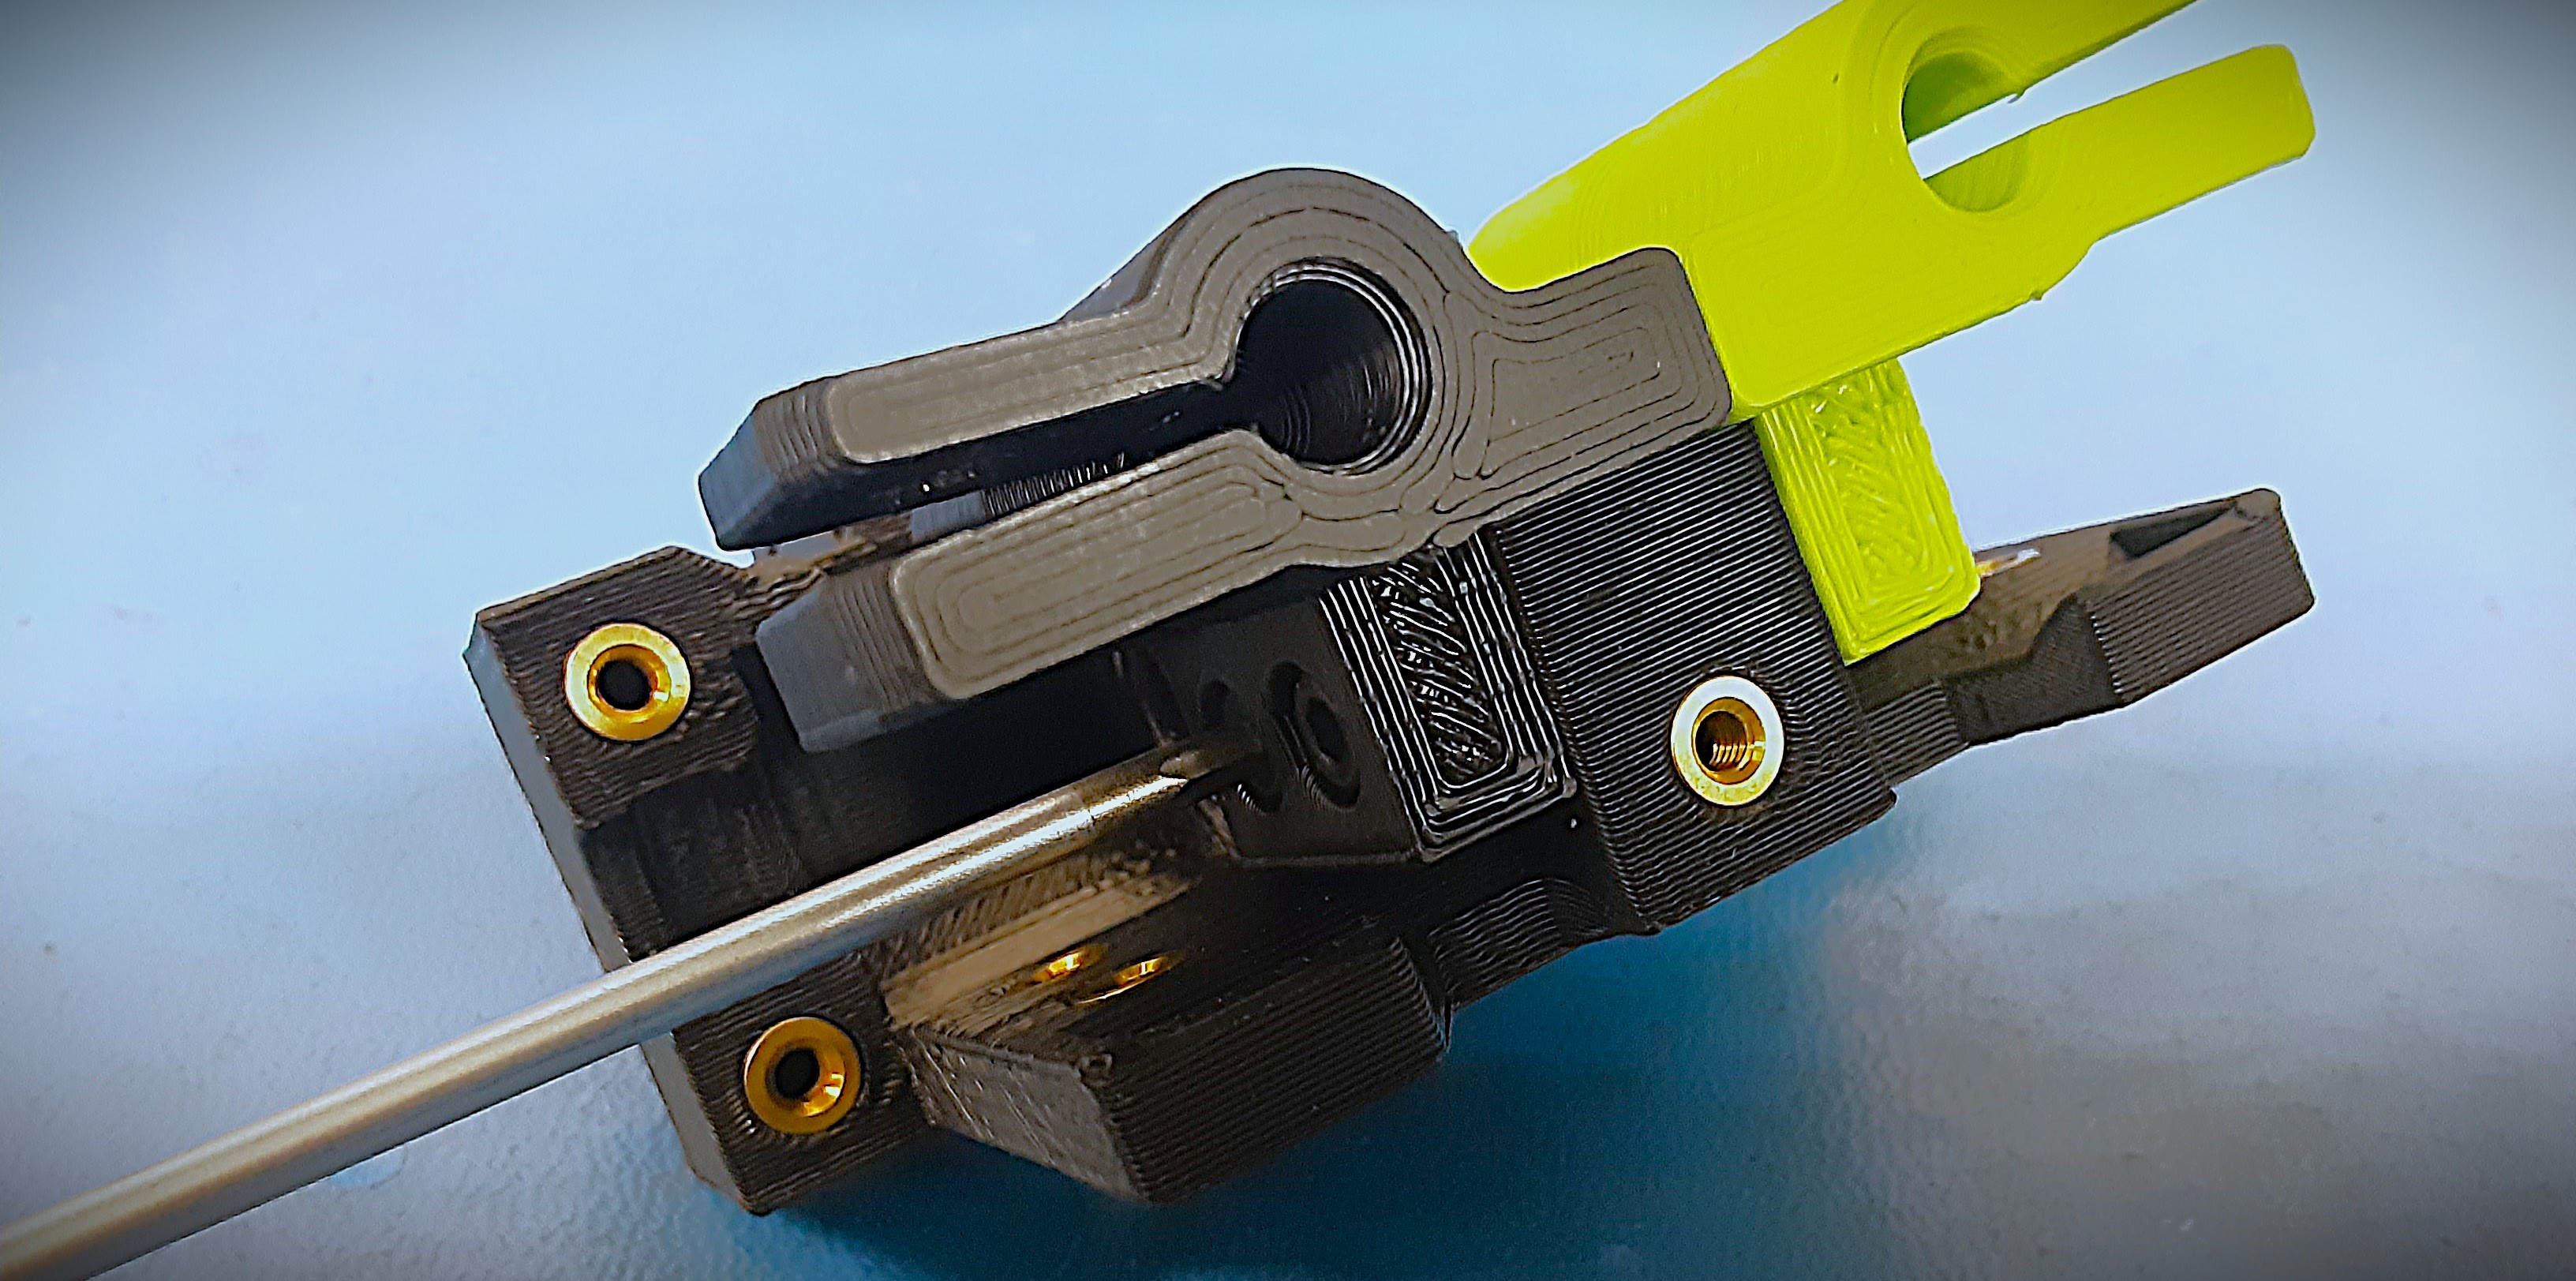
3E) Grab the two filament wheel bearing assemblies, 2x PP-GP0758, and 4x HD-BT0039.
3F) Place one filament wheel assembly in the jet pack base on the green tower side. Line up the filament wheel assembly outer bearing with the groove in the jet pack base.
3G) Secure the filament wheel assembly with 1x PP-GP0758 and 2x HD-BT0039. Be careful to not over tighten the clamp. There should be a small gap between the jet pack base and bearing clamp. Check that the Filament Wheel Bearing moves freely and is not sticking or caught on anything.
3H) Repeat the last two steps for the filament wheel assembly on the black tower side.
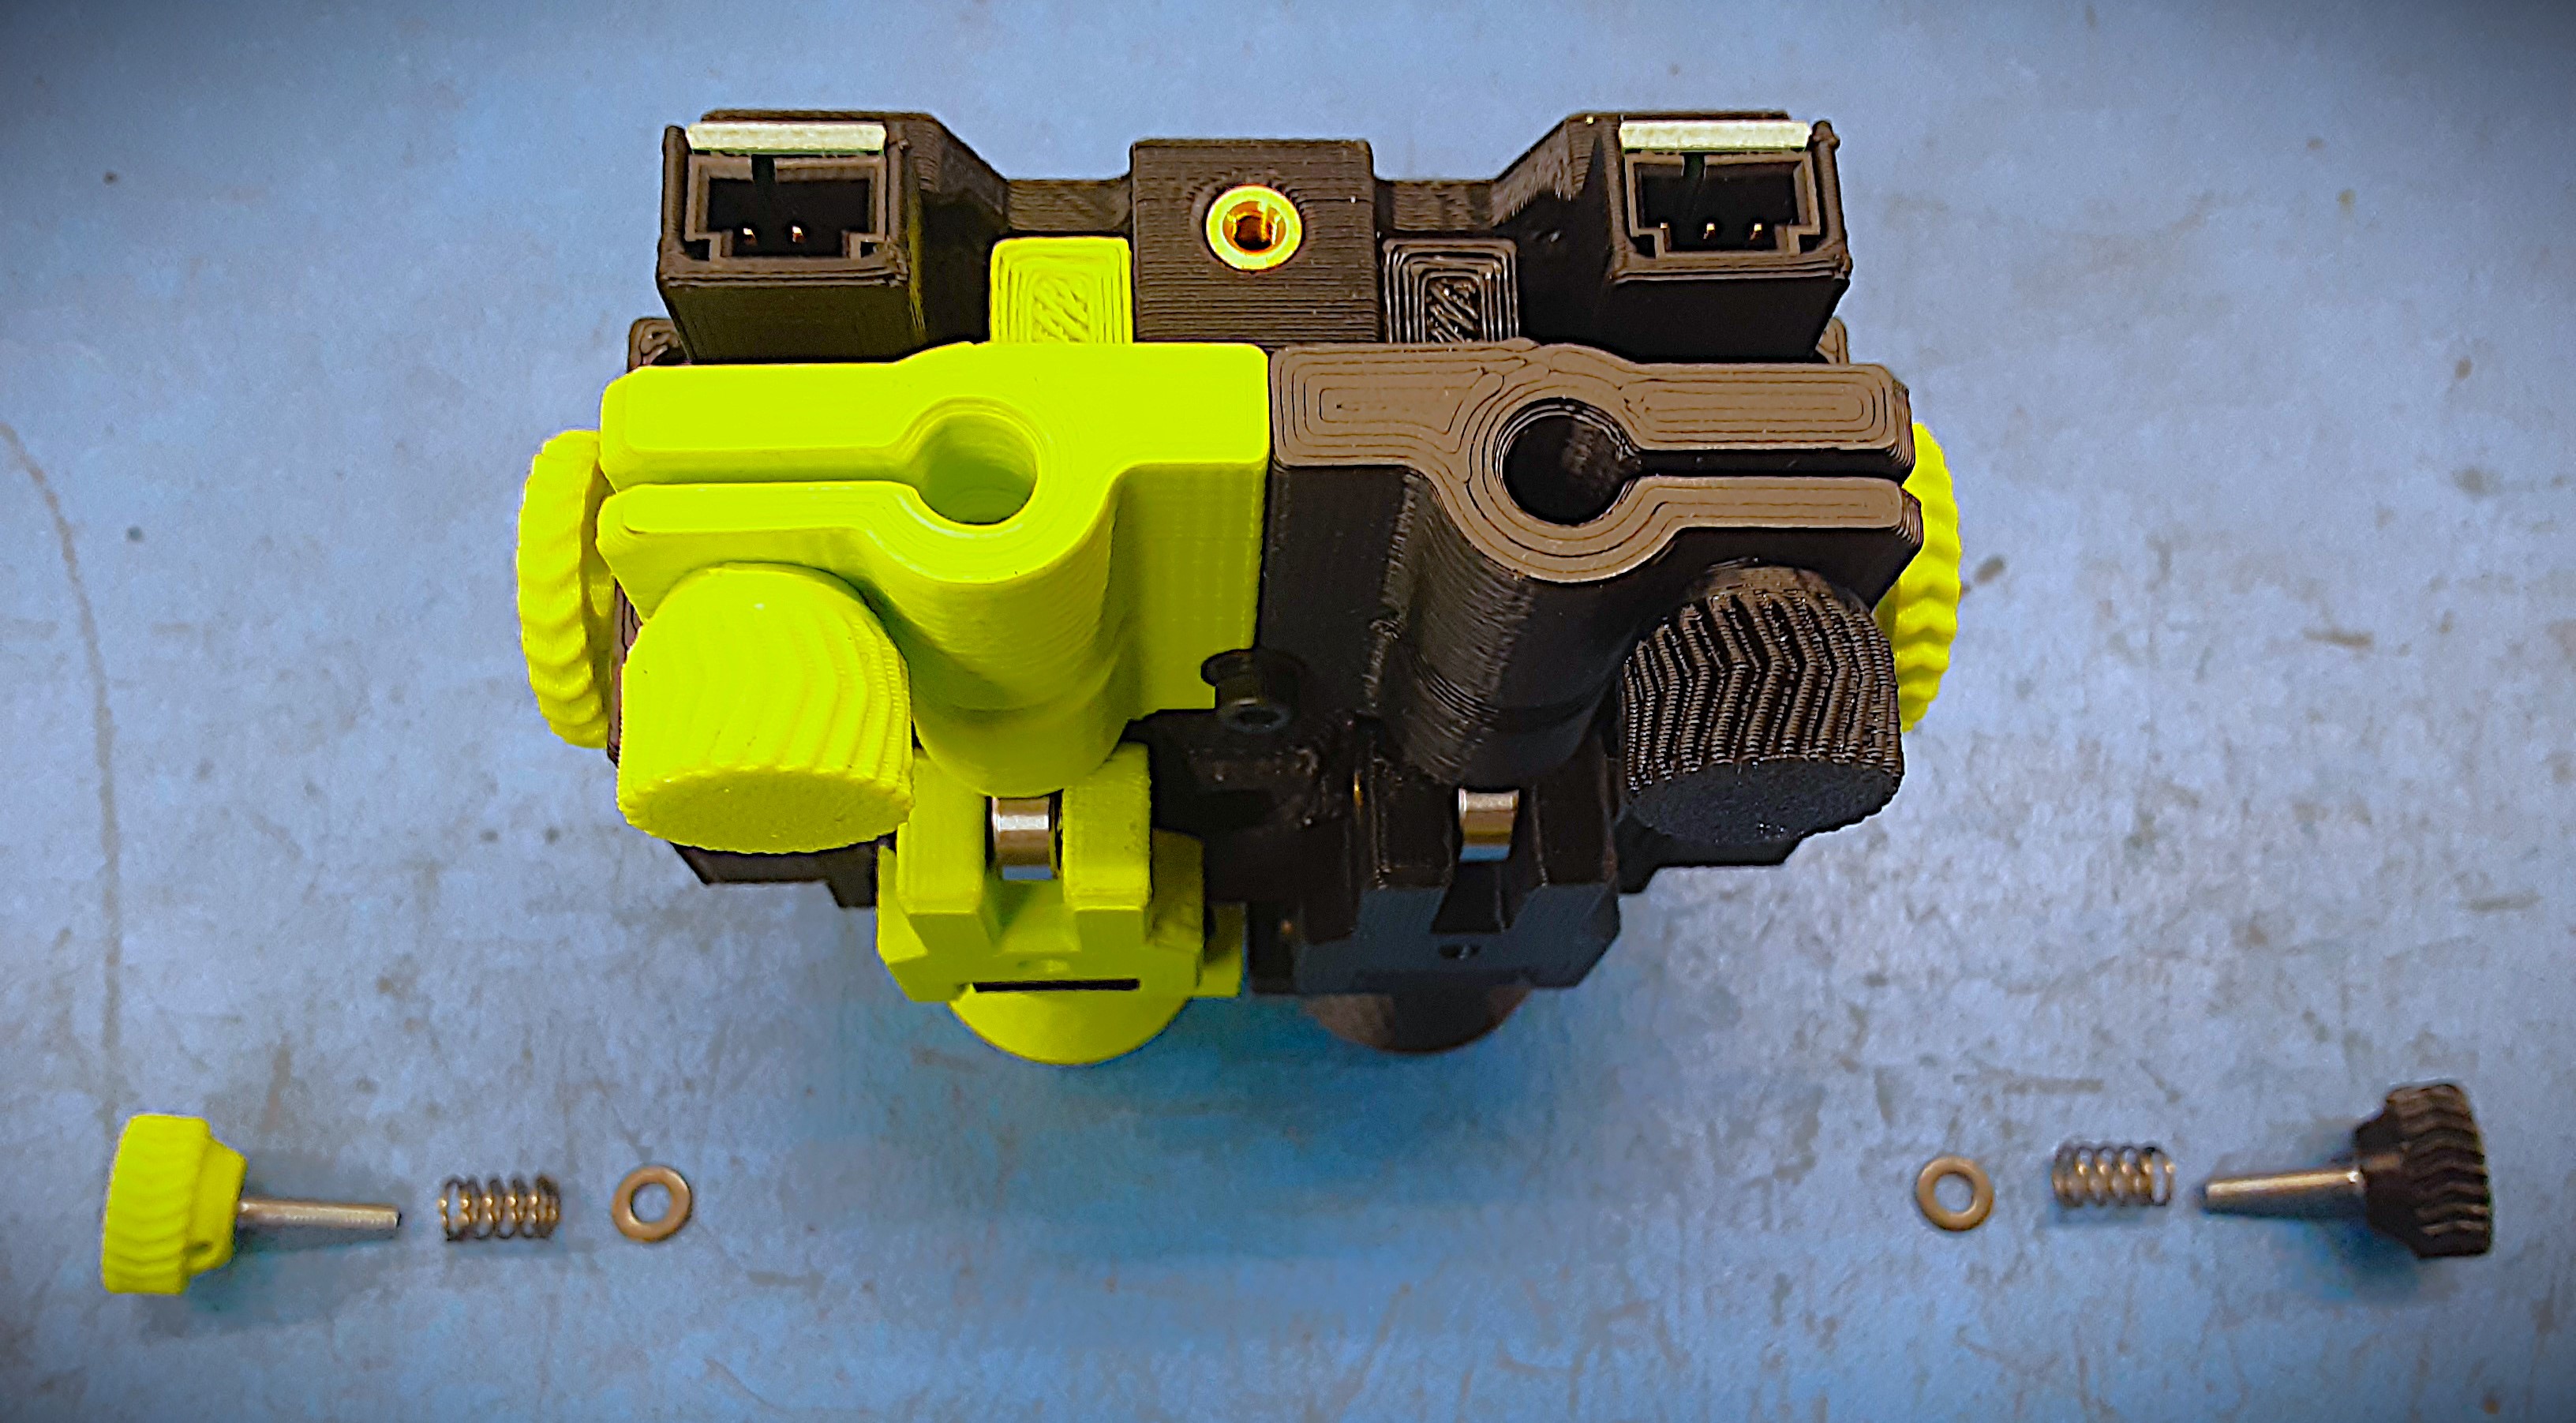
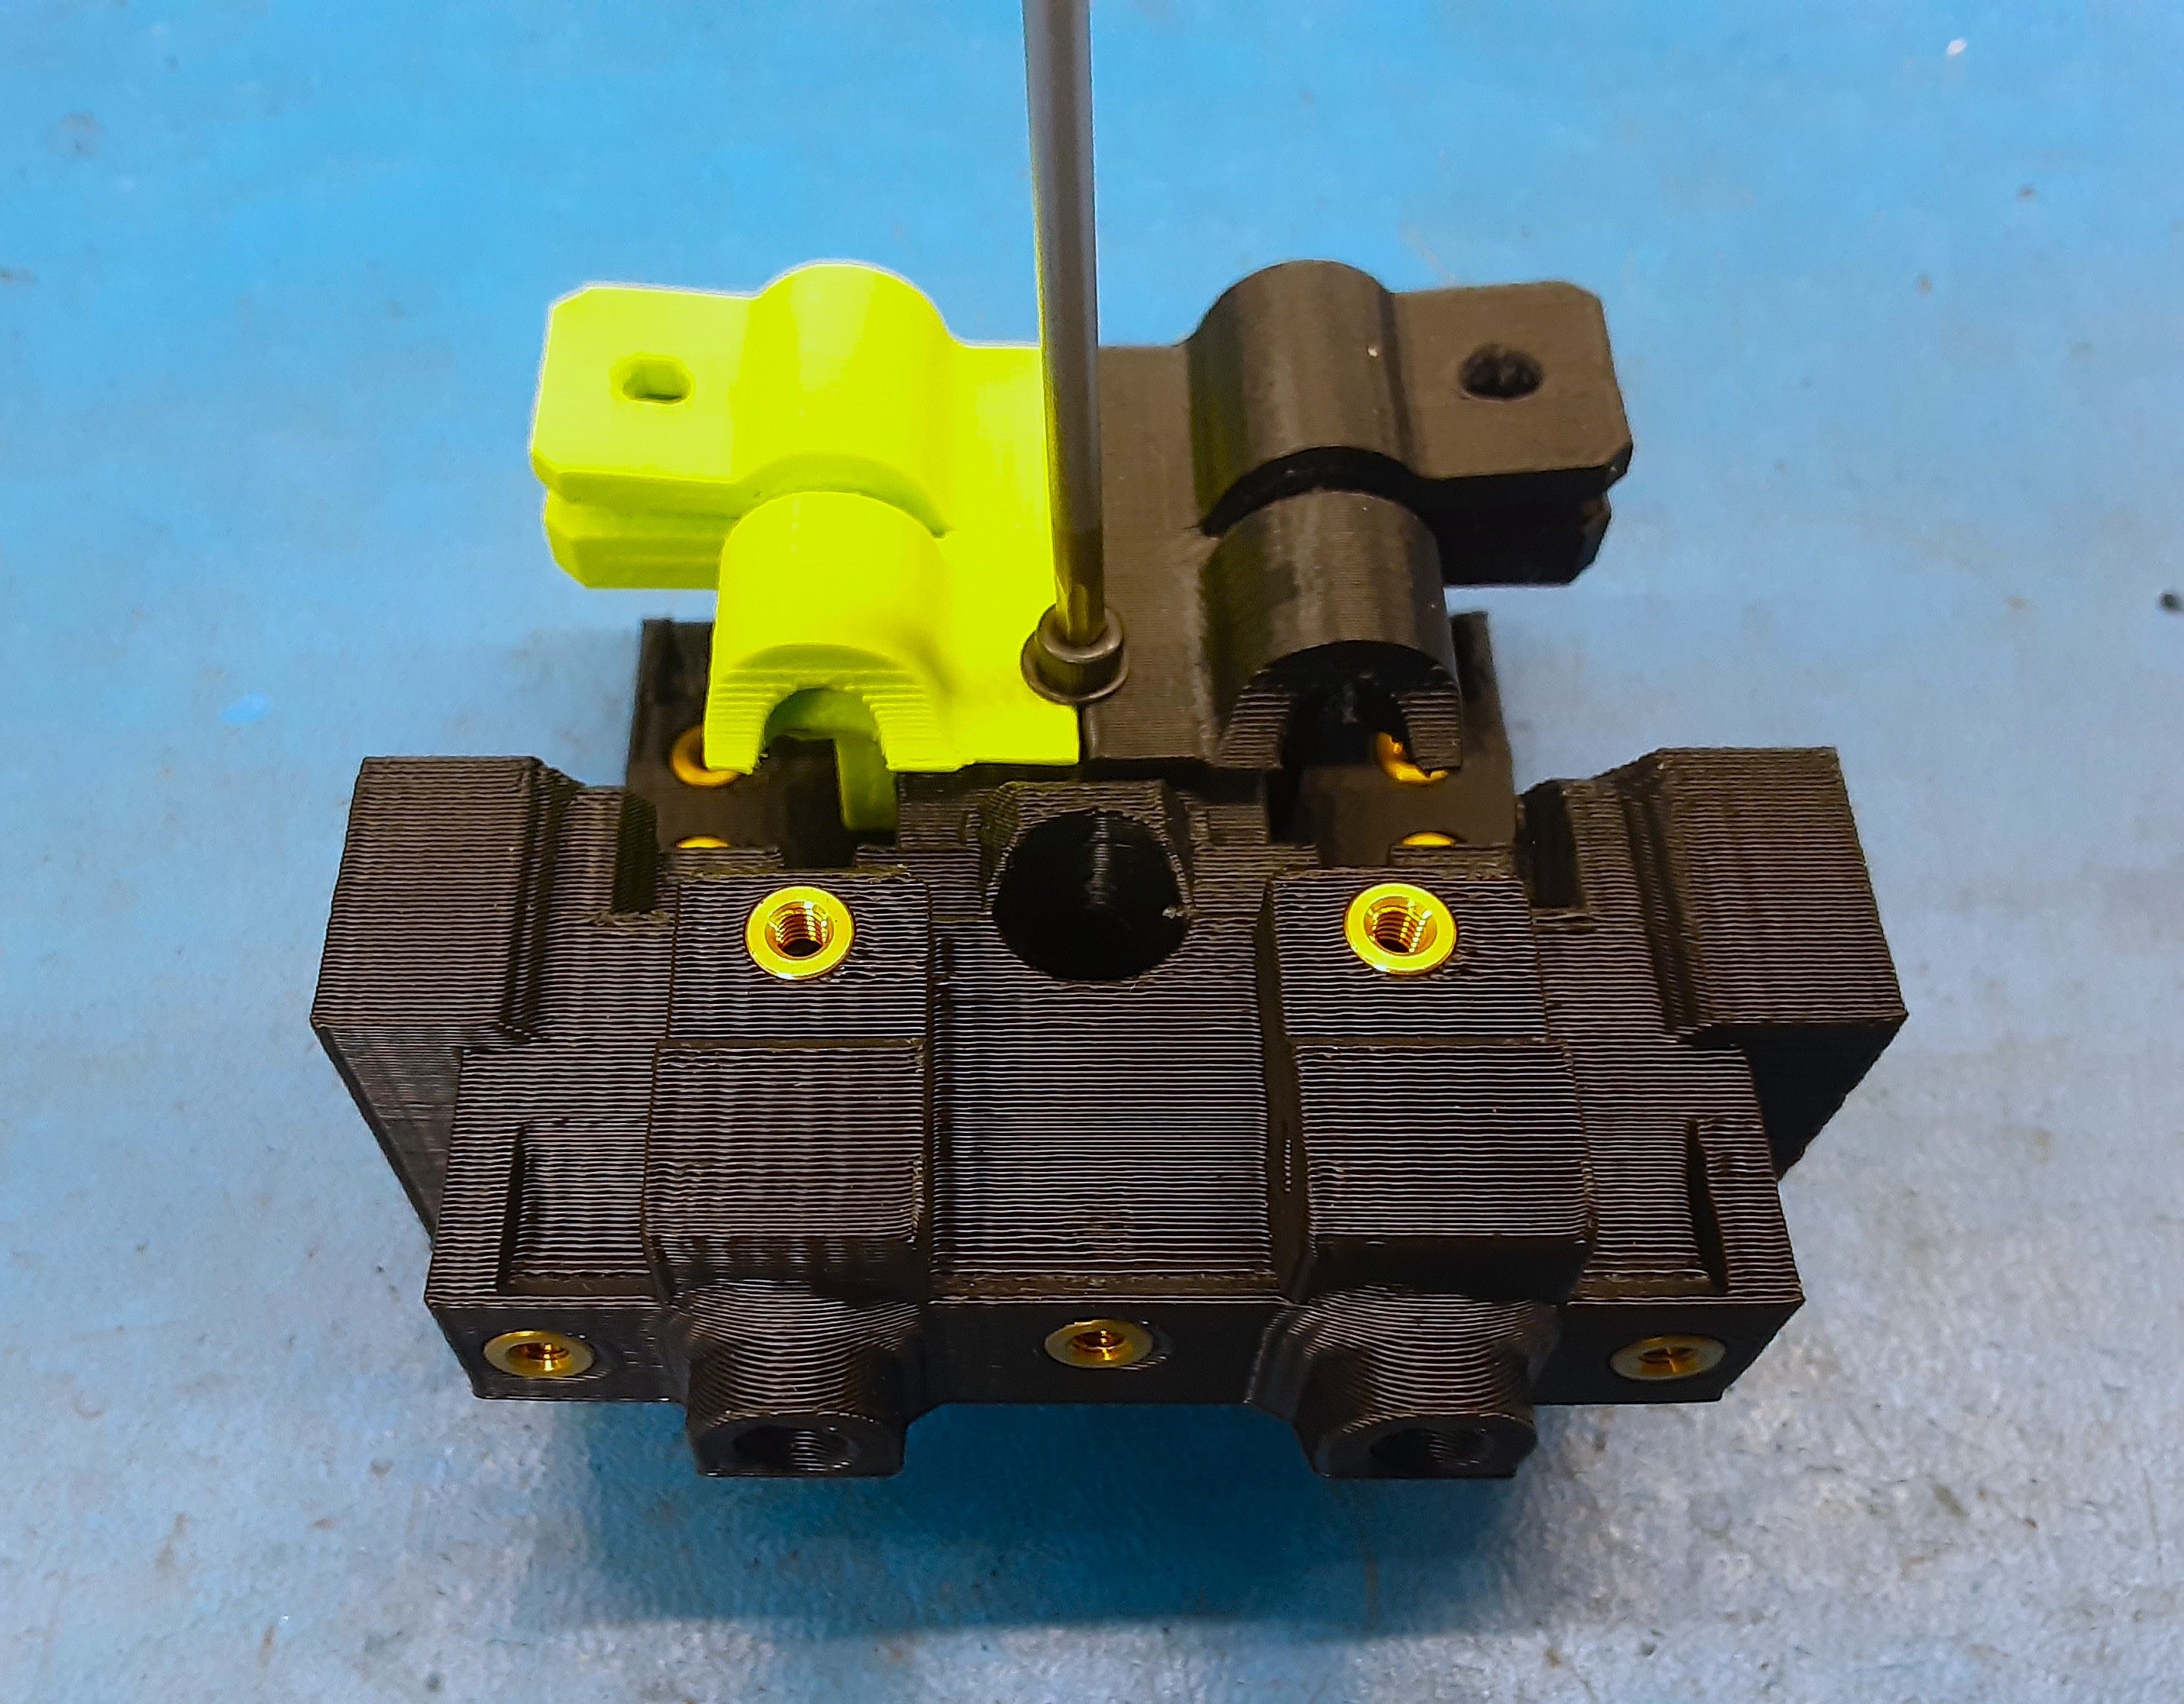
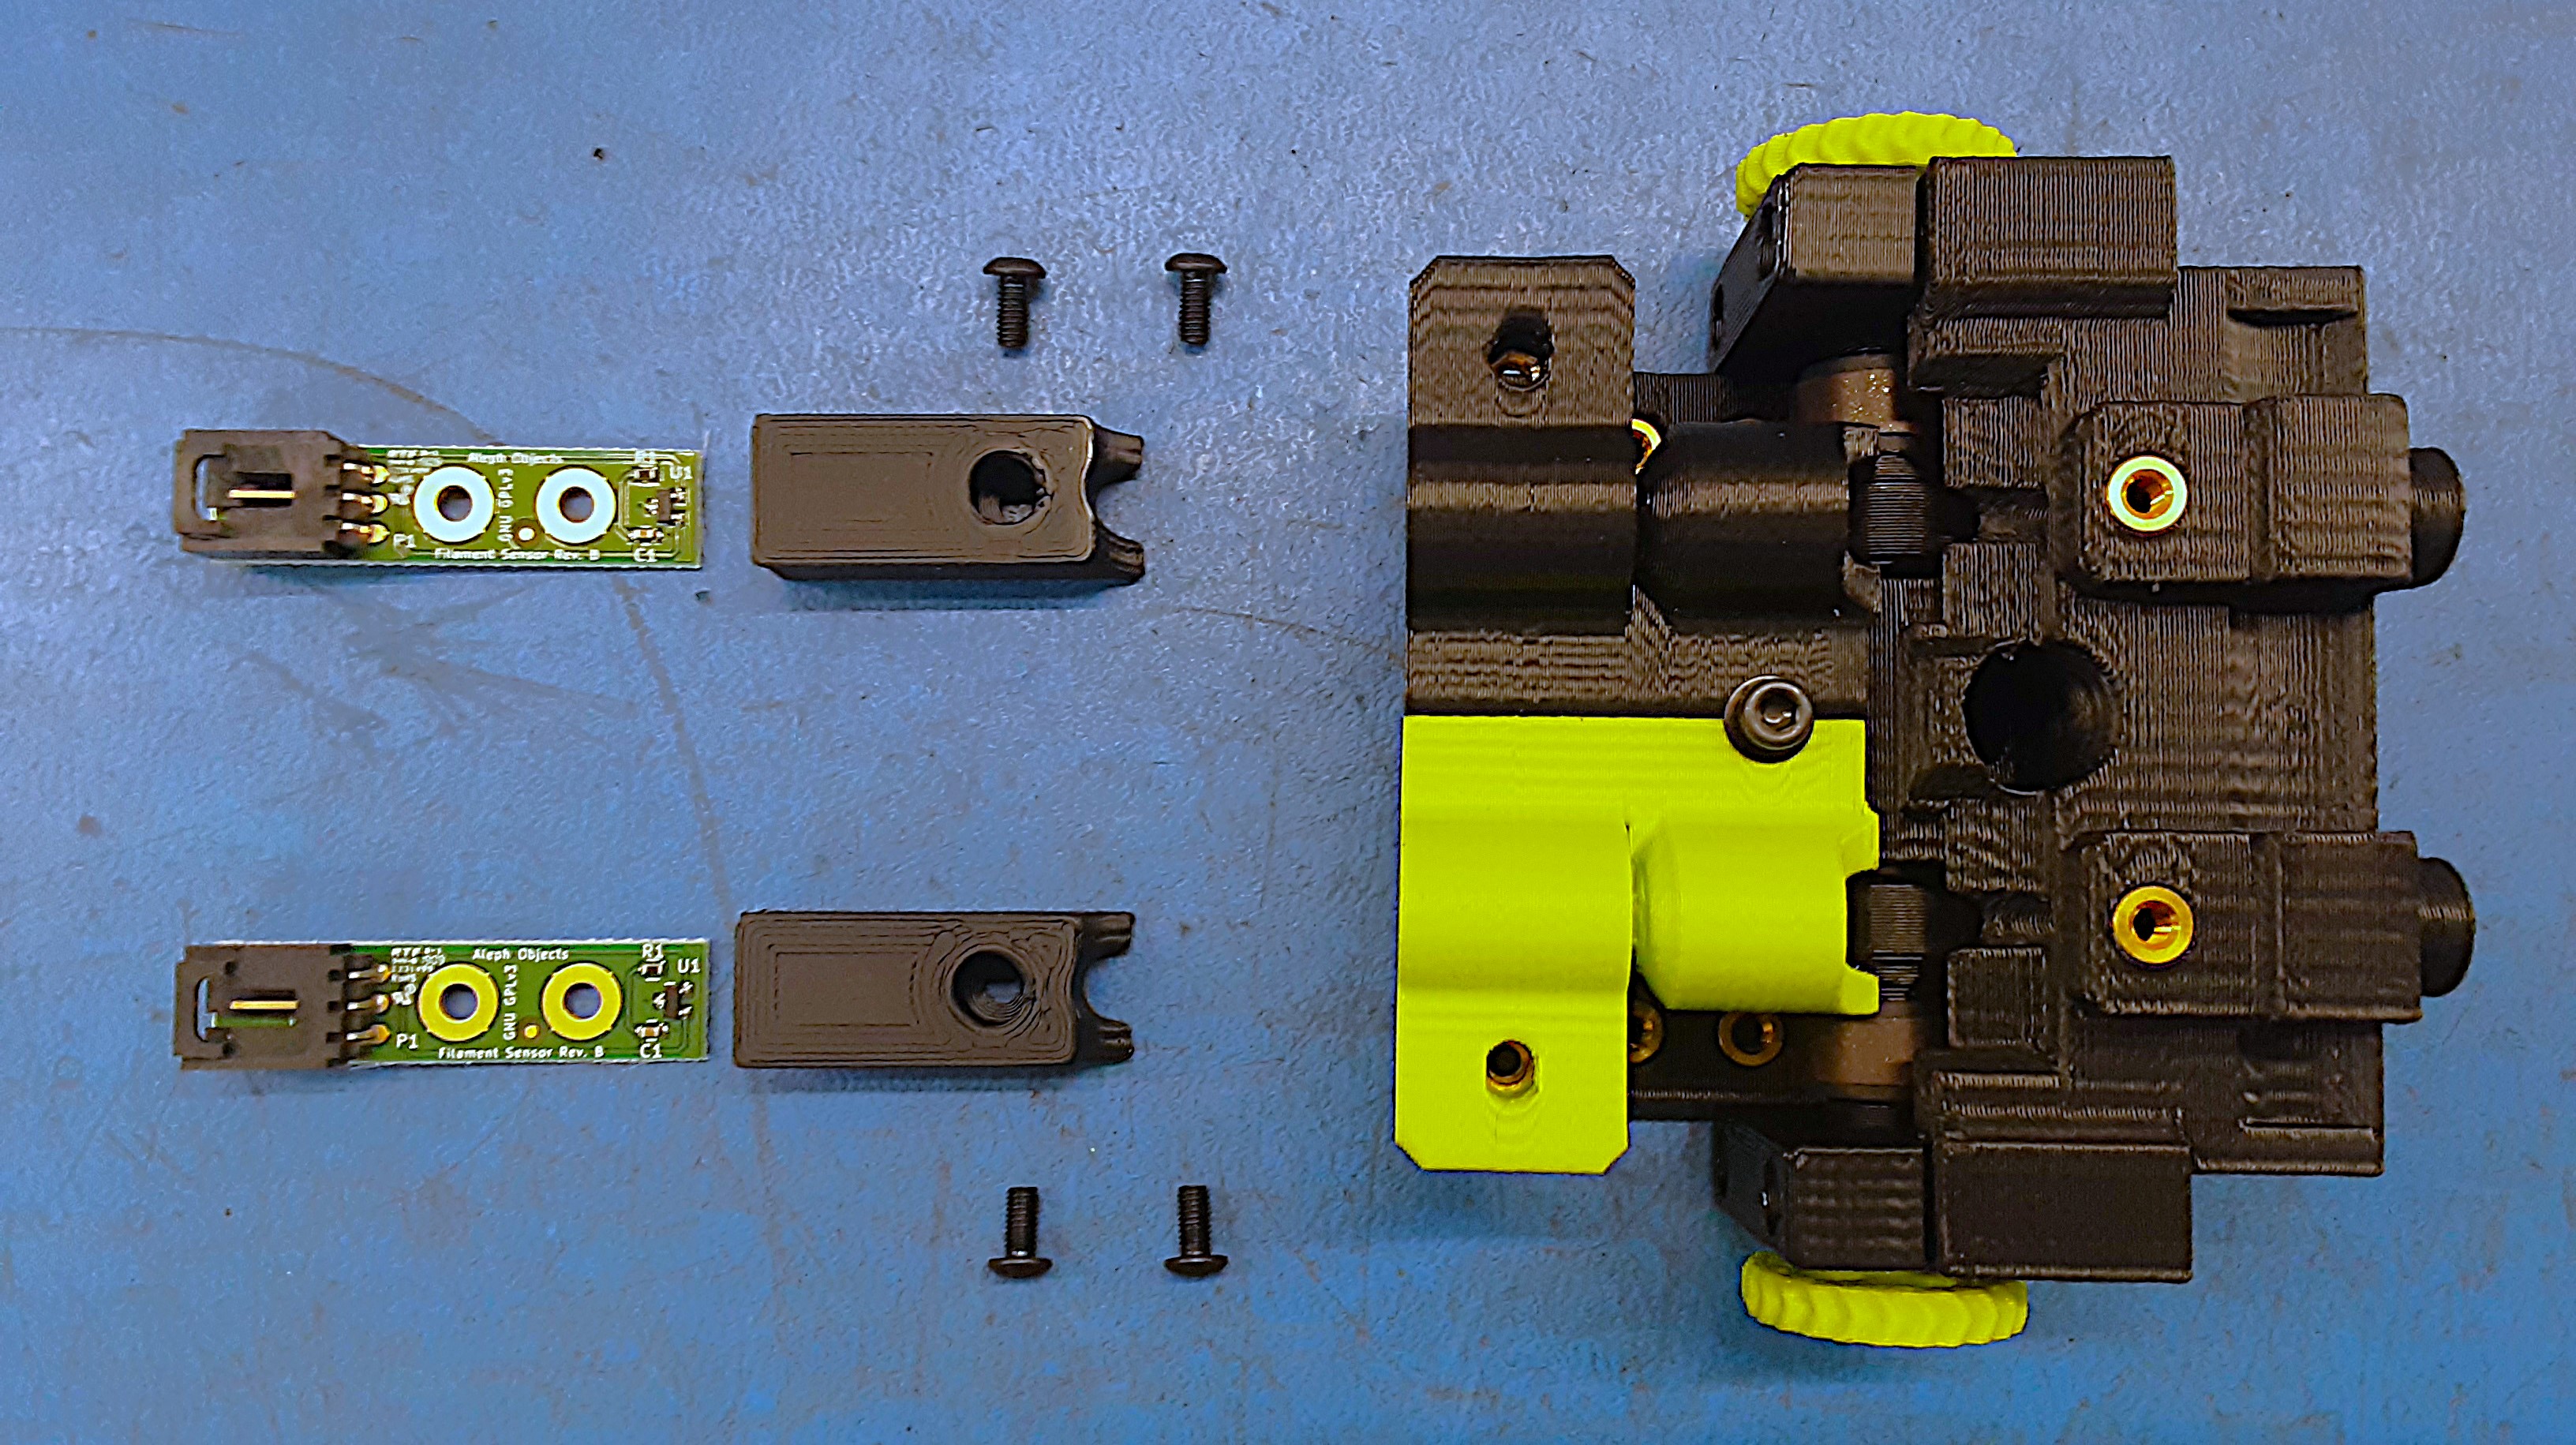
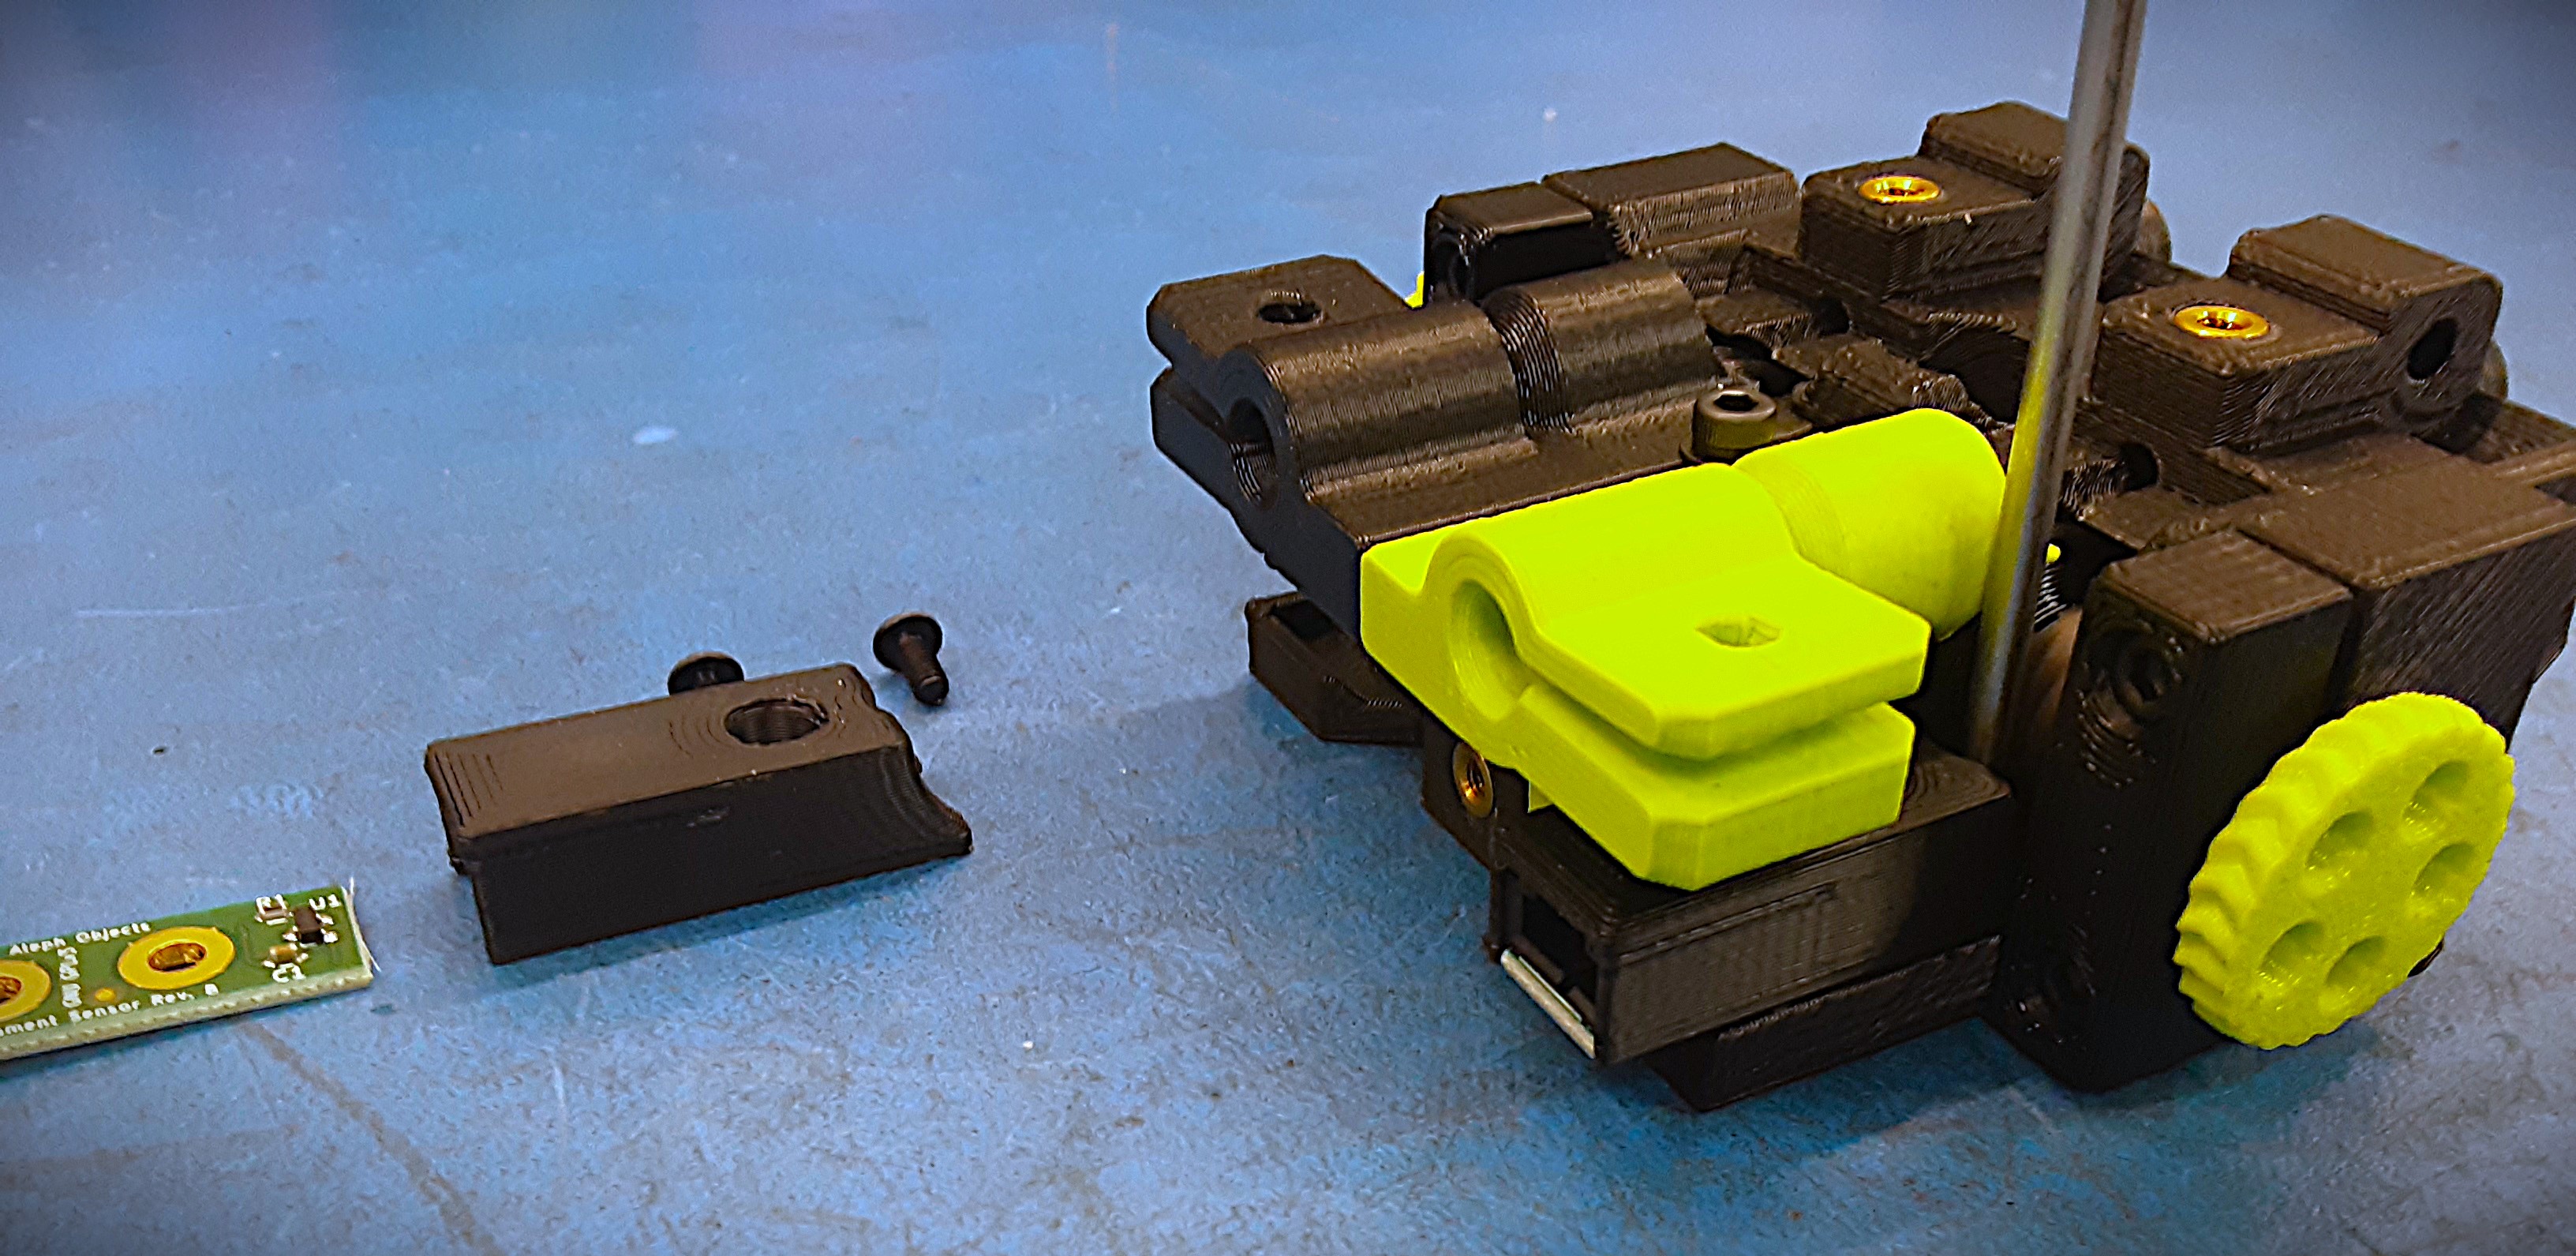
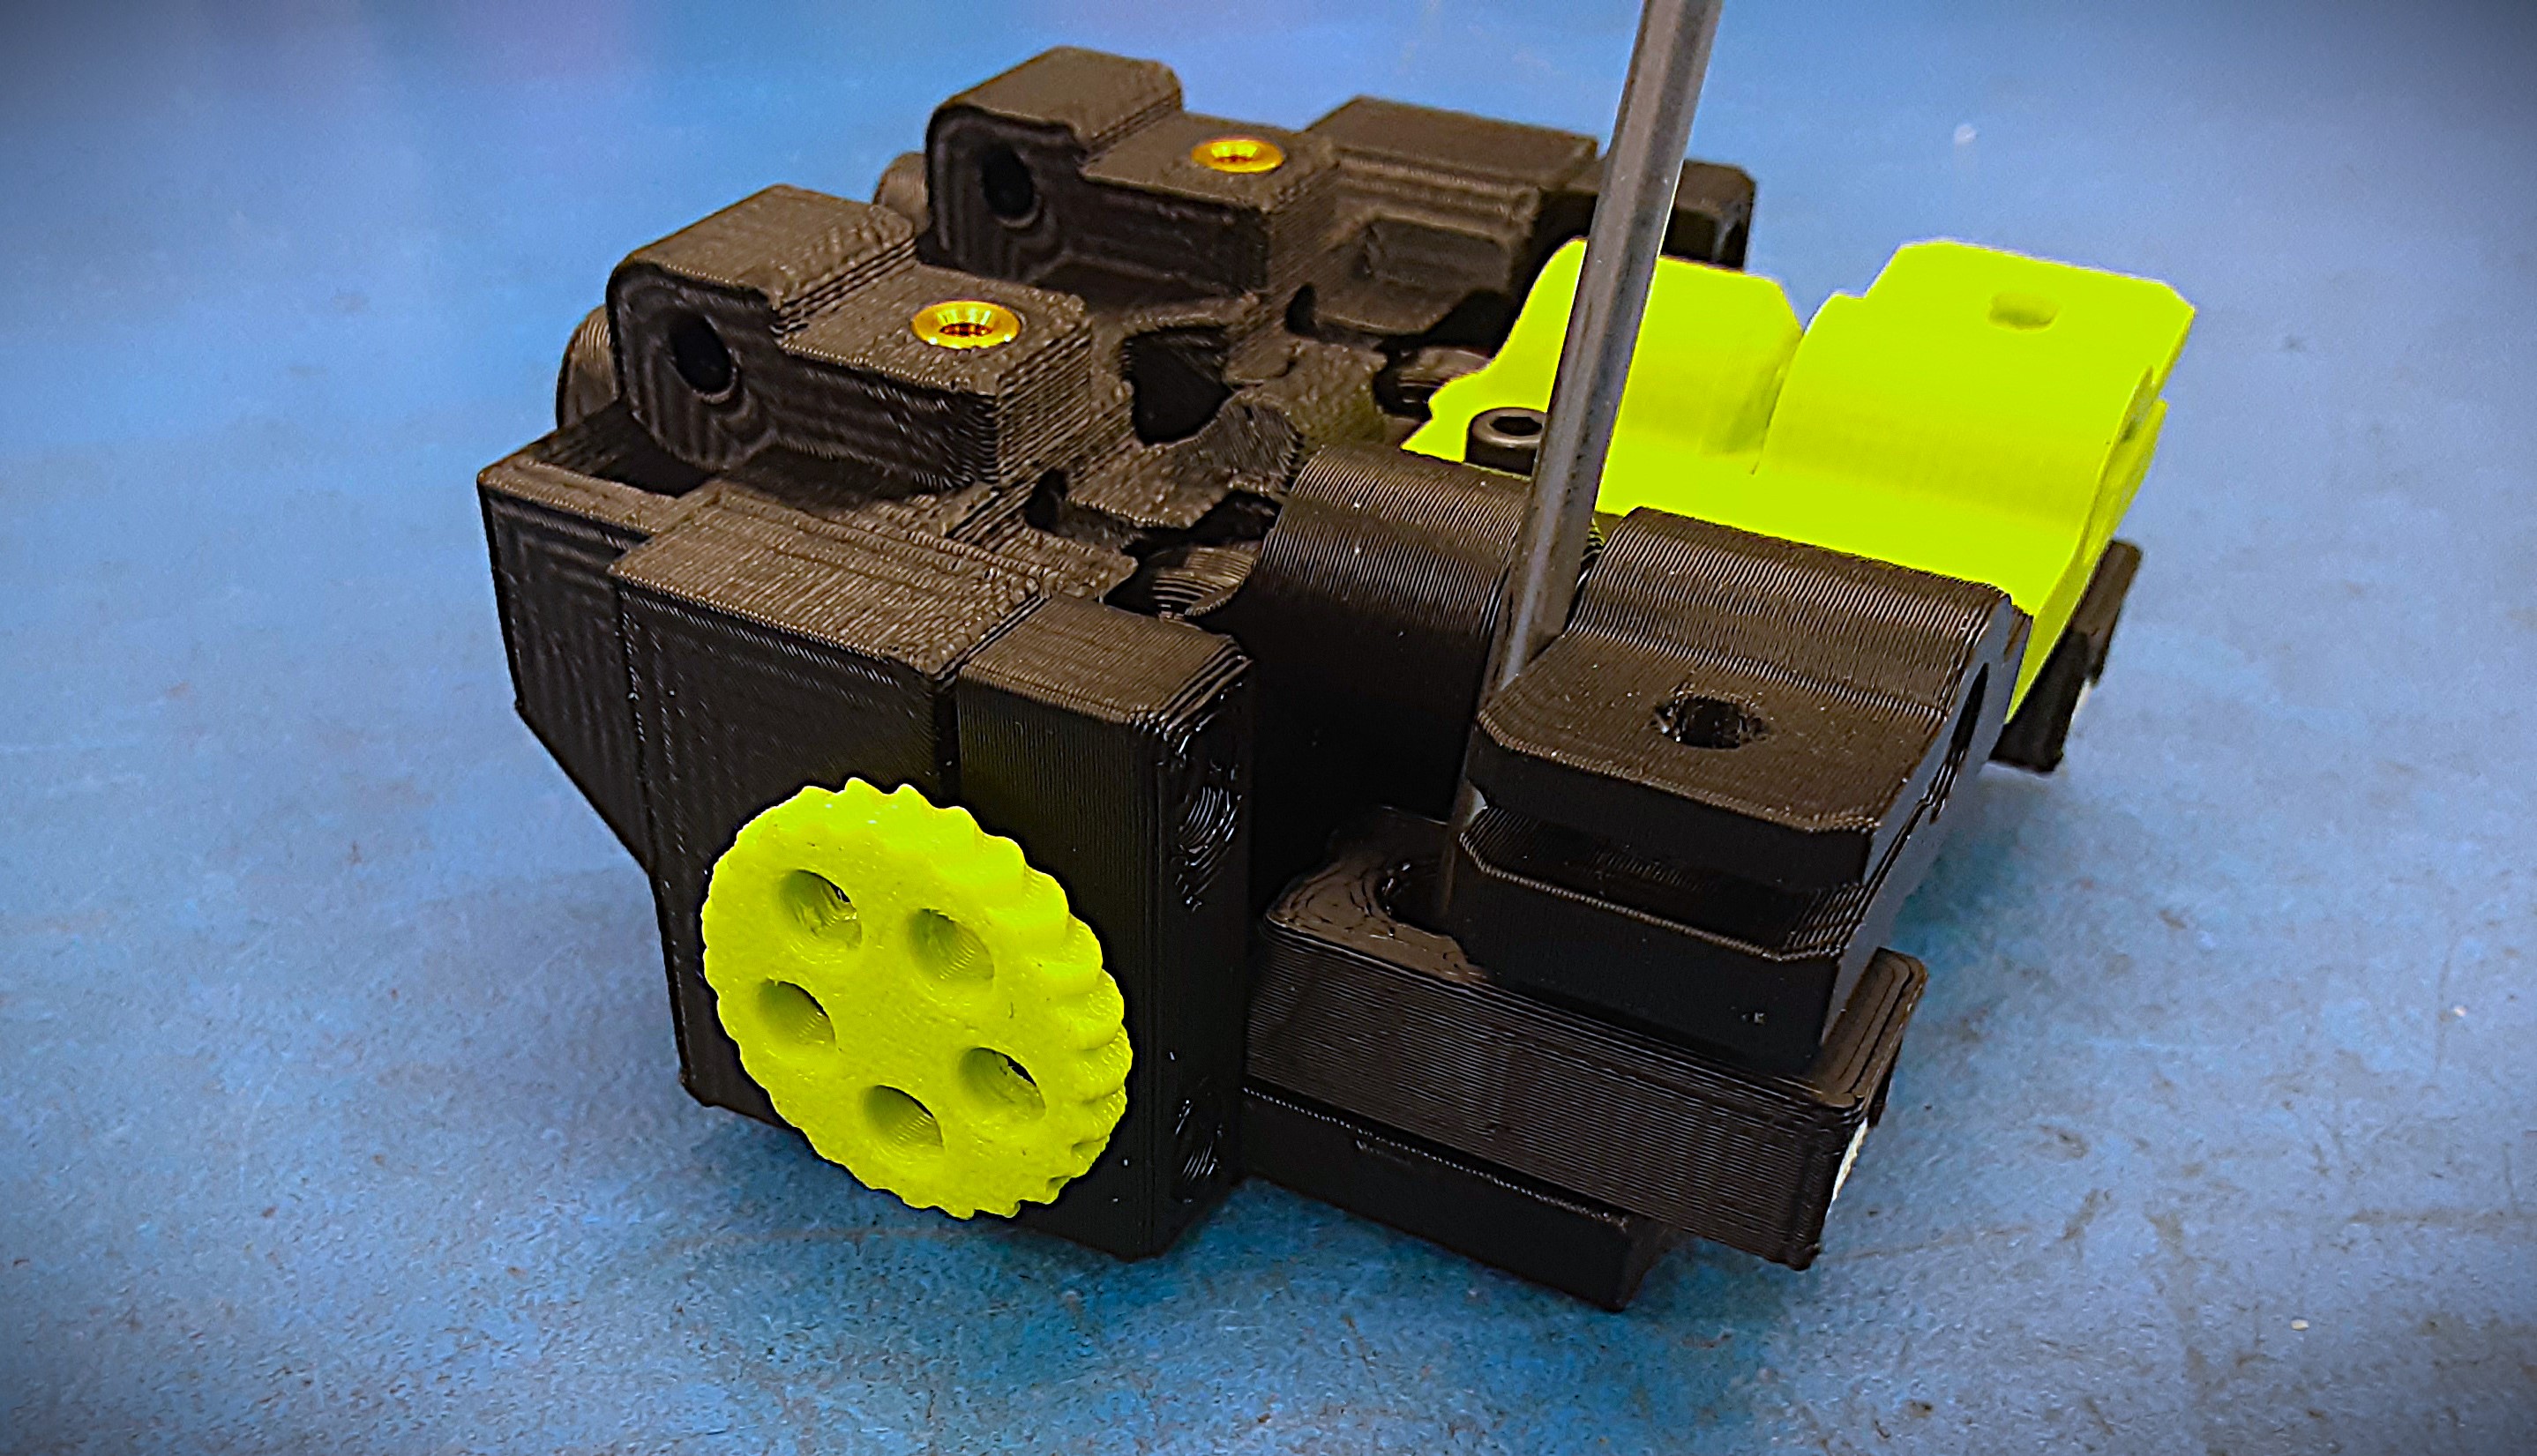
3I) Grab 2x PP-GP0763, 2x PC-BD0109, and 4x HD-BT0140.
3J) Place the PP-GP0763 on PC-BD0109 over the connector so the hole in the cover lines up with the hole closest to the connector on the board. Insert the cover and board in between the green tower and jet pack base, then attach them to the base using 2x HD-BT0140.
3K) Repeat the previous step for the black tower side. Check that the Filament Wheel Bearings still move freely and are not sticking or caught on anything.

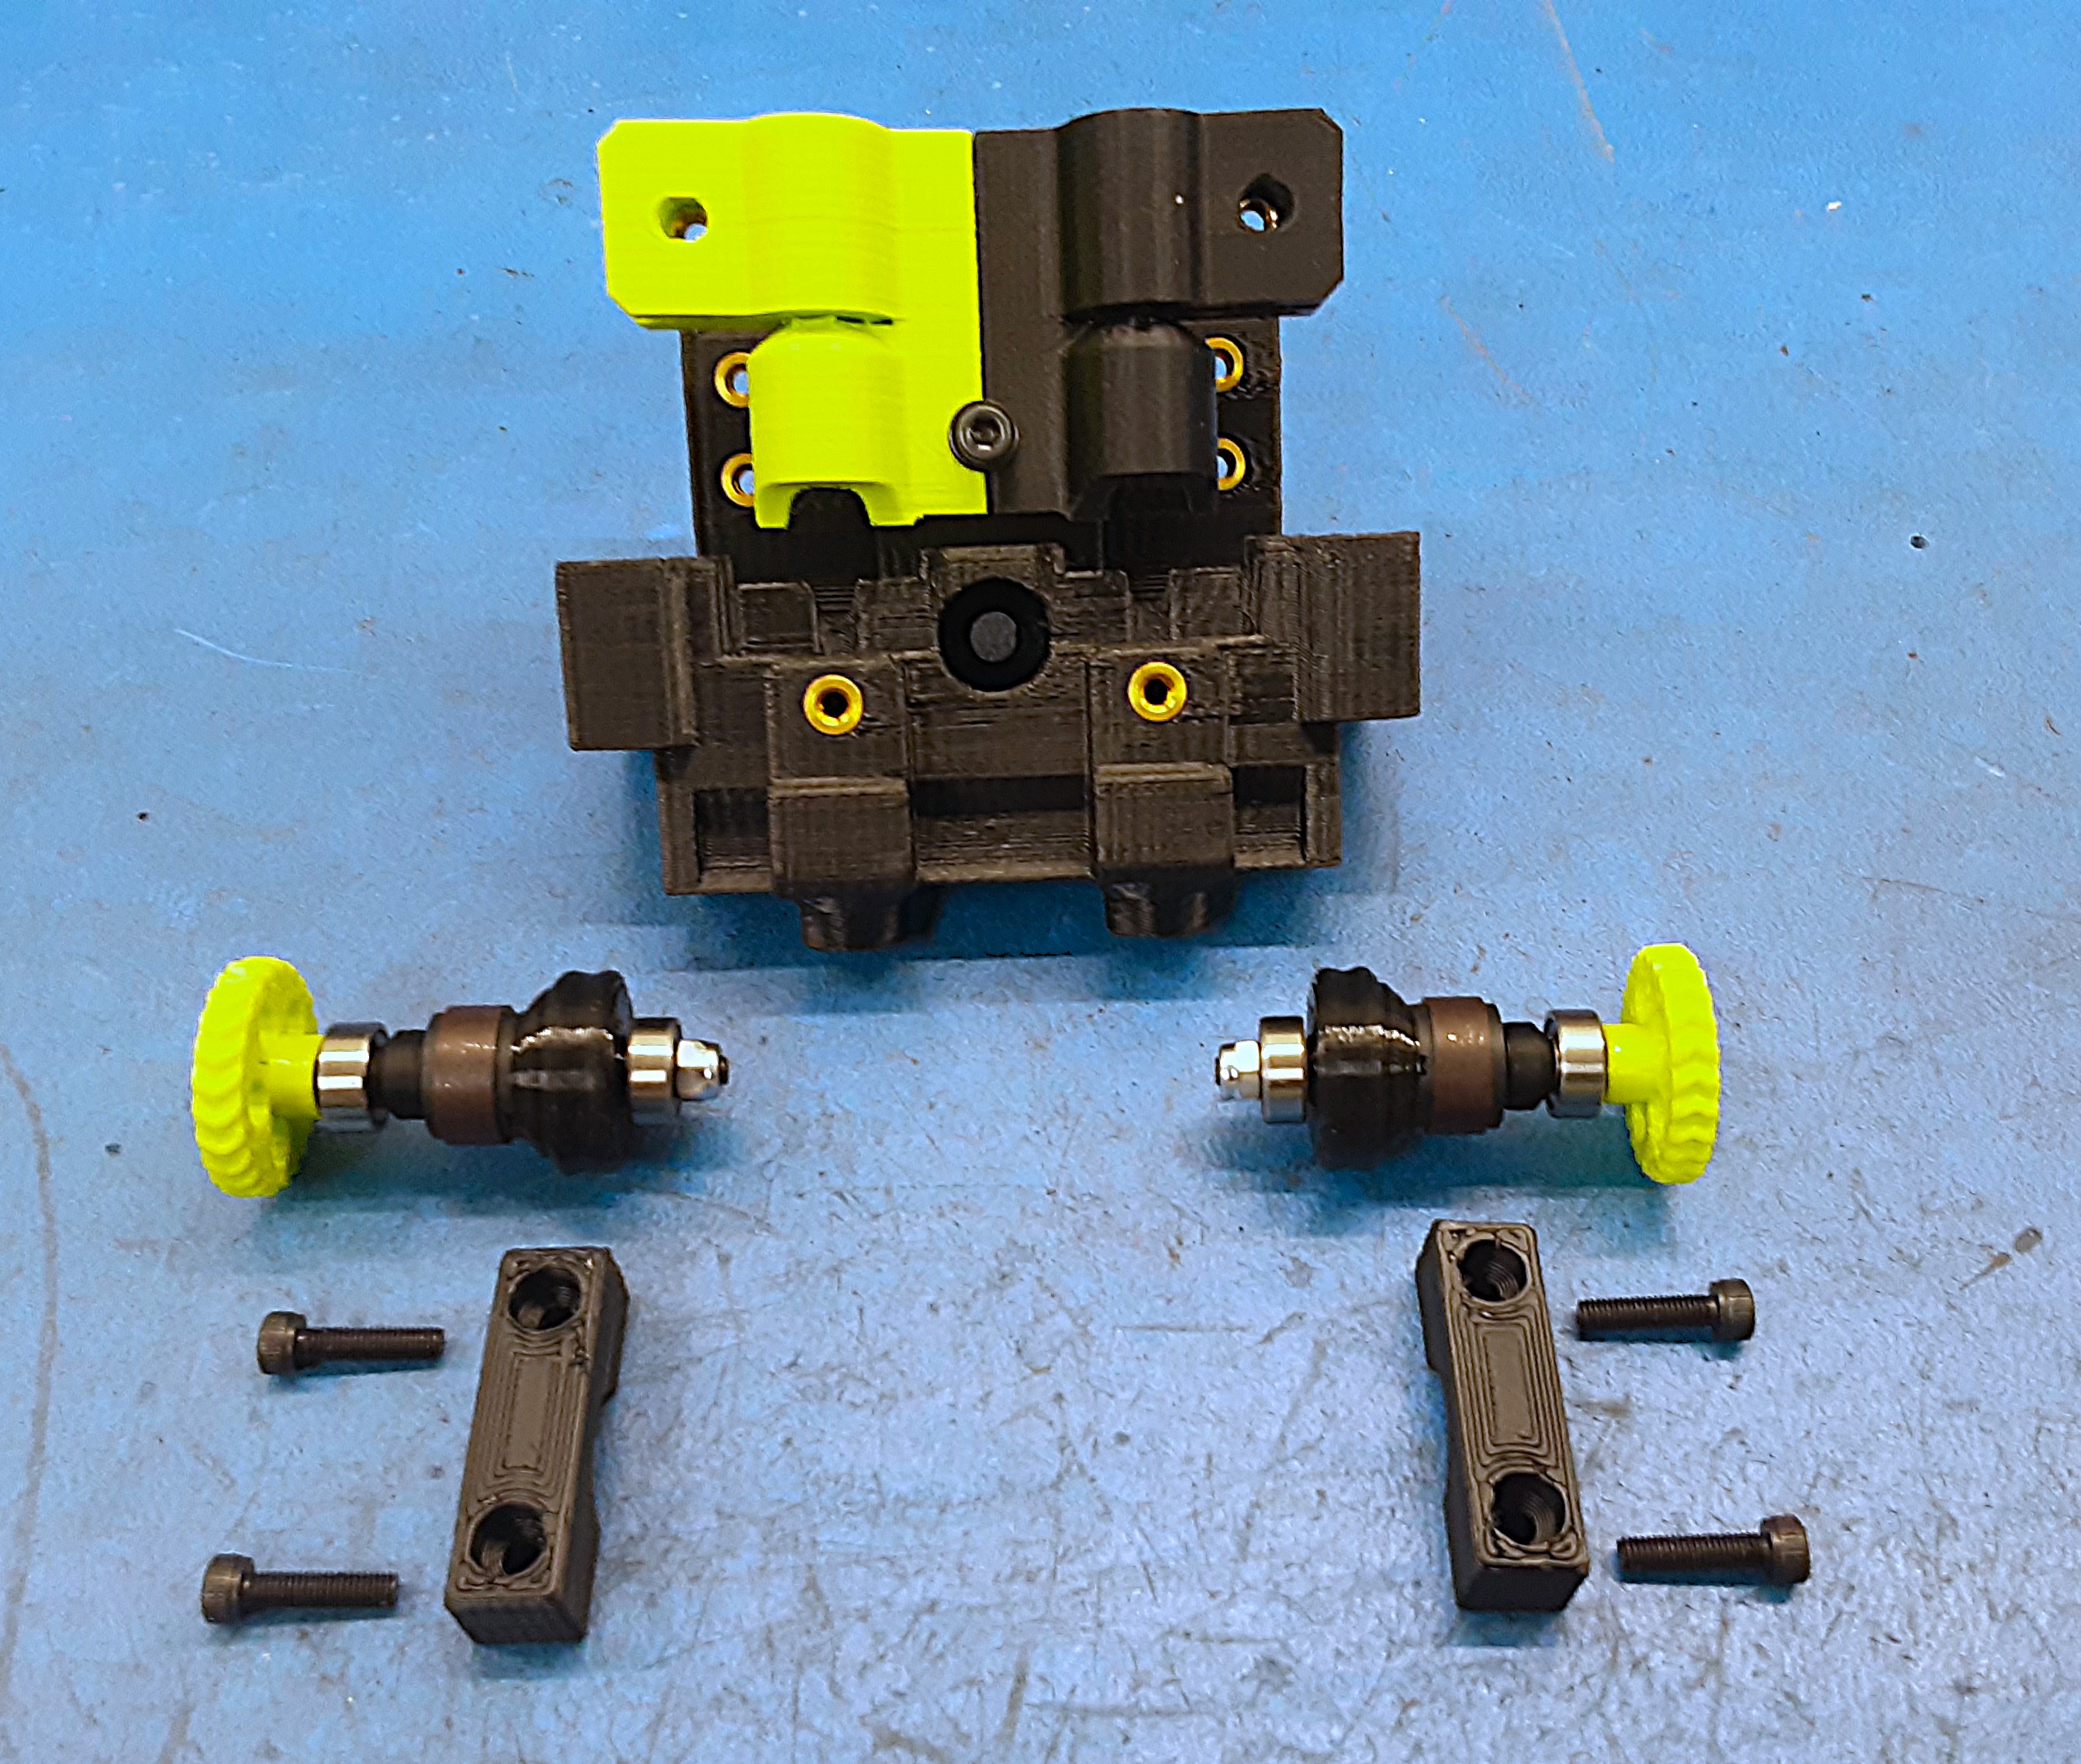
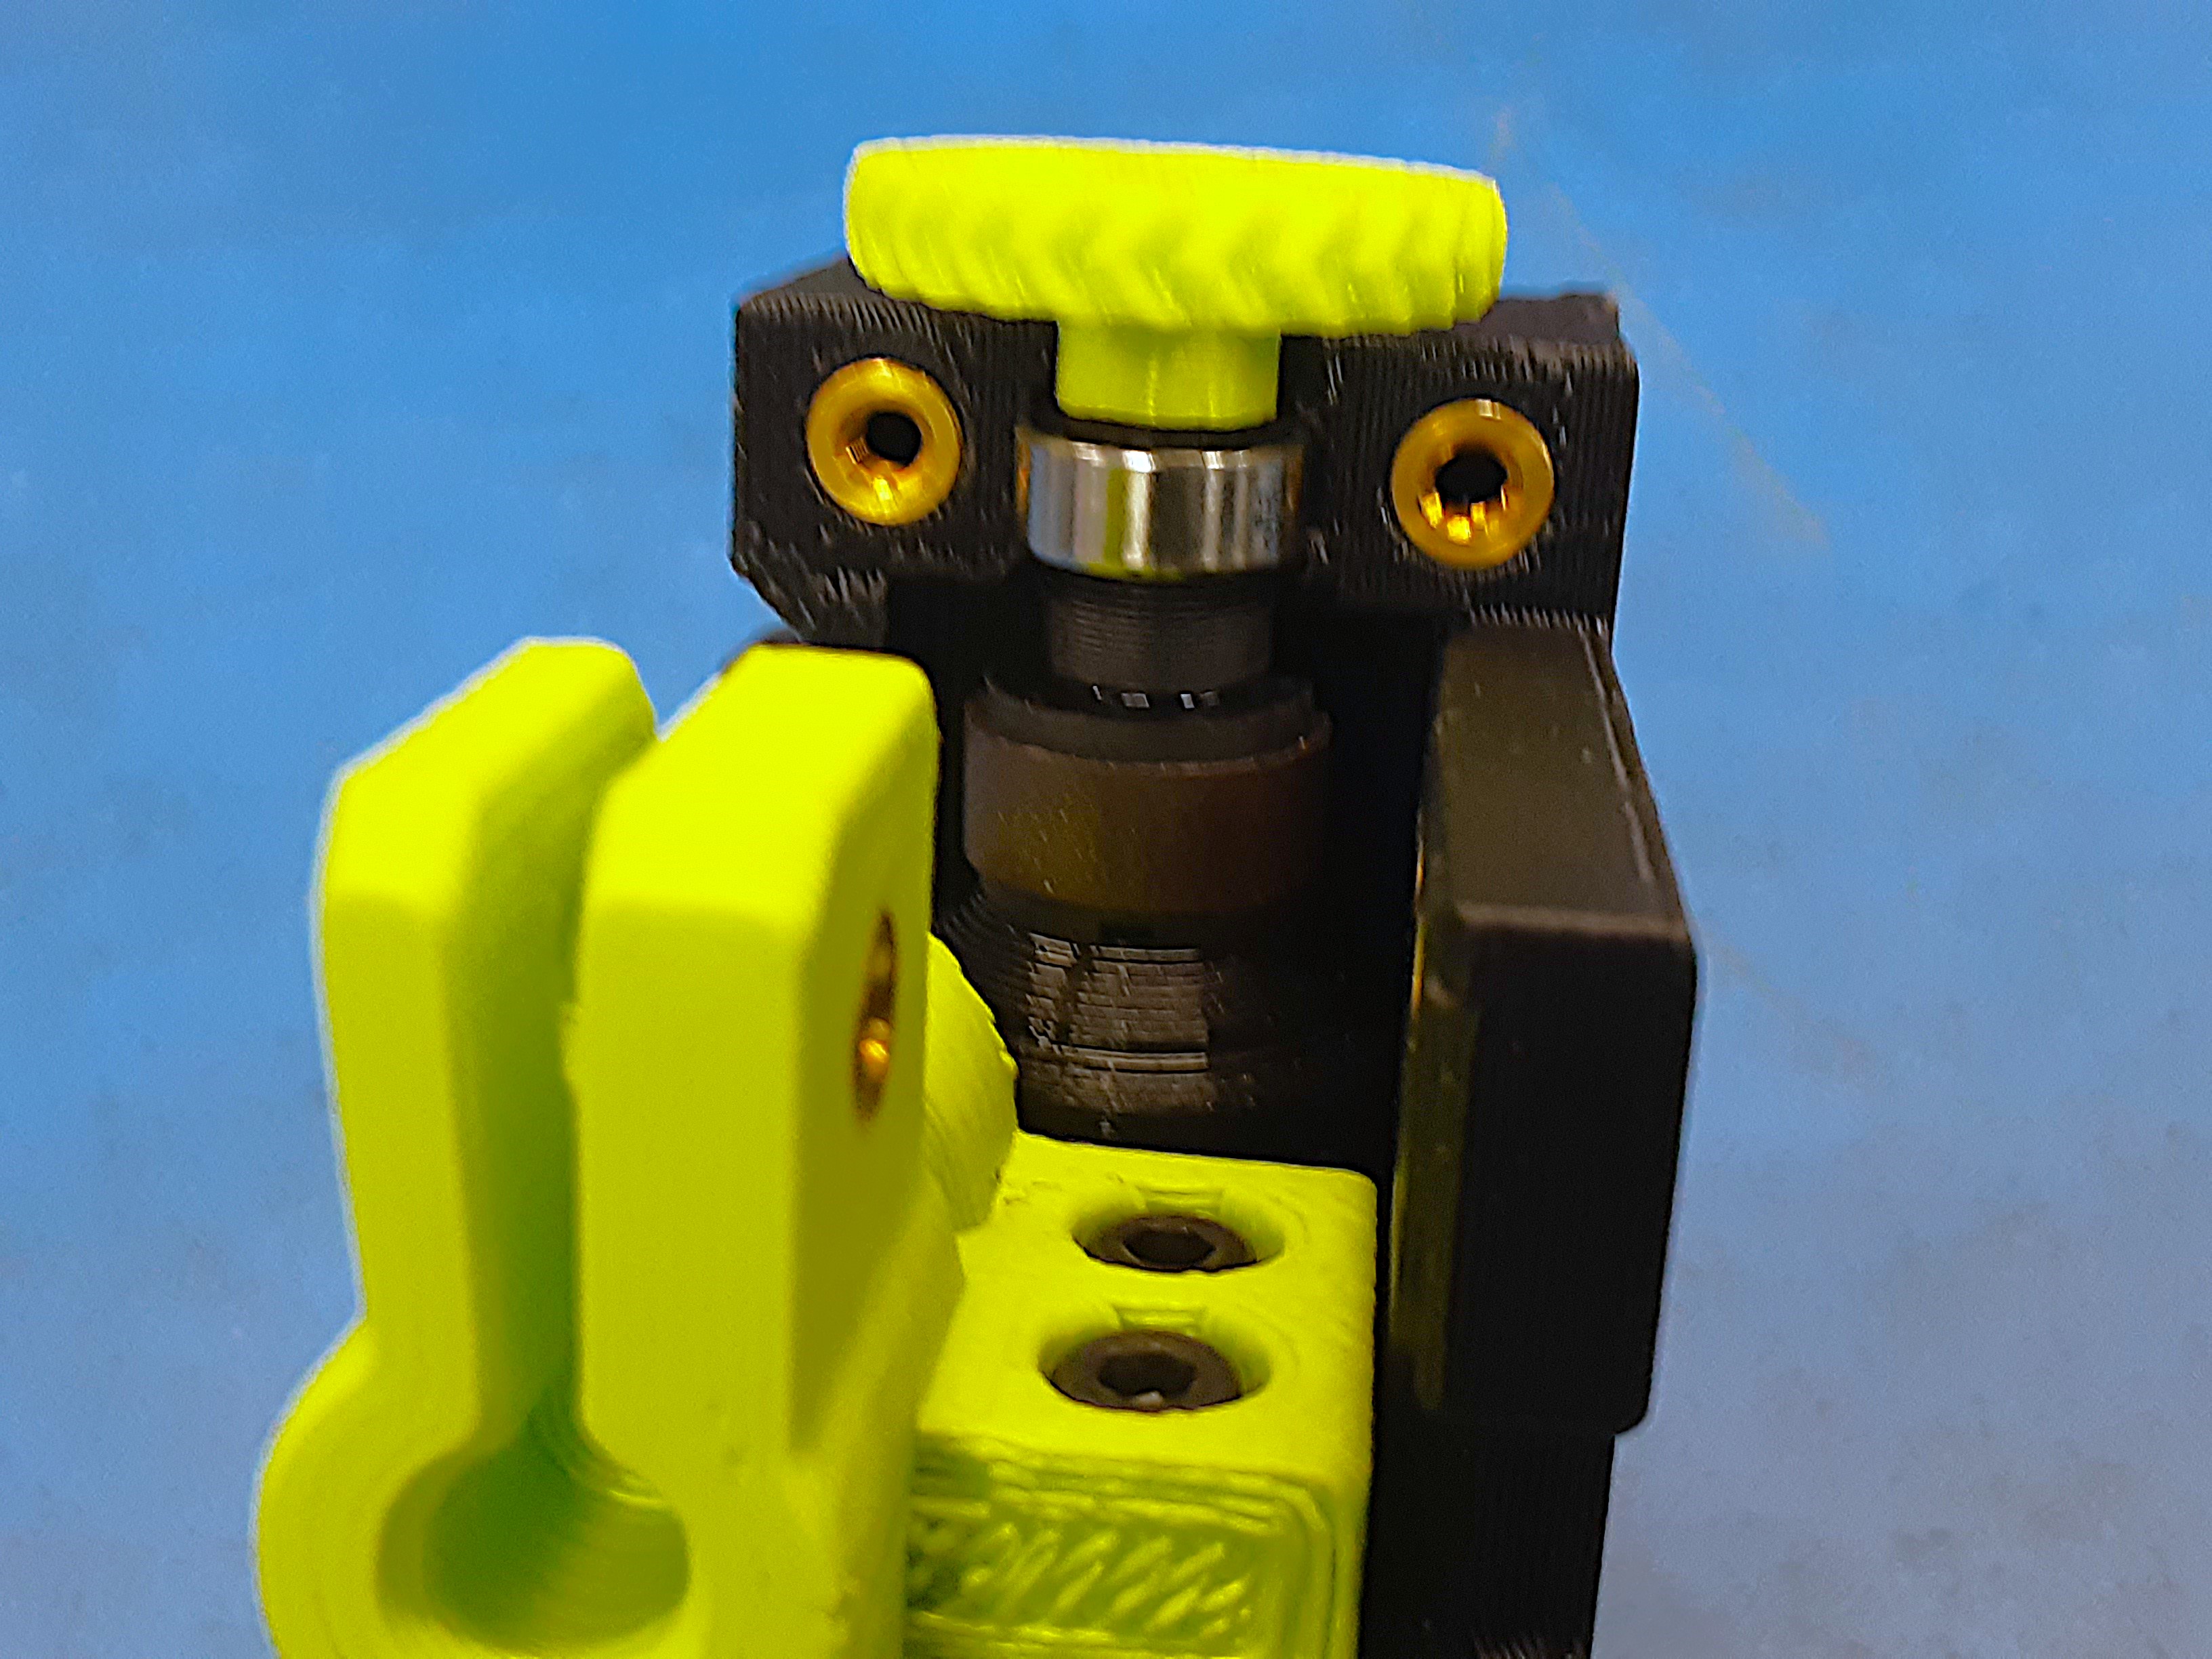

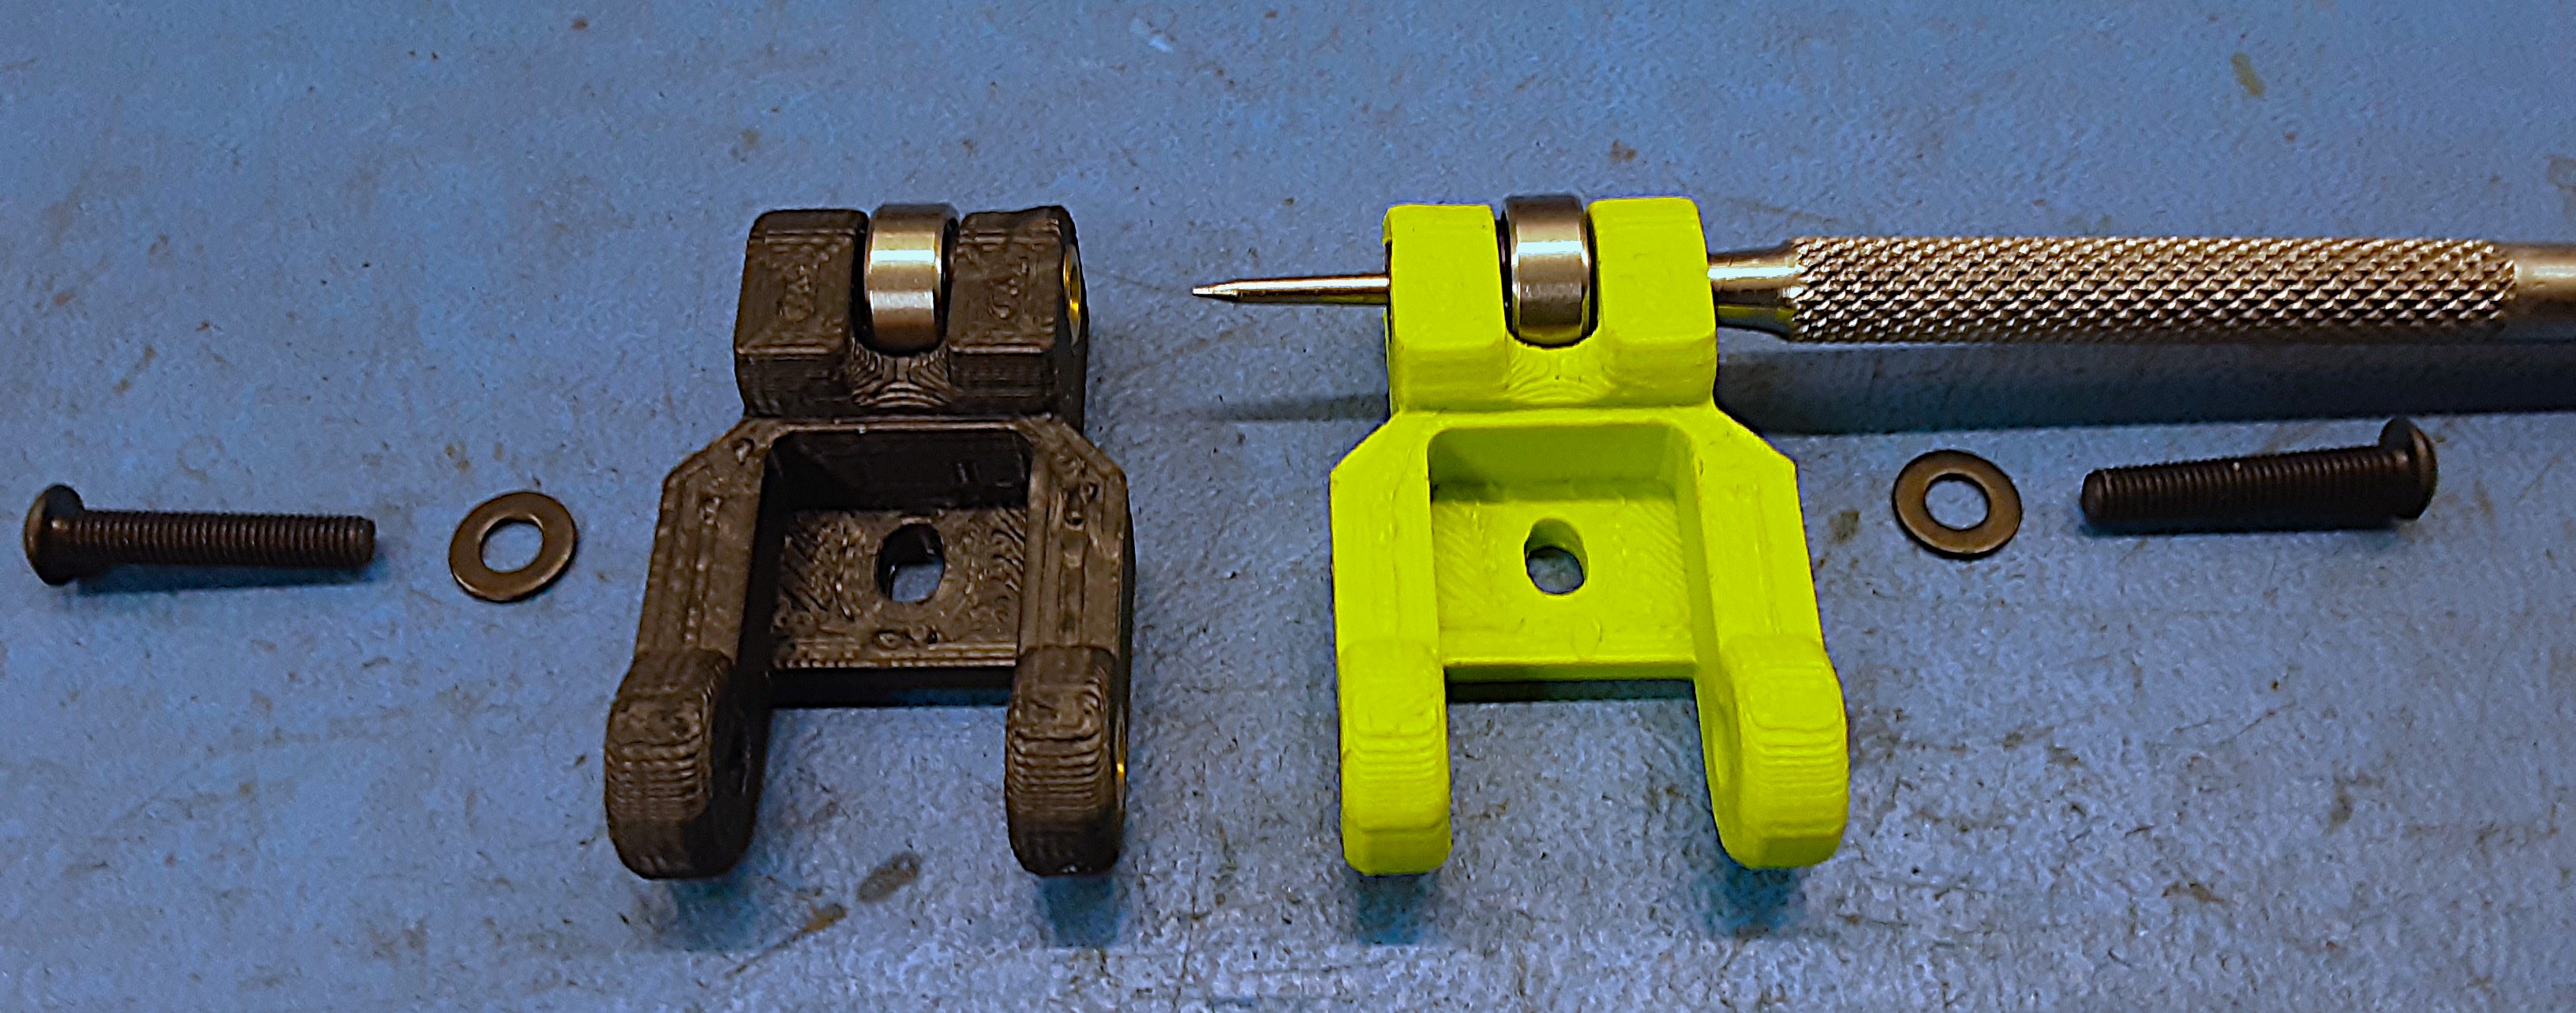
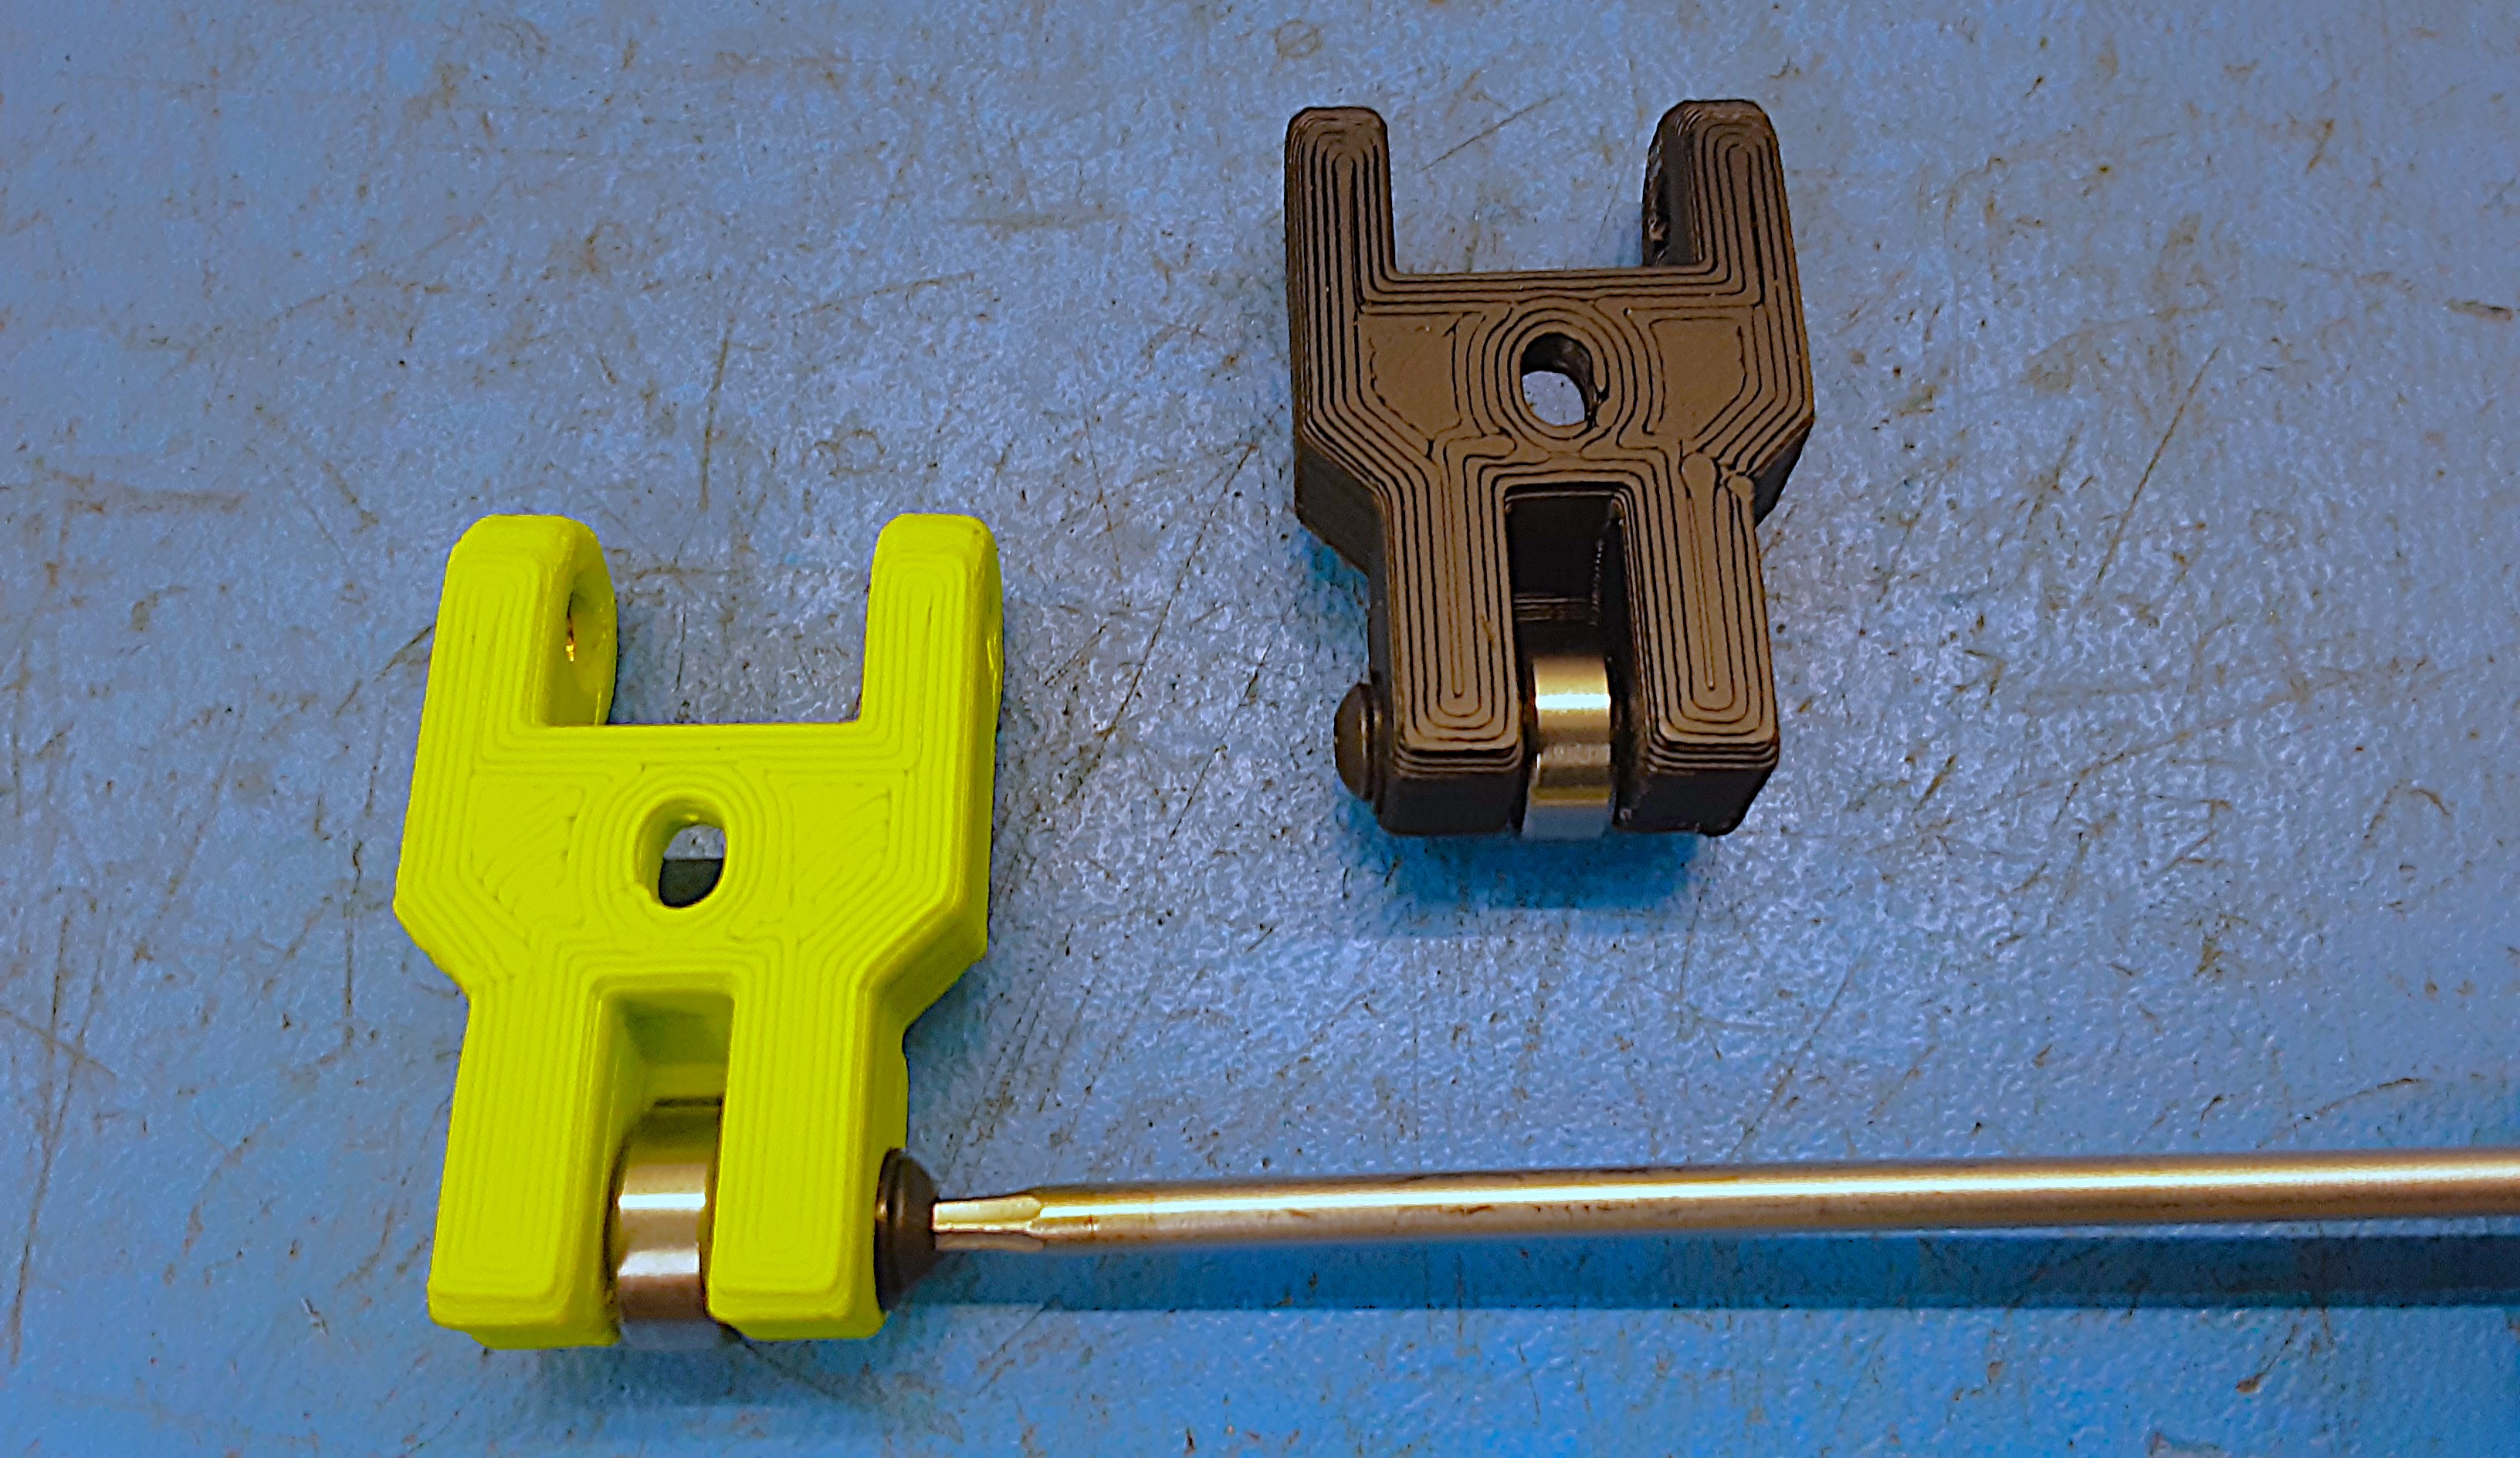
4A) Grab 1x PP-GP0754, 1x PP-GP0755, 2x HD-BT0256, 2x HD-MS0470, and 6x HD-WA0038.
4B) Using a poker tool line up the bearings with a washer on both sides of the bearings as shown. Make sure that the flat sides of the washers are facing the bearing.
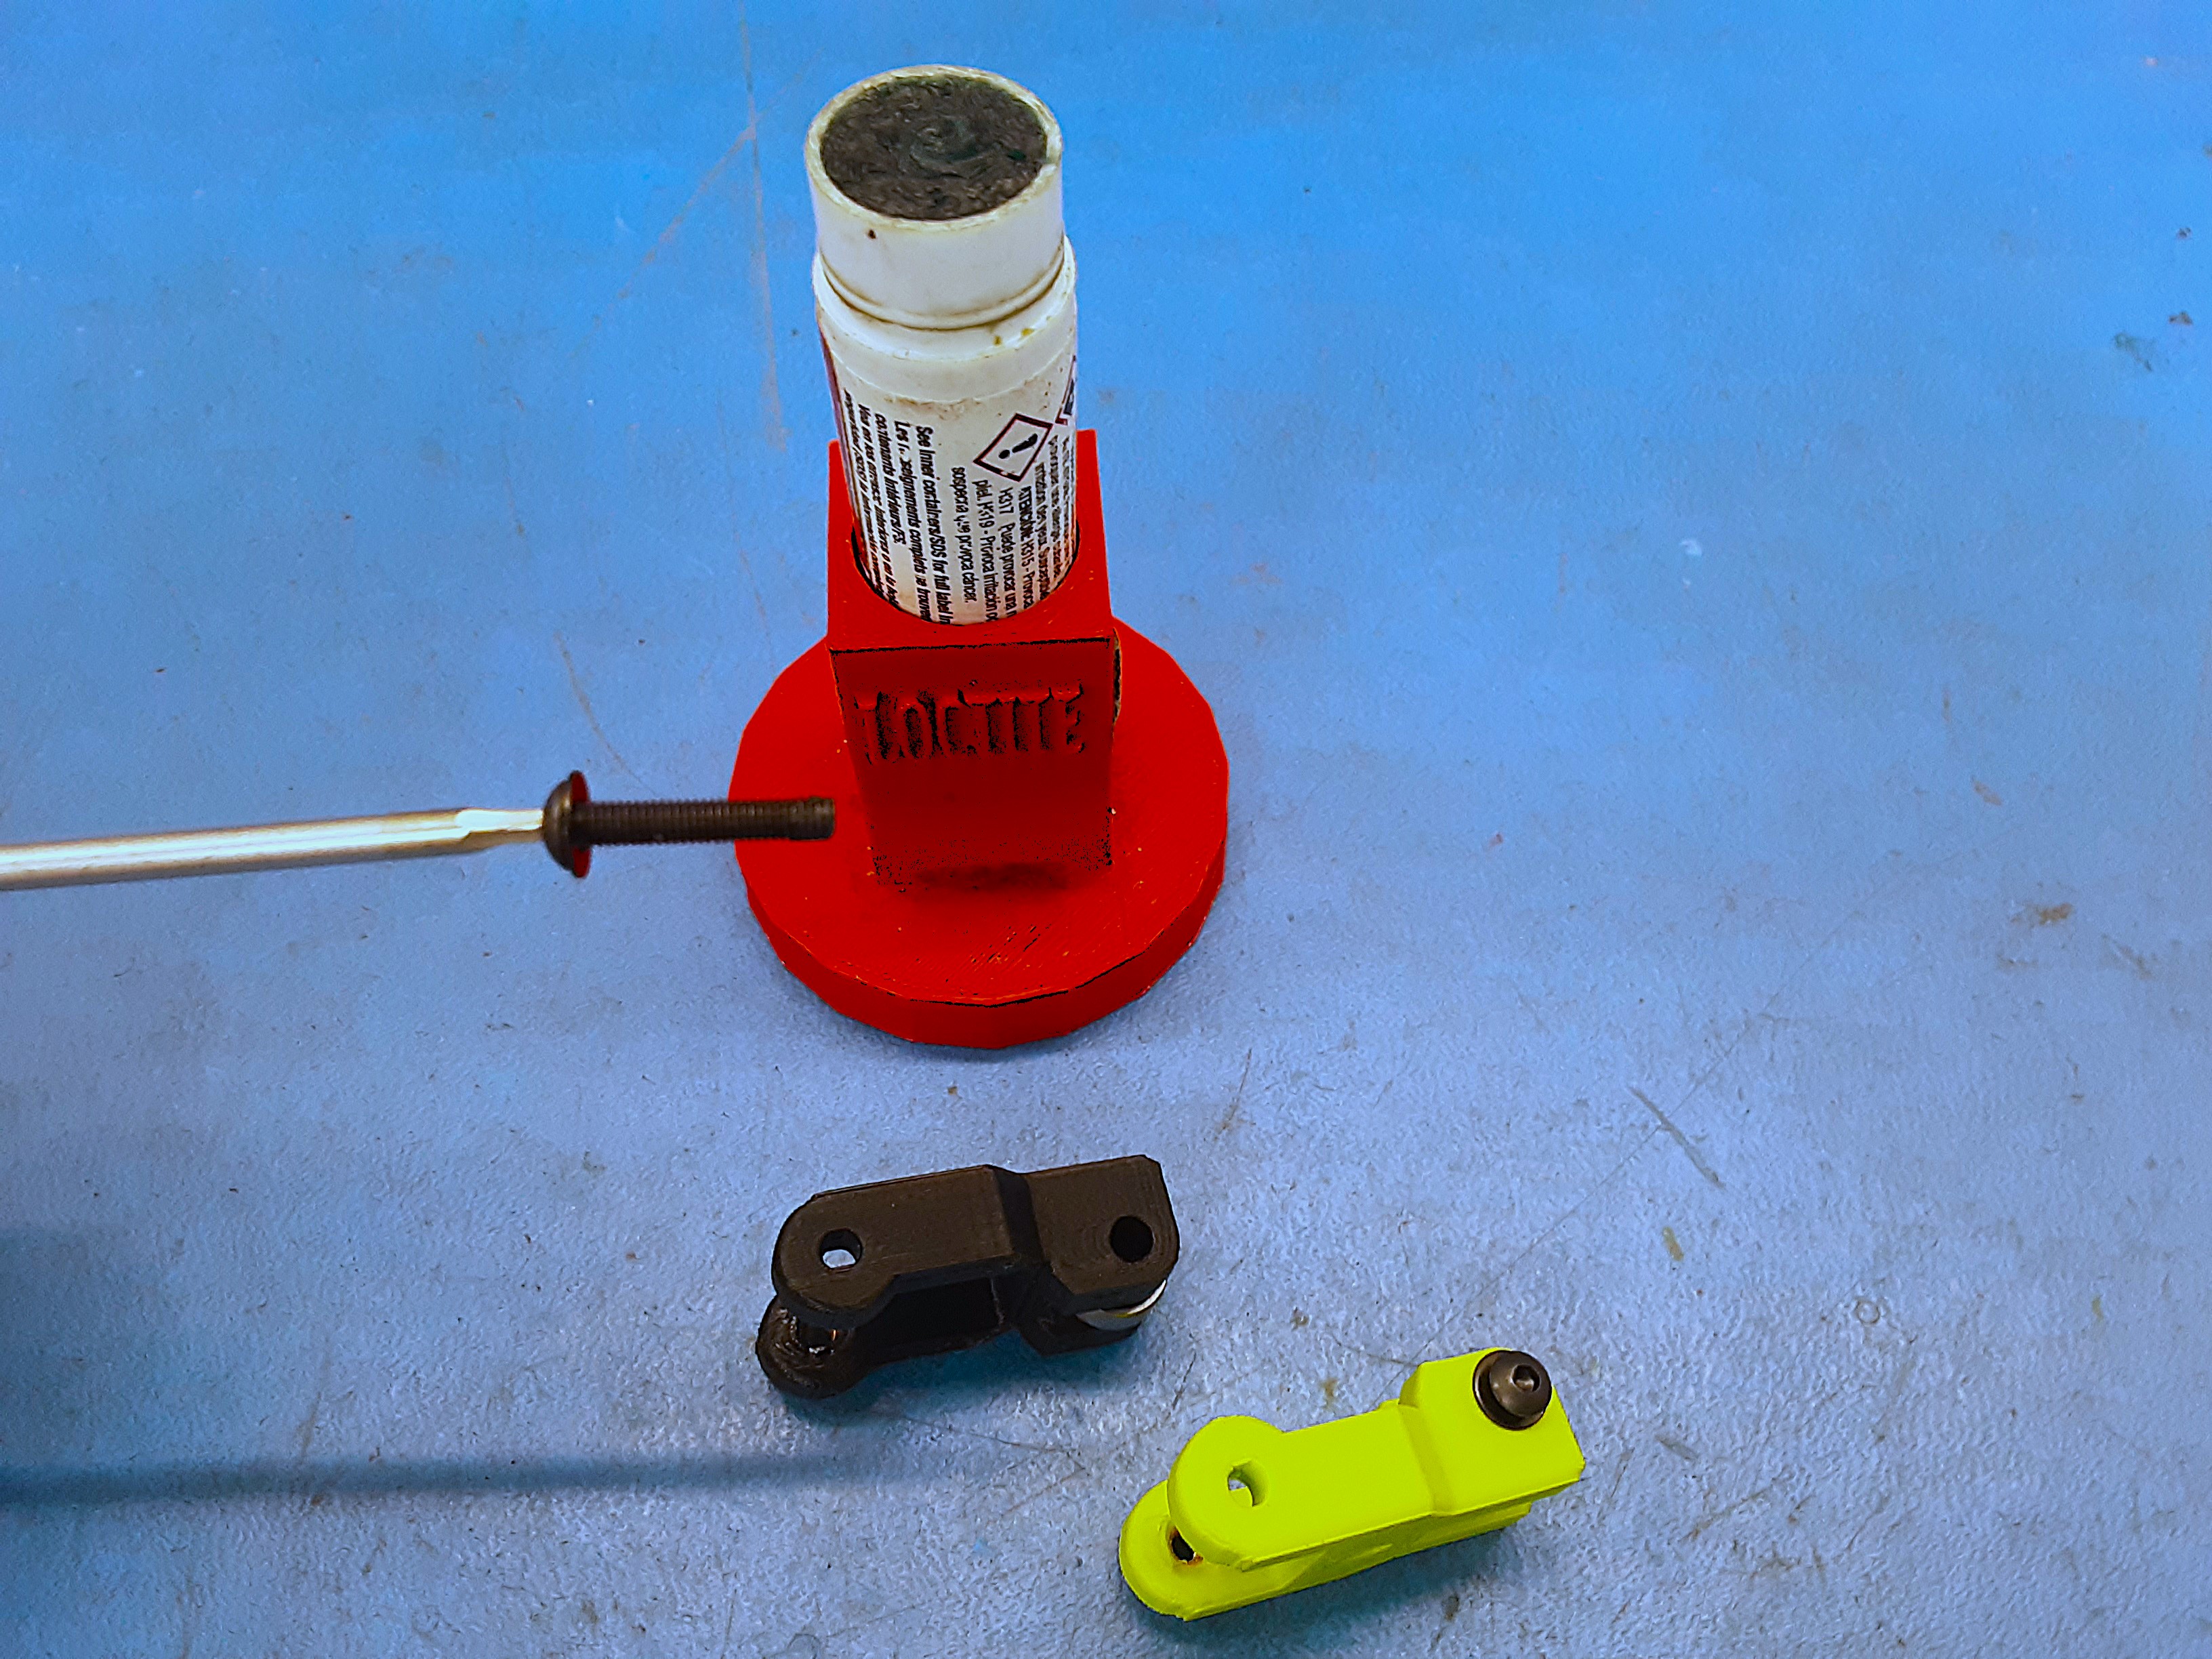
4C) Add some blue loctite to the end of HD-BT0256 and with HD-WA0038 on the bolt install it in the idler through the bearing.
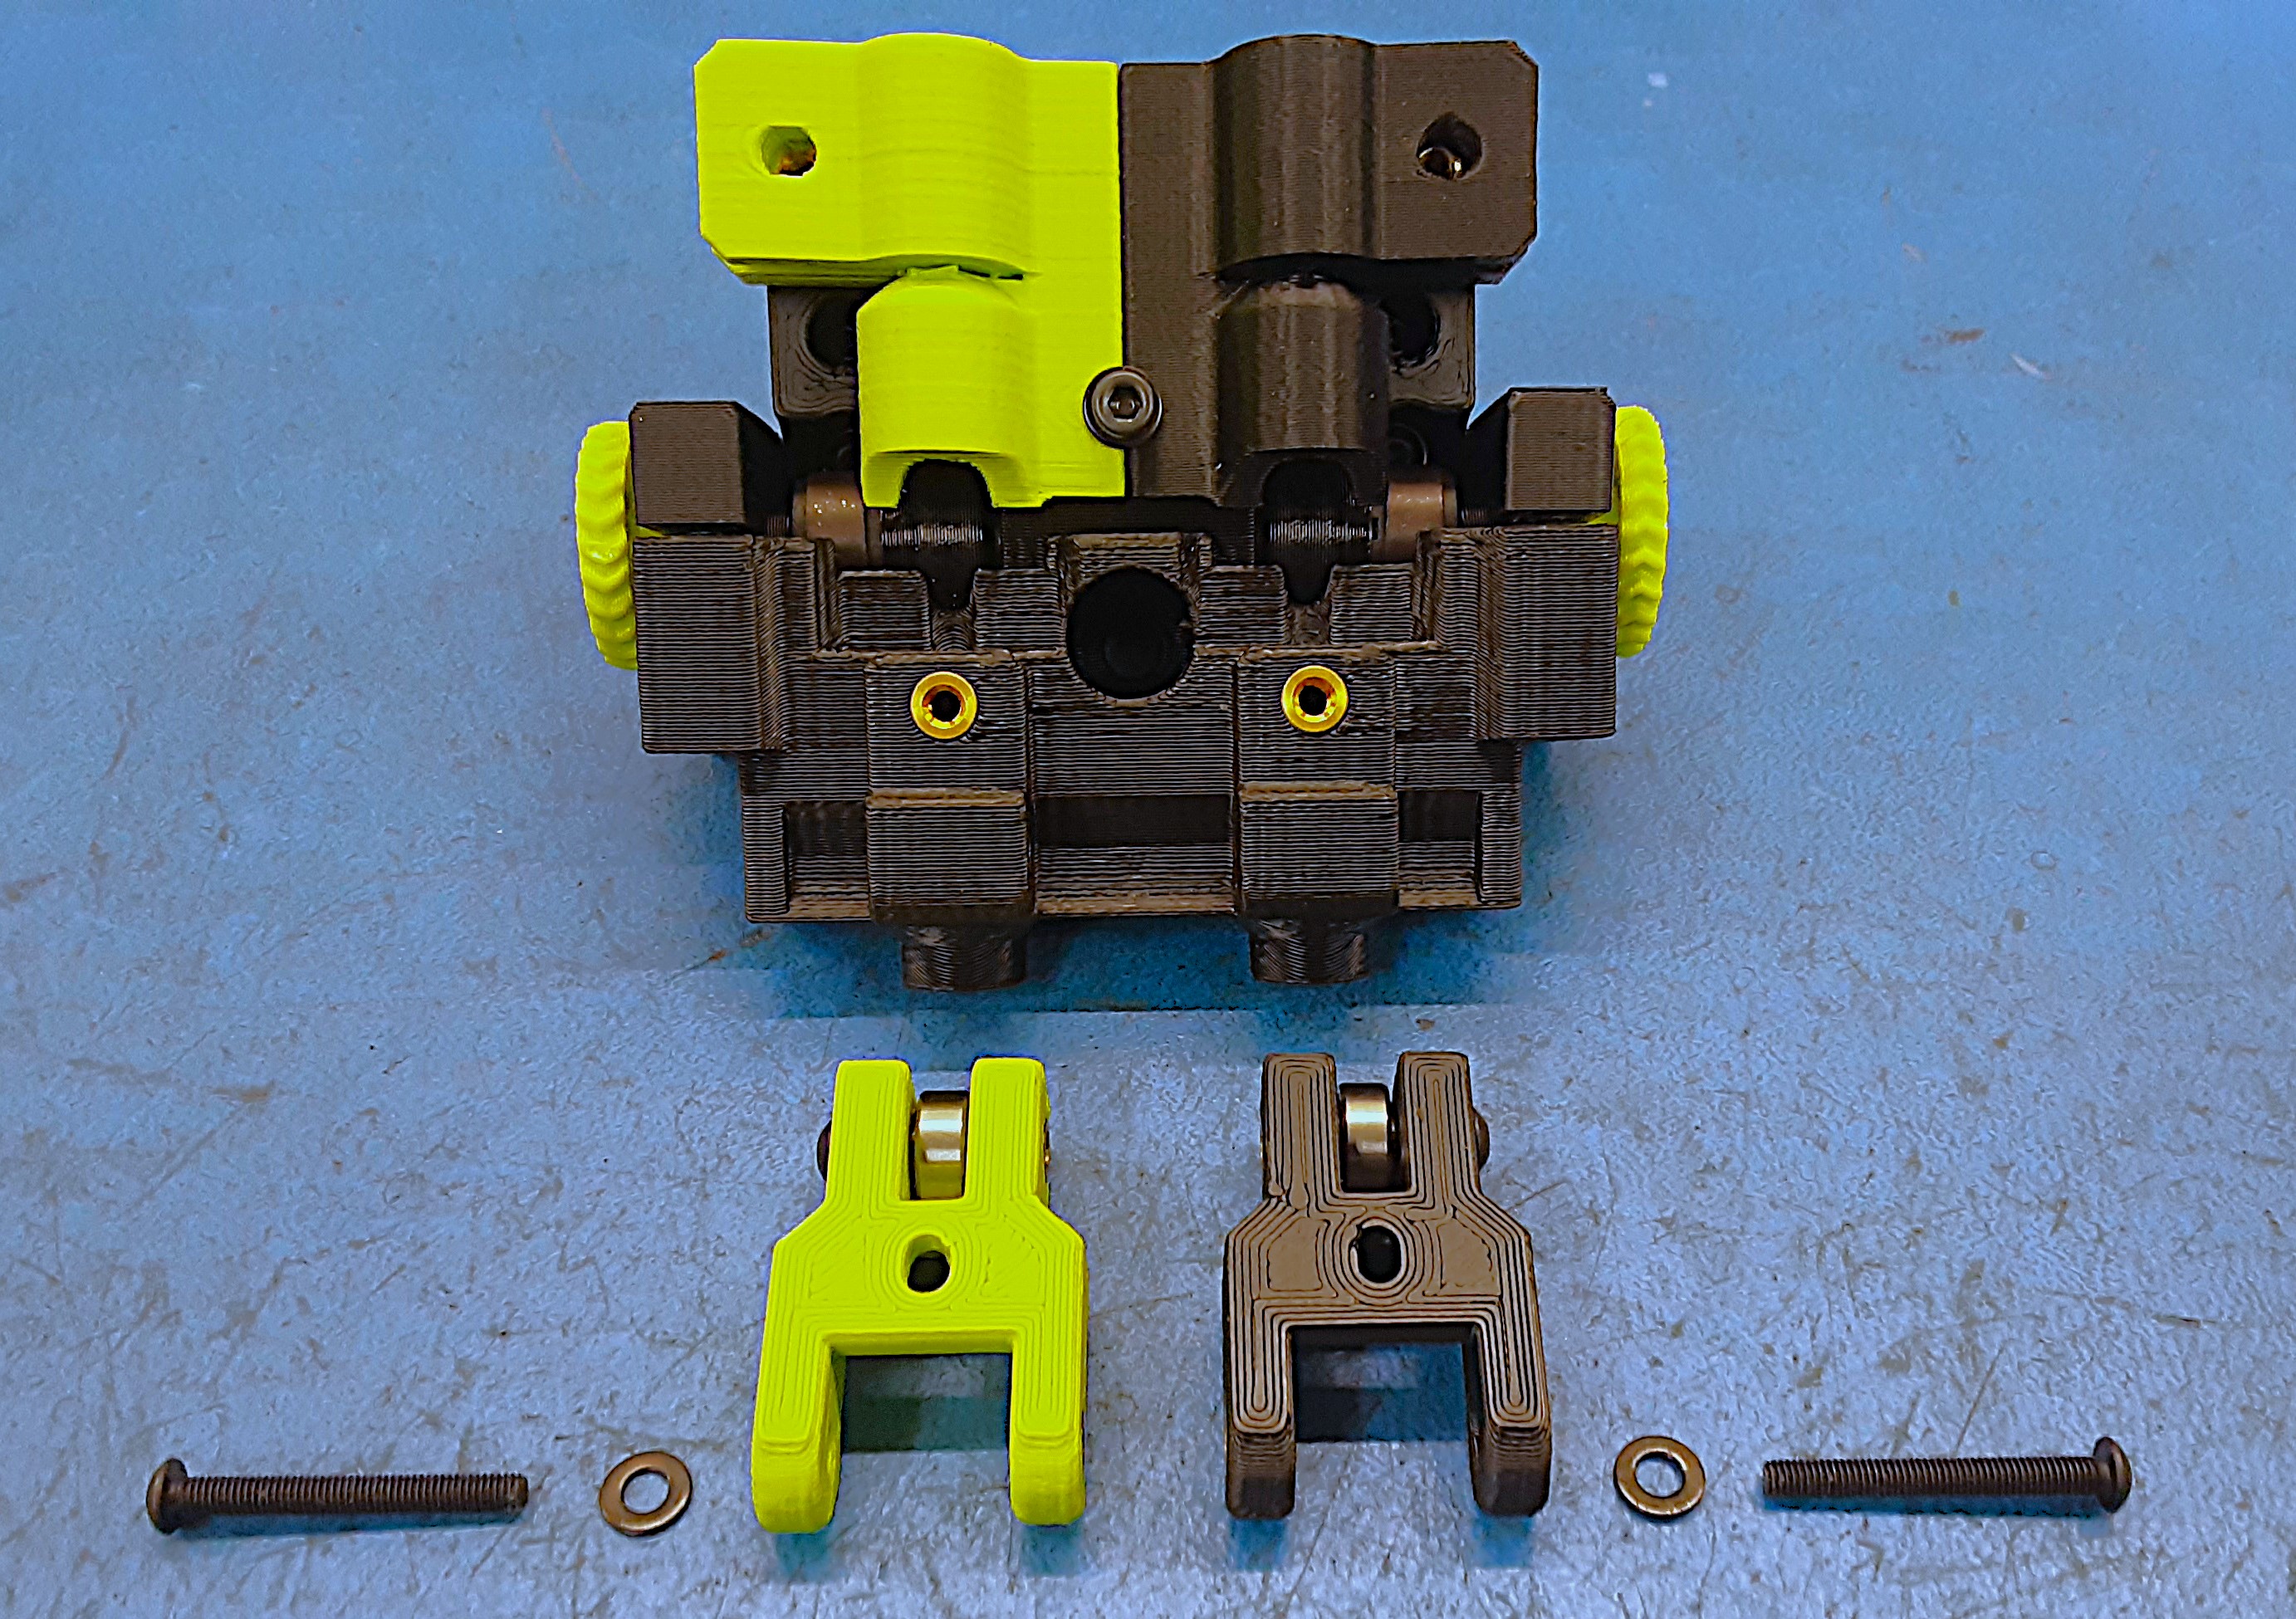
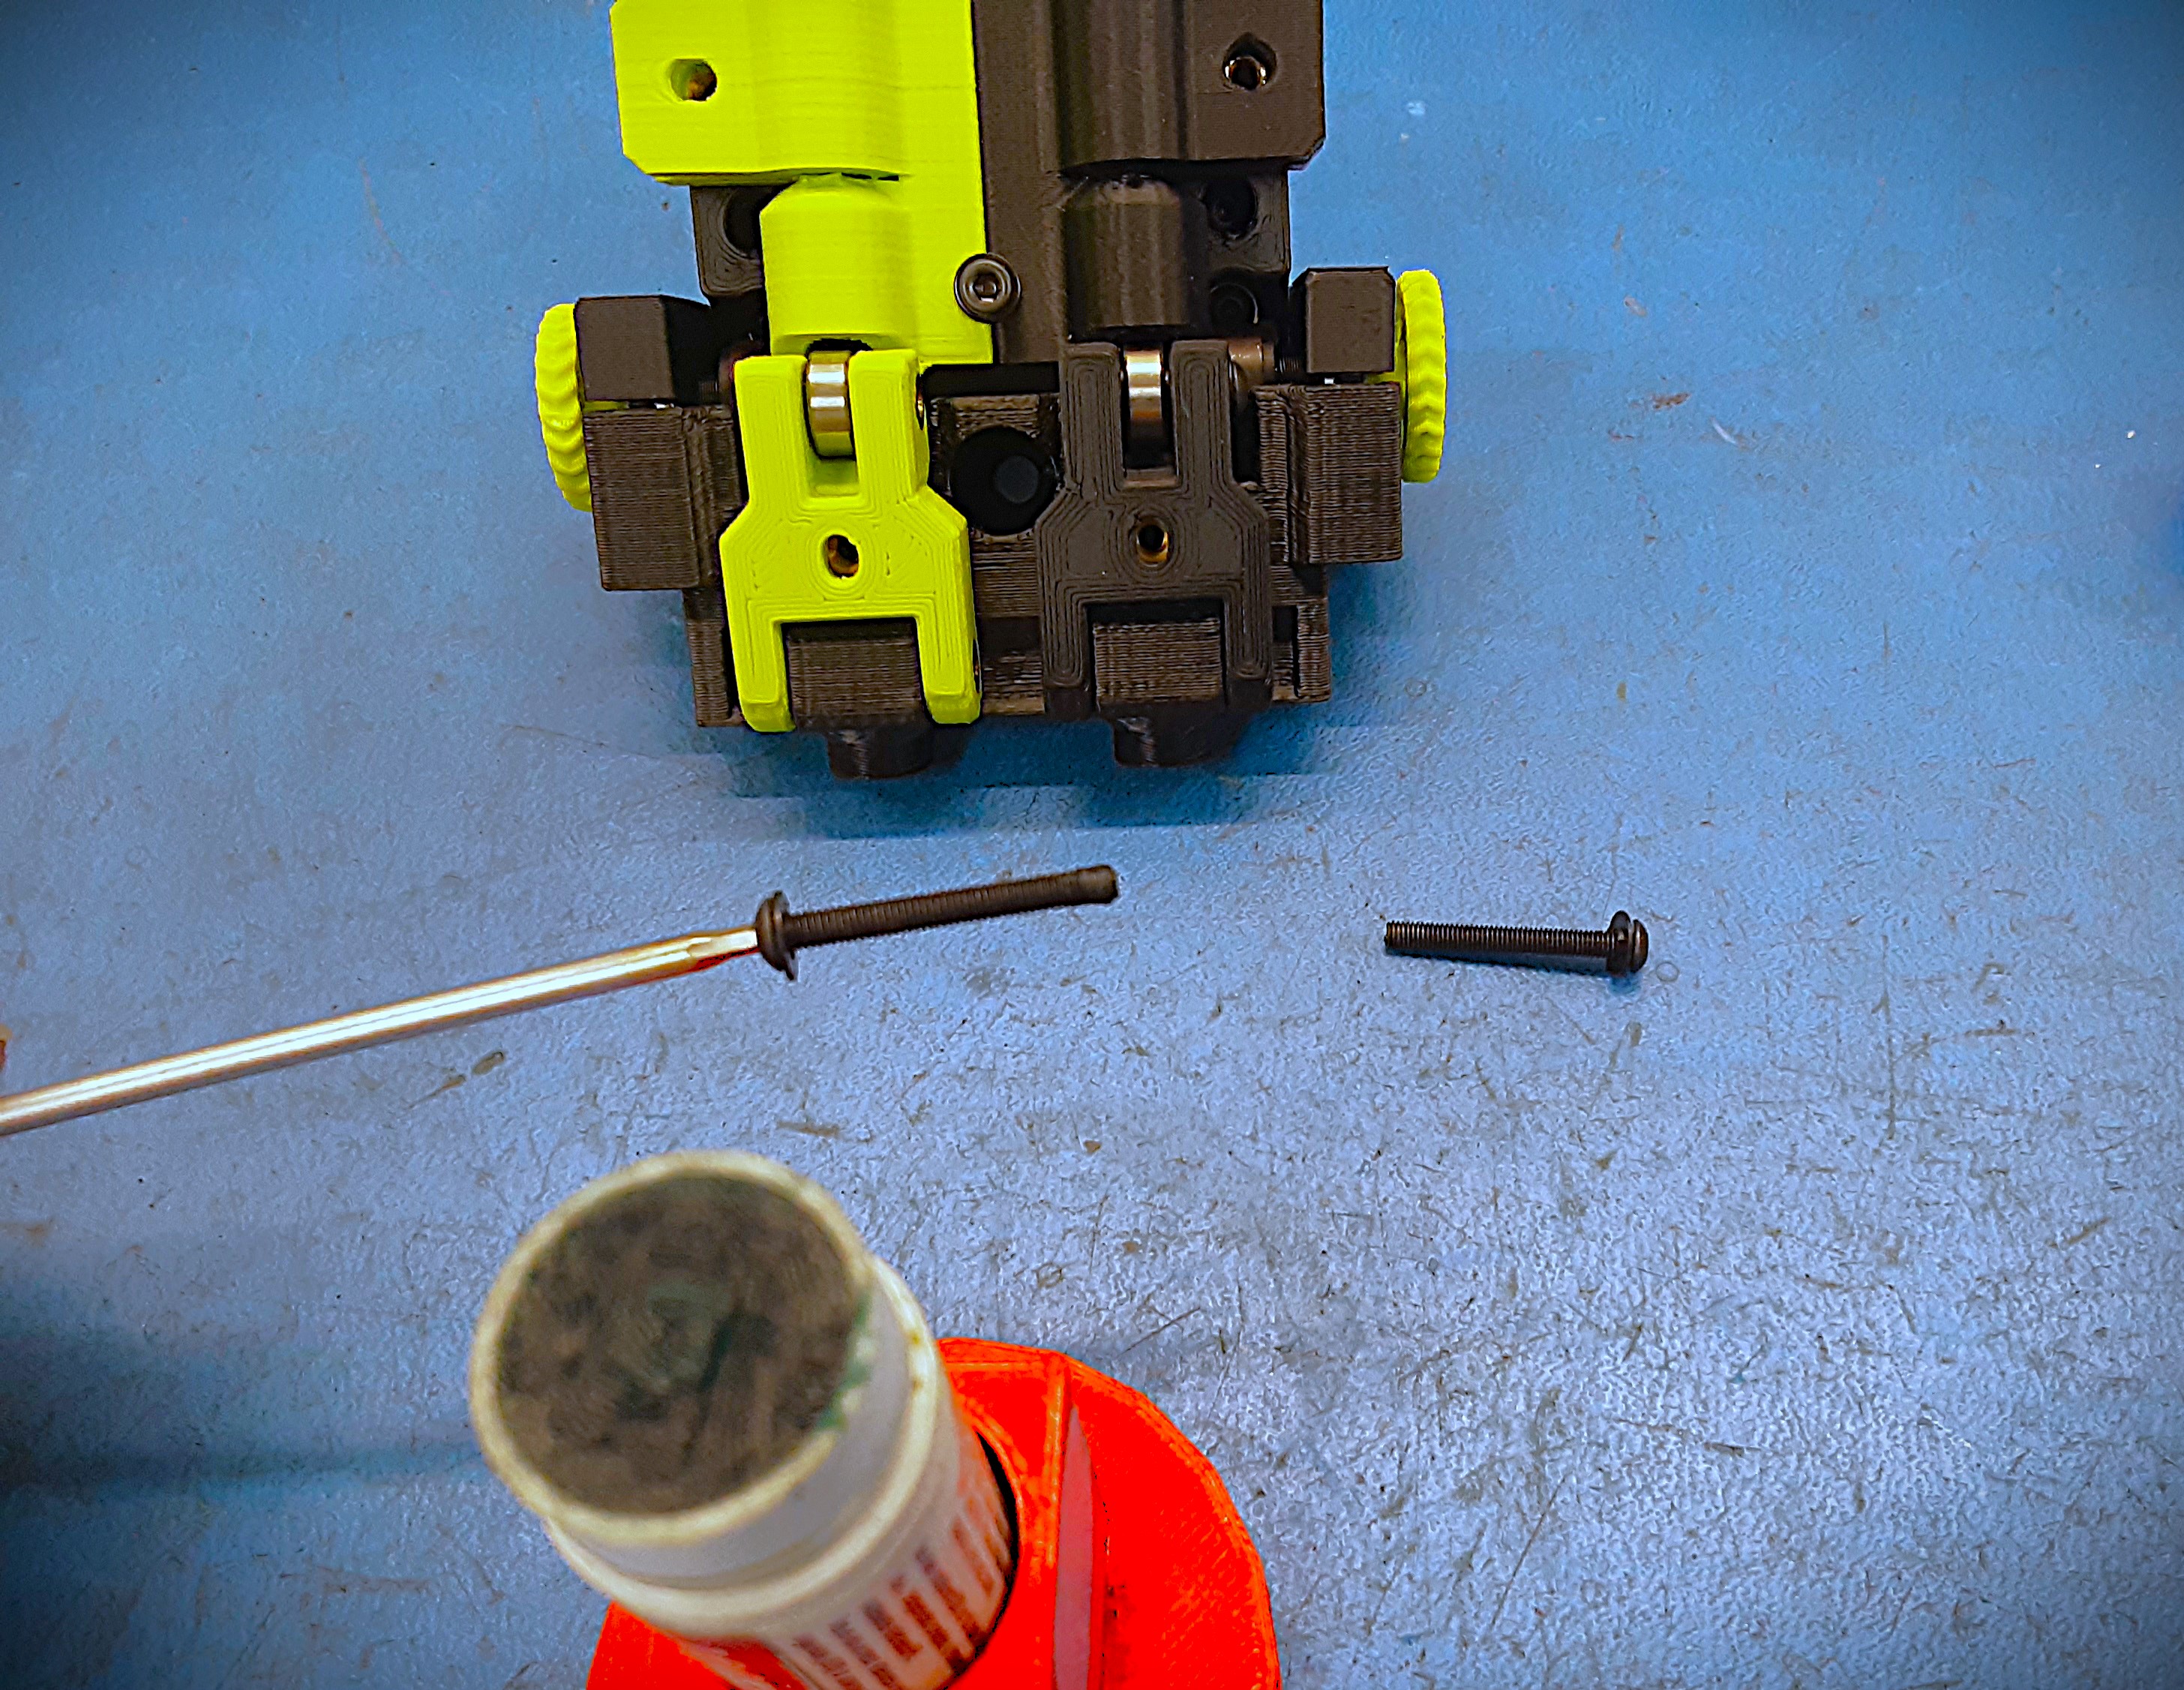
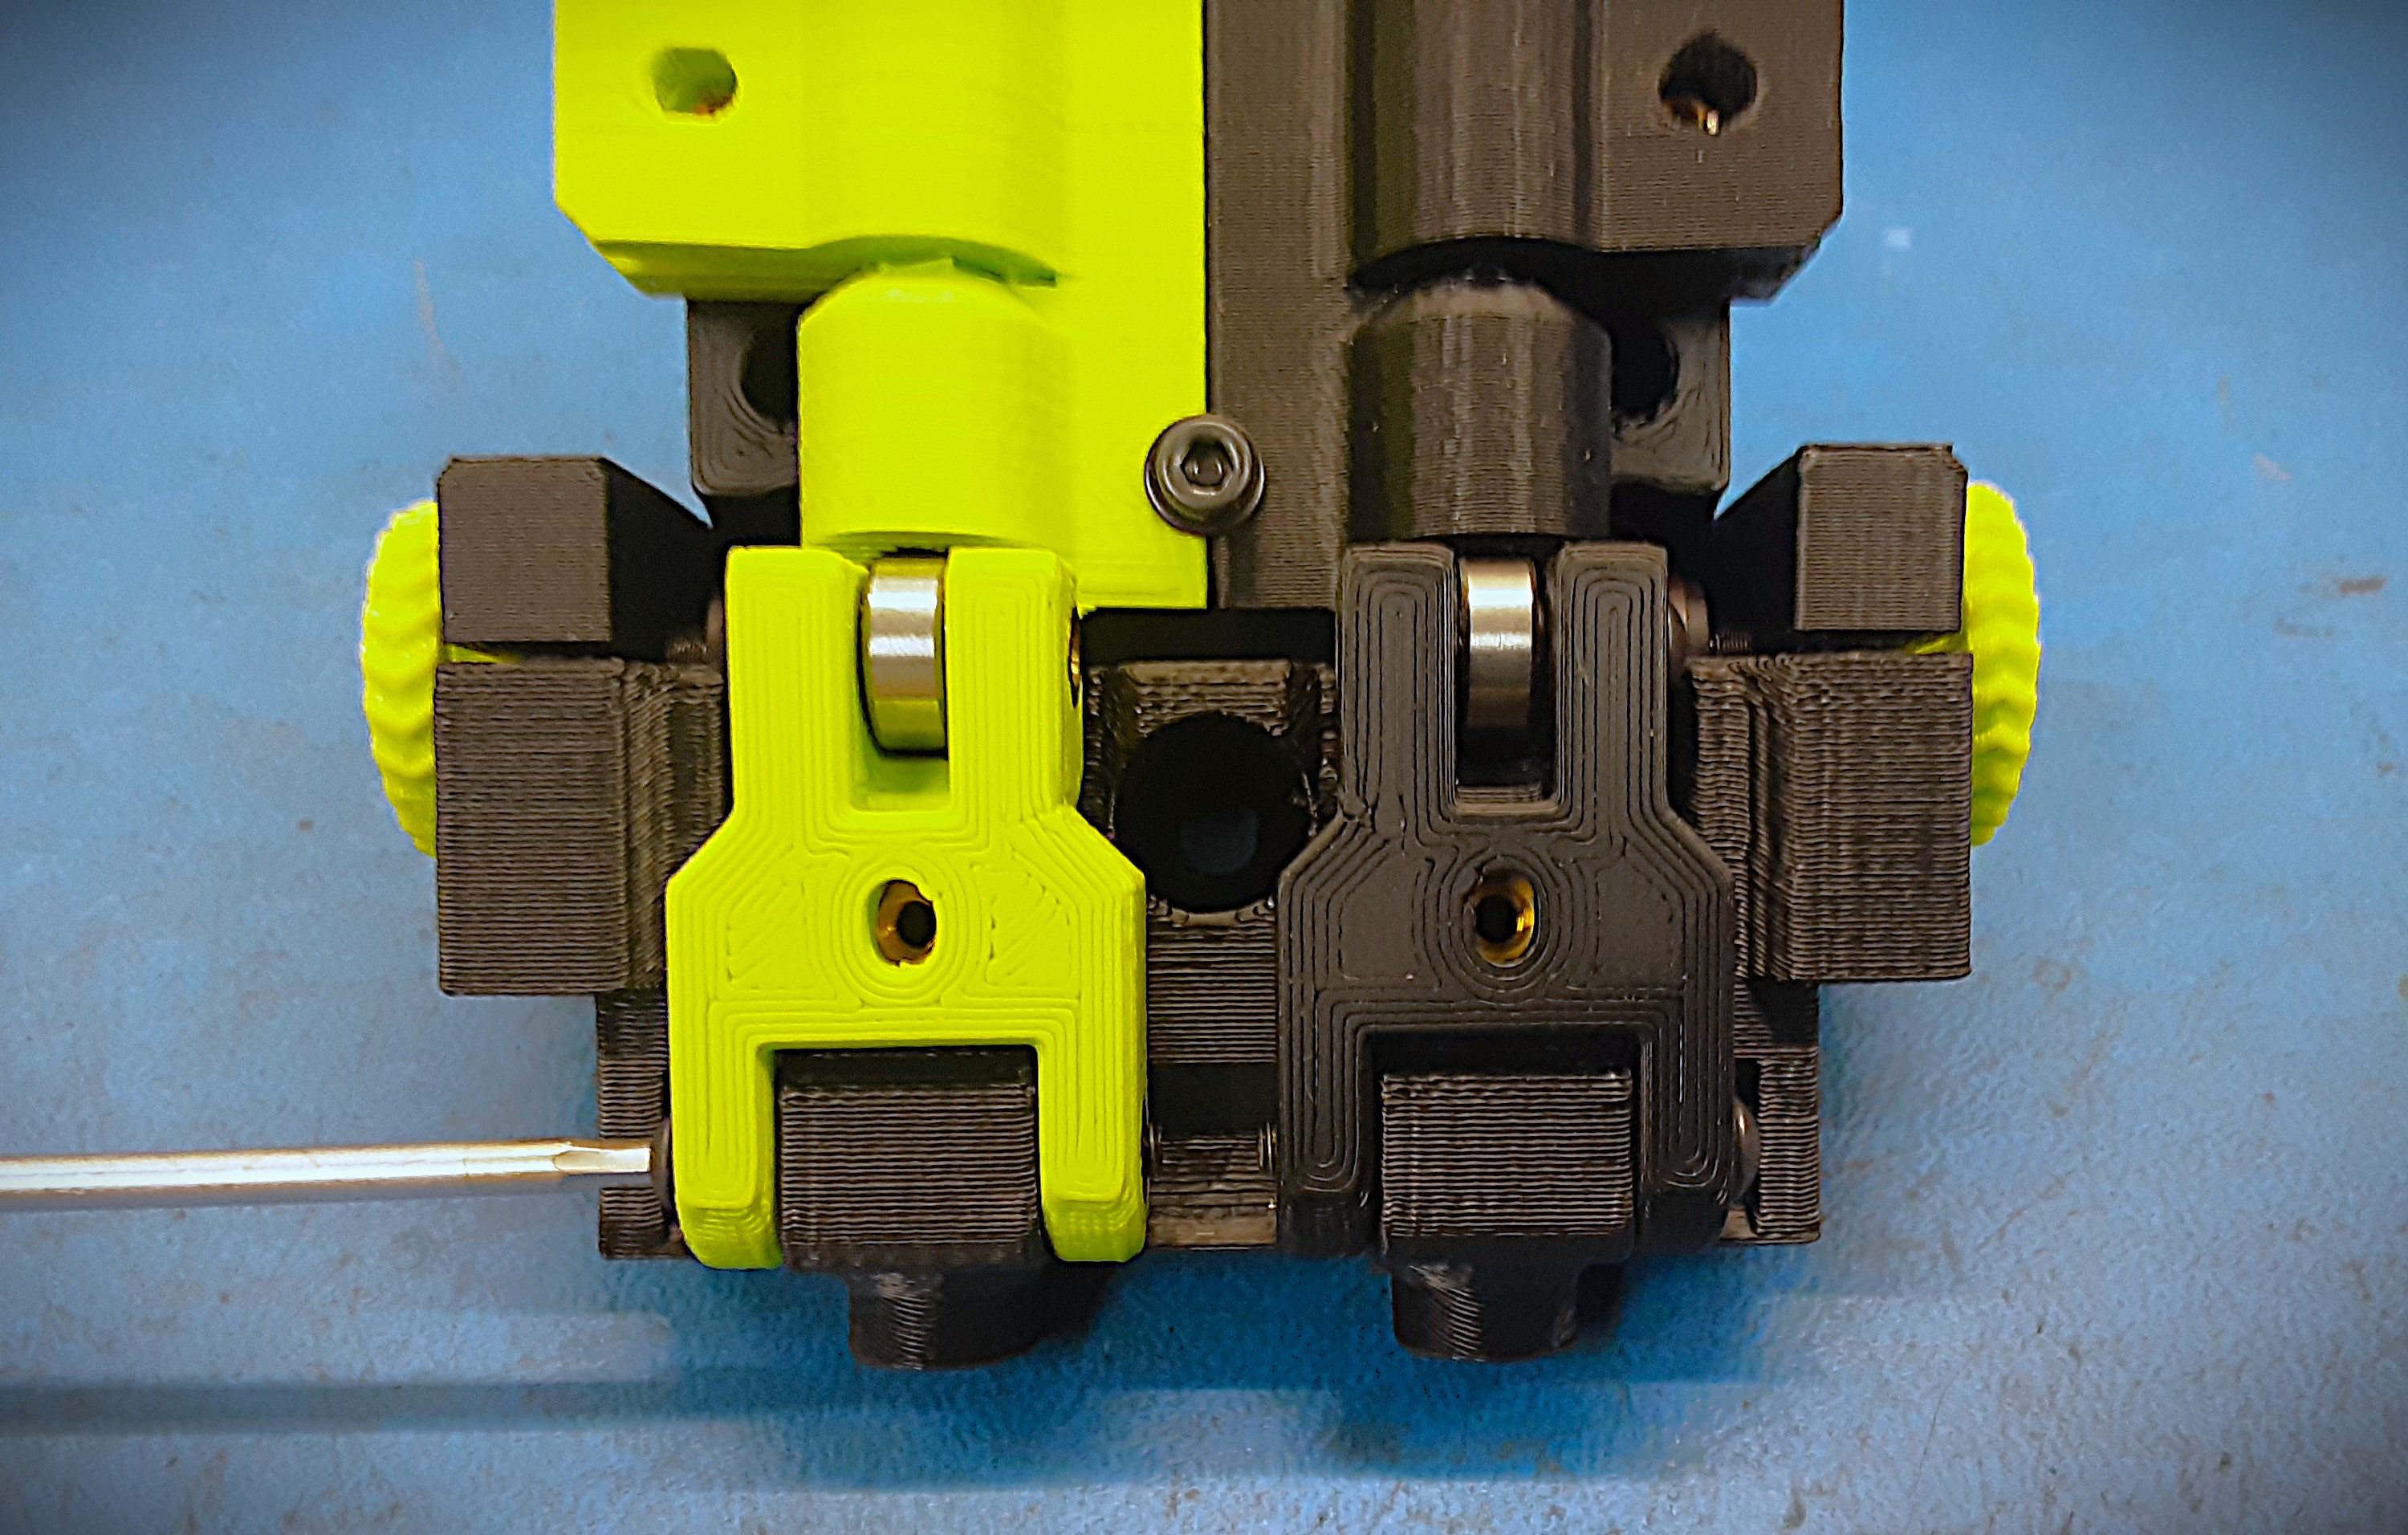
4D) Grab the jet pack base, the idlers, 2x HD-BT0202, and 2x HD-WA0038.
4E) Add some blue loctite to the ends of HD-BT0202 and with HD-WA0038 on each bolt install the idlers onto the jet pack base. Be careful not to over tighten the bolt. The idlers should move freely.
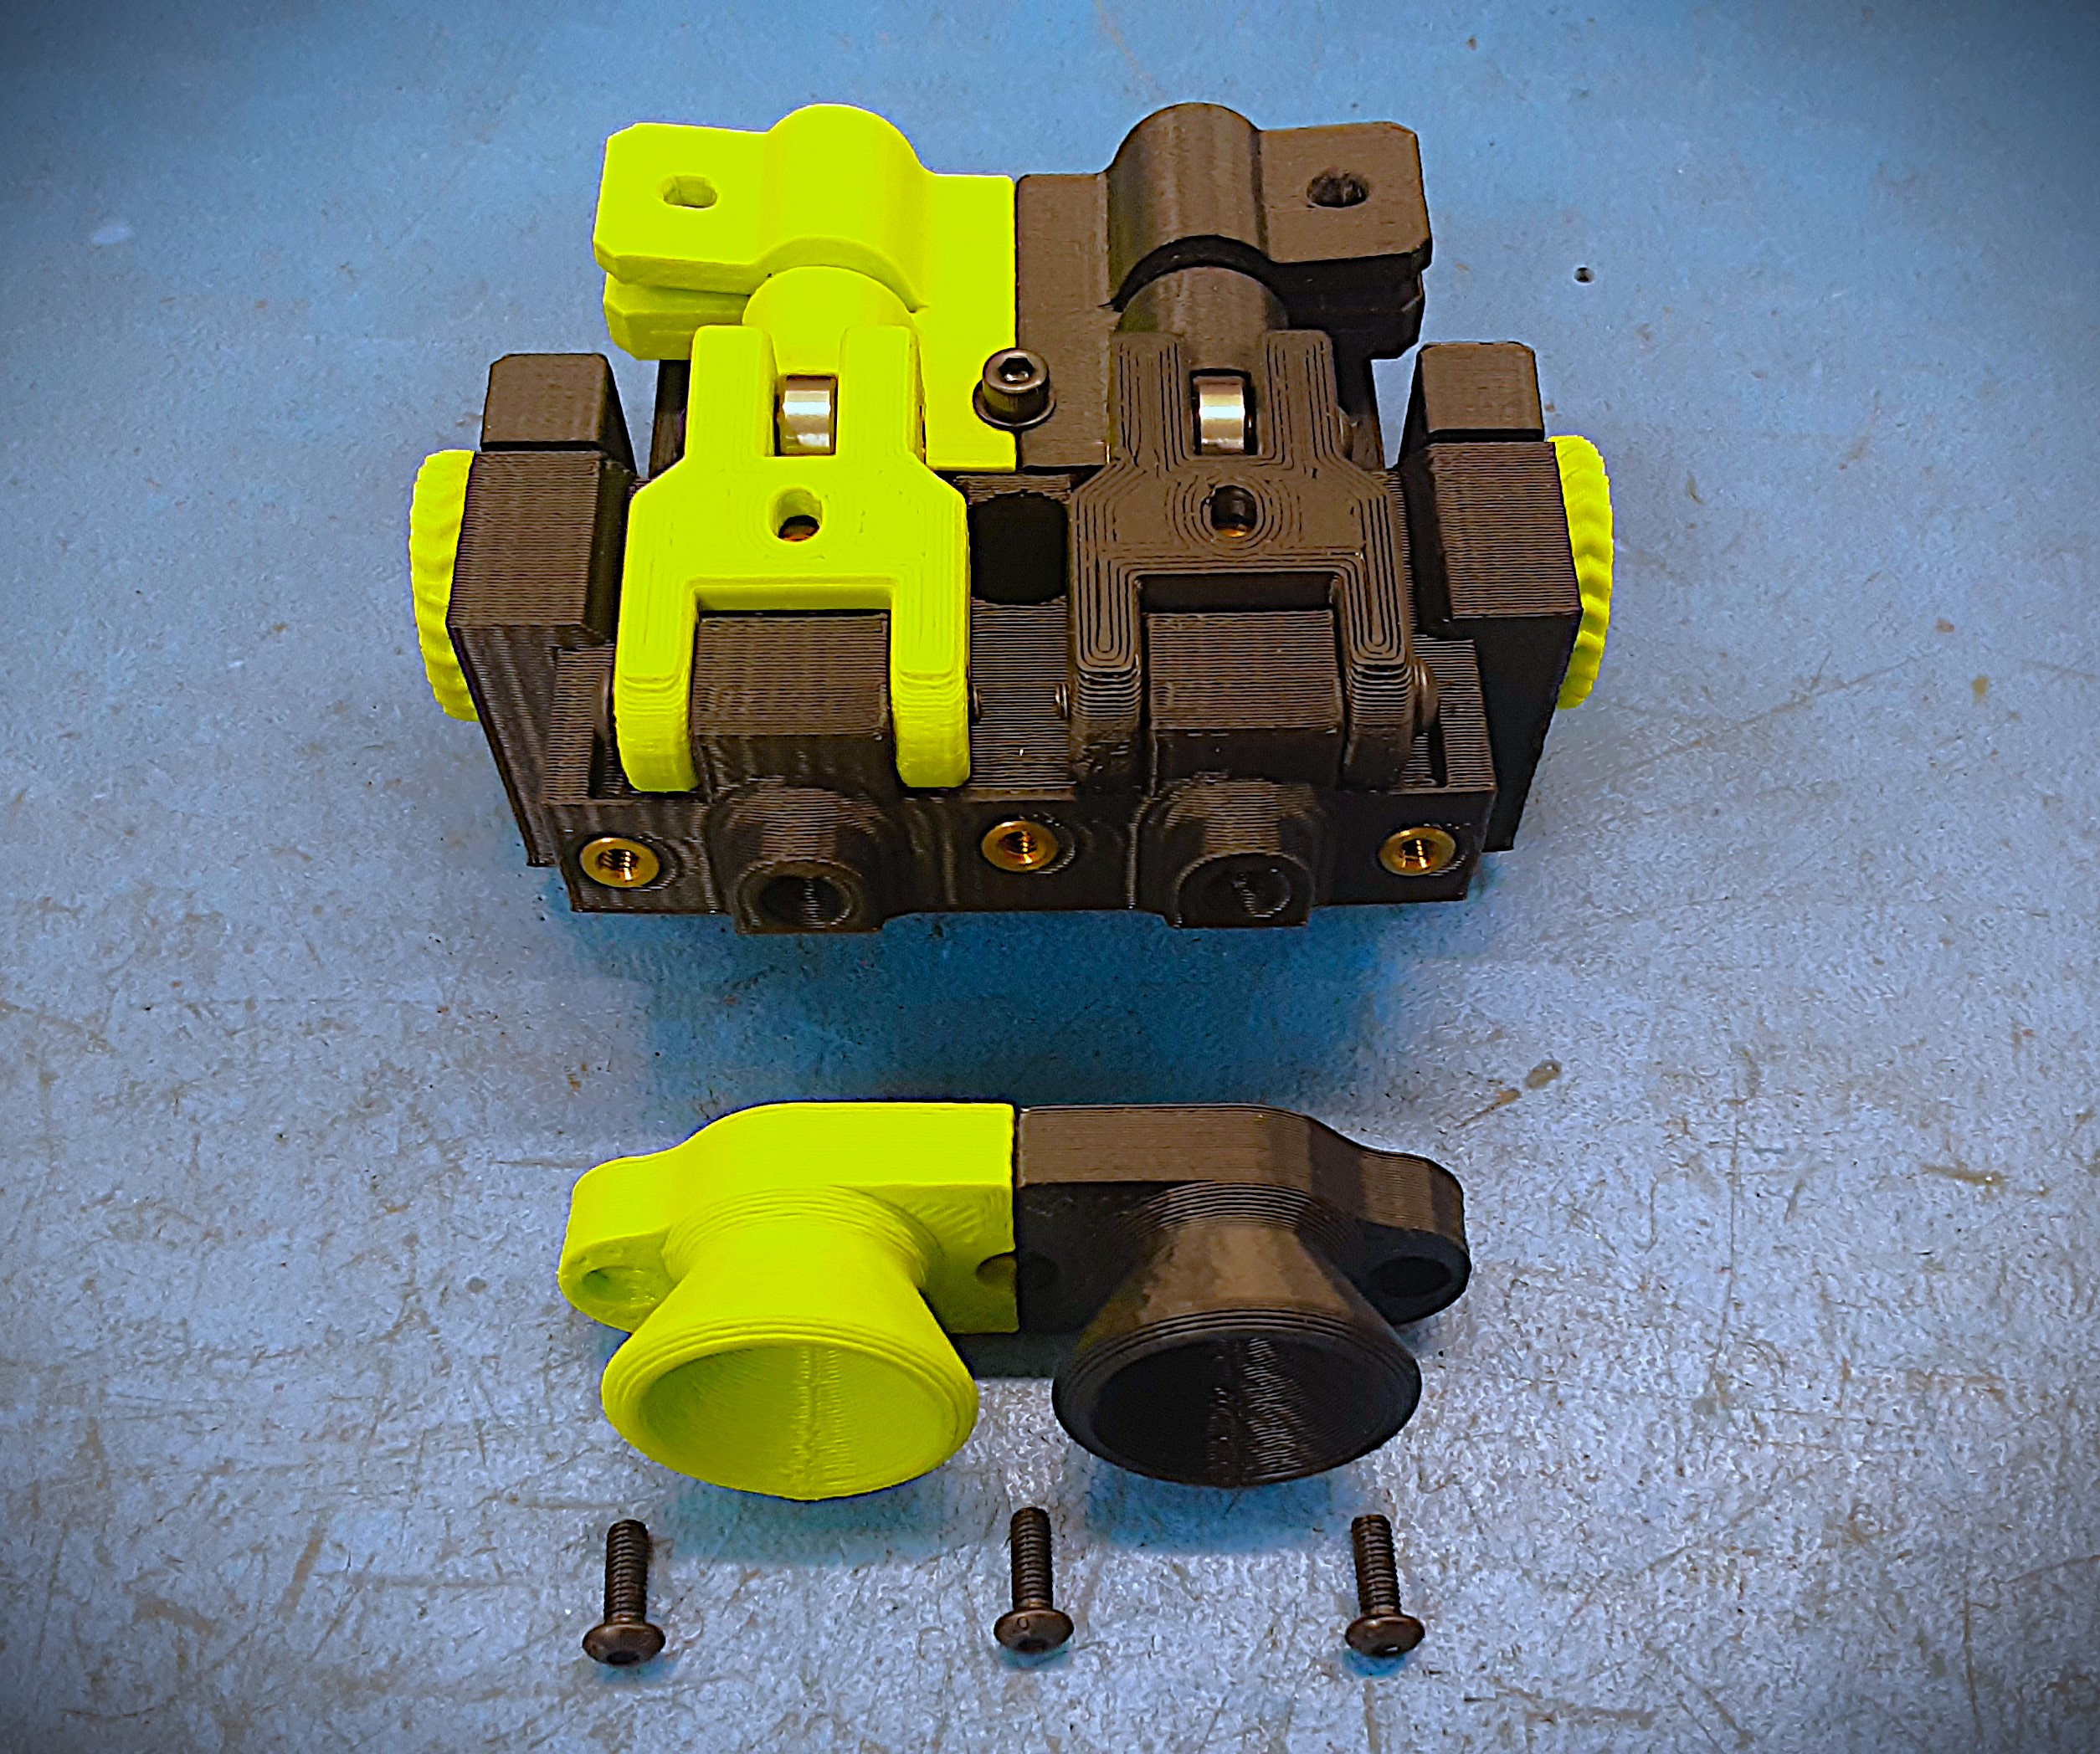
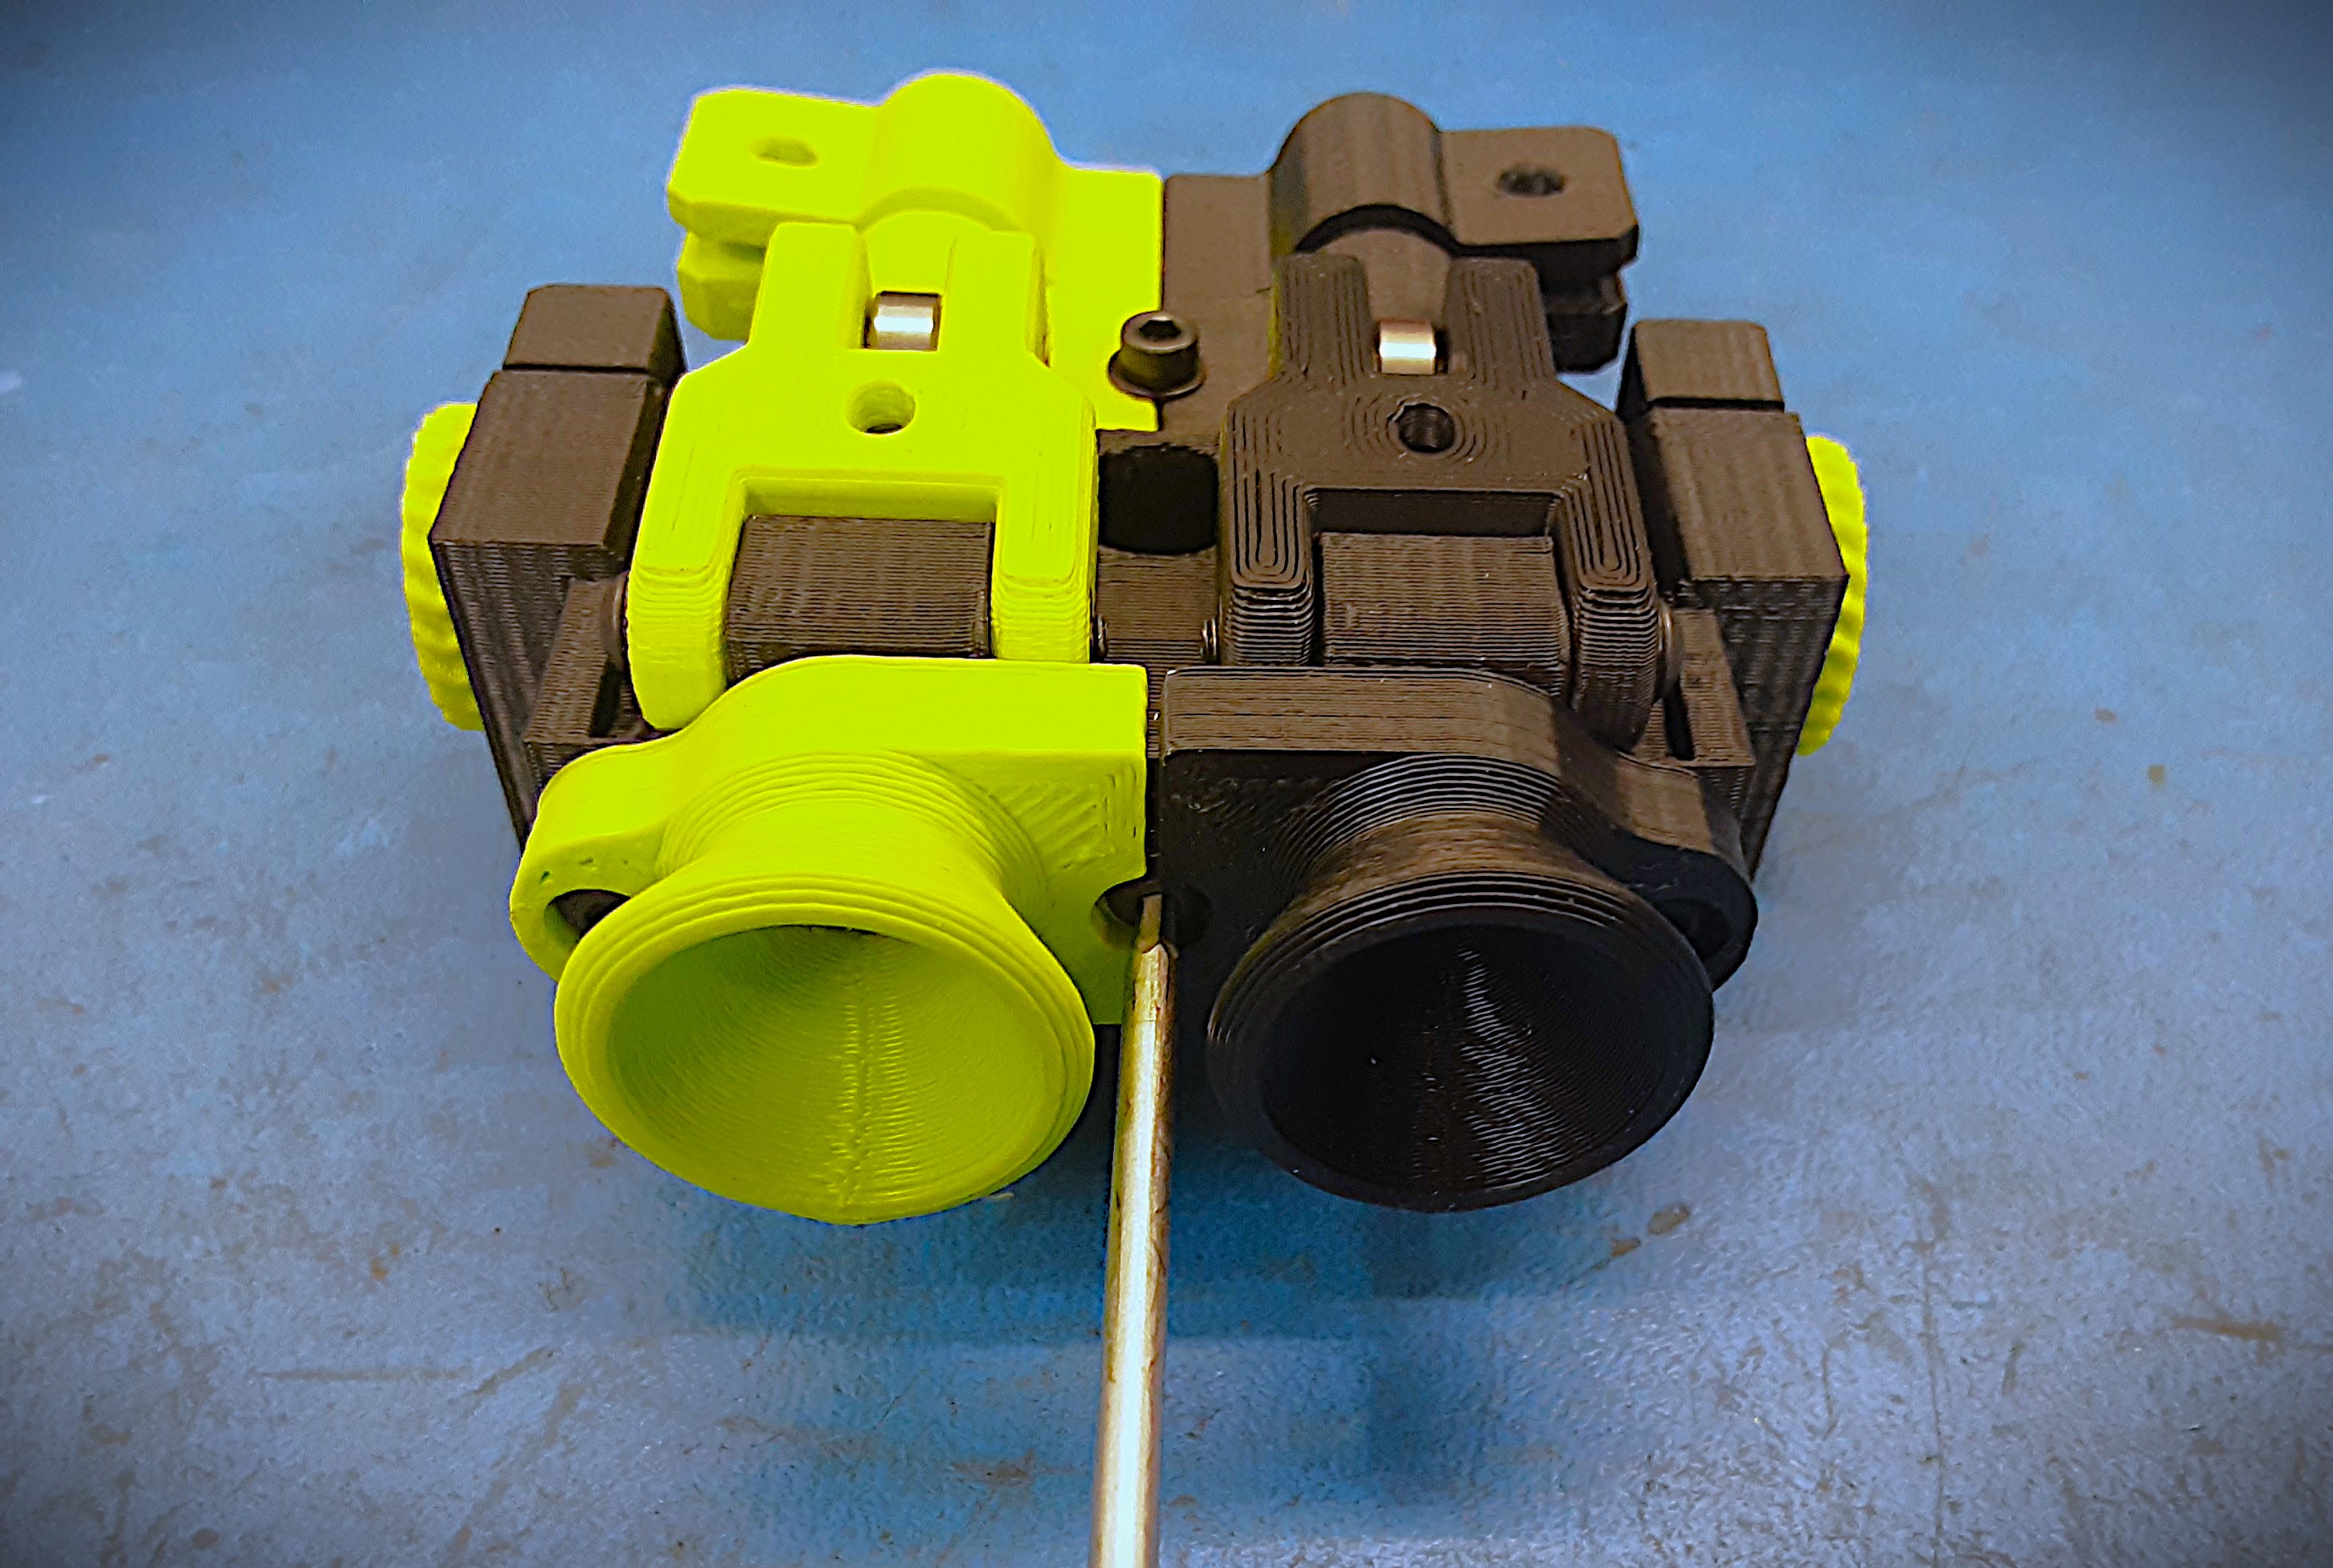
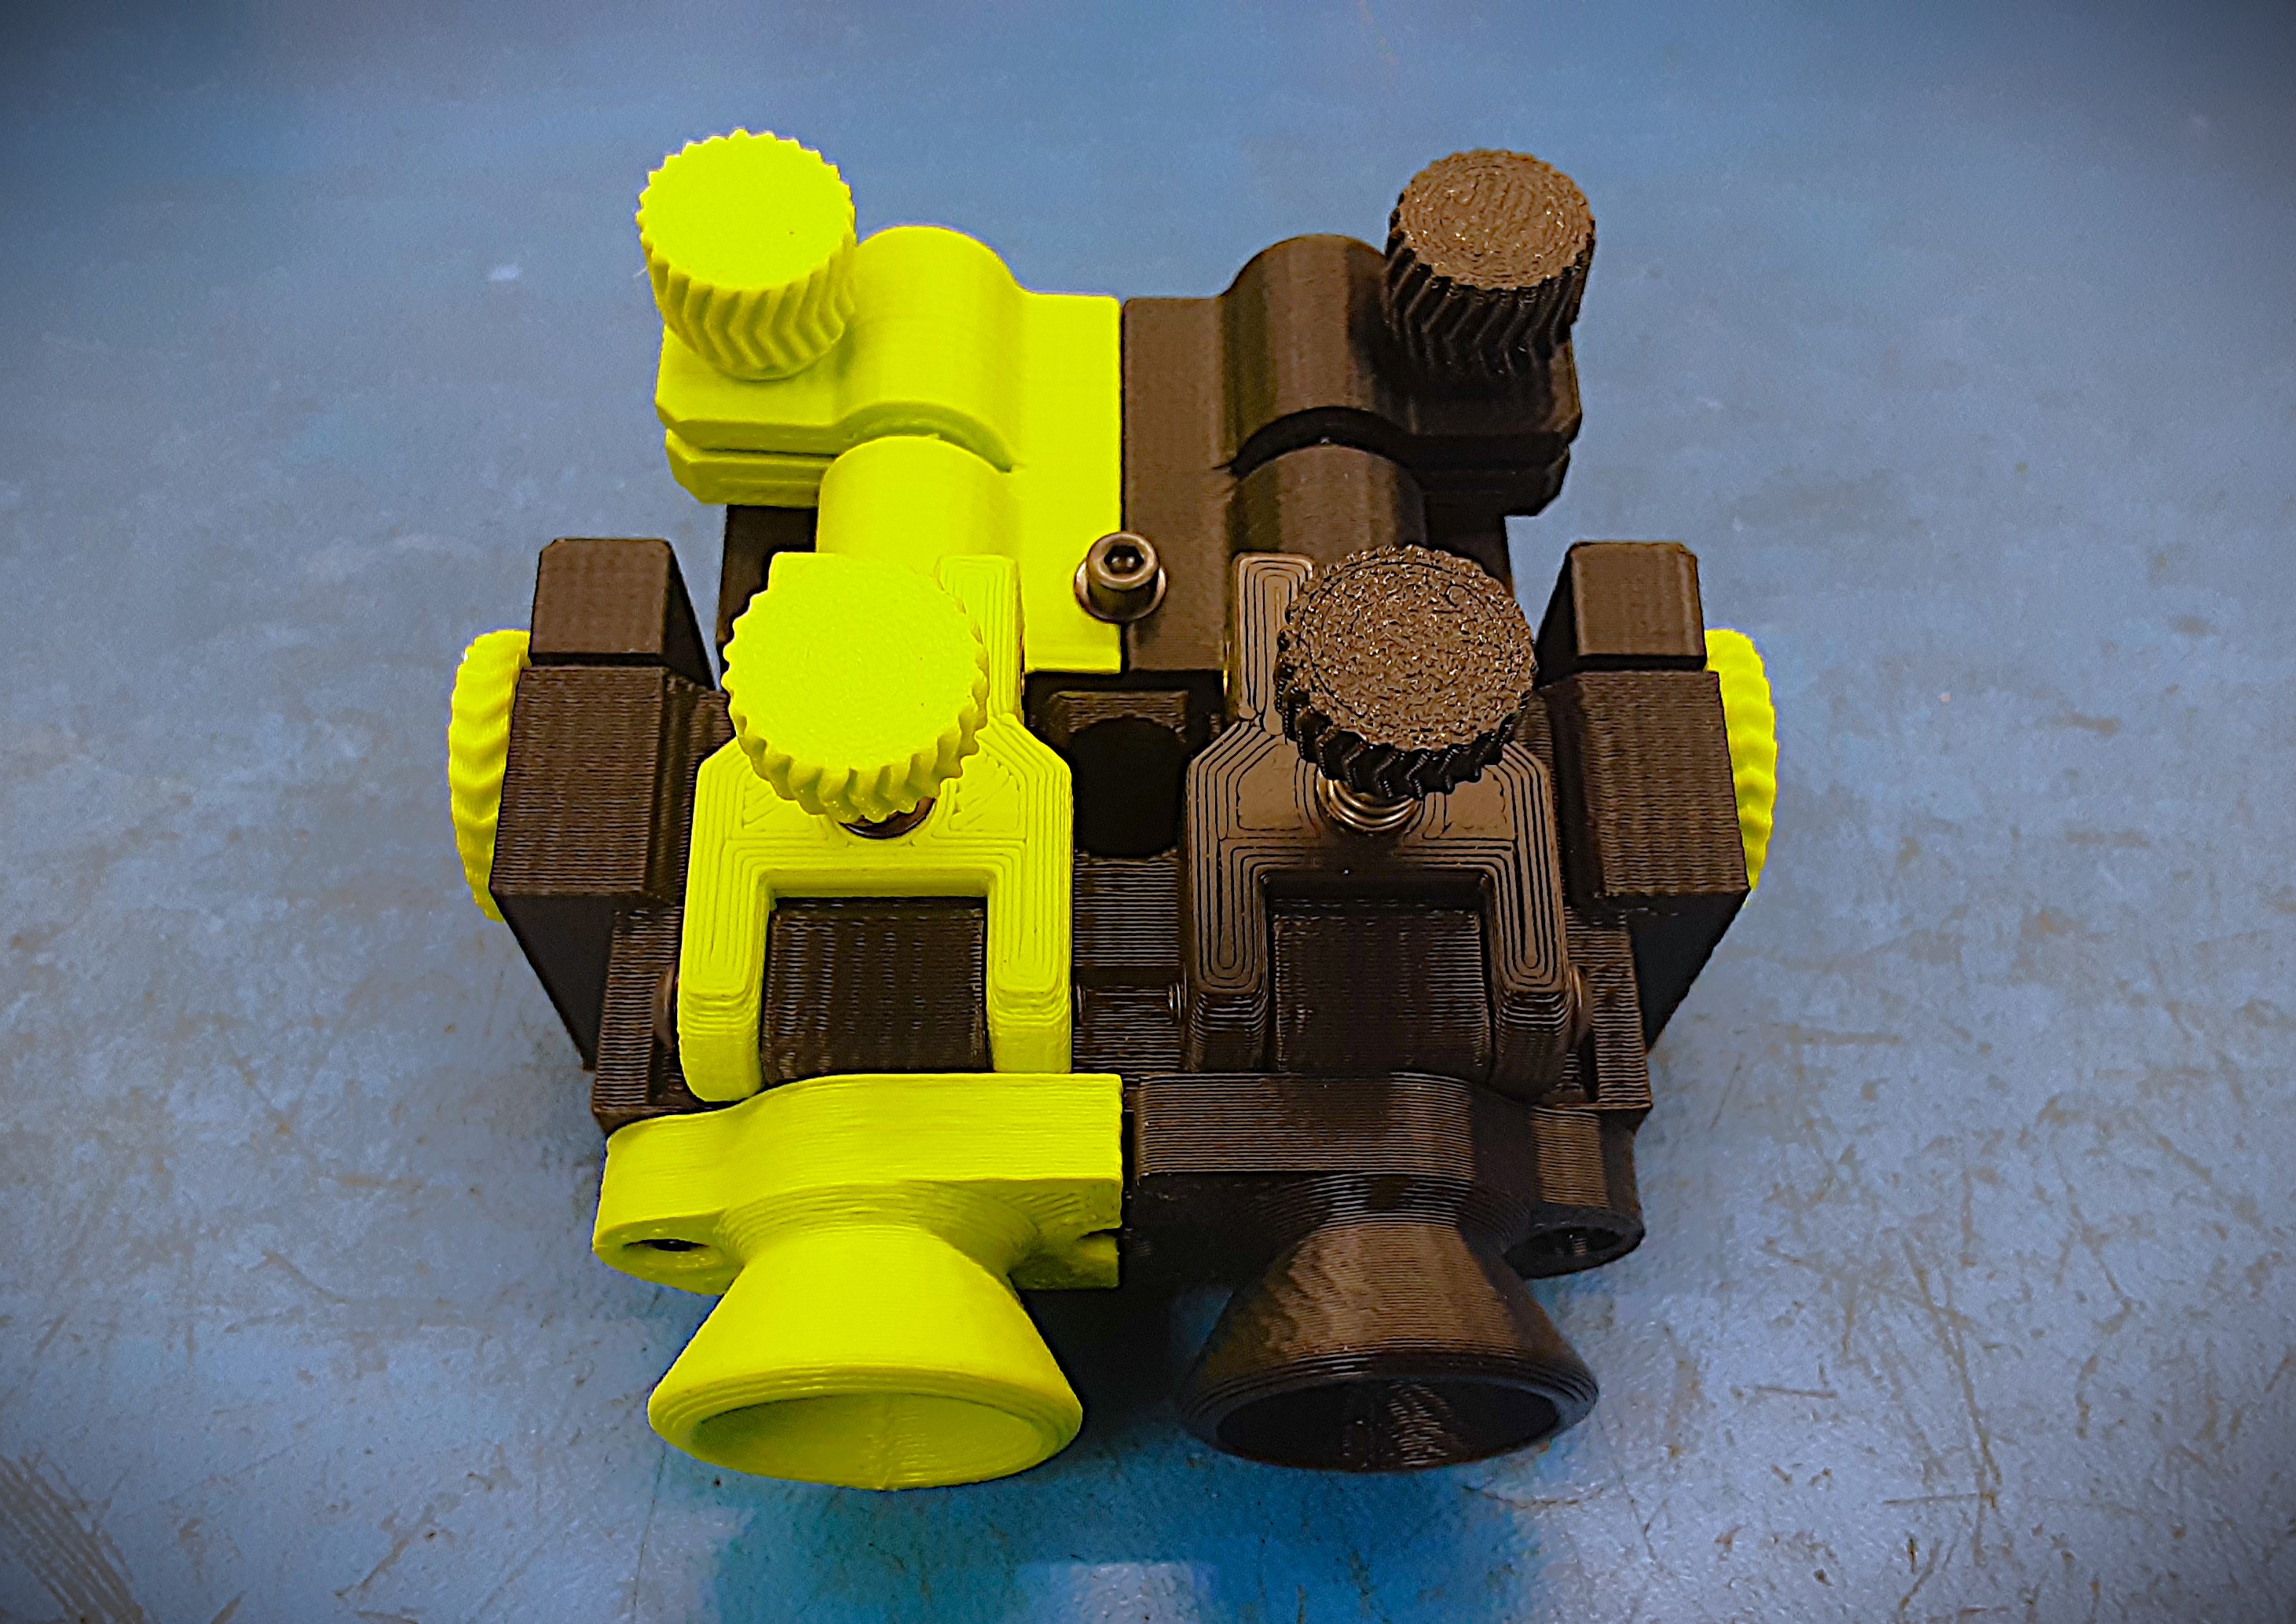
5A) Grab the jet pack base, 1x PP-GP0756, 1x PP-GP0757, and 3x HD-BT0137.
5B) Attach PP-GP0757 to the bottom right of the jet pack base using 1x HD-BT0137. Then attach PP-GP0756 to the bottom left of the jet pack base using 1x HD-BT0137. Install 1x HD-BT0137 in between the two thrusters into the jet pack base.
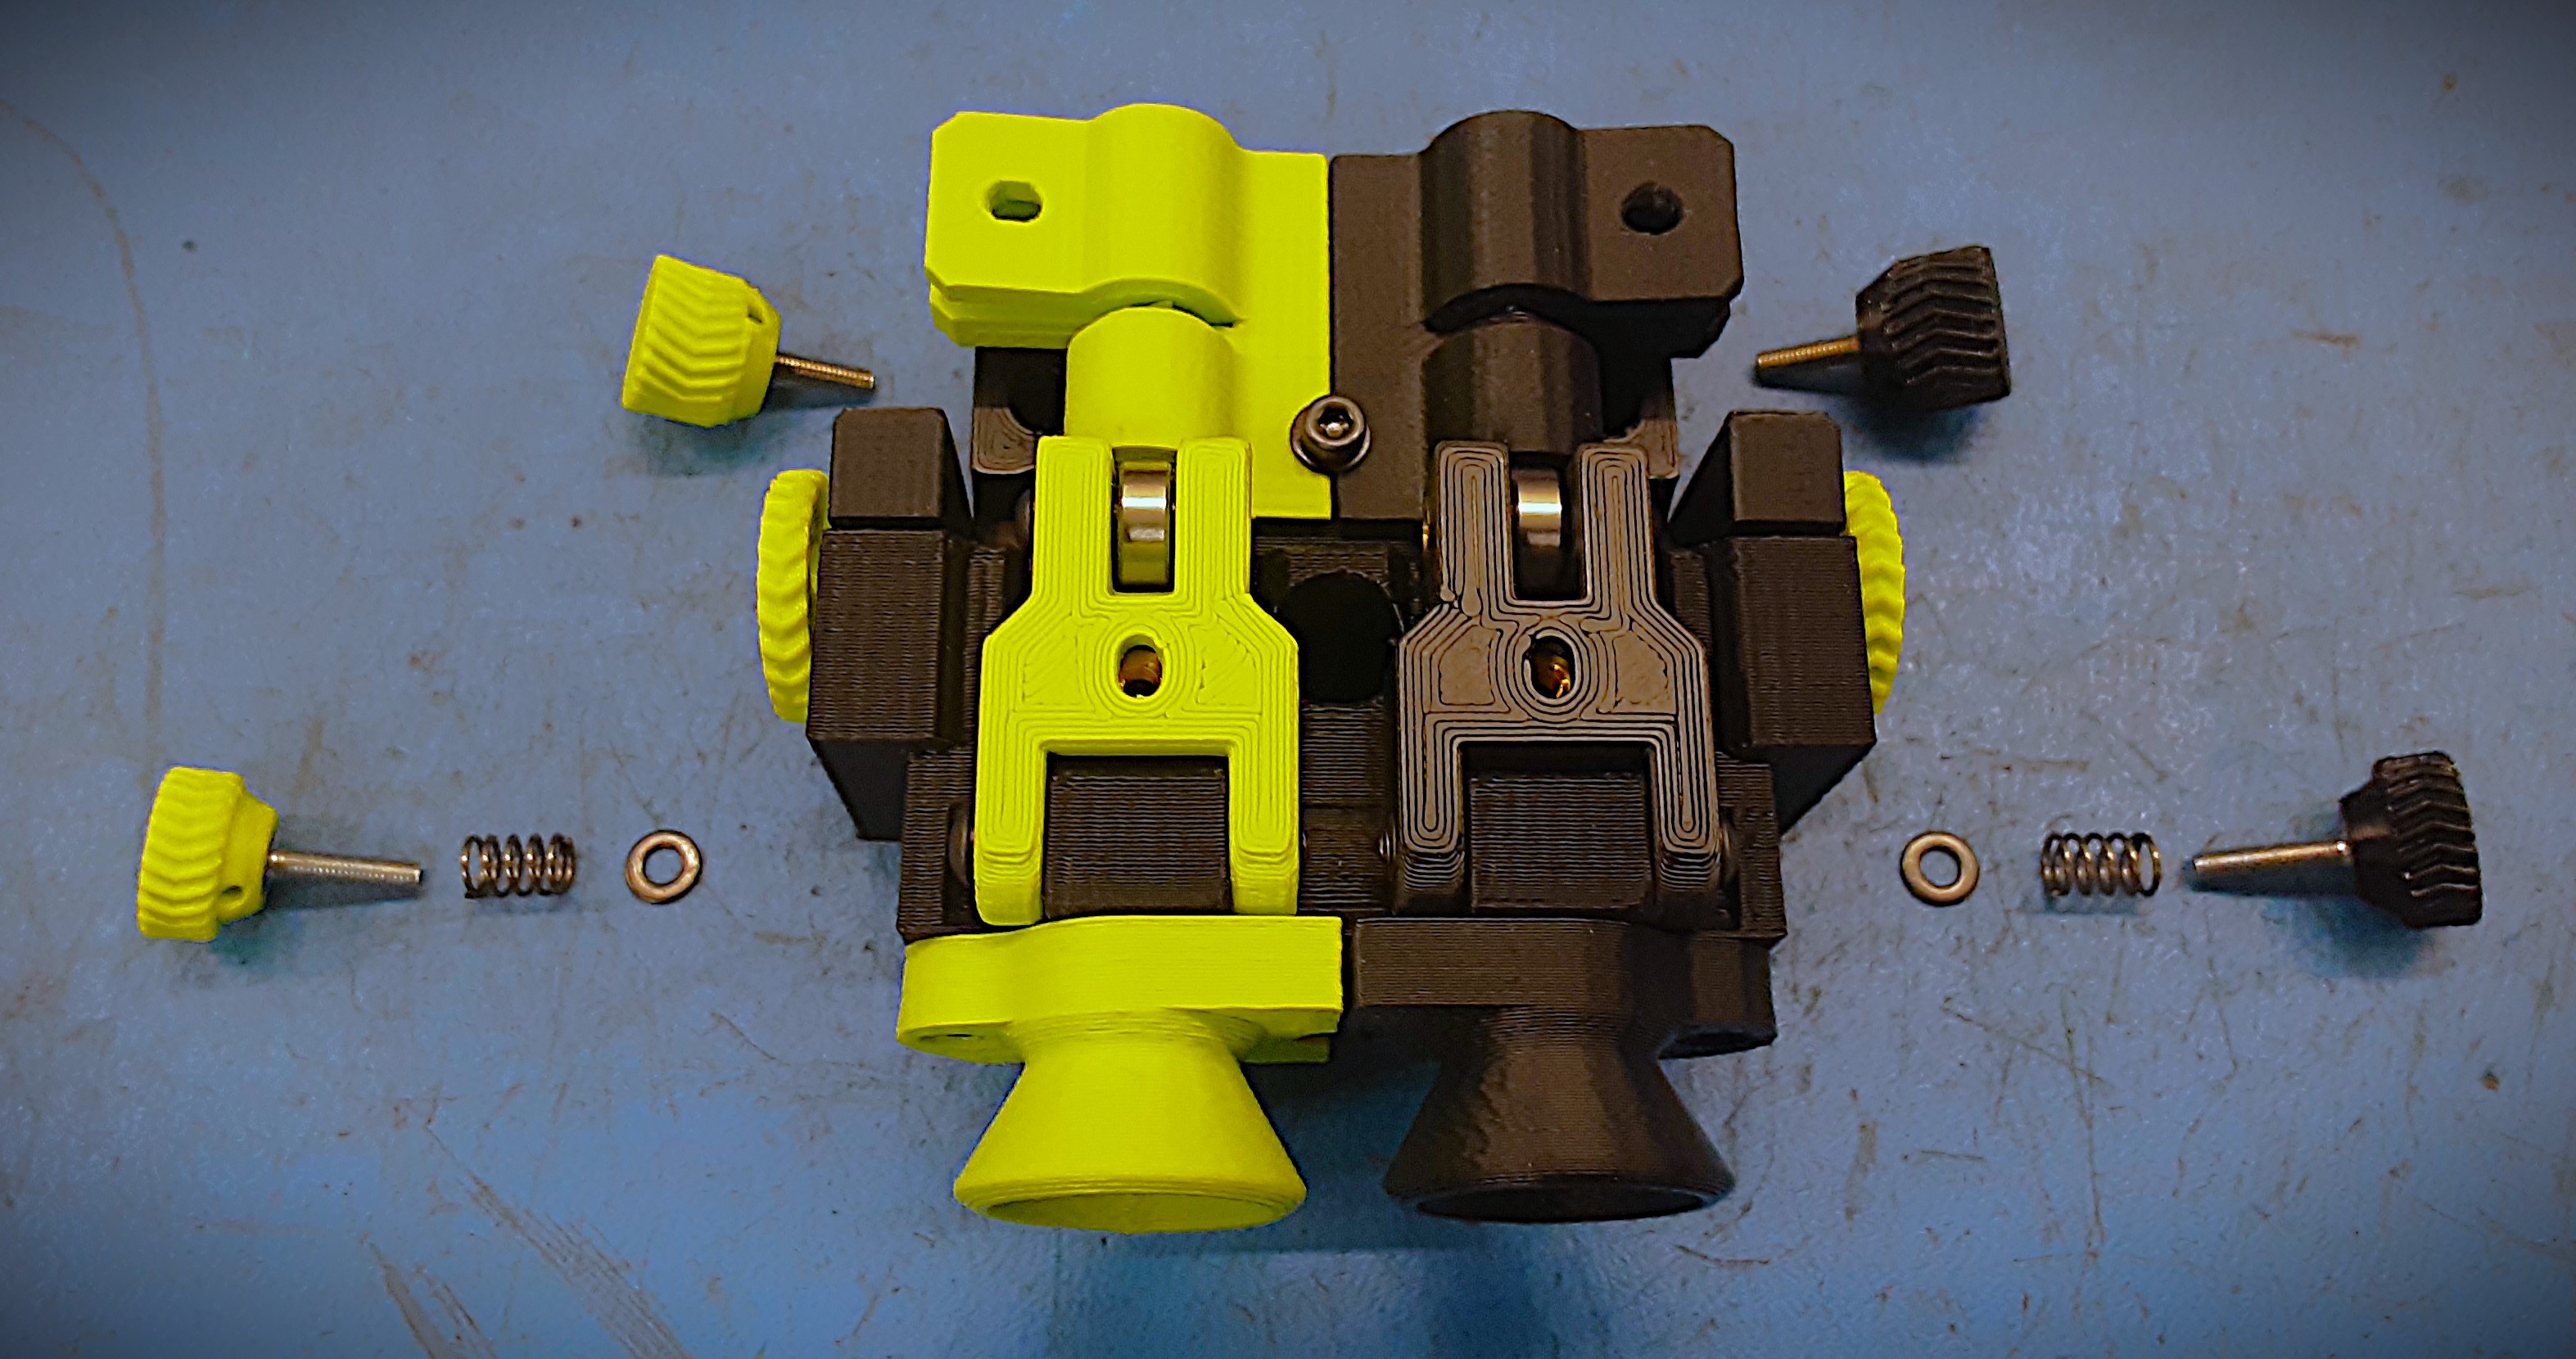
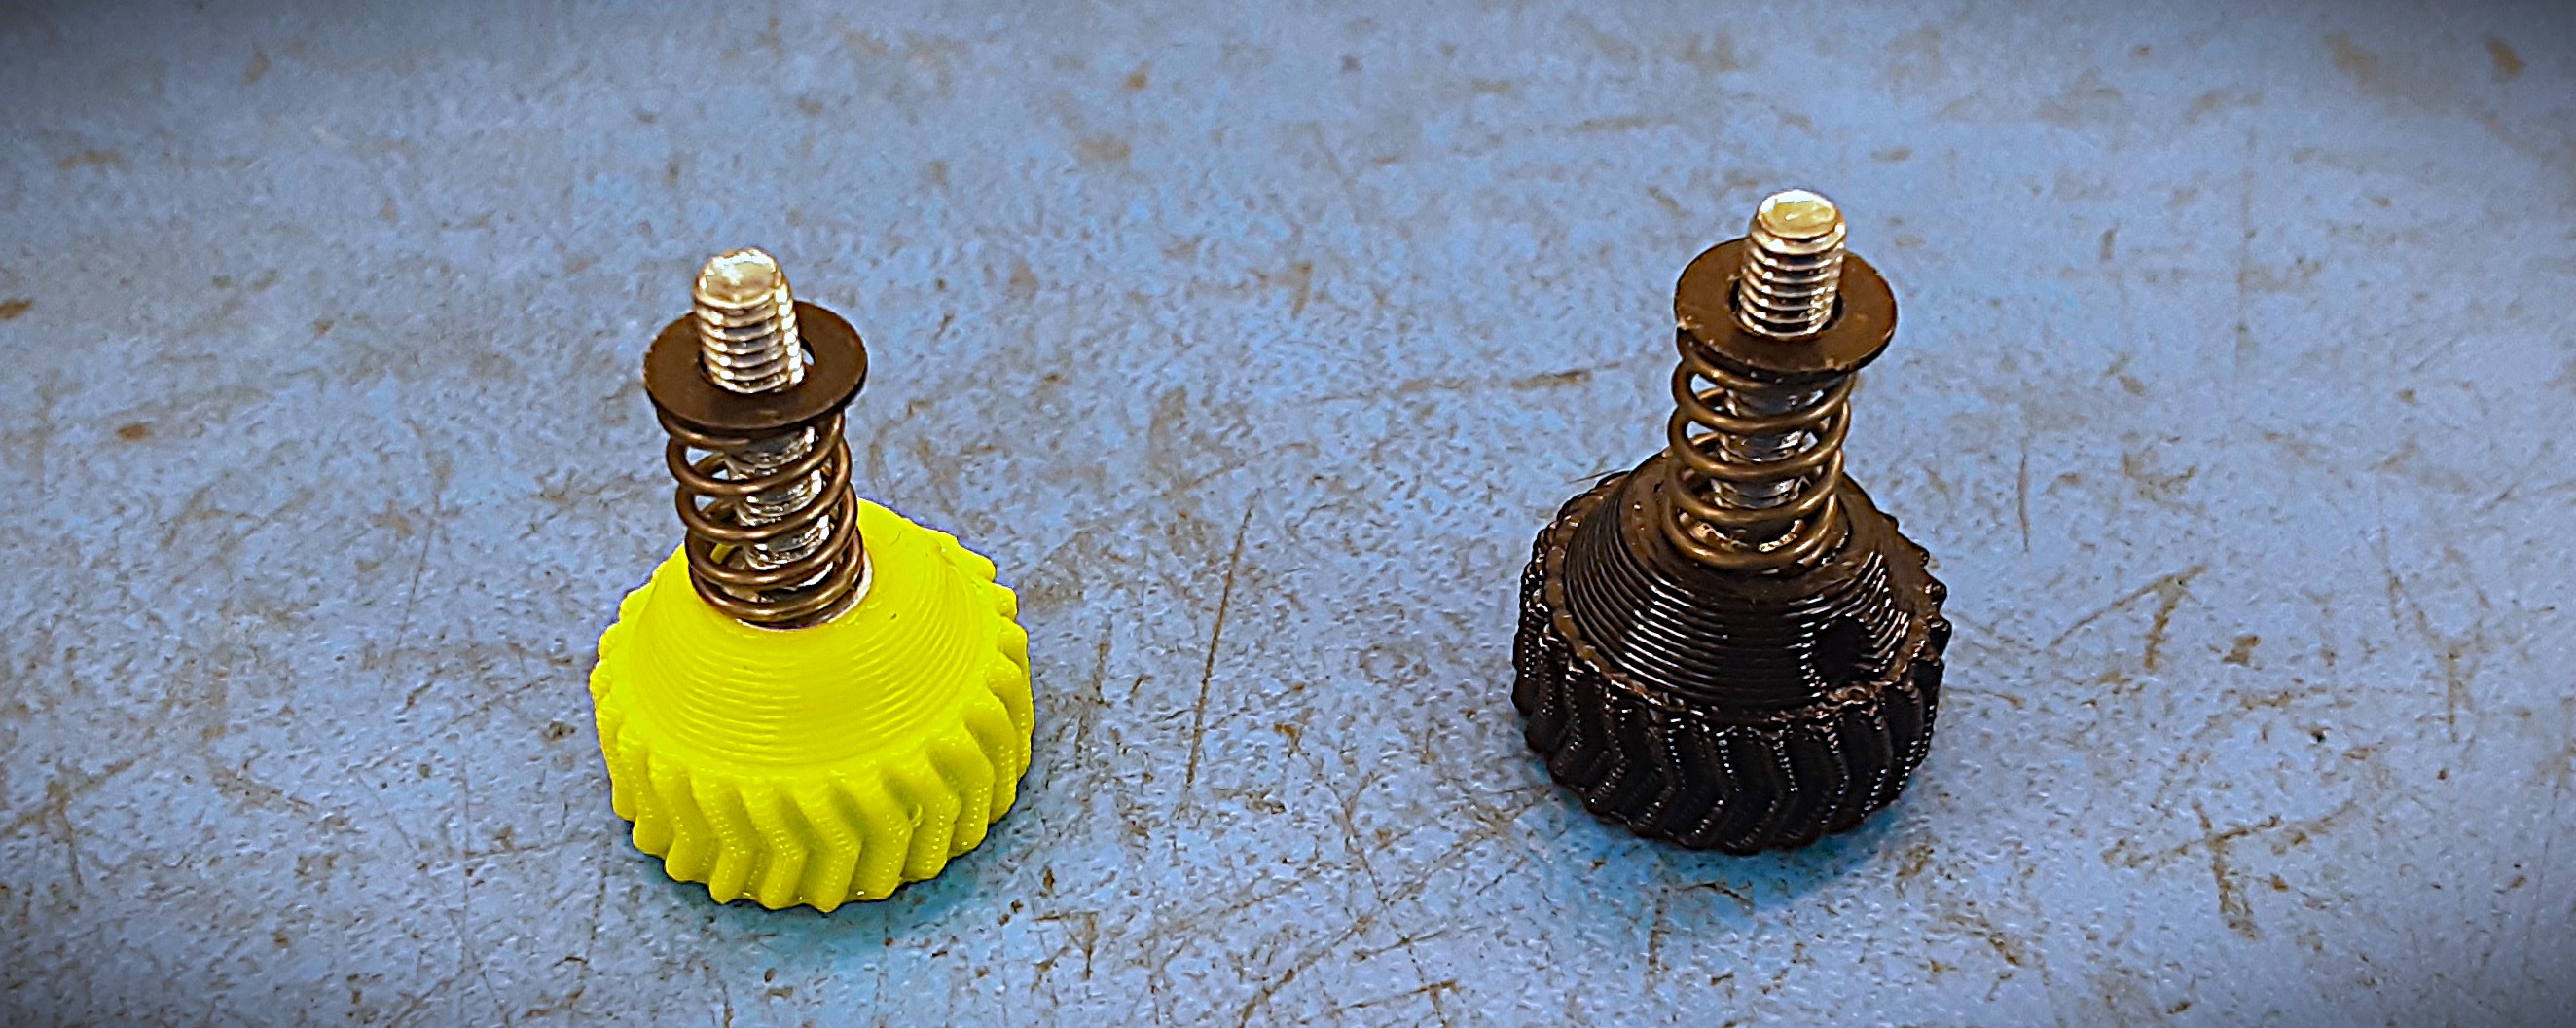
5C) Grab 1x PP-GP0761 and 1x PP-GP0762 each with a HD-BT0091 bolt heat inserted,
1x PP-GP0647-GRN and 1x PP-GP0647-BLK each with a HD-BT0275 bolt heat inserted, 2x HD-WA0038, and 2x HD-MS0471.
5D) Install thePP-GP0761 knob in the green tower and PP-GP0762 knob in the black tower.
5E) Put a spring and then a washer on PP-GP0647-GRN and PP-GP0647-BLK knobs.
5F) Install PP-GP0647-GRN knob through the left idler into the jet pack base and PP-GP0647-BLK through the right idler into the jet pack base.