Open HardwareAssembly Instructions
Guides for installation and assembly of the LulzBot line of products made by FAME 3D LLC.
Guides for installation and assembly of the LulzBot line of products made by FAME 3D LLC.
Cura LE is a little less intuitive to use on ChromeOS since it is forced to run in a subsystem.
It does not naturally have access to any of the ports or files on the device that are not specifically handed to it.
This makes tethered printing over USB and firmware flashing unfeasible and makes importing 3D models and exporting gcode files to a flash drive a little more manually intensive.
This guide is here to serve a work around for who wish to use CURA LulzBot Edition on their Chromebook in the event that it is required.
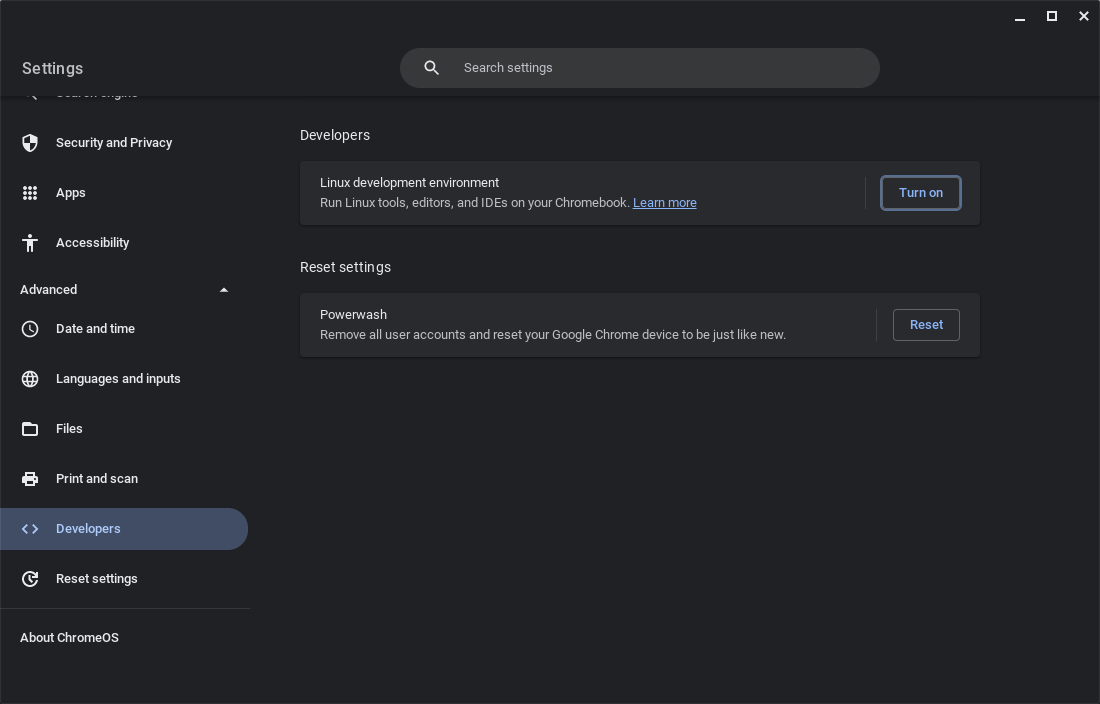
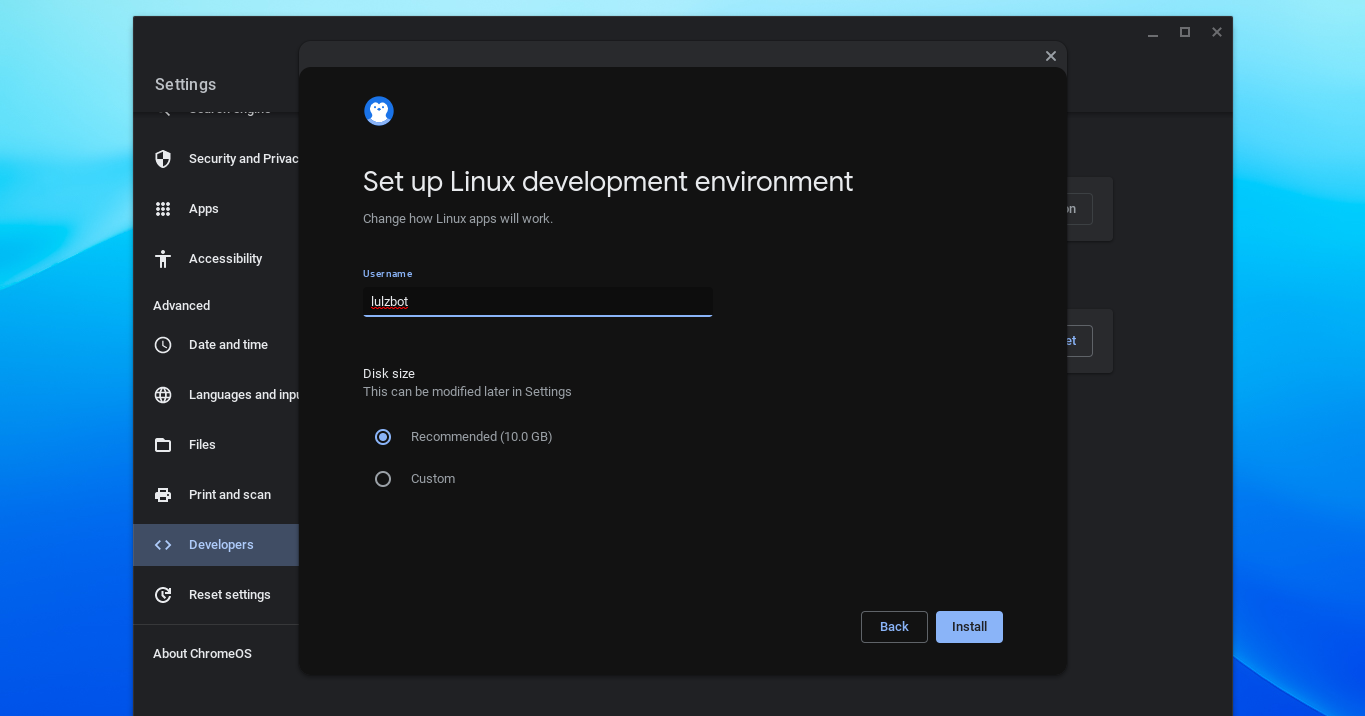
Turn on the Linux development environment within the Developers menu within Settings.
You should be met with a window that asks for a username and drive allocation.
The default username and drive allocation sizes should be fine for our purposes.
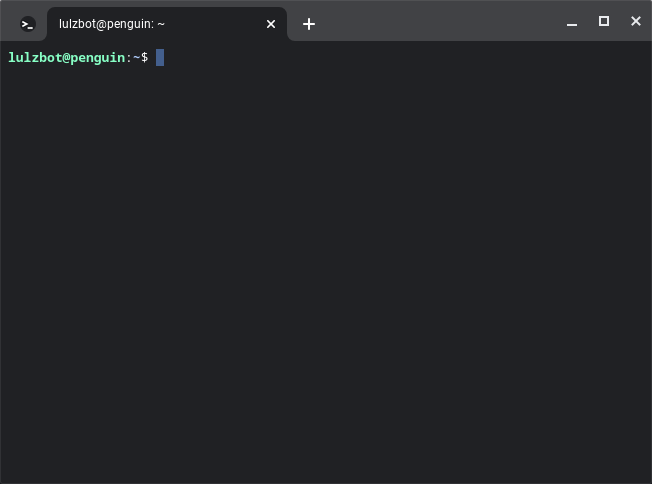
Once the Linux development environment is finished being installed, you should be greeted with a Linux terminal window. This can be closed, but should indicate that the installation was successful.
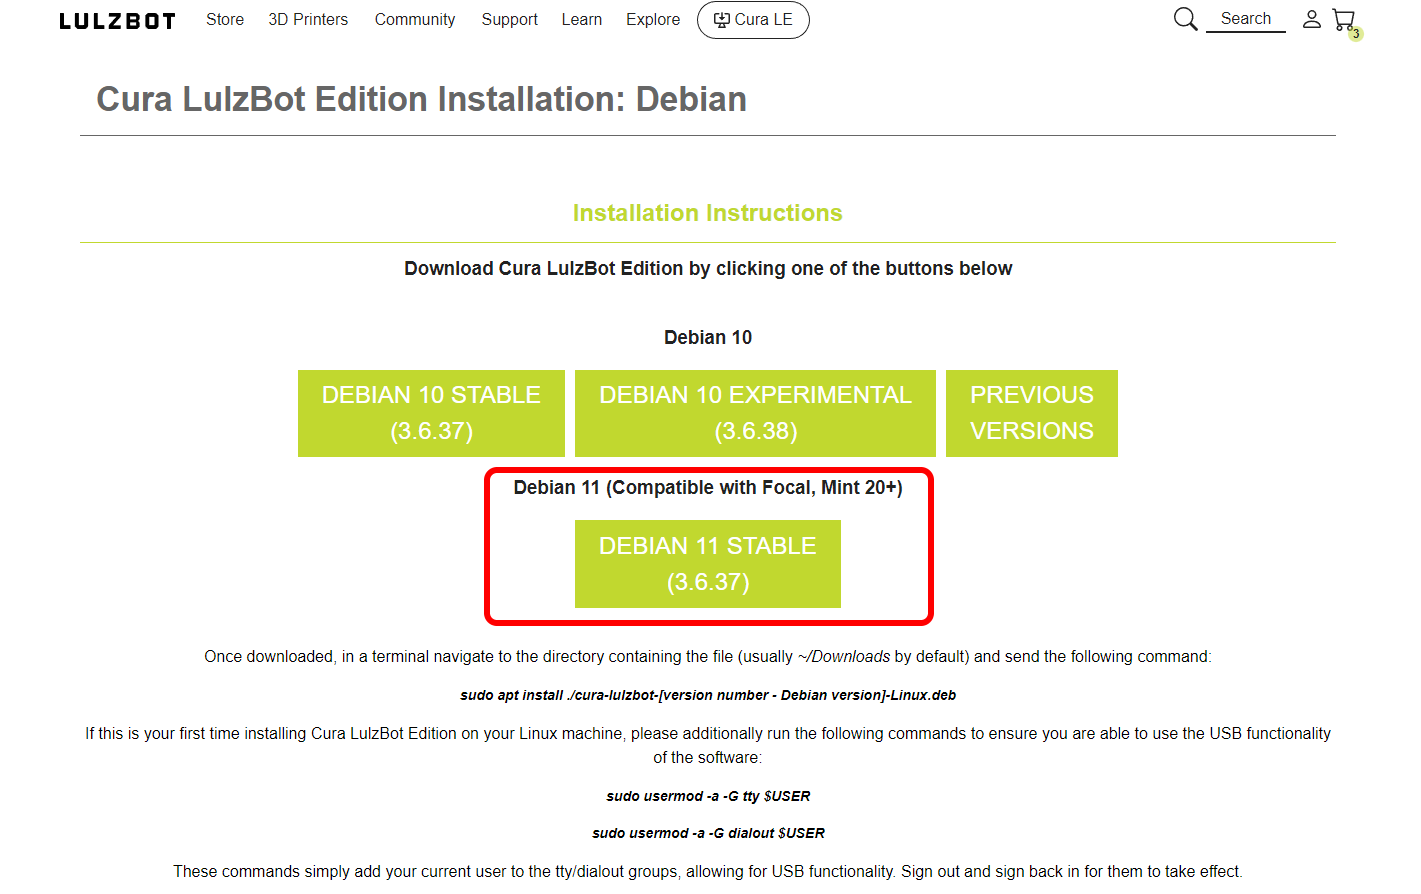
Navigate to the Cura LE DEBIAN download portion of our website linked HERE.
Download the installer for Cura LE.
The version that we’re going to need the version compatible with Debian 11.
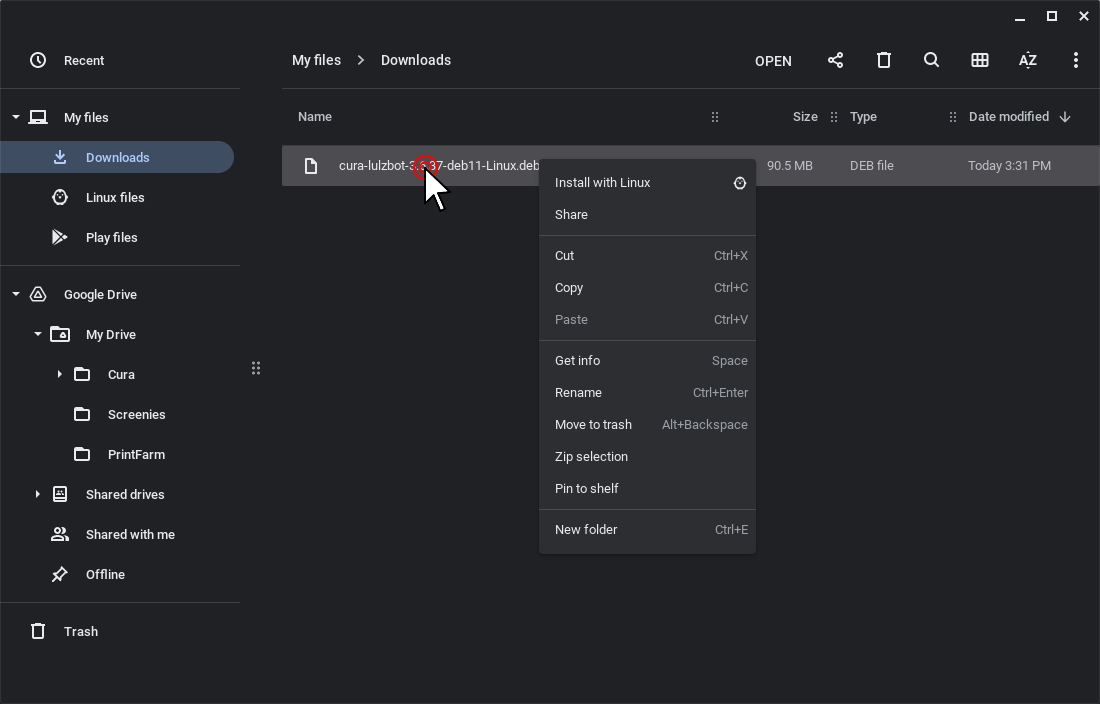
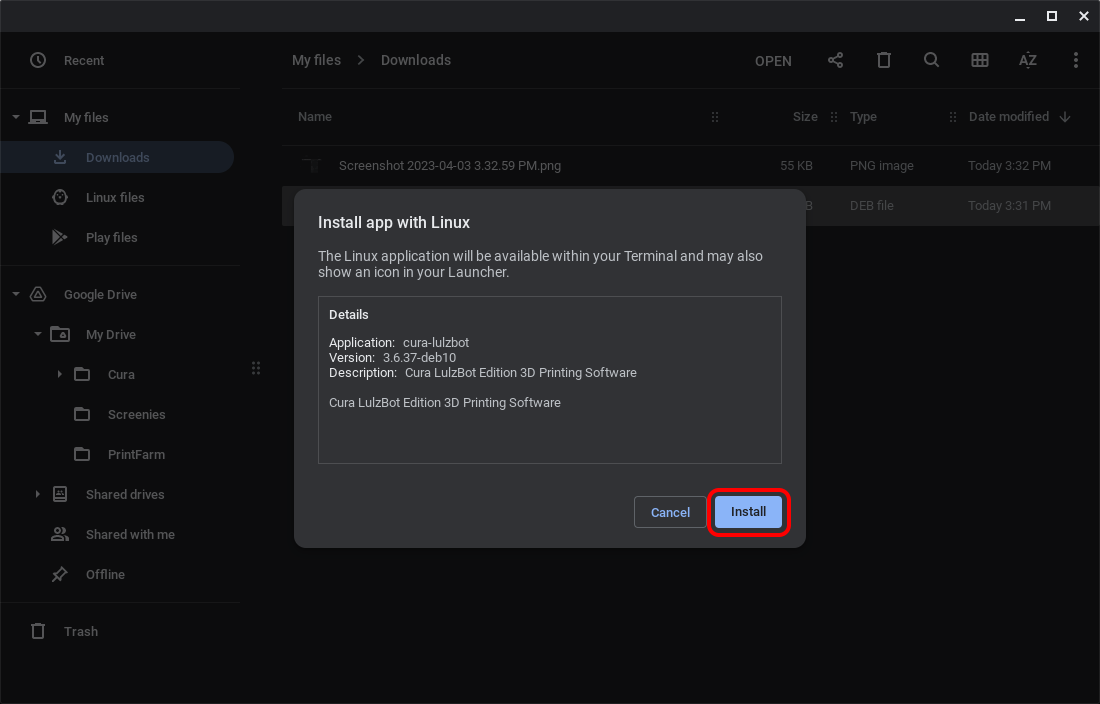
After downloading, find the “.deb” file you just downloaded in your Downloads folder in the file explorer.
Right click, and select “Install with Linux”.
On the pop u menu, Click “Install”.
Once the installation finishes, Cura LulzBot Edition should be found within the “Linux apps” folder in your applications menu!


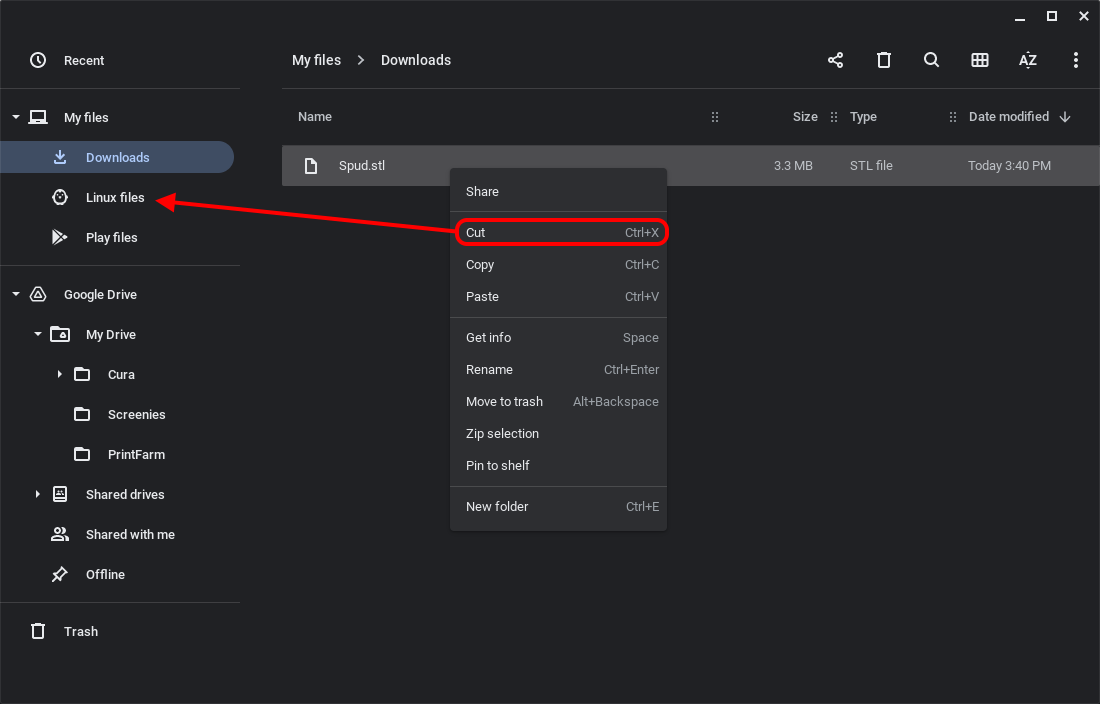
Once you have Cura LE open and a 3D Model you’d like to print, move the file into the Linux files folder in your file manager.
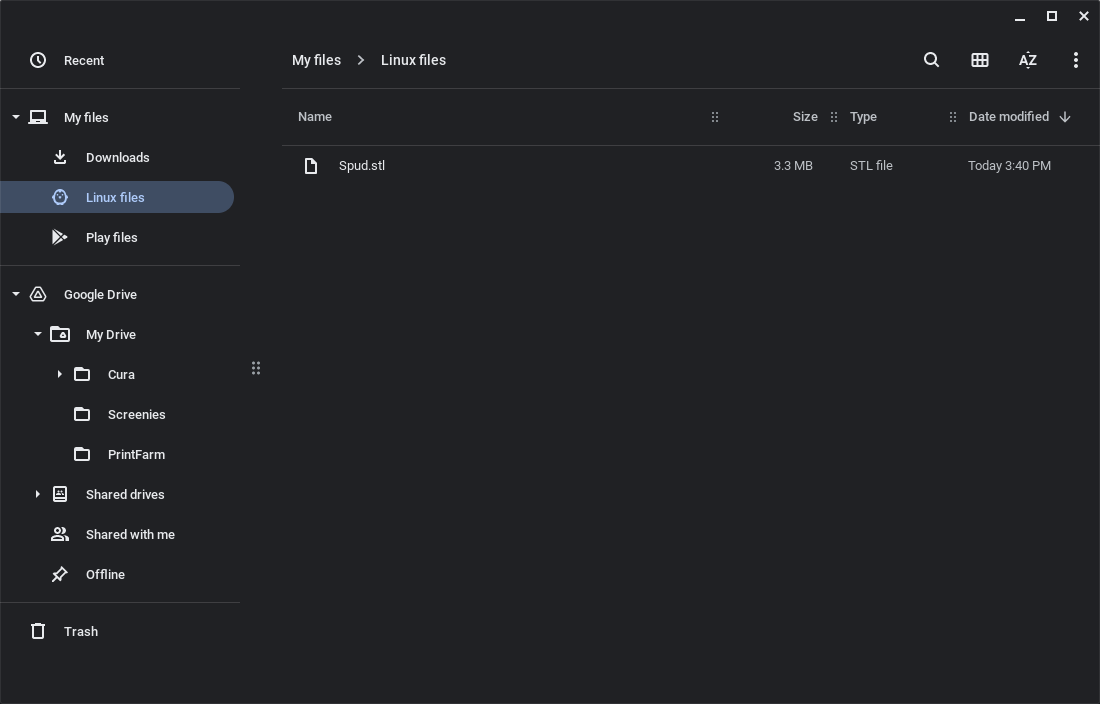
This will make it visible within the Linux subsystem.
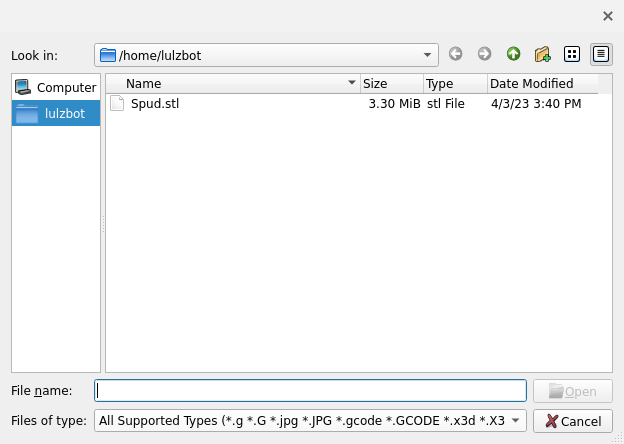
You should now be able to see the model file within the user’s home directory in Cura LE.
You can now use Cura LE to slice your object with settings appropriate for your printer setup.
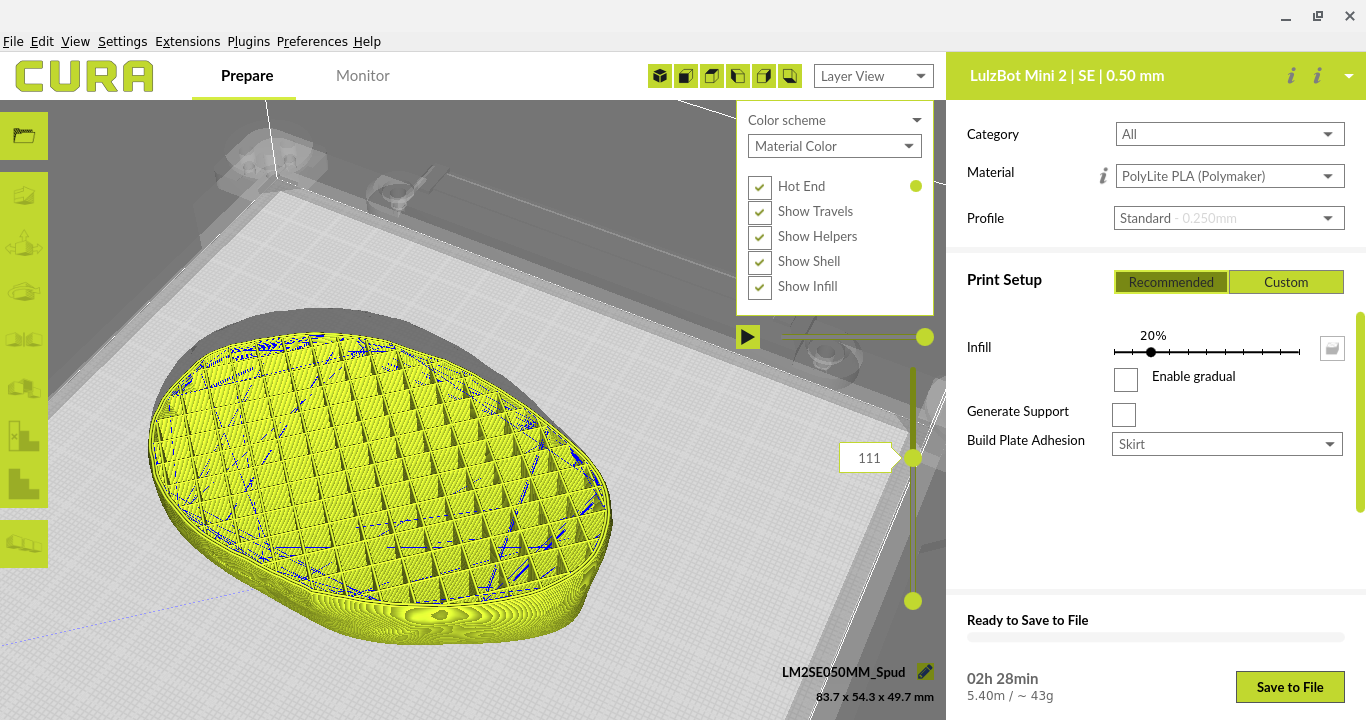
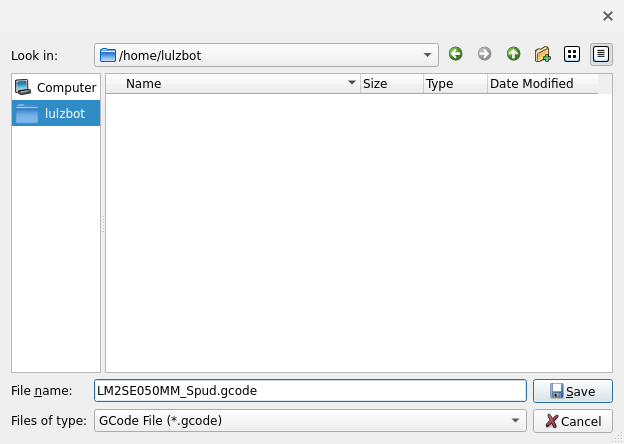
Once finished setting up the print and slicing it, clicking Save to File in the lower right hand corner of Cura will prompt you with a file explorer.
for the sake of ease, save the gcode file within the /home/[your username] folder.
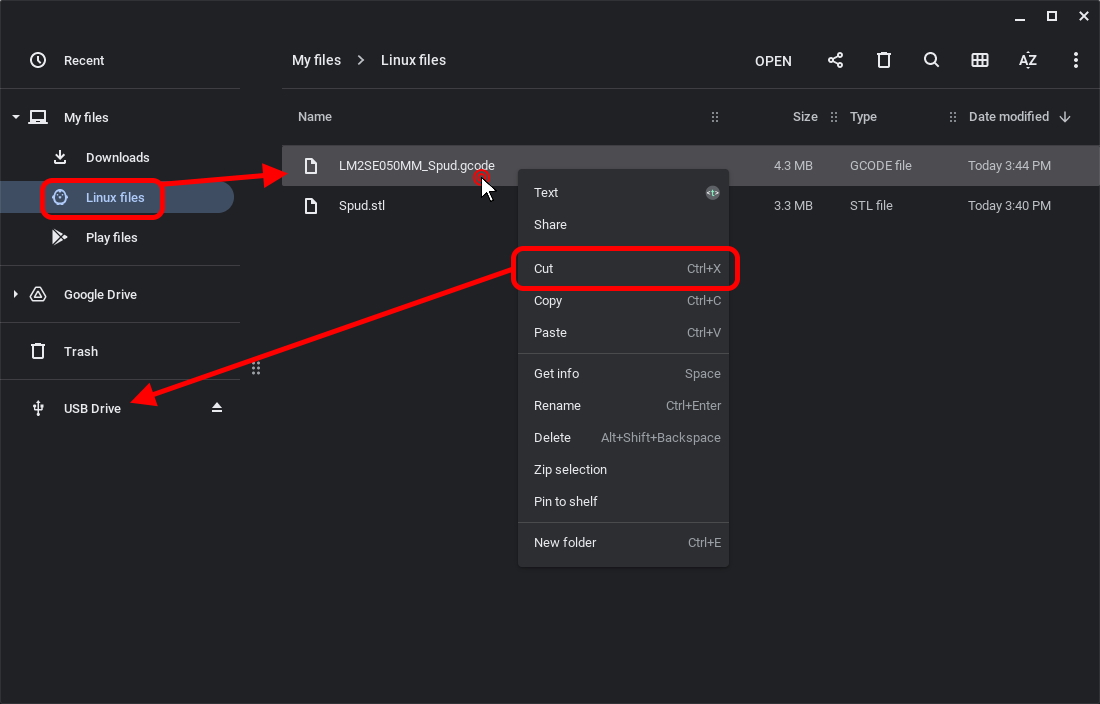
The file should then be able to be found within the ChromeOS file explorer within the “Linux files” folder.
It can then be moved or copied to your external drive of choice for use in a LulzBot printer!