Open HardwareAssembly Instructions
Guides for installation and assembly of the LulzBot line of products made by FAME 3D LLC.
Guides for installation and assembly of the LulzBot line of products made by FAME 3D LLC.
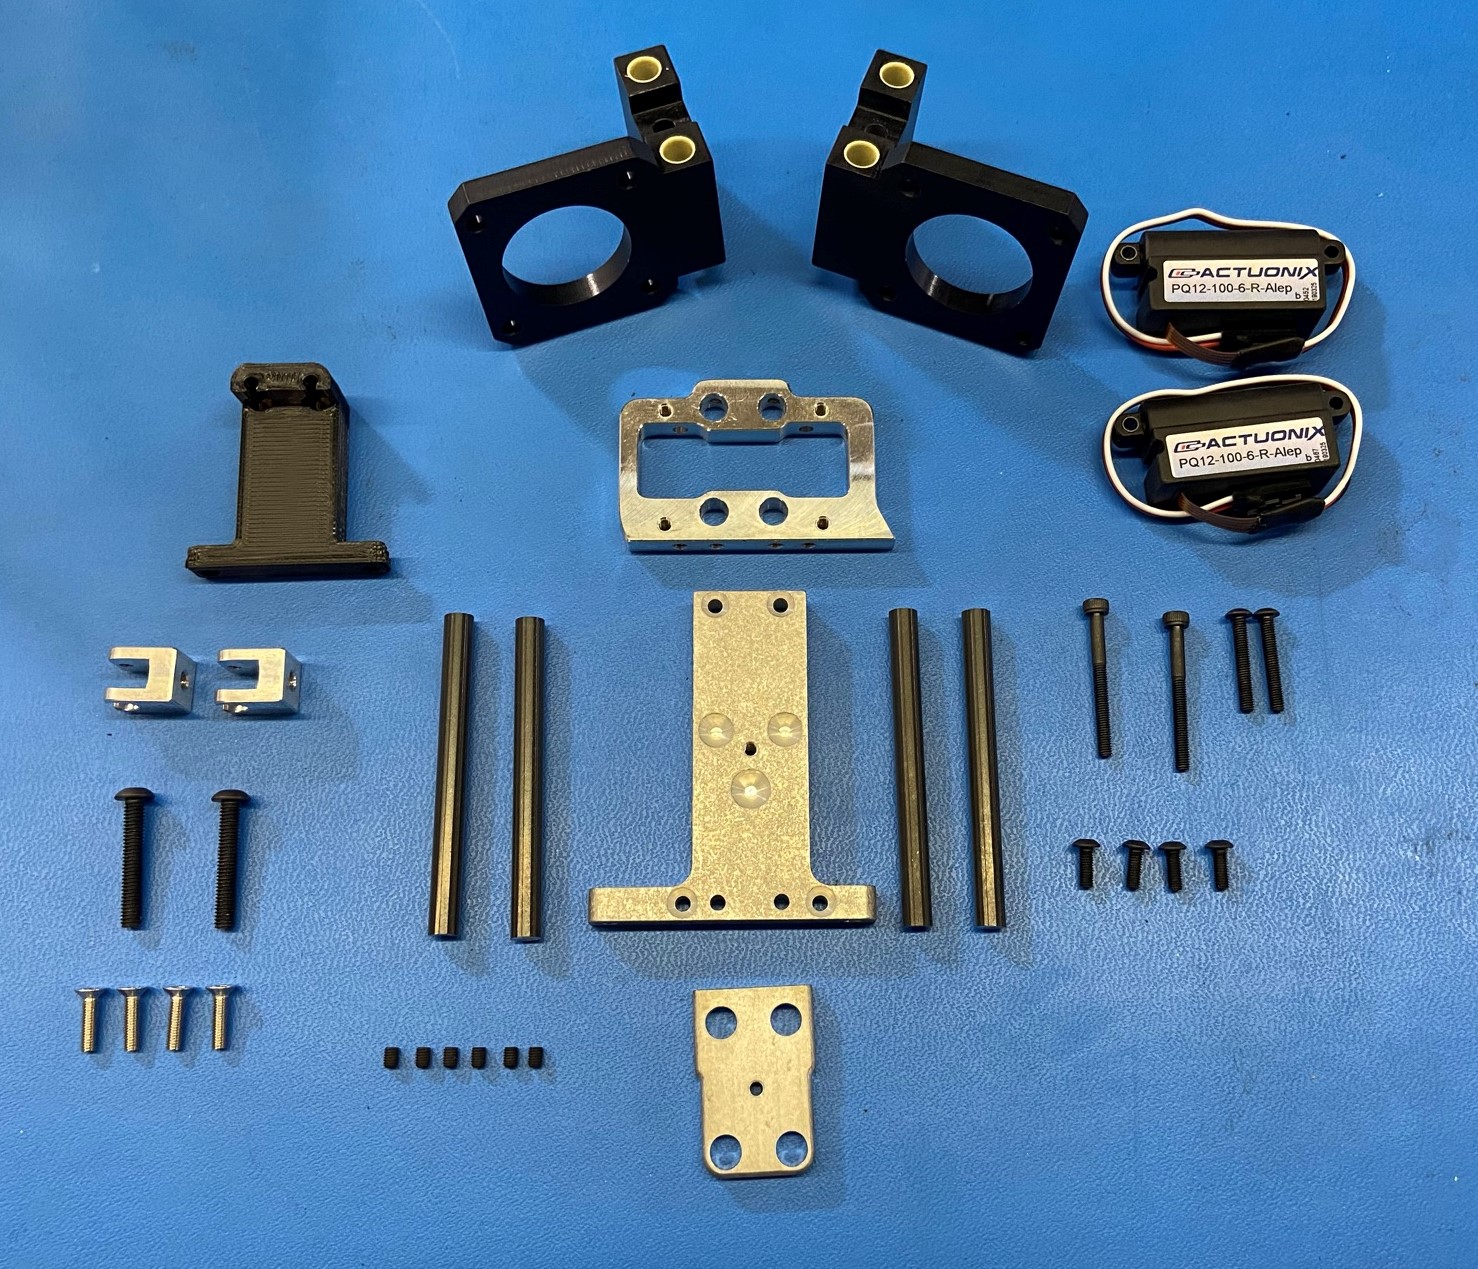
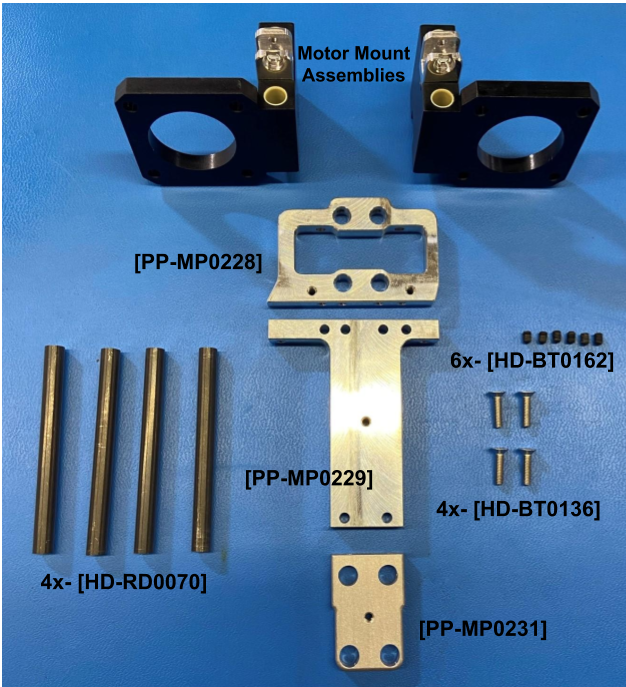
2x- [PP-MP0232] Motor Mount Ambidextrous, Machined
2x- [PP-MP0230] Actuator Connector
2x- [HD-BT0161] M4x25 BHCS
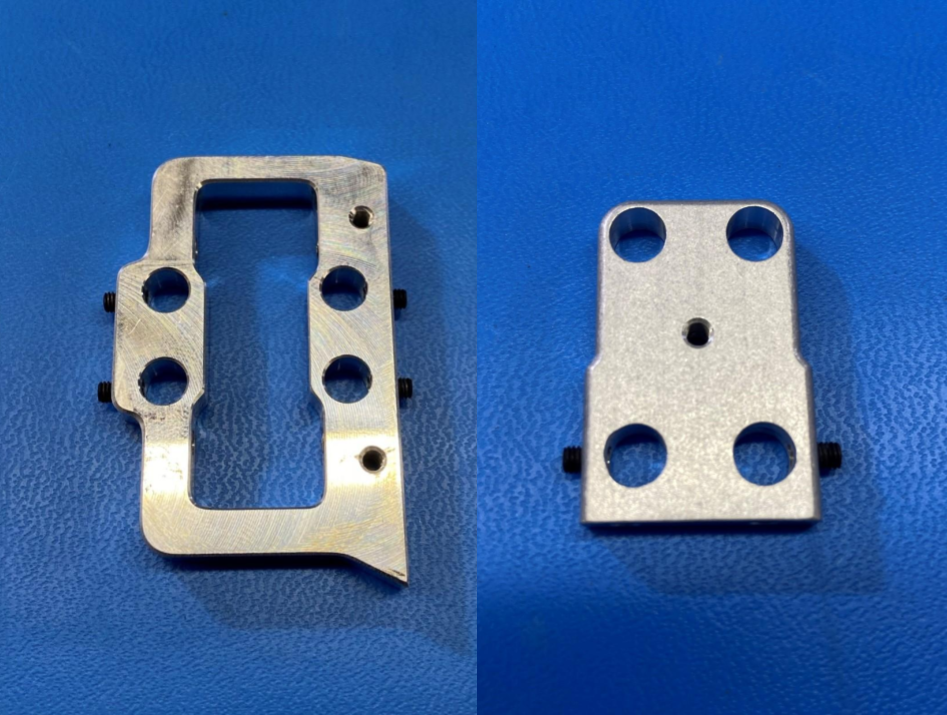
1x- [PP-MP0228] Top Rod Mount
1x- [PP-MP0229] Back Plate
1x- [PP-MP0231] Bottom Plate
4x- [HD-BT0136] M3x12 SST FHCS
6x- [HD-BT0162] M3x4 Set Screw
2x- [HD-BT0041] M3x25 SHCS
4x- [HD-BT0137] M3x8 BHCS
2x- [HD-BT0171] M3x20 BHCS
2x- [EL-MS0536] Micro Linear Servo w/custom cable and connector
4x- [HD-RD0070] 6mm smooth rod
1x- [PP-GP0422] Actuator Mount
Materials:
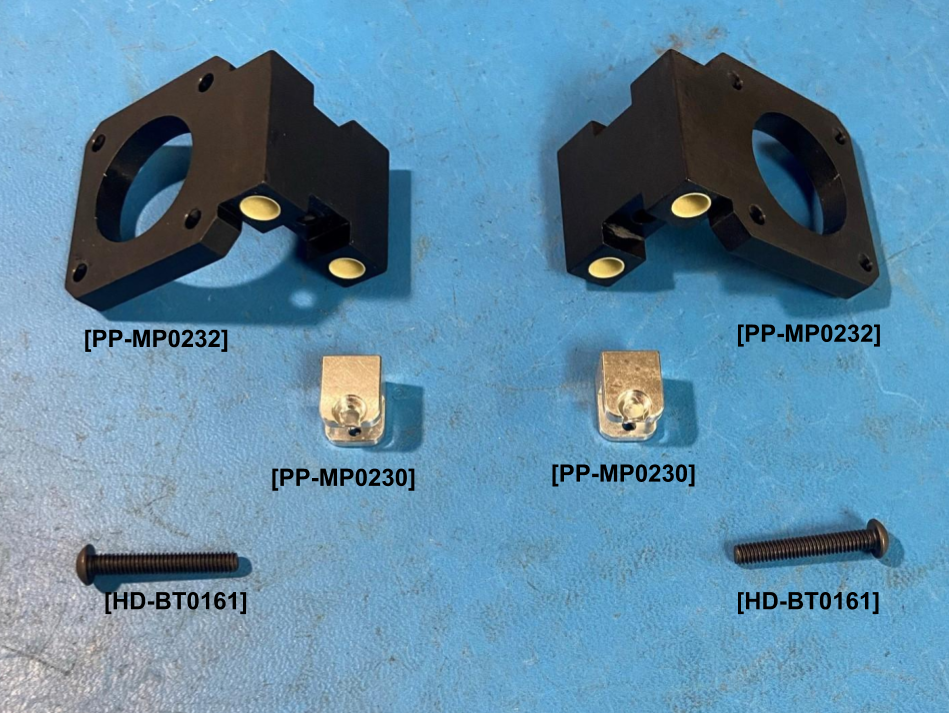
2x- [PP-MP0232] - Motor Mount Ambidextrous, Machined
2x- [PP-MP0230] - Actuator Connector
2x- [HD-BT0161] - M4x25 BHCS
Position the machined motor mounts [PP-MP0232] with the four bolt holes is facing up, as shown
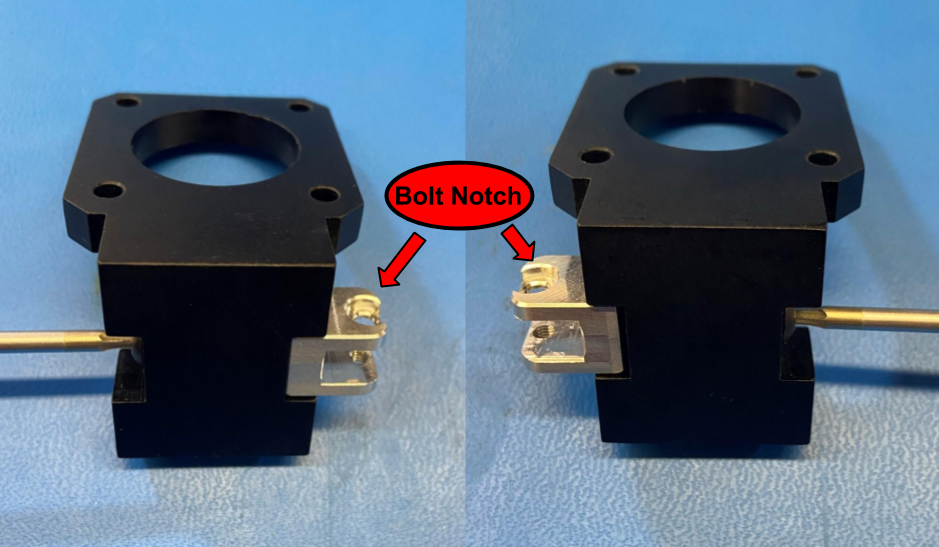
Then install the Actuator Connector [PP-MP0230] with the bolt notch facing up [reference#1] using 1x M4x25 BHCS [HD-BT0161]
Torque to 5in*lbs
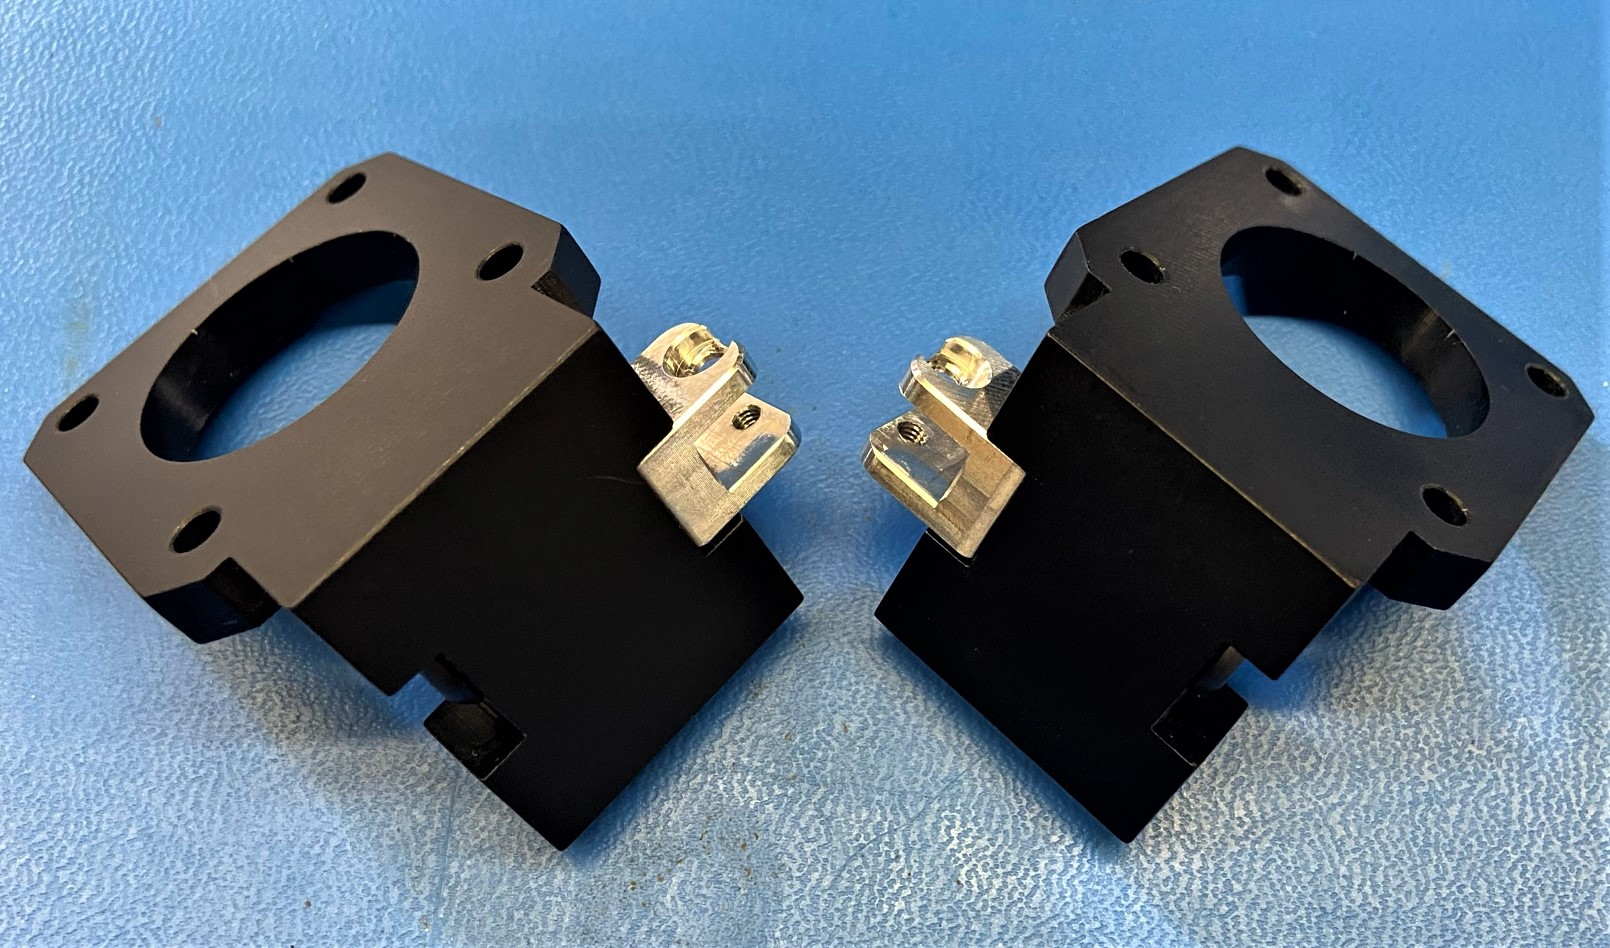
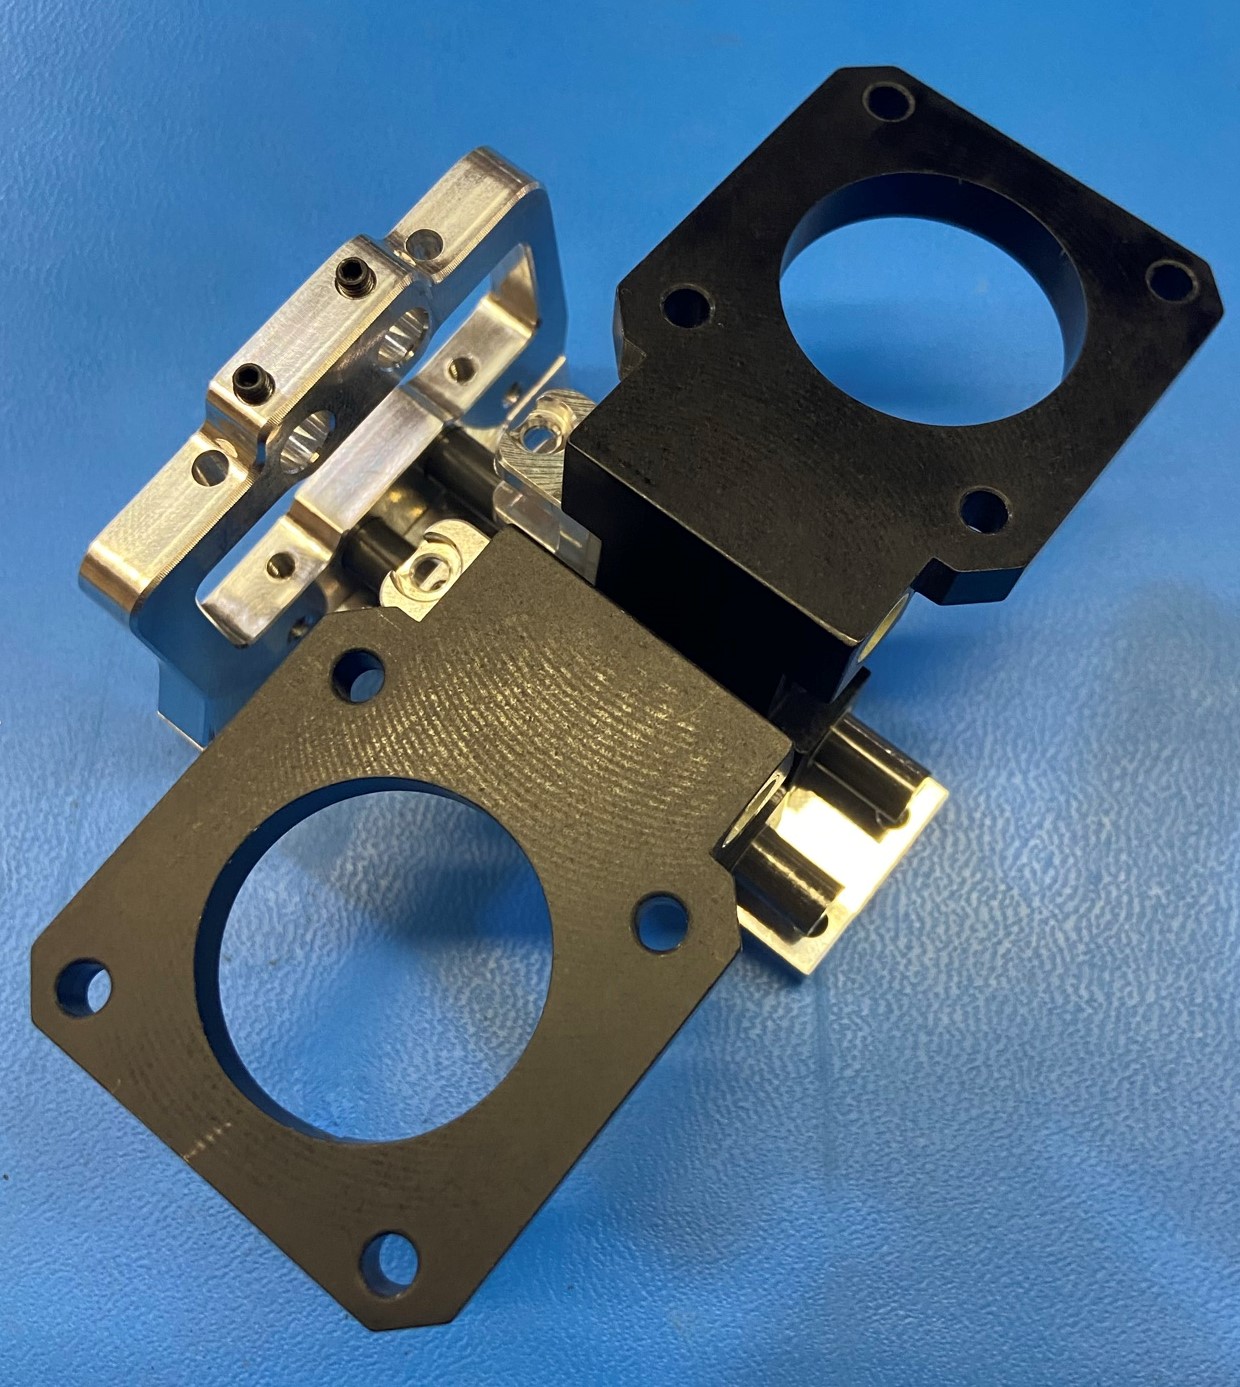
Repeat with the second motor mount making sure to install the actuator connector to the other side of the motor mount so it is a mirror of the first motor mount, as shown in [reference#1]
Materials:
2x- Motor Mount Assembly (Step 2)
4x- [HD-RD0070] - 6mm smooth rod
1x- [PP-MP0228] - Top Rod Mount
1x- [PP-MP0229] - Back Plate
1x- [PP-MP0231] - Bottom Plate
4x- [HD-BT0136] - M3x12 SST FHCS
6x- [HD-BT0162] - M3x4 Set Screw
Using 6x M3x4 set screws [HD-BT0162] install 4x set screws in the four threaded holes on the Top Rod Mount [PP-MP0228] and 2x set screws in the two threaded holes on the Bottom Plate [PP-MP0231], as shown in [reference#2]
Make sure that the set screw are not fastened deep enough to scratch the 6mm smooth rod
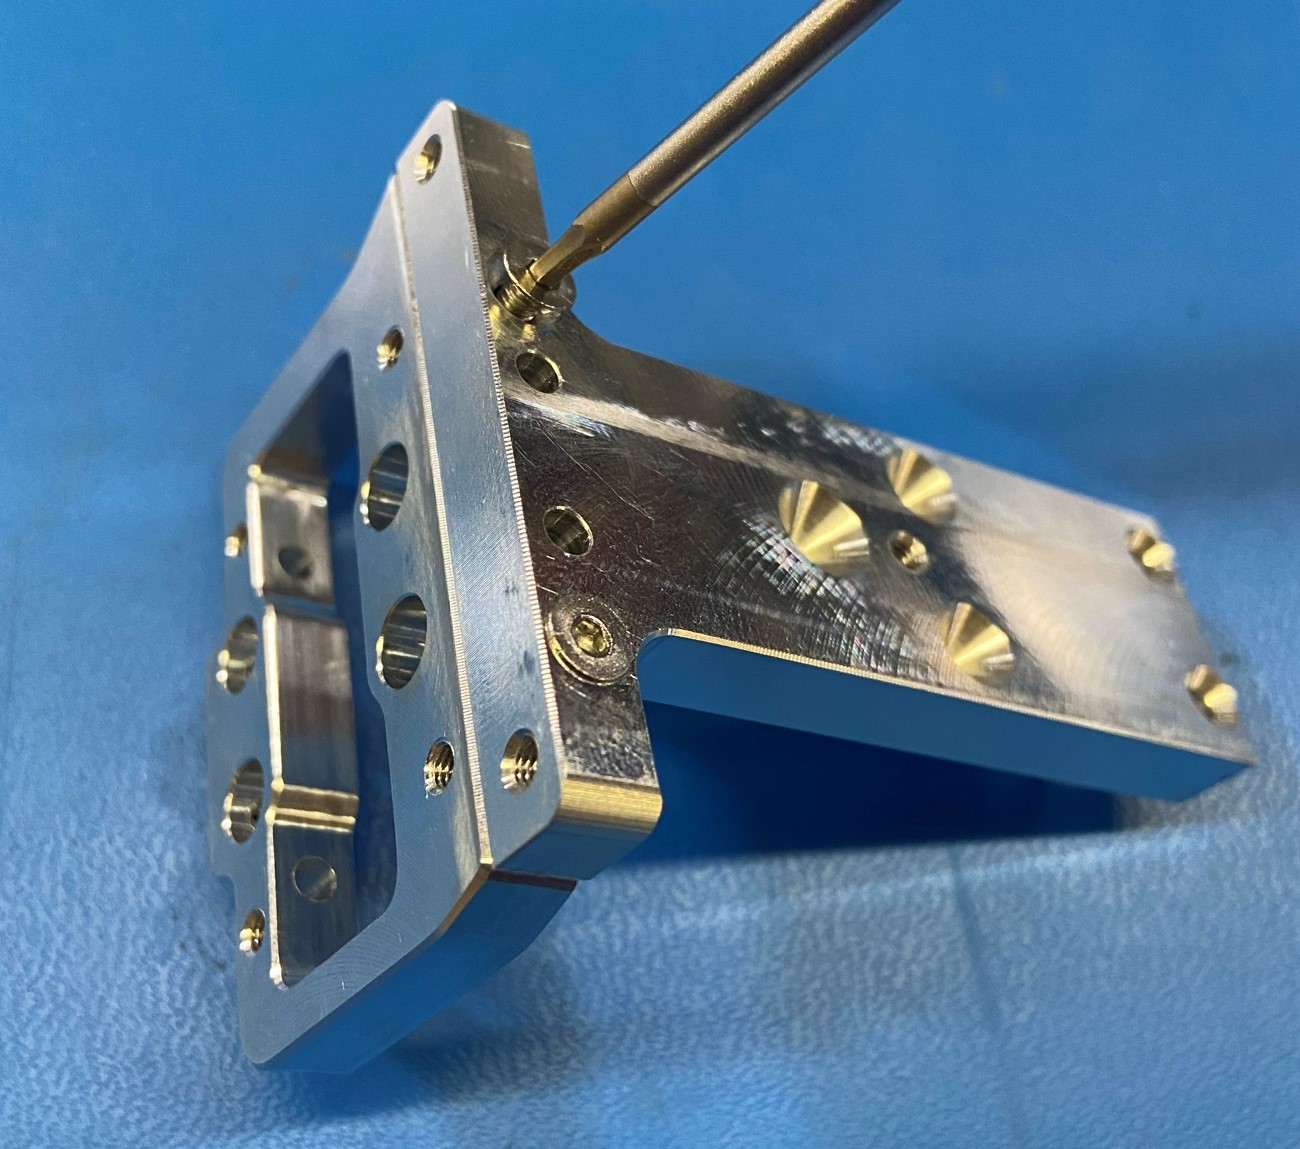
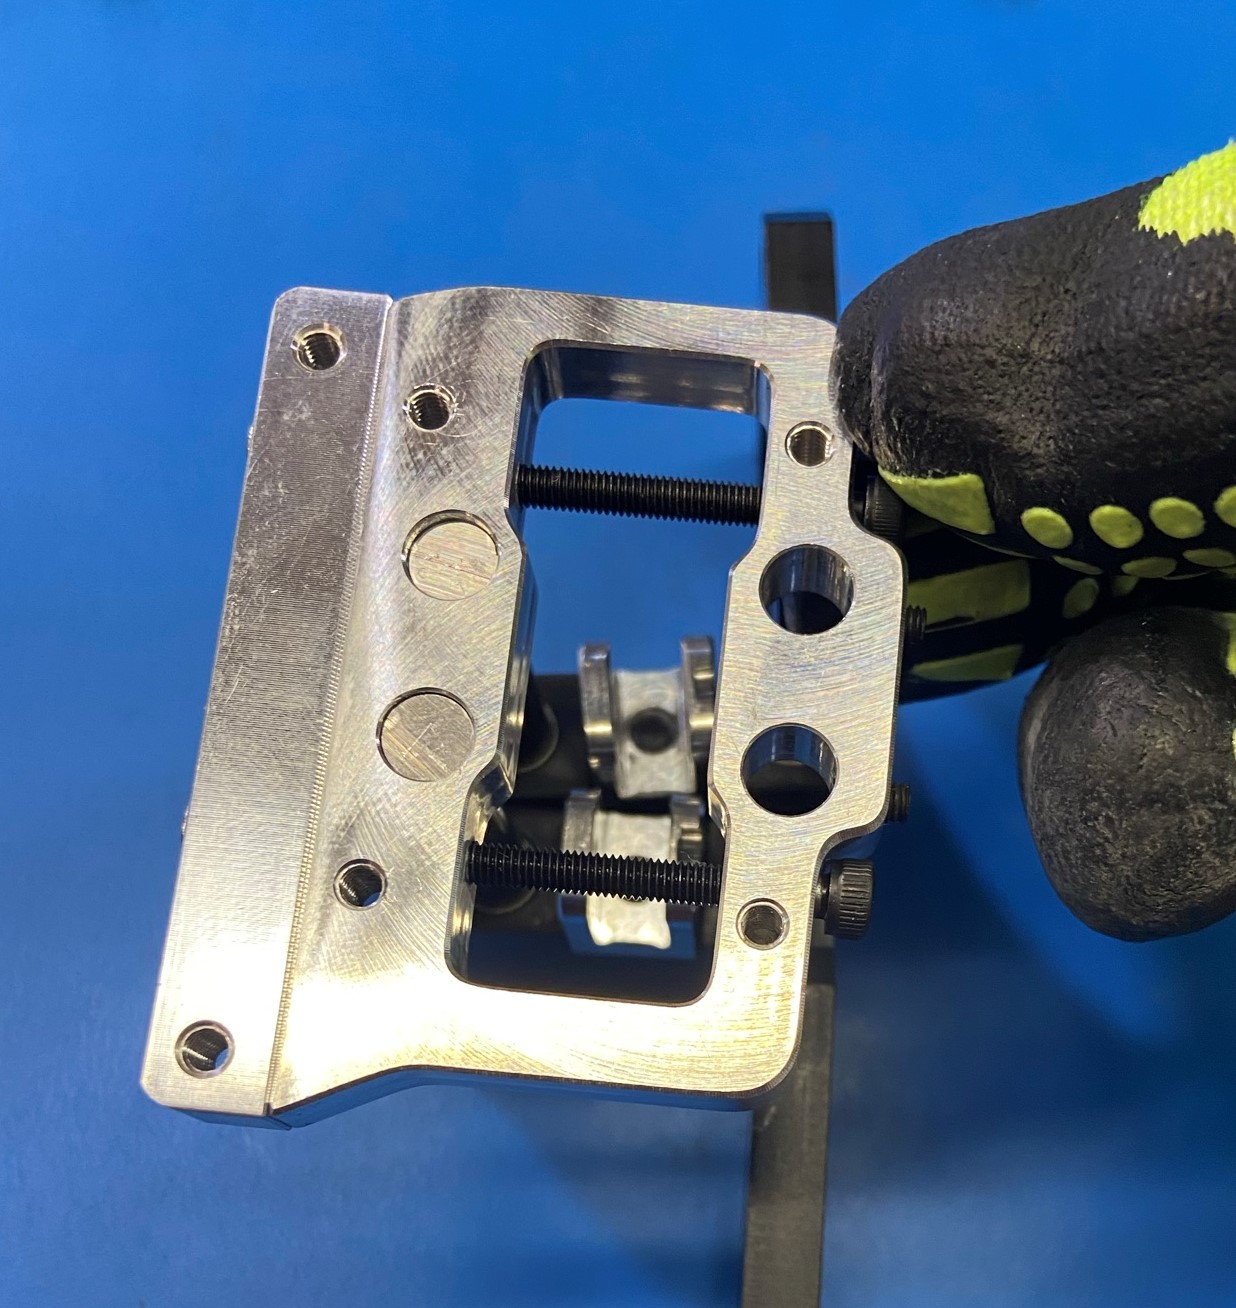
Attach the Top Rod Mount to the Back Plate [PP-MP0229] using 2x M3x12 FHCS [HD-BT0136] make sure to have the countersunk holes face outwards on the back plate, as shown in [reference#3]
Leave screws loose to allow the smooth rods to move
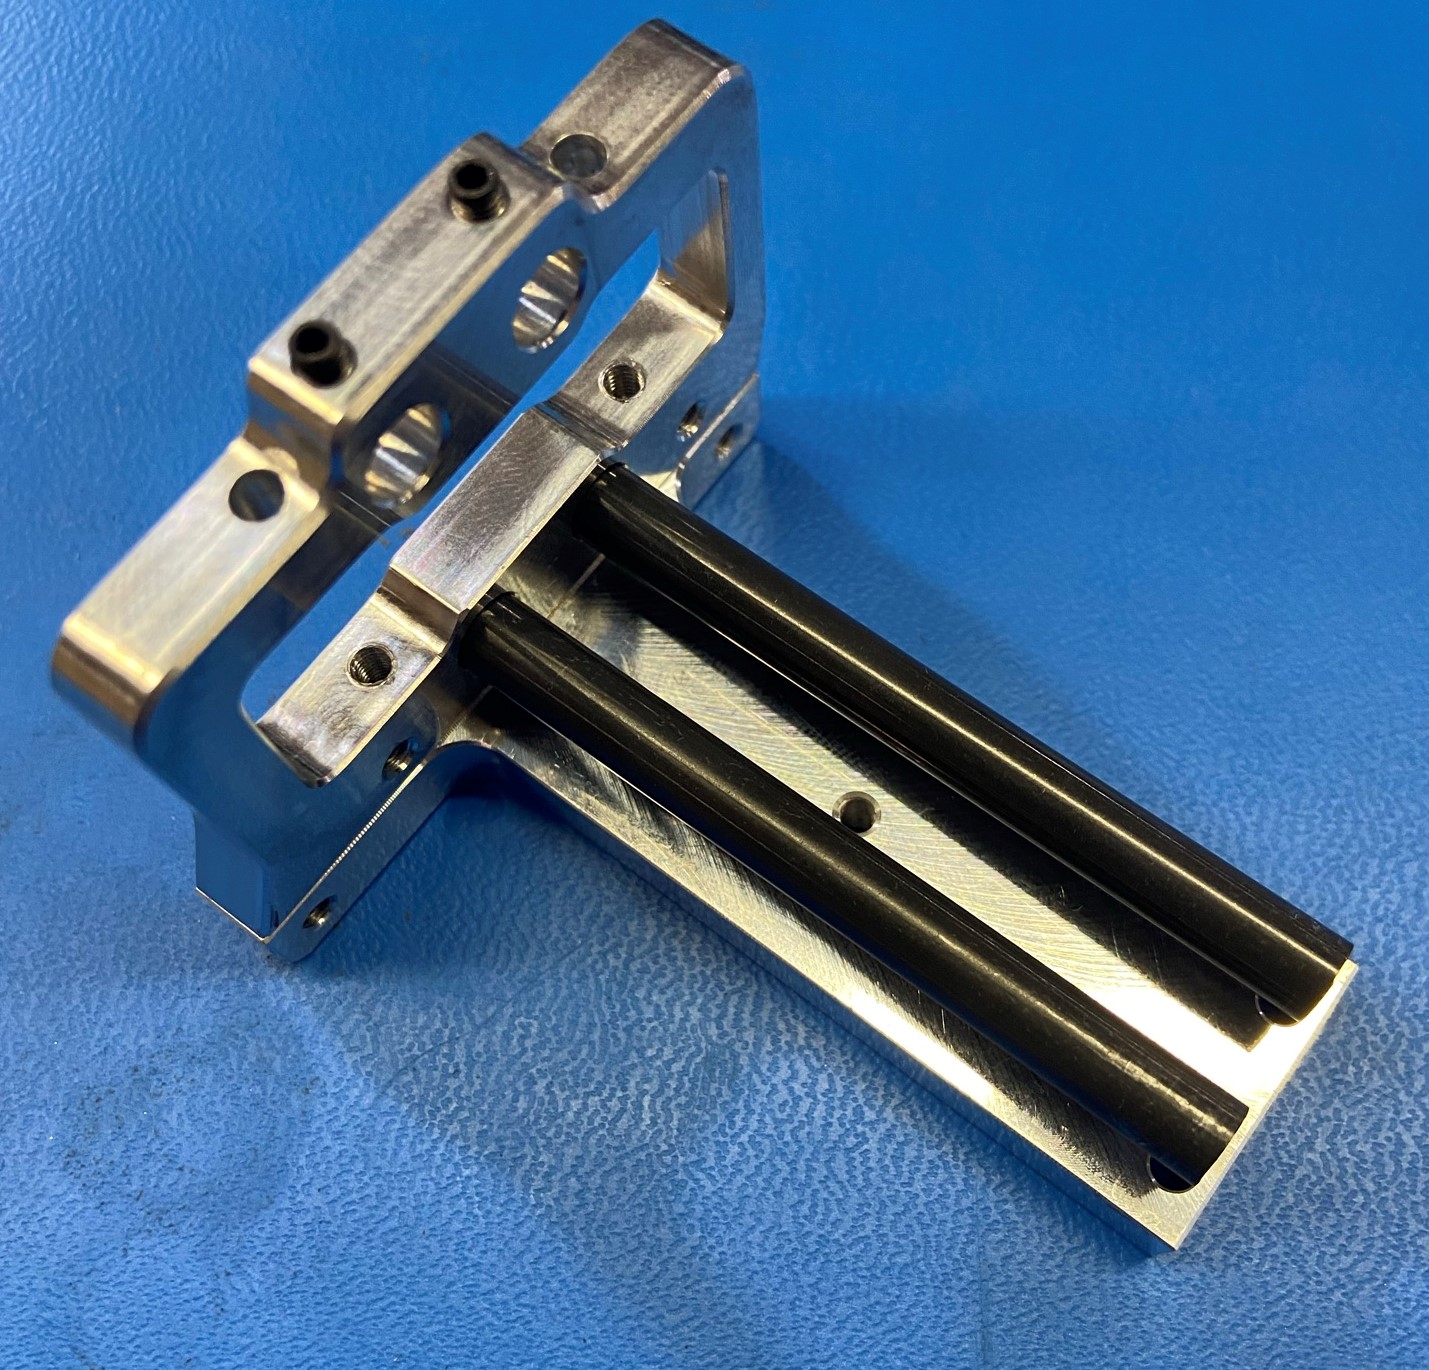
Take 2x 6mm Smooth Rods [HD-RD0070] and slide them through the back two holes on the Top Rod mount plate.
Slide the motor mount assemblies over the two rods making sure the actuator connectors are facing the Top Rod mount plate.
Then install the Bottom Plate using 2x M3x12 FHCS [HD-BT0136] making sure the fillet on the bottom plate is facing away from the top rod mount, as shown in [reference#4]
Leave set screws loose to reduce binding, all screws will be tightened at the end of the sub-assembly
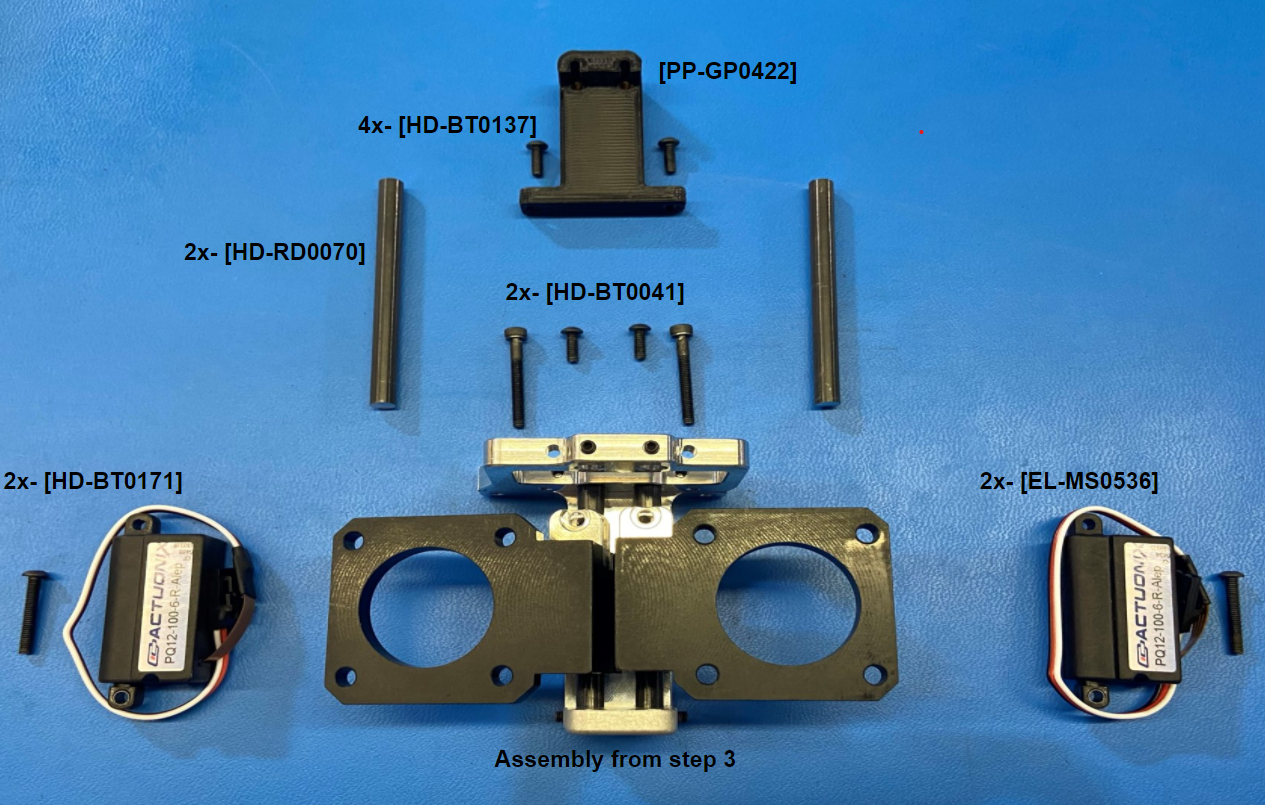
Materials:
Assembly from step 3
2x- [HD-BT0041] - M3x25 SHCS
4x- [HD-BT0137] - M3x8 BHCS
2x- [HD-BT0171] - M3x20 BHCS
1x- [PP-GP0422] - Actuator mount
2x- [EL-MS0536] - Micro Linear Servo w/custom cable and connector
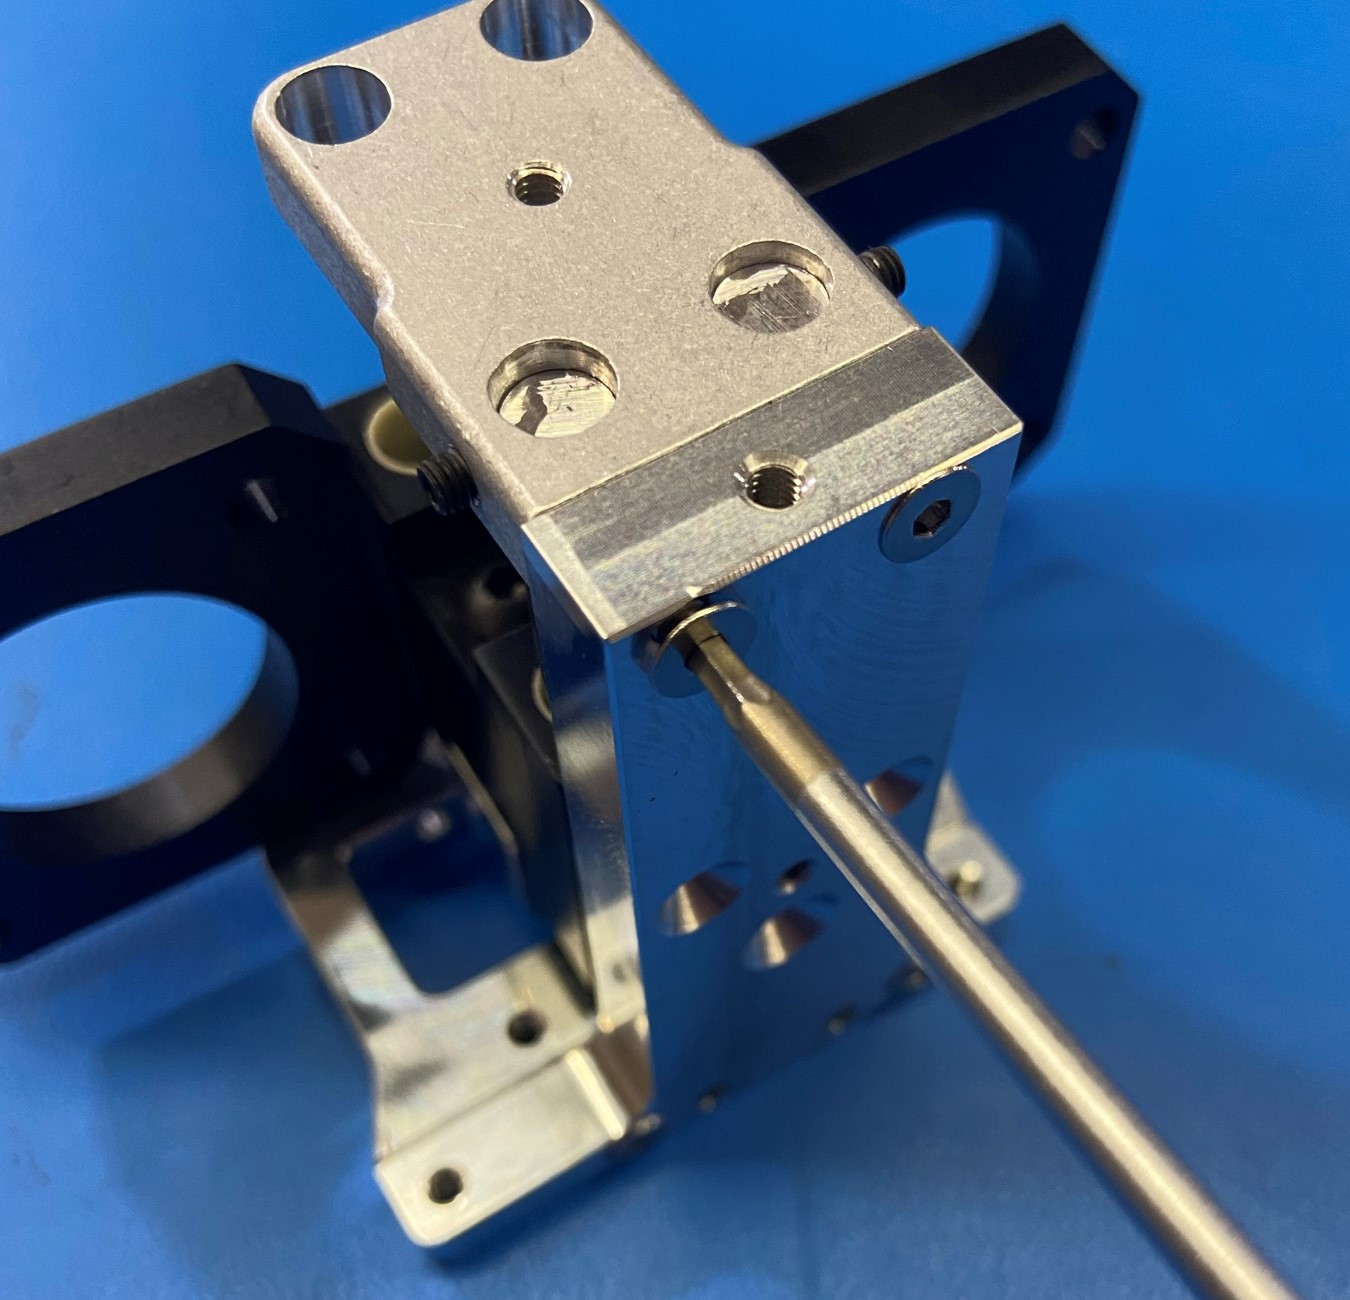
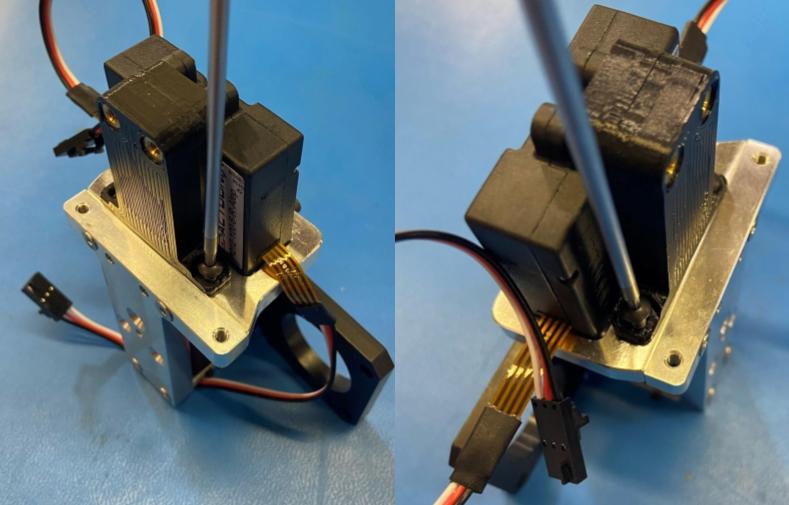
Start by fastening 2x M3x25 SHCS [HD-BT0041] into the assembly from step 3.
Finger tight make sure not to over tighten
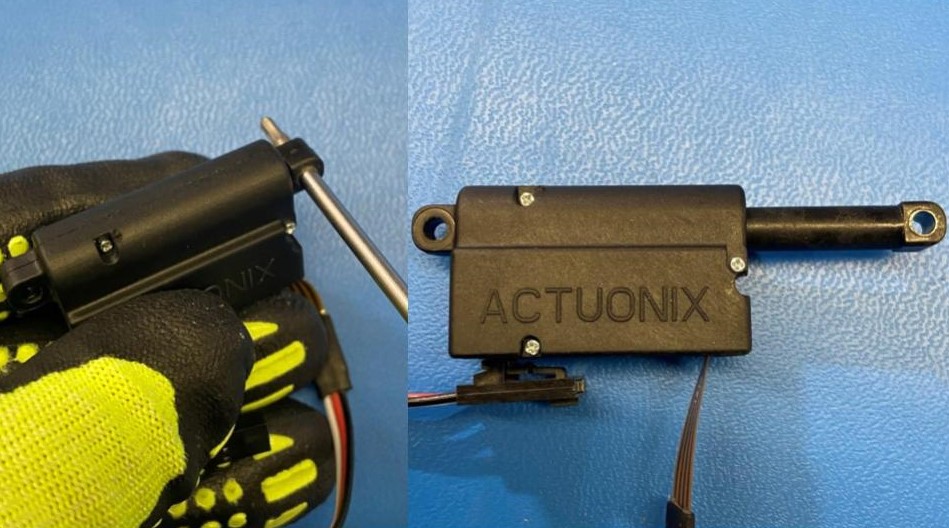
Slide a screwdriver through the actuator's hole then pull till the actuator is extended, repeat with the second actuator
Slide the Micro Linear Servo [EL-MS0536] into the assembly so that the M3x25 SHCS are seated in the groove on the servo . Then fasten the actuators to the actuator connector[PP-MP0230] installed on step 2, using 1x M3x8 BHCS [HD-BT0137].
Repeat the process for the second actuator
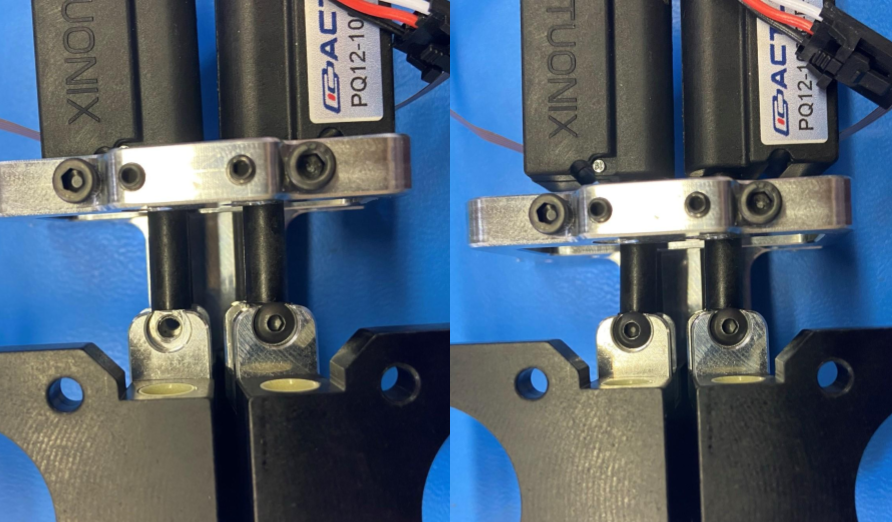
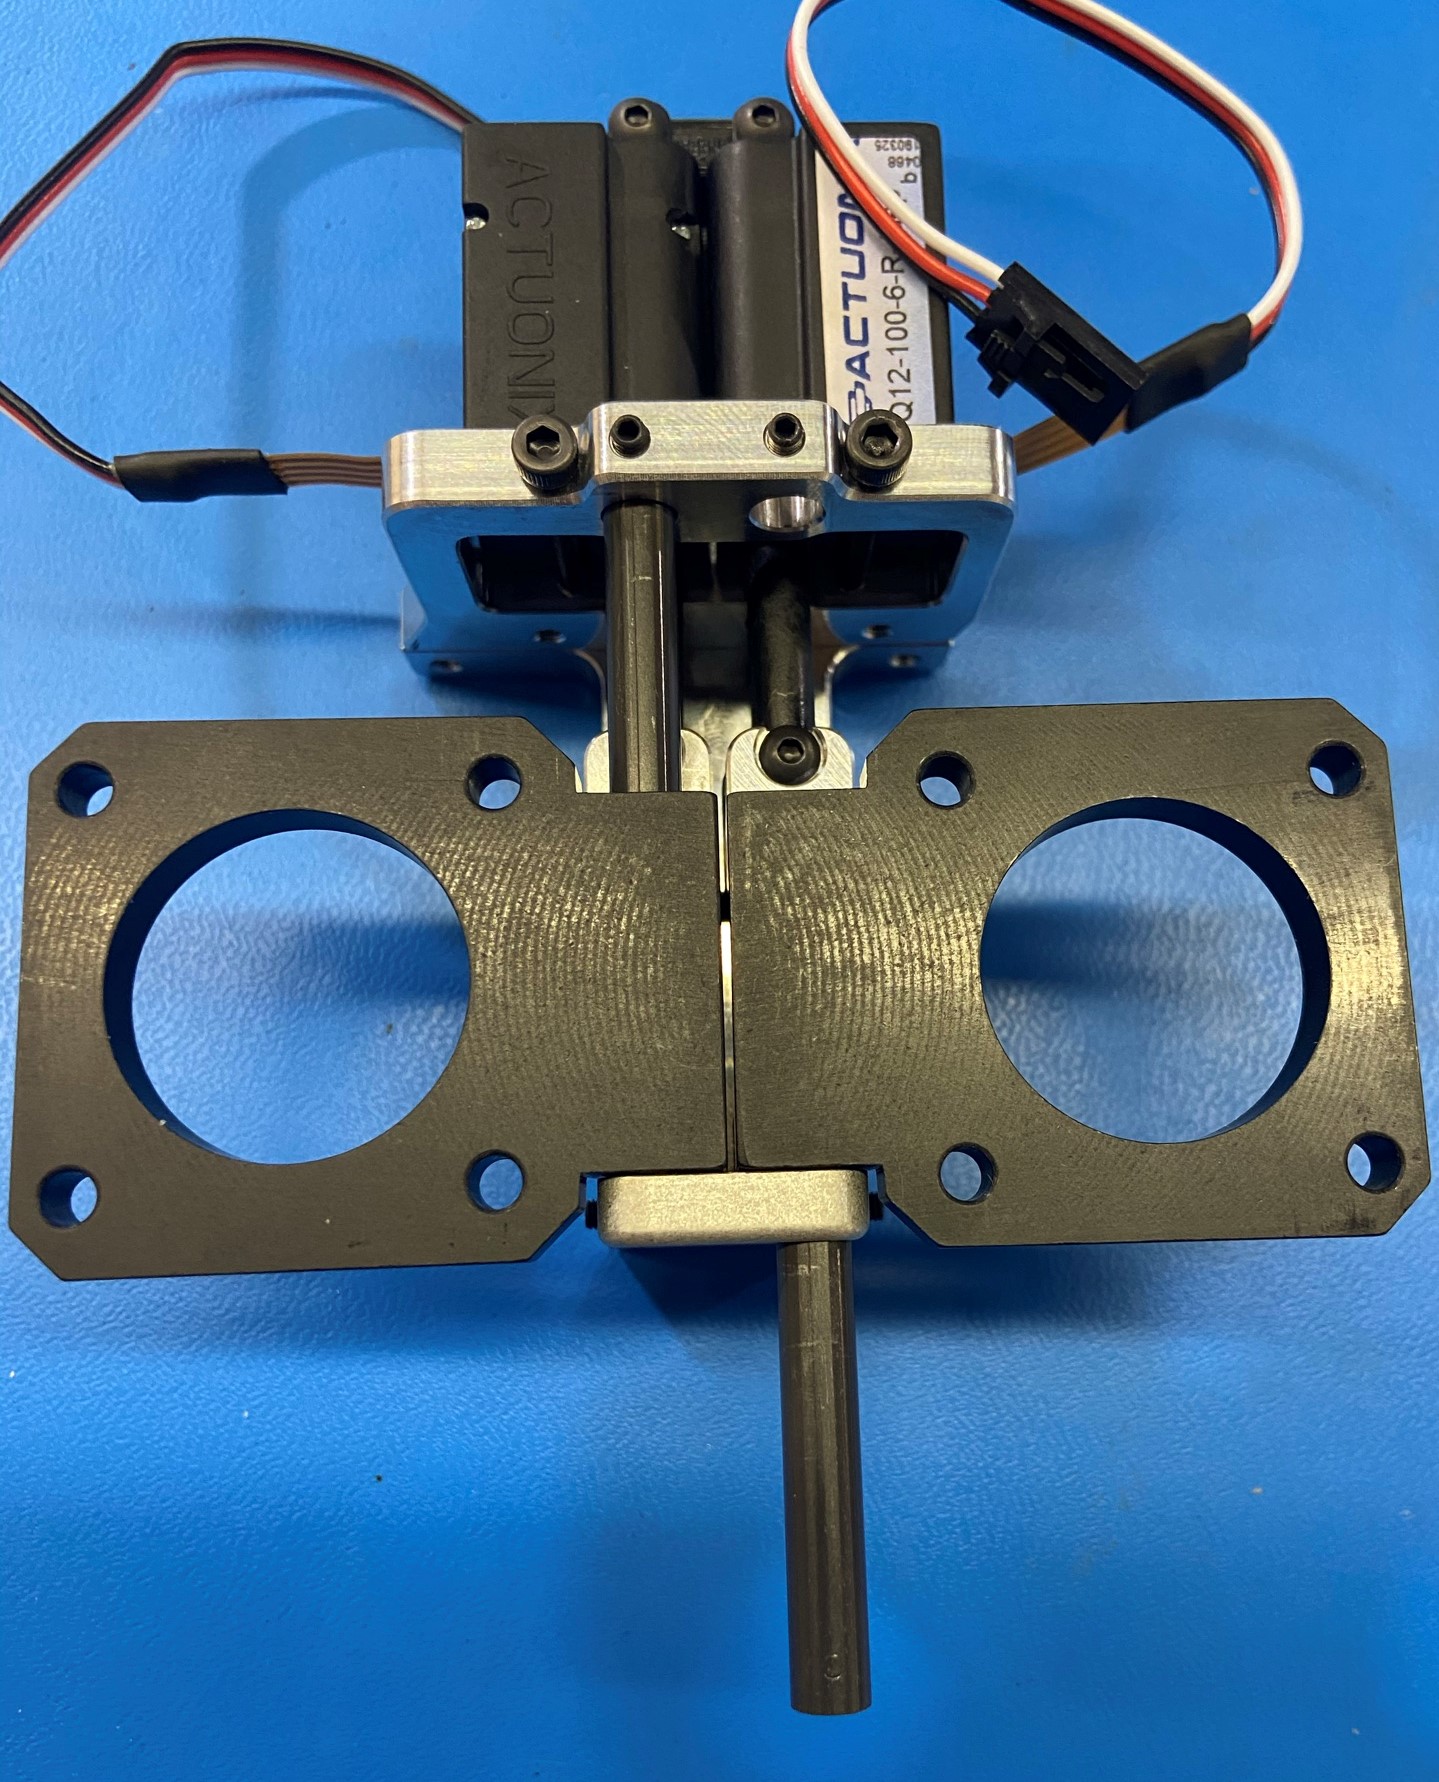
Secure the actuator mount [PP-GP0422] to the top rod mount using 2x M3x8 BHCS [HD-BT0137]. Then install 2x M3x20 BHCS [HD-BT0171] to secure the actuators to the actuator mount.
Insert the 2x 6mm smooth rods [HD-RD0070] into the assembly. Ensure the smooth rods are flush with the top plate.


Torque all set screws to 3 in*lbs
Check Work
- Verify all bolts and set screws are tightened down
- Verify the actuators can move smoothly and are able to move by hand

