Open HardwareAssembly Instructions
Guides for installation and assembly of the LulzBot line of products made by FAME 3D LLC.
Guides for installation and assembly of the LulzBot line of products made by FAME 3D LLC.
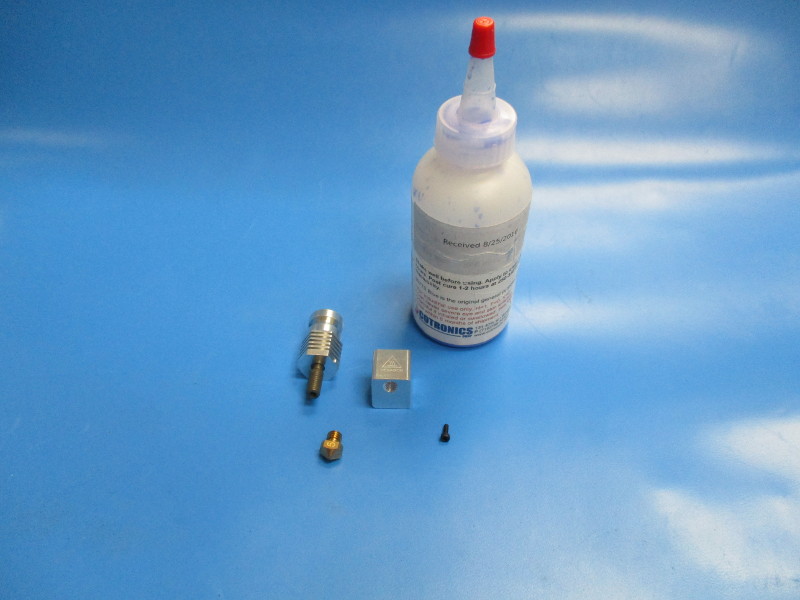
Gather parts
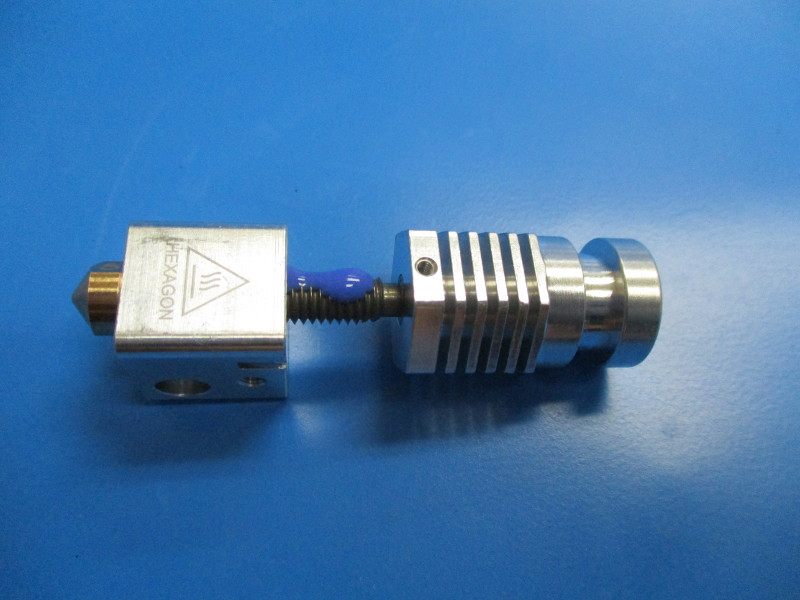
Hexagon hot end with Heat break (PP-MP0133)
Hexagon heater block (PP-MP0134)
High temperature thread locker (TL-CS0040)
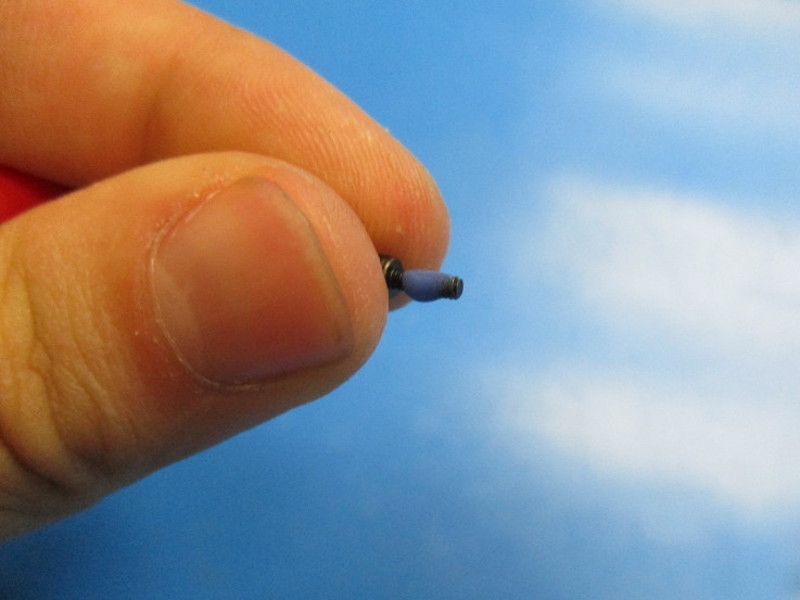
Heat sink set screw (HD-BT0173)
Varies by unit being made: Select either the 0.5mm nozzle for 3mm filament (PP-MP0135) or 0.6mm nozzle for 3mm filament (PP-MP0139)
Mini_Extruder- 0.5mm nozzle for 3mm filament (PP-MP0135)
Mini_Flexystruder_v2- 0.6mm nozzle for 3mm filament (PP-MP0139)
TAZ 6_Extruder 0.5mm nozzle for 3mm filament (PP-MP0135)
TAZ_Dual_Extruder_v2- 0.5mm nozzle for 3mm filament (PP-MP0135)
TAZ_FlexyDual_Extruder_v2- 0.6mm nozzle for 3mm filament (PP-MP0139)
TAZ_Flexy_v2- 0.6mm nozzle for 3mm filament (PP-MP0139)
TAZ 5_Extruder_v2d- 0.5mm nozzle for 3mm filament (PP-MP0135)
Tools needed:
1.5mm hex driver
Torque wrench with 7mm attachment
18mm attachment
18mm torque wrench
4.5mm wrench
Compressed air
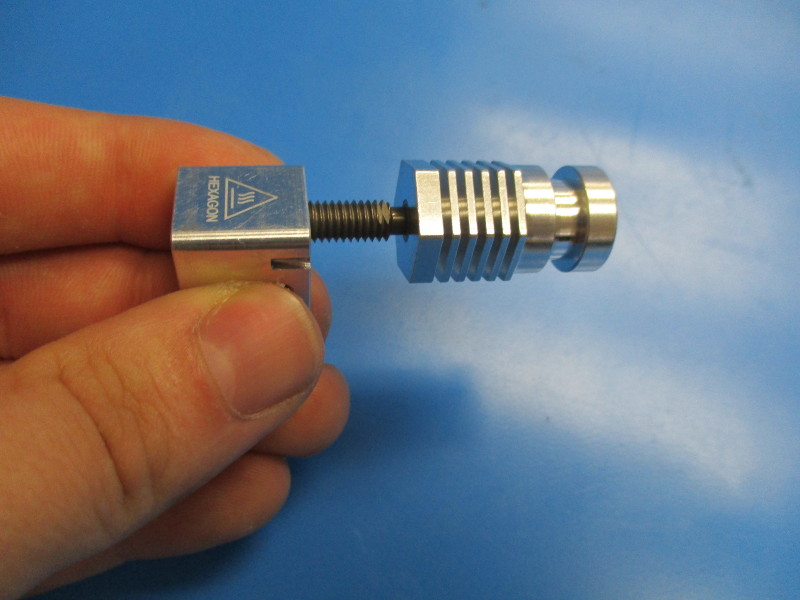
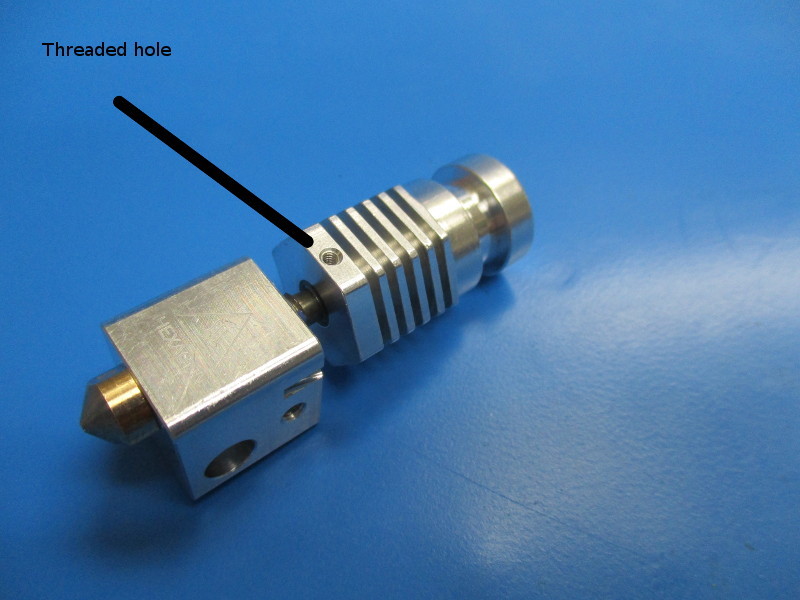
Take the heat sink and thread it into the top hole on the heater block (see image “threading heat sink” for heater block orientation)
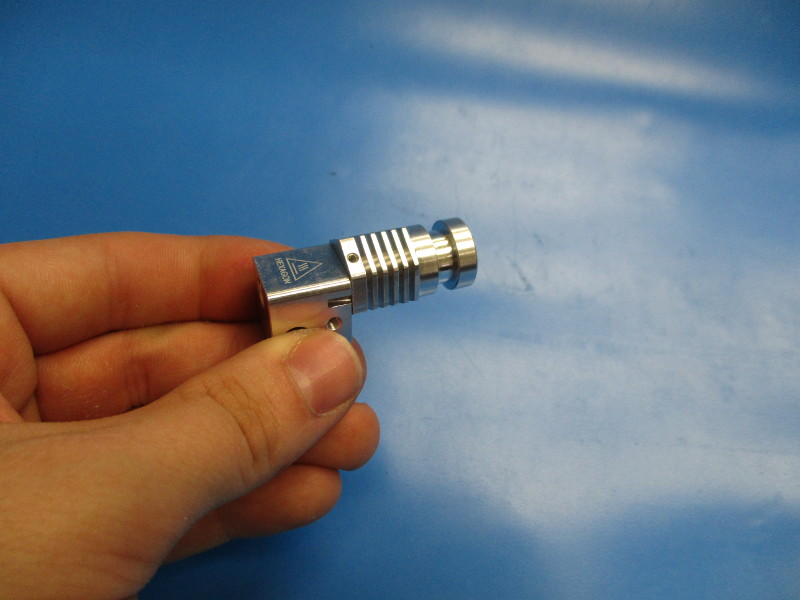
Thread the heat sink all the way onto the heater block until the heat sink bottoms out on the heater block.
Unscrew the heat sink from the heater block so that metal burrs can be blown out.
Blow air through the threaded hole for the heat sink in the heater block. Blow air onto the heat break (threaded portion). Ensure metal burrs are non-existent on the heat break and in the heater block.
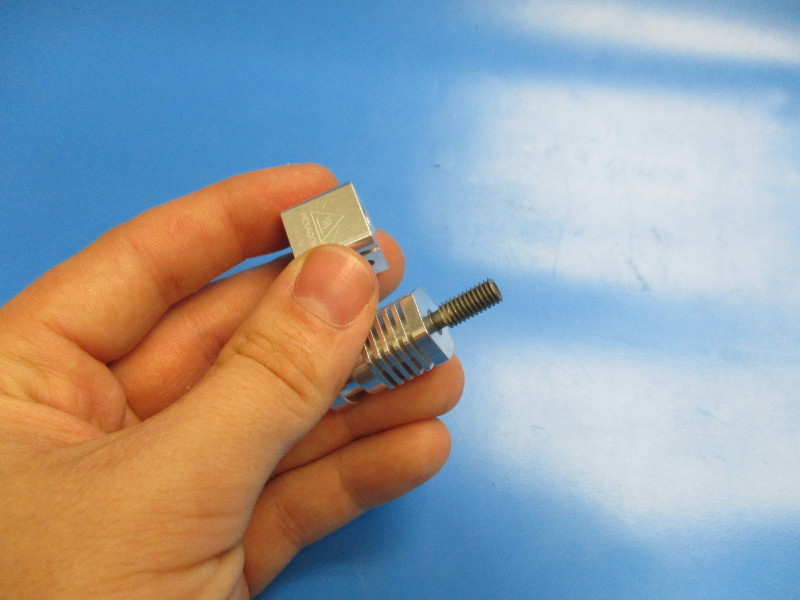
Thread the first two threads of the heat break into the heater block
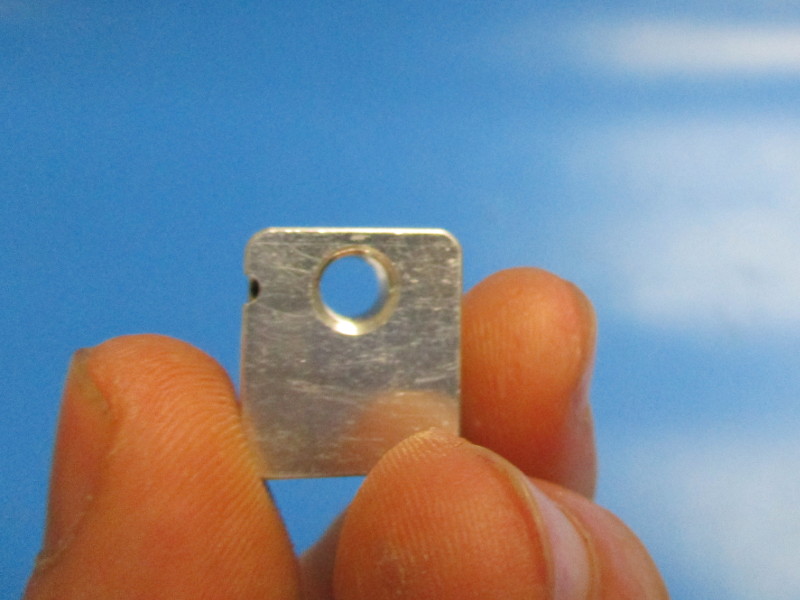

Take the heat sink and thread it into the top hole on the heater block (see image “threading heat sink” for heater block orientation)
Thread the heat sink all the way onto the heater block until the heat sink bottoms out on the heater block.
Unscrew the heat sink from the heater block so that metal burrs can be blown out.
Blow air through the threaded hole for the heat sink in the heater block. Blow air onto the heat break (threaded portion). Ensure metal burrs are non-existent on the heat break and in the heater block.
Thread the first two threads of the heat break into the heater block


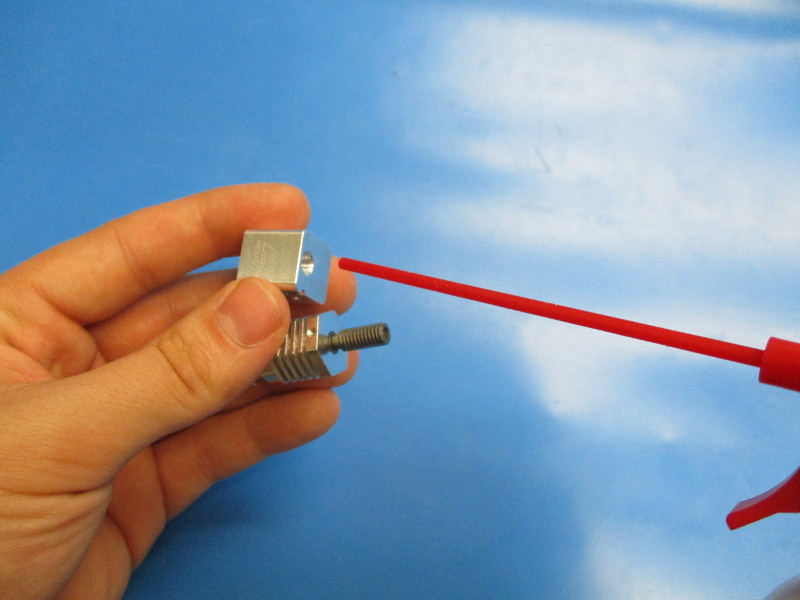
Apply a liberal amount of thread locker from the exposed threads from the heater block up to the top thread on the heat break.
Apply thread locker on the opposite side of the heat break. Cover 4 threads on this side.
Finger tighten the heat sink down until it bottoms out.
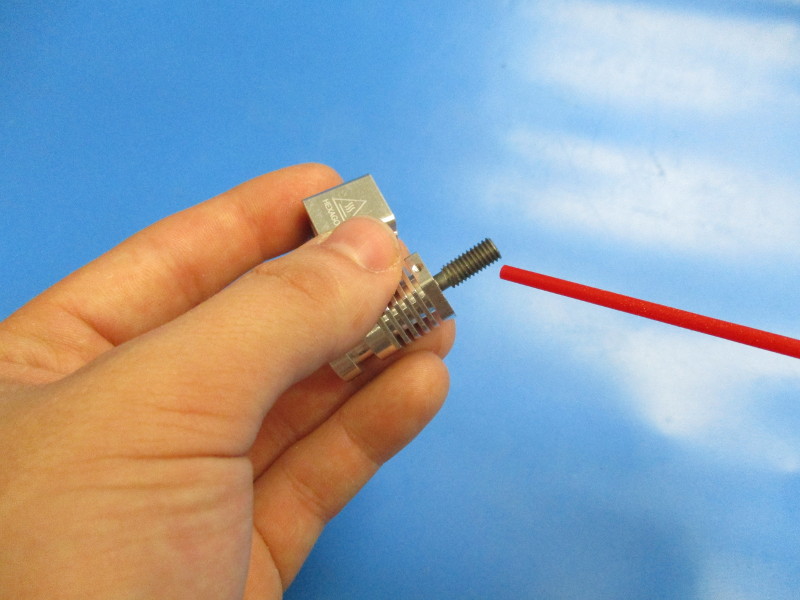
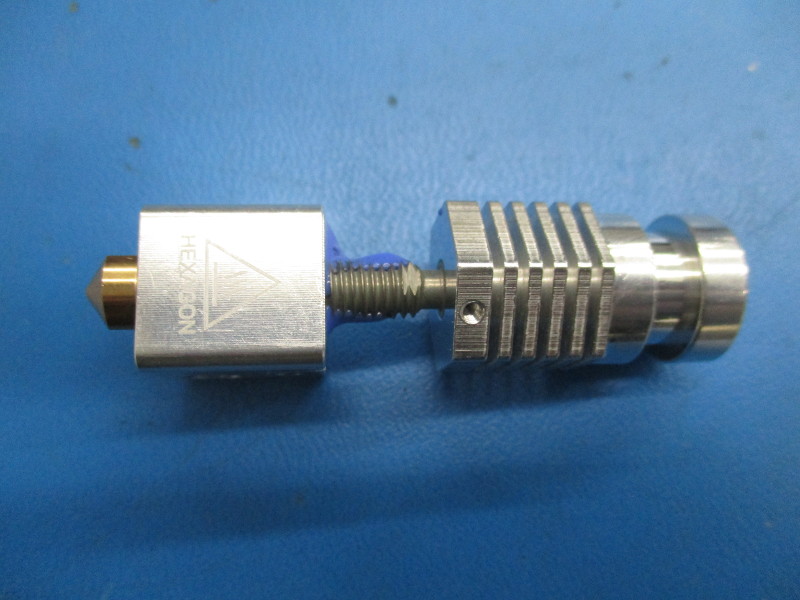
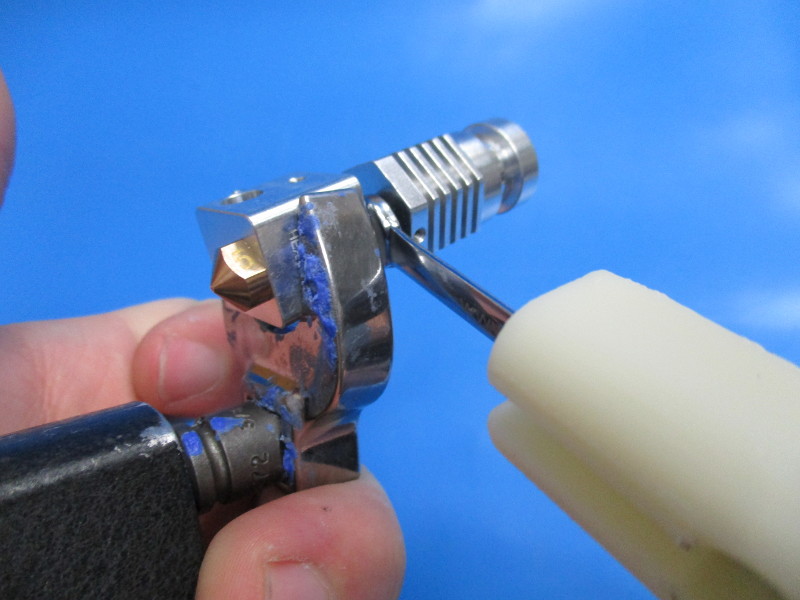
On the heat break, the top two threads have flat spots parallel to each other. (see image “heat break flat spots”) Use the 4.5mm wrench on the heat break and the 18mm attachment, for the torque wrench, on the heater block to torque the heater block to 15in*lbs.


Tools needed: 1.5mm hex driver
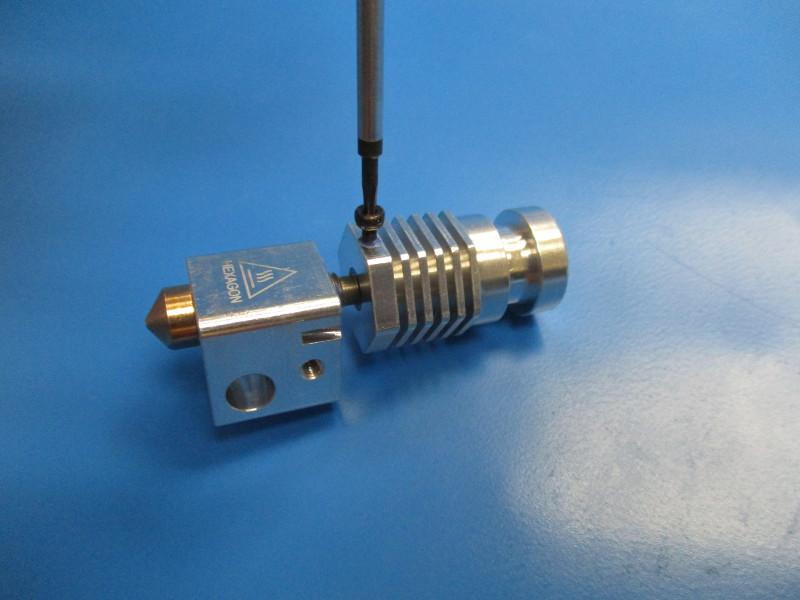
Locate the threaded hole on one of the faces of the heat sink. This hole will need to be on the backside if possible. Rotate the heat sink around until the hole is on the back side. If the heat sink feels like its too tight to rotate, leave it be.
Coat the heat sink set screw with thread locker. Thread the screw into the heat sink hole and torque to 5in/lbs

Nozzle and Wiring harnesses required for each product:
AS-TH0014_TAZ6_Extruder_Pin_Assignments AND 0.5mm nozzle for 3mm filament (PP-MP0135)
AS-CB0007 Heater Cartridge 180mm Harness
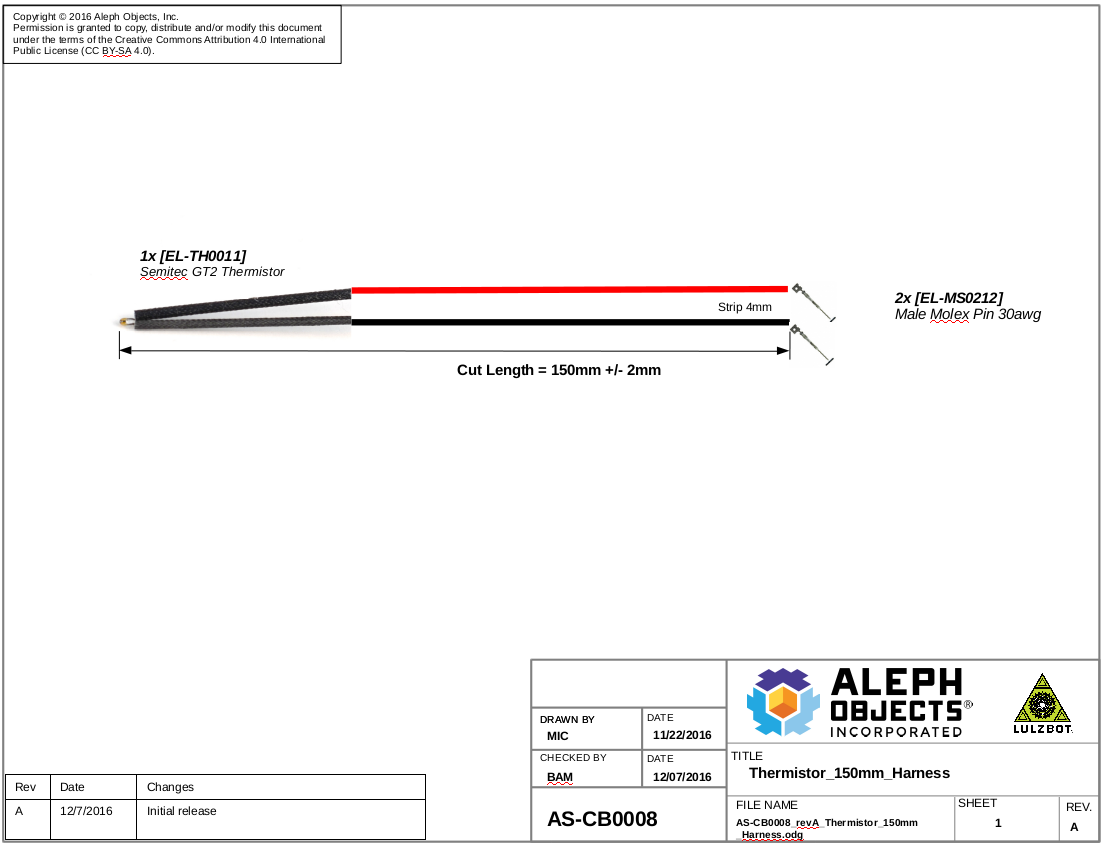
AS-CB0008 Thermistor 150mm Harness
AS-CB0009 Zero Sense 155mm Harness


Nozzle and Wiring harnesses required for each product:
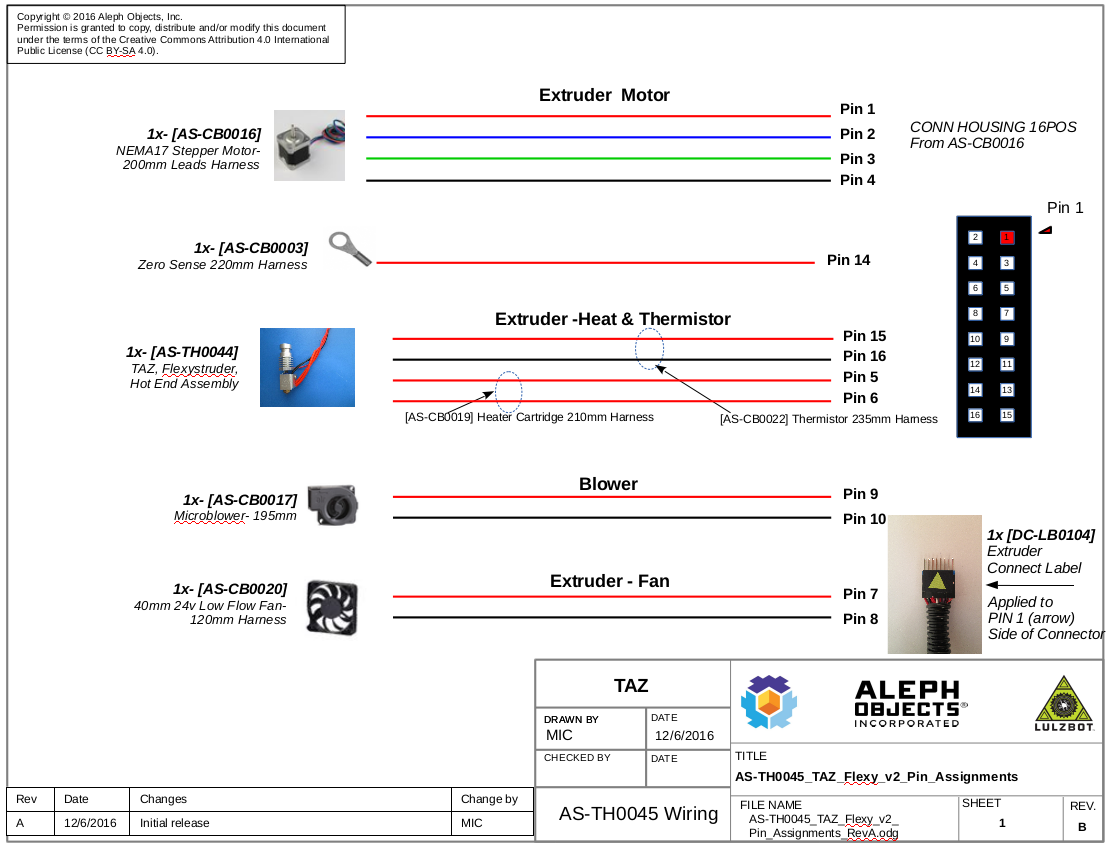
AS-TH0045_TAZ_Flexy_v2_Pin_Assignments AND 0.6mm nozzle for 3mm filament (PP-MP0139)
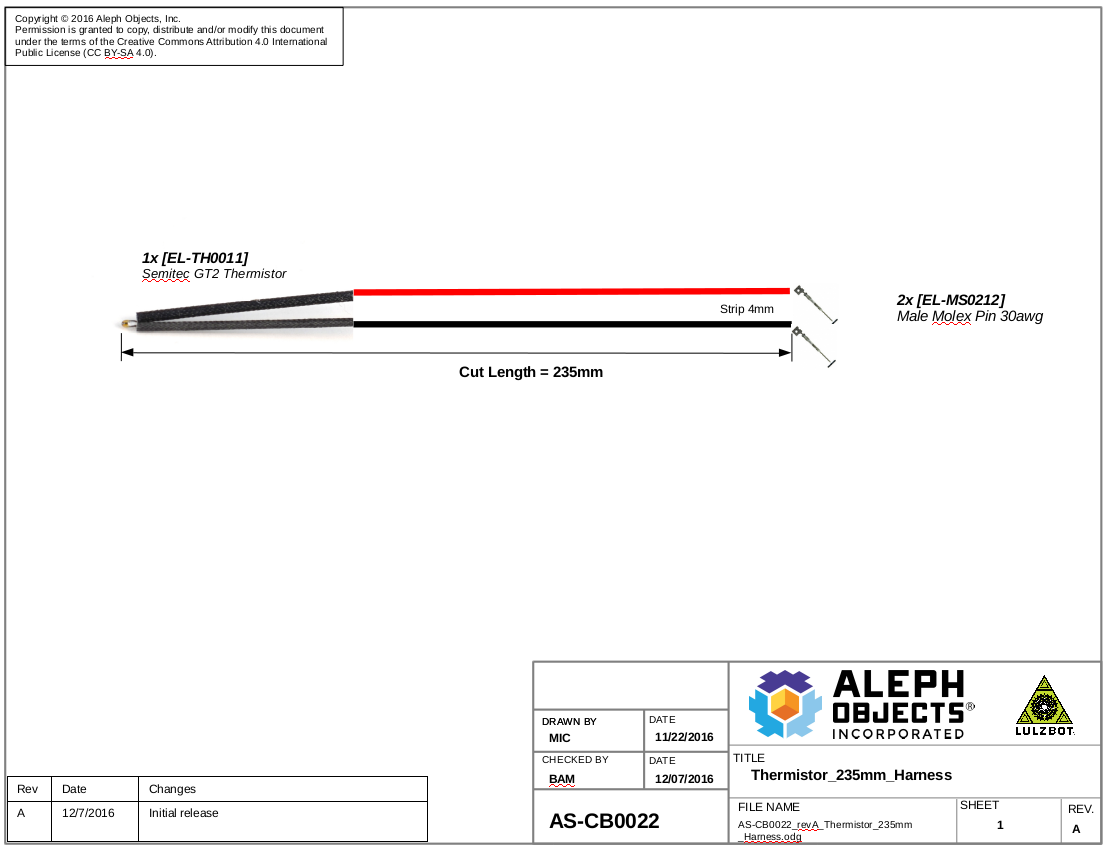
AS-CB0022 Thermistor 235mm Harness
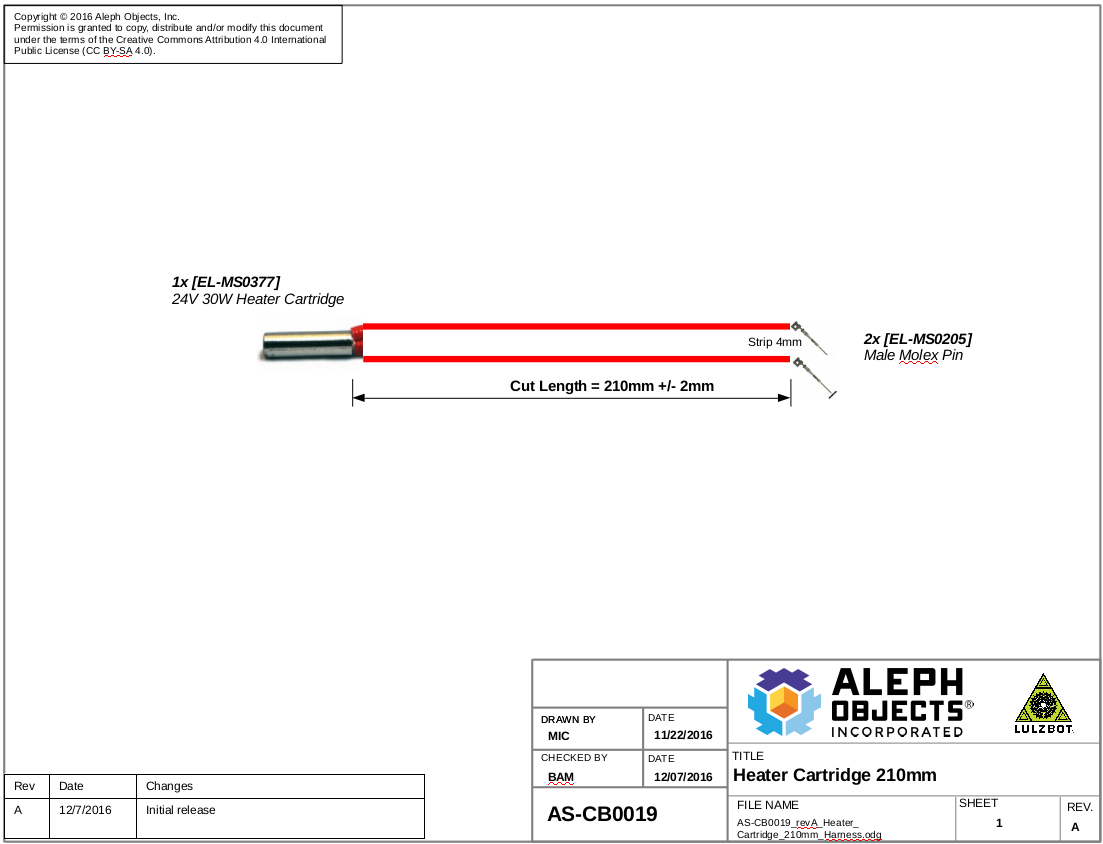
AS-CB0019 Heater Cartridge 210mm Harness
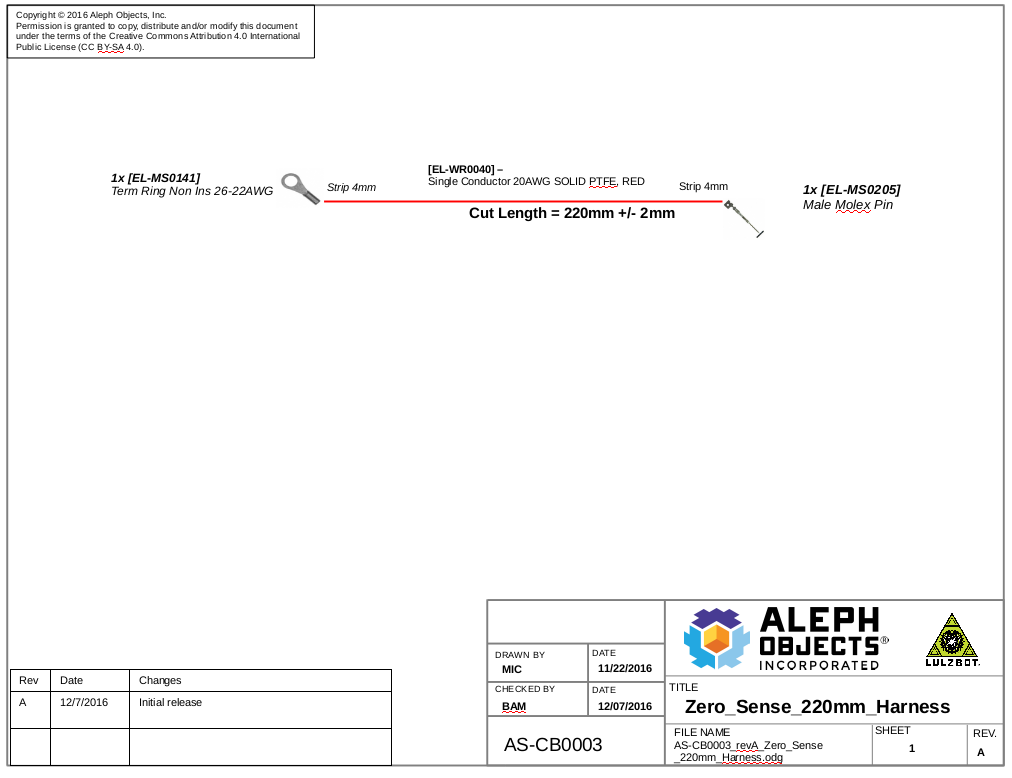
AS-CB0003 Zero Sense 220mm Harness


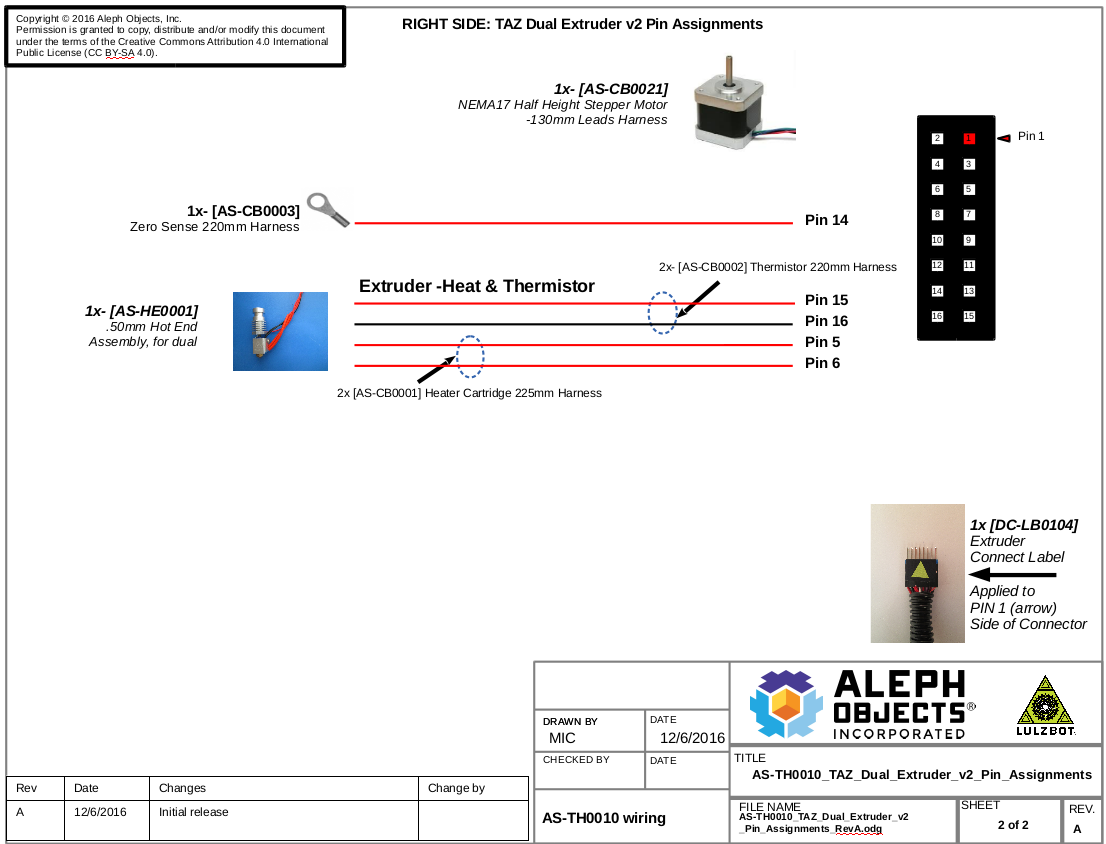
Nozzle and Wiring harnesses required for each product:
AS-TH0010_TAZ_Dual_Extruder_v2_Pin_Assignments AND 0.5mm nozzle for 3mm filament (PP-MP0135)
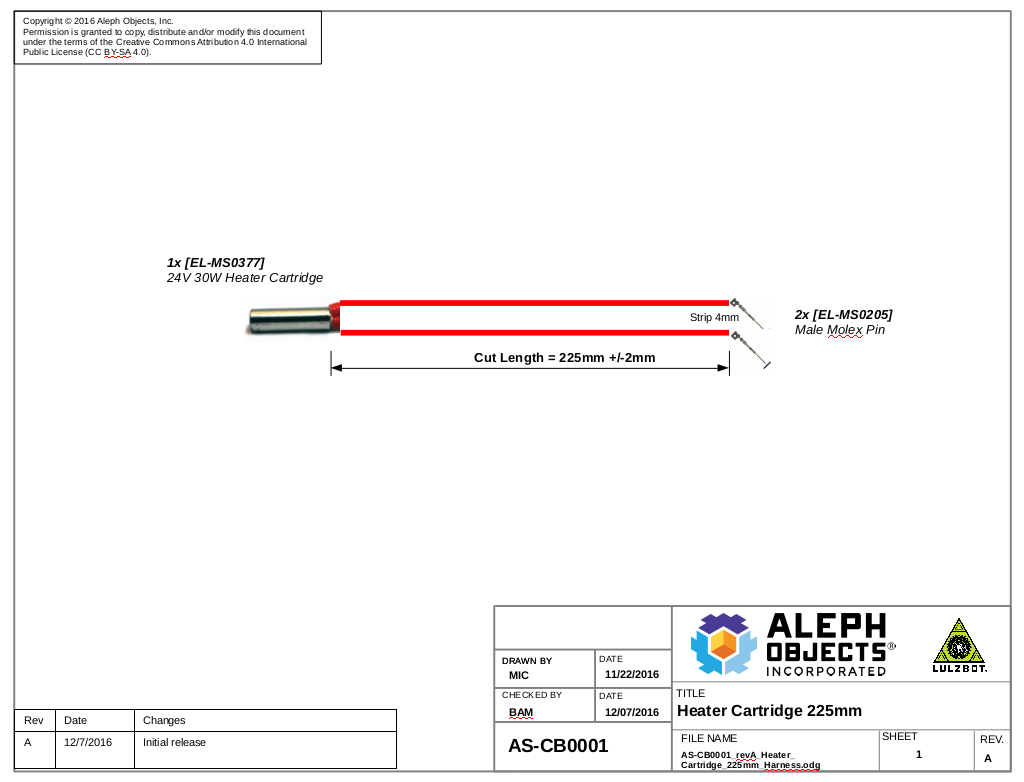
AS-CB0001 Heater Cartridge 225mm Harness
AS-CB0002 Thermistor 220mm Harness
AS-CB0003 Zero Sense 220mm Harness


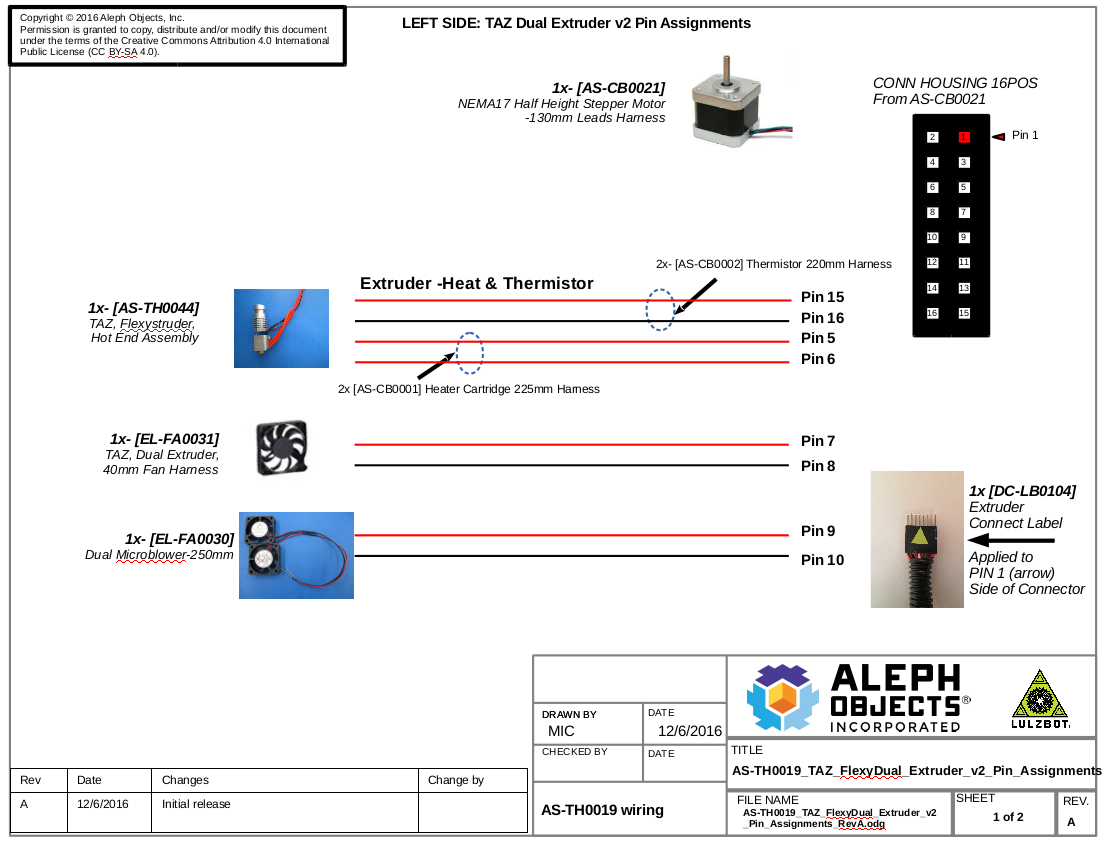
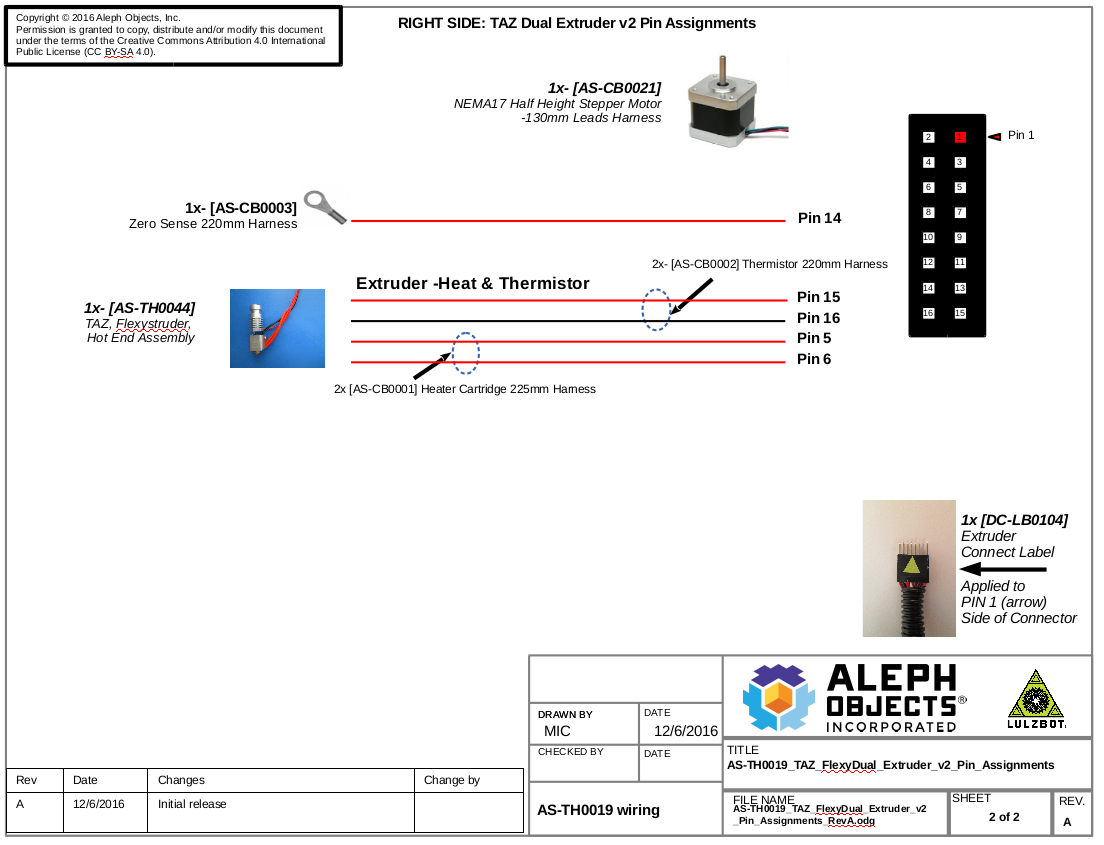
Nozzle and Wiring harnesses required for each product:
AS-TH0019_TAZ_FlexyDual_Extruder_v2_Pin_Assignments AND 0.6mm nozzle for 3mm filament (PP-MP0139)
AS-CB0001 Heater Cartridge 225mm Harness
AS-CB0002 Thermistor 220mm Harness
AS-CB0003 Zero Sense 220mm Harness


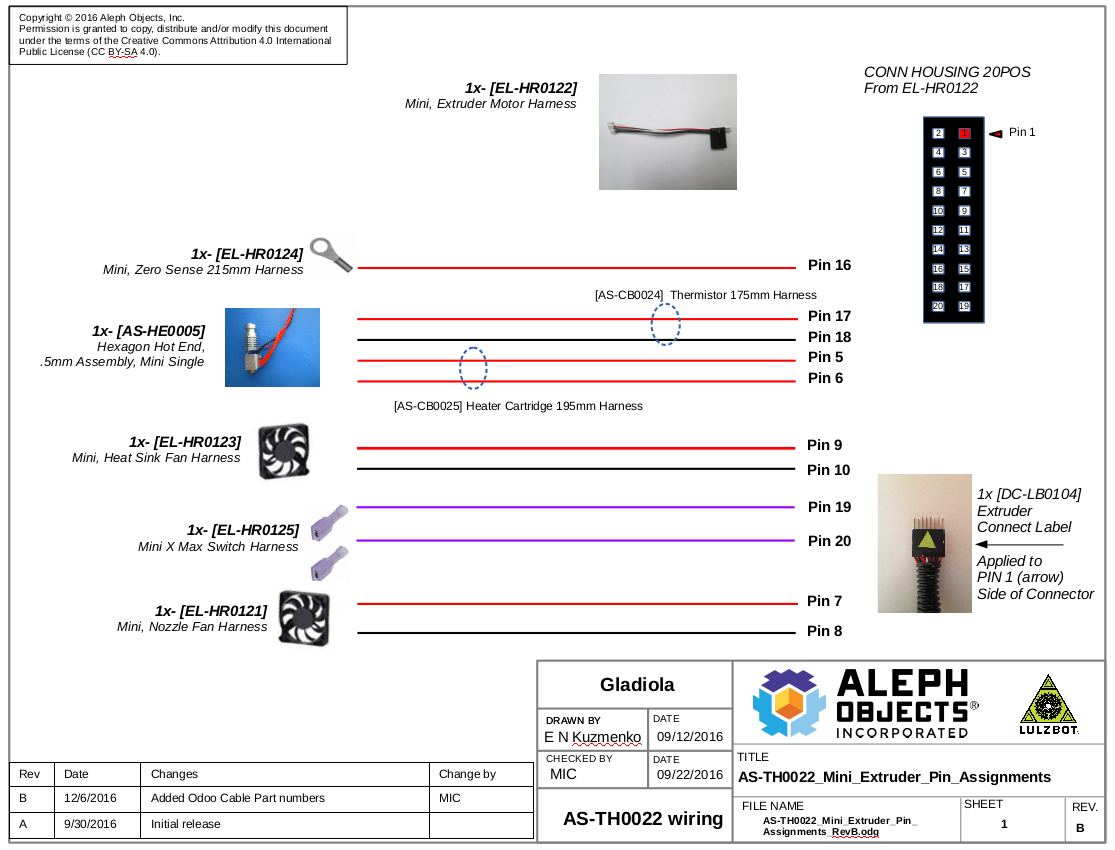
Nozzle and Wiring harnesses required for each product:
AS-TH0022_Mini_Extruder_Pin_Assignments AND 0.5mm nozzle for 3mm filament (PP-MP0135)
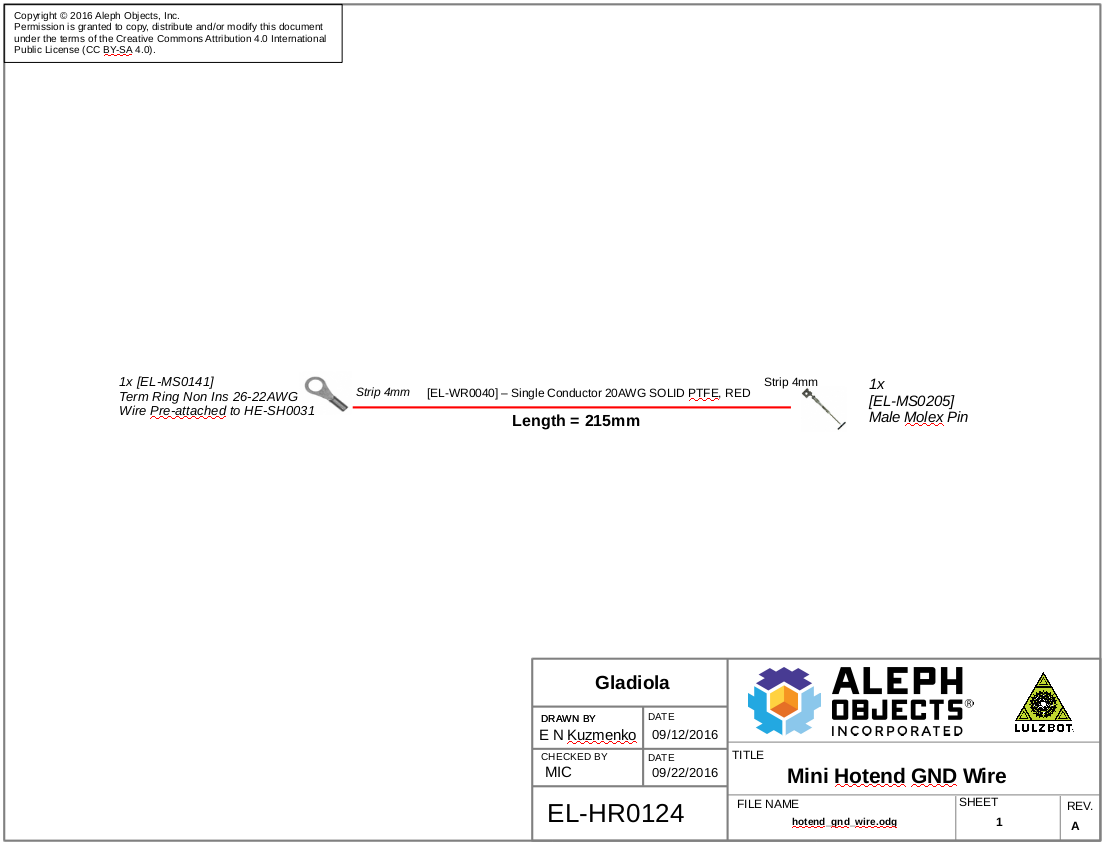
EL-HR0124 Mini, Zero Sense 215mm Harness
AS-CB0024 175mm_Heater_Cartridge_Harness
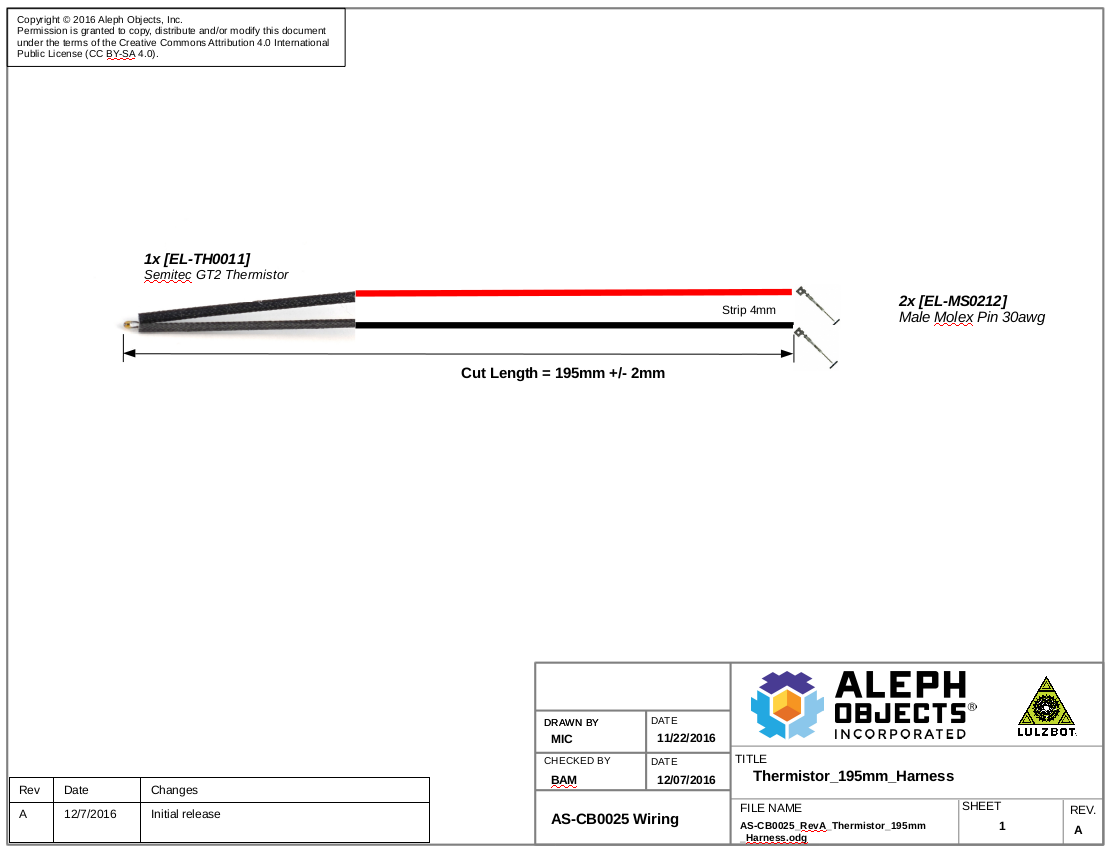
AS-CB0025 195mm_Thermistor_Harness

Nozzle and Wiring harnesses required for each product:
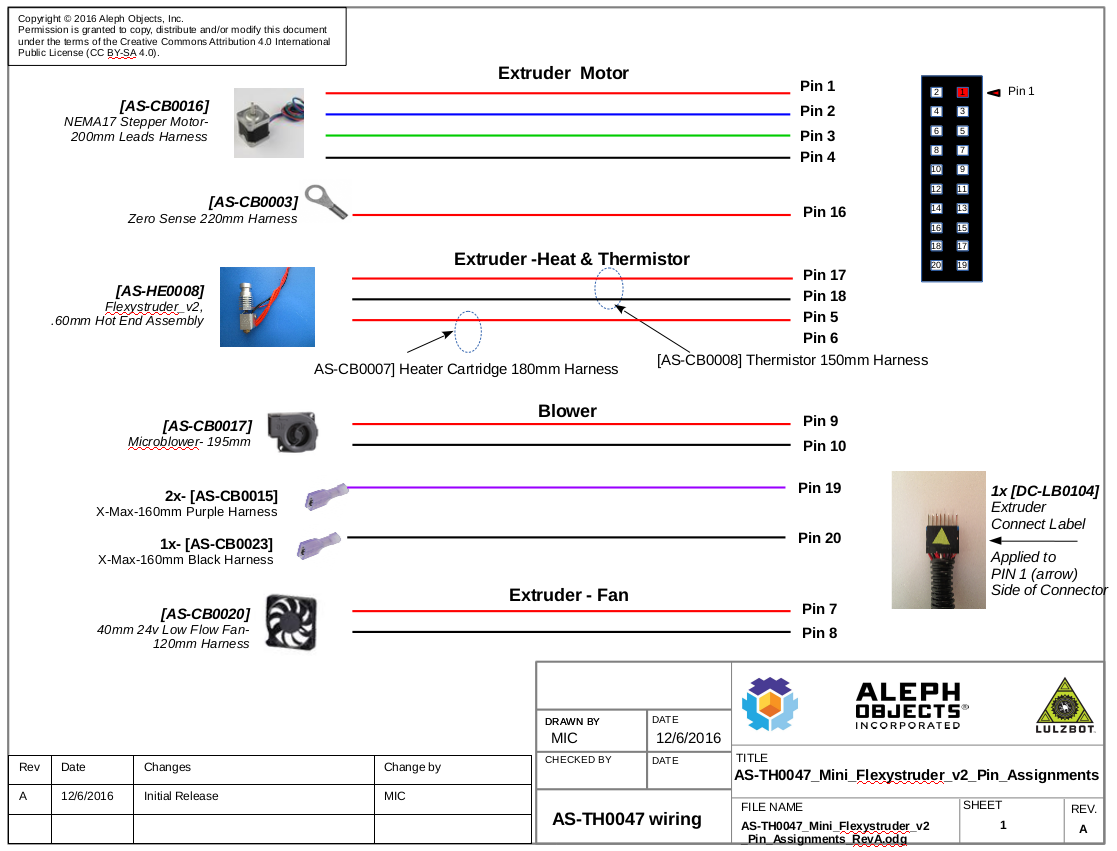
AS-TH0047_Mini_Flexystruder_v2_Pin_Assignments AND 0.6mm nozzle for 3mm filament (PP-MP0139)
AS-CB0003 Zero Sense 220mm Harness
AS-CB0007 Heater Cartridge 180mm Harness
AS-CB0008 Thermistor 150mm Harness


Nozzle and Wiring harnesses required for each product:
AS-TH0049_TAZ5_Extruder_v2d_Pin_Assignments AND 0.5mm nozzle for 3mm filament (PP-MP0135)
AS-CB0019 Heater Cartridge 210mm Harness
AS-CB0022 Thermistor 235mm Harness
Gather parts
Hot end assembled (per product, select from list)
Heater cartridge harness (per product, select from list)
Thermistor harness (per product, select from list)
Retention plate (PP-MP0136)
Set screw (HD-BT0172)
M3x8 BHCS (HD-BT0104)
Tools needed: 2mm hex driver

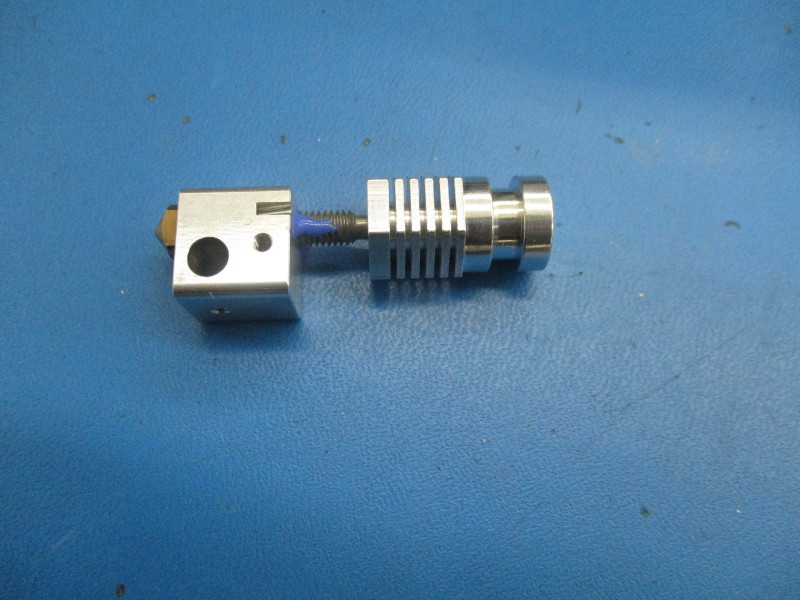
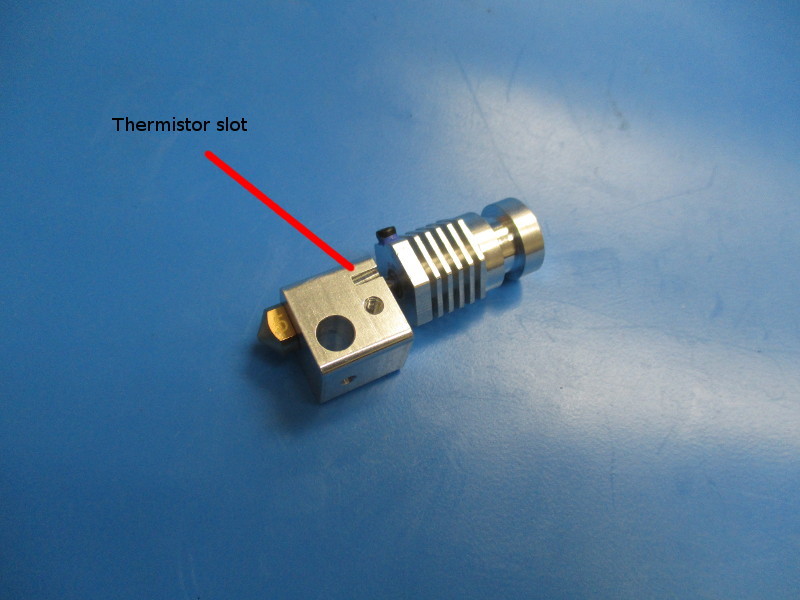
Lay the hot end on its side so the thermistor slot is facing up. (see image “thermistor slot” for orientation)
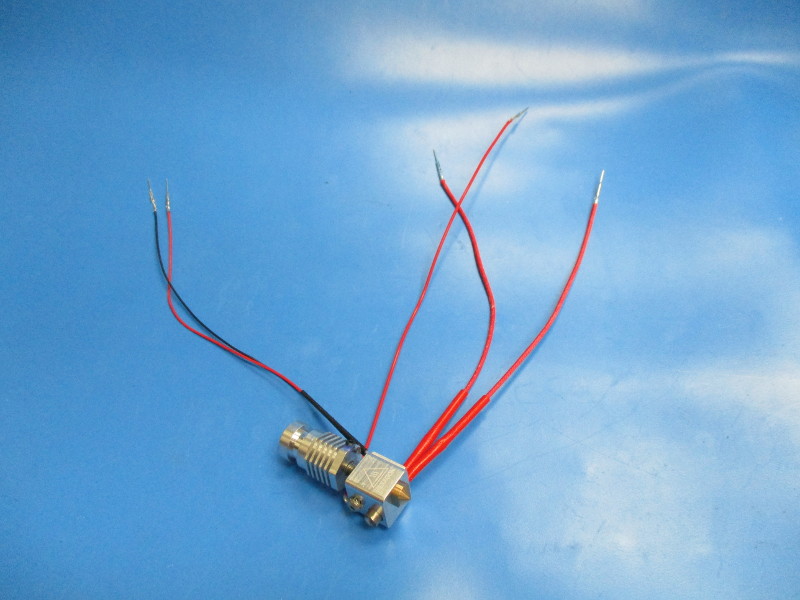
Insert the heater cartridge into the large hole.
Take the thermistor and slide the black shielding back. Ensure the white PTFE shielding is completely covering the wires running into the resistor or thermistor.
Slide black shielding on the red wire back until it sits against the thermistor
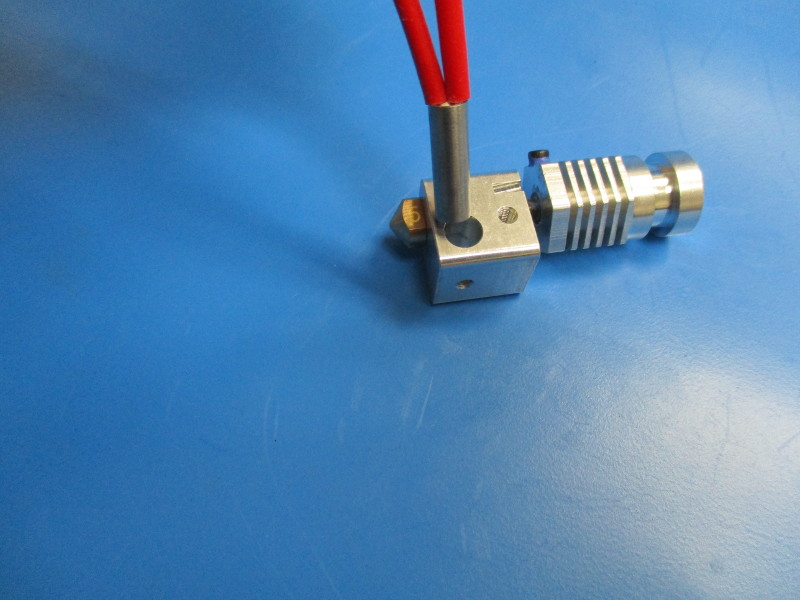
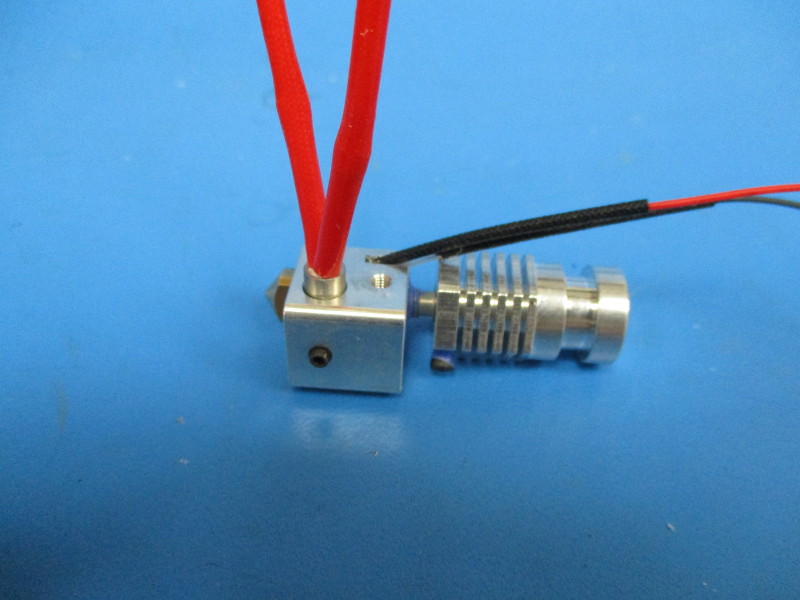
Insert the thermistor into the thermistor slot on the heater block. The red wire side of the harness will sit up against the heater block (see image “Inserting thermistor” and “Thermistor inserted”)


Install the retention plate onto the side of the heater block that has the harnesses installed.
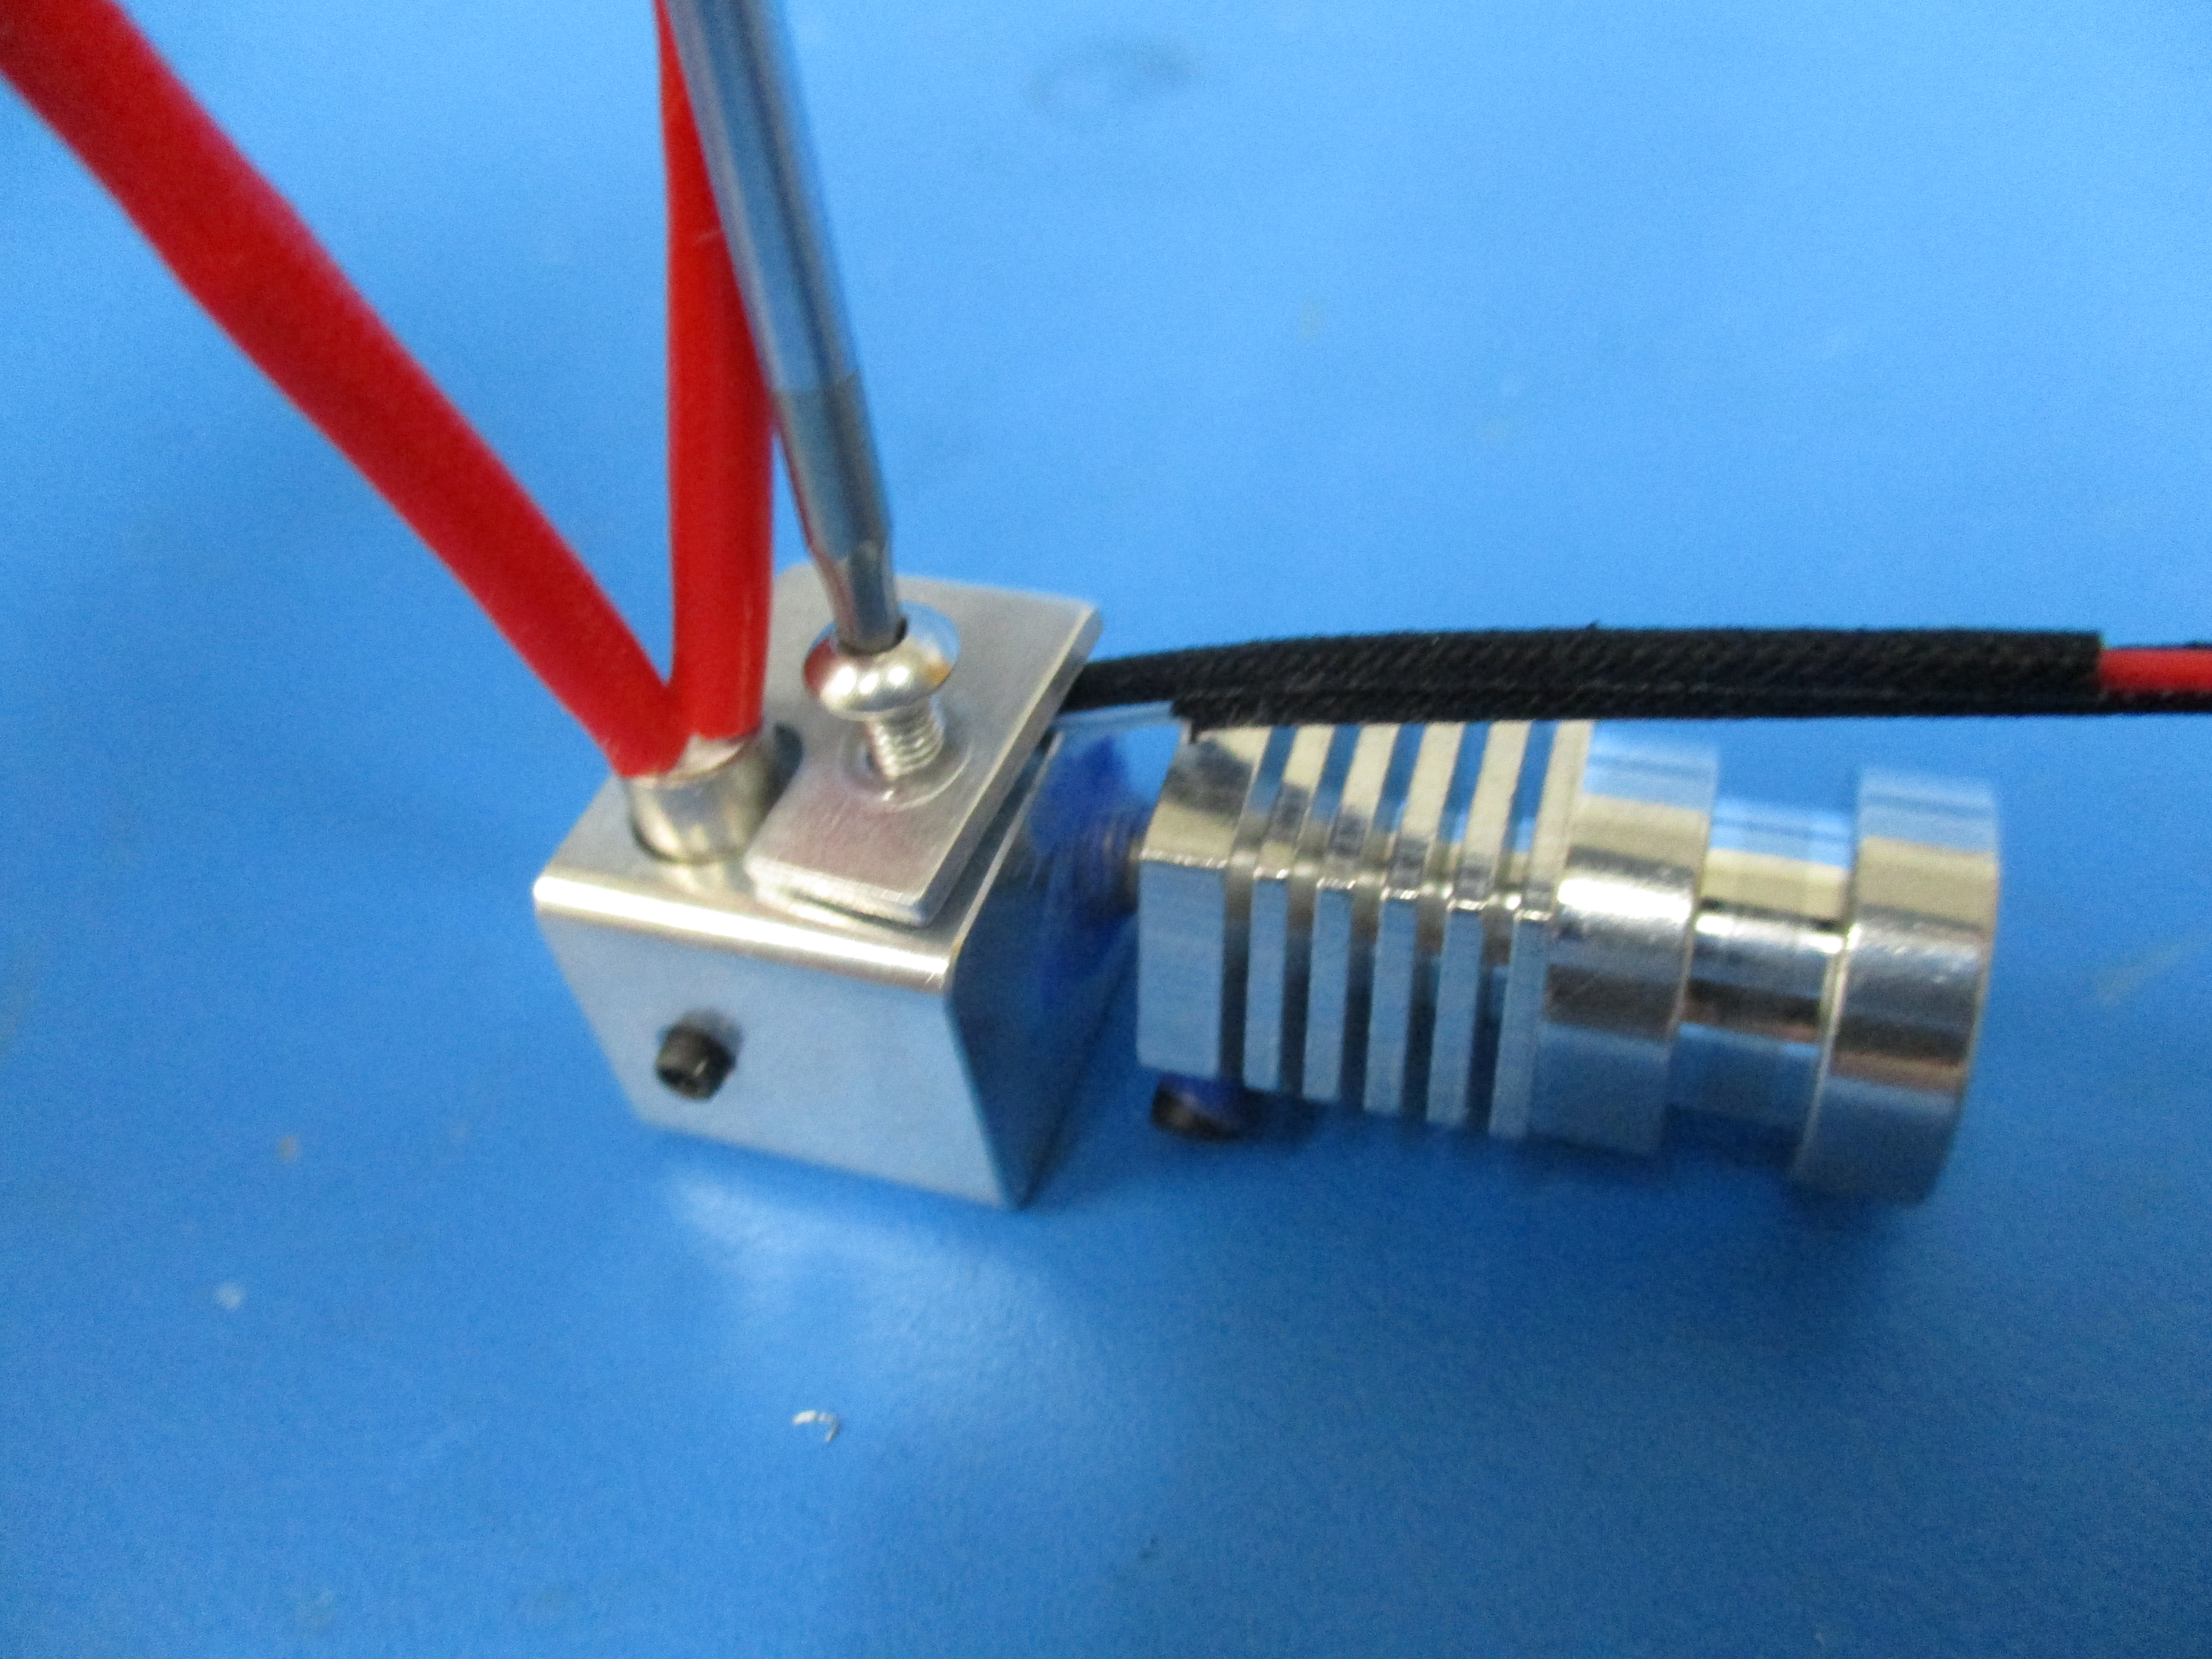
Ensure the retention plate is lined up with the edge of the heater block. (see image “Retention plate aligned”) Torque to 4in*lbs
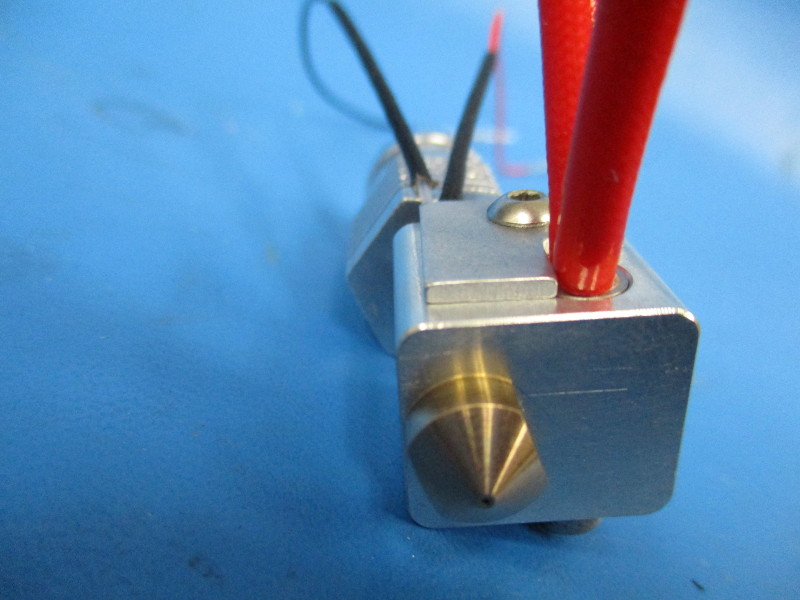
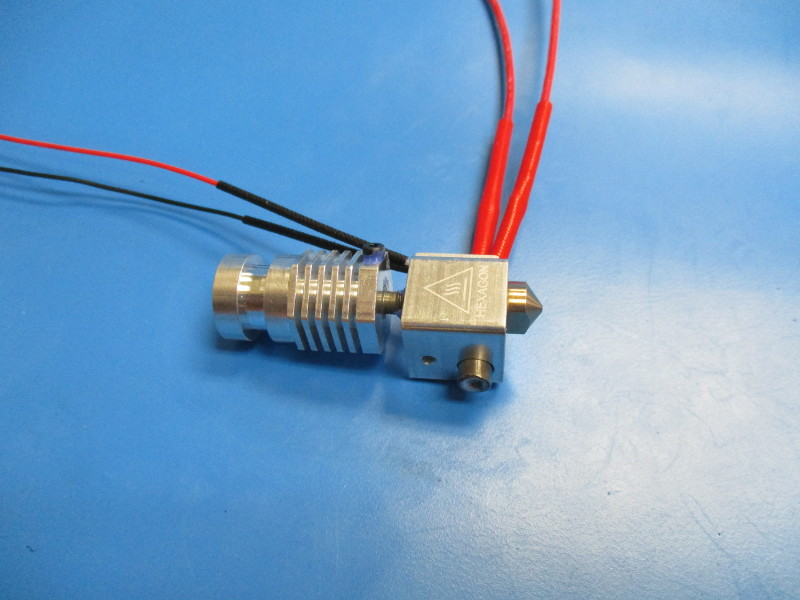
Rotate the hot end so that the front of the hot end is facing down. (see image “ hot end orientation”)
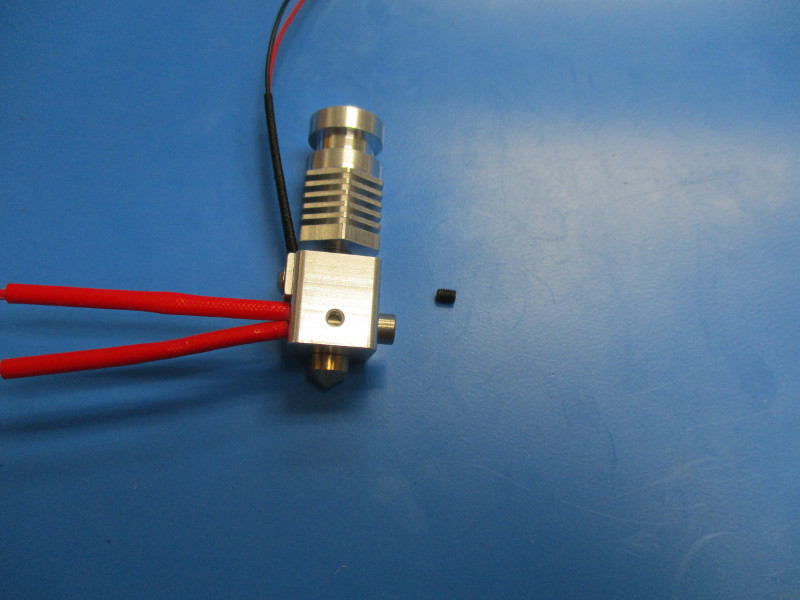
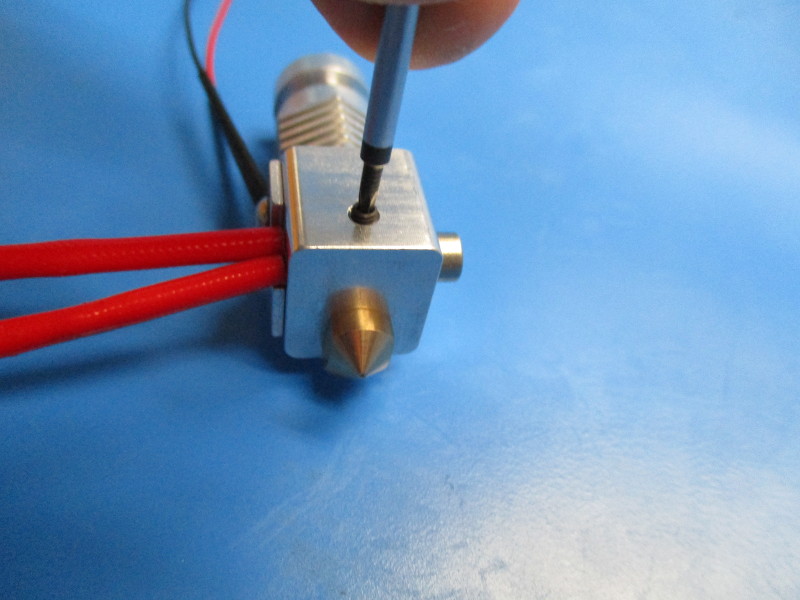
Install the set screw into the threaded hole on the heater block. Ensure the heater cartridge is up against the retention plate. Use the 1.5mm driver to finger tighten the set screw to secure the heater cartridge.
Flip the hot end so that the set screw is facing down.

Gather parts
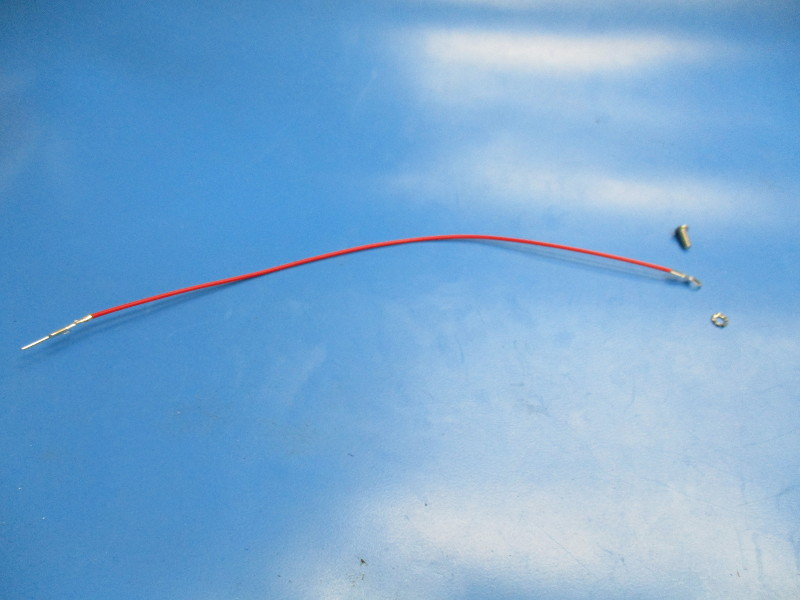
Zero volt sense harness (per product, select from list)
M3x8 BHCS (HD-BT0104)
External star washer (HD-WA0027)
Tools needed: 2mm hex driver
TAZ 5 Extruder does not use a Zero volt sense line, Dual Extruders use only one (1) Zero Sense line
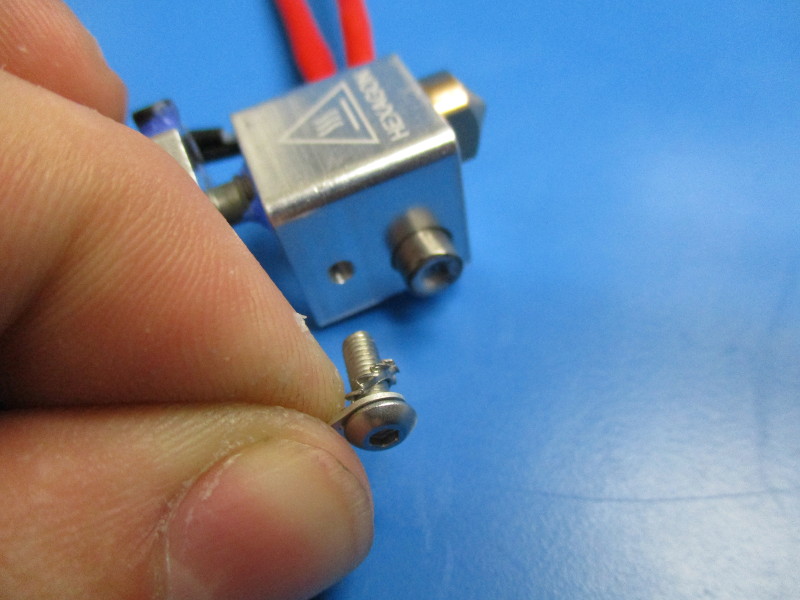
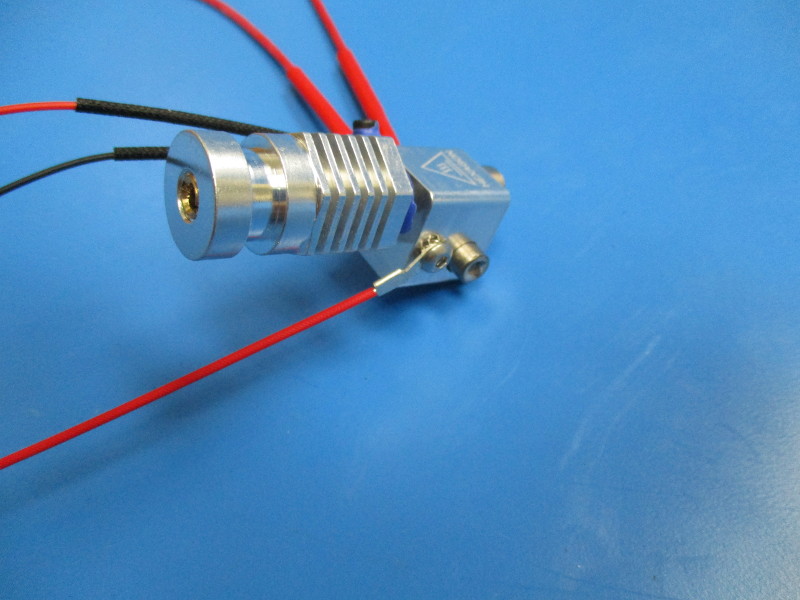
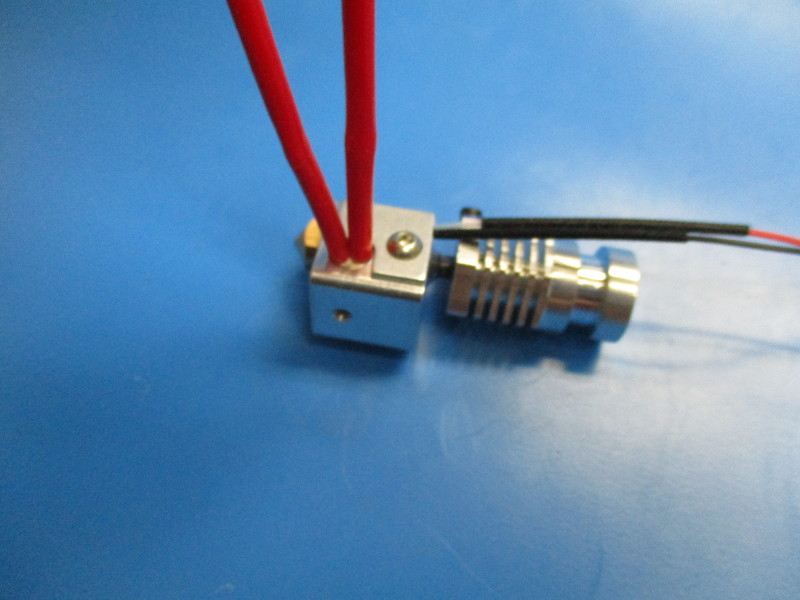
Install the zero volt sense harness onto the M3x8 BHCS followed by the star washer. (see image “Component installation order”)
Install the zero volt sense harness and components onto the heater block. (see image “Zero volt sense harness installation”)
Torque to 4in*lbs
Bend the wire so that it runs behind the heat break. Ensure that the wire is not touching the heater block.