Open HardwareAssembly Instructions
Guides for installation and assembly of the LulzBot line of products made by FAME 3D LLC.
Guides for installation and assembly of the LulzBot line of products made by FAME 3D LLC.

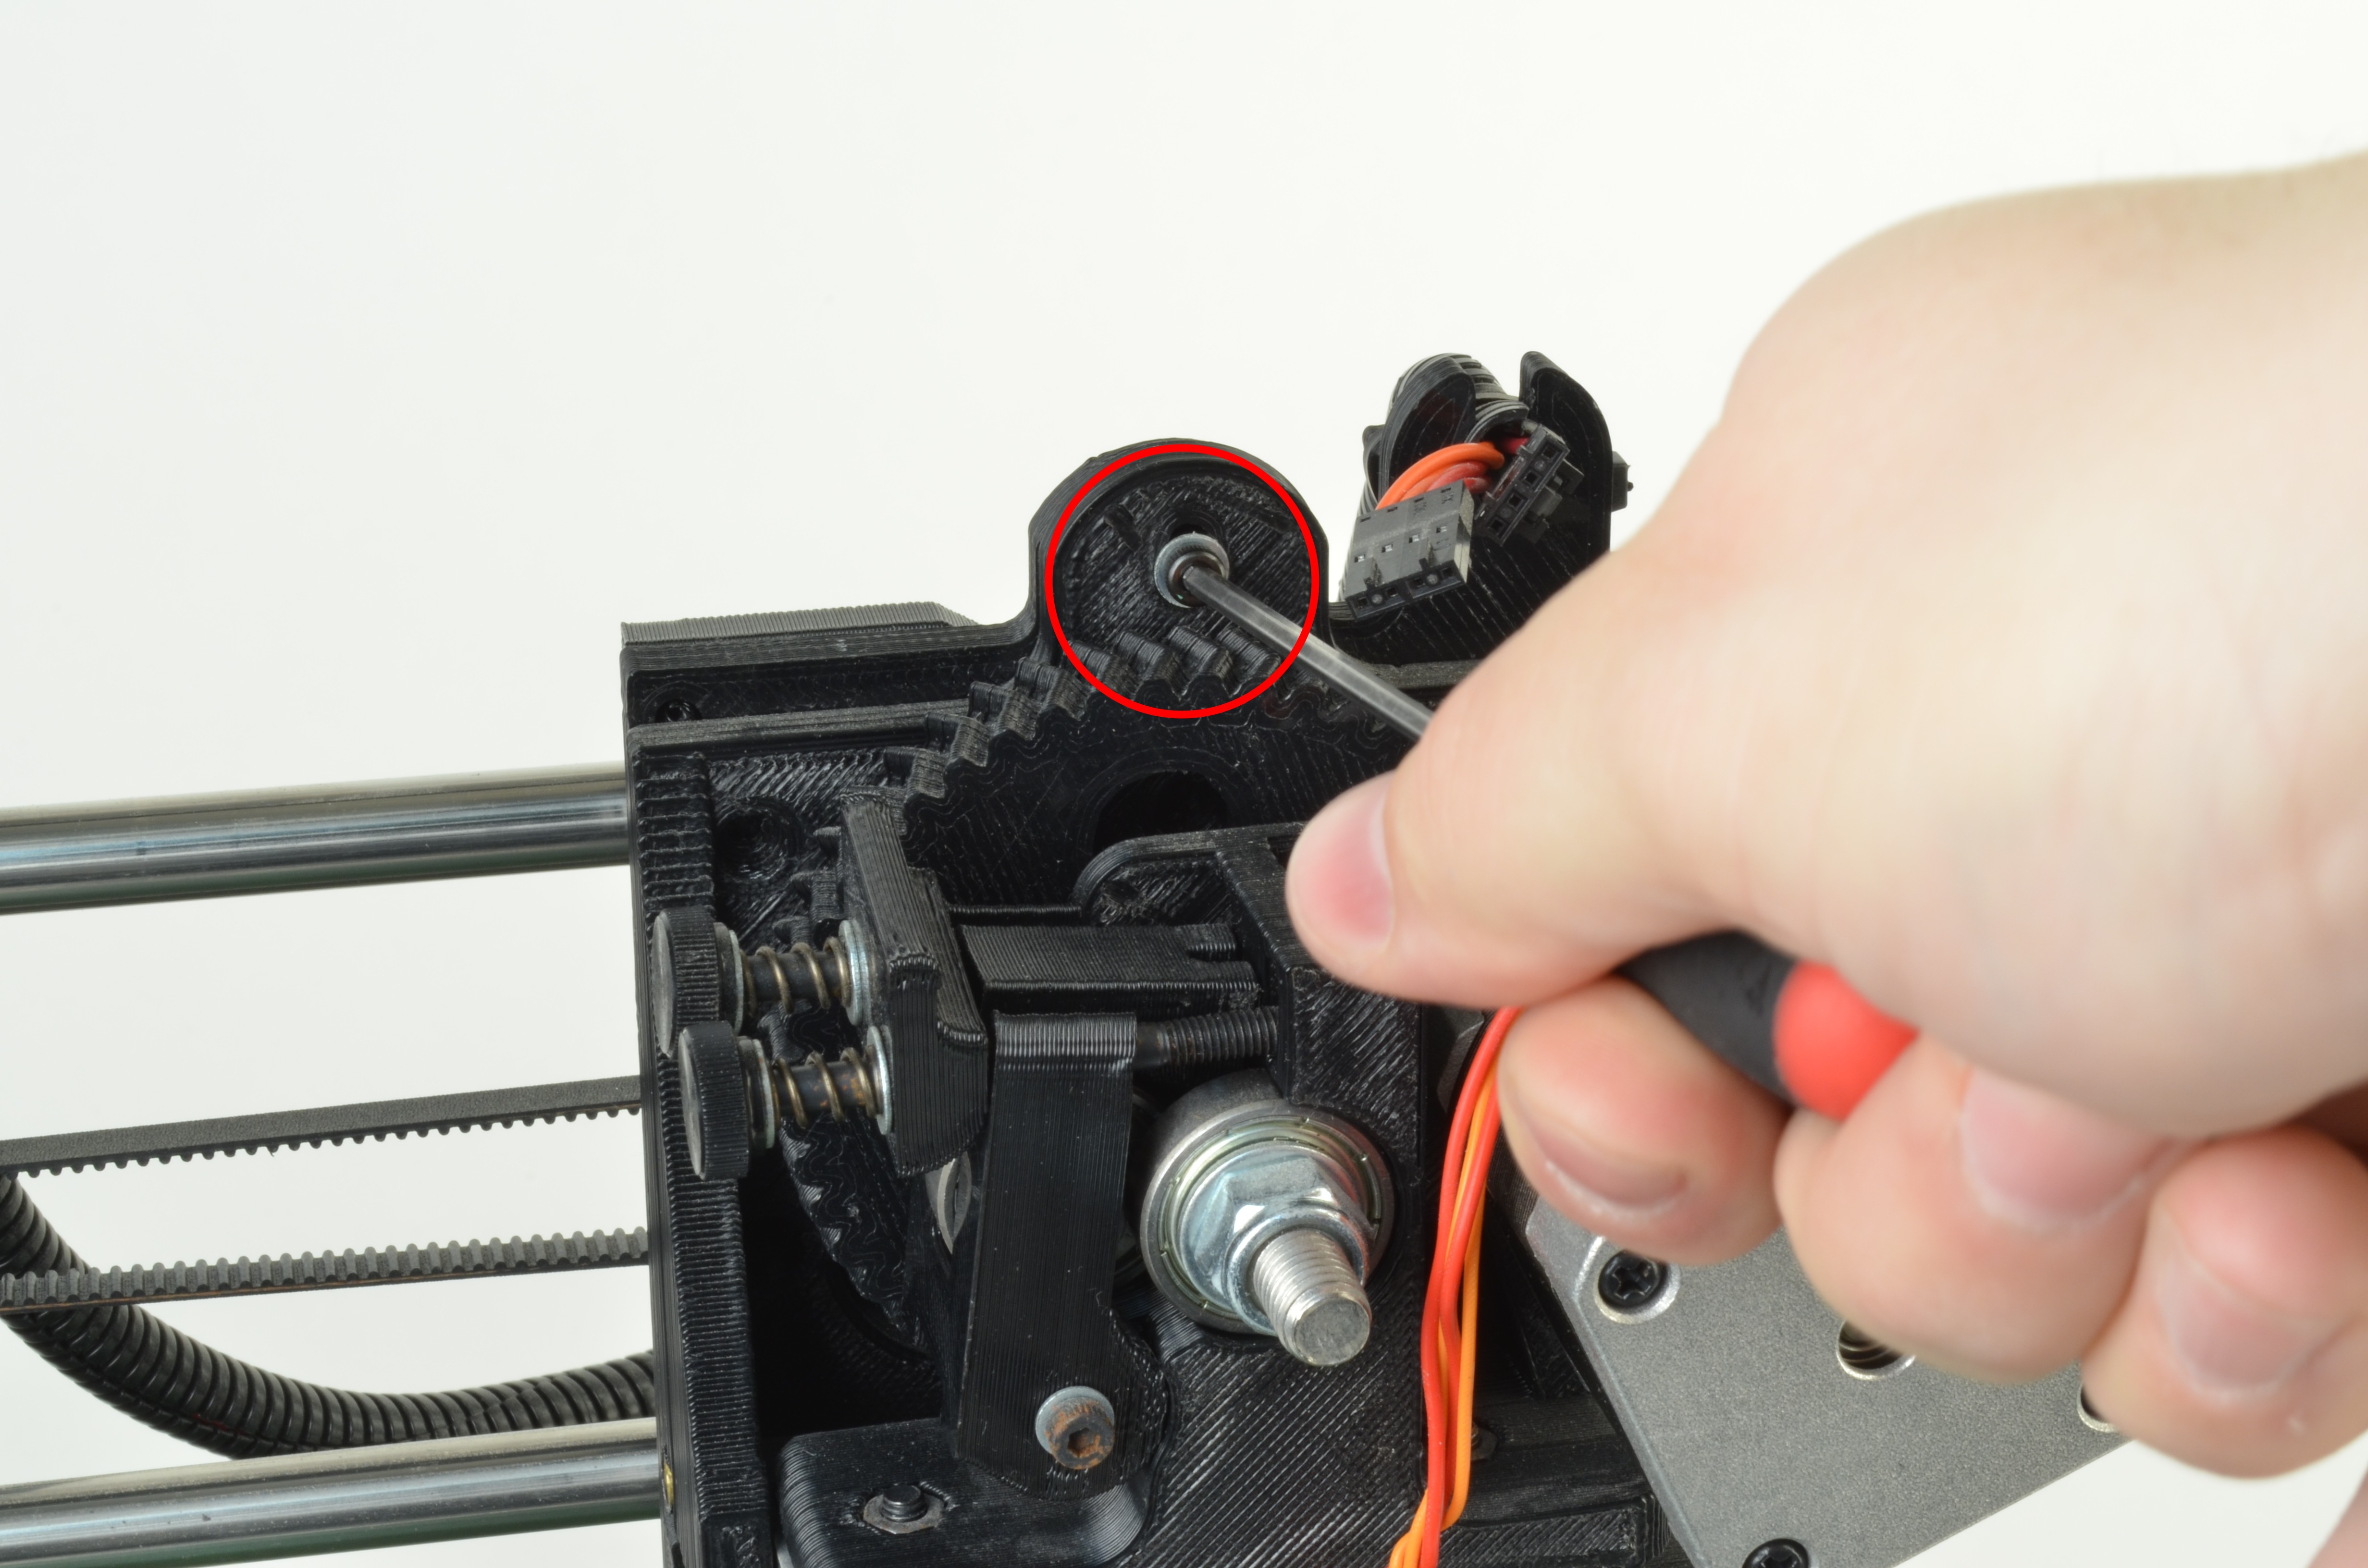
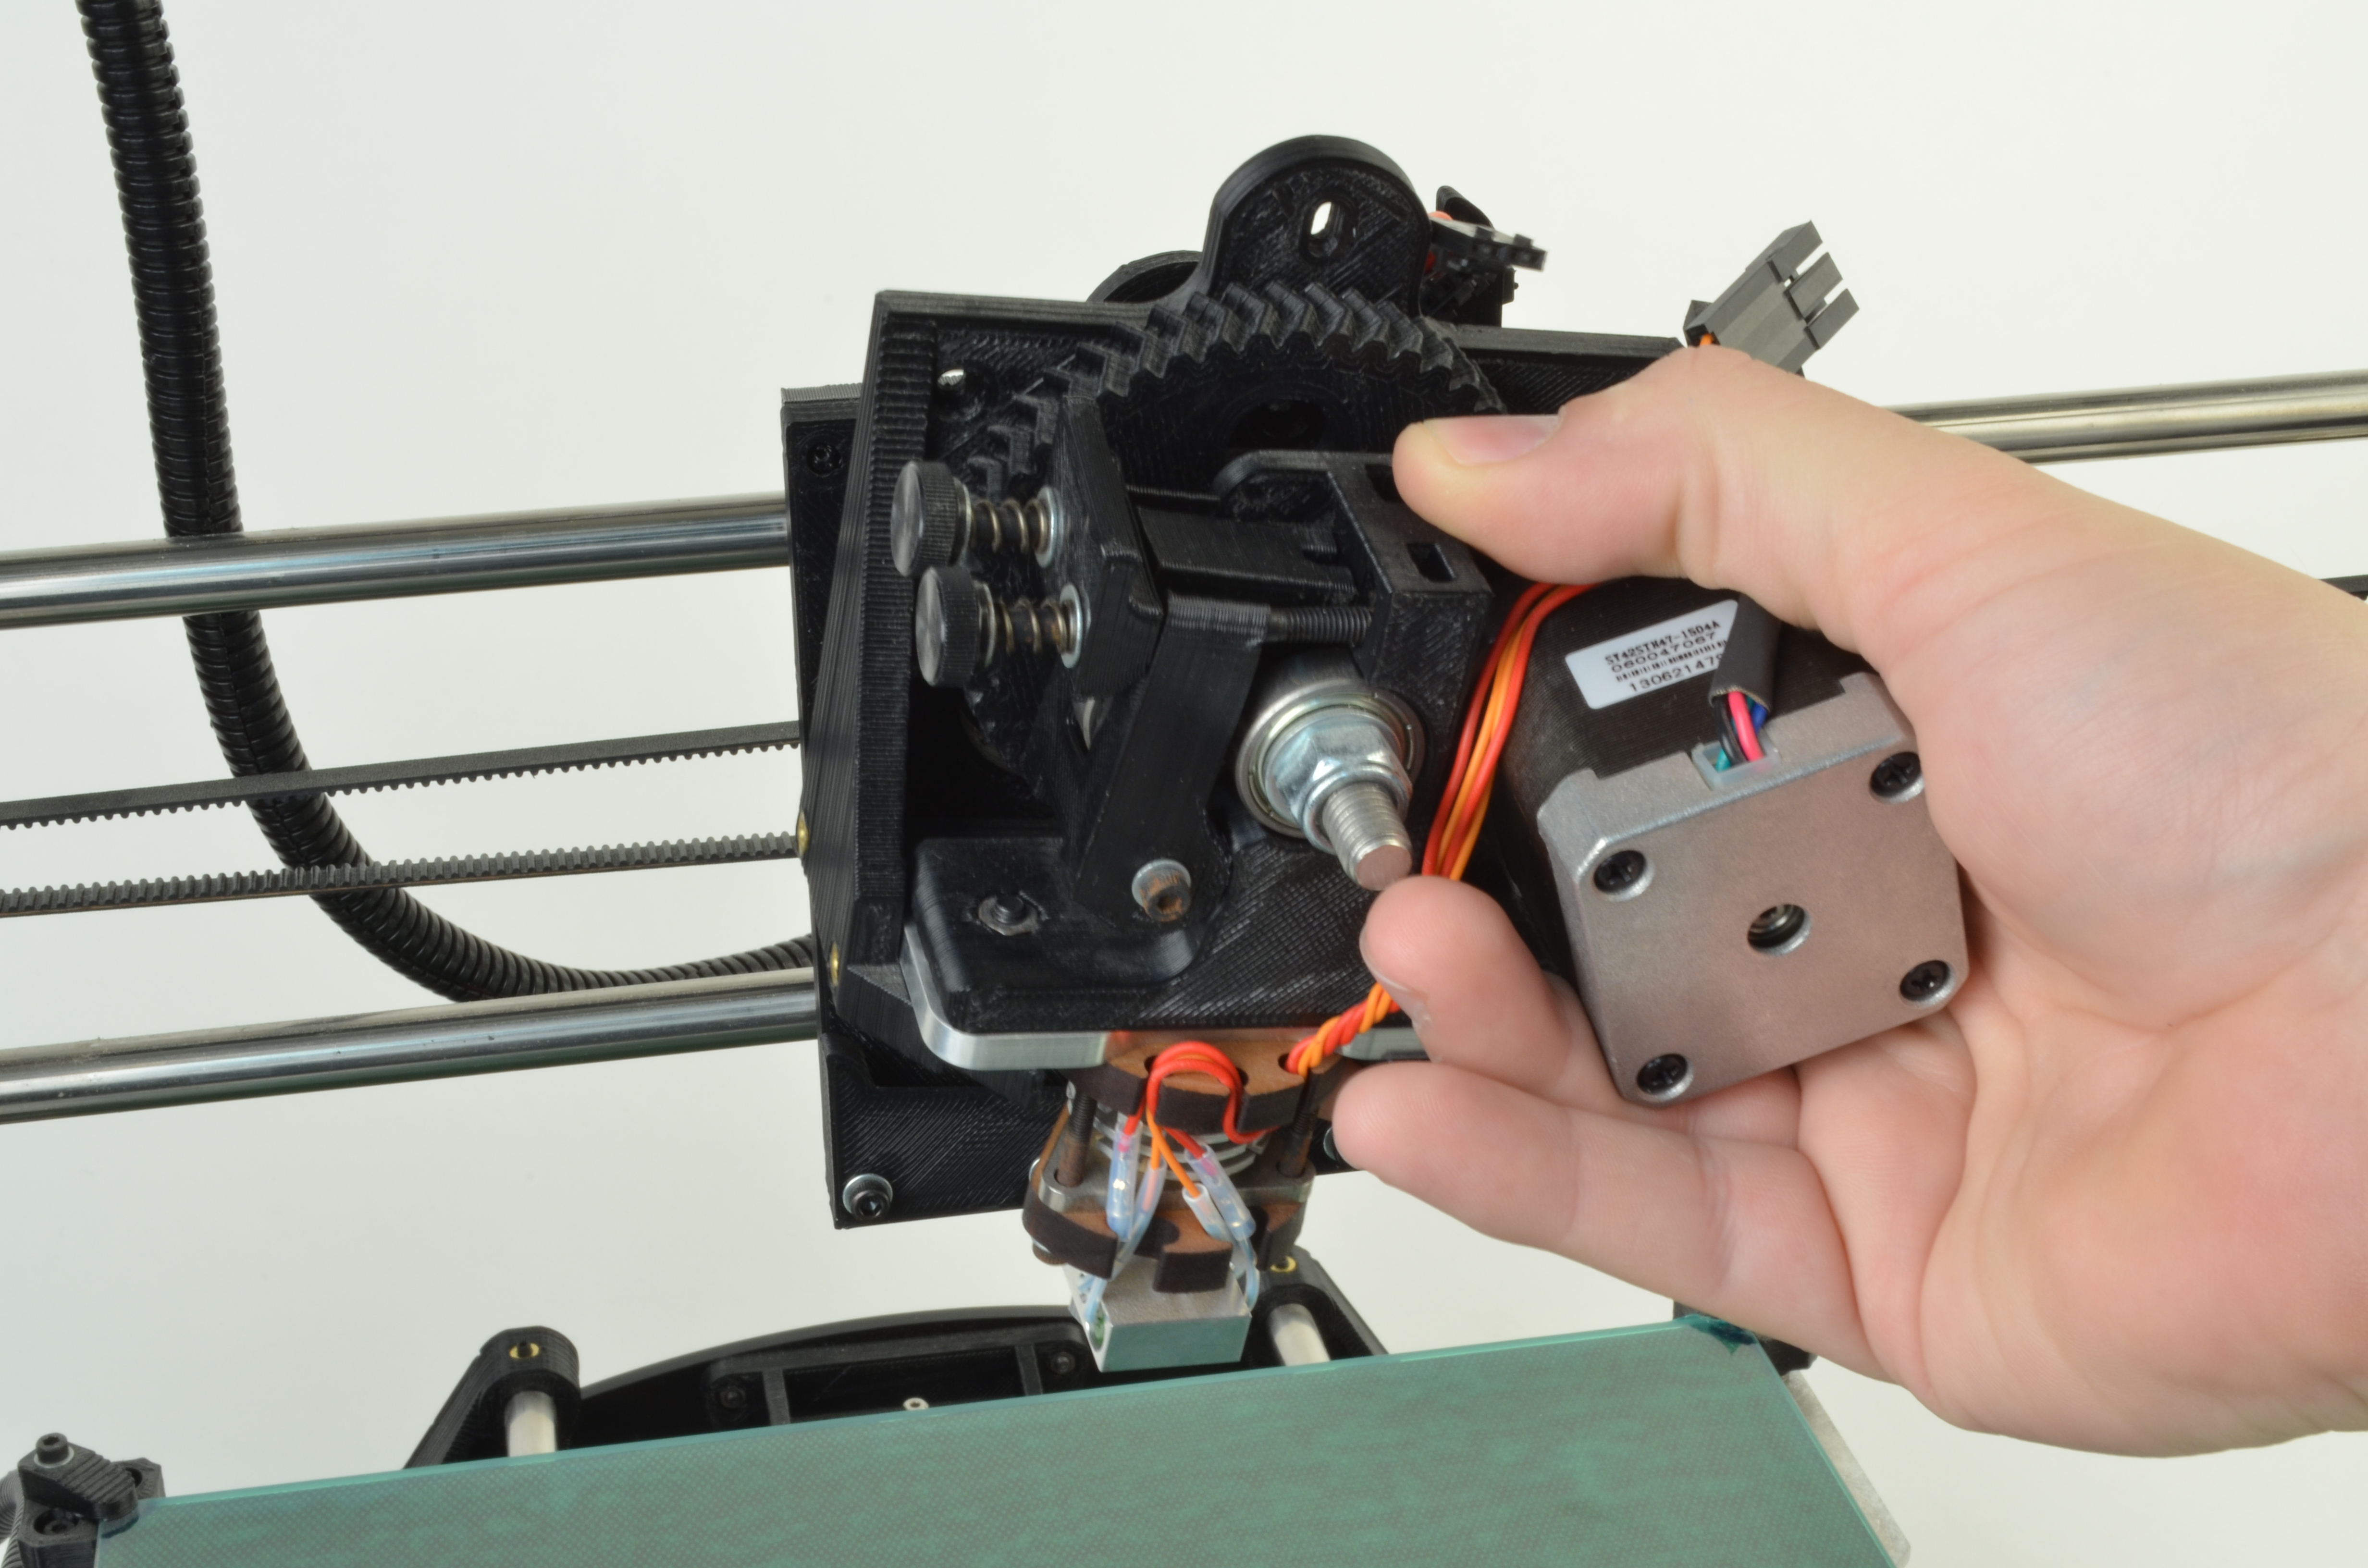
Use the 2.5-mm wrench to remove the one M3 screw holding the current extruder mount to the X axis carriage.
Save the screw and washer.
Lift the existing toolhead straight up to remove and set aside.
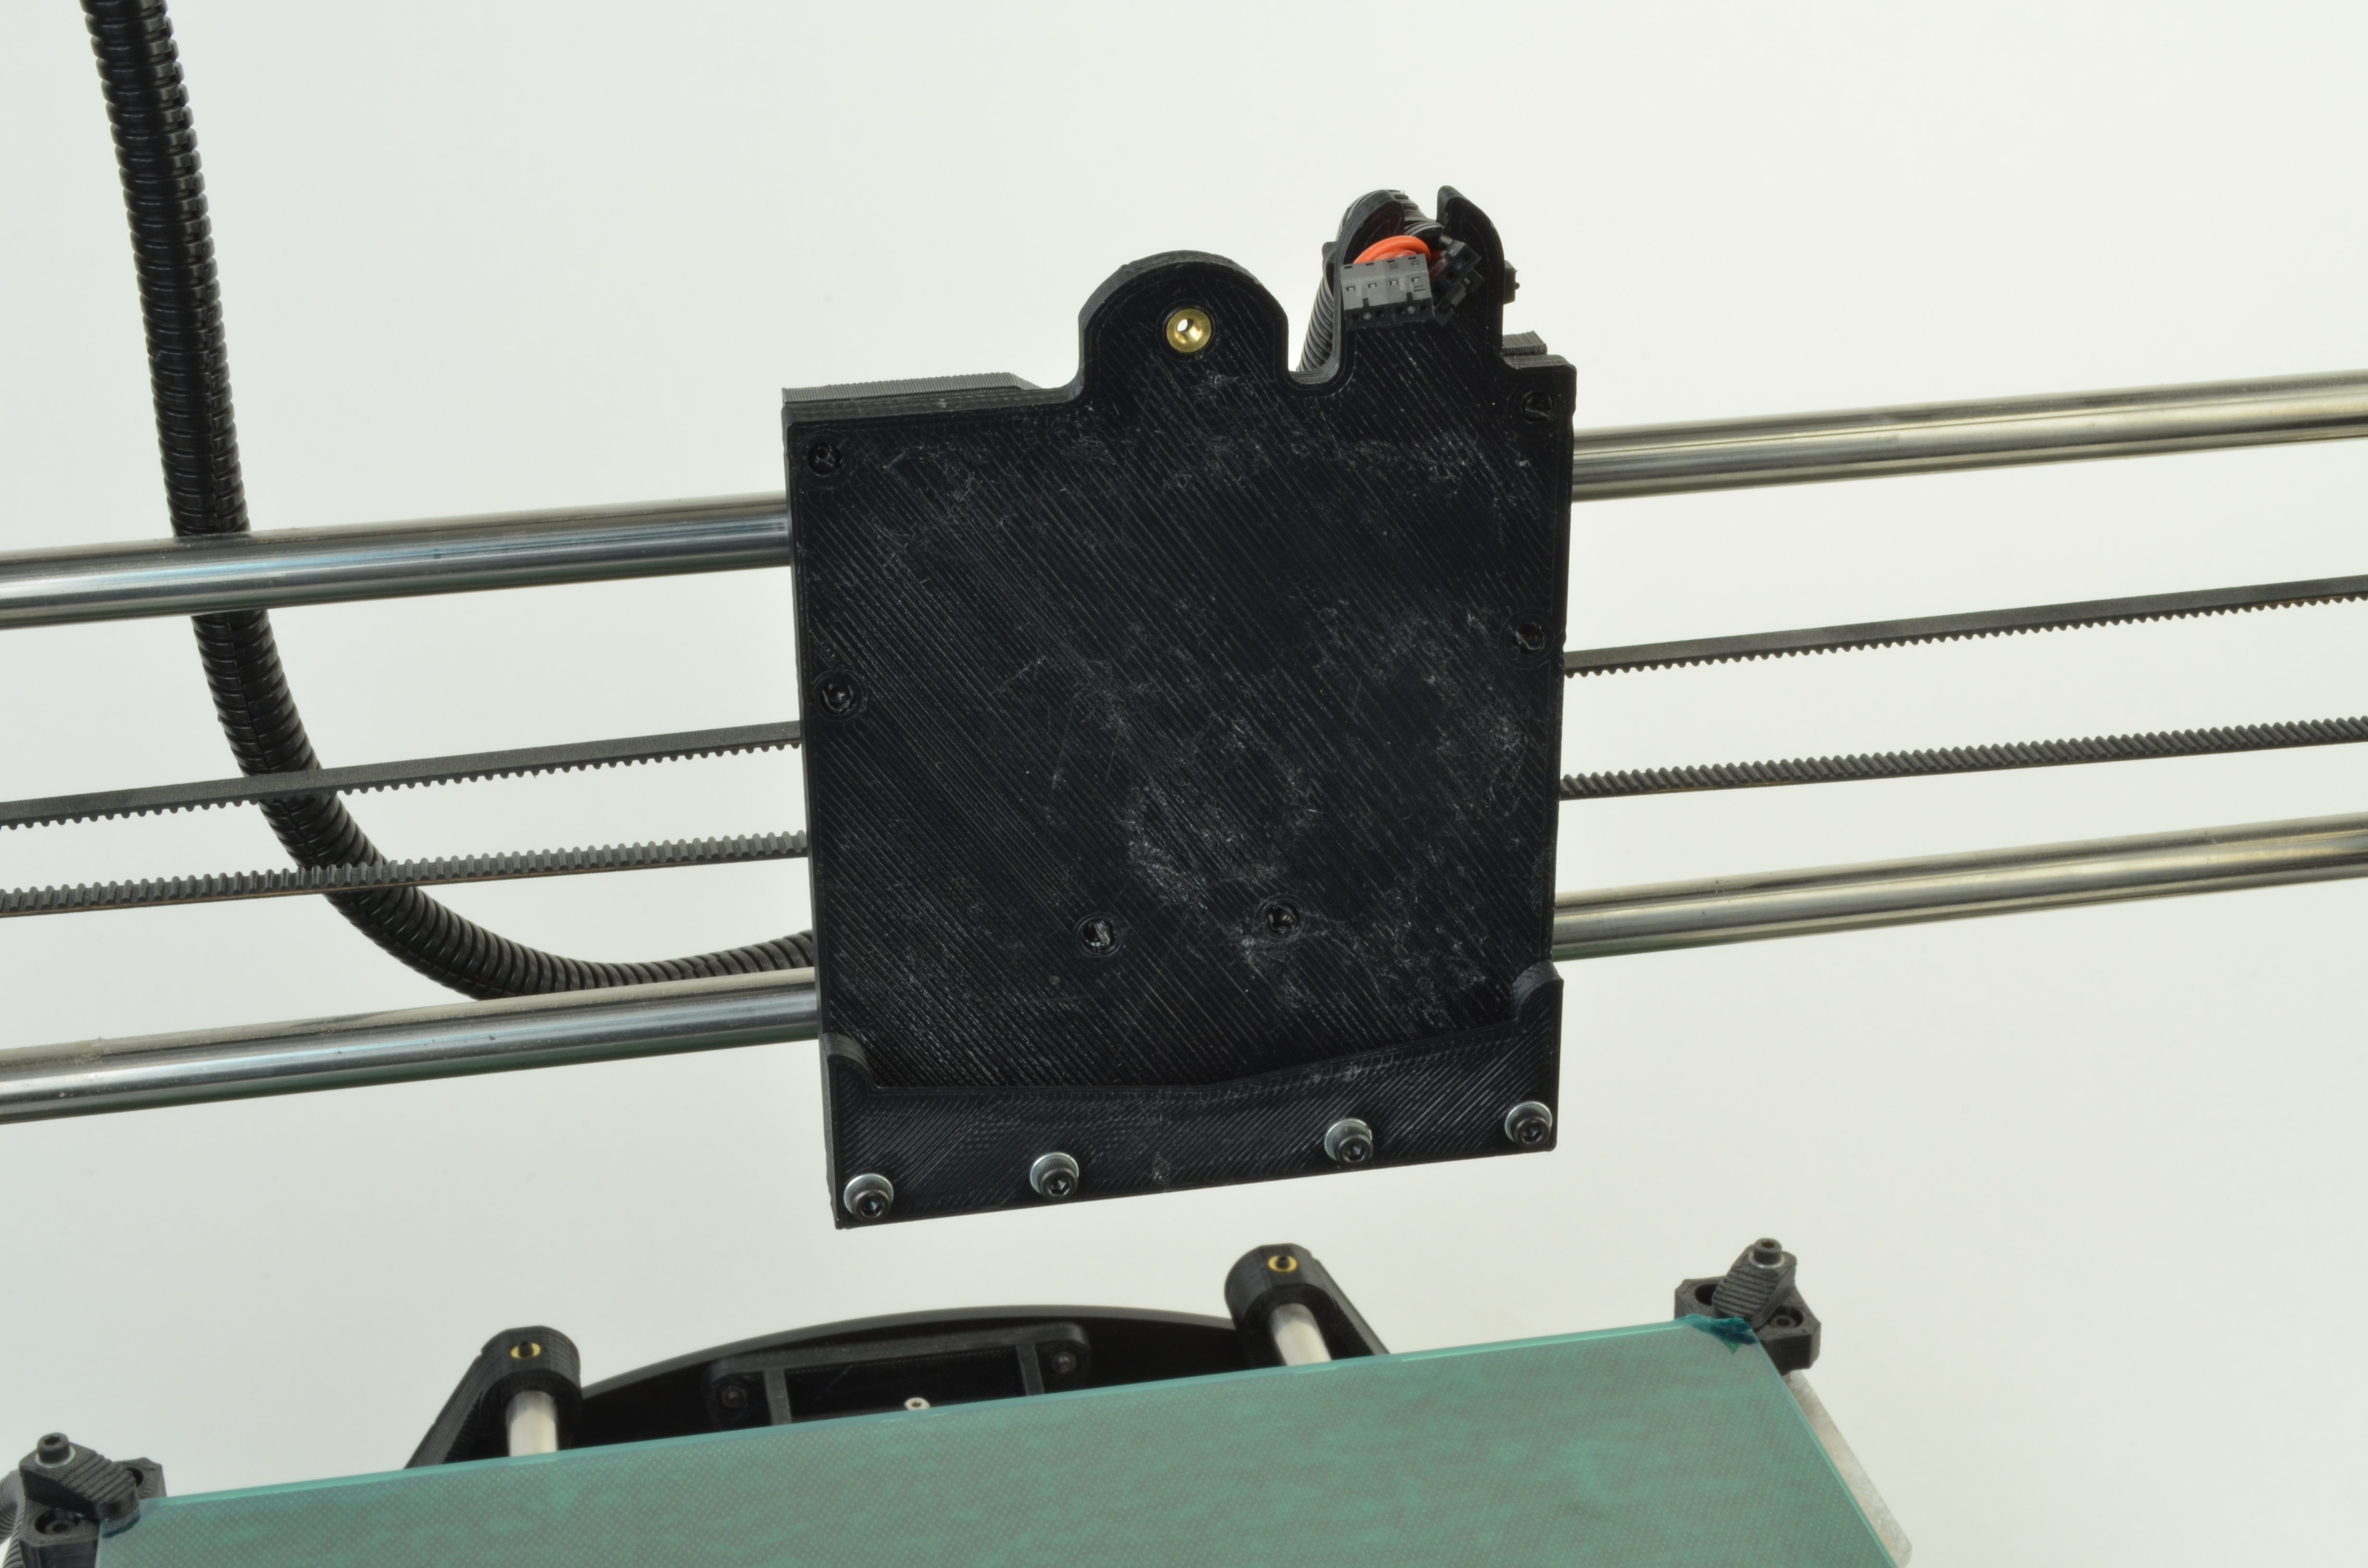
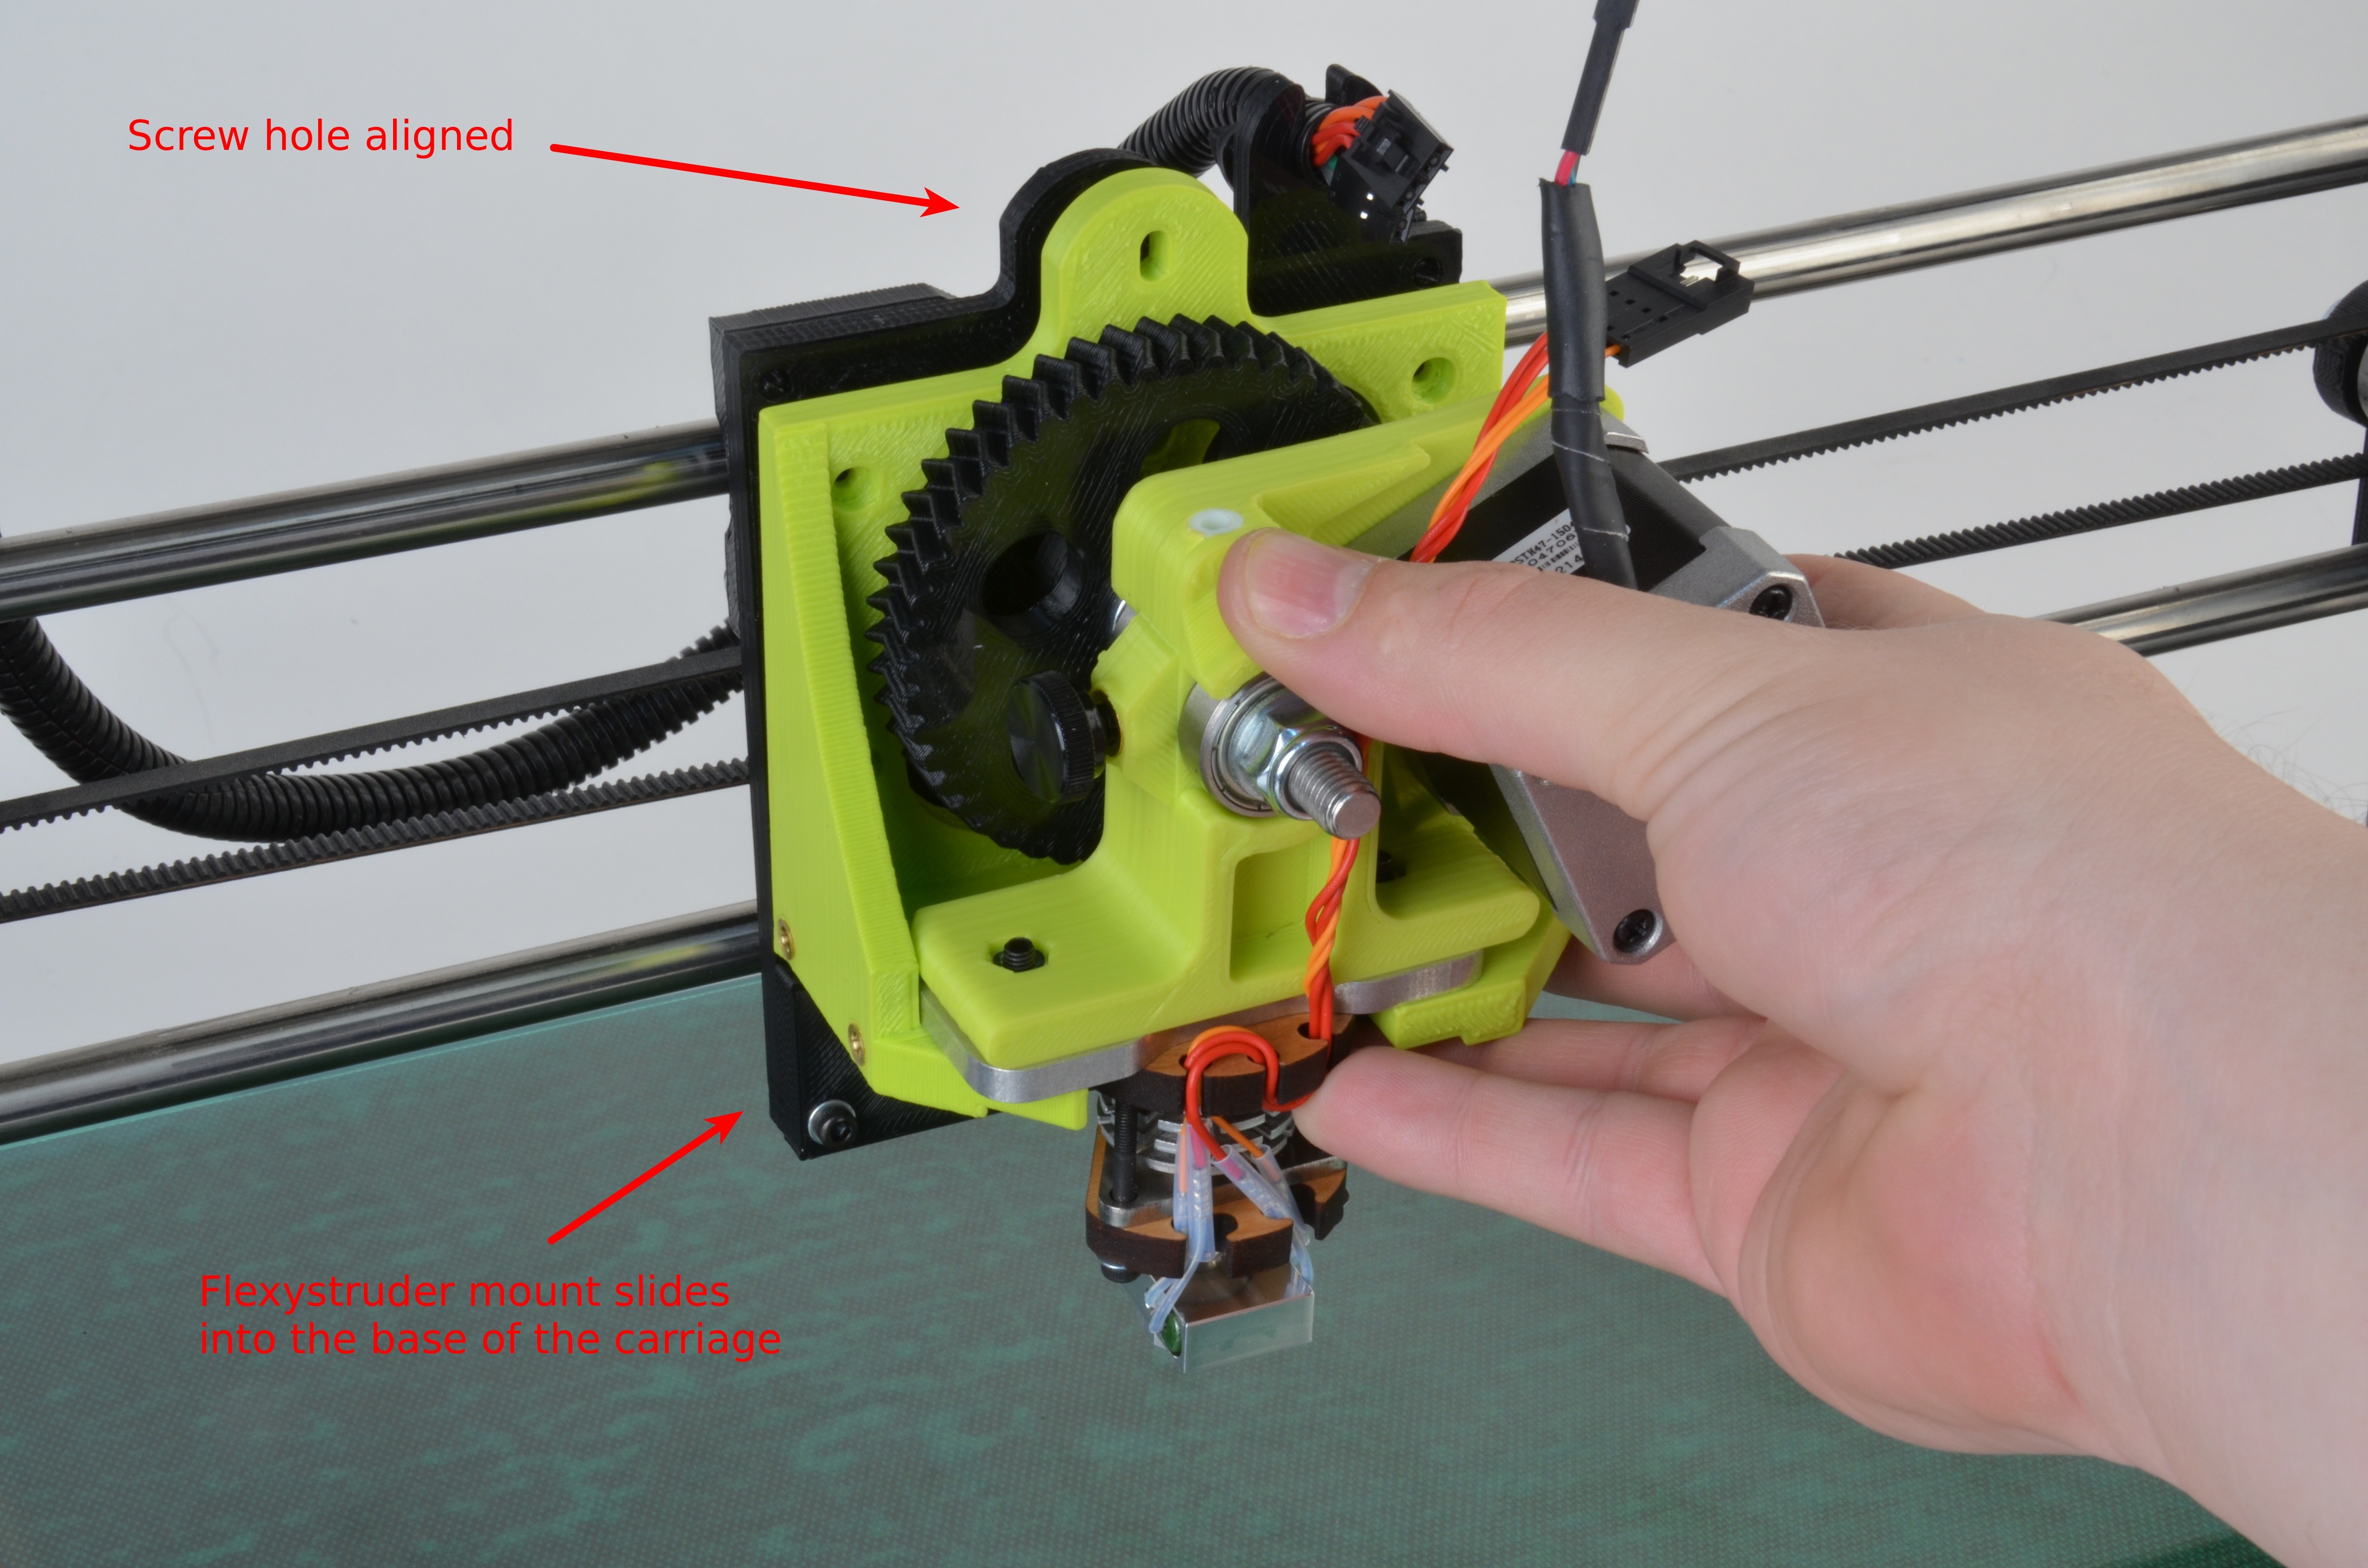
Mount the Flexystruder by sliding in the lower portion of the mounting plate into the X axis pocket
Center and fully seat the Flexystruder, making sure that the screw hole lines up.

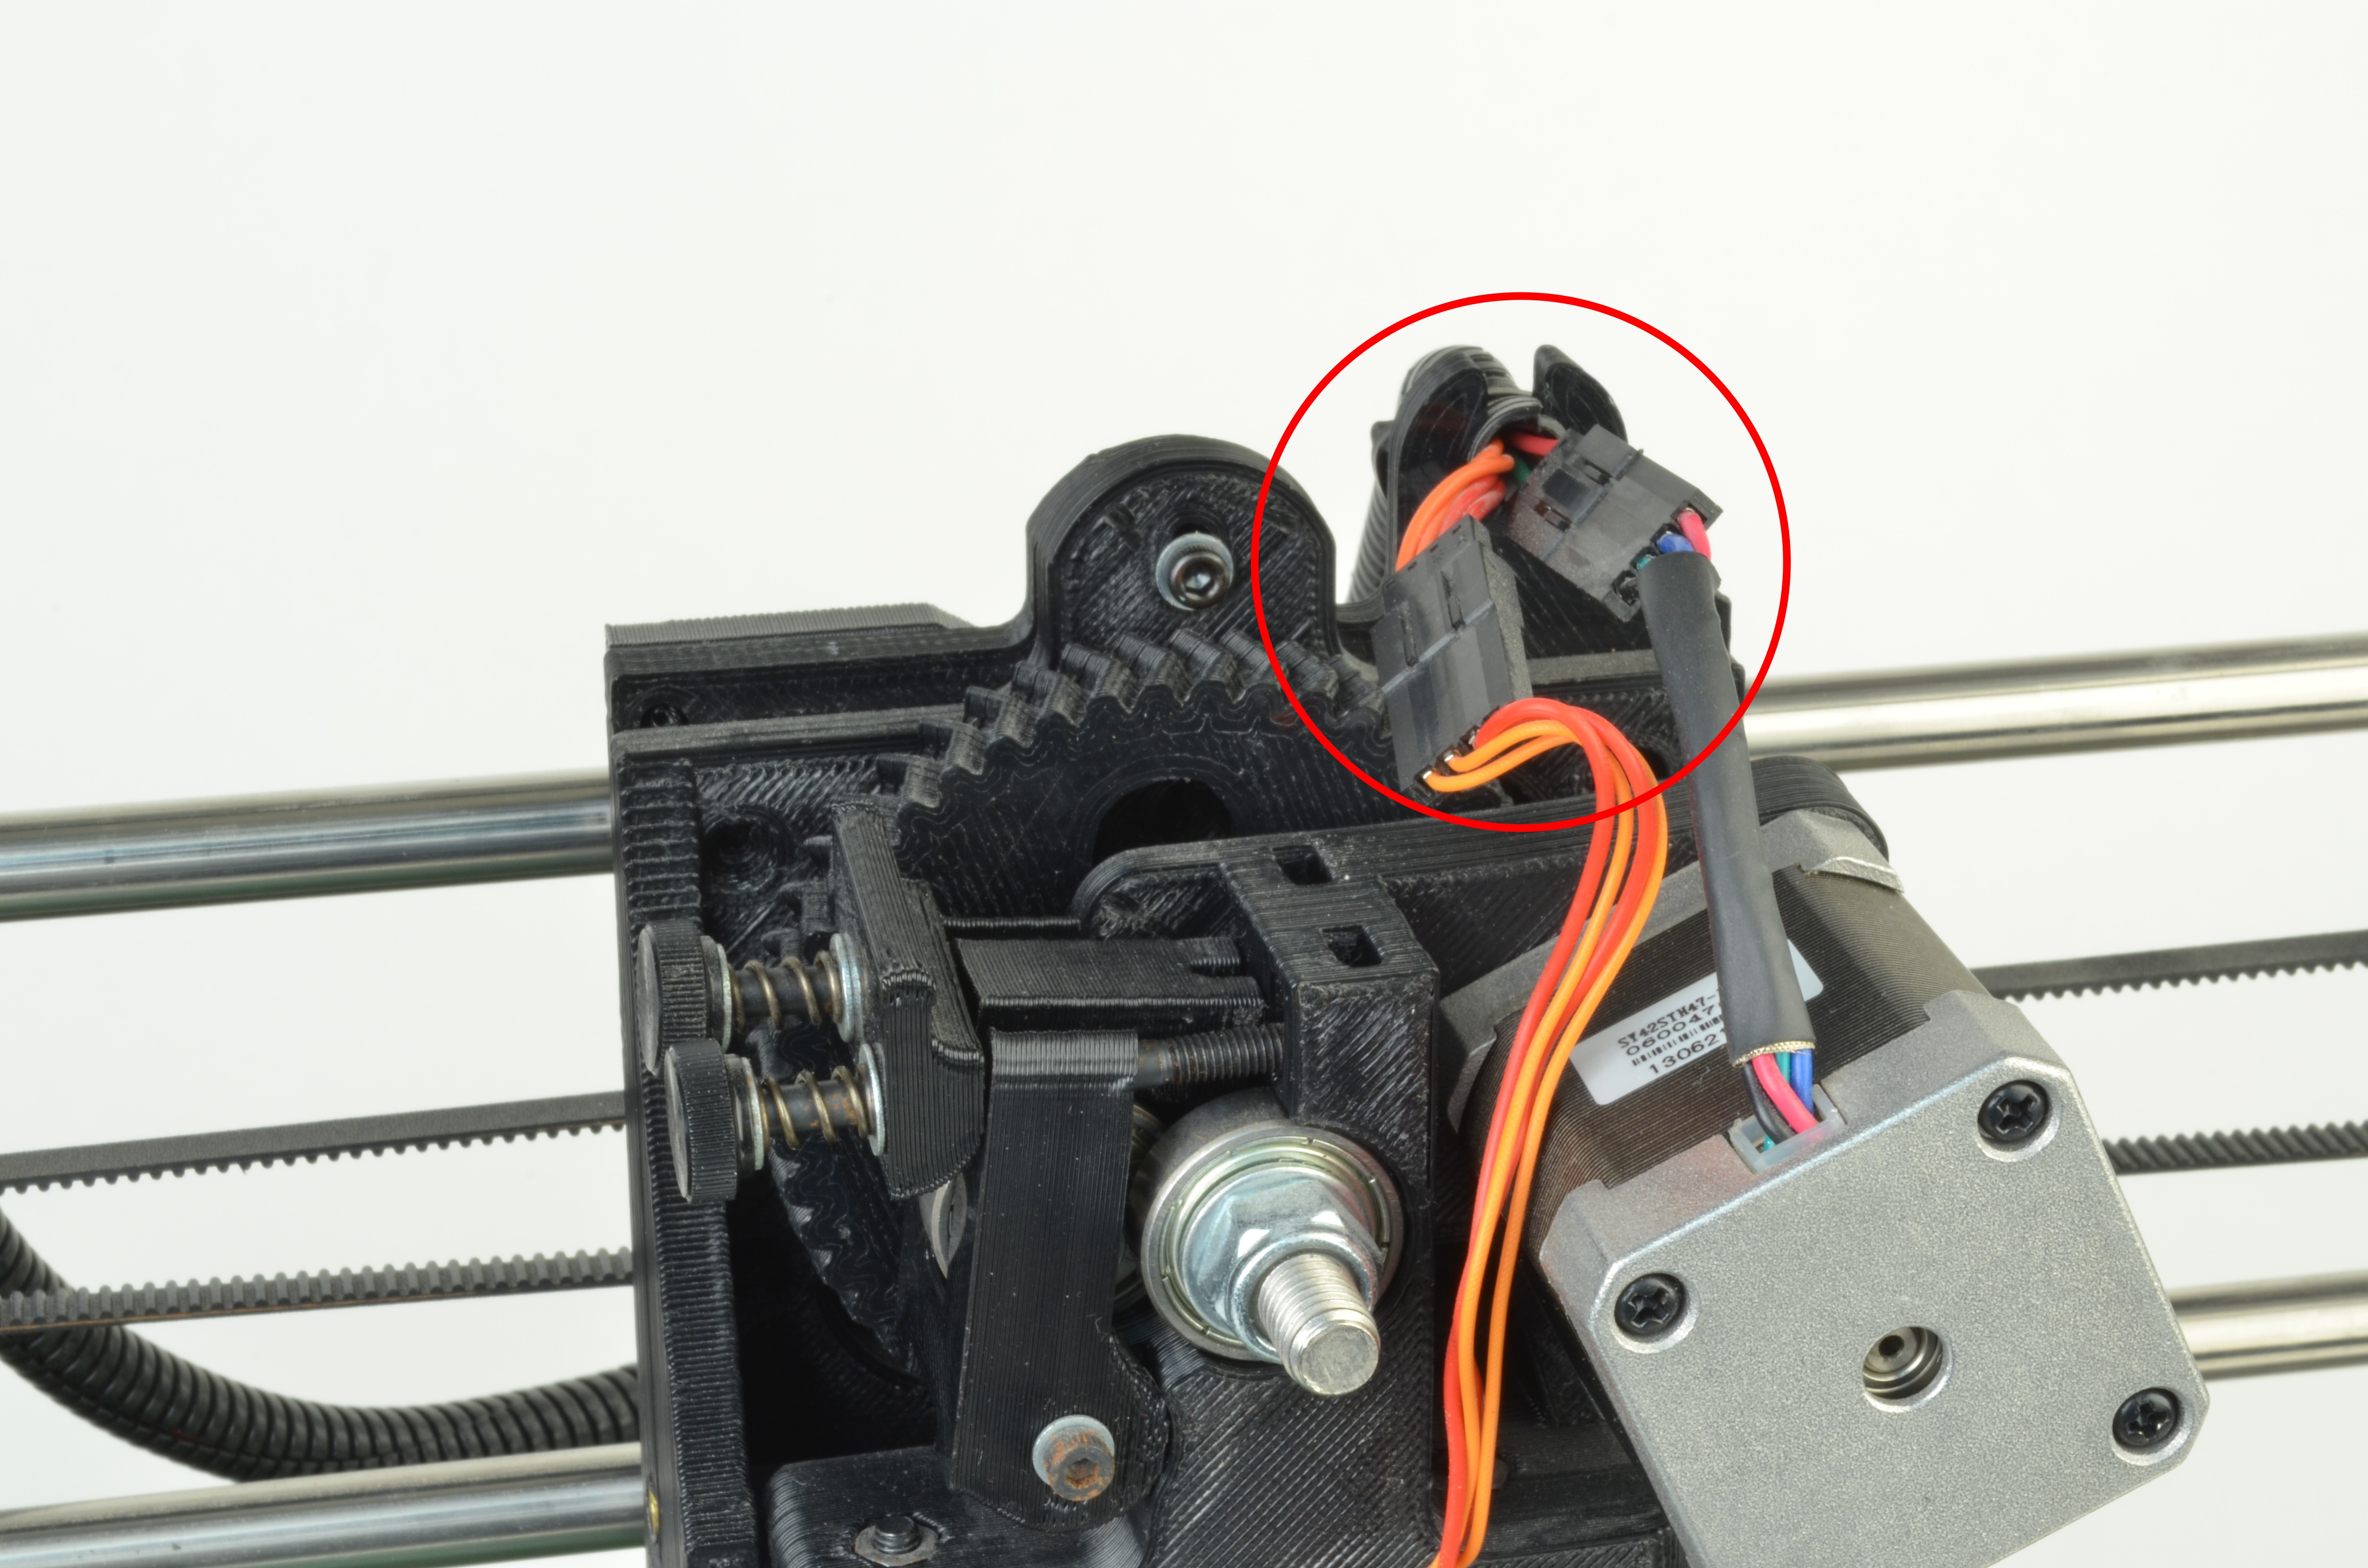
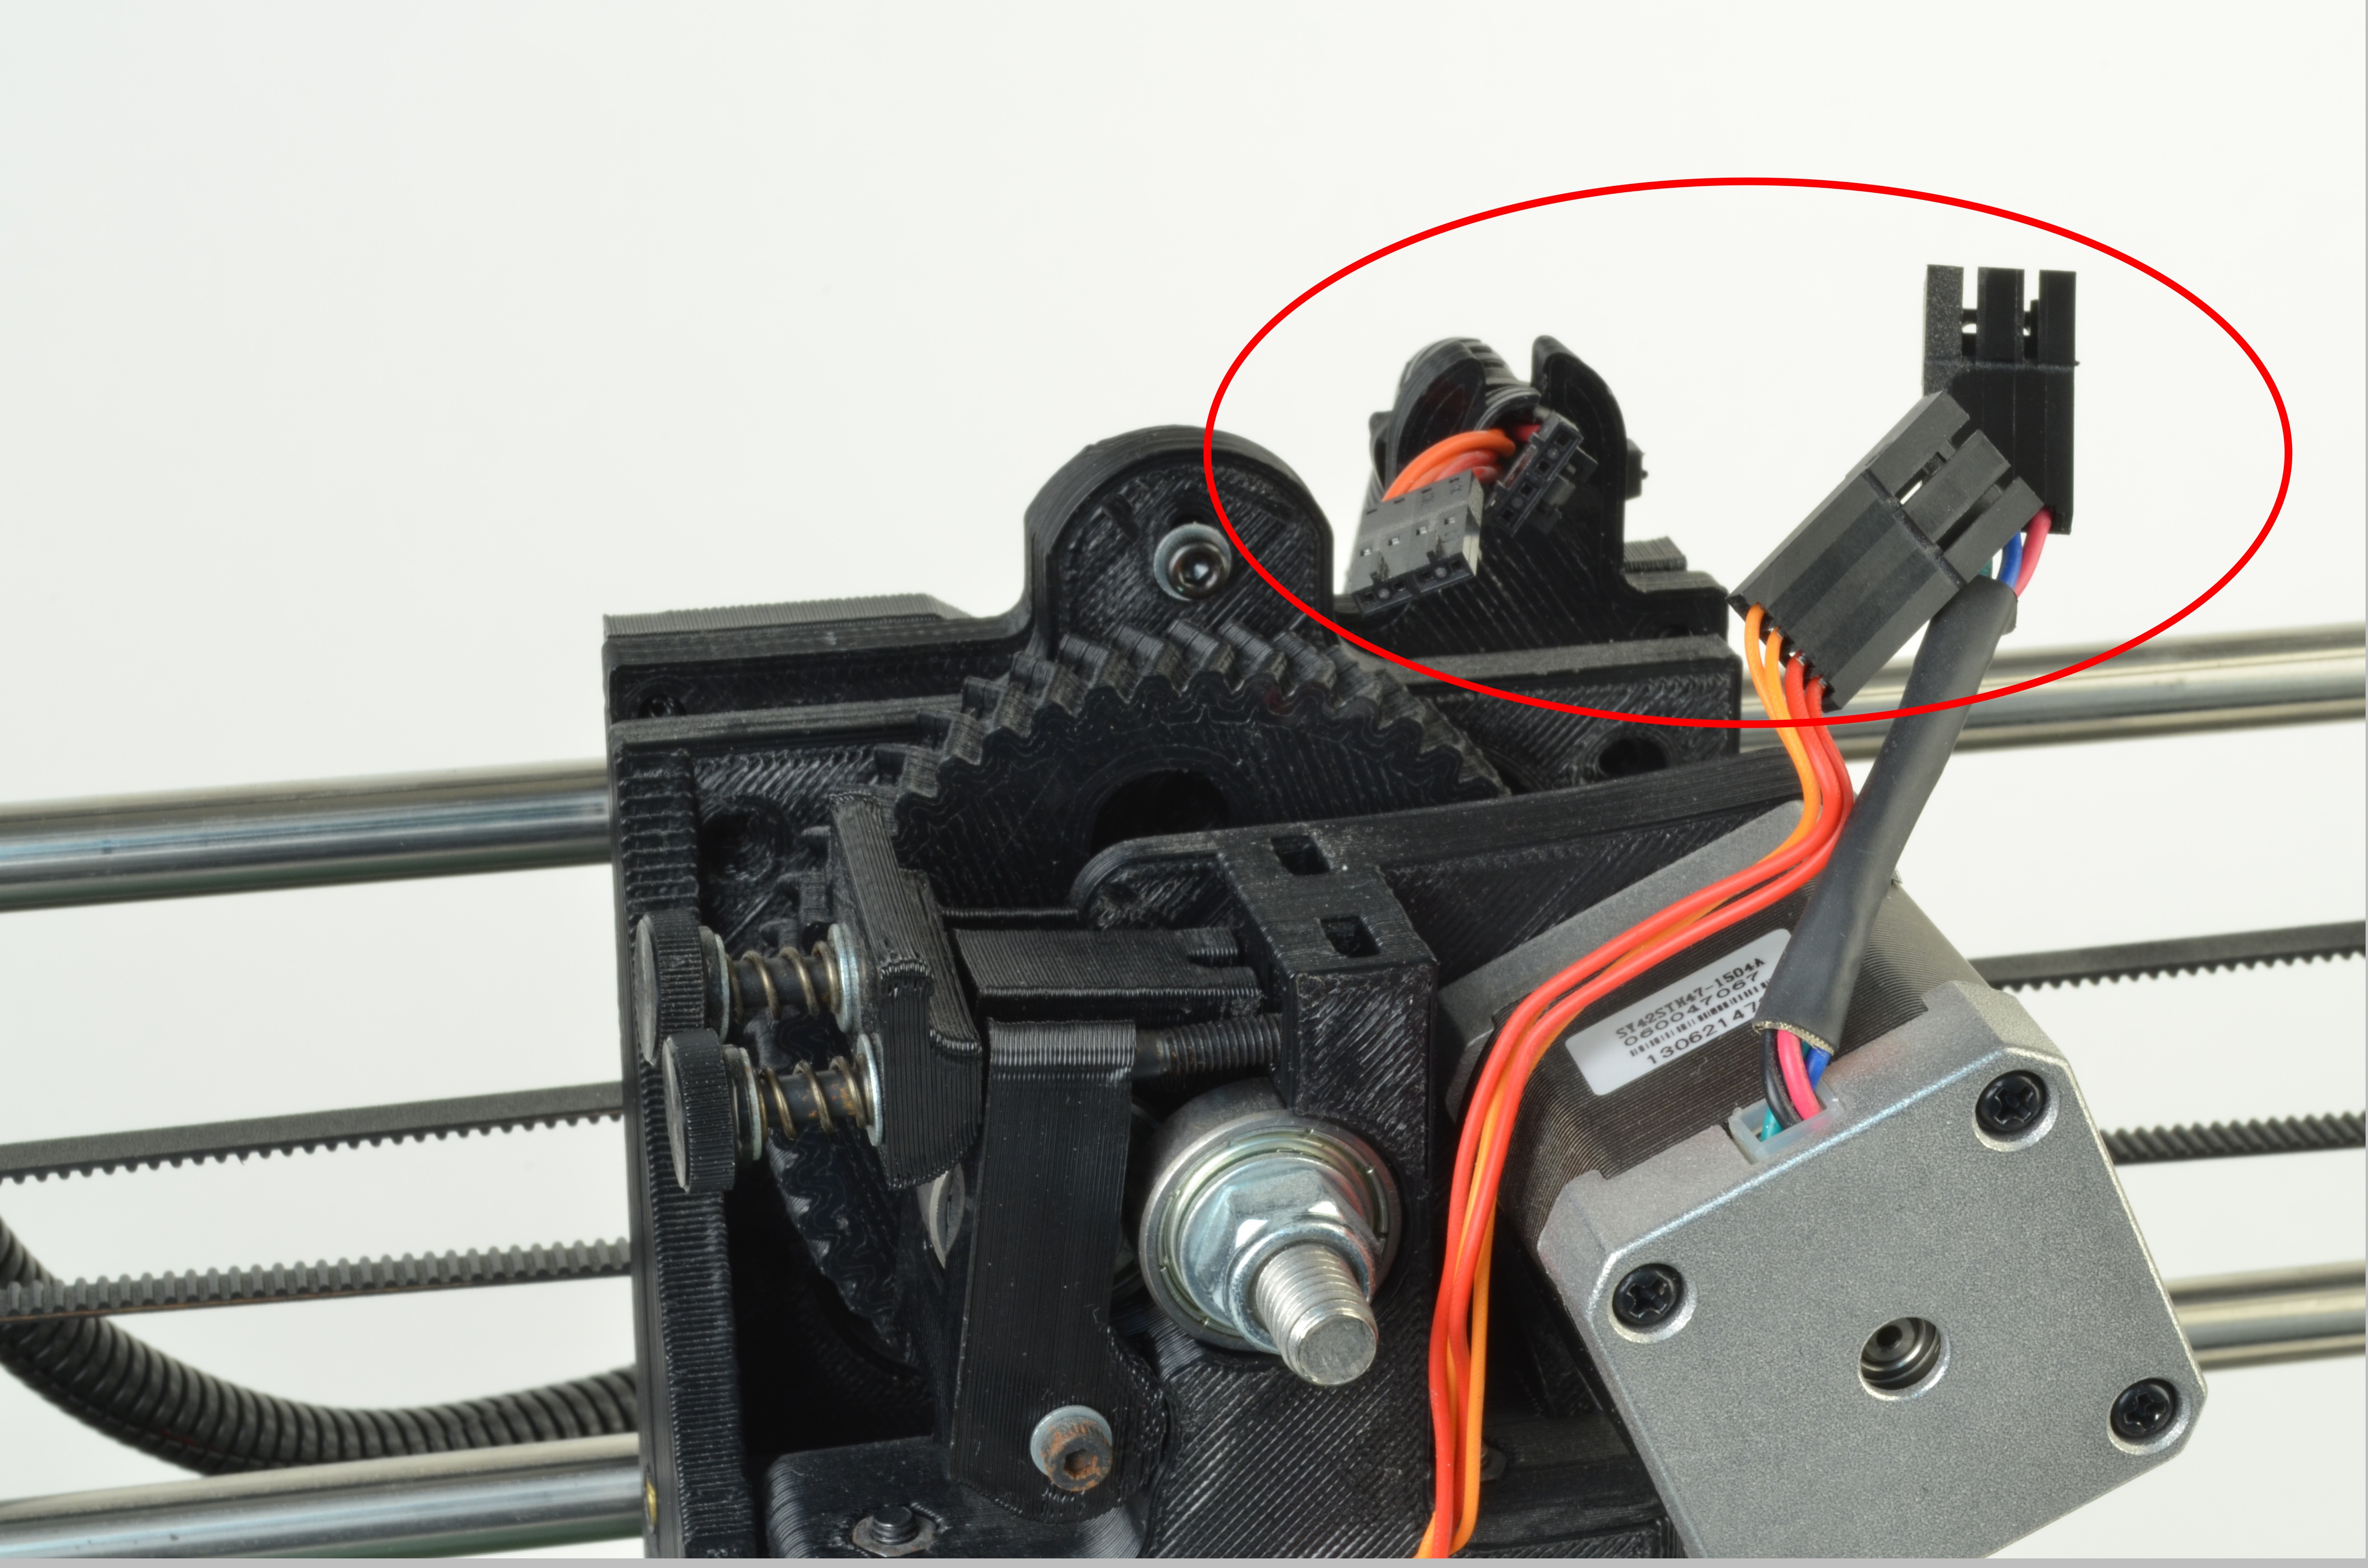
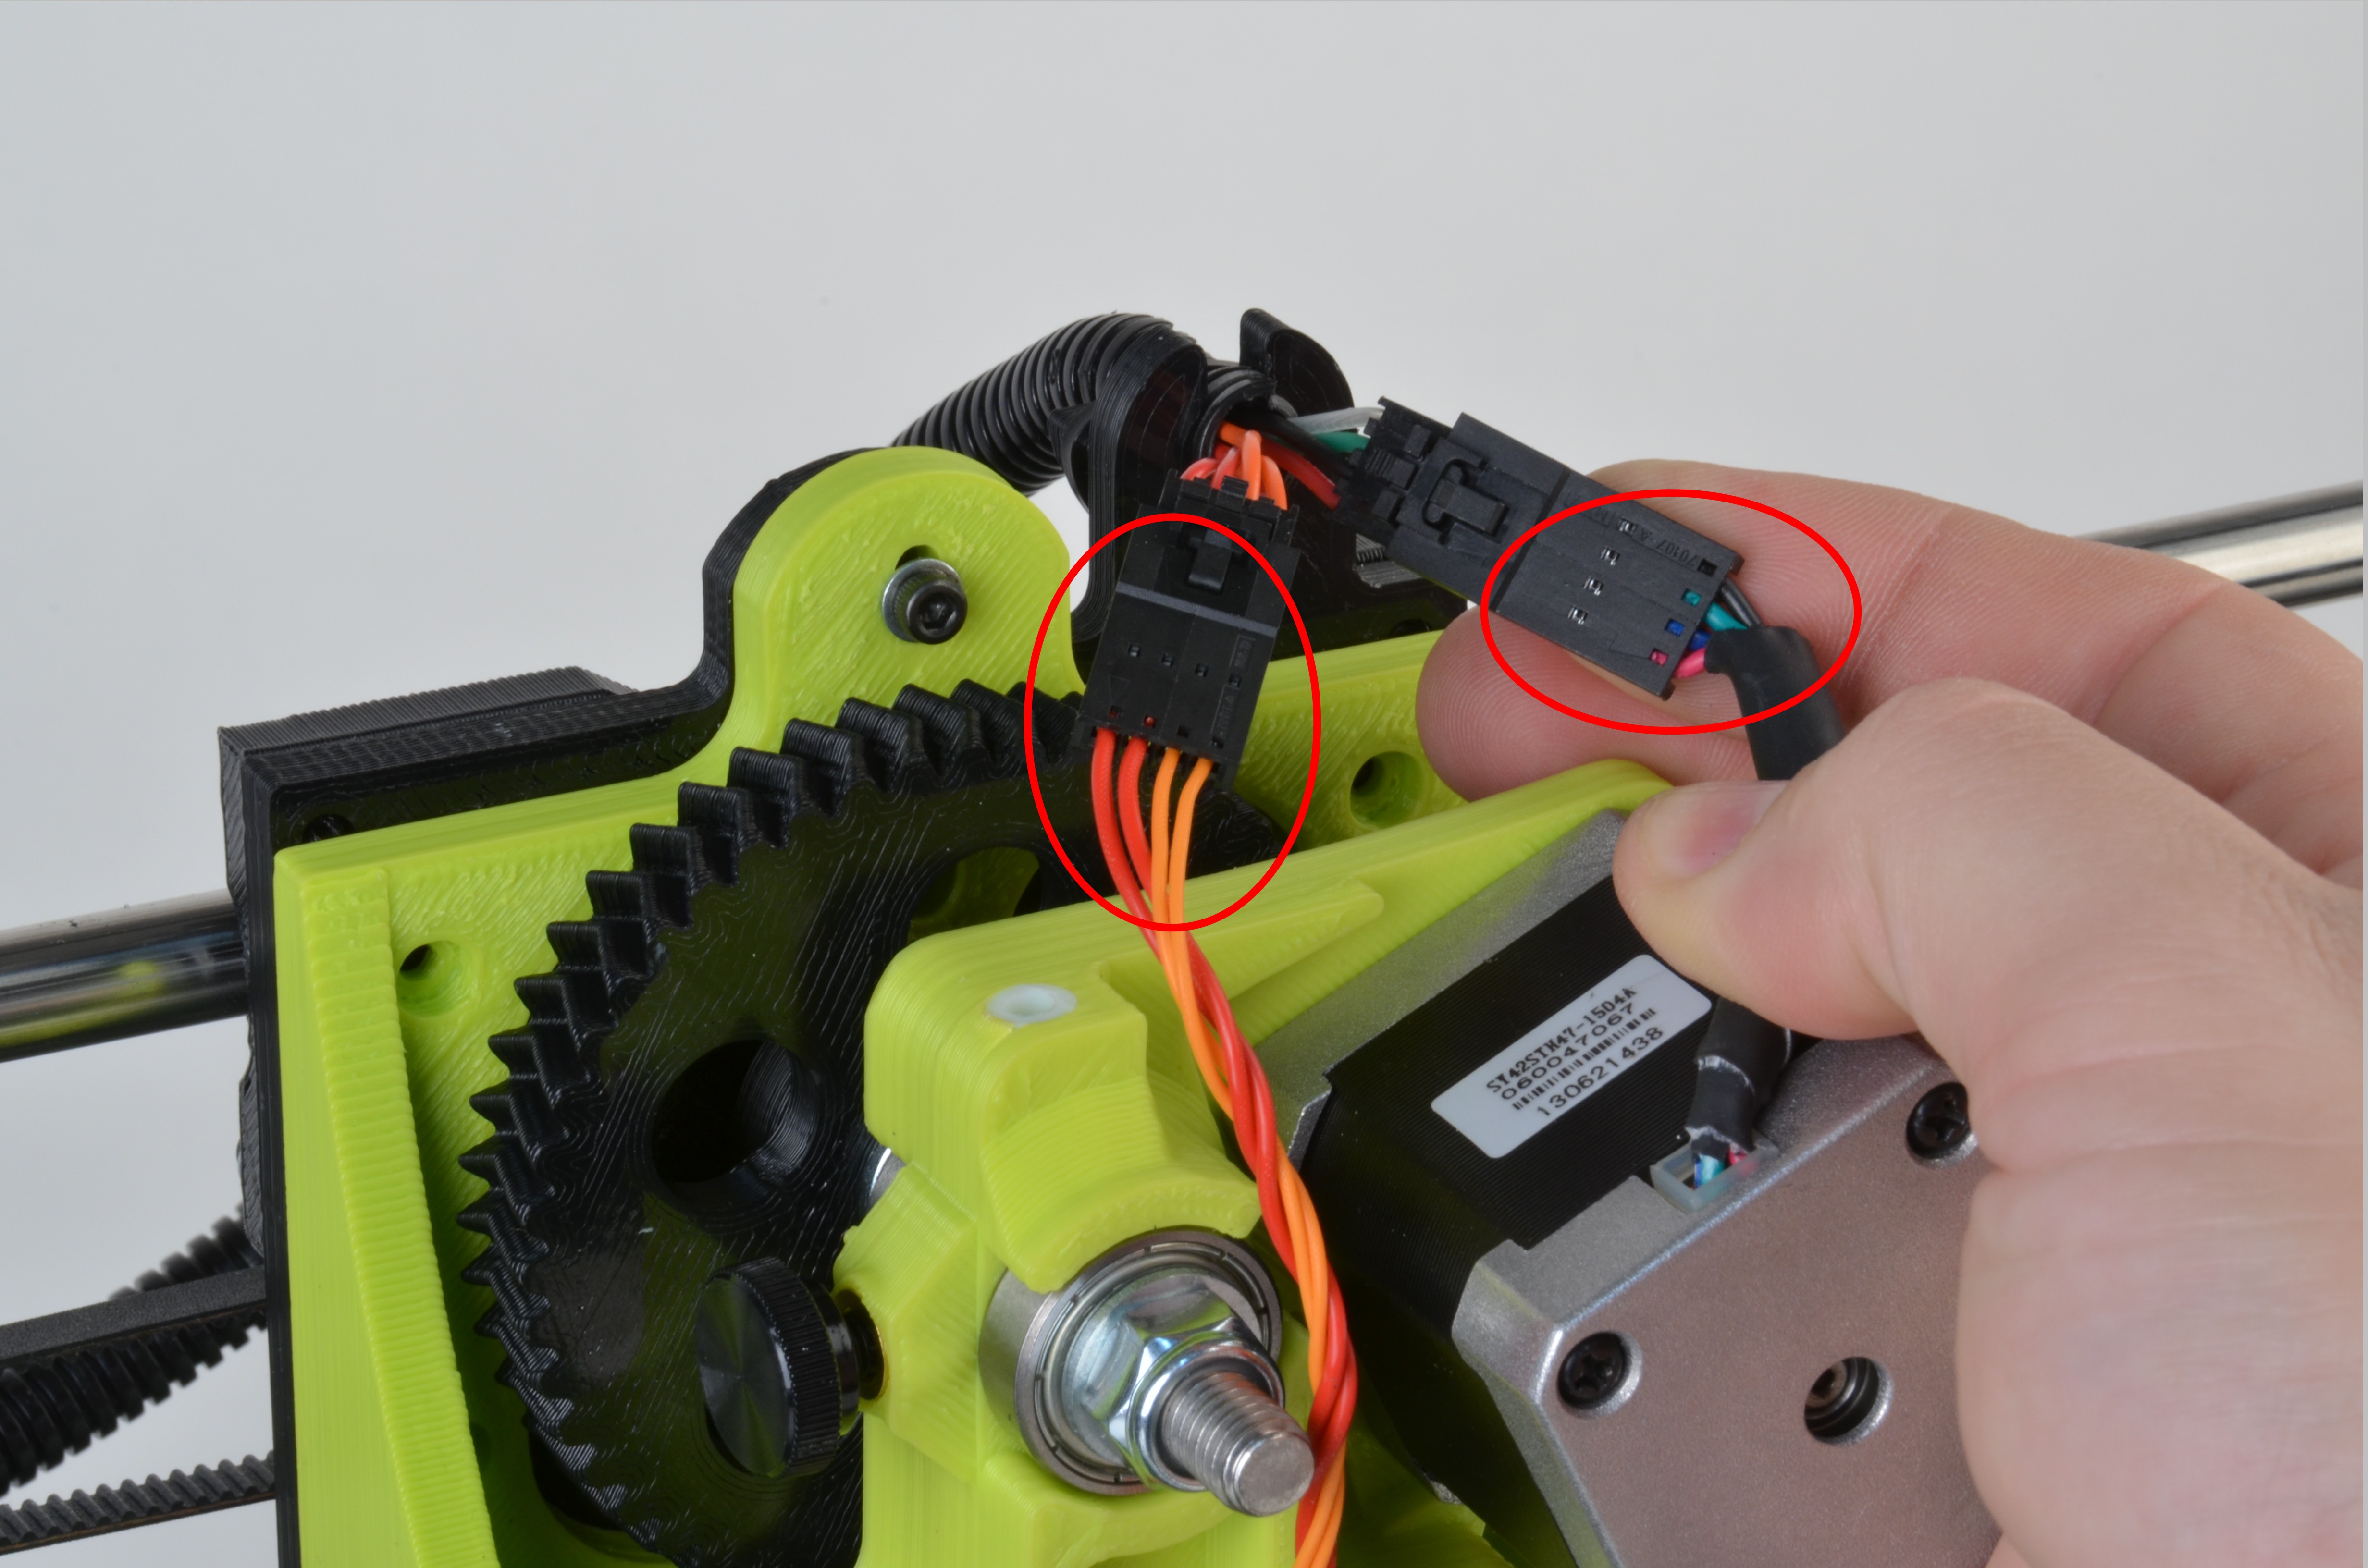
Connect the red & orange wire pair to the red & orange wire harness connector.
Connect the multi-colored wire pair to the multi-colored wire harness connector.
Load your favorite flexible filament into the hot end.
Manually turn the large herringbone gear, counter-clockwise to drive the filament into the hot end.
If you encounter resistance, stop and rotate the gear clockwise.


Ensure the filament tension knob has an approximately 2mm gap between the end of the thumbscrew and the body of the extruder
Calibrate your Flexystruder by going to our Extruder Calibration Guide
IMPORTANT - If installing on a TAZ 3D printer equipped with the All-Metal Hexagon Hot End (Fangtooth), you'll need to reflash the printer with our Flexy TAZ 5 firmware to power the flexystruder.
