Open HardwareAssembly Instructions
Guides for installation and assembly of the LulzBot line of products made by FAME 3D LLC.
Guides for installation and assembly of the LulzBot line of products made by FAME 3D LLC.
The print head replacement is easiest to perform with the print head at least 2" (50mm) above the bed, and the back of the printer facing toward you. The printer should be powered off and unplugged before starting.
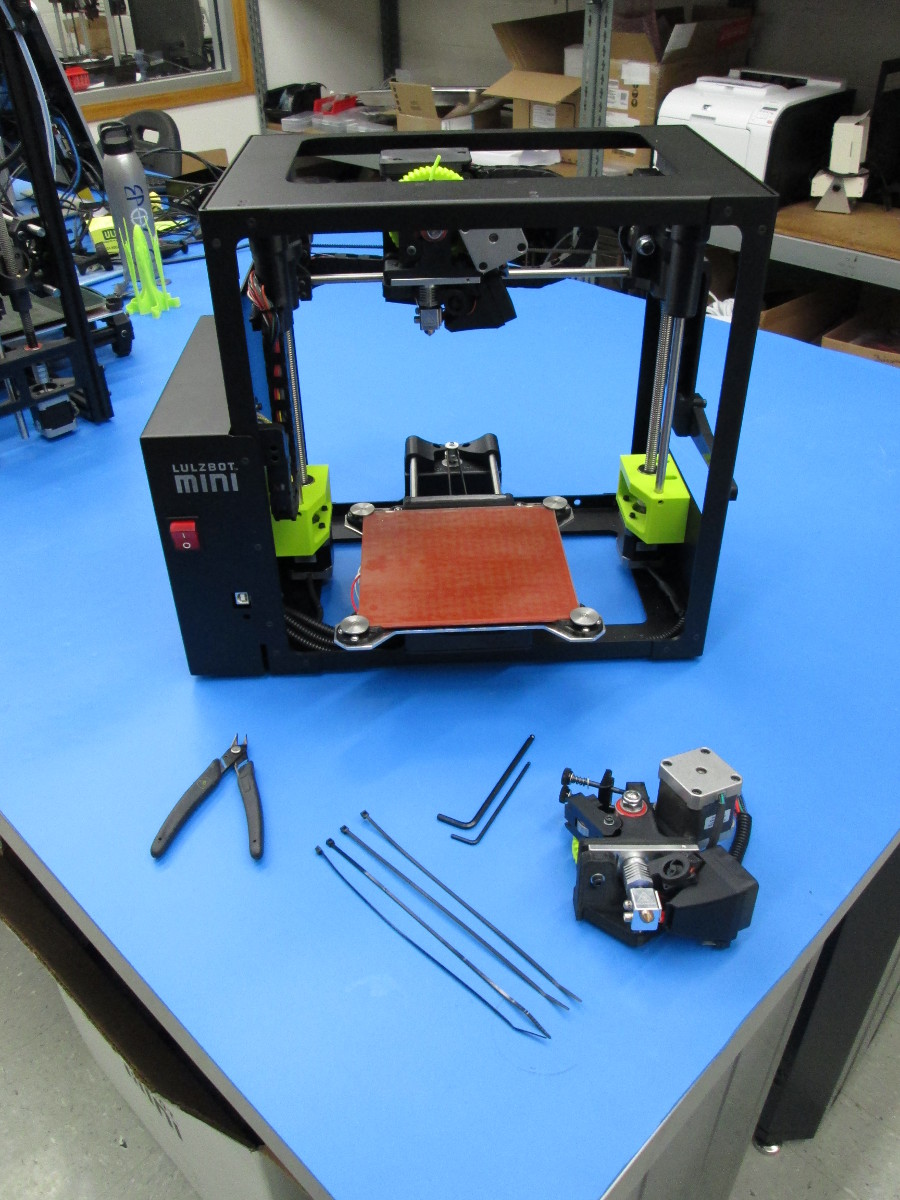
To replace the print head on the LulzBot Mini, you'll need the following tools and parts included with your replacement print head:
New Print Head
Small (2.5mm) allen key
Larger (4mm) allen key
4 zip ties
You'll also need to provide a pair of wire cutters or scissors to cut the zip ties
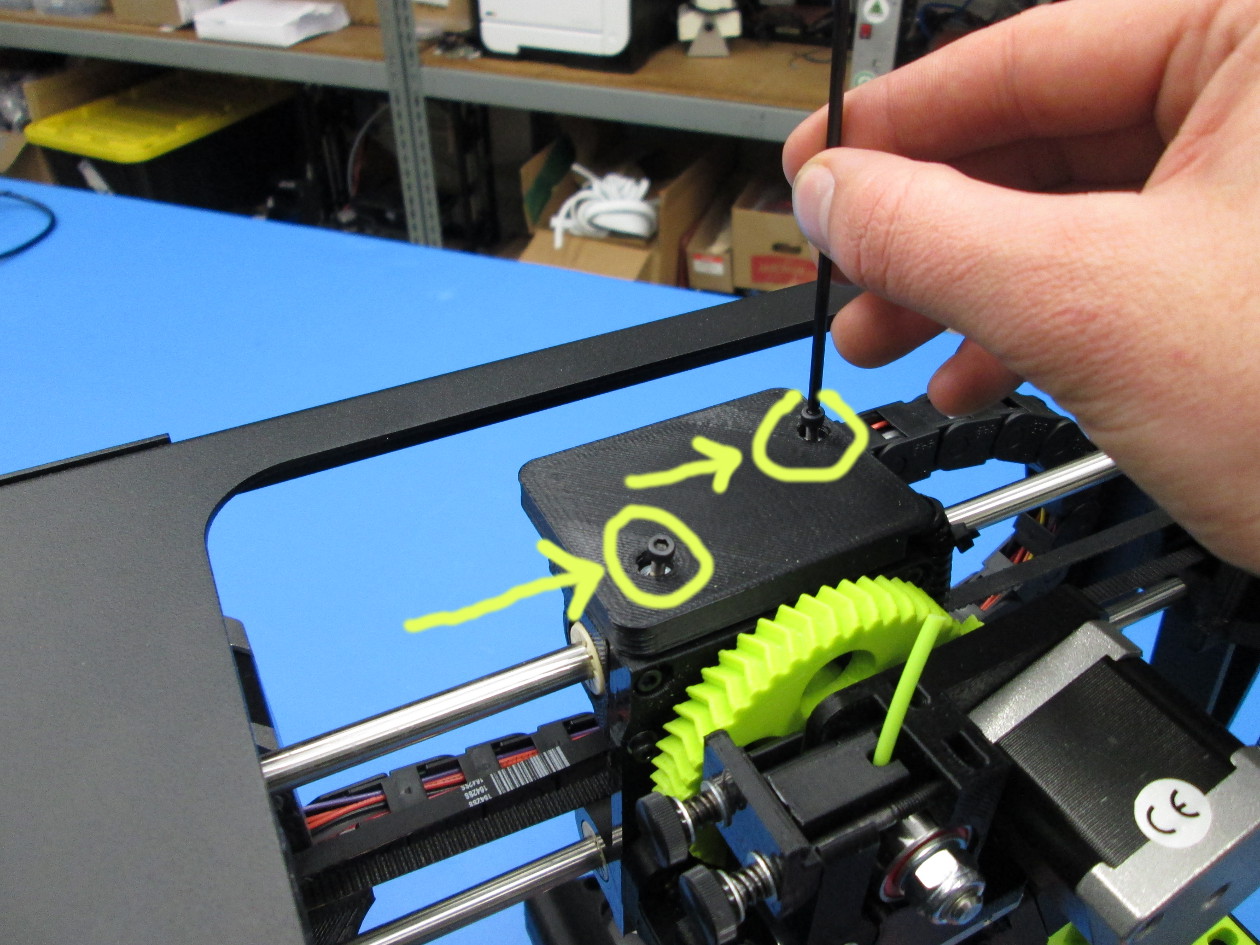
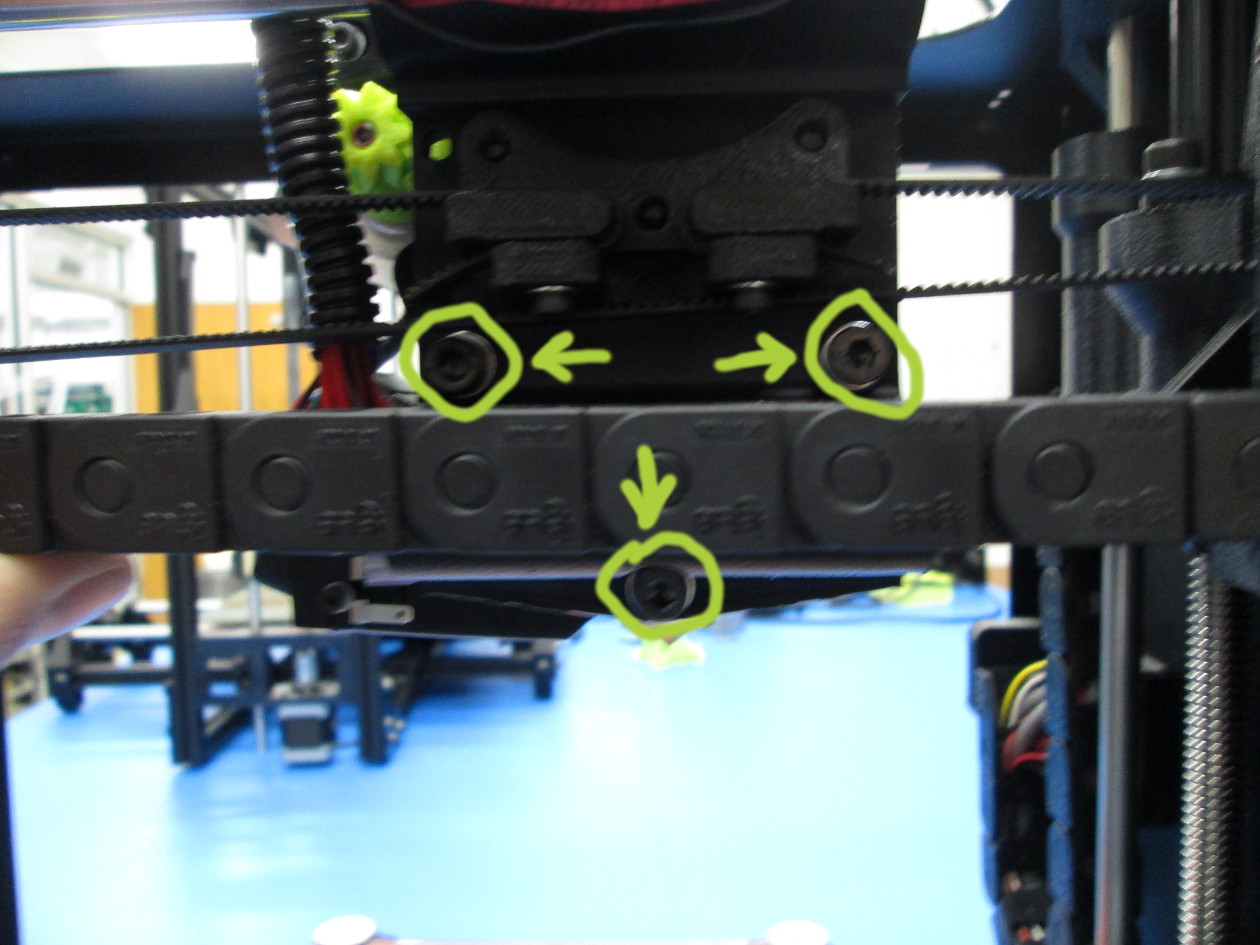
Start by removing the 2 bolts shown using the smaller of the 2 wrenches (2.5mm) included with your replacement print head.
Remove the plate and set it aside.

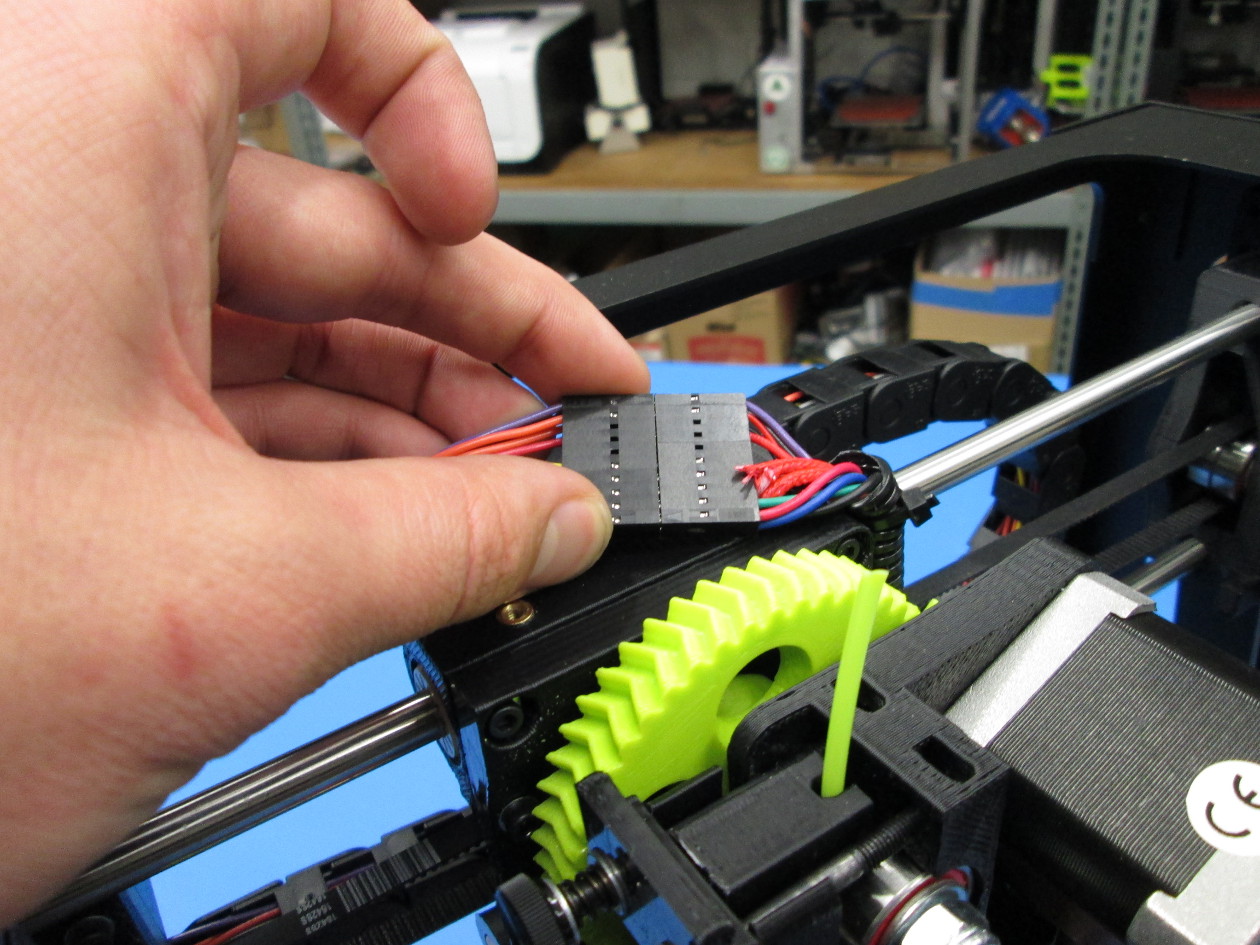
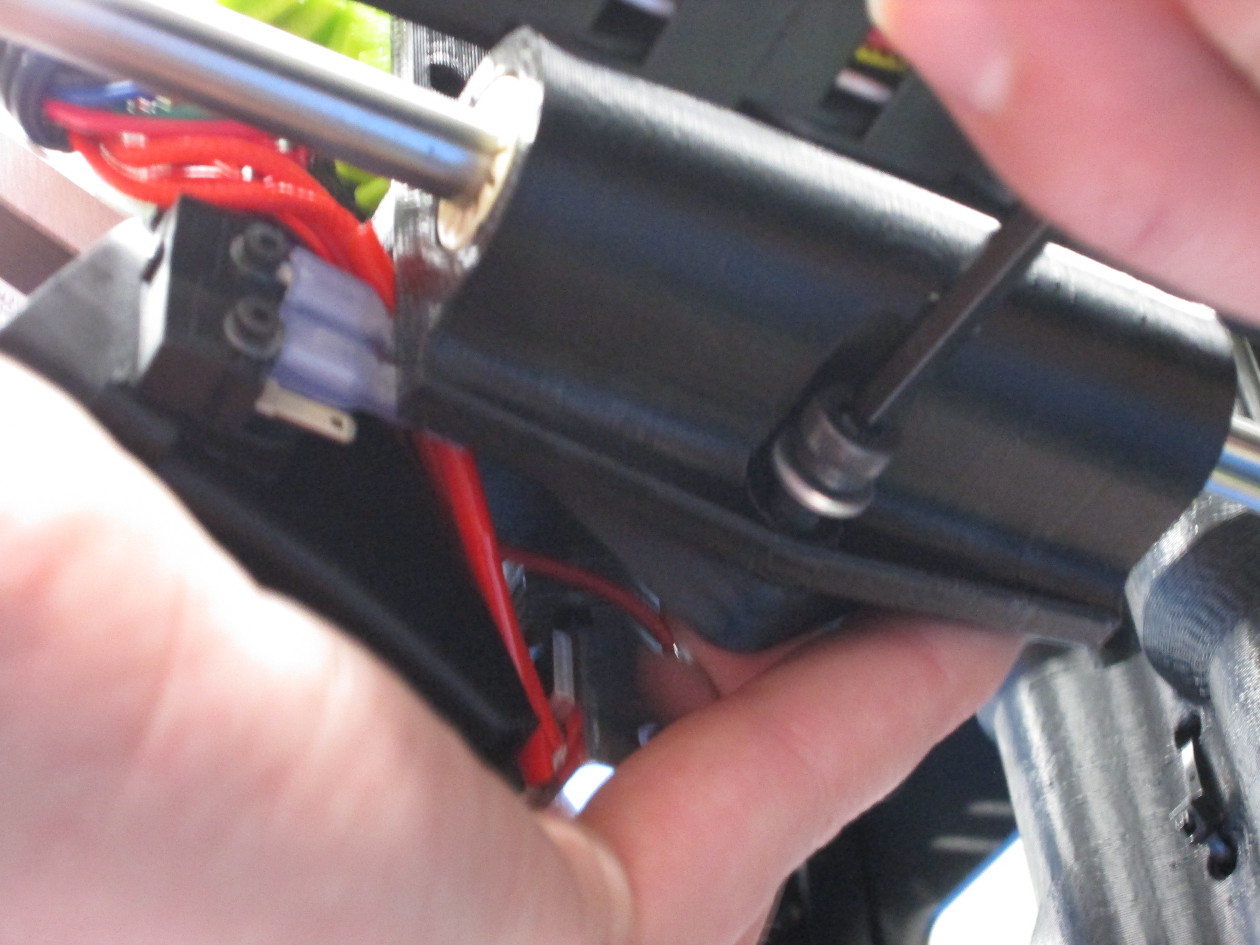
Pull apart the electrical connector that's exposed on the top of the print head
There are no latches, just pull it apart holding either side of the black plastic housing
Be sure not to bend or twist as you're pulling it apart, as this could damage the connector.
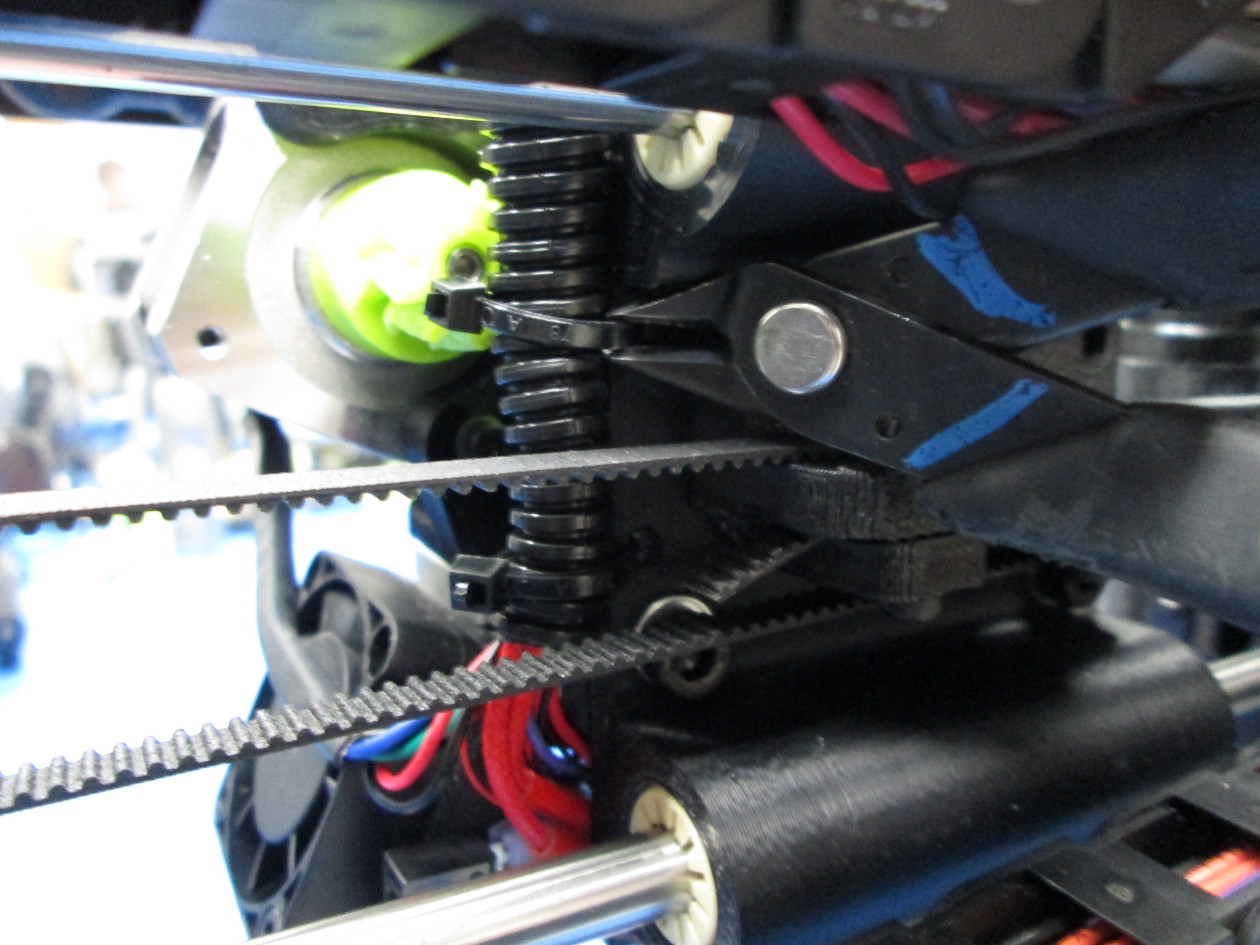
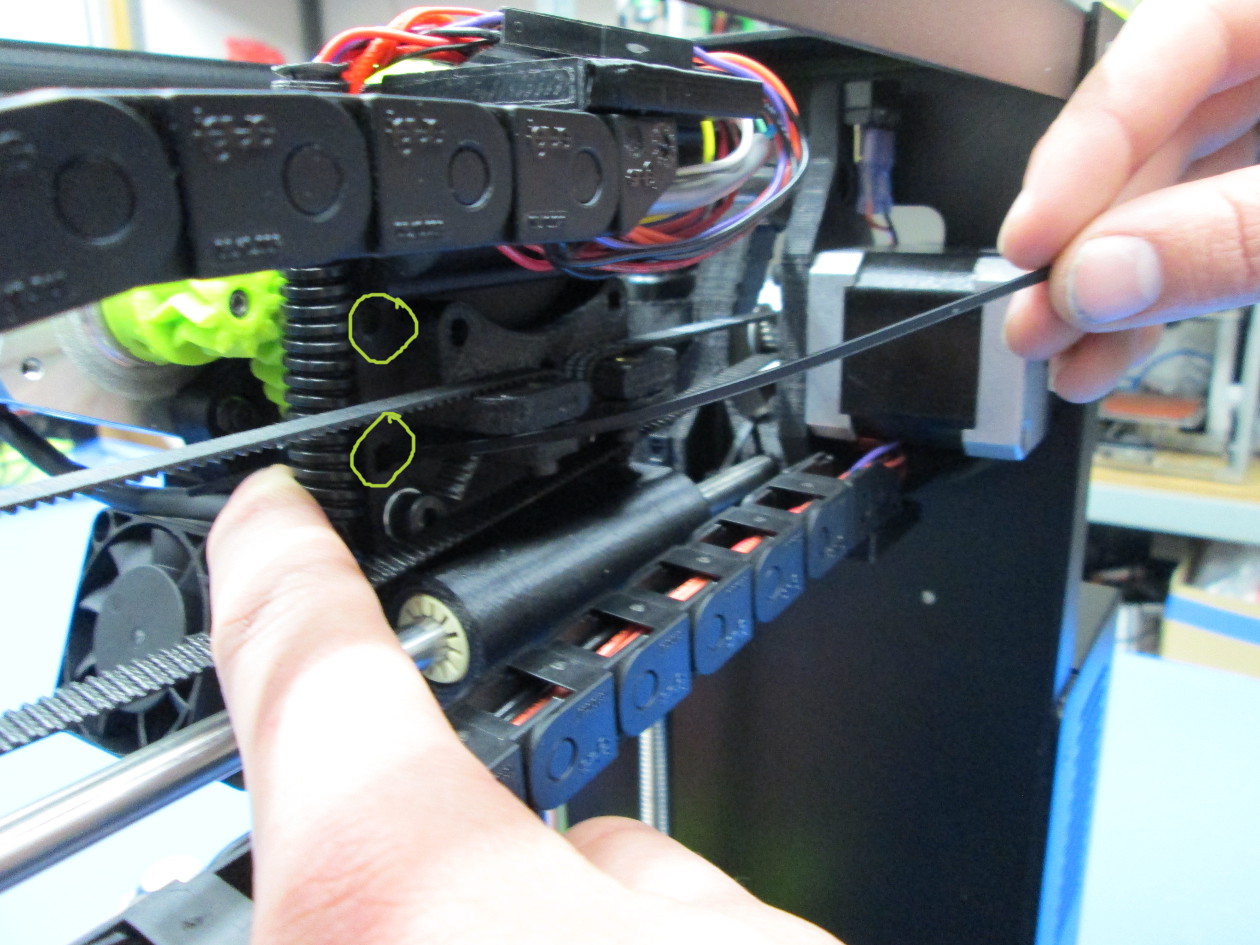
Next you'll need to clip the 2 zip ties holding the electrical harness to the side of the print head, shown here
This is easiest to do when looking at the machine from the back
Be careful not to clip the belt as well
You can remove and throw away the used zip ties now

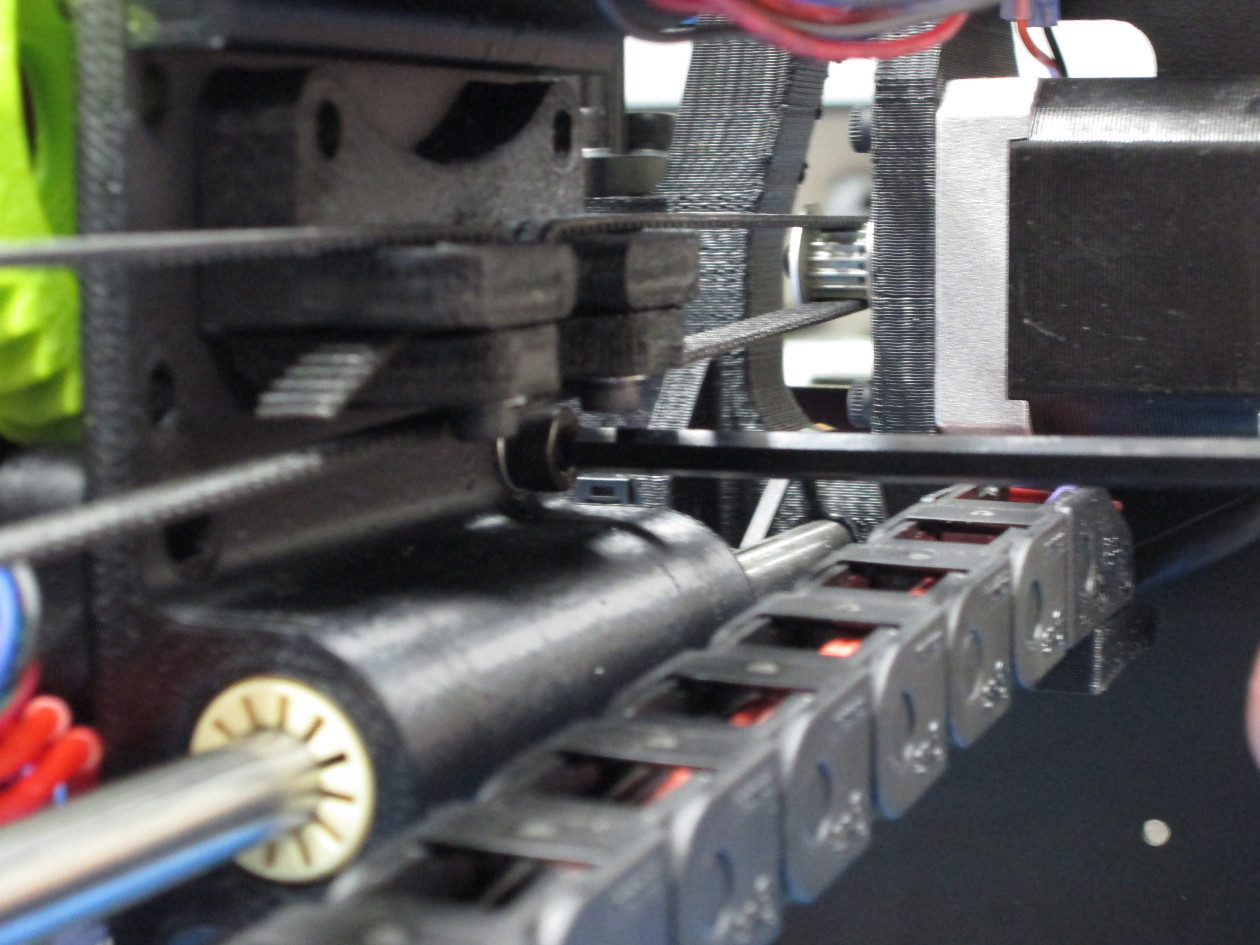
Next you'll need to unscrew the 3 bolts on the back of the print head
Hold on to the print head as you unscrew the last bolt to prevent it from dropping onto the bed
Once all 3 bolts are removed, you can pull the print head off of the printer and set it aside
Hold the new print head up to the x-carriage, the rectangular tab will help you get it into the right position
Re-install the 3 large screws in the bottom of the print head, making sure to get all 3 started before tightening any of them down completely
If any of them don't screw in freely, don't force them. Back out the screw and try to start it again, making sure that it is feeding straight in and are not tilted in any direction.
Once all 3 screws are feeding in well, tighten all 3 down in any order.
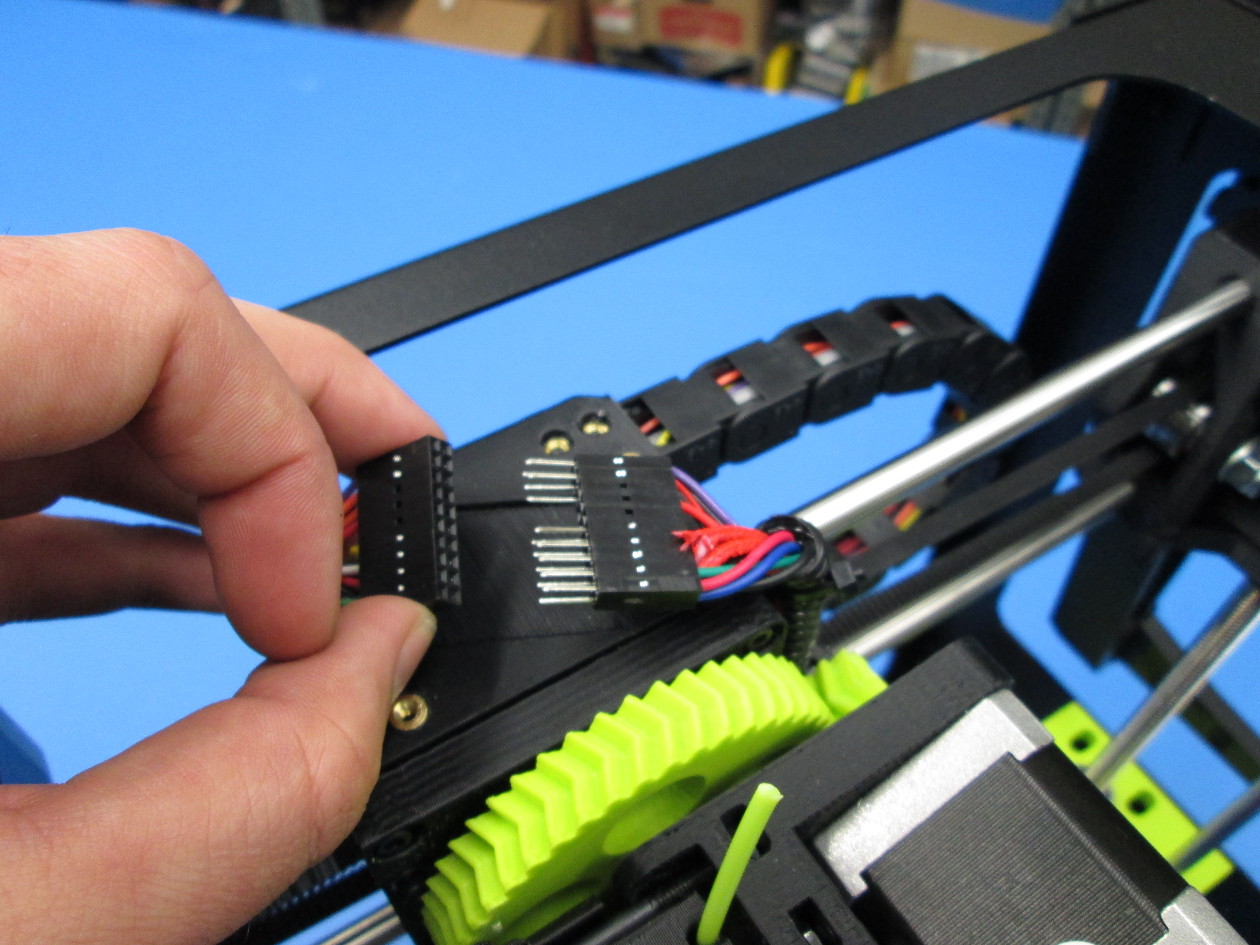
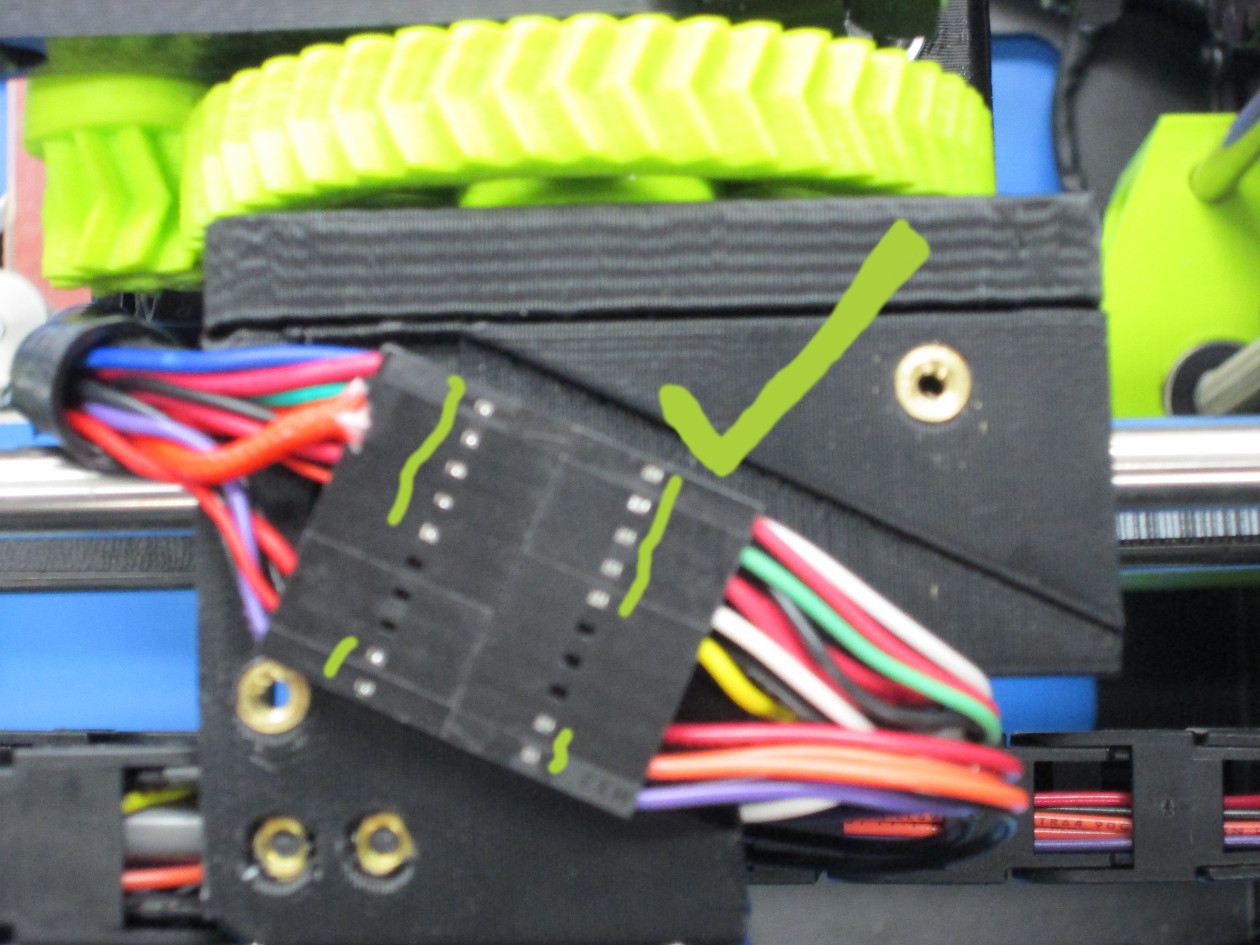
Paying careful attention to make sure that the pins are lined up, carefully slide the electrical connector together without twisting or bending any of the pins.
You can check that it is lined up correctly by checking that the metal pins visible on the sides of the connector line up


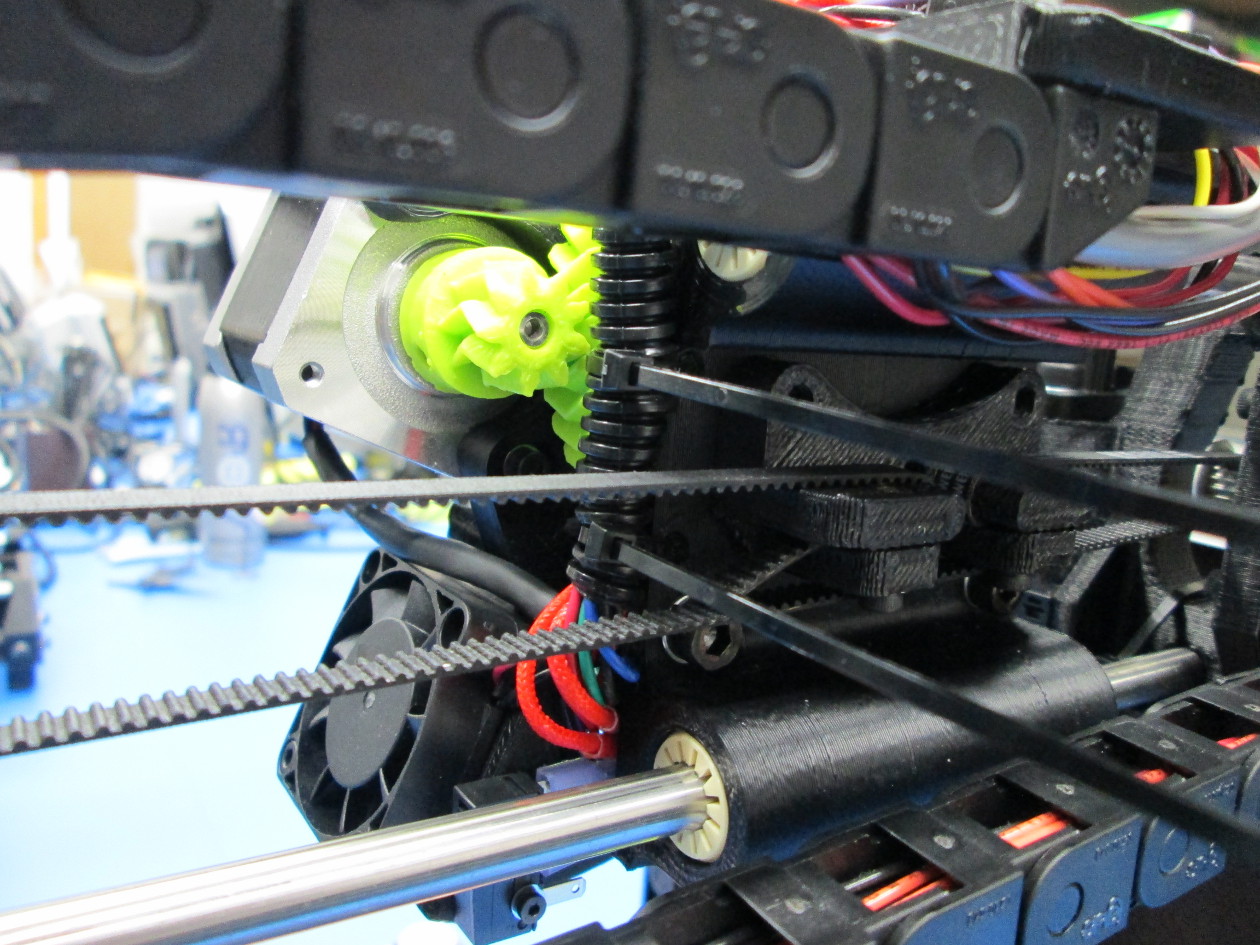
Use 2 of the zip ties to tie the harness up to the side of the print head
Make sure that the harness and the zip ties are clear of the belt, gears and rods
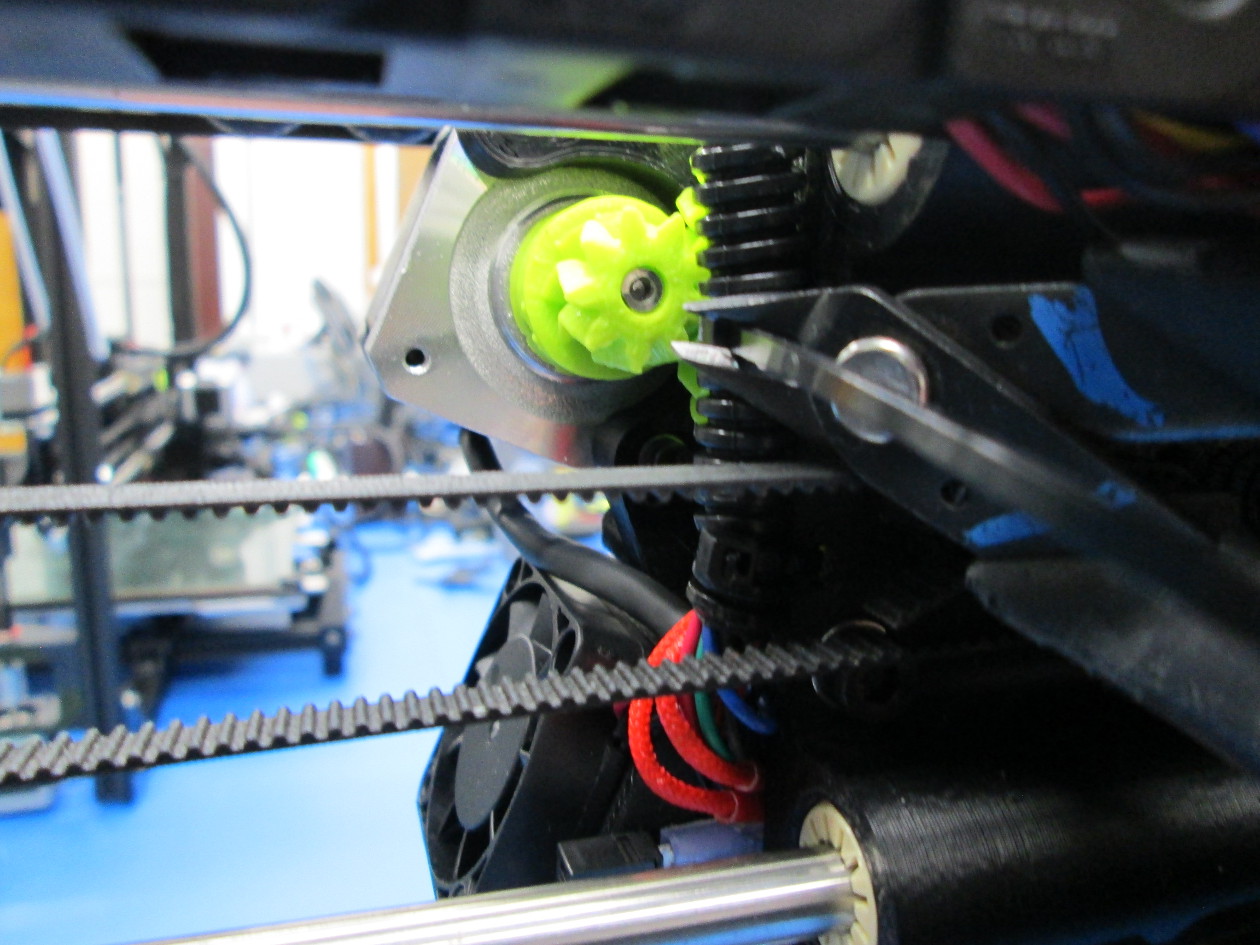
Install a 3rd zip tie at the top of the black cable sleeving as shown, this is just to keep the wires together going into the connector area
Clip off the free ends of the zip tie

Reinstall the top plate, making sure that the small opening in the corner is over the harness as shown
Make sure that the wires are not pinched, the cutout in the top plate should locate the connector well

