Open HardwareAssembly Instructions
Guides for installation and assembly of the LulzBot line of products made by FAME 3D LLC.
Guides for installation and assembly of the LulzBot line of products made by FAME 3D LLC.
Gather parts:
1x- Mini, Bed Plate Assembly
1x- EL-HR0114 - Bed Harness
1x- PP-GP0249 bed clip v3
4x- HD-BT0128 M3 x 6 Bolt, FHCS Black-Oxide
2x- HD-BT0104 M3 x 8 Bolt, BHCS, SST
13x- HD-BT0137 M3 x 8 Bolt, BHCS, Black-Oxide
1x- HD-NT0001 Metric Zinc-Plated Steel Nylon-Insert Locknut, Class 8, M3 Screw sz, .5MM pitch, 5.5MM W, 4MM H
8x- HD-WA0038 Black-Oxide 18-8 Stainless Steel Flat Washer, M3 Screw Size, 3.2mm ID, 7.0mm OD
1x- EL-MT0029 NEMA 17 Stepper Motor
1x- EL-MT0032 Nema 17 Stepper Motor Damper
1x- HD-MS0033 GT2, 16 Teeth, timing pulley, AL
2x- HD-BT0140 M3 x 6 Bolt, BHCS Black-Oxide
2x- HD-MS0058 8" cable tie
Tools needed:
2.5mm hex driver
Place the Y Bed plate assembly plate side down onto the work station
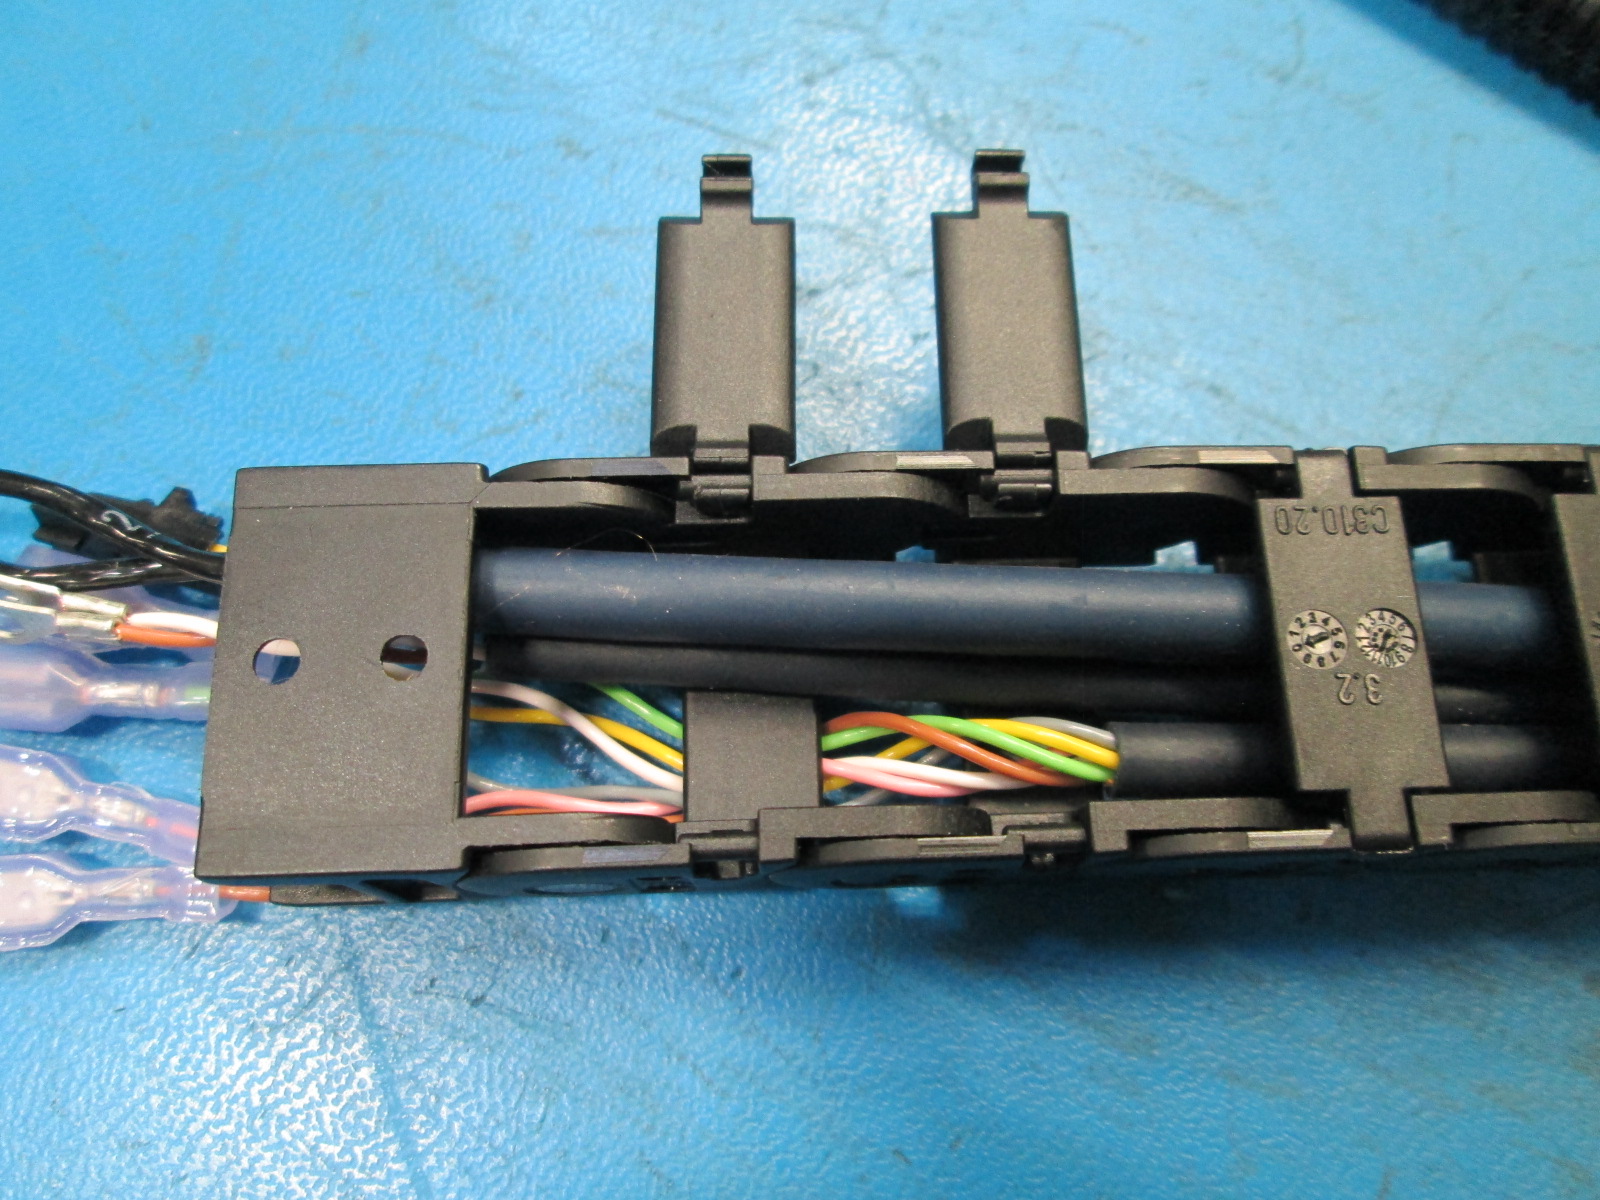
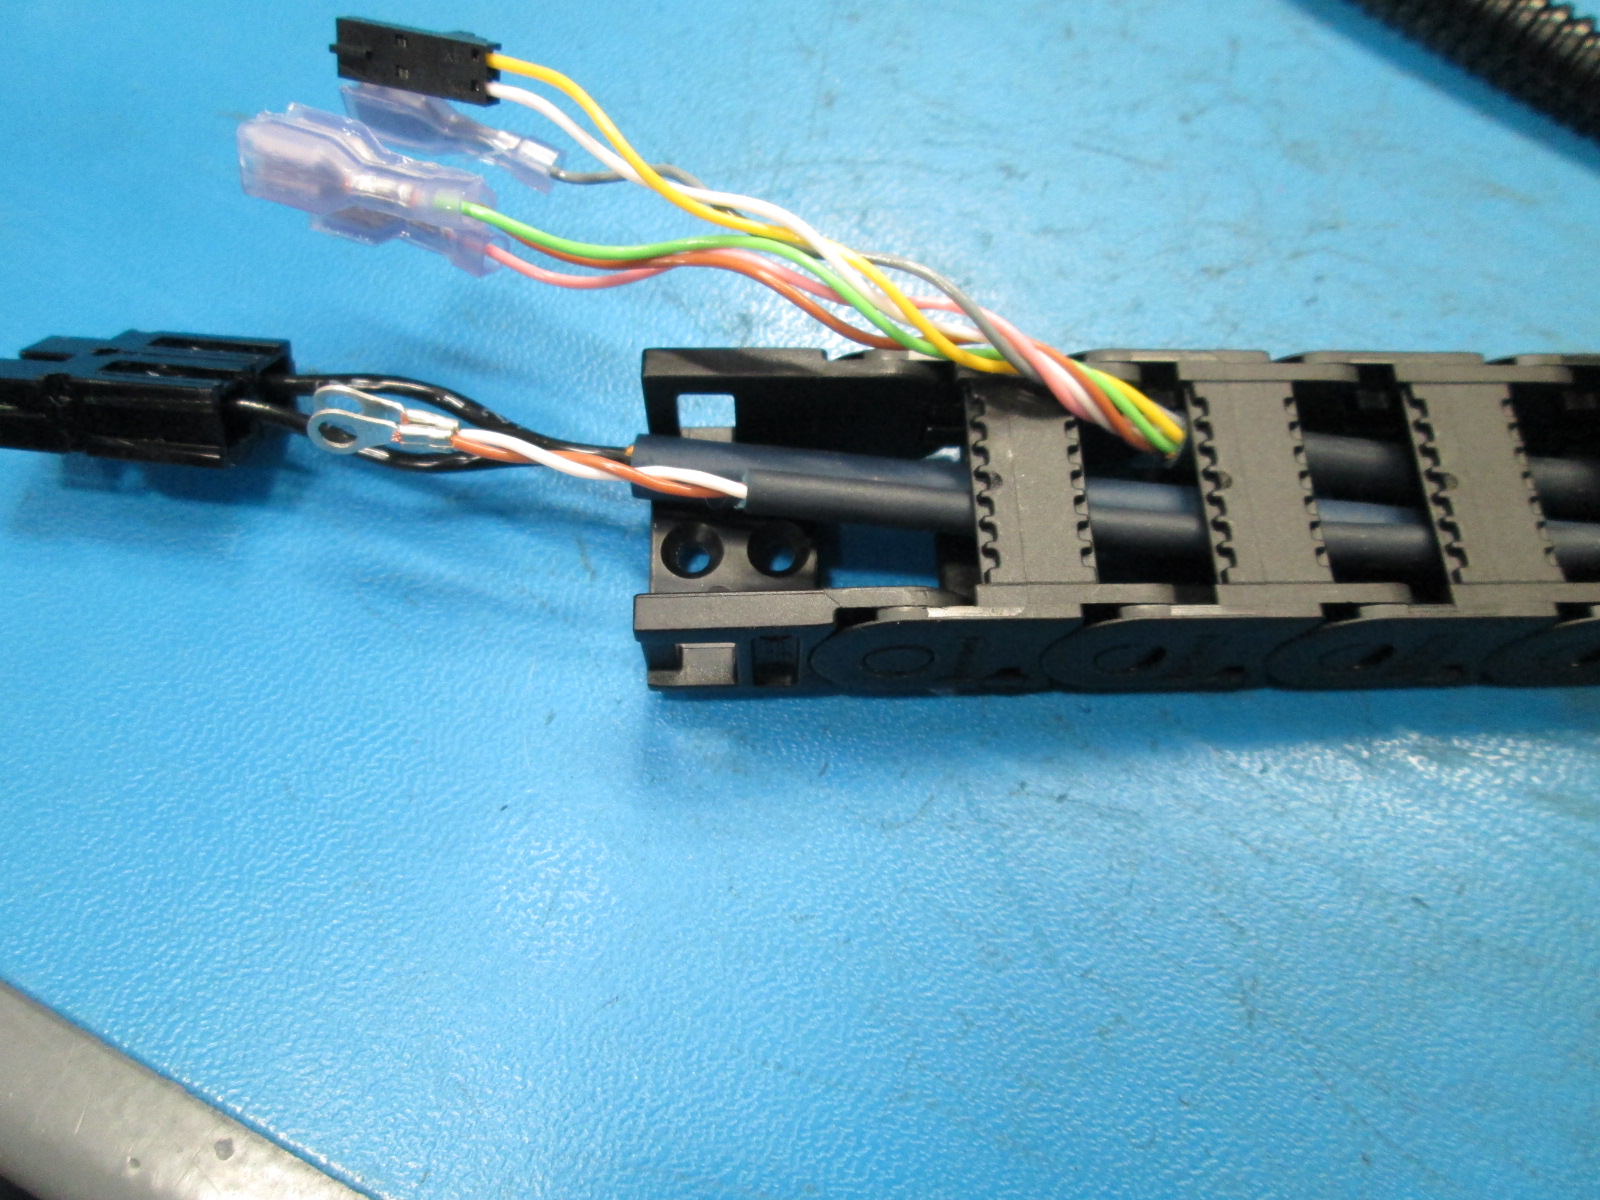
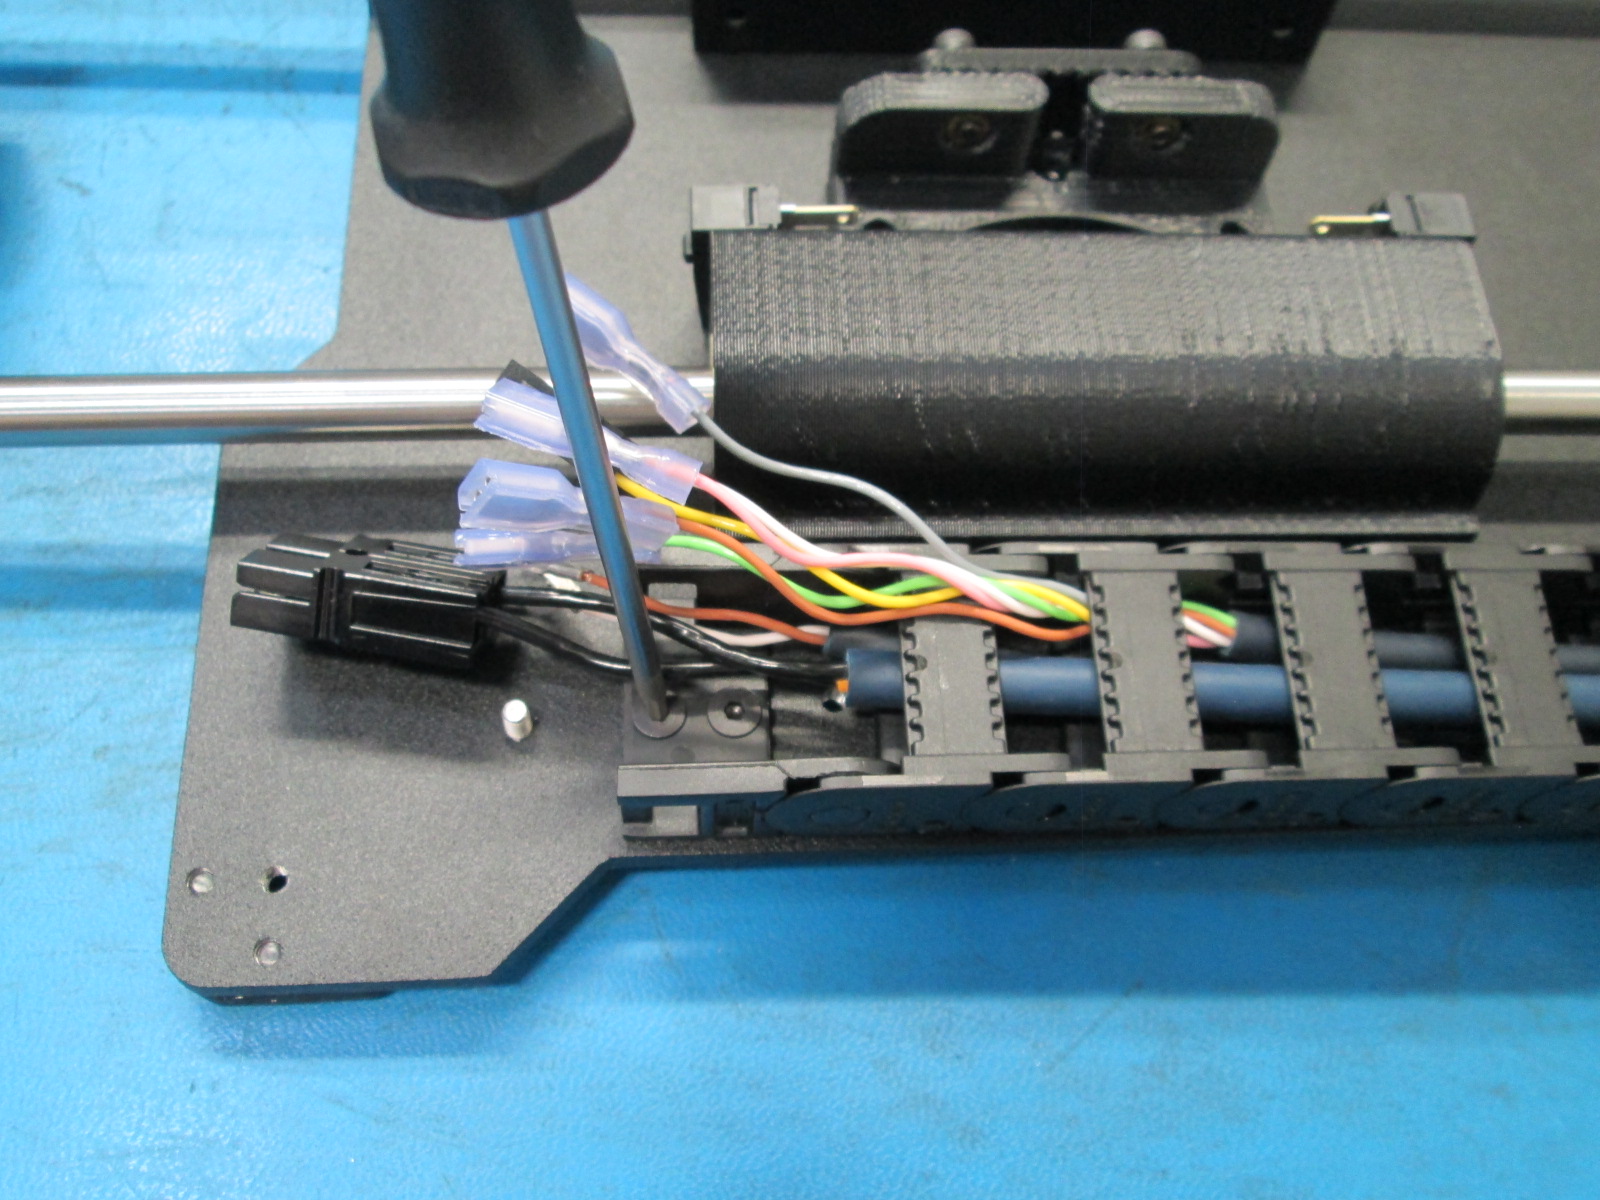
Route the Yellow/ White wire pair as well as the Green, Gray, Brown, and Pink wires through the last slot in the cable chain, open the last two backside access latches, send wires through the last slot in the top side of the chain, close the latches
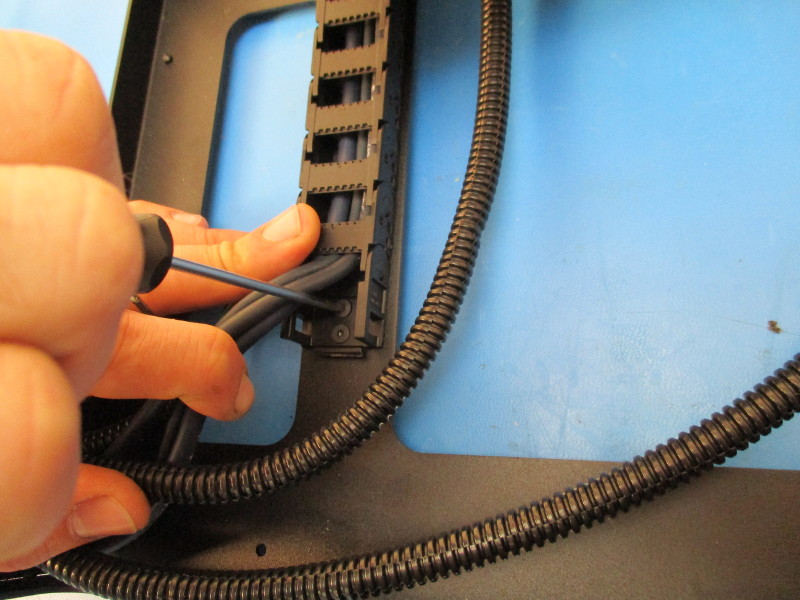
Attach EL-HR0114 (Y axis Harness) to Y bed plate assembly with 2x- M3x 6 FHS black, tightened to 5in*lbs
Connect the two ring terminals from the cable harness to the screw, Secure the ring terminals to the screw with a M3 Nyloc nut tighten until the ring terminals no longer move and the SS screw head remains flush and tight to the bed plate
Connect the Green & Gray to the switch on the front (idler side) and the Pink & Brown on the back (motor side),
Tie the two pairs together with a cable tie with the cable tie as close to the Gray/ Brown wires pair.
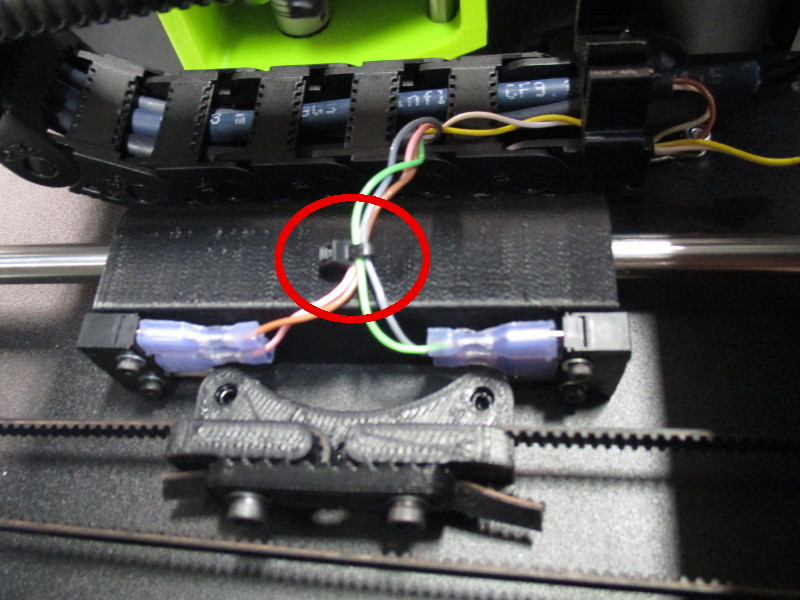
Cables inside of the cable chain must not cross or overlap one another See example image
Install the bed clip


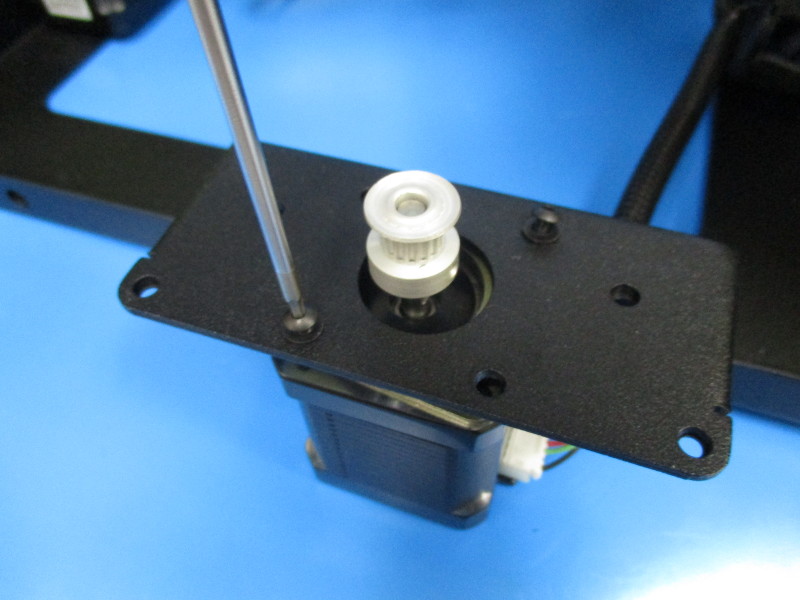
Offset a pulley 10mm from the face of the motor; Align one of the set screws with the flat of the motor shaft
Tighten screw to 5 in-lbs then tighten the second screw to 5 in-lbs
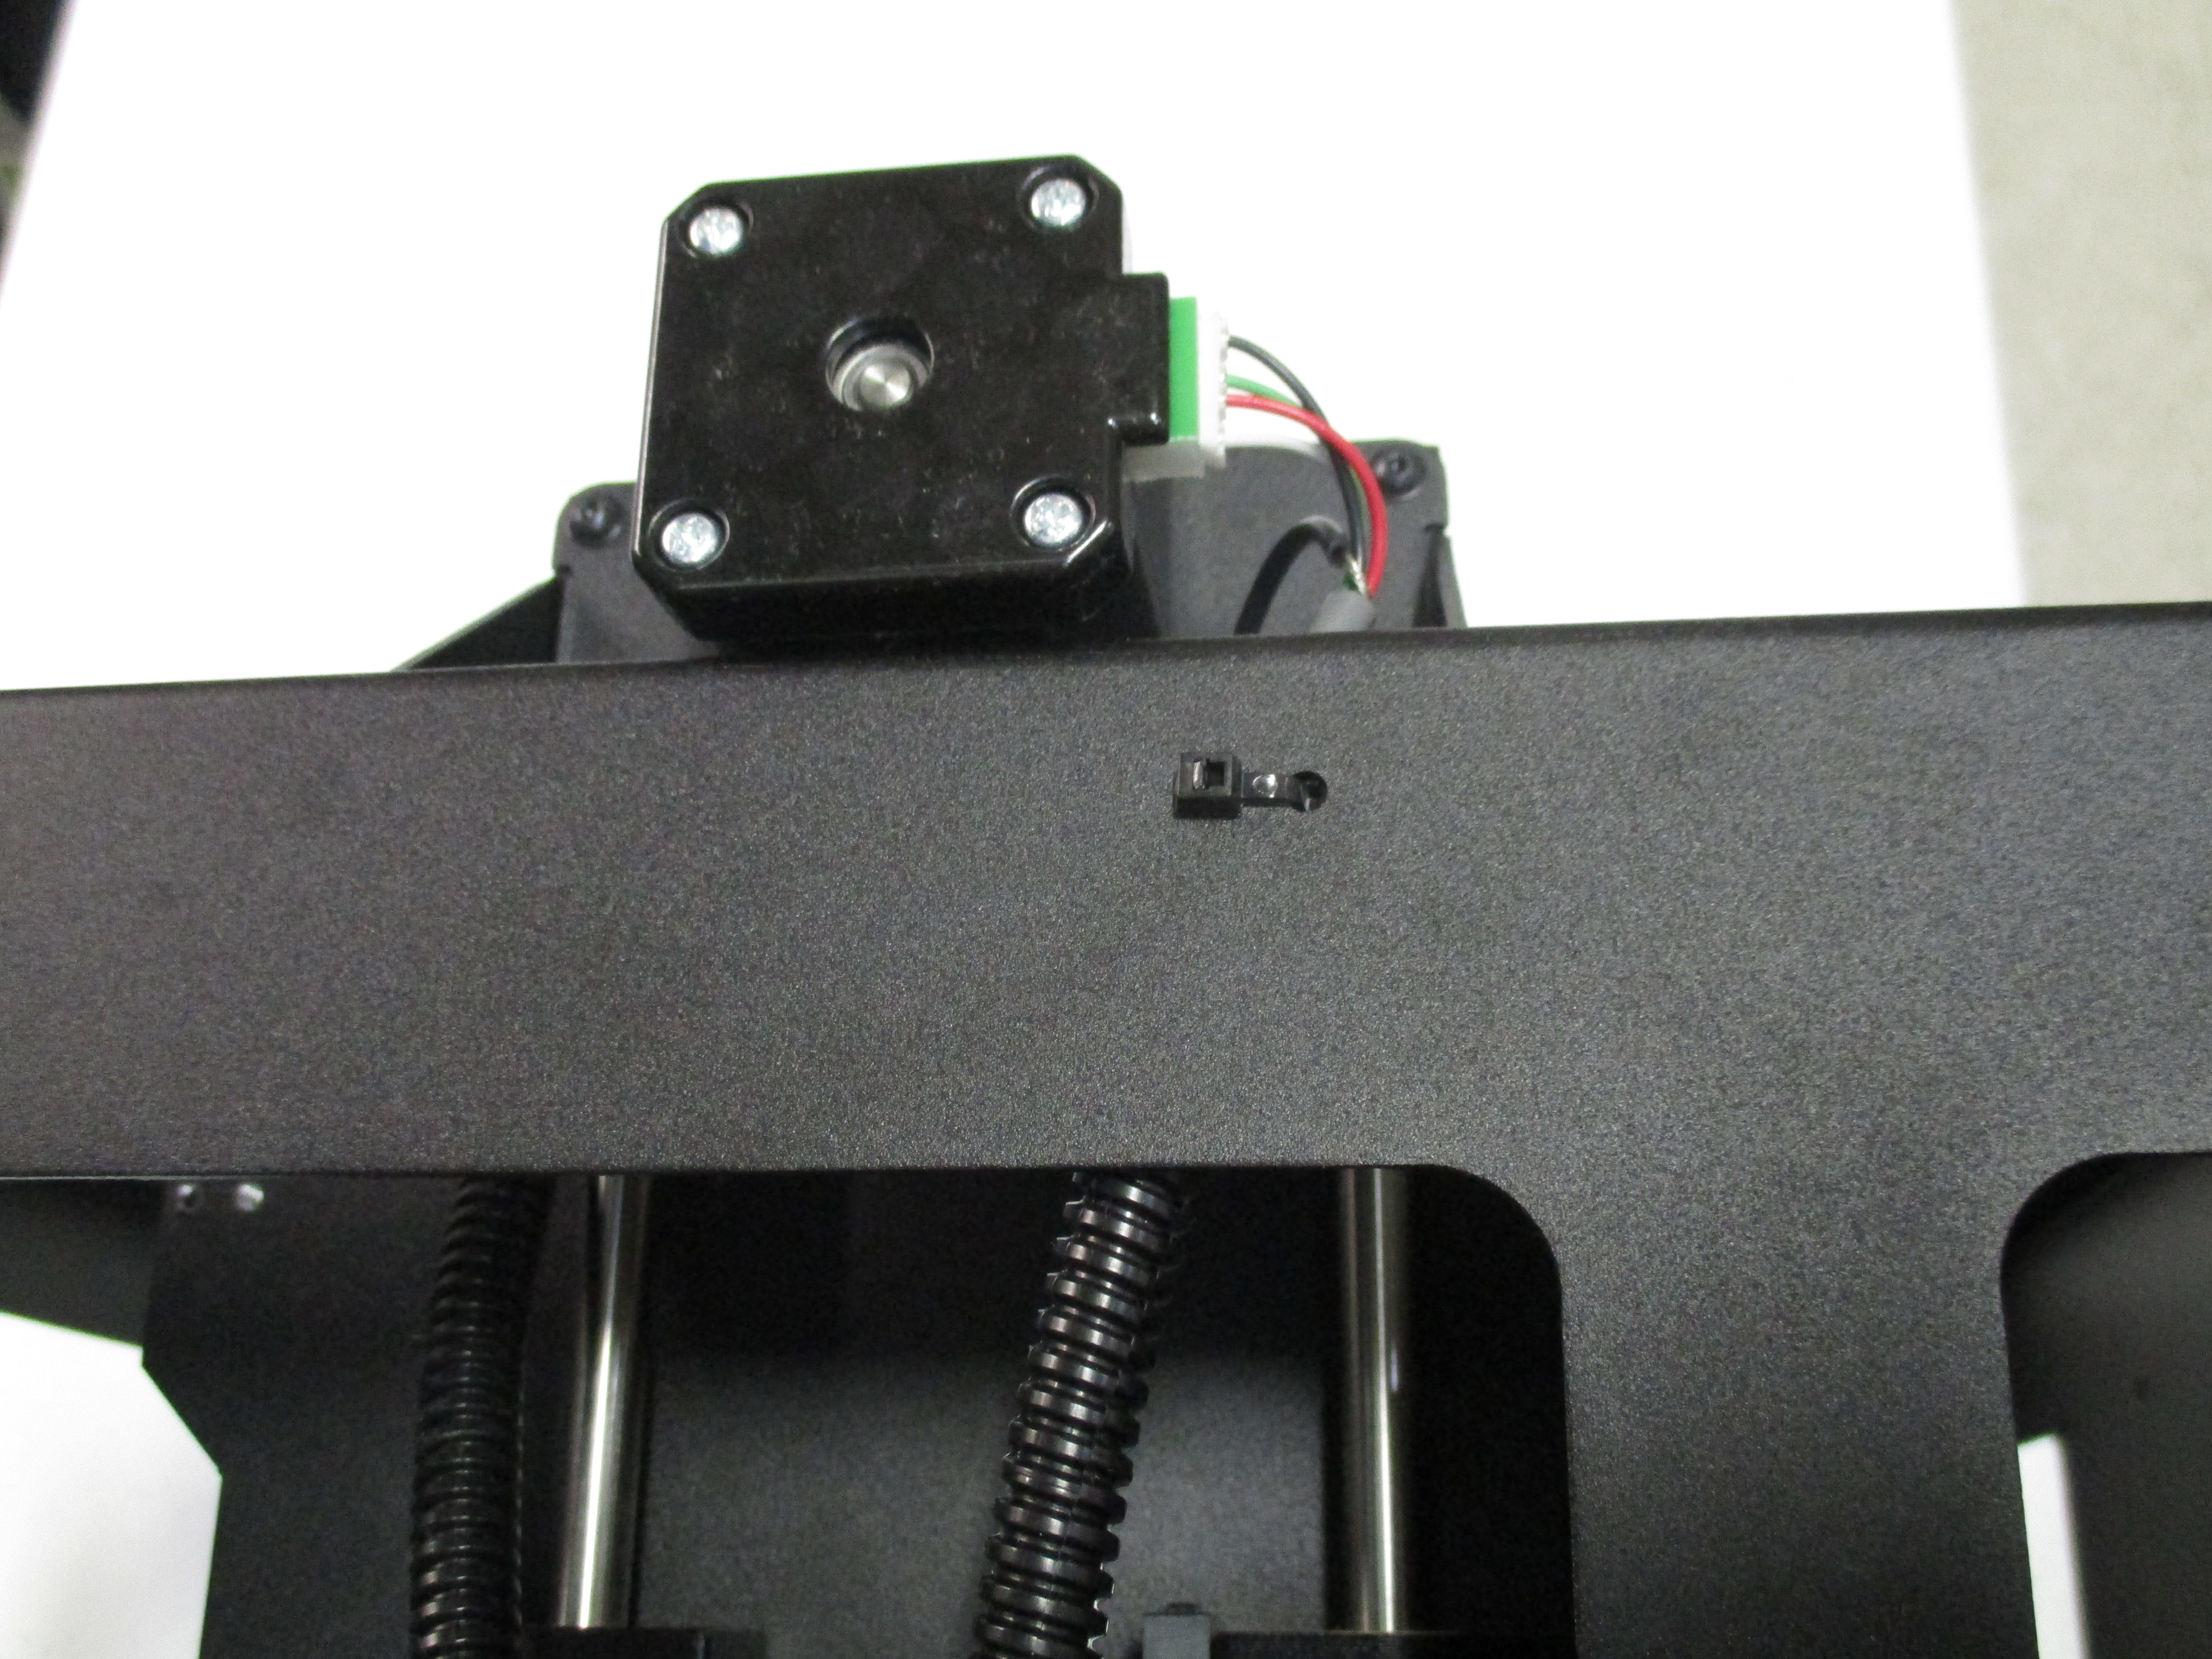
Route the Y motor cable segment with the motor connector through round vertical opening in the bottom plate then connect the cable fork terminal to the motor with a M3 x 5 SST screw, tighten (~8 in*lbs), note position of the installed screw to the motor connector
Install a damper onto the Motor using 2x- M3x 6 BHCS Black (no washers are used here)
Install the motor (note orientation shown) onto the bottom plate assembly, secure motor with 2x- M3x 6 BHCS Black with M3 Black washers, tighten screws to ~8 in*lbs


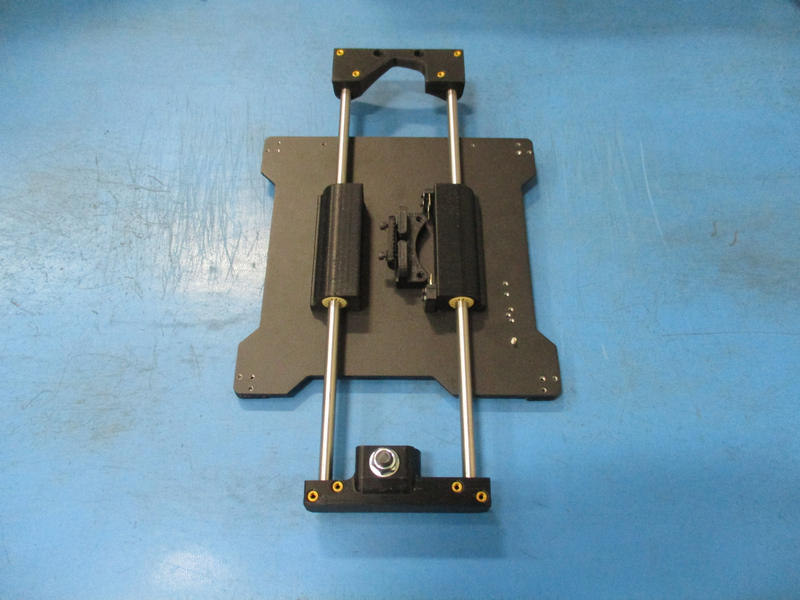
Align the Bottom Plate flange with a square opening with the idler end of the Y bed plate assembly, the motor end will align with the opposite side of the bottom plate
Secure the Idler end to the bottom plate with 4x- M3x 8 BHCS Black and 4x- M3 washers black, tighten to 5 in*lbs
Secure the motor mount to the bottom plate with 4x- M3x 8 BHCS Black and 4x- M3 washers black, tighten to 5 in*lbs
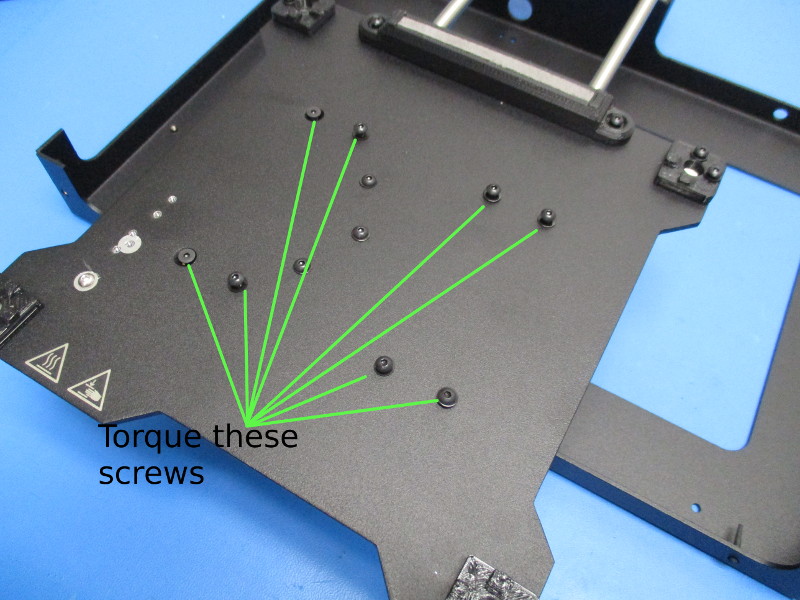
Flip the assembly so the bed mount is facing up. Slide the bed mount plate to the idler side. Torque the double bearing holder screws to 5in*lbs.

Place the assembly so the bed plate is now up and the bottom plate is on the work station, push the bed plate assembly toward the motor end until the bed stops
Attach the ferrite end of the Y axis cable to the bottom plate with 2x- M3x 6 FHS black
Secure the Y axis cable to the bottom plate with a 8" cable tie