Open HardwareAssembly Instructions
Guides for installation and assembly of the LulzBot line of products made by FAME 3D LLC.
Guides for installation and assembly of the LulzBot line of products made by FAME 3D LLC.
Tools Needed:
Torque Drivers
Validate all screws on the machine are properly secured.
Start with large screws and then check small screws/setscrews.
Check that all frame screws are tight/properly torqued to 5 in*lbs.
Check that all plastic parts are fastened securely/properly torqued:
Y Assembly:
Y ends – 5 in*lbs
Double Bearing Holders- 5 in*lbs
Belt Mount- 5 in*lbs
Wiper Pad Holder- 5 in*lbs
Z axis:
Right and Left Z lowers - 5 in*lbs
Right and Left Z uppers- 5 in*lbs
X carriage/Toolhead:
Extruder body- 8 in*lbs
Extruder Mount- 5 in*lbs
Upper bearing holder- 5 in*lbs
Fan Mounts- 3 in*lbs
Belt Mount- 5 in*lbs
Frame:
Spool arm hinge bracket to frame- 5 in*lbs
Spool arm support- 8 in *lbs
Spool Arm- 8 in*lbs
Handle- 5 in*lbs
Check that all motors and hardware are mounted securely/properly torqued:
Motors-5 in*lbs
Endstops-2 in*lbs
X and Y Belt Clamps-5 in*lbs
Bed washers- 5 in*lbs
Z nuts- 8 in*lbs
Fans- 3 in*lbs
Check that all set screws are tight/properly torqued:
Couplers- 5 in*lbs
Motor Pulleys- 5 in*lbs
X end setscrews- 2 in*lbs
Z smooth rod setscrews- 2 in*lbs
Y end motor adjustment screws- 5 in*lbs max
Tools Needed:
Sonic Belt Tensioner
With the machine off, start by checking that the Y axis moves smoothly and check for play in bearings
Check the X axis
Materials Needed:
1x- 24v Mini Print Bed Assembly
4x- M3X12mm Stainless Steel Flat Head Cap Screws (HD-BT0136)
4x- Mini Bed Leveling Washers (PP-MP0082)
4x- 8mm Spacers for M3 Screws (HD-MS0360)
Tools Needed:
2mm Hex Driver
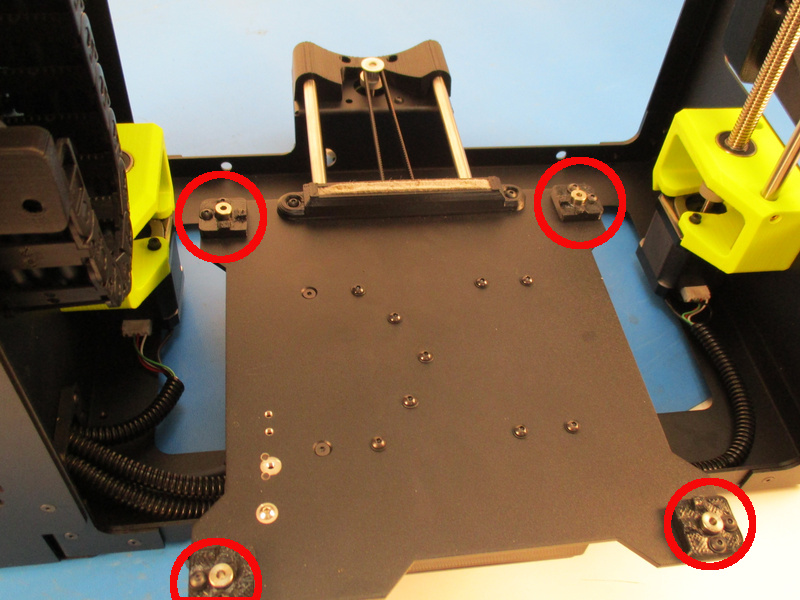
Place the four 8mm spacers into the holes in the Ninjaflex bed corners (see picture).
Place the heat bed on the bed corners oriented with the wires coming out the left side of the heat bed (see picture).
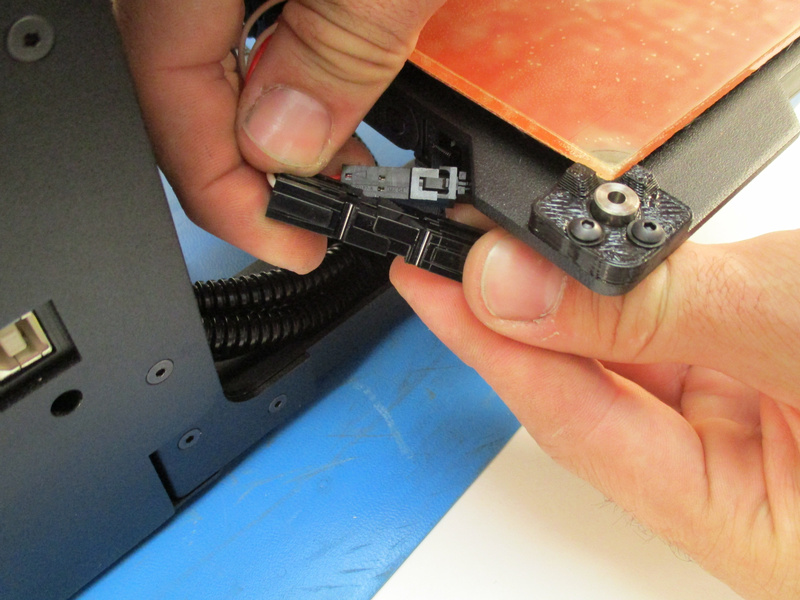
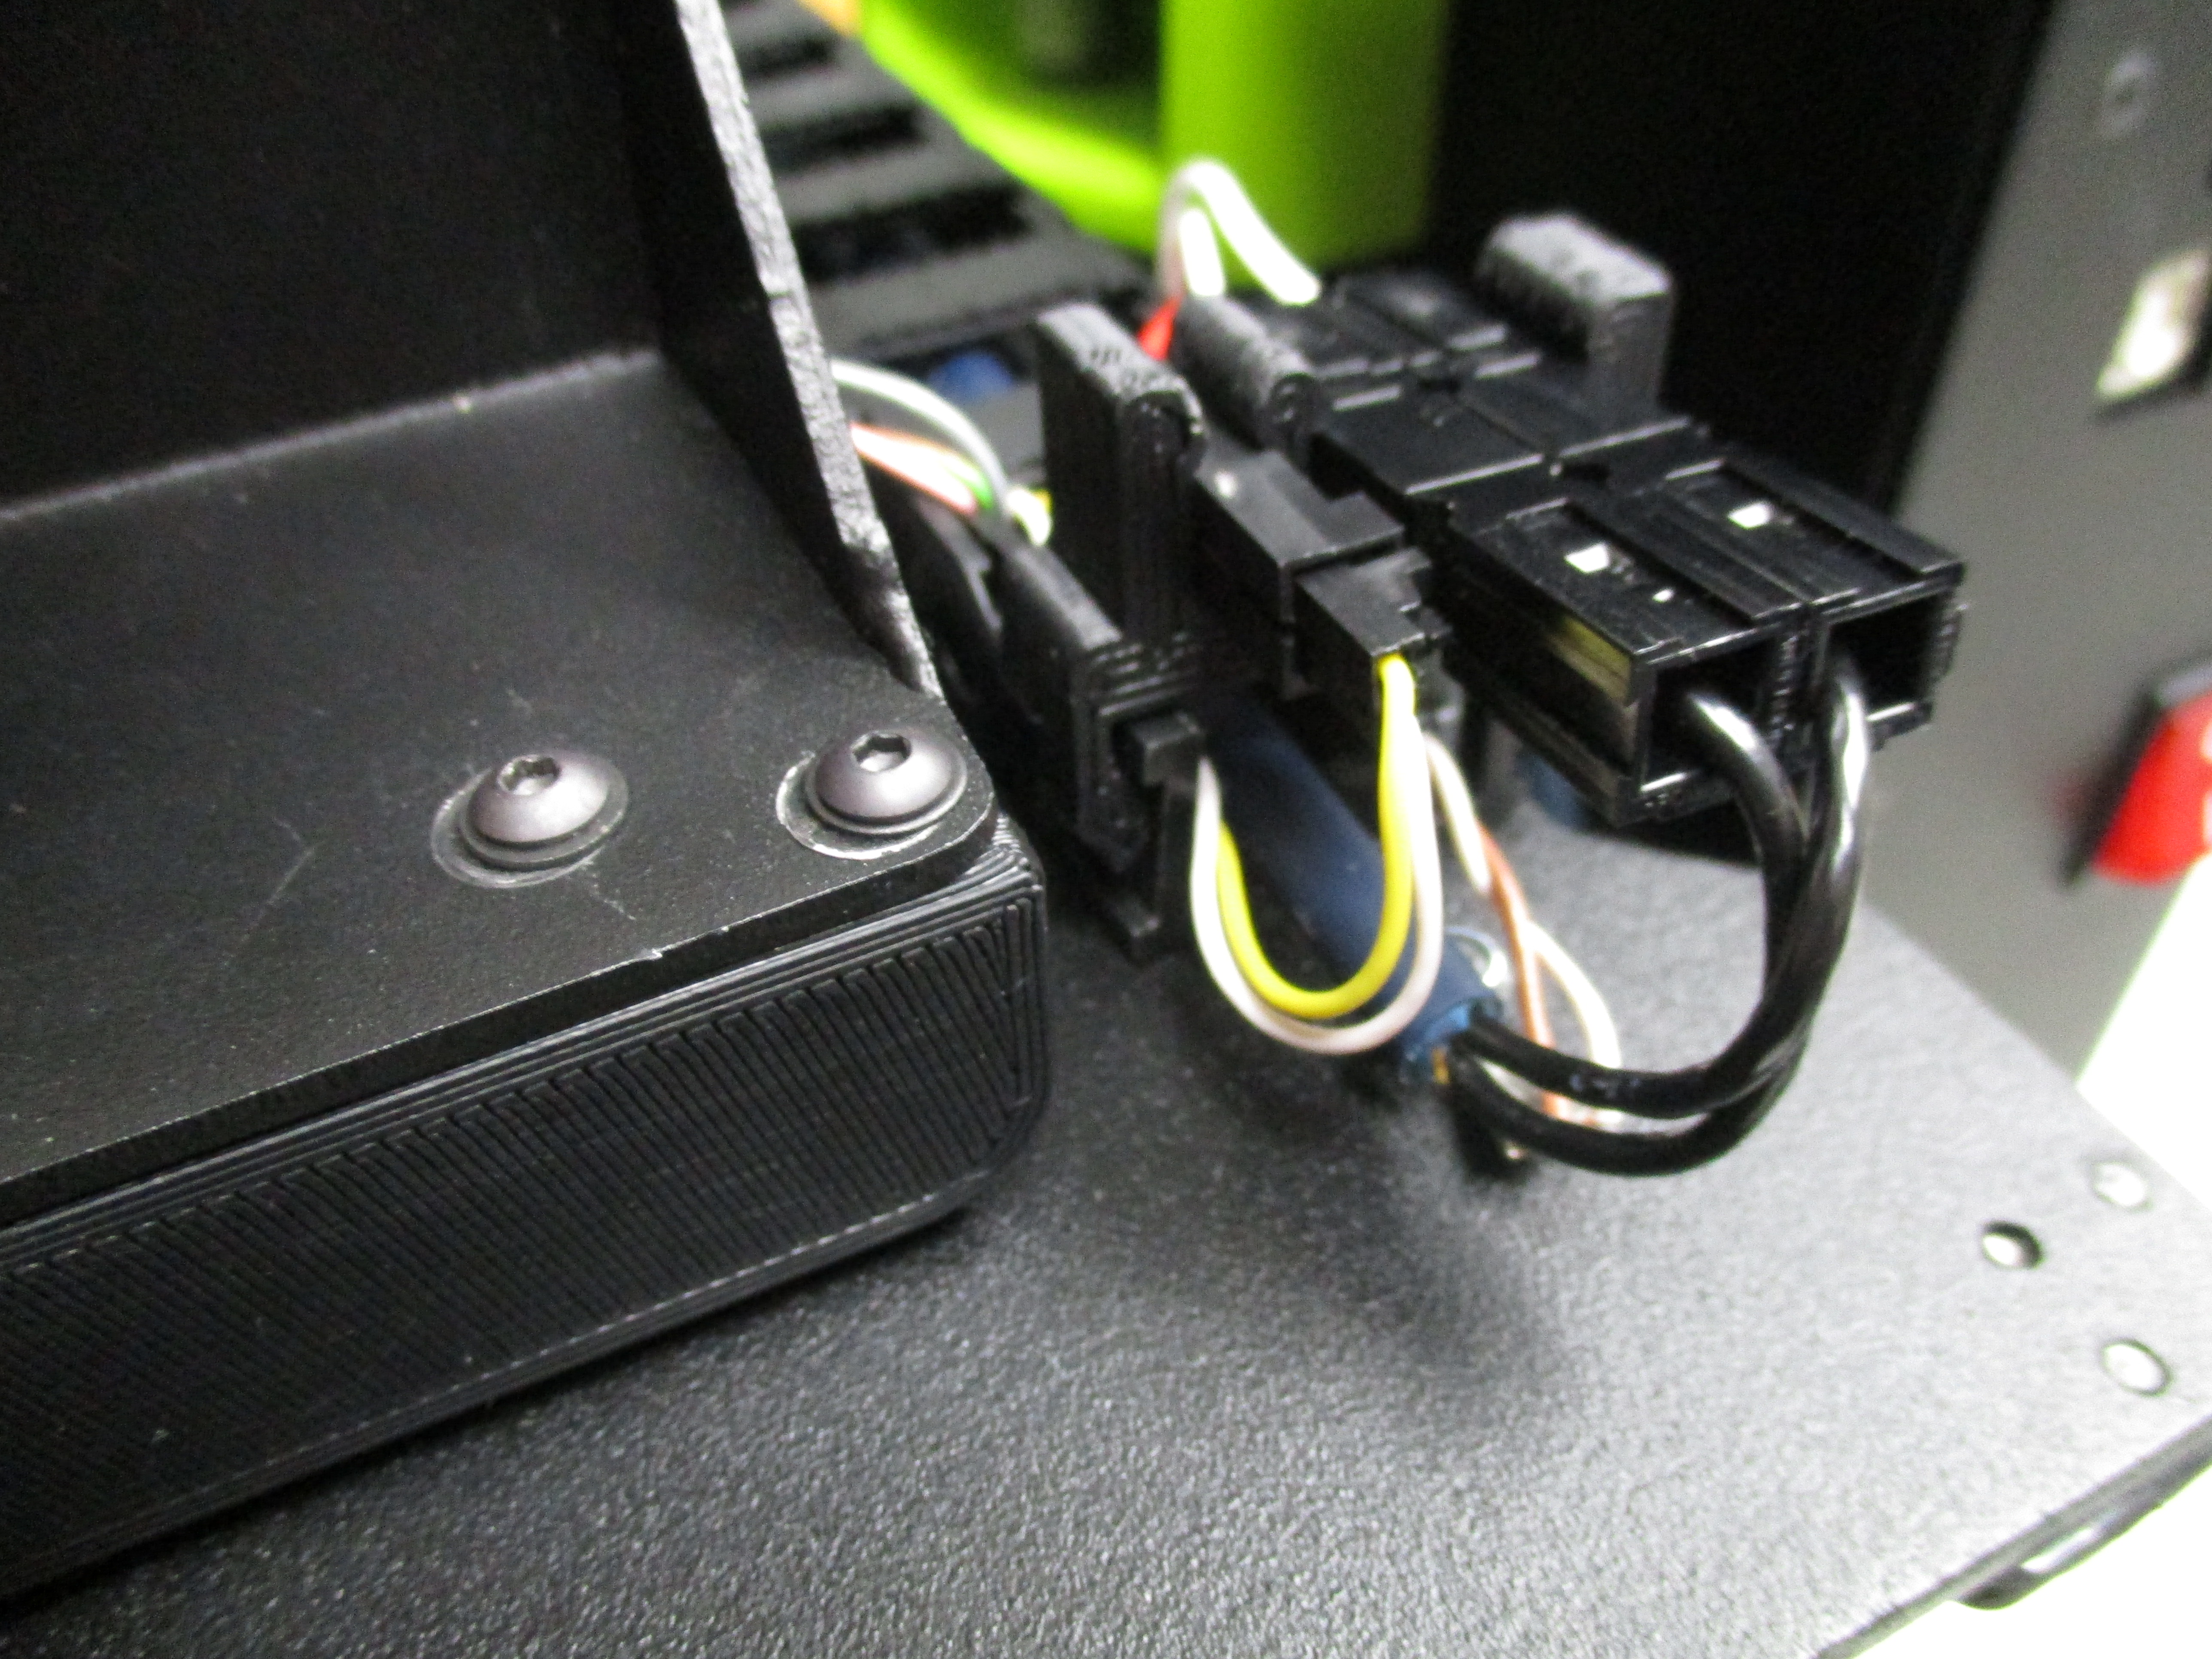
Plug in the bed thermistor and heater cable connectors.
Fasten the heat bed down with four M3x12mm Stainless Steel Flat Head Cap Screws (HD-BT0136) and four Bed Leveling Washers (PP-MP0082). Torque to 5 in*lbs. washers must sit level against the bed.
Insert the connectors in the appropriate slots on the Mini Bed Clip(PP-GP0249). Ensure the thermistor (white and yellow wires) is routed under the bud clip as shown.


Turn on the printer with the USB plugged into the printer and the CPU.
Open the latest edition of Lulzbot Cura.
On the top left, click on the “Machine” drop down menu and select Lulzbot Mini.
Again click on the “Machine” drop down menu and with Lulzbot Mini selected, click on “Install Default Firmware.” A pop up menu will appear stating the .hex file that will be installed.
Click start and the software will automatically install the firmware.
Use the mini firmware check to ensure the correct firmware was flashed.
Materials Needed:
3 meters- PolyLite PLA LulzBot Green Filament (RM-PL0118) 3mm
Tools Needed: None
Feed some 3mm filament into the toolhead. It should feed about 100mm before stopping. If it doesn't feed approx 100mm then there is likely a misalignment issue or something obstructing the filament feed path.
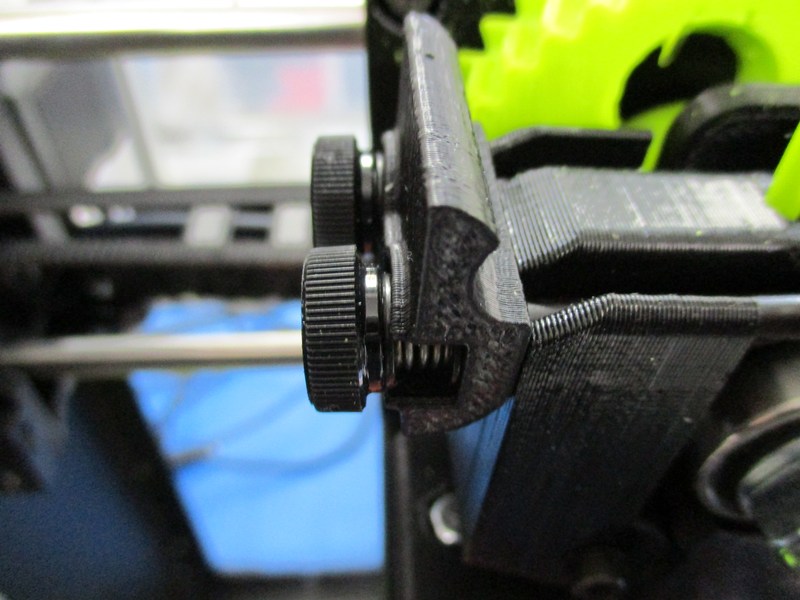
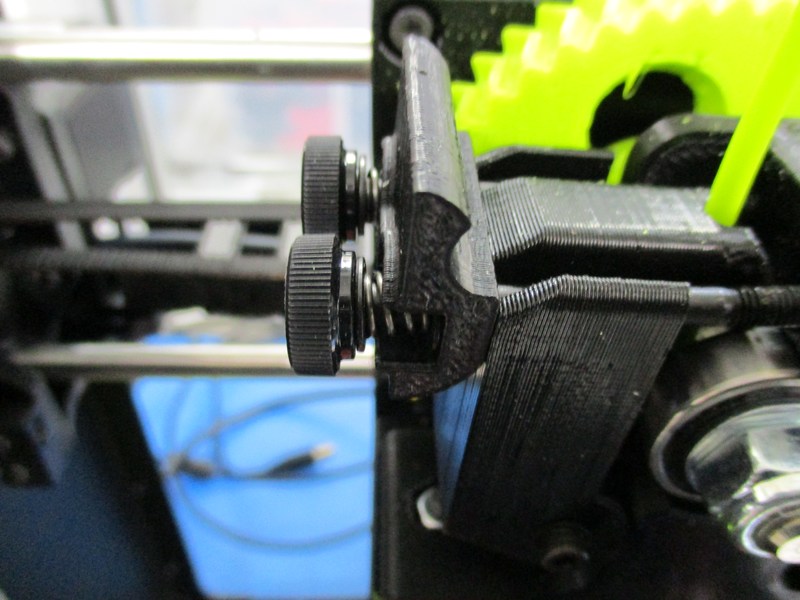
With the filament in the toolhead, close the extruder idler block and latch. Check the extruder latch tension. When properly tensioned the washer under the thumbscrews should be flush with the extruder latch.
Check the large and small herringbone gears for play/backlash. The large gear and the small gear need to be mated together in a way that there is easy rotation but won't have any free movement known as “slap” between the gear teeth. Hold the small gear firmly with your finger and thumb, and try to move the large gear back and forth to see if there is any small movement between the teeth of the gears. Rotate the large gear ¼ turn and repeat this process multiple times to ensure alignment. If there is movement the small gear and large gear need to be moved closer to each other. To do this you need loosen the M3 screws ¼ turn counter-clockwise and push the motor closer to the body. Repeat until you have desired the results, tighten screws once the fit is correct.
With the machine still on and connected to Cura or Pronterface,
First auto home the printer to verify the Xmin, Ymax, and Zmax endstops are functional.
Move the z axis up and down through the full range of motion. The z axis should move smoothly and not have any binding.
Turn the motors off (M84 in Cura/Pronterface terminal) and slide the X axis as far to the right as far as it can go.
Slide the Y axis toward the back of the printer as far as it can go.
Enter the command M119 in the Cura/Pronterface terminal to check the endstop status. It should say Zmax, Ymin and Xmax are triggered. This verifies that these endstops are indeed functional.
Materials Needed:
3m- PolyLite PLA LulzBot Green Filament Sample (RM-PL0118)
Tools Needed:
Micrometer
With the CPU still connected to Octoprint via ethernet connection, open the octoprint dialog box
Enter the command “M851 Z-0.80.” This sets the Z offset to -0.8mm to ensure we don't crash the bed on the first attempt.
Now enter the command “M500” to save this setting.
Load the calibration octopus print and attempt to print:
Watch the skirt print and stop the print once the skirt has finished. Measure the skirt height with a micrometer. The skirt should give a 0.30mm-0.45mm bead height.
Verify the extruder fans are mounted correctly and have proper flow (fan rotation direction and air flow) direction. There is a sticker on the center of each fan, if the sticker is facing outward, the fan is mounted backwards.
NOTE: When starting the octopus test print watch the printer perform its wipe function to be sure it is wiping the nozzle on the wiper pad and not dragging the nozzle through the wiper pad mount.
With the printer still connected to Octoprint, run the “Burn In” G-code.
Run this G-code for about 20 minutes.
Run the “calibration octopus” G-code.
Let the print fully finish and inspect for issues.
Check for “flatlining” which occurs when printing a circle or round edge, part of the circle will be a straight edge instead of a smooth arc. This is usually caused by bushings binding on the smooth rods and not sliding smoothly.
Check for Z wobble
Check for any feature that is inconsistent from "normal" prints
If the print doesn't have any issues, the printer is ready for packaging.