Open HardwareAssembly Instructions
Guides for installation and assembly of the LulzBot line of products made by FAME 3D LLC.
Guides for installation and assembly of the LulzBot line of products made by FAME 3D LLC.
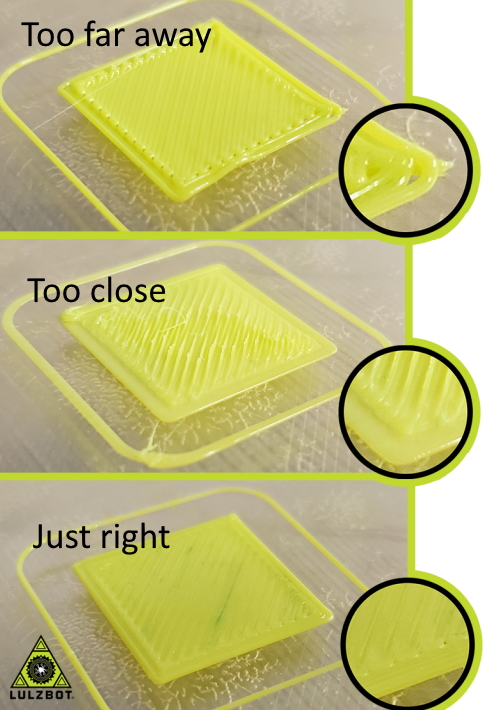
The z offset wizard allows you to easily calibrate your printer's z offset to ensure that your nozzle is at a near-perfect print height.
The z probe wizard will require a piece of standard printer paper or a sticky note.
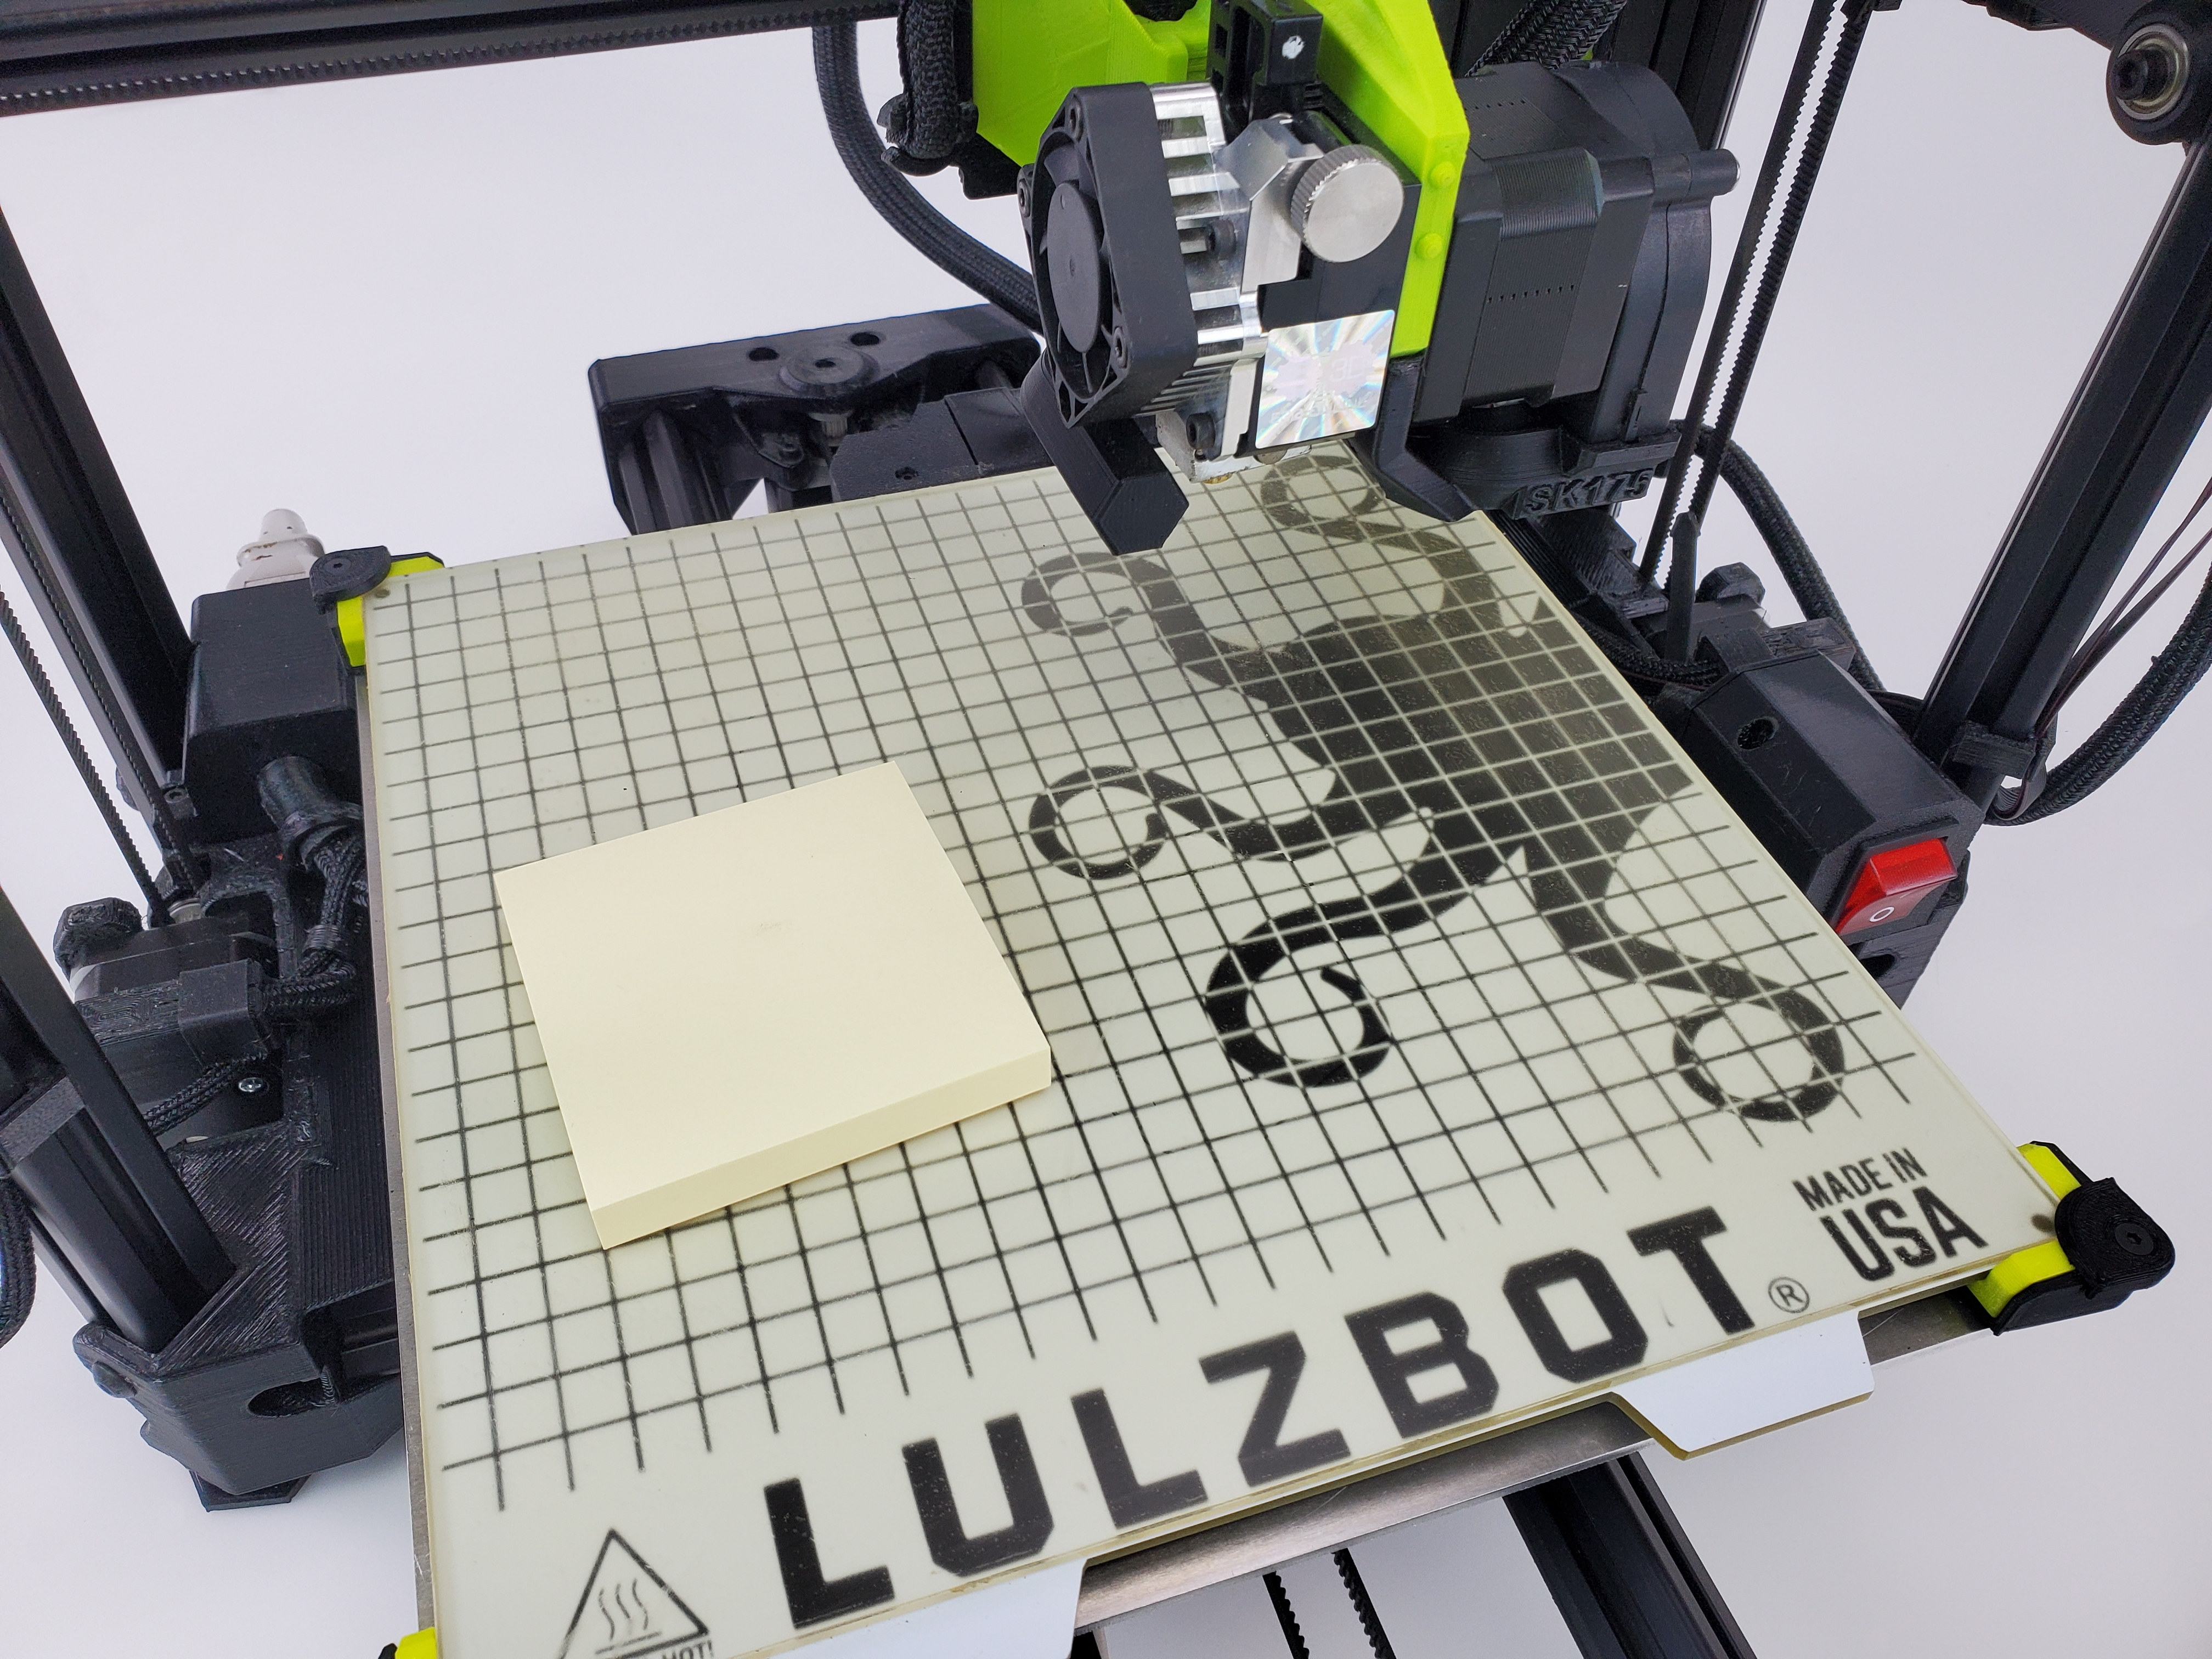
It is recommended to use a sticky note as you want your paper to be ~0.1mm thick.
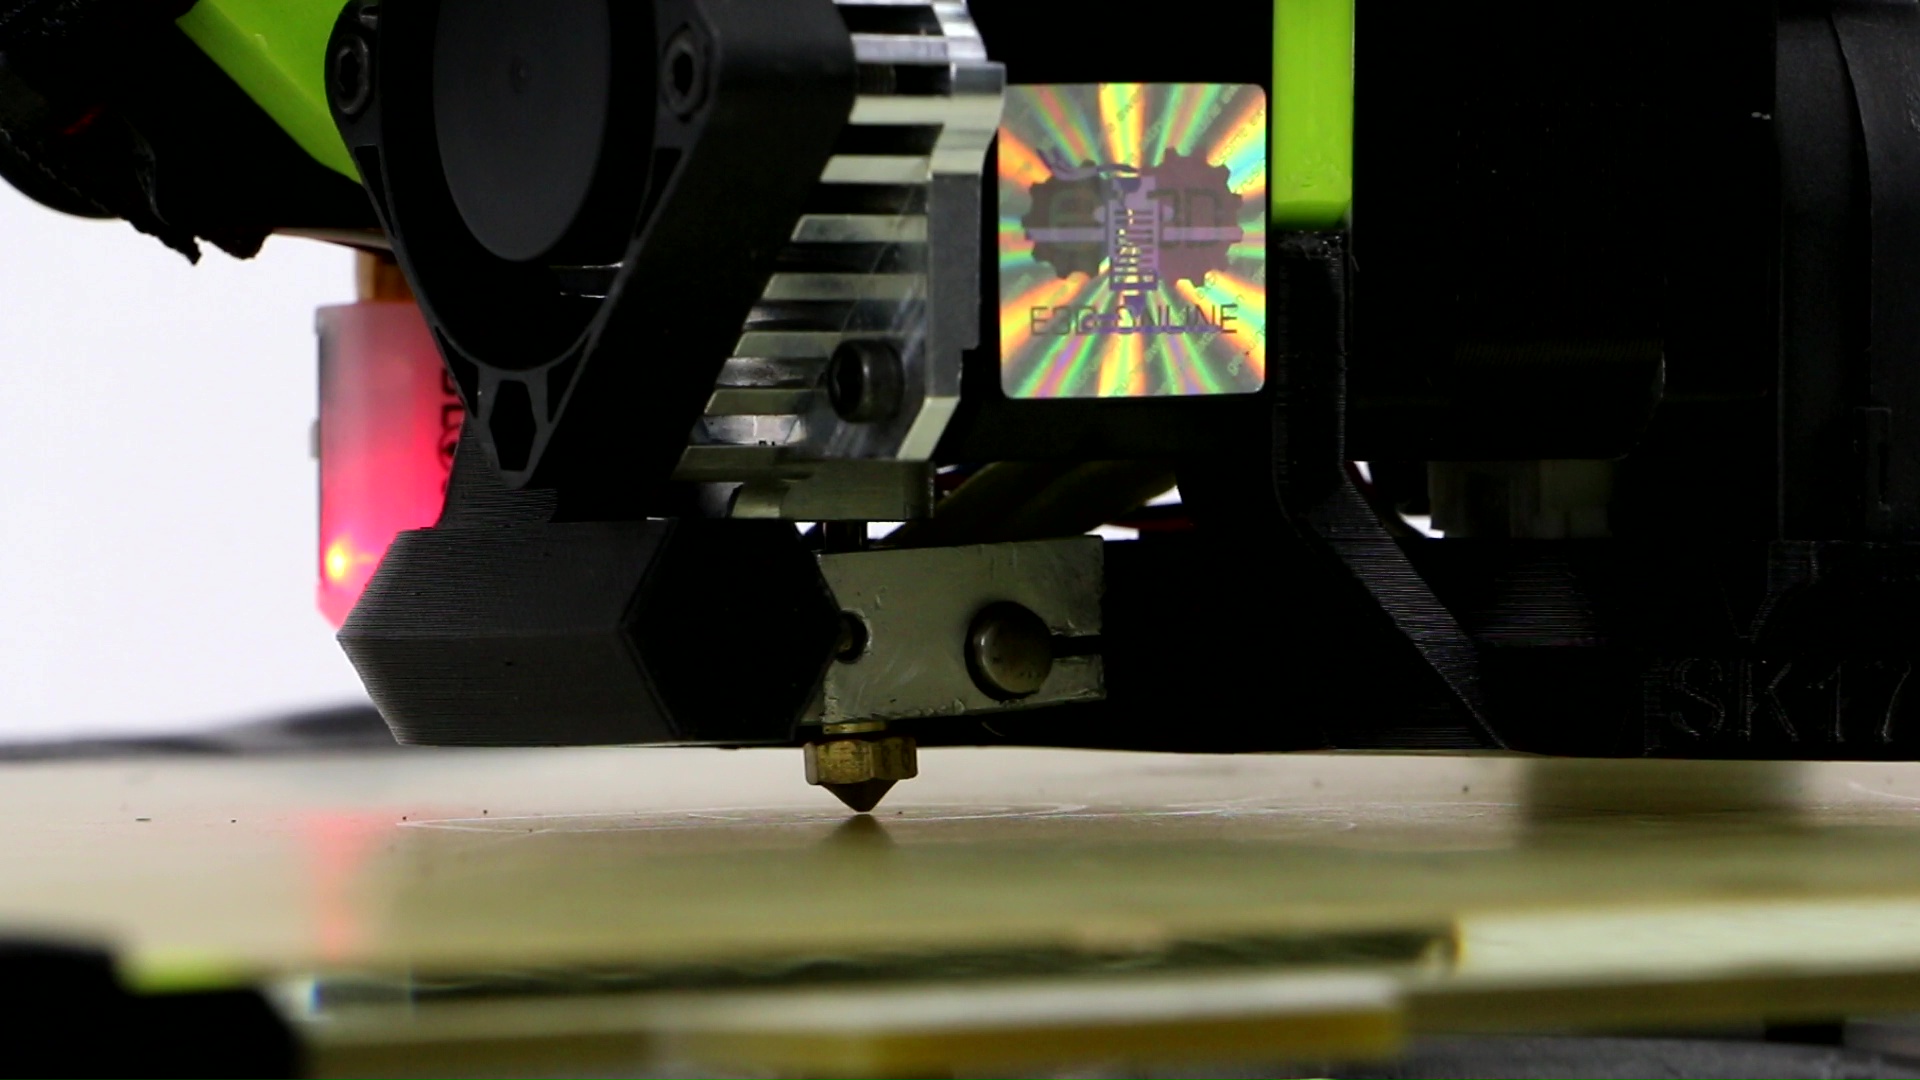
Be sure to remove any filament from your printer and ensure that the nozzle of the tool head is clean and clear of debris.
Note: Currently, the SideKick printers are the only printers capable of running the z probe wizard.
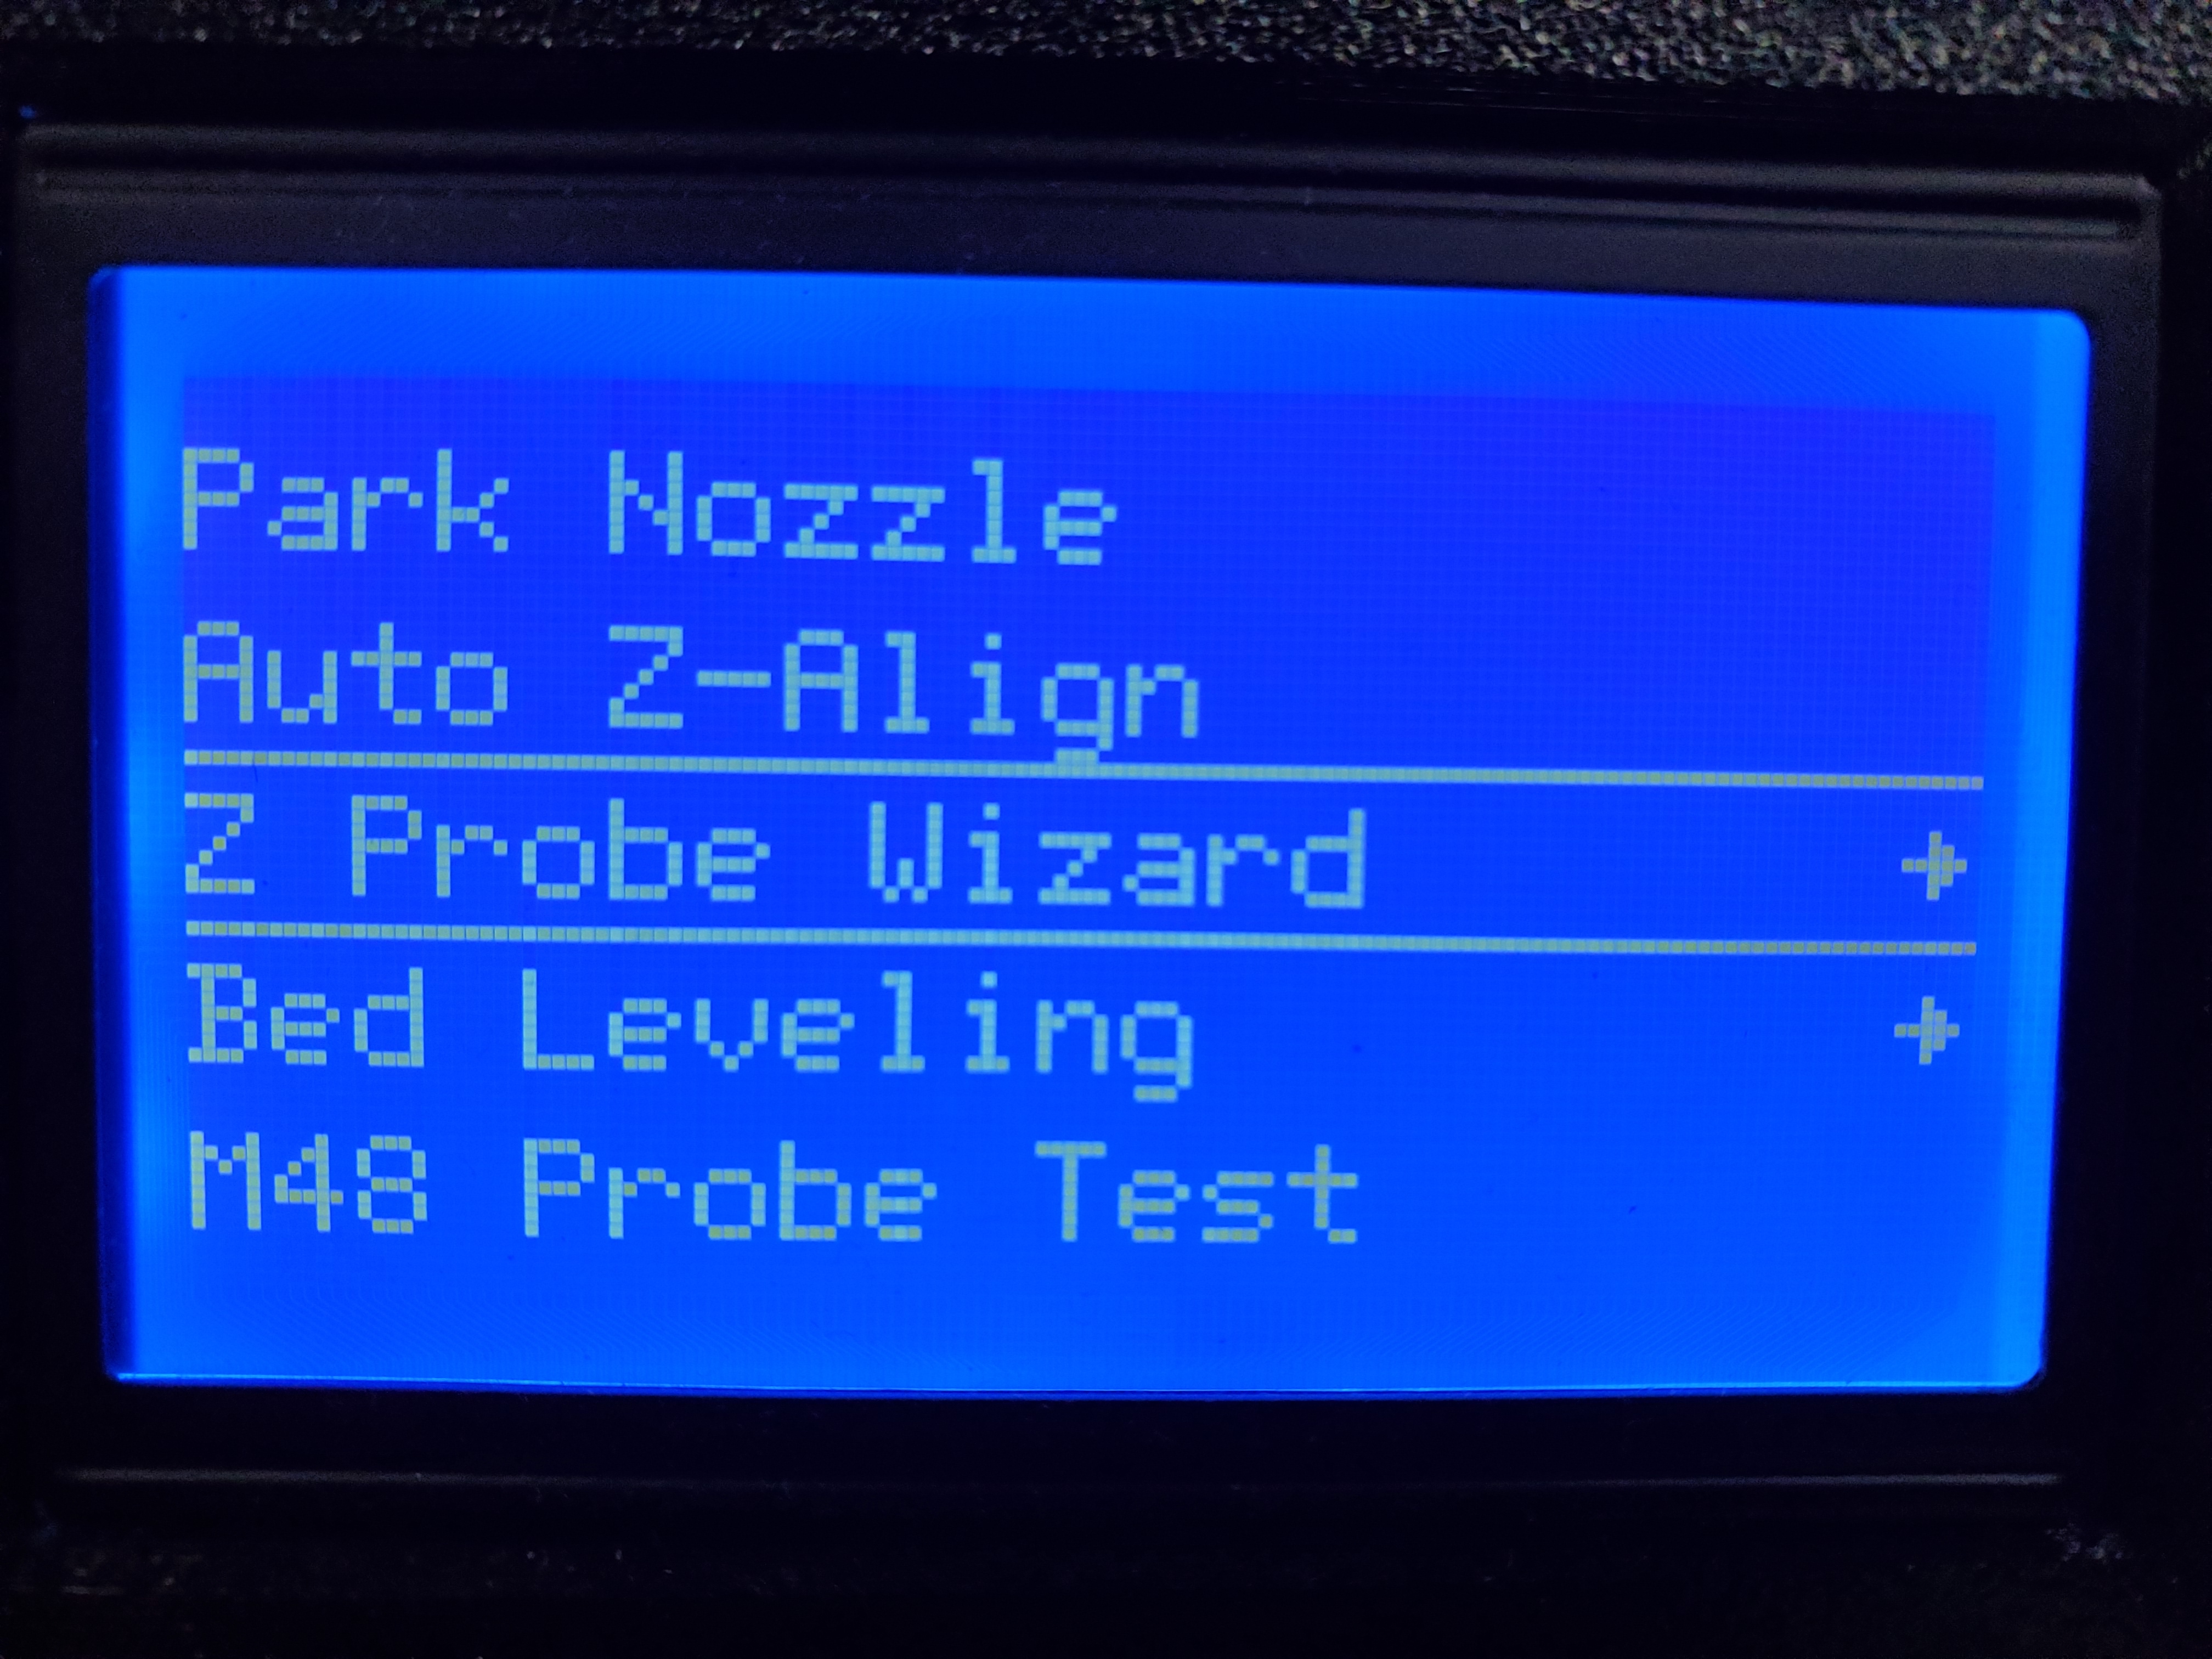
Navigate to the z probe wizard on your printers LCD.
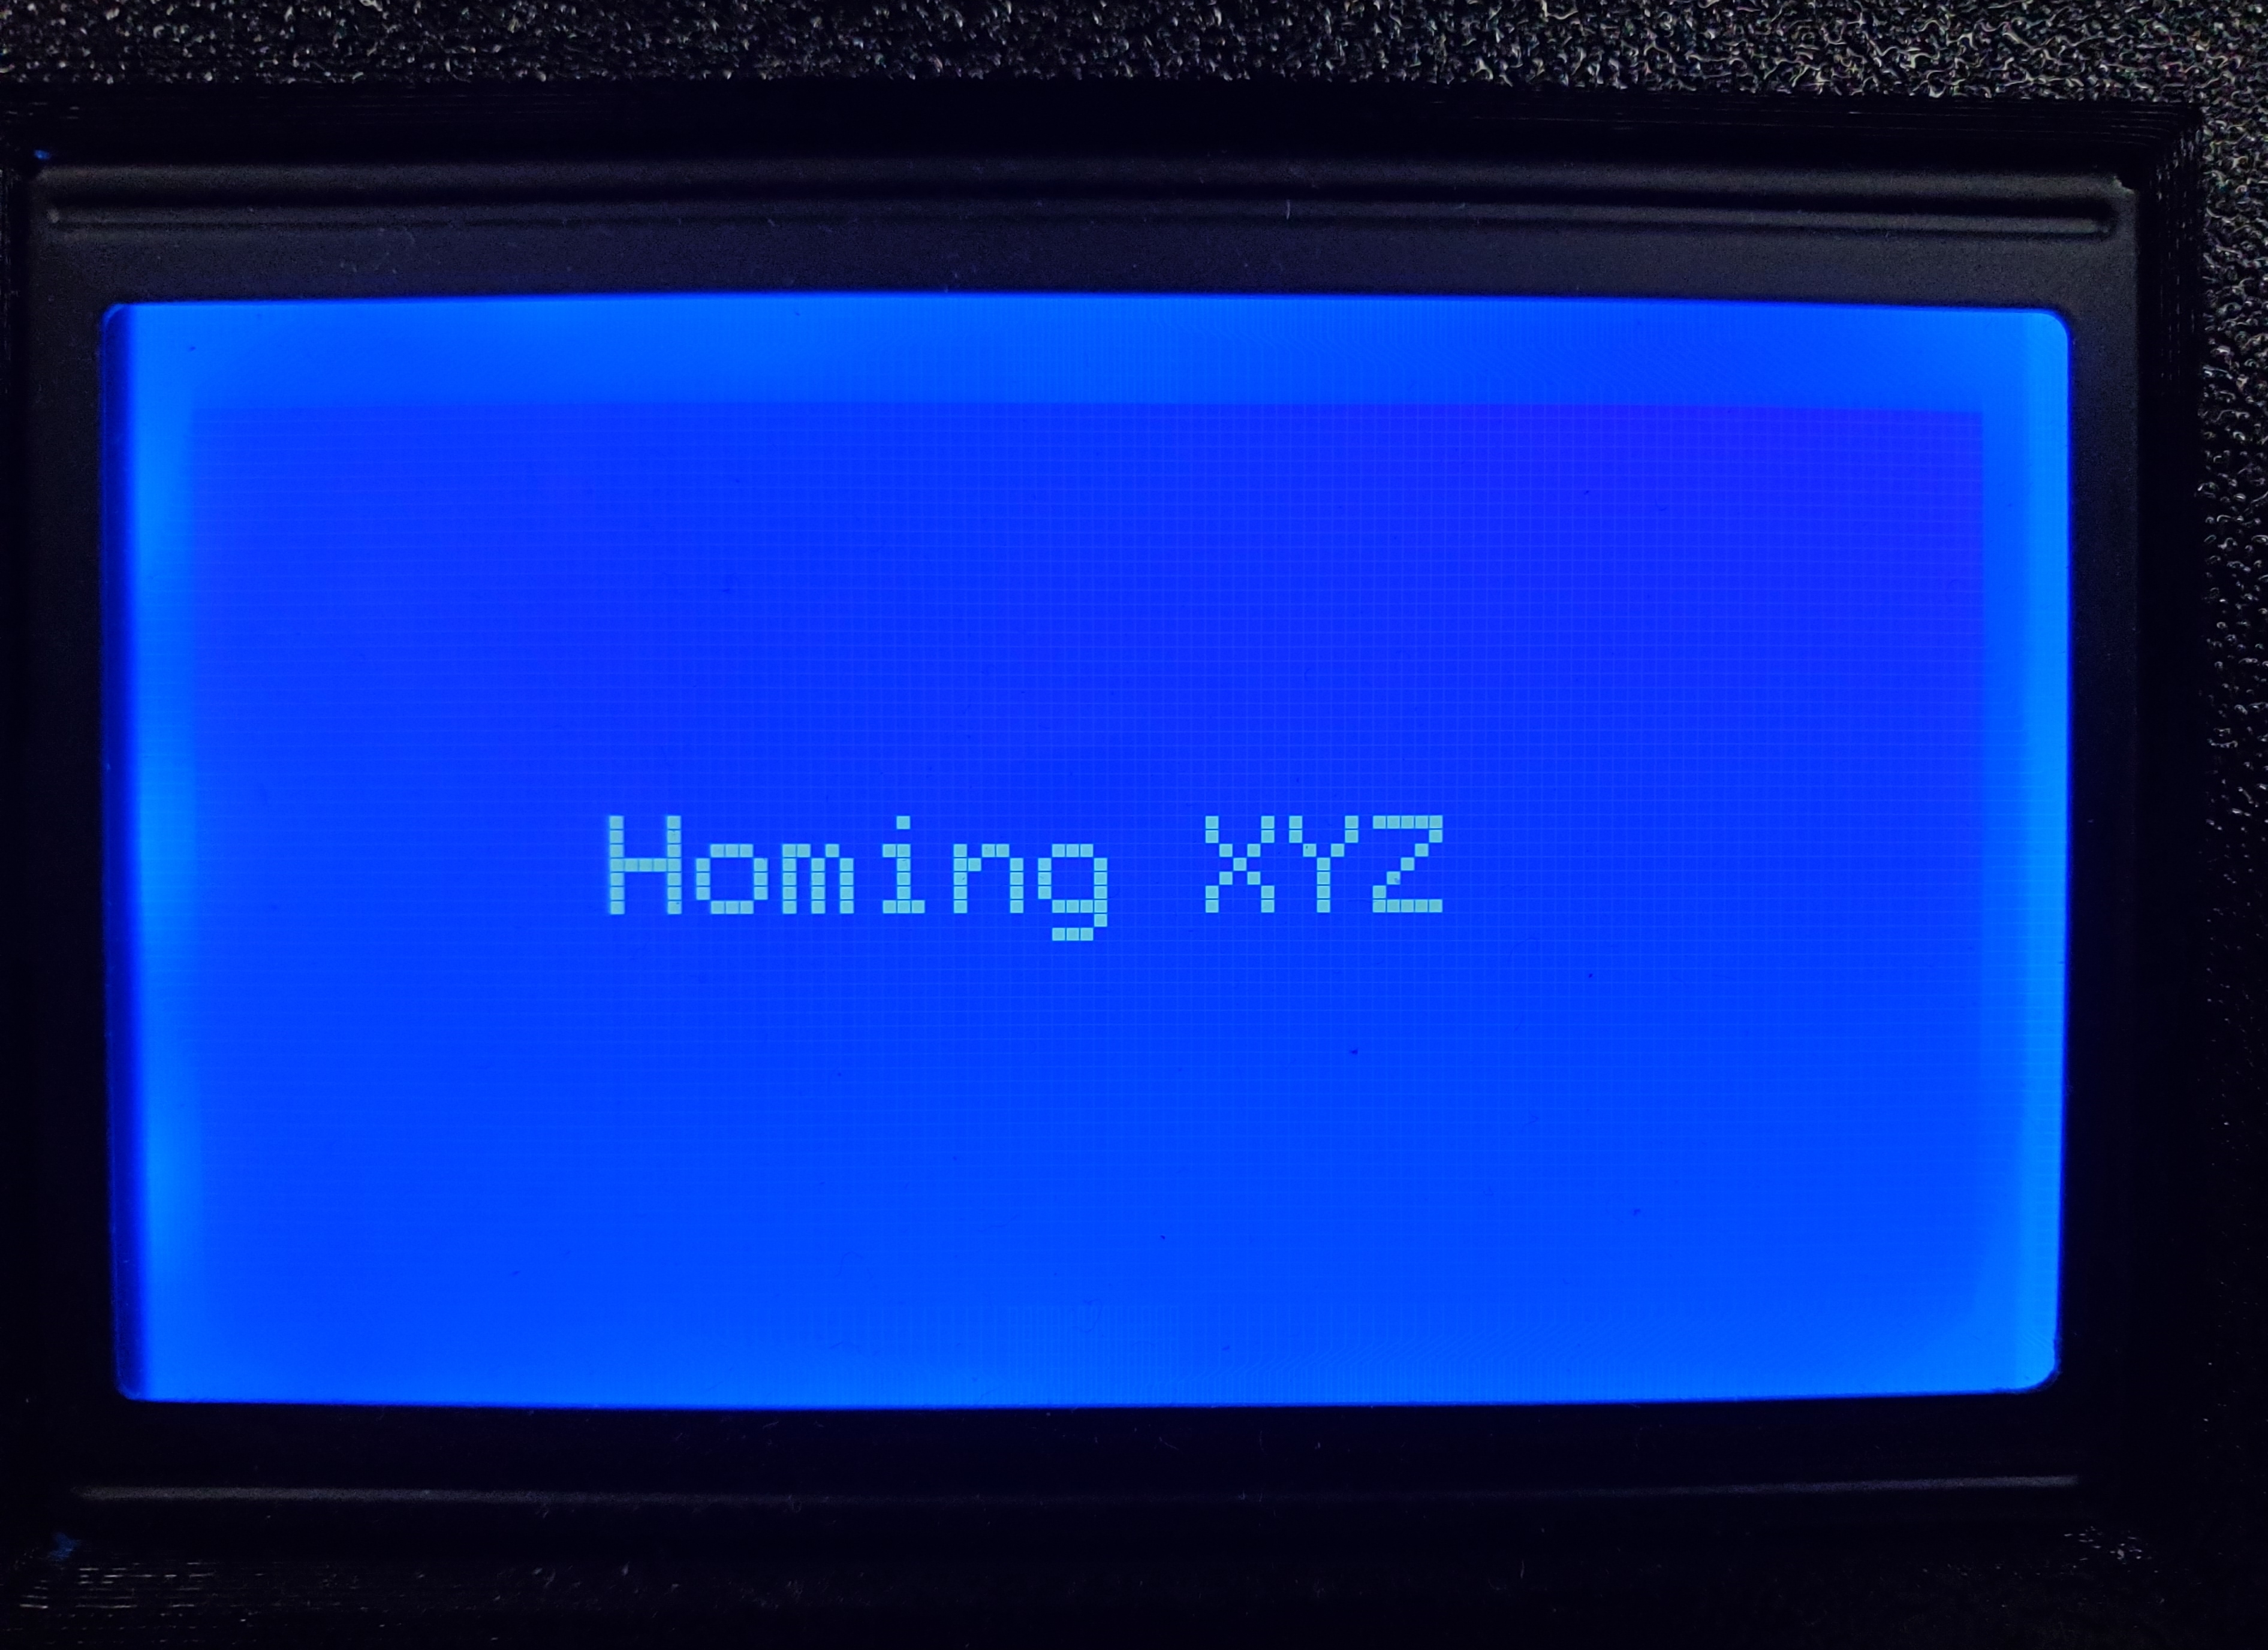
Motion > Z Probe Wizard.
The printer will home the x, y, and z and align itself for the calibration process.
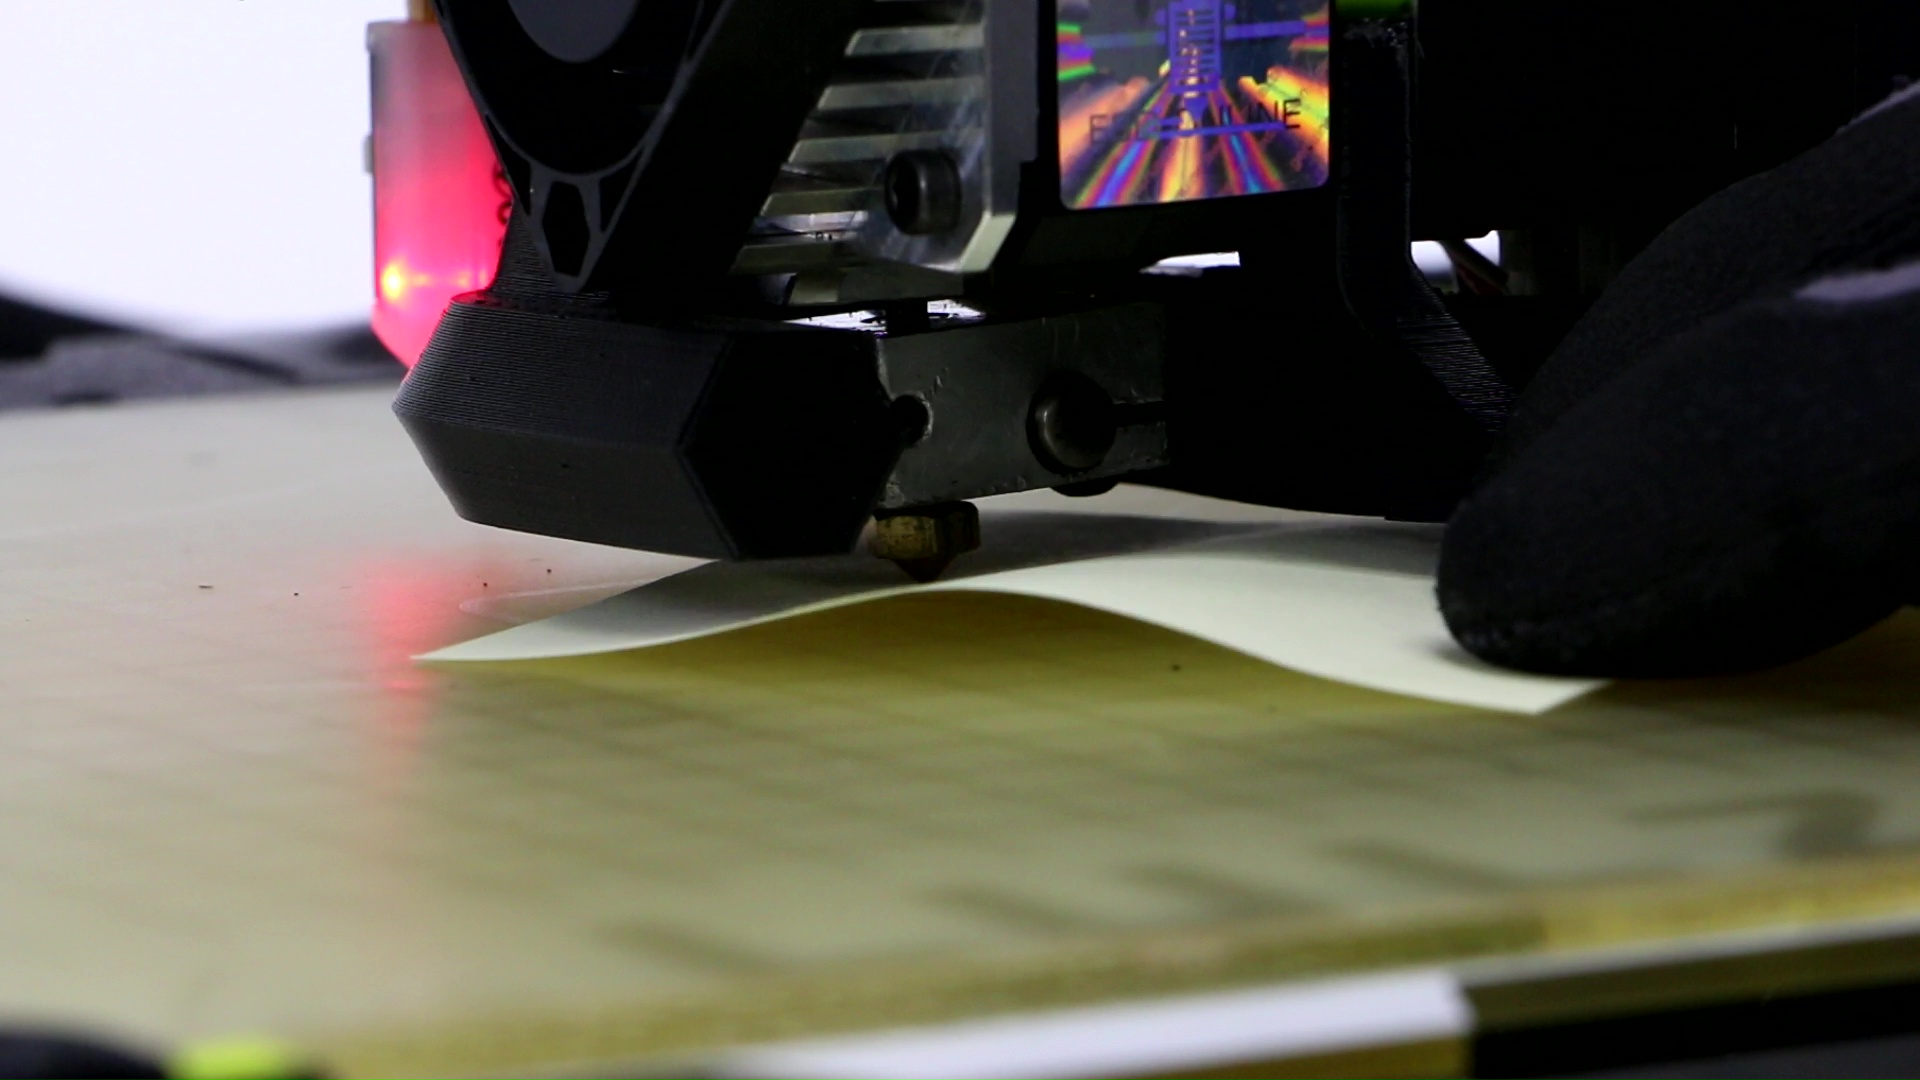
Select the option "Move 0.1mm".
Place your paper/sticky note under the nozzle and lower the printer's nozzle until you feel a slight amount of resistance from the nozzle on the print paper when moving the paper/sticky note back and forth.
Once you feel some resistance, raise the nozzle up just a little bit and push the LCD button in to go back to the z offset wizard screen.


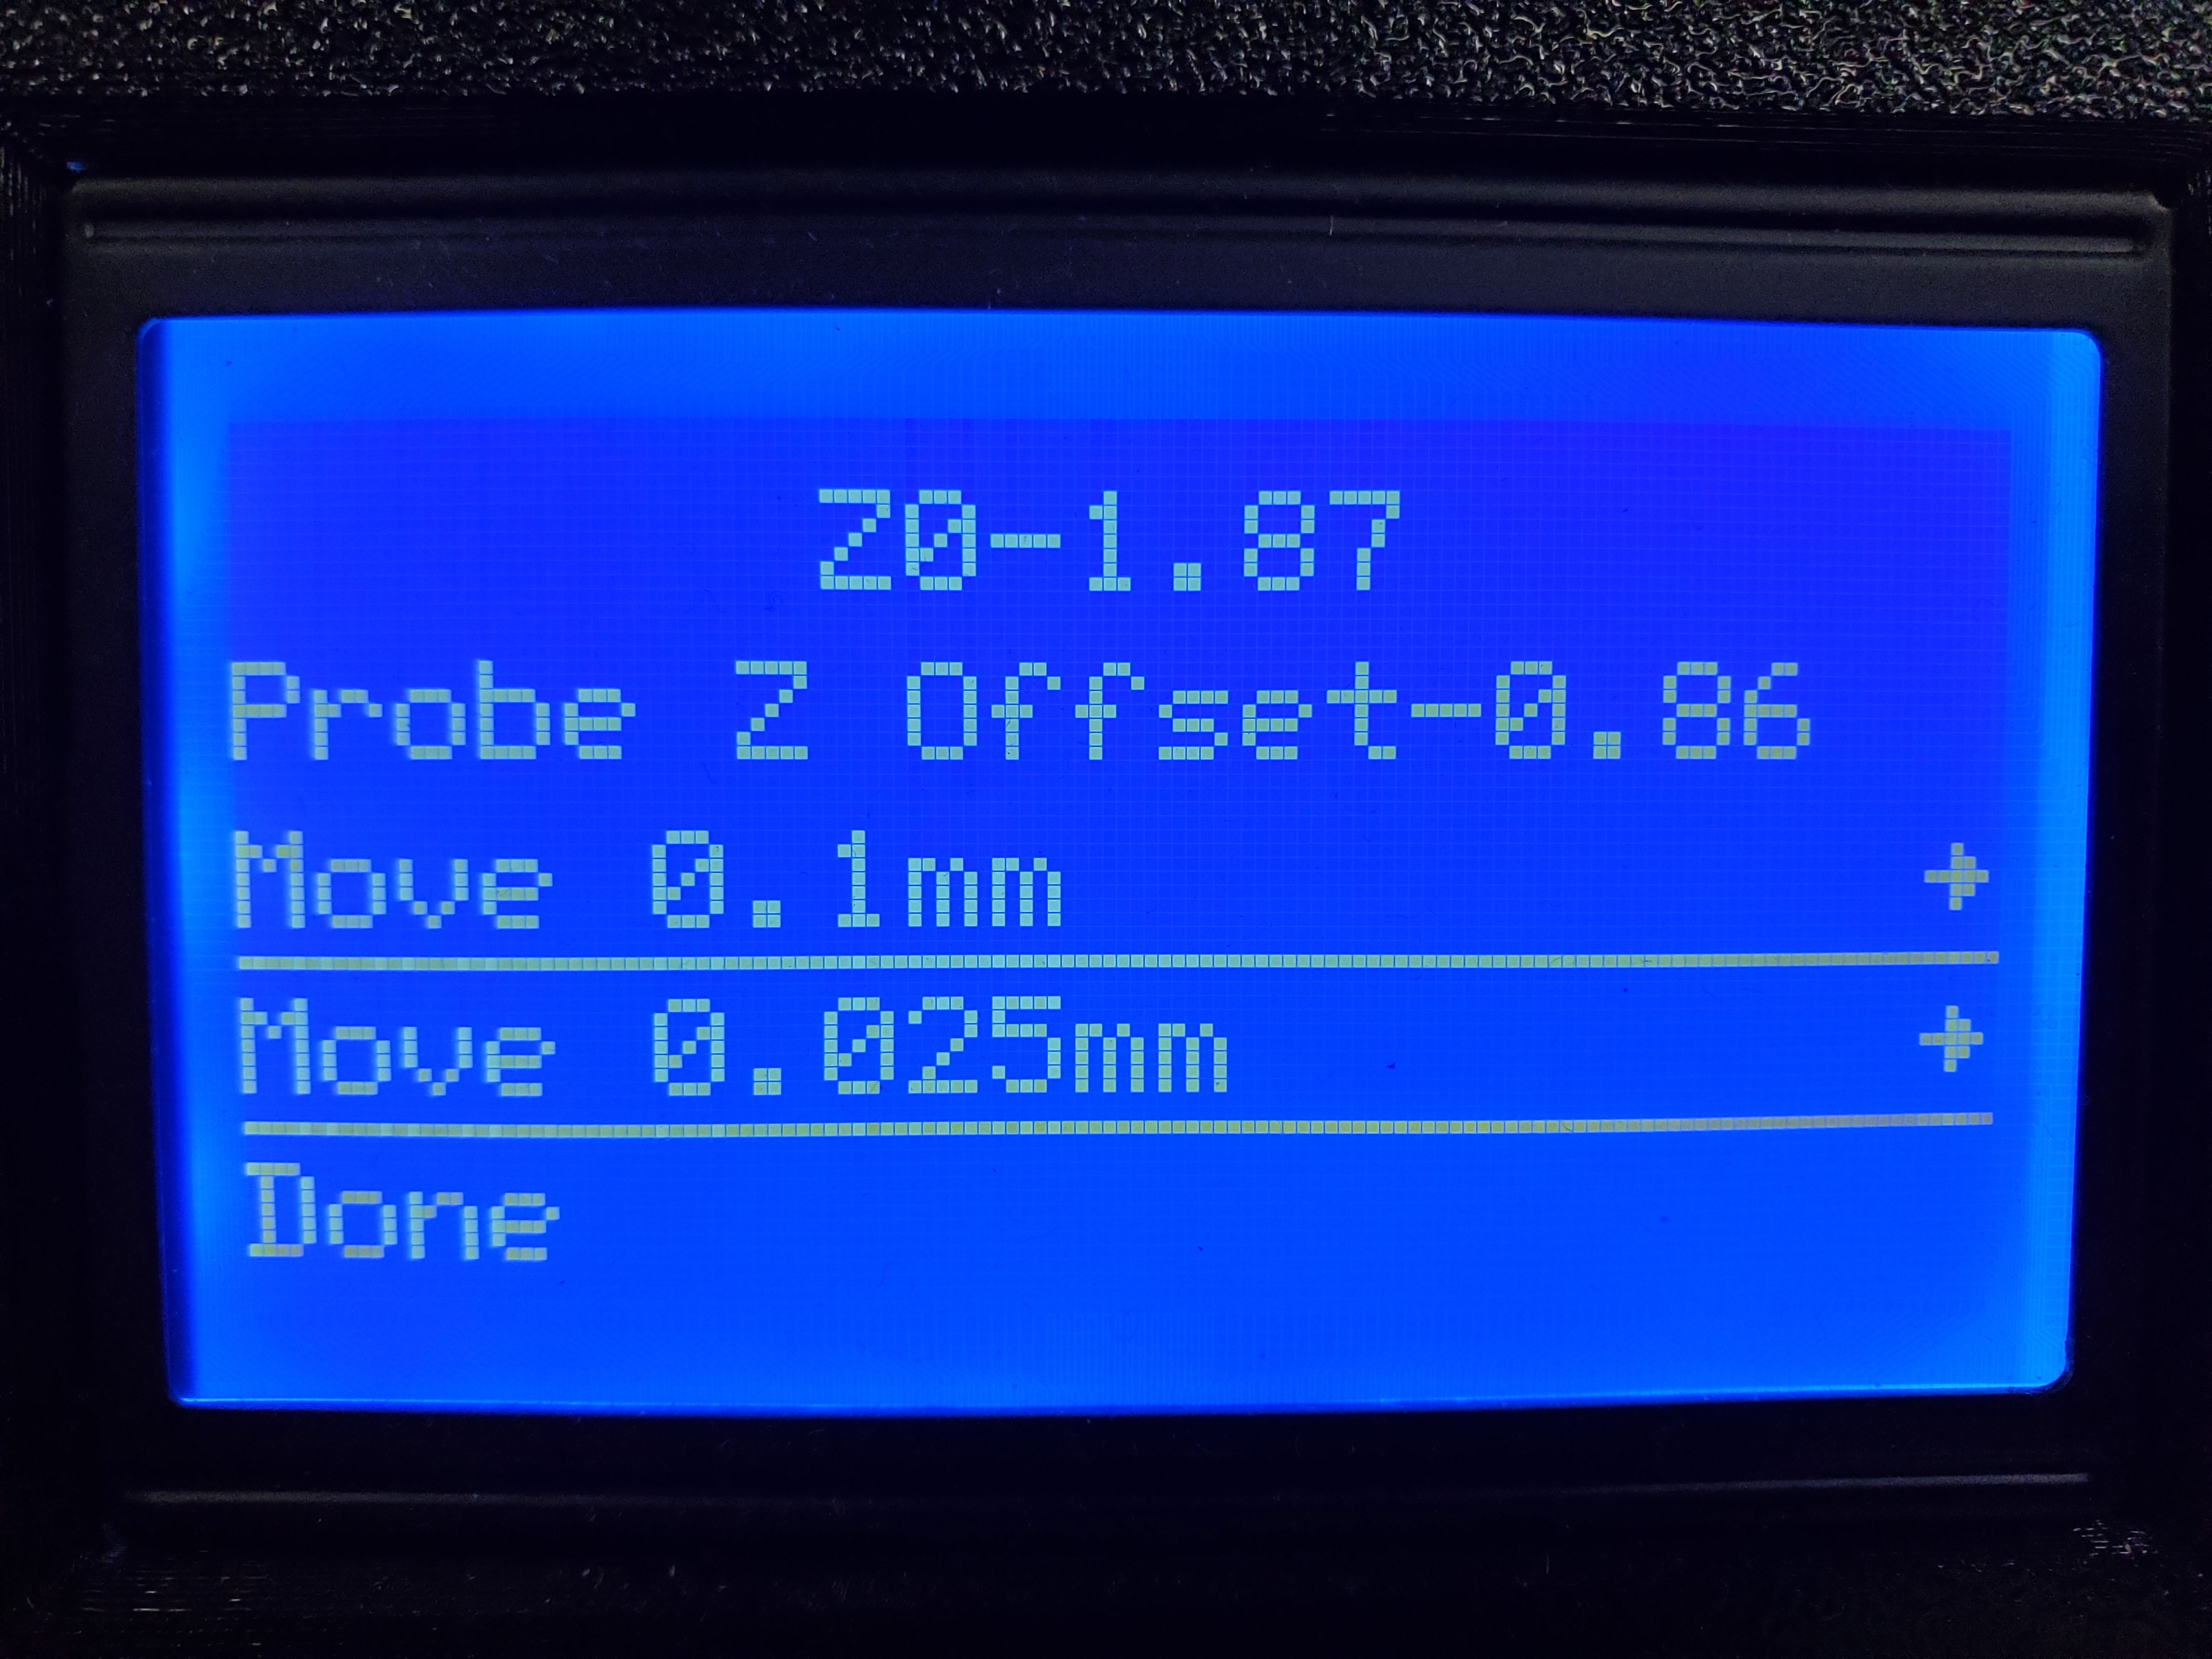
Select the option "Move 0.025mm".
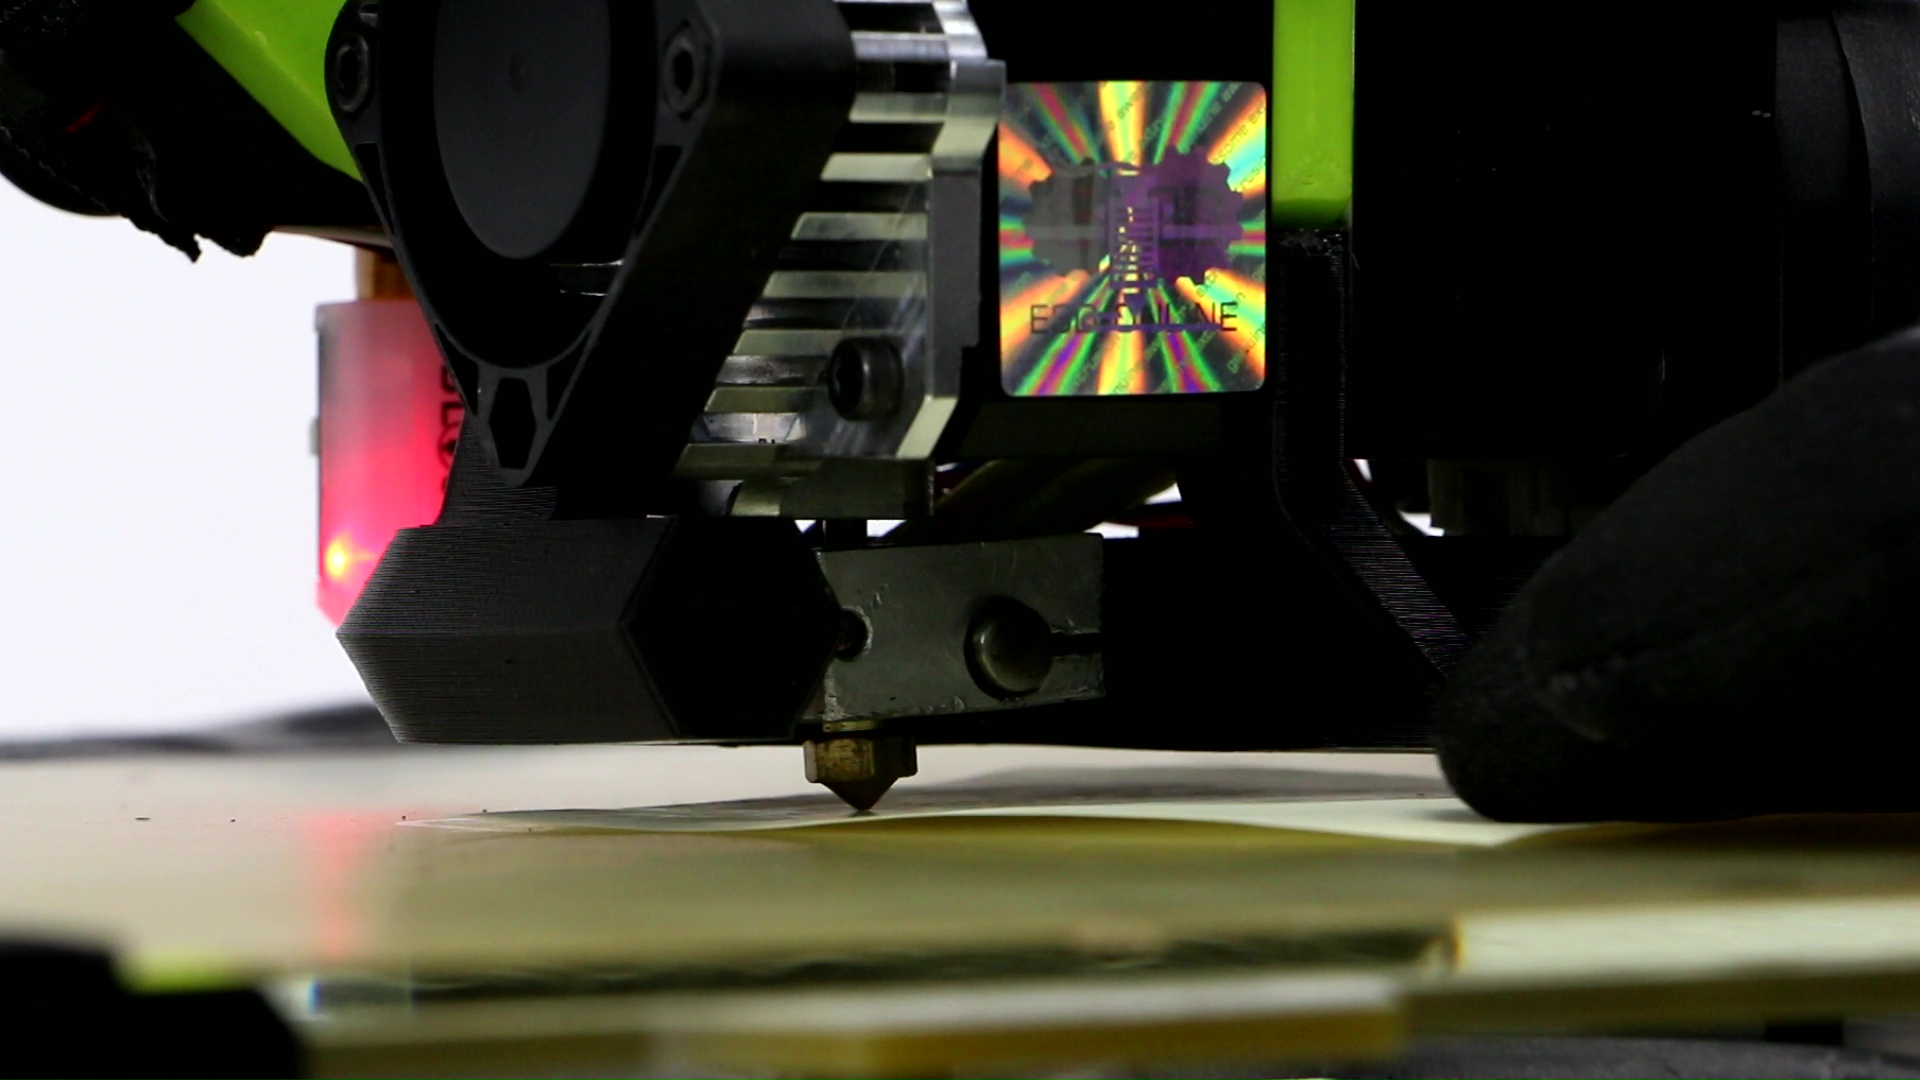
Make finer adjustments up or down until you feel the slightest amount of resistance on the paper while moving it back and forth.
Push the LCD button again to go back to the z offset wizard screen.
Once calibrated, scroll down and select DONE.
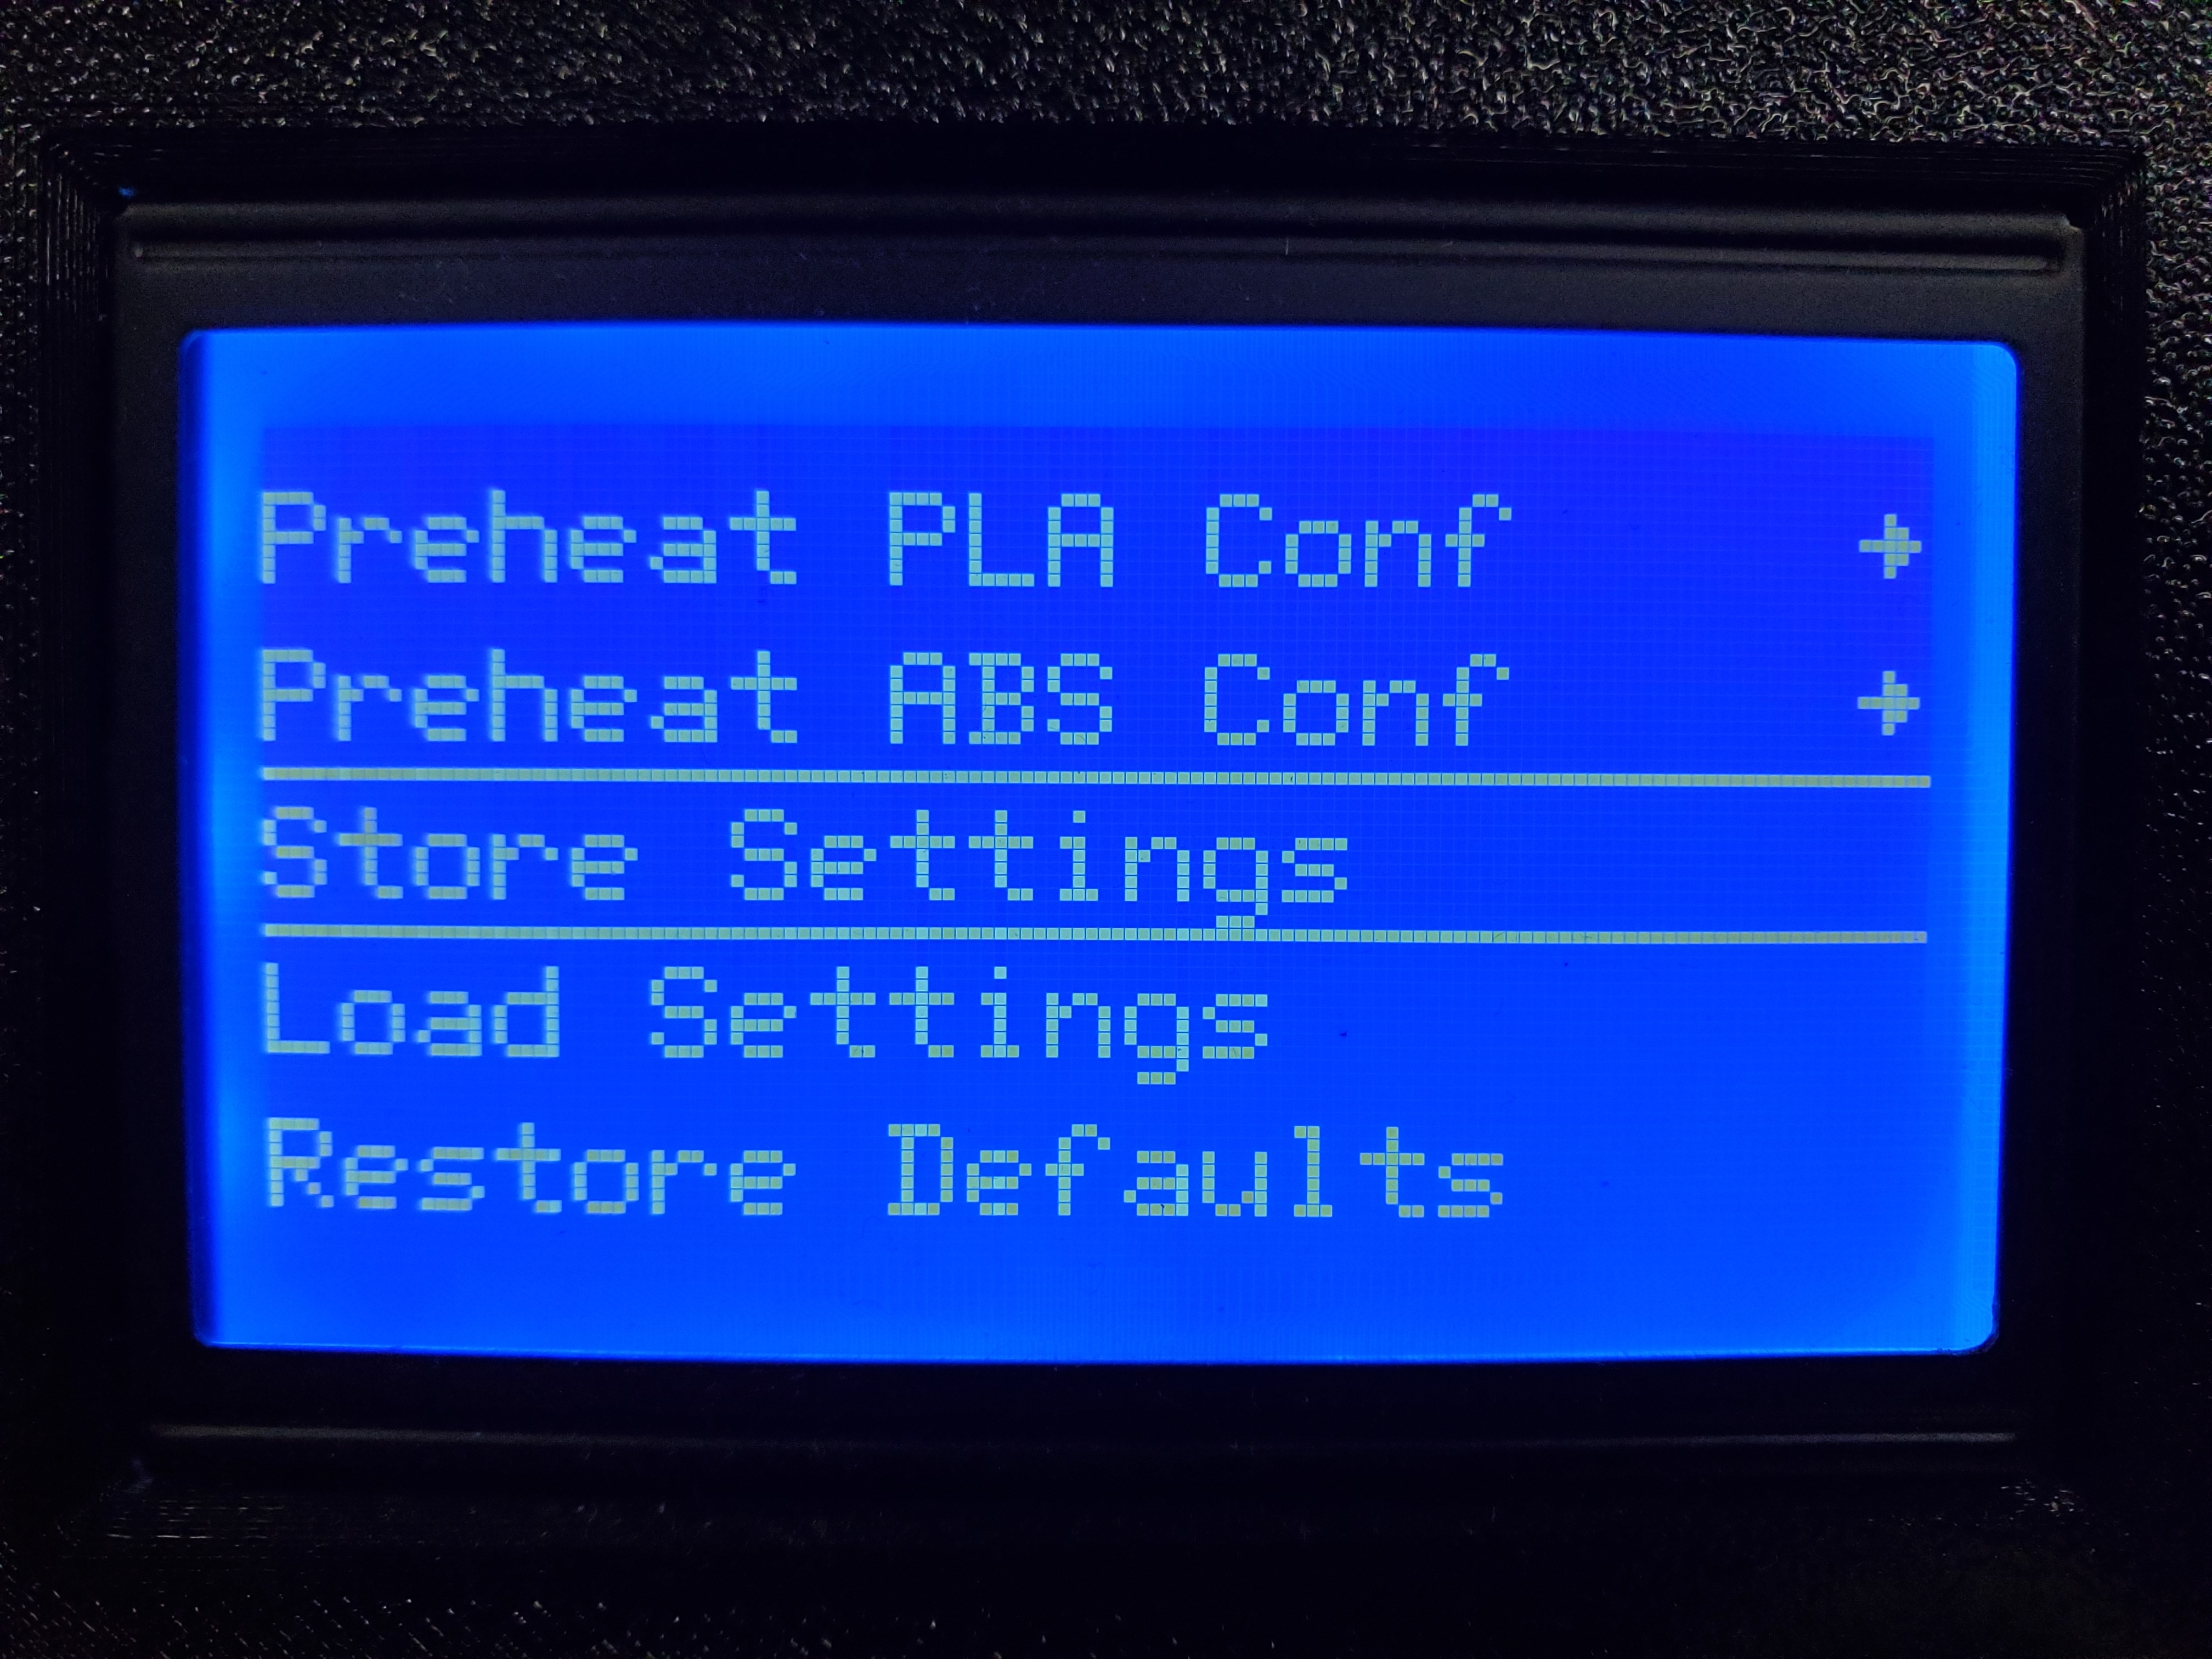
Navigate to your Configuration menu by scrolling up and clicking:
Menu > Configuration.
Scroll down and select Store Settings.
You should hear an audible tone that signifies your z-offset has been stored.
After running the z probe wizards, your z offset should be calibrated fairly well.
You may need to slightly adjust your z-offset depending on your configuration during a print as each filament and tool head may differ slightly in regards to how it performs during the first layer.
To do this during your printer's first layer navigate to the tune menu on your LCD and scroll down to z-offset. From here you can tune the offset up and down and the printer will adjust the first layer height as you adjust the settings.
Just remember to go back to the configuration menu and click store the settings once your printer is done again.
For a video on this process, you can follow along with this YouTube video.