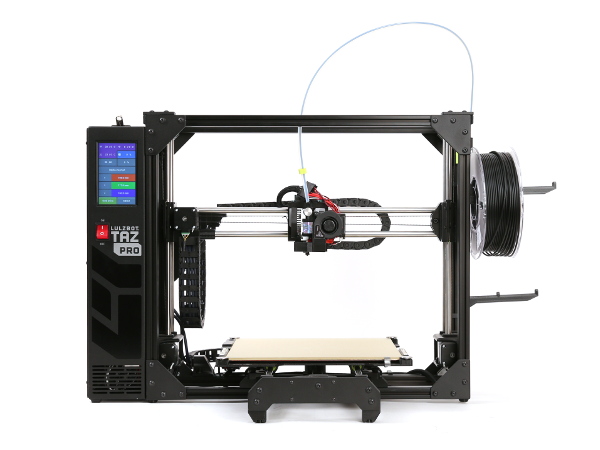
Open HardwareAssembly Instructions
Guides for installation and assembly of the LulzBot line of products made by FAME 3D LLC.
Guides for installation and assembly of the LulzBot line of products made by FAME 3D LLC.
Follow the instructions below to quickly install your new tool head on a LulzBot TAZ Pro 3D Printer.
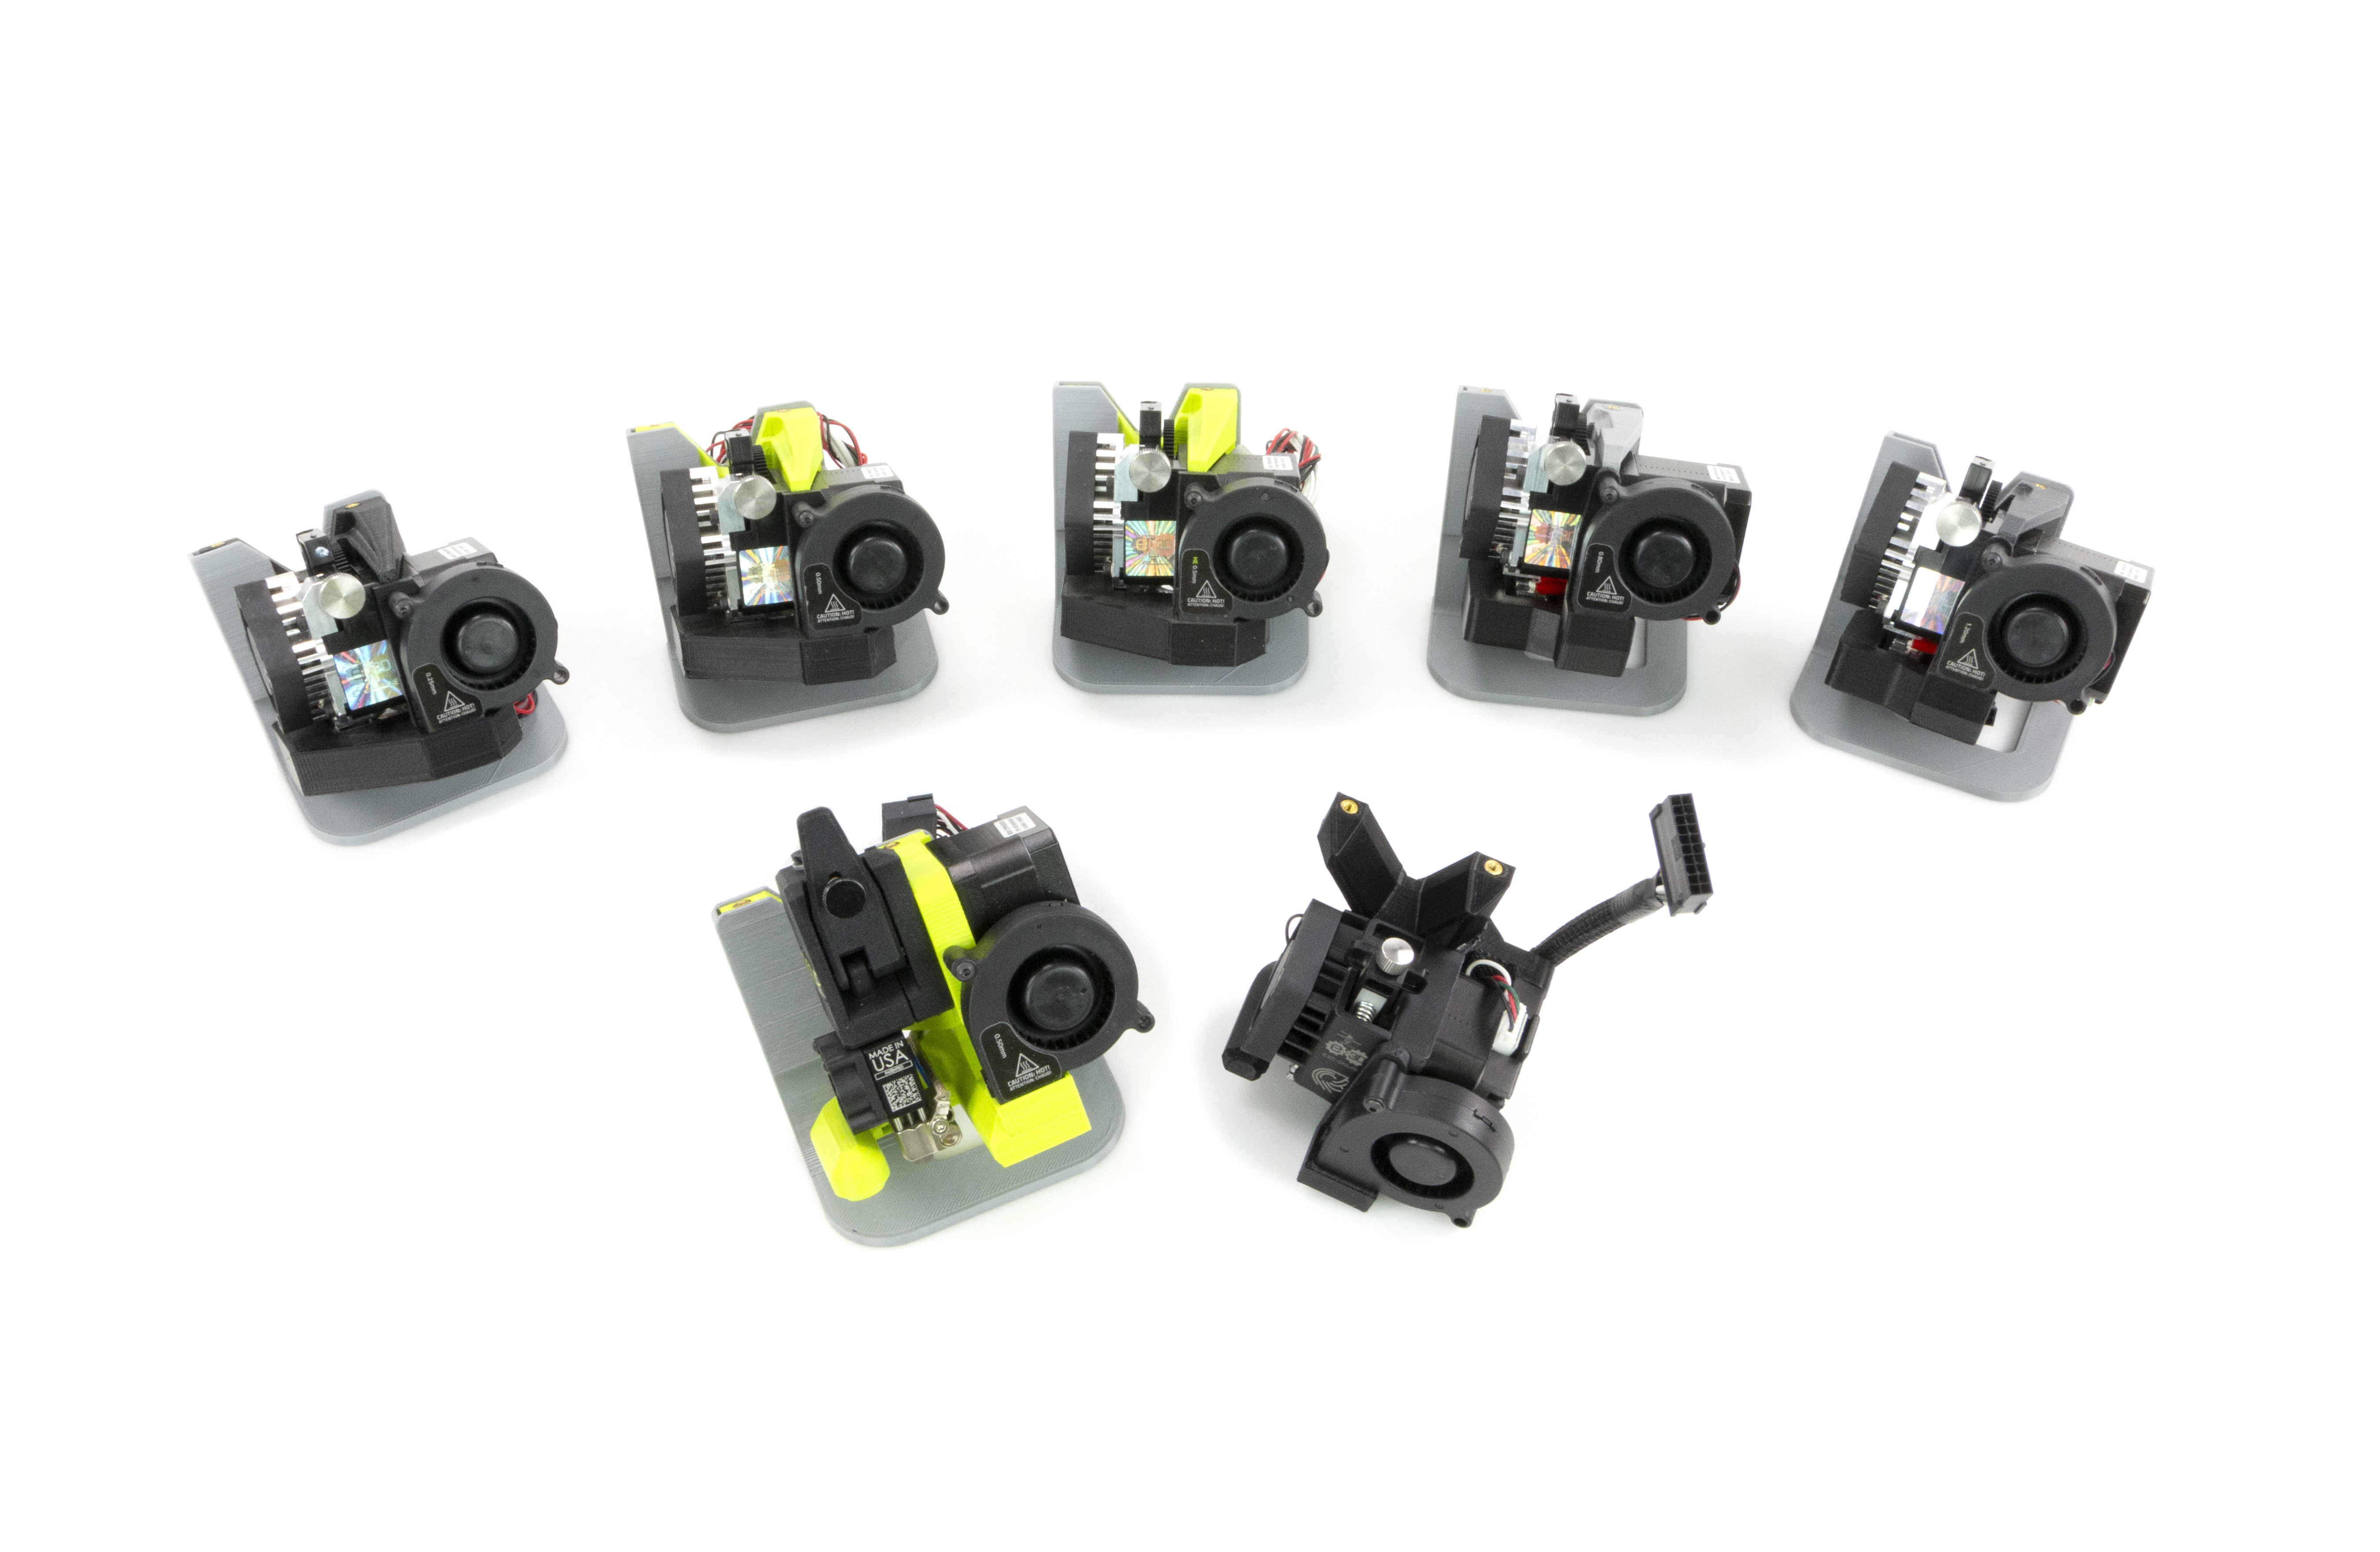
Included materials vary depending on tool head. See the links below for materials included with each compatible tool head.
You will also need
4A
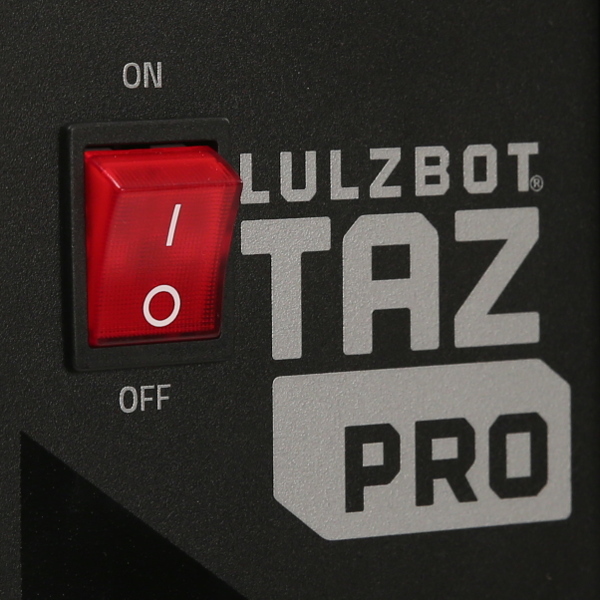
Power on the LulzBot Pro 3D Printer. This will automatically move the X-axis gantry to the top of the printer.
4B
Home the 3D printer by using the LCD touch screen. Press Menu, then Auto Home.
4C
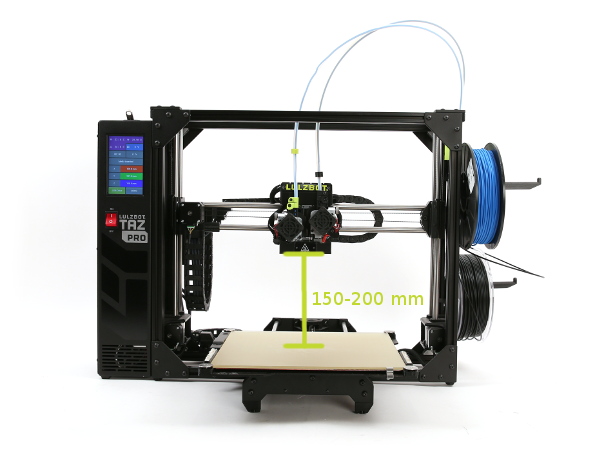
Adjust the position of the tool head using the LCD touch screen menu so that is about 200 mm above the print bed and close to the middle of the X-axis.
5A
Once the tool head is position, turn the printer off.
5B
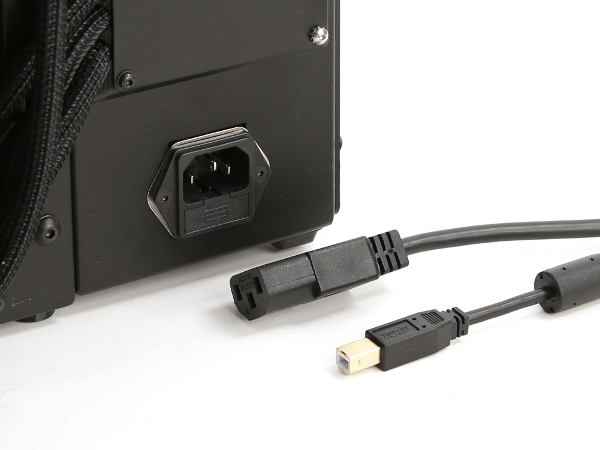
Unplug the AC power cable from the wall outlet, then unplug from the rear of the printer.
5C
Unplug the USB cable (if installed).
6A
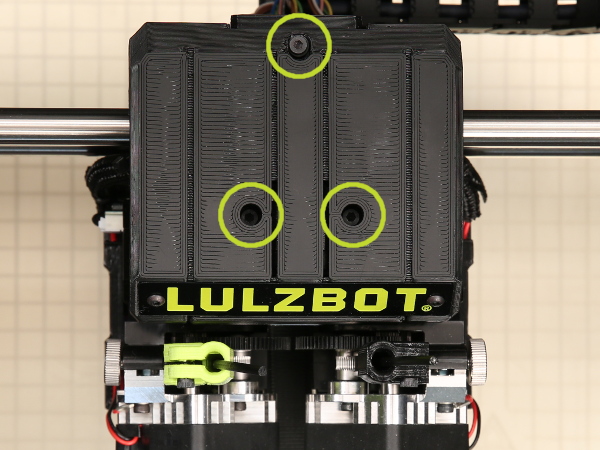
Unscrew the three screws highlighted on the top of the tool head cover.
6B
Lift the toolhead cover up and off of the tool head.
7A
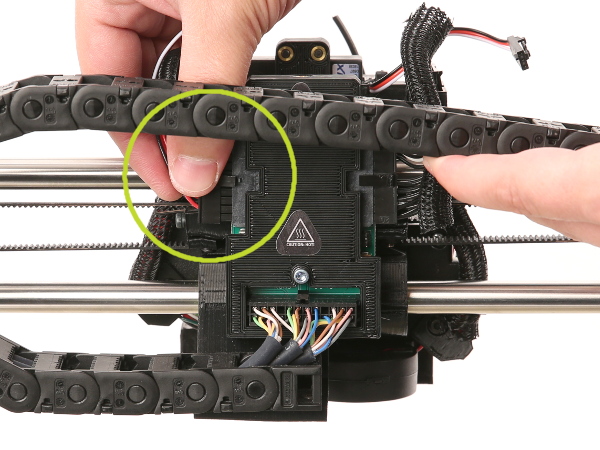
Turn the printer so that the back of the printer can be easily accessed, then unplug the 3 pin connections from each side of the tool head carriage.
7B
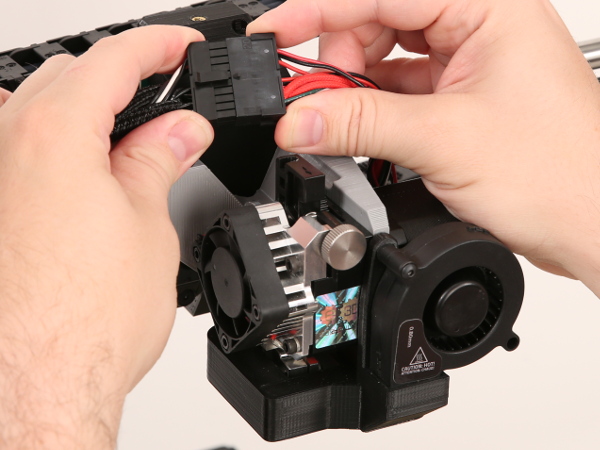
Unplug the large connection from the left side (when viewed from behind) of the tool head carriage.
7C
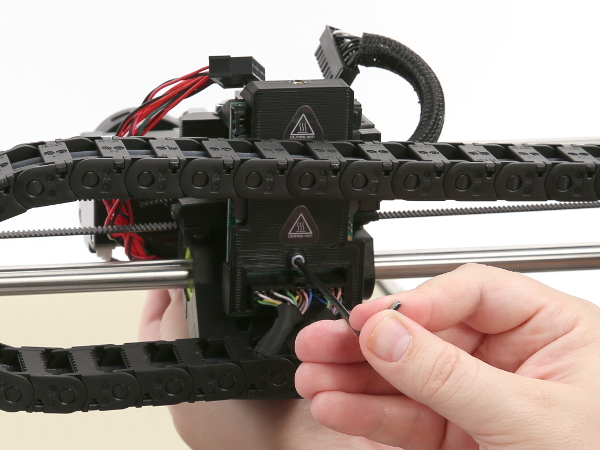
Unplug the remaining large connection from the tool itself, leaving the wiring in place to plug into the new accessory tool head.


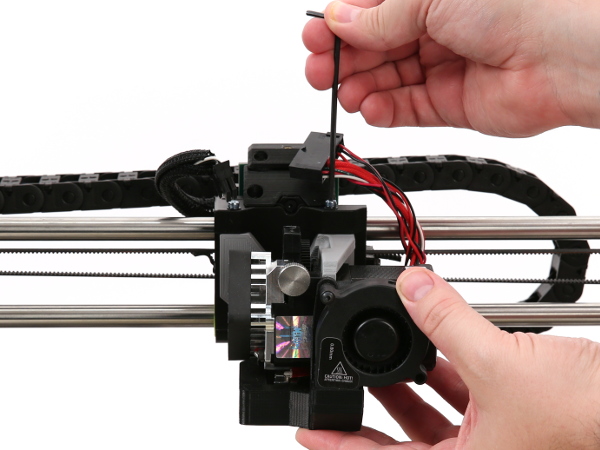
8A
Support the tool head to ensure it does not fall onto the print bed.
8B
Unscrew the tool head mounting screw on the back of the X-axis carriage with the 2 mm hex key.
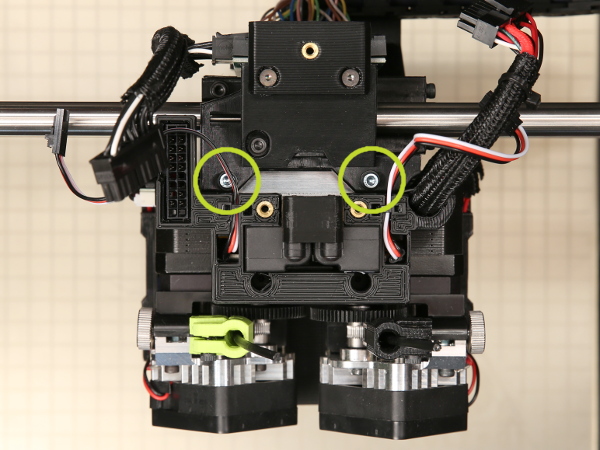
8C
Unscrew the two tool head mounting screws on the top of the tool head with the 2 mm hex key.
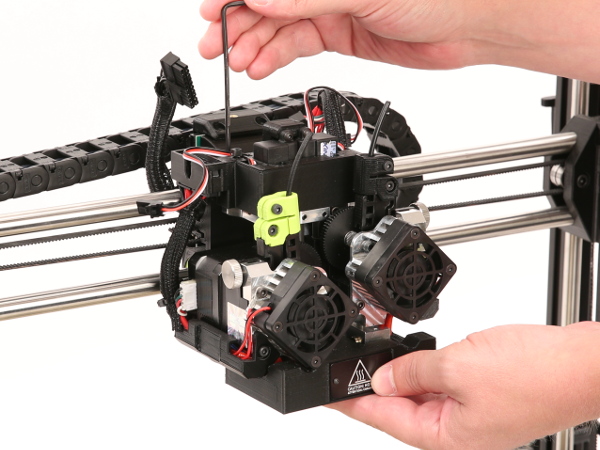

9A
Hold new tool head in place while screwing in both top tool head mounting screws using the 2 mm hex key.
9B
While still supporting the tool head, screw in the tool head mounting screw on the back of the X-axis carriage using the 2 mm hex key.
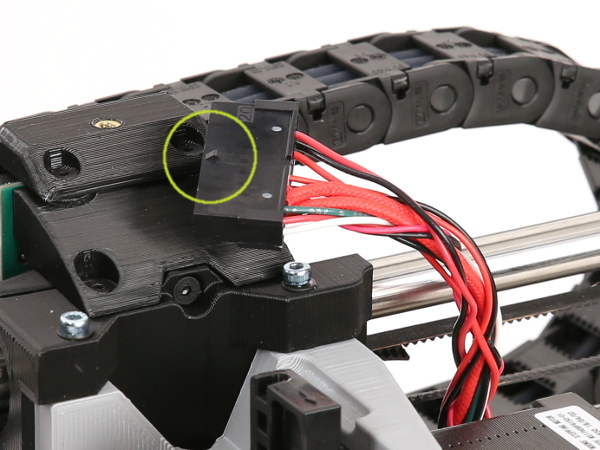
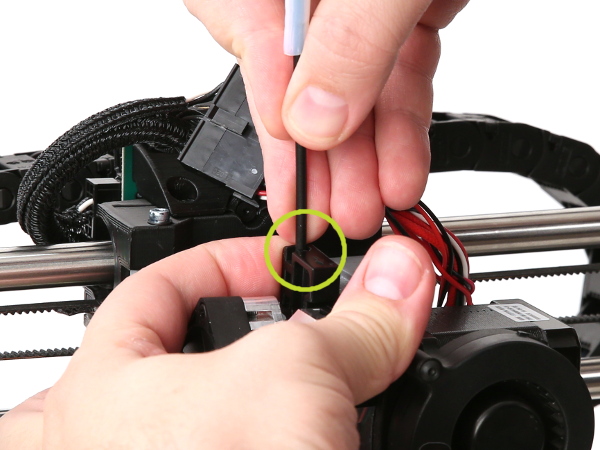
Find the side of the connector on the tool head wiring with a small wedge. Align it with the clip on the connector from the X-axis carriage and connect them.
11A
Install the latest version of Cura LulzBot Edition. It is important to have the LulzBot Edition of Cura, as it has preset machine configuration profiles built into it.
11B
Go to LulzBot.com/Cura to install Cura LulzBot Edition.
11C
Plug in your LulzBot TAZ Pro 3D printer to the power supply and power on your 3D printer.
11D
Once powered on, connect your 3D printer to your computer using the USB cable.
11E
Open Cura LulzBot Edition.
12A
Select Settings dropdown > Printer > Add Printer
12B
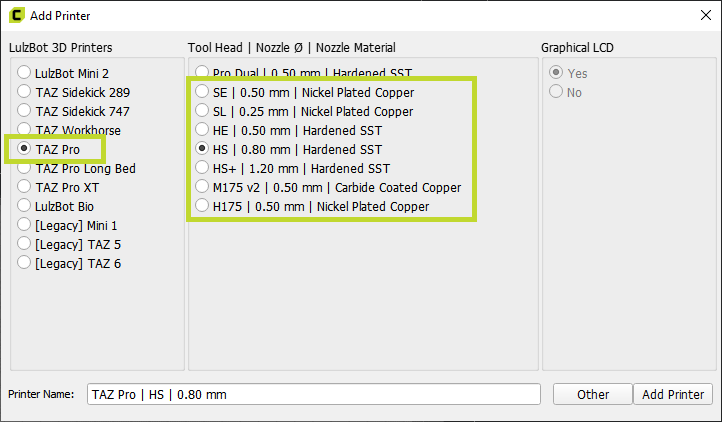
Select LulzBot TAZ Pro in the first column, then the appropriate toolhead in the second column, and click Add Printer.
12C
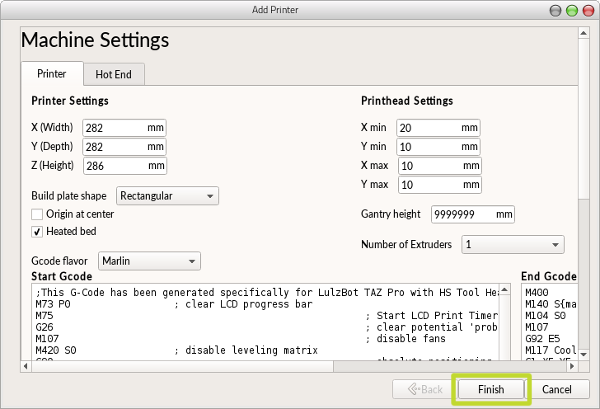
Select Finish.
13A
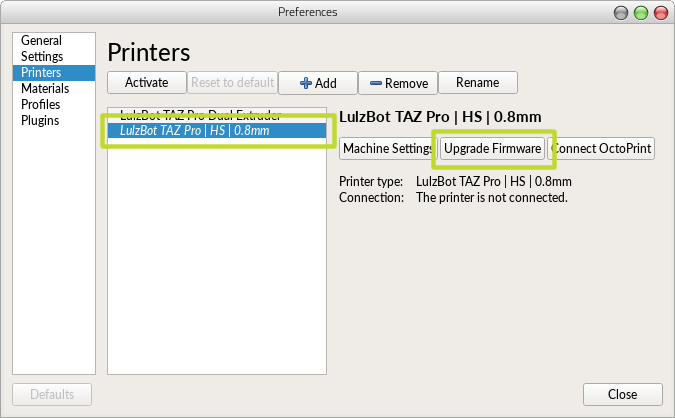
Select Settings dropdown > Printer > Manage Printers.
13B
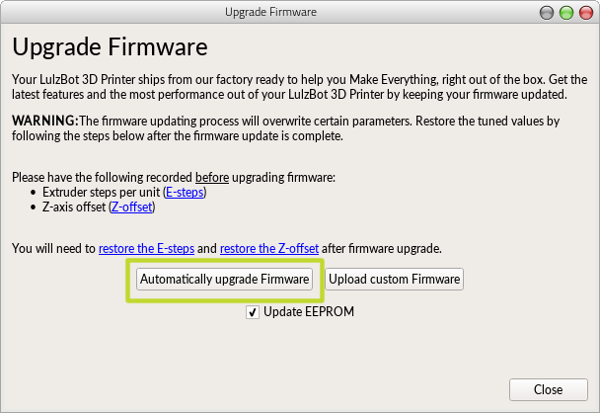
Confirm the LulzBot TAZ Pro and correct tool head are selected, and click Upgrade Firmware.
11C
Select Automatically Update Firmware.

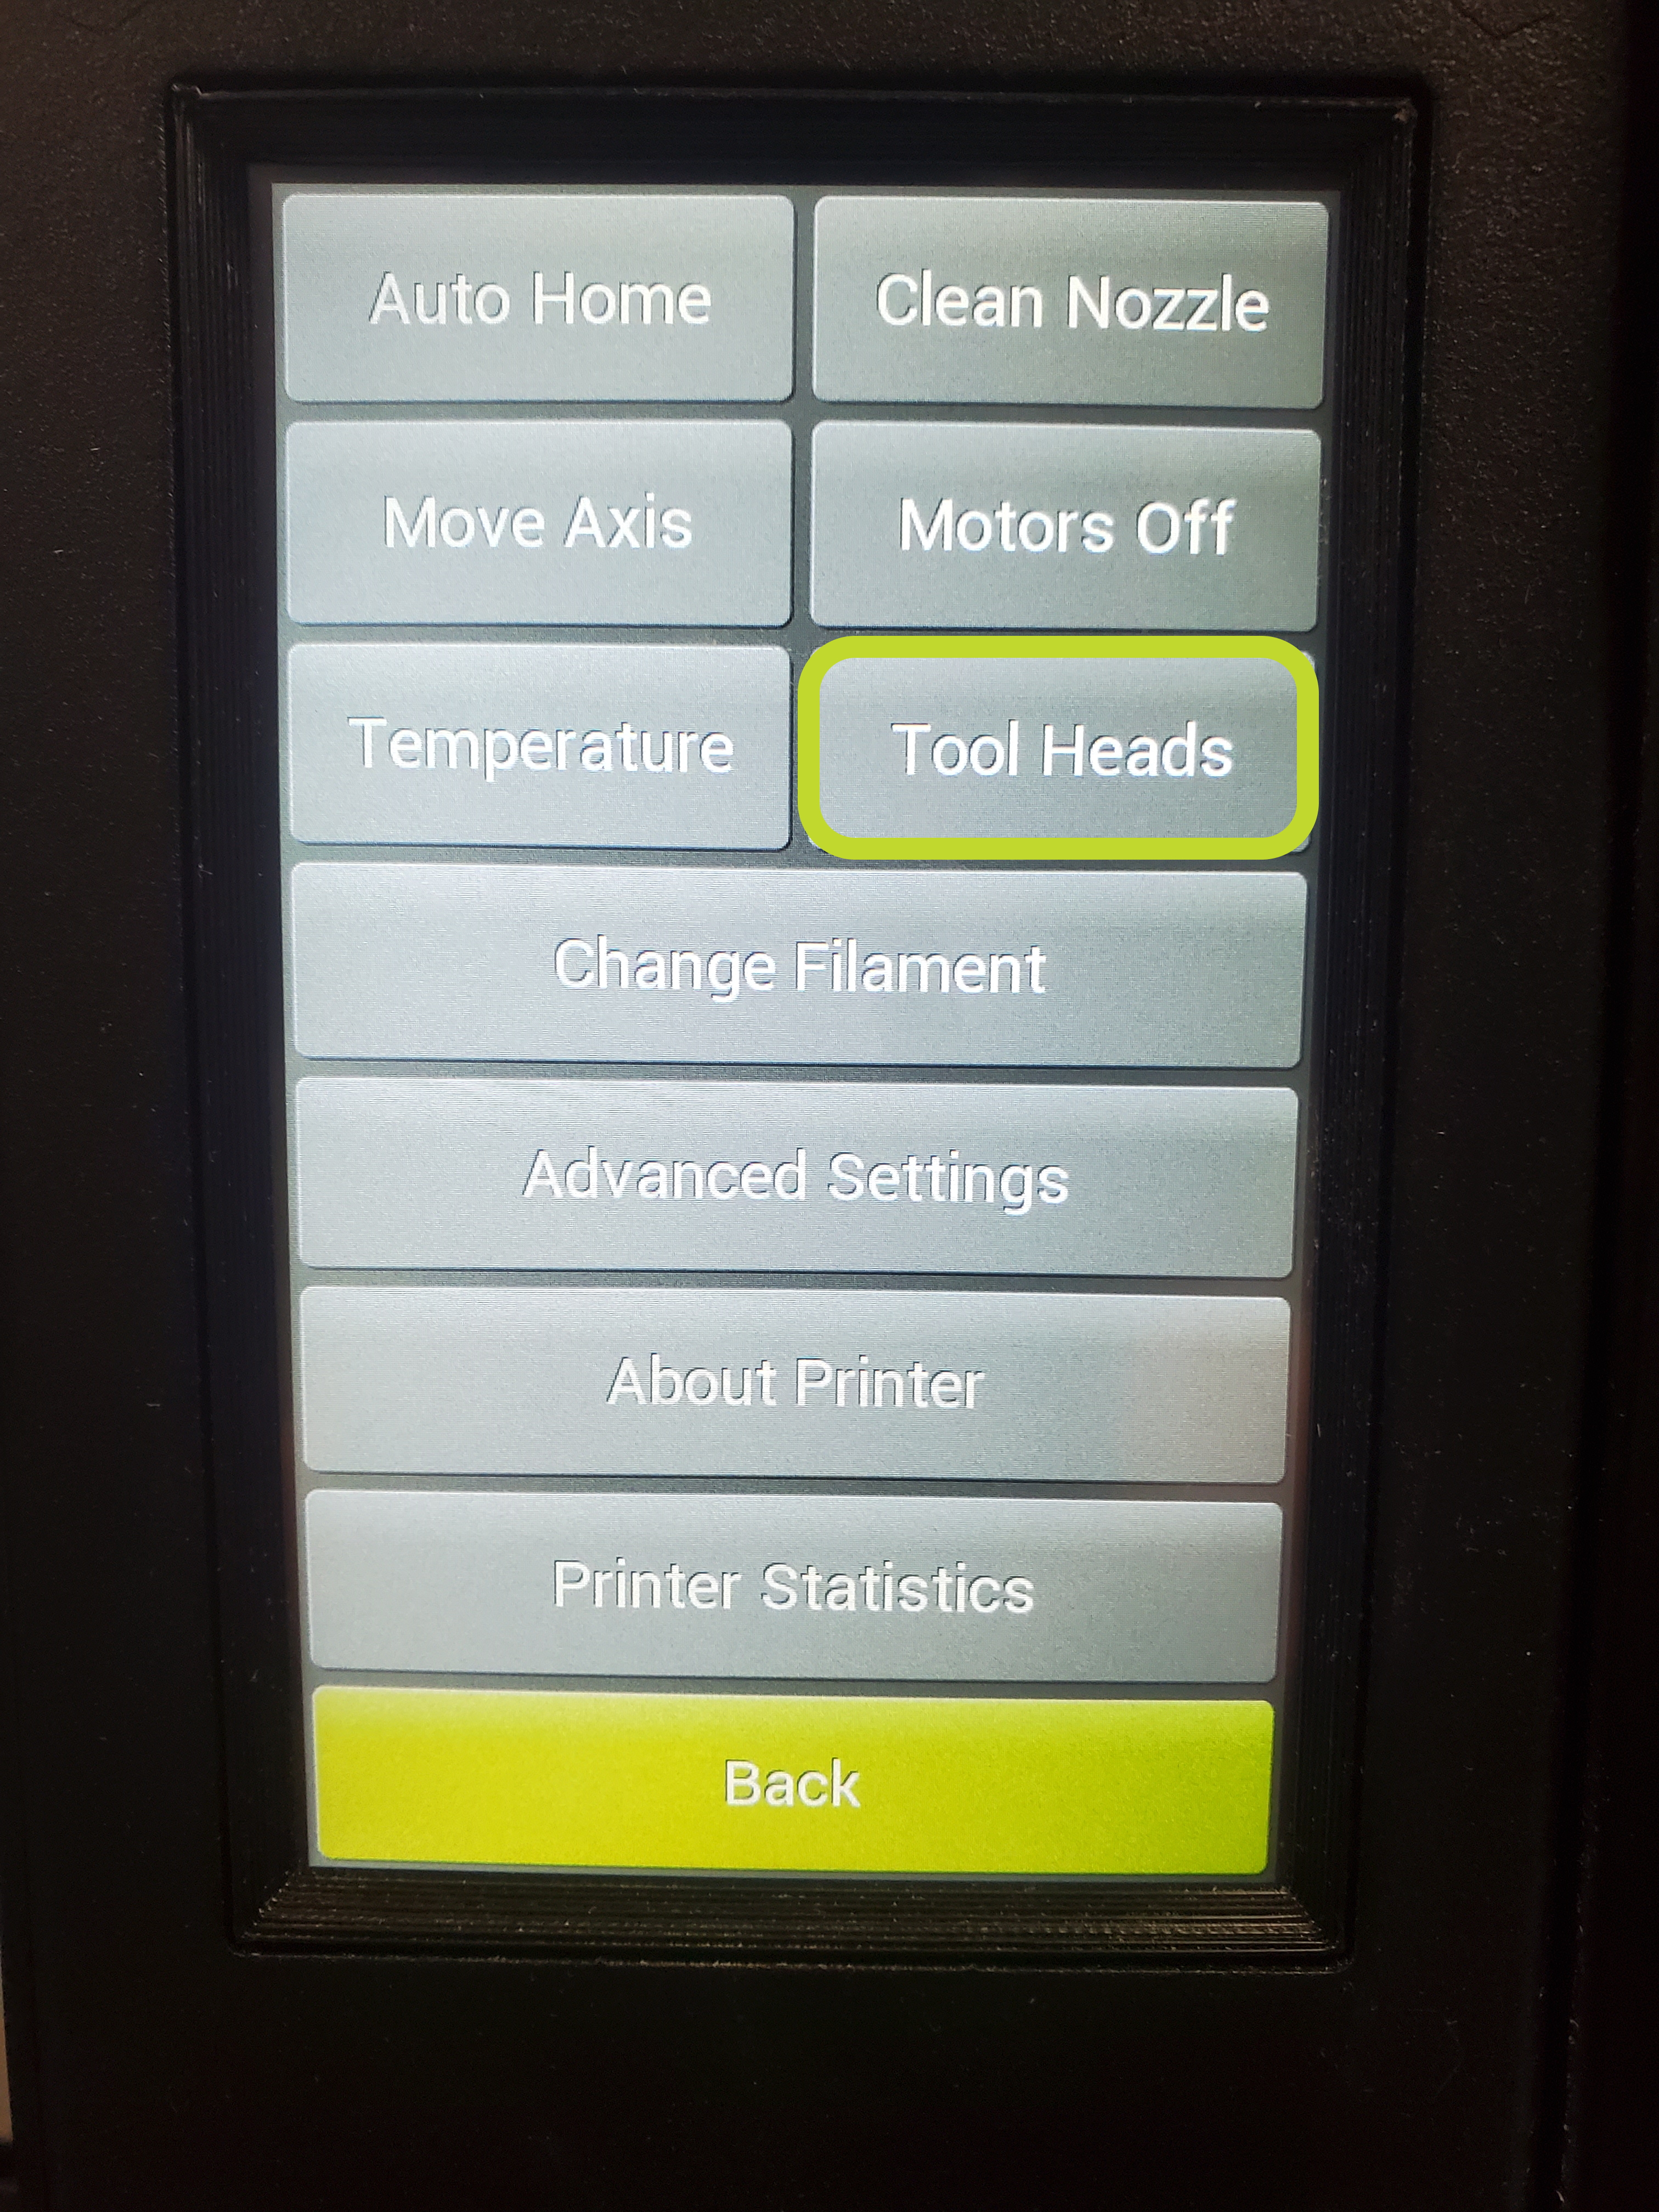
Navigate to the first menu screen on your printers LCD and select the Tool Heads menu.
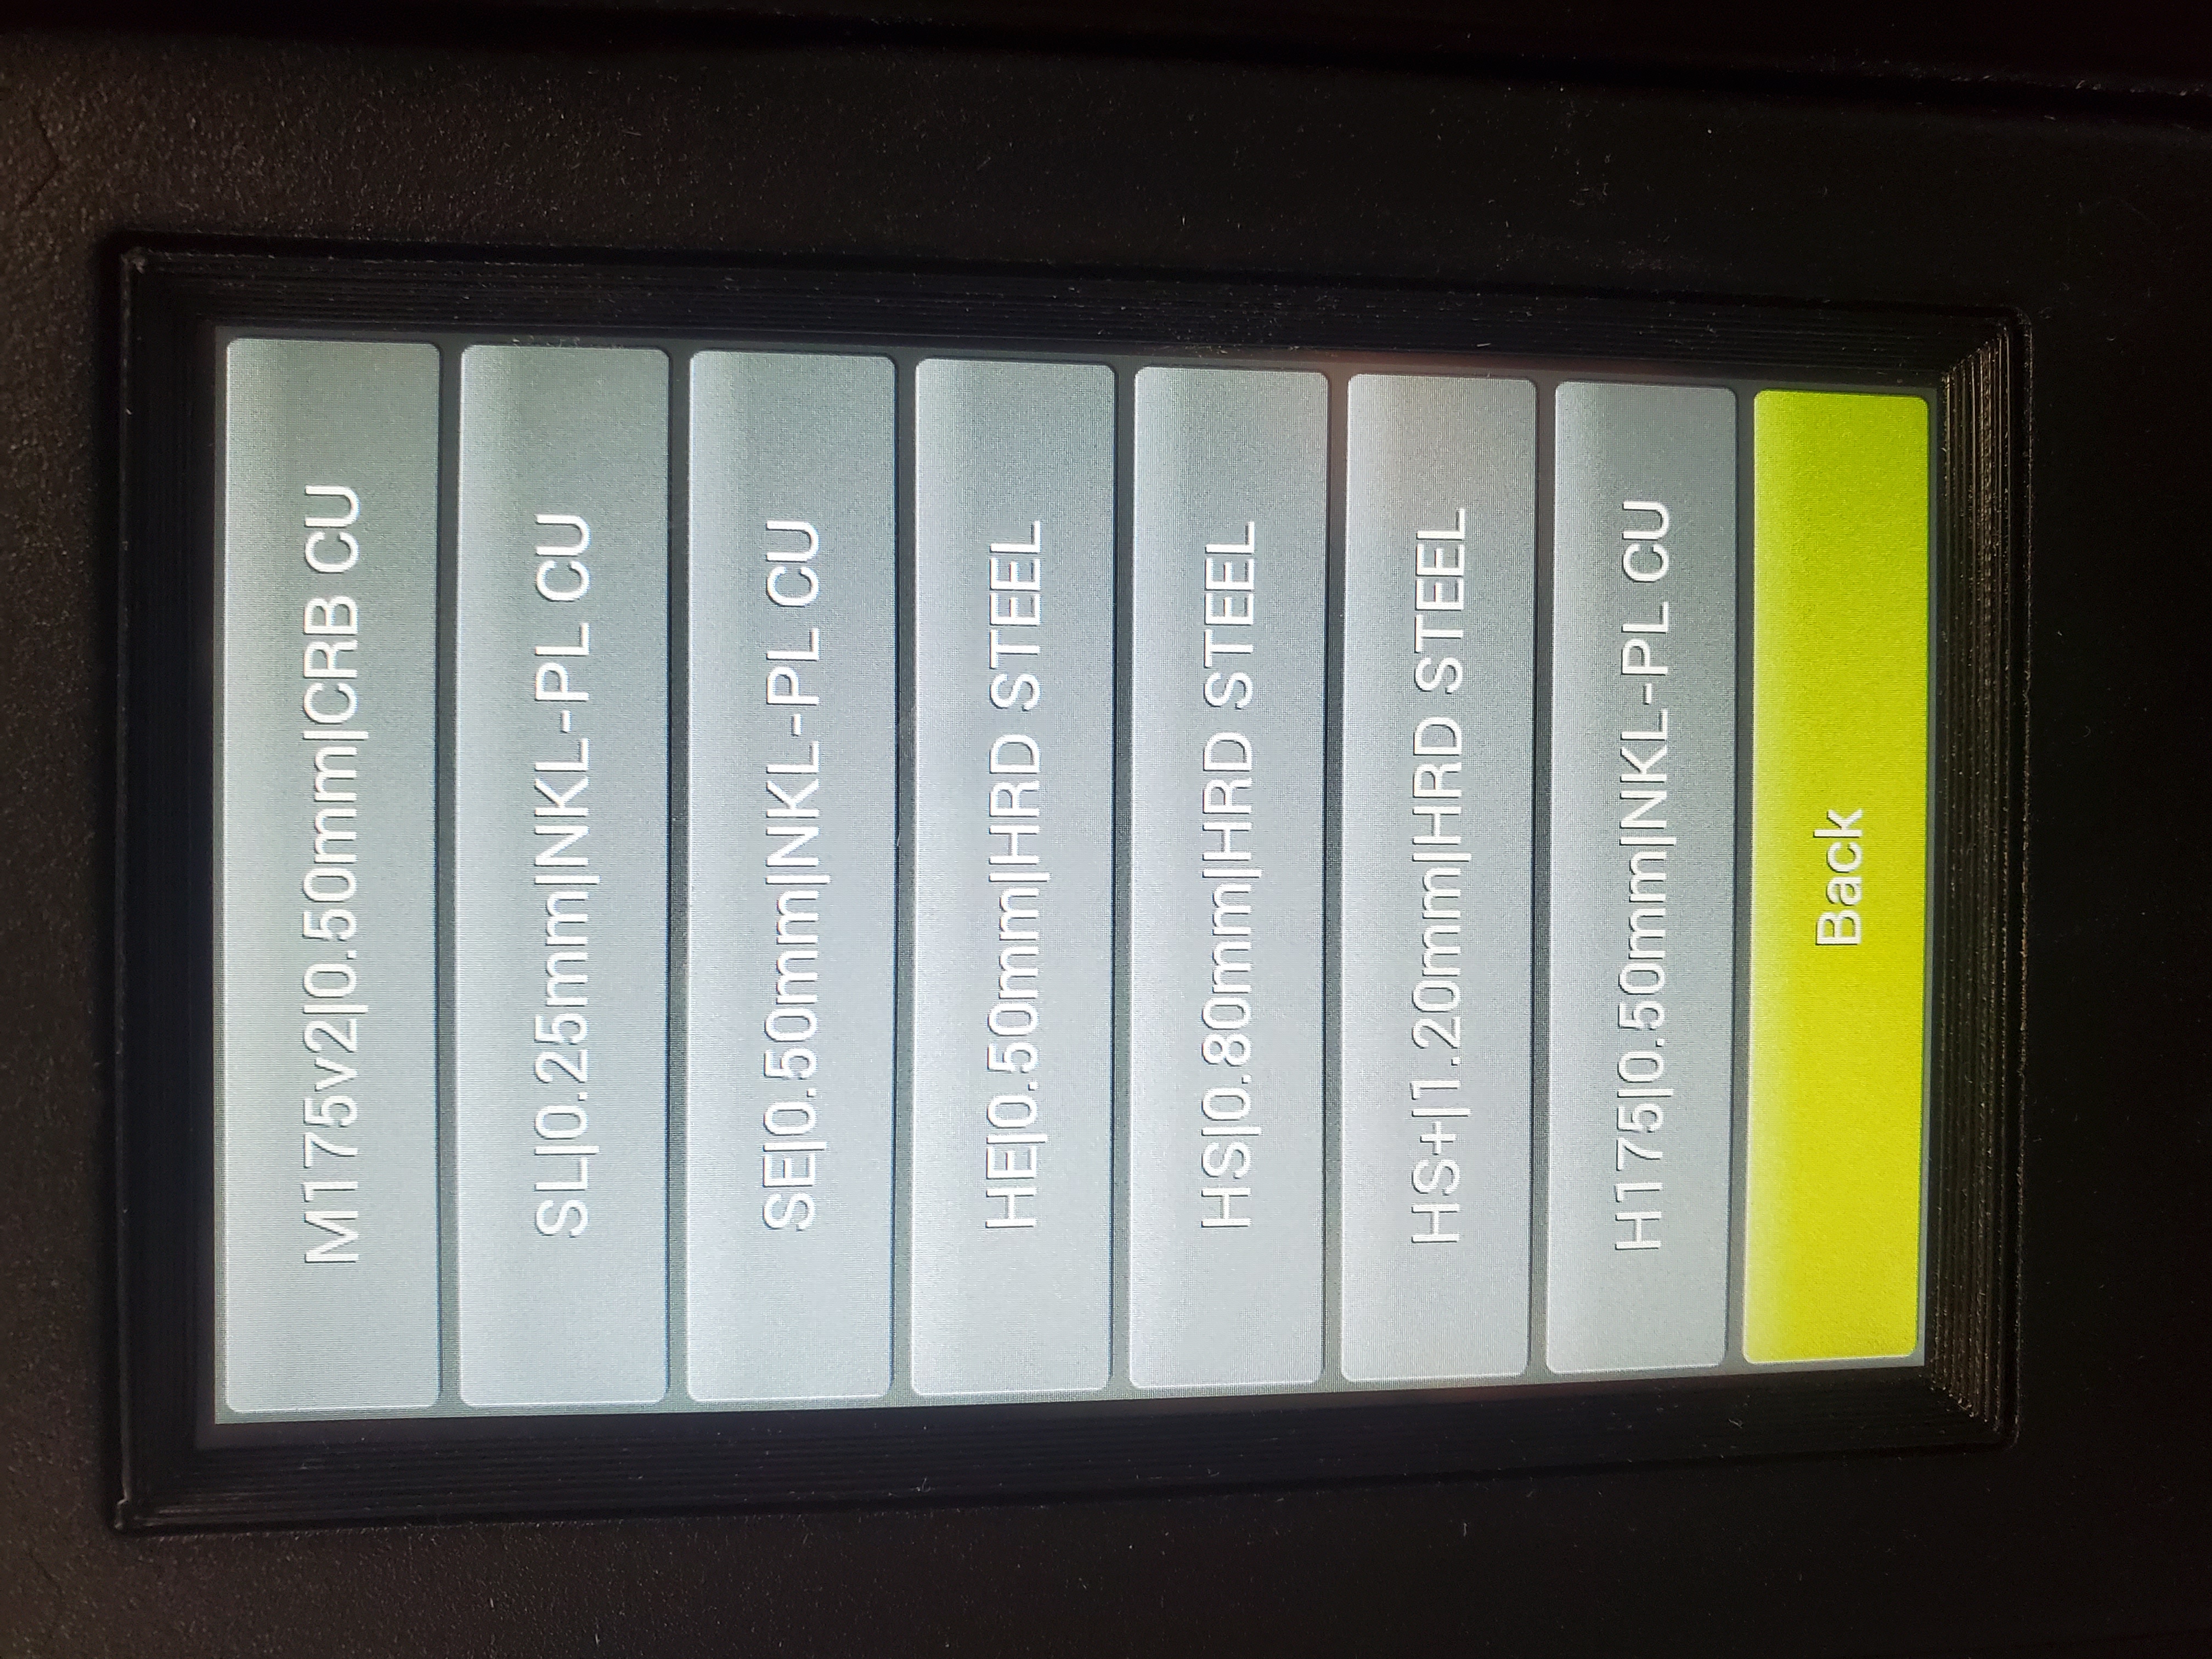
Scroll down until you find the correct tool head that corresponds with the tool head installed on your printer and select it.
15A
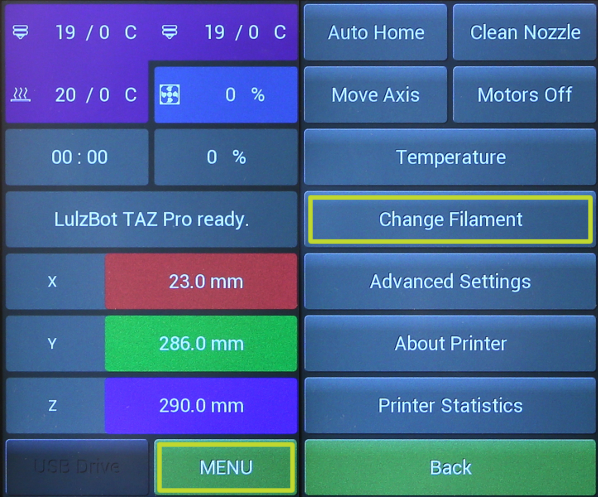
Using the LCD touchscreen press Menu, then Change Filament.
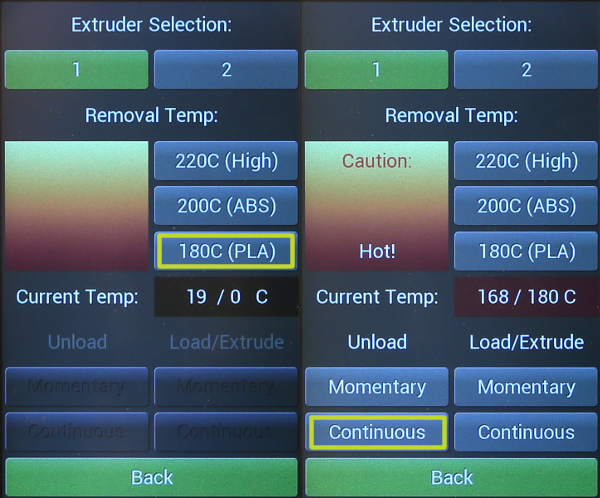
15B
On the Change Filament screen, press 180C (PLA). When the tool head has reached the target temperature, press Unload Continuous.
Note: PLA is used during quality assurance testing. When switching tool heads in the future, be sure to match the temperature to the filament that was previously used.
15C
Once filament stops retracting remove it from the tool head.
16A
Insert new filament into the toolhead while pinching the extruder idler.
16B
Press the Continuous extrude button on the touch screen LCD and let filament feed through the tool head until it extrudes smoothly.

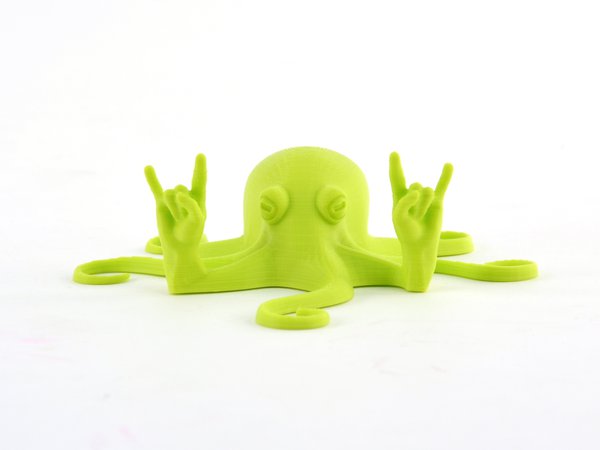
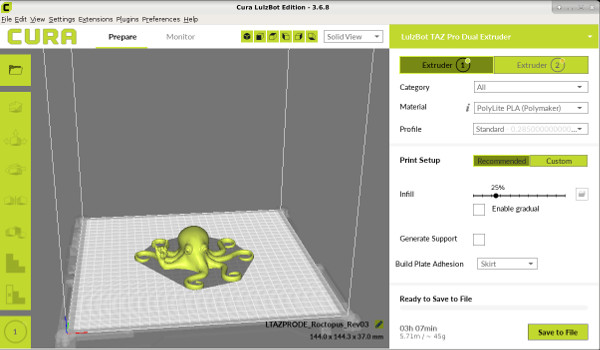
You've now finished installation and are ready to start printing! Try performing a test print, such as the Rock2pus.
If you encounter issues please contact Technical Support by emailing Support@LulzBot.com, or by calling +1-701-809-0800.