Project Dashboard Maintenance and Repairs Leveling the X-Axis Workflow

1 Required Tools

  • Tape Measure
Required Tools

2 Power Down

  • Power off and unplug your 3D printer.
Power Down

3 Measure Current Position

  • Measure from the X-axis smooth rod to the Z upper connectors on the right and left side
Left Axis Measurment Locations
Right Axis Measurment Locations

4 Make Adjustment

  • If the measurements are not equal, manually rotate the right threaded rod clockwise/counterclockwise to bring the X-axis to level
Rotate the Z Axis

5 Verify Measurement

  • Verify both the left hand side and right hand side measurements are equal.
Right Axis Measurements
Left Axis Measurements

6 Test Z Axis Movement

  • Plug in and power on your 3D printer
  • Use the Graphical LCD Controller, or GLCD, to move the Z-axis by pressing in on the controller knob and selecting: Movement > Auto Home
  • After homing, move the Z-axis to the top of the Z-axis travel height through the GLCD: Movement > Move Axis > 10mm > Z-axis > 270
LCD Menu

7 Perform a Test Print

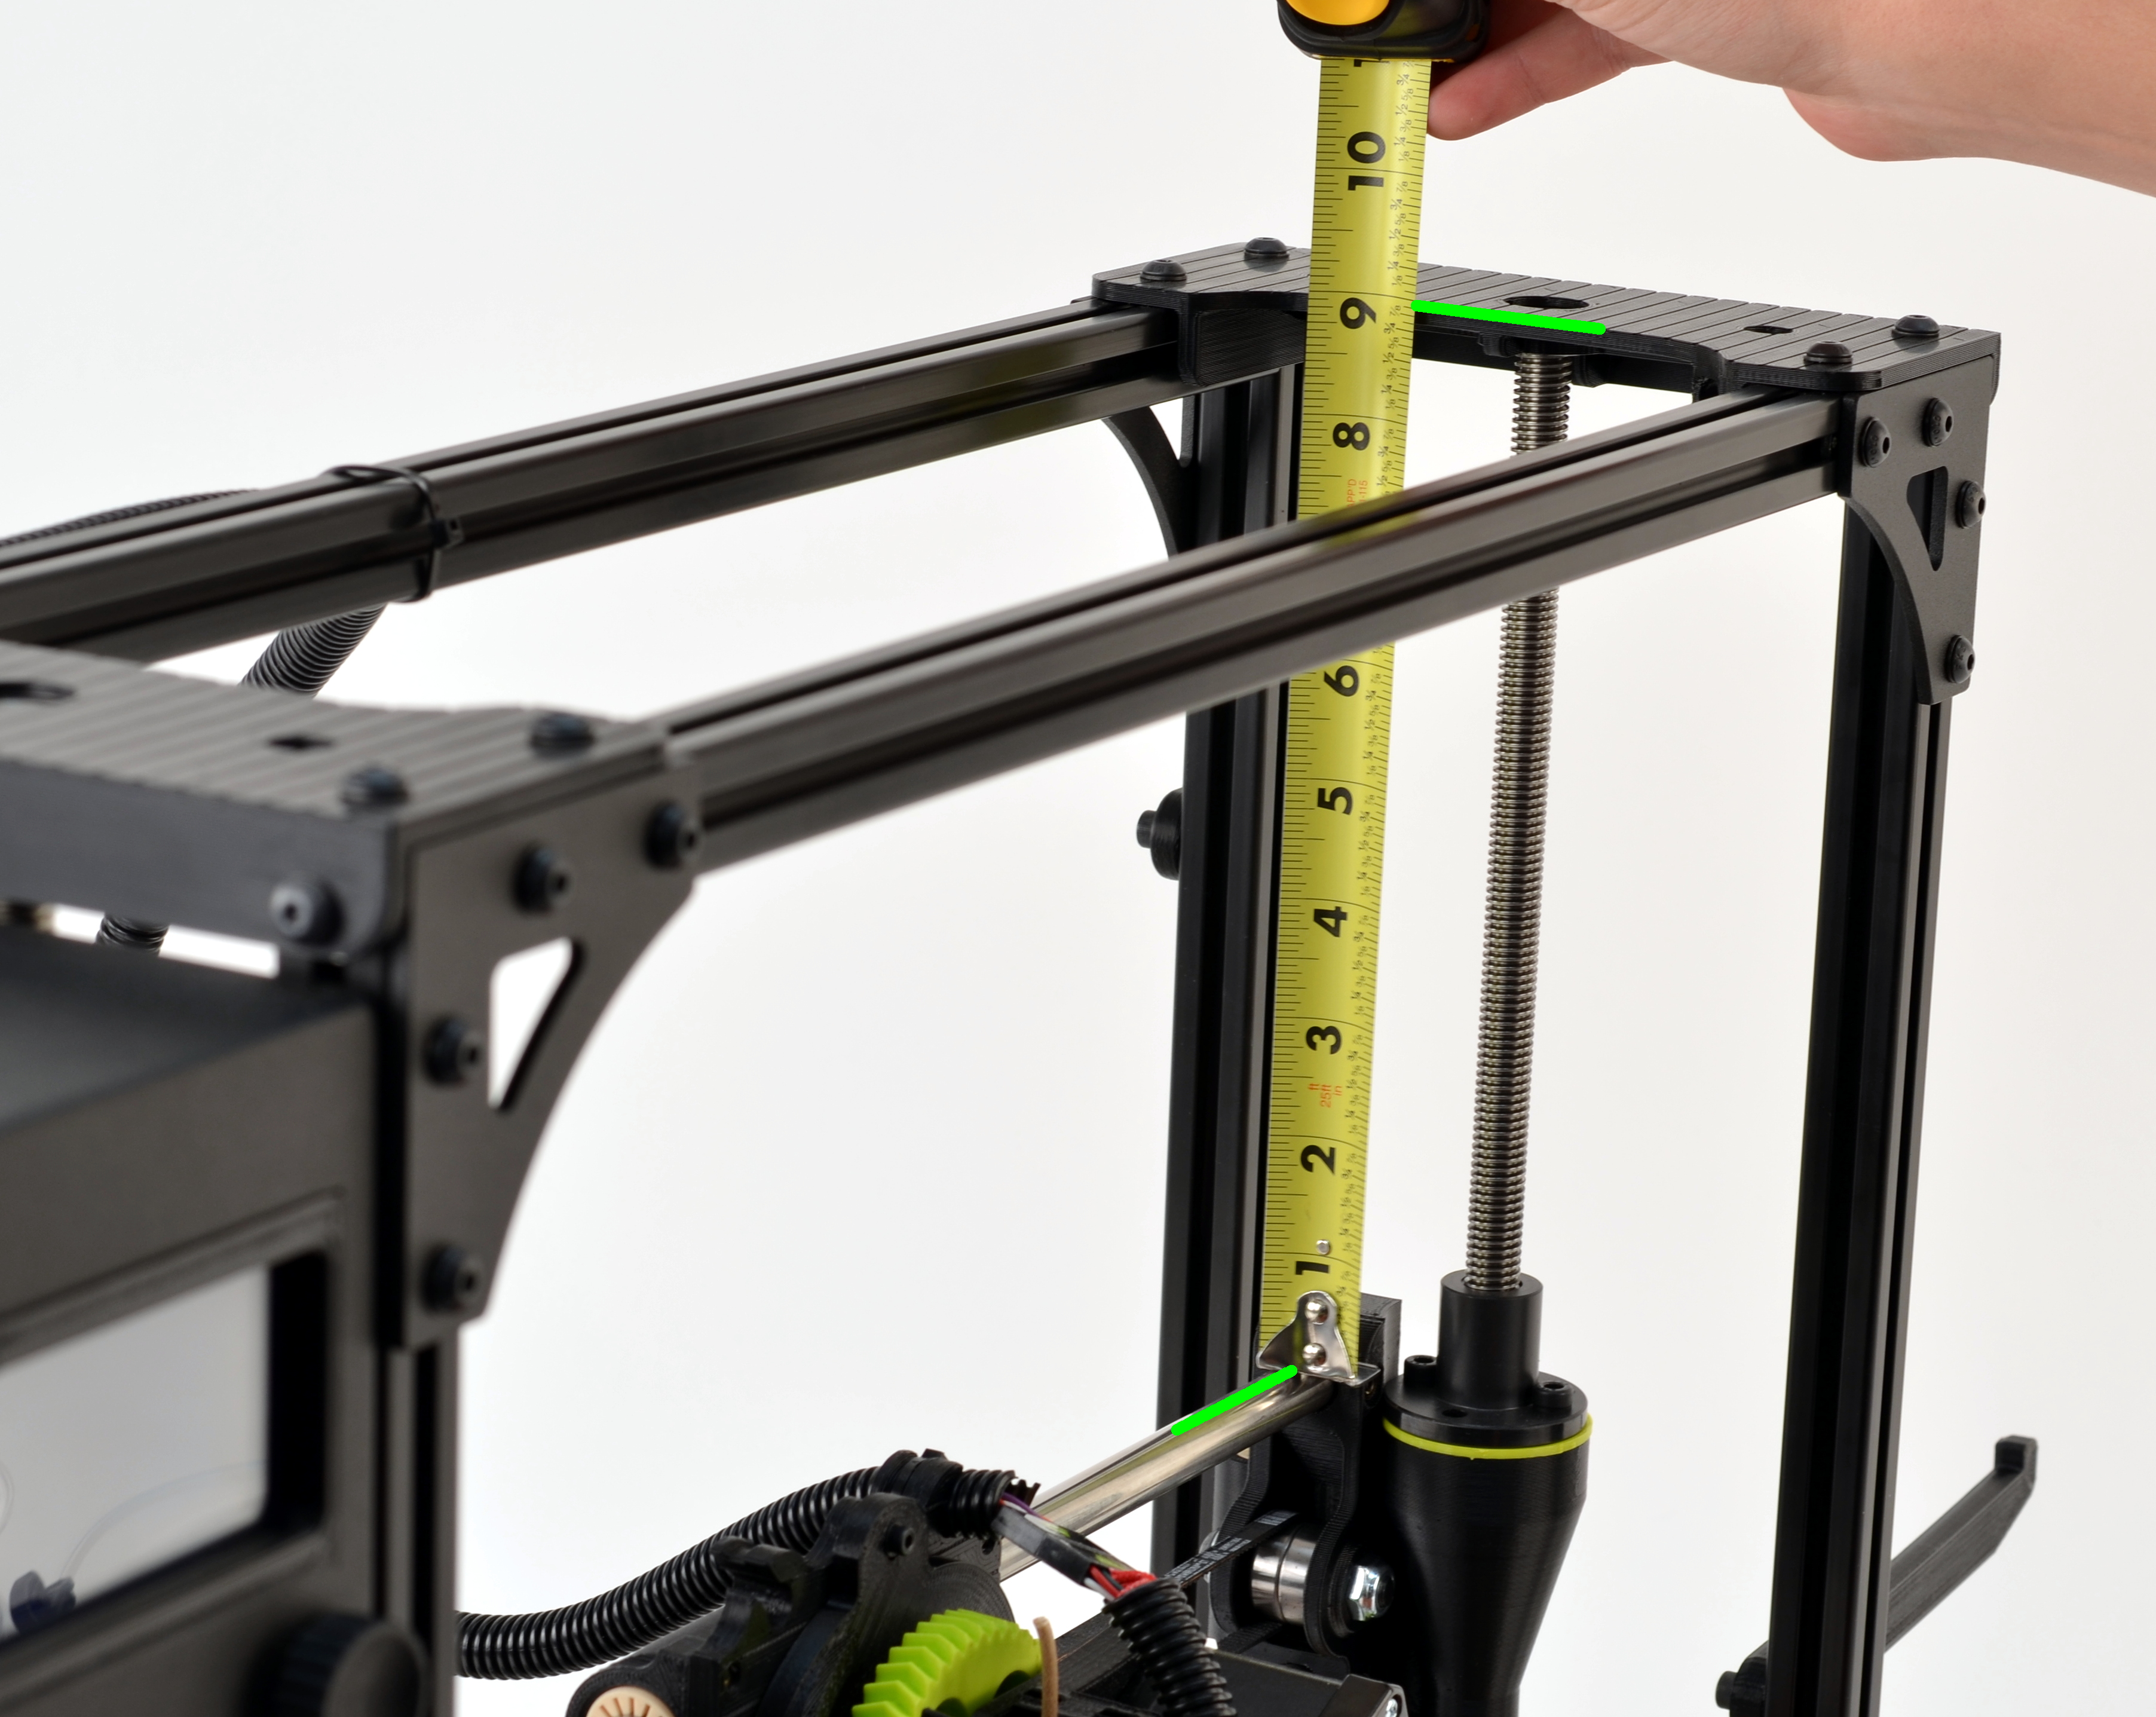
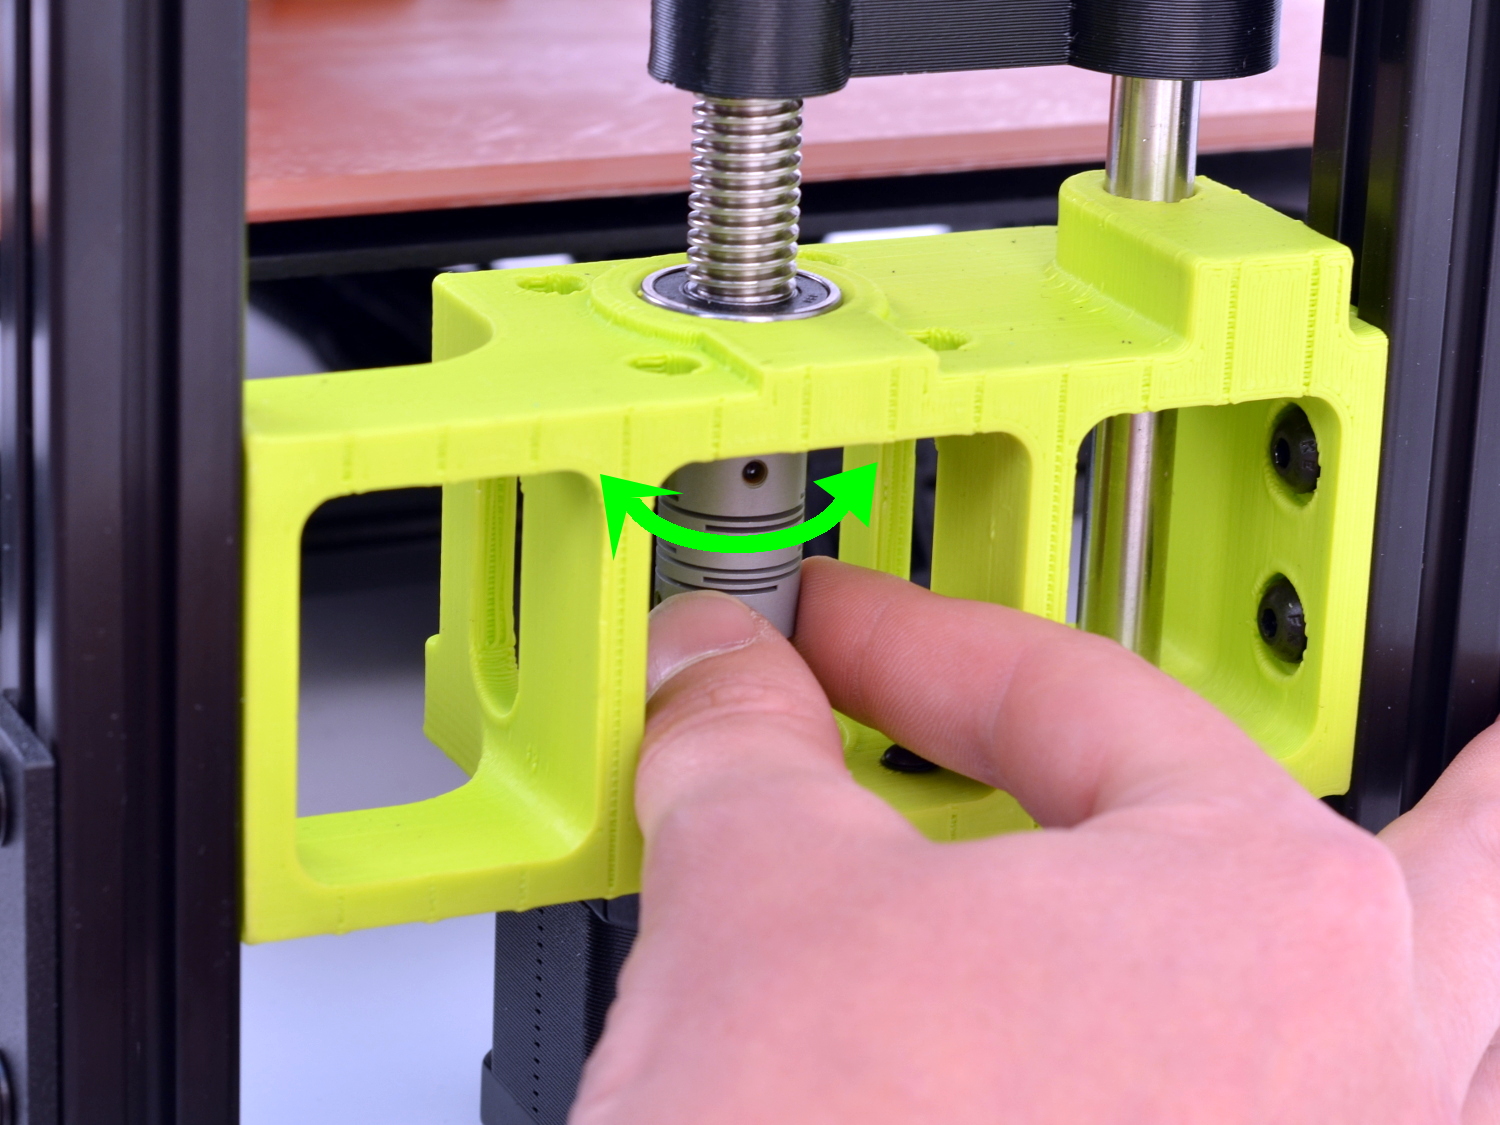
  • If the Z-axis moves smoothly during homing and also back up to the top of the printer, perform a test print. Follow the First Print section of the Quick Start Guide included with your TAZ 3D printer.

  • If you cannot home or move your Z-axis up after leveling, please contact our support team at Support@LulzBot.com or +1-970-377-1111

Done! Take me home