Open HardwareAssembly Instructions
Guides for installation and assembly of the LulzBot line of products made by FAME 3D LLC.
Guides for installation and assembly of the LulzBot line of products made by FAME 3D LLC.
Components:
Tools:
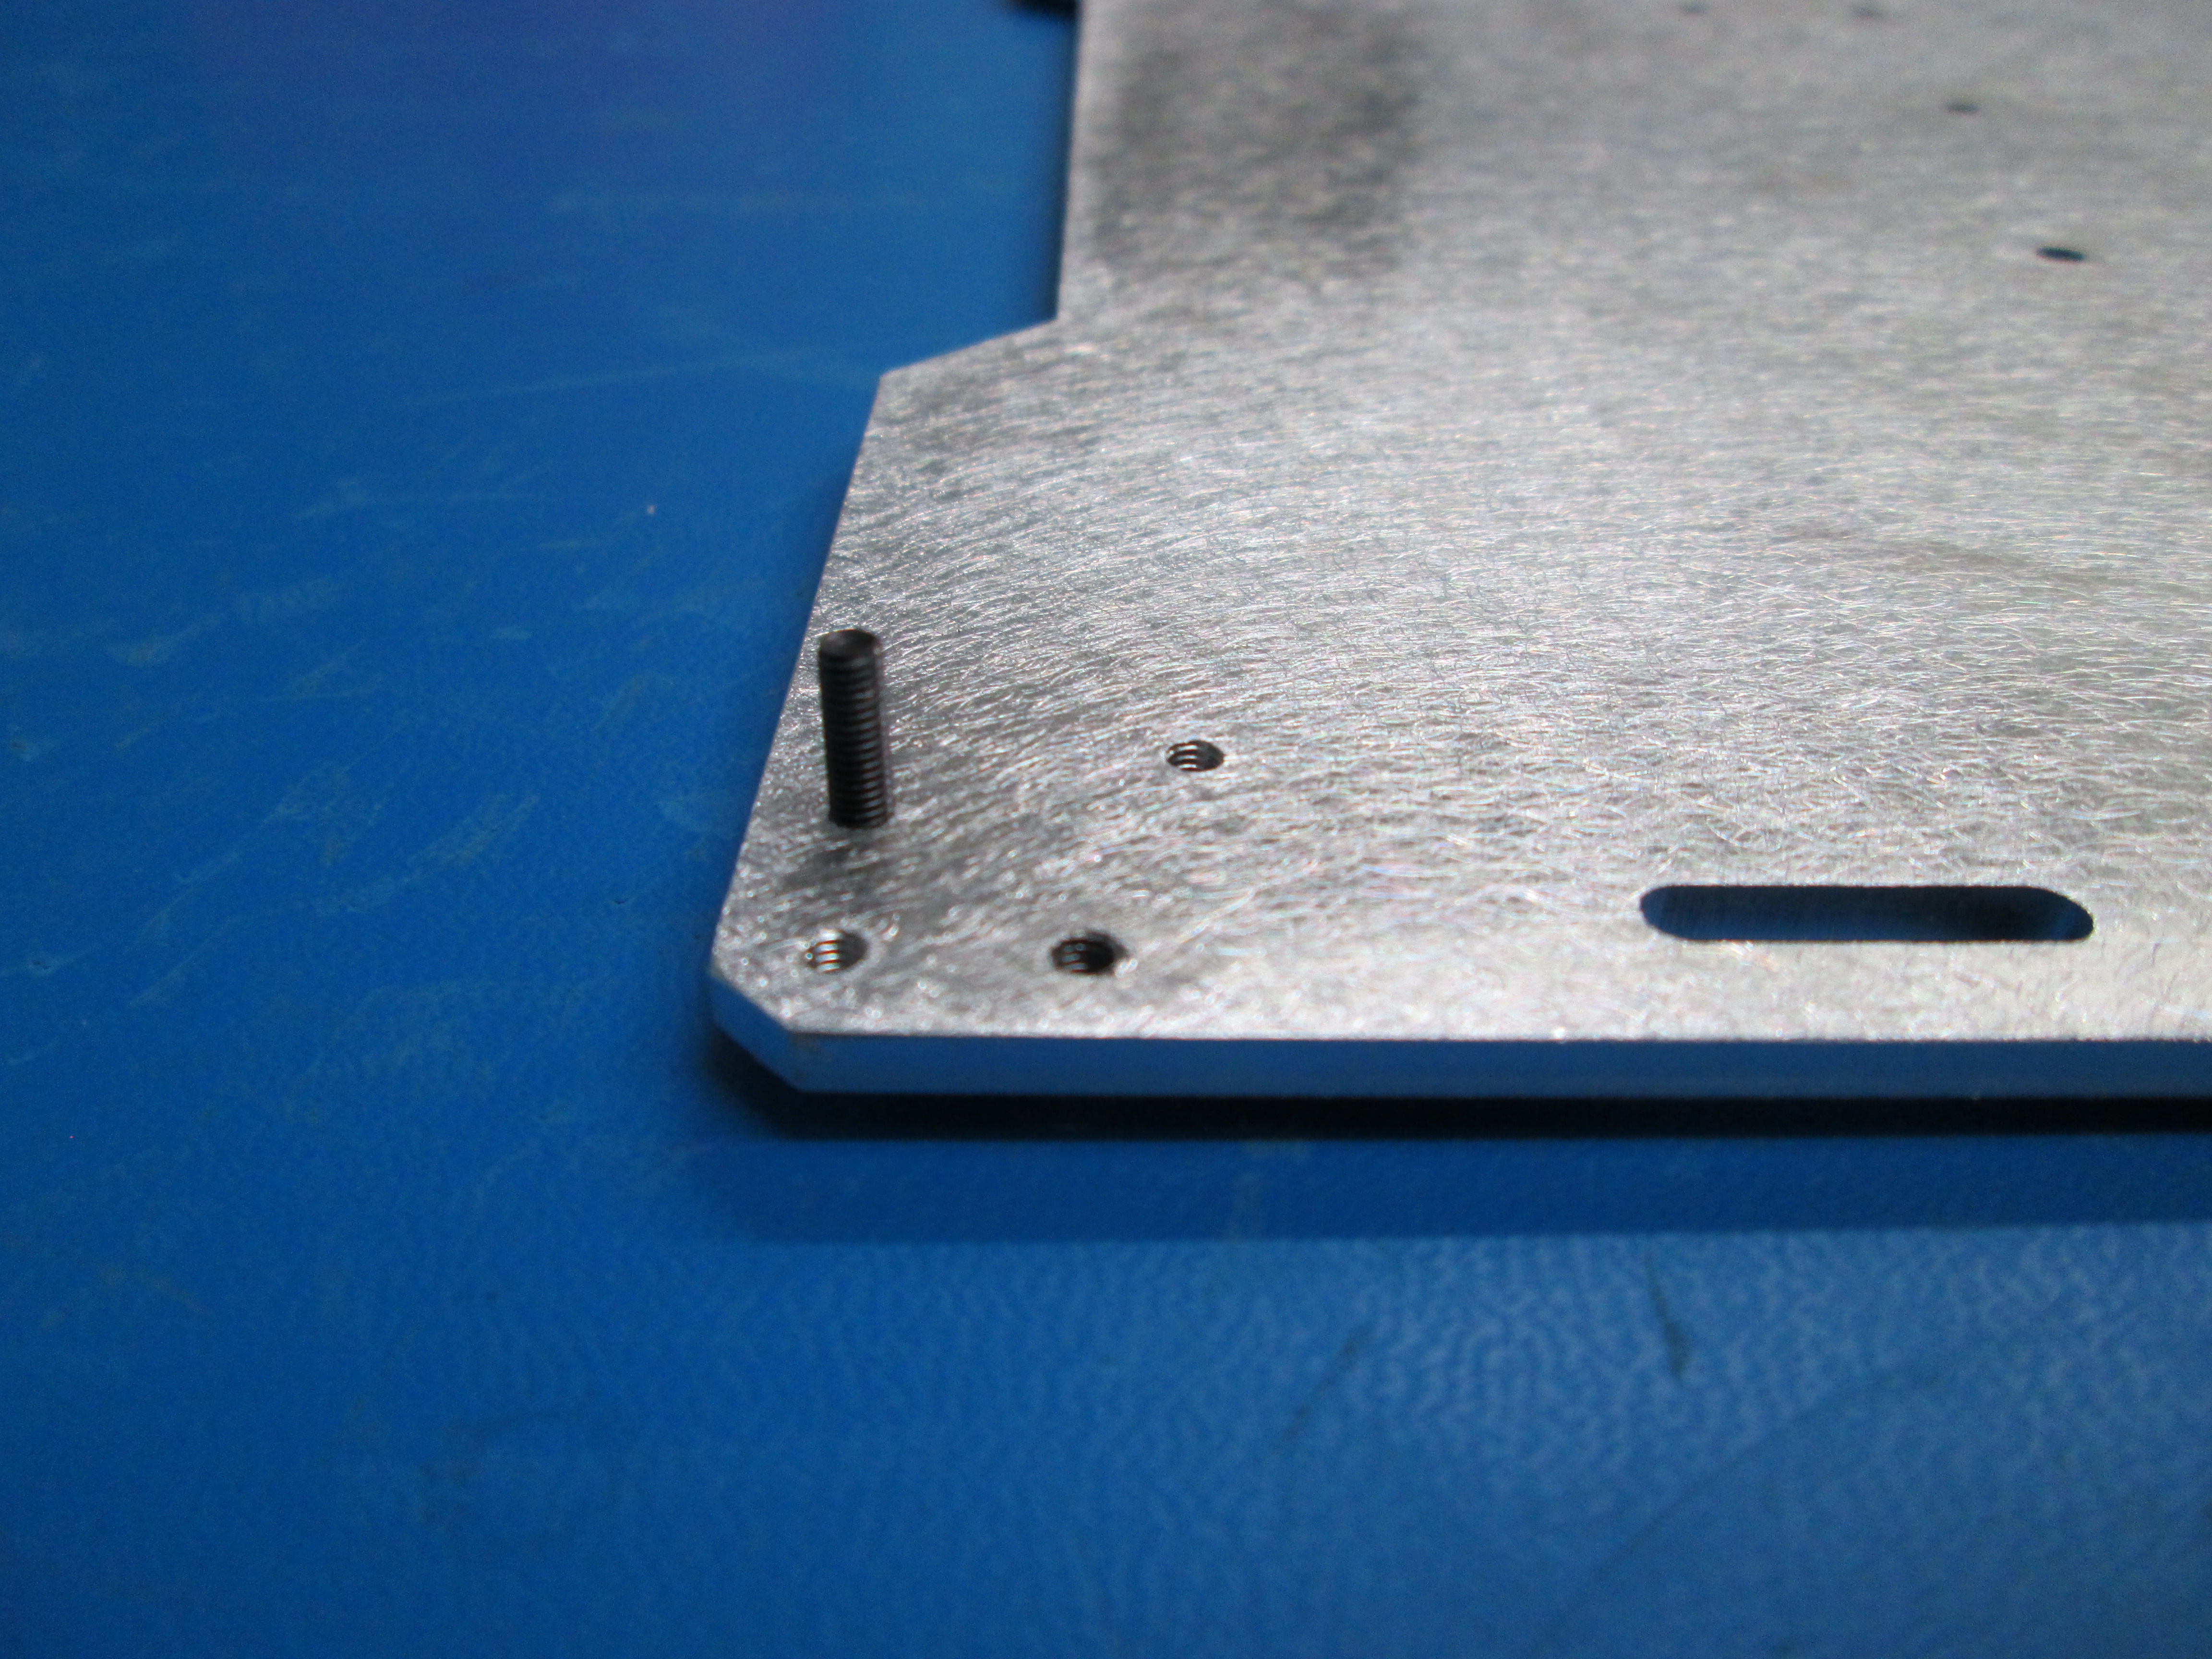
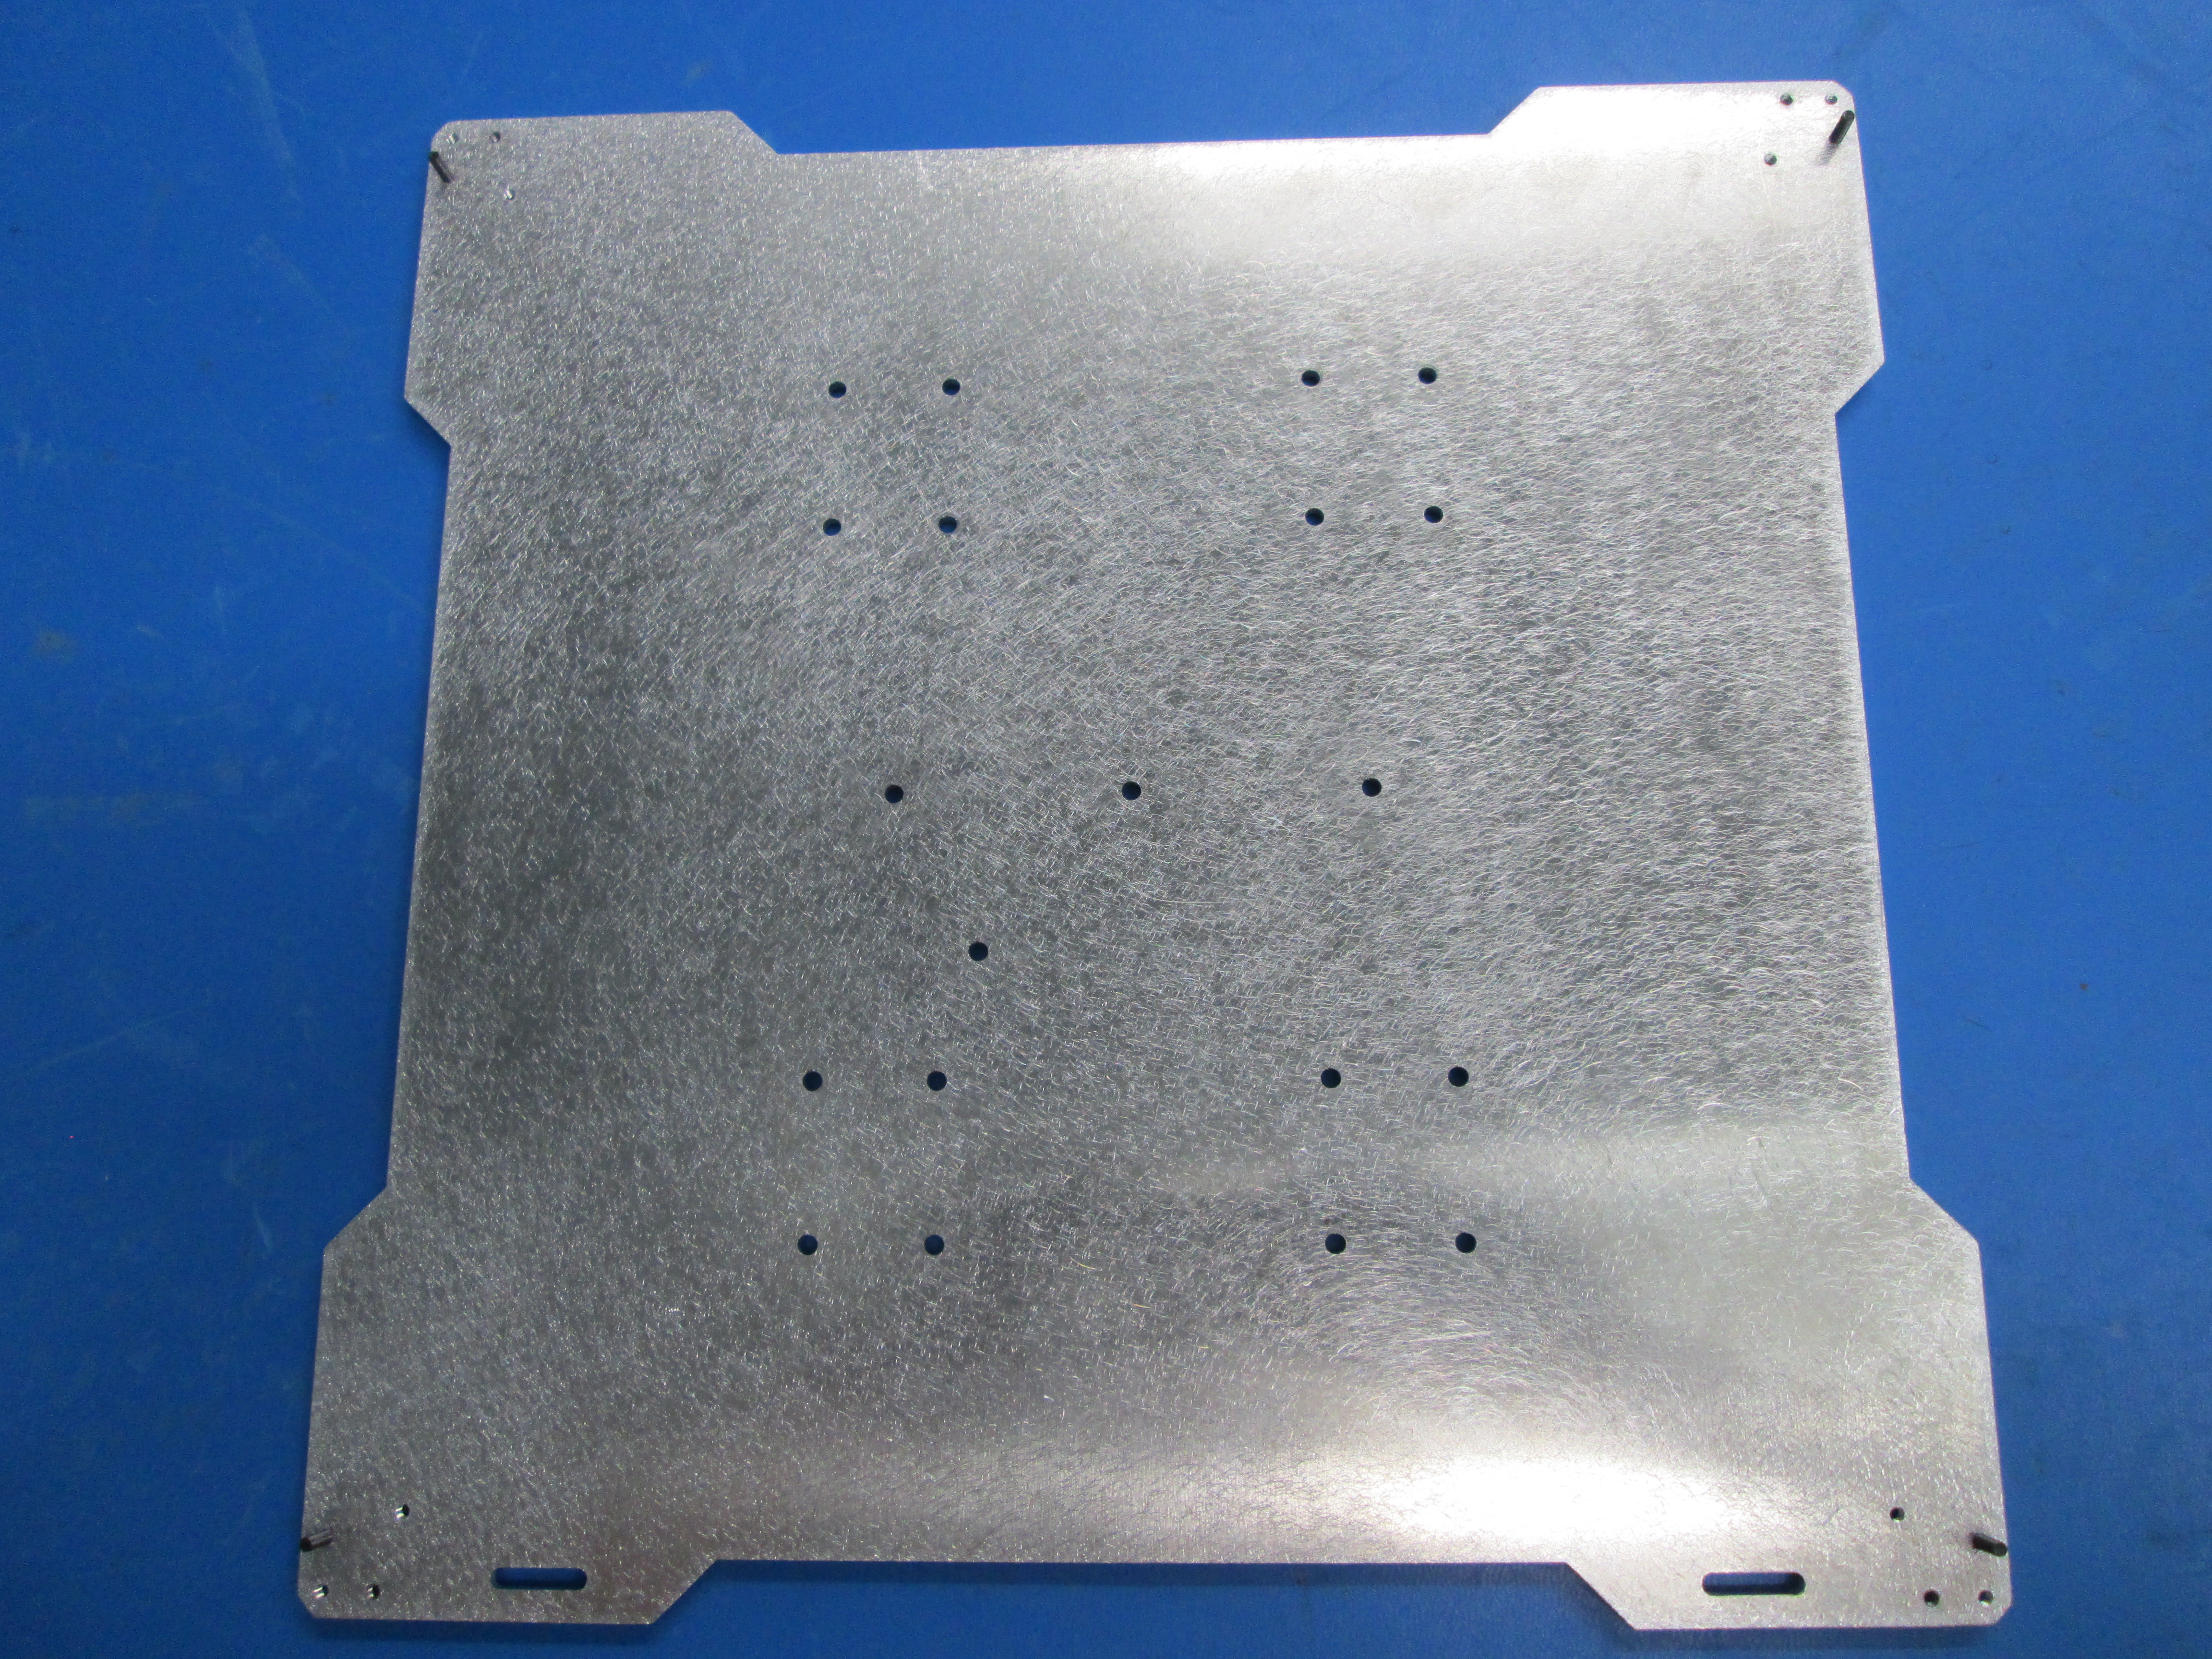
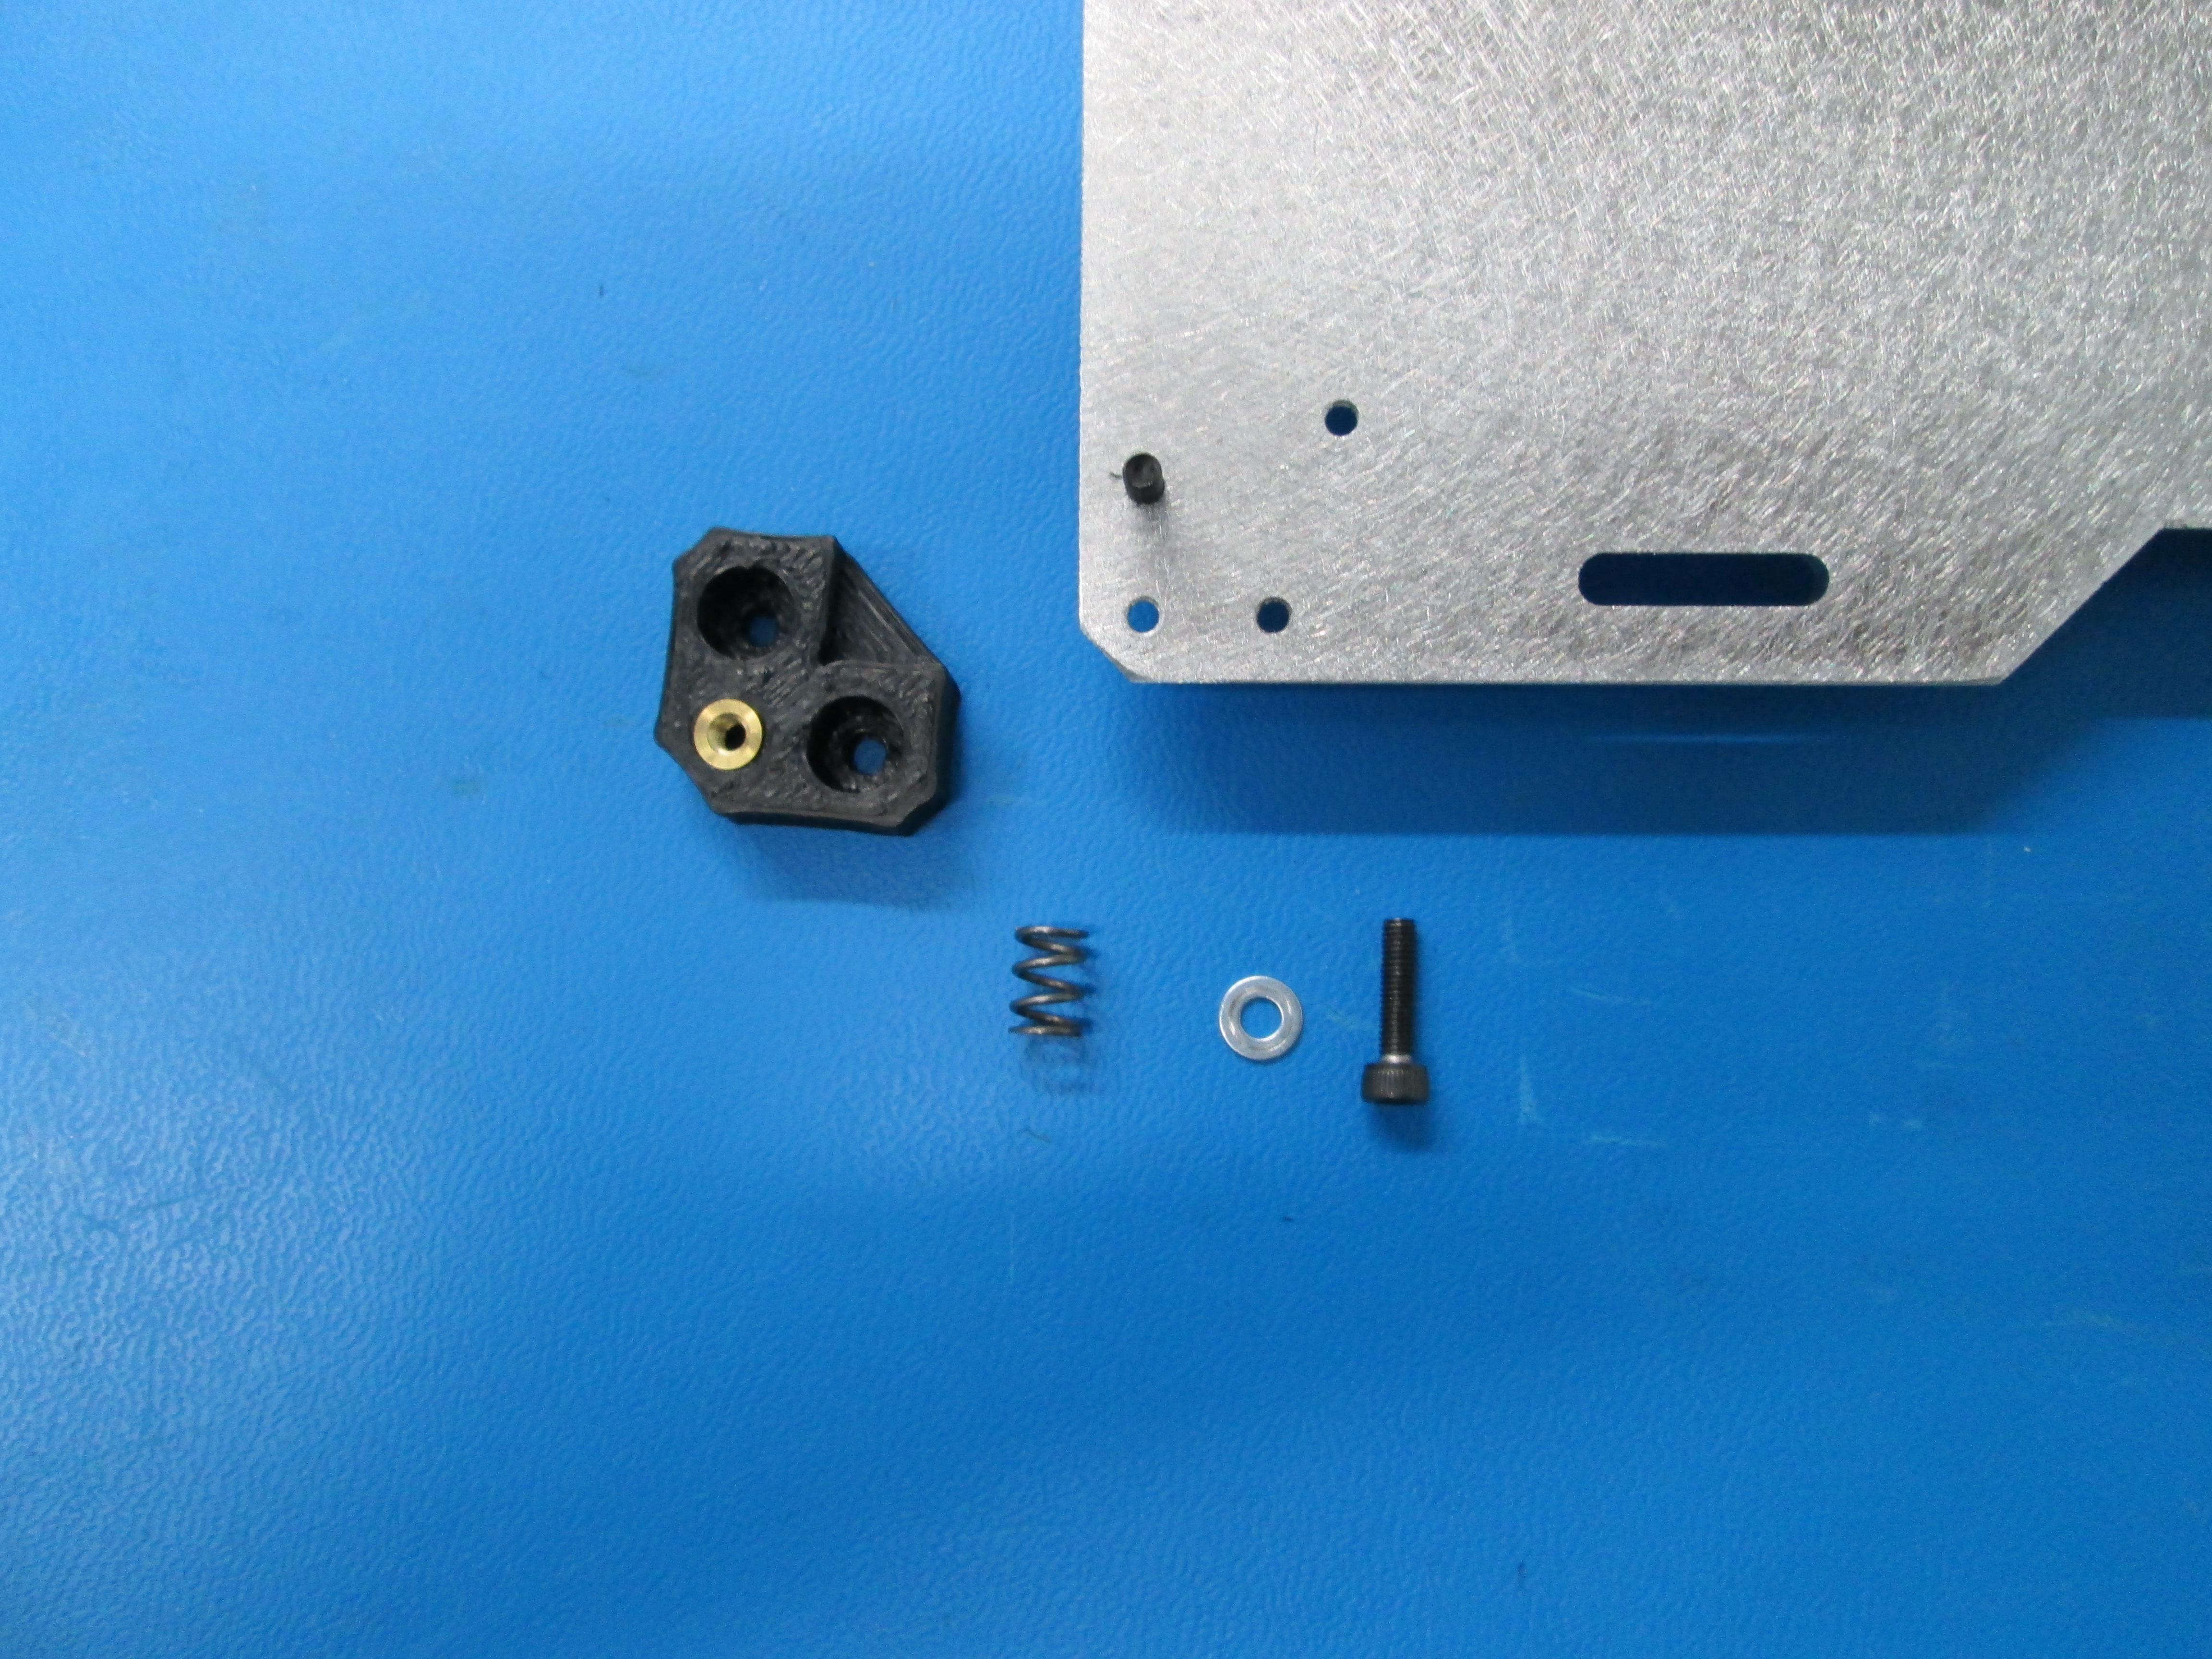
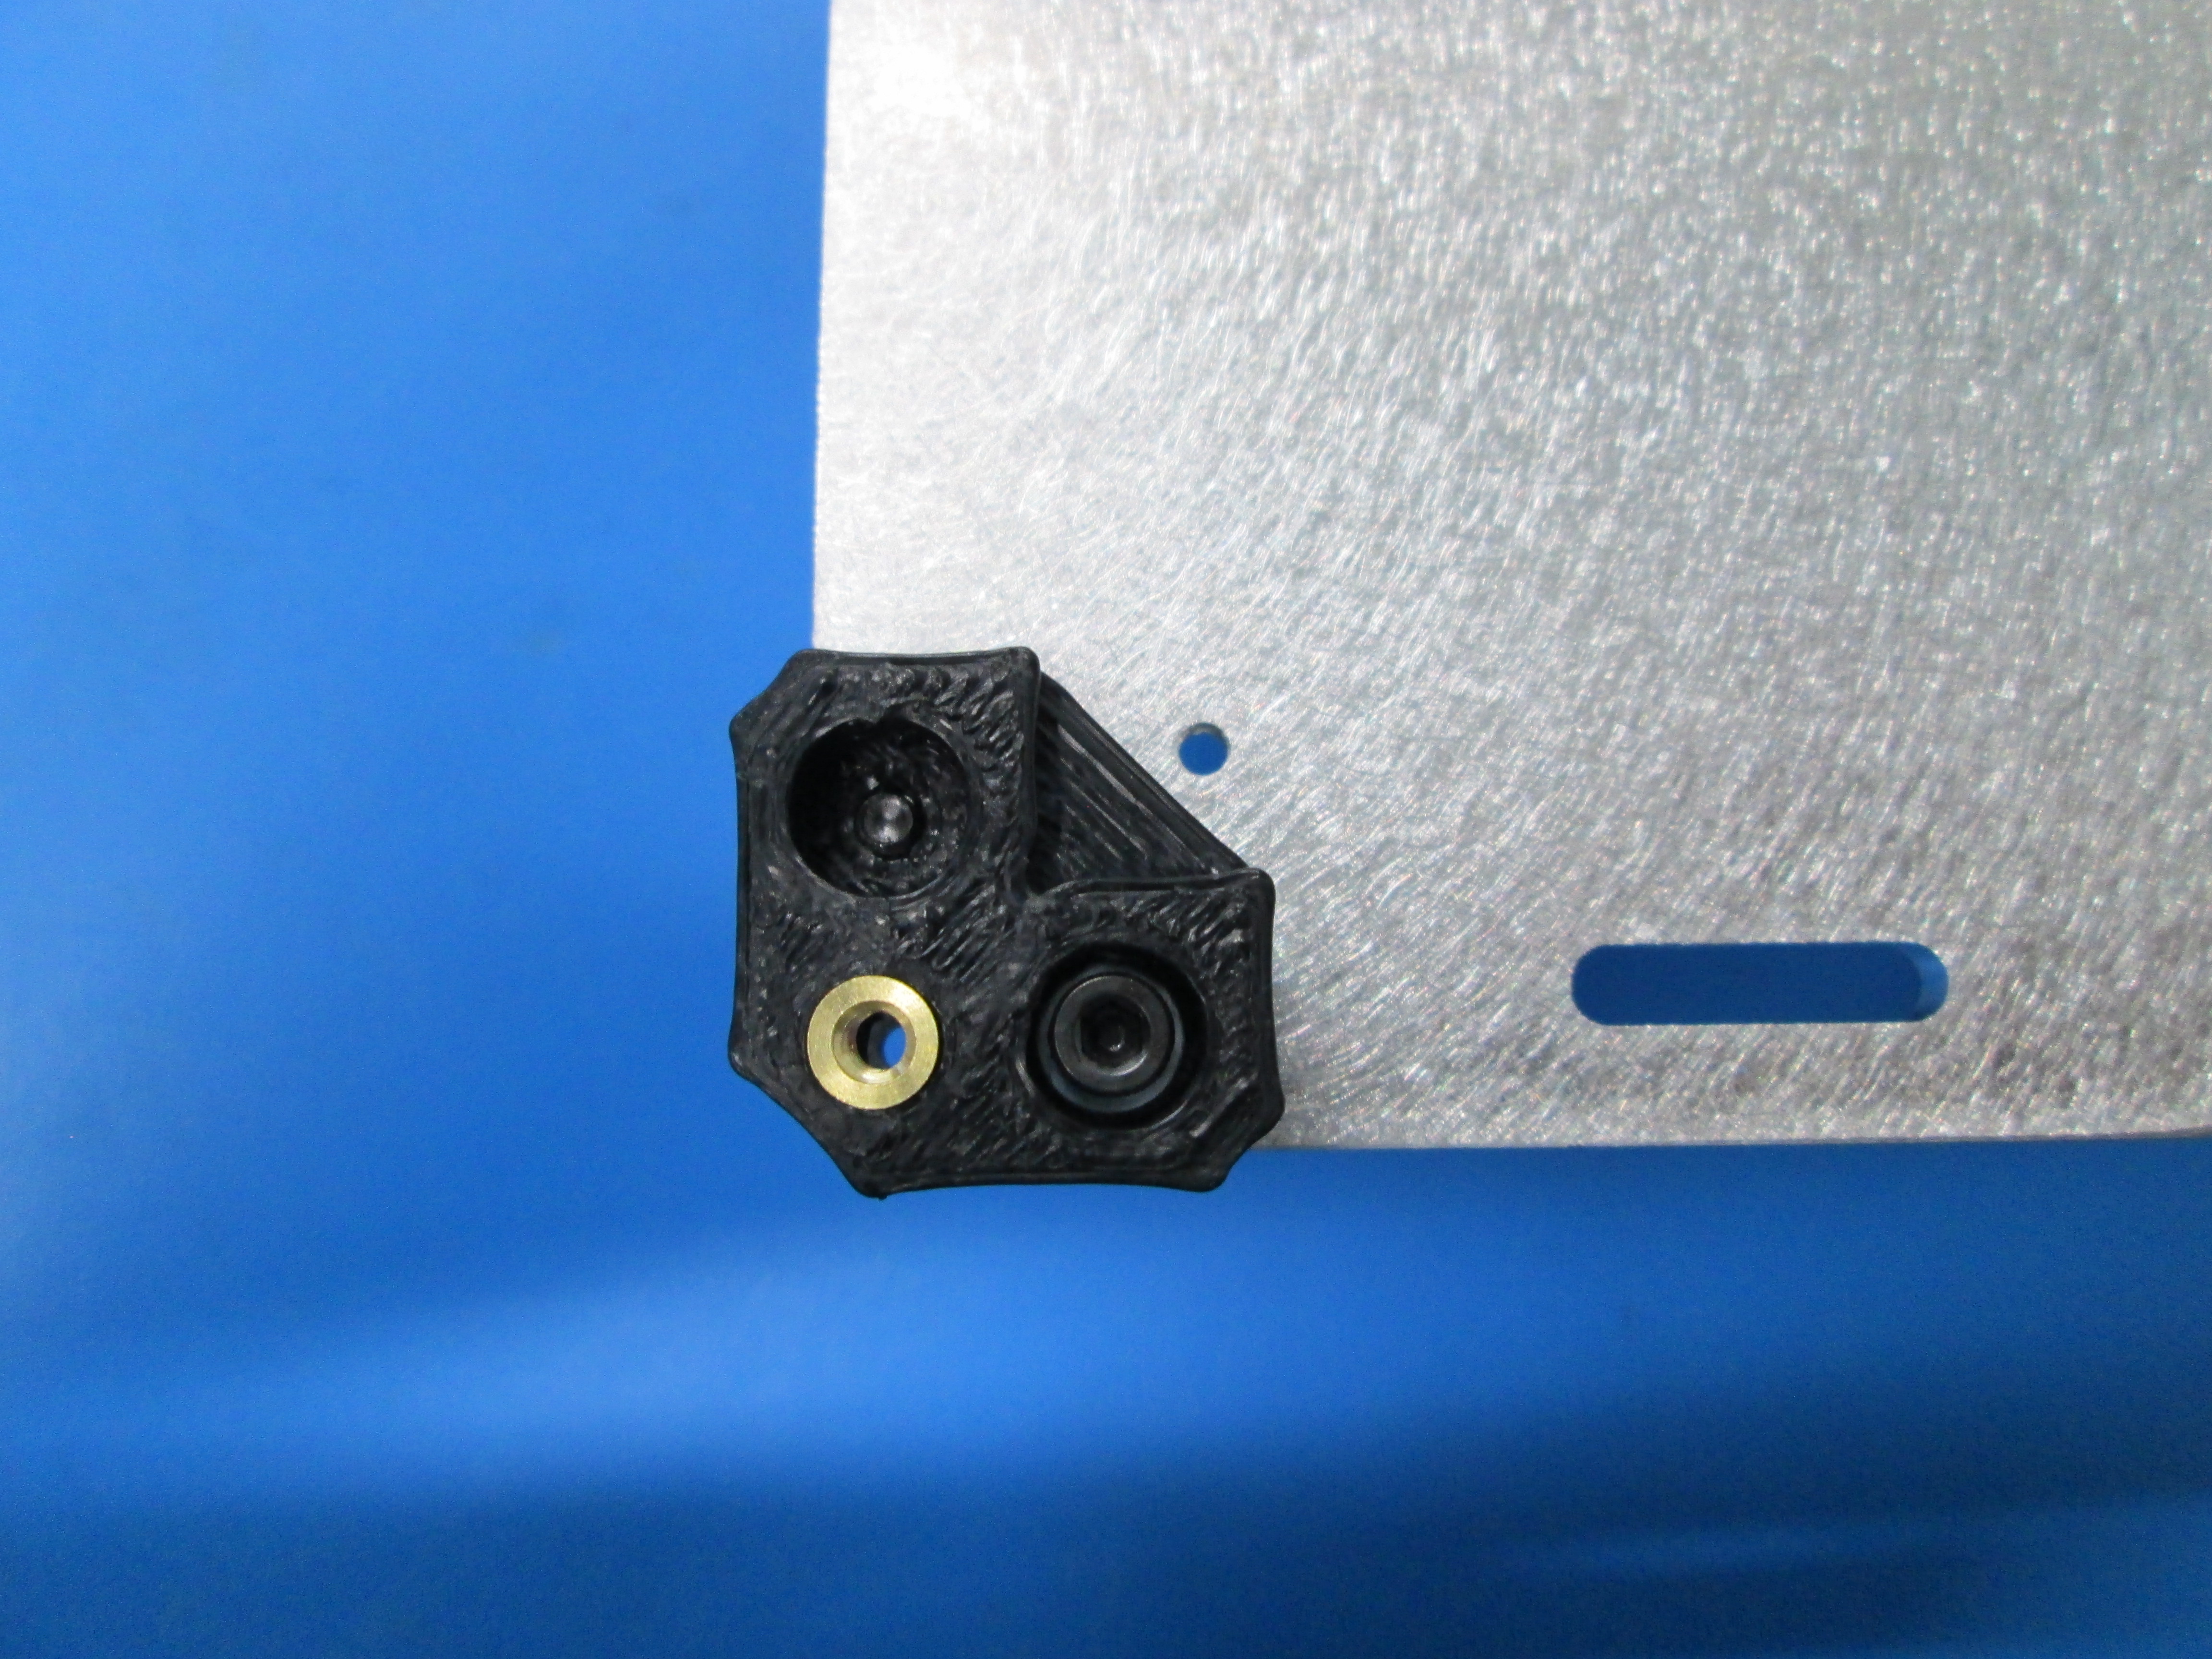
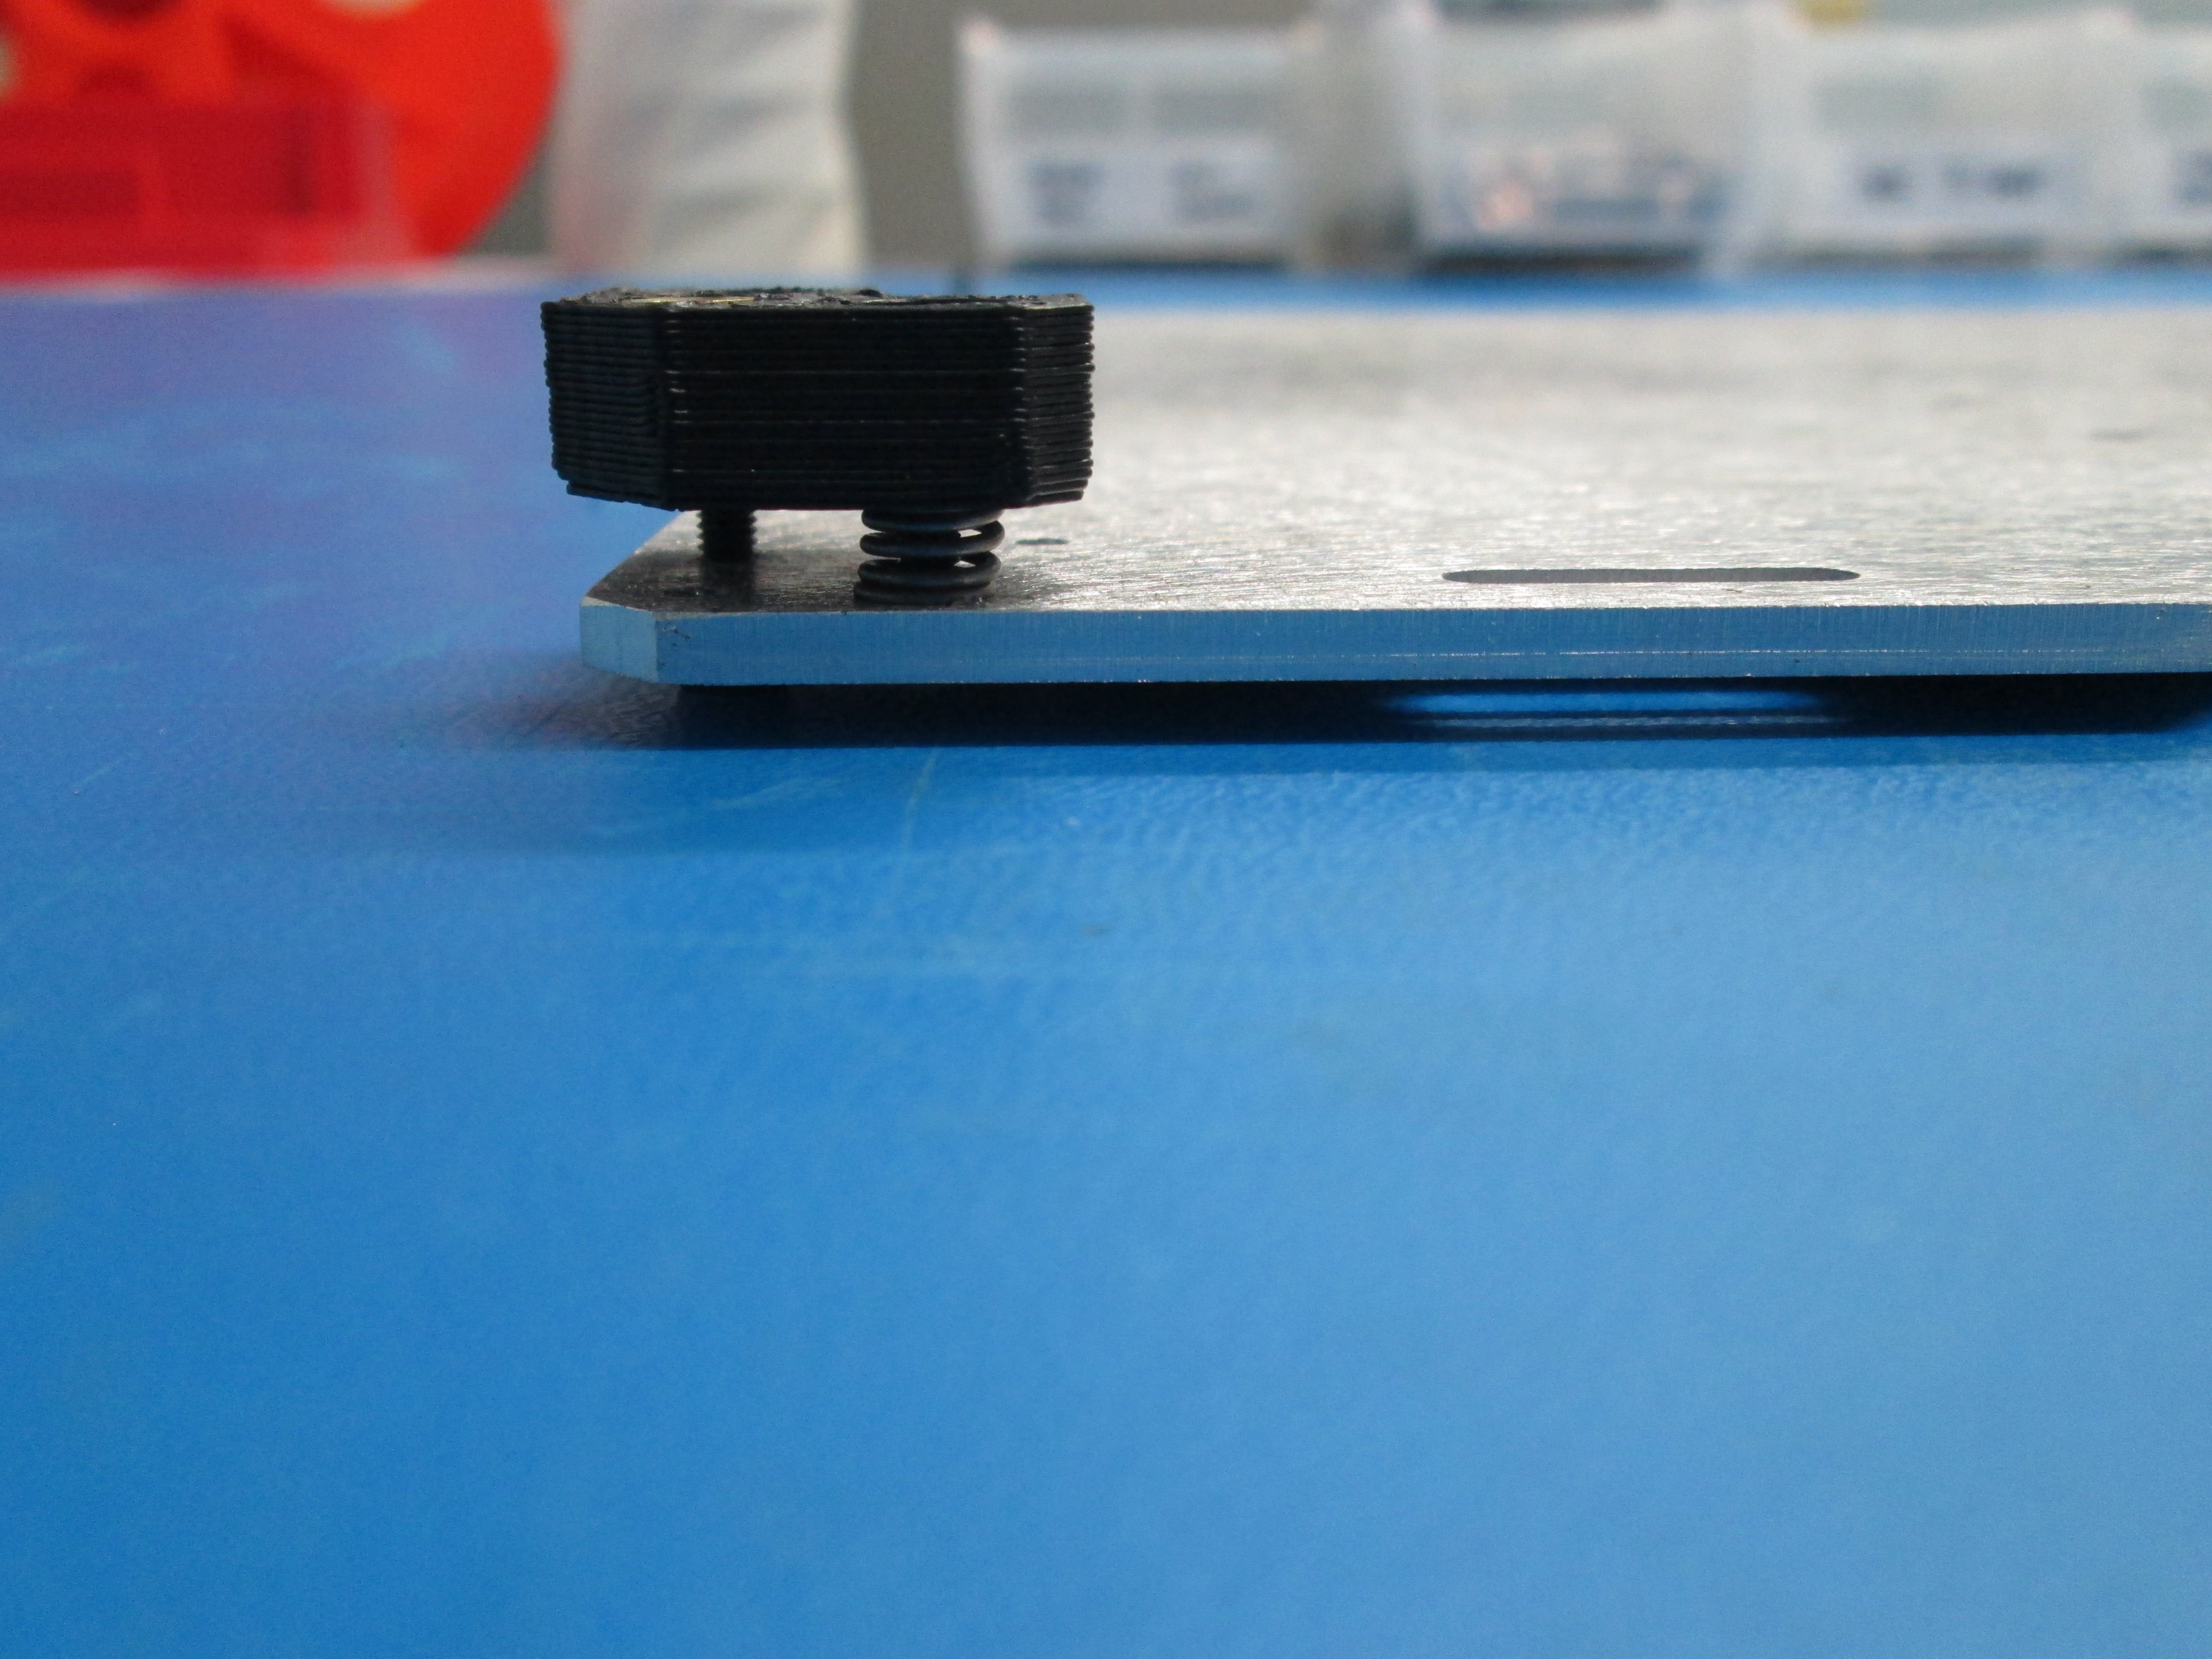
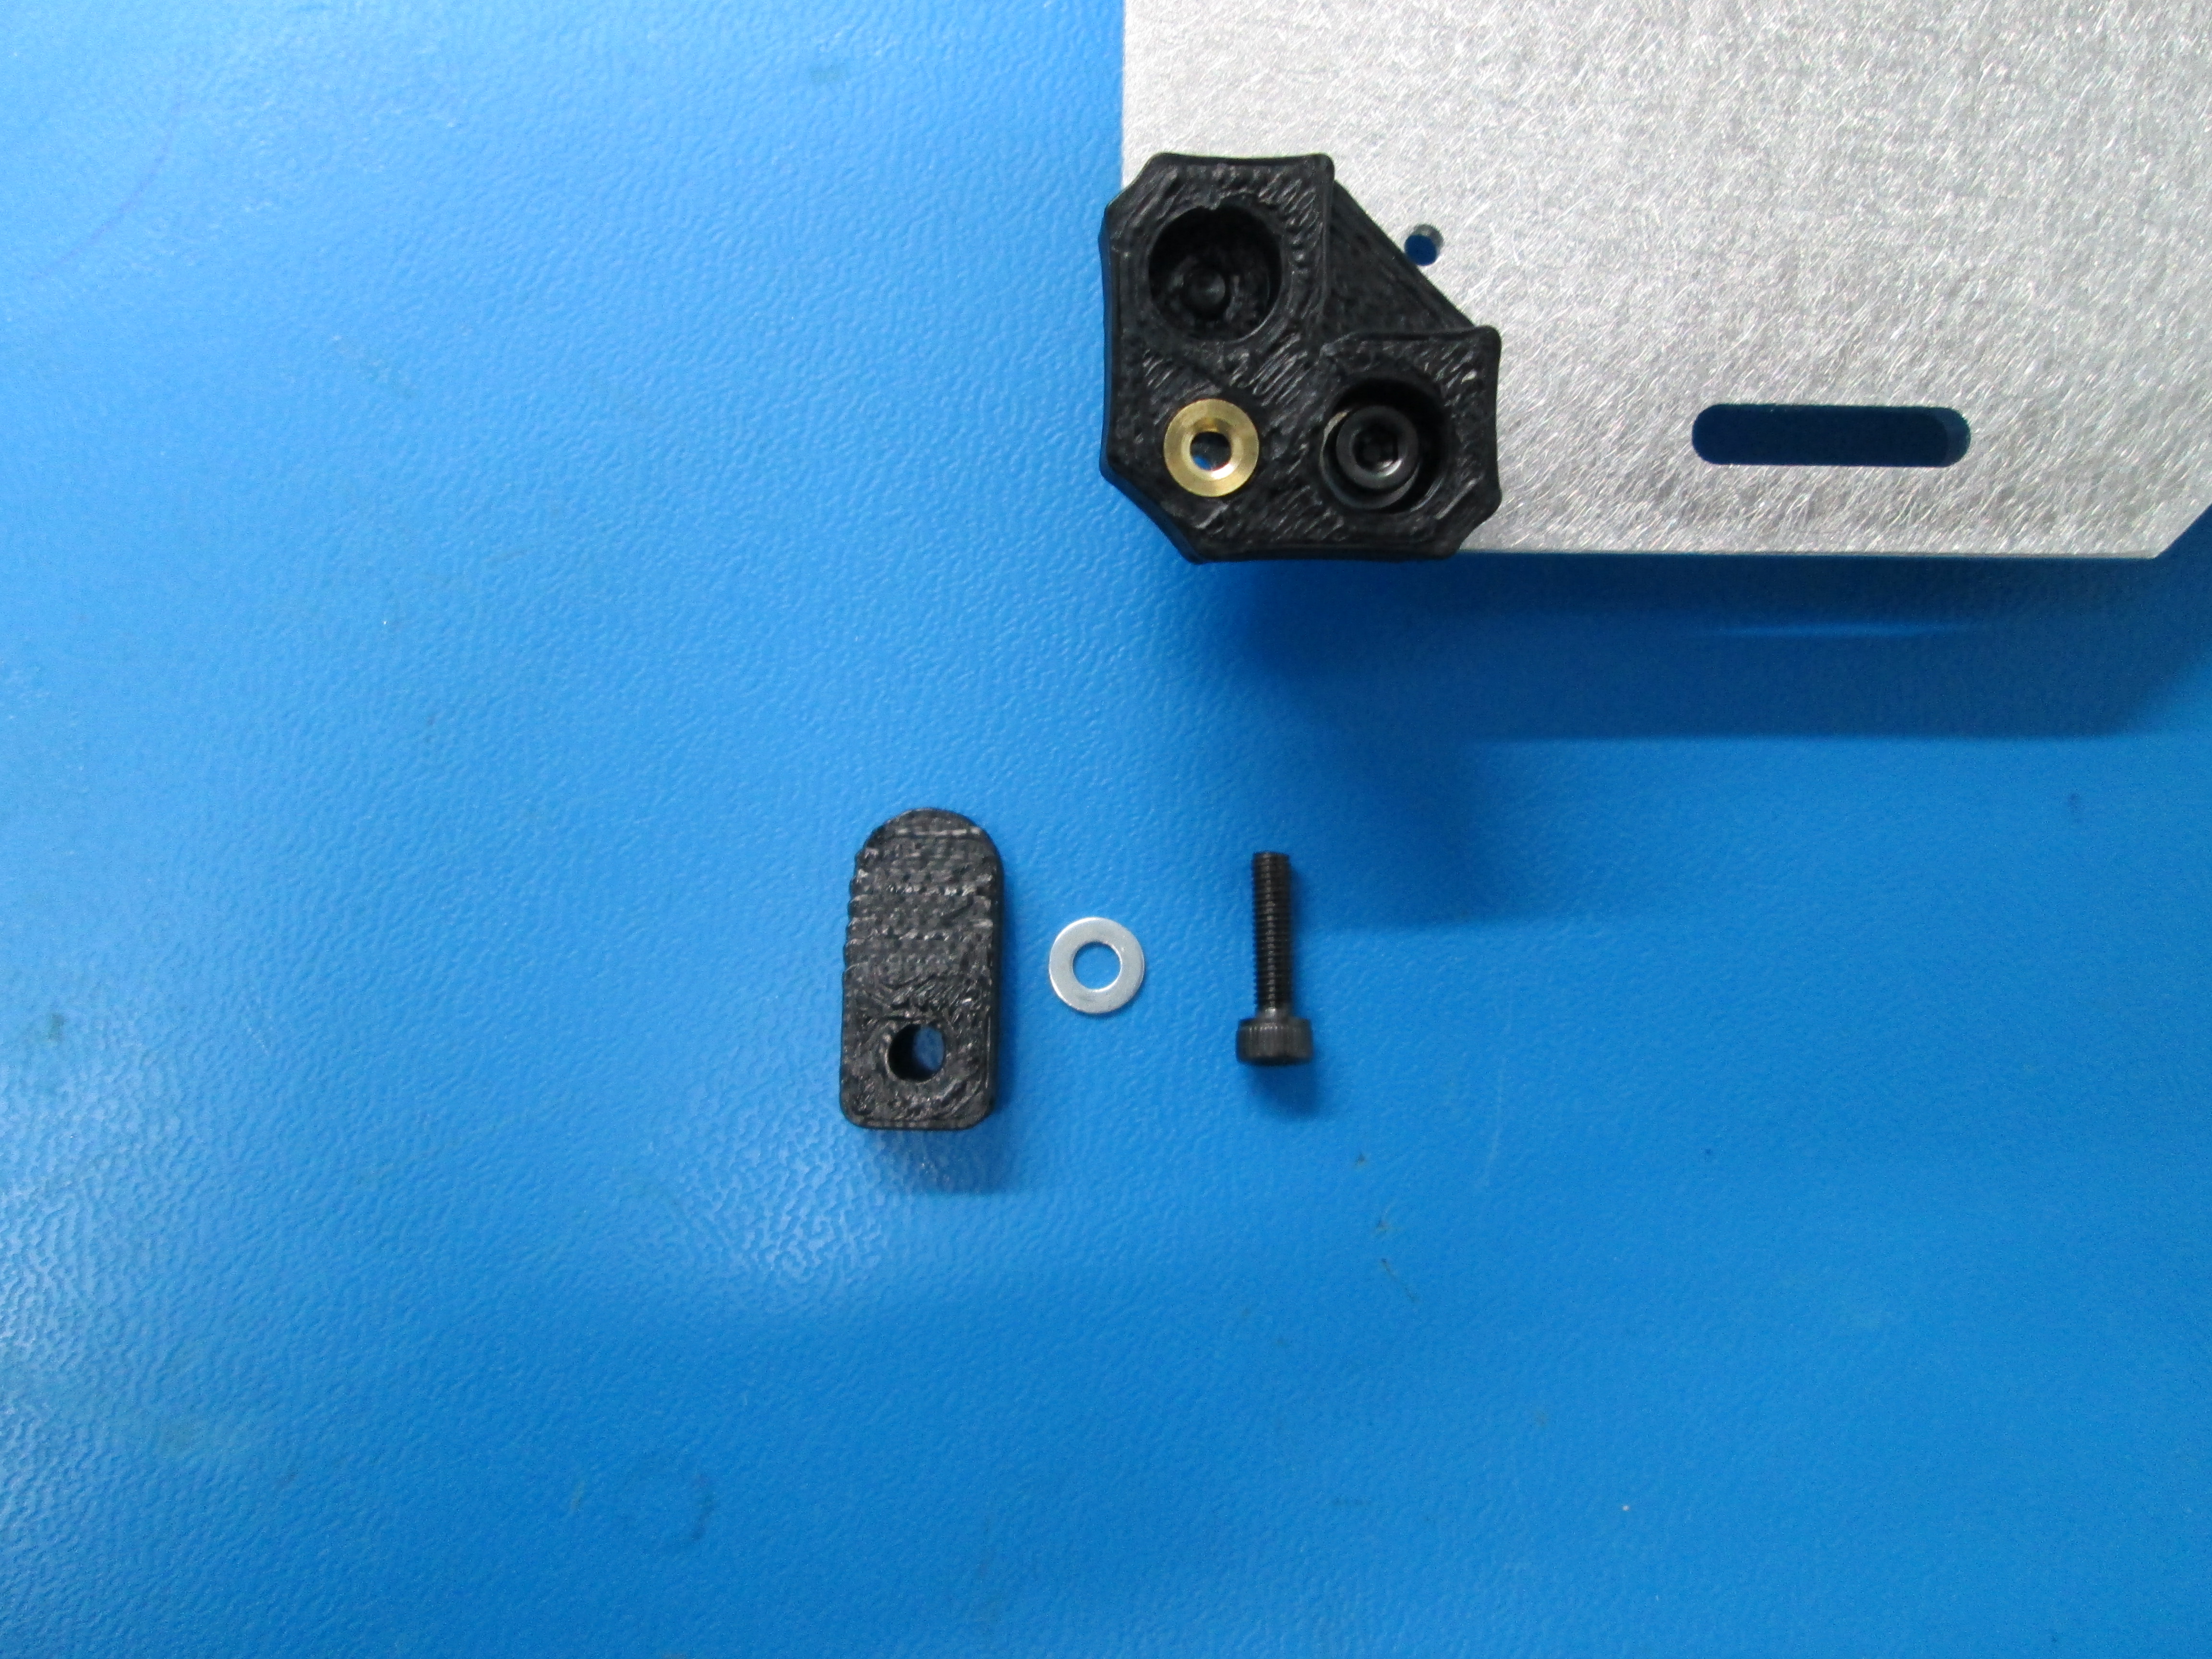
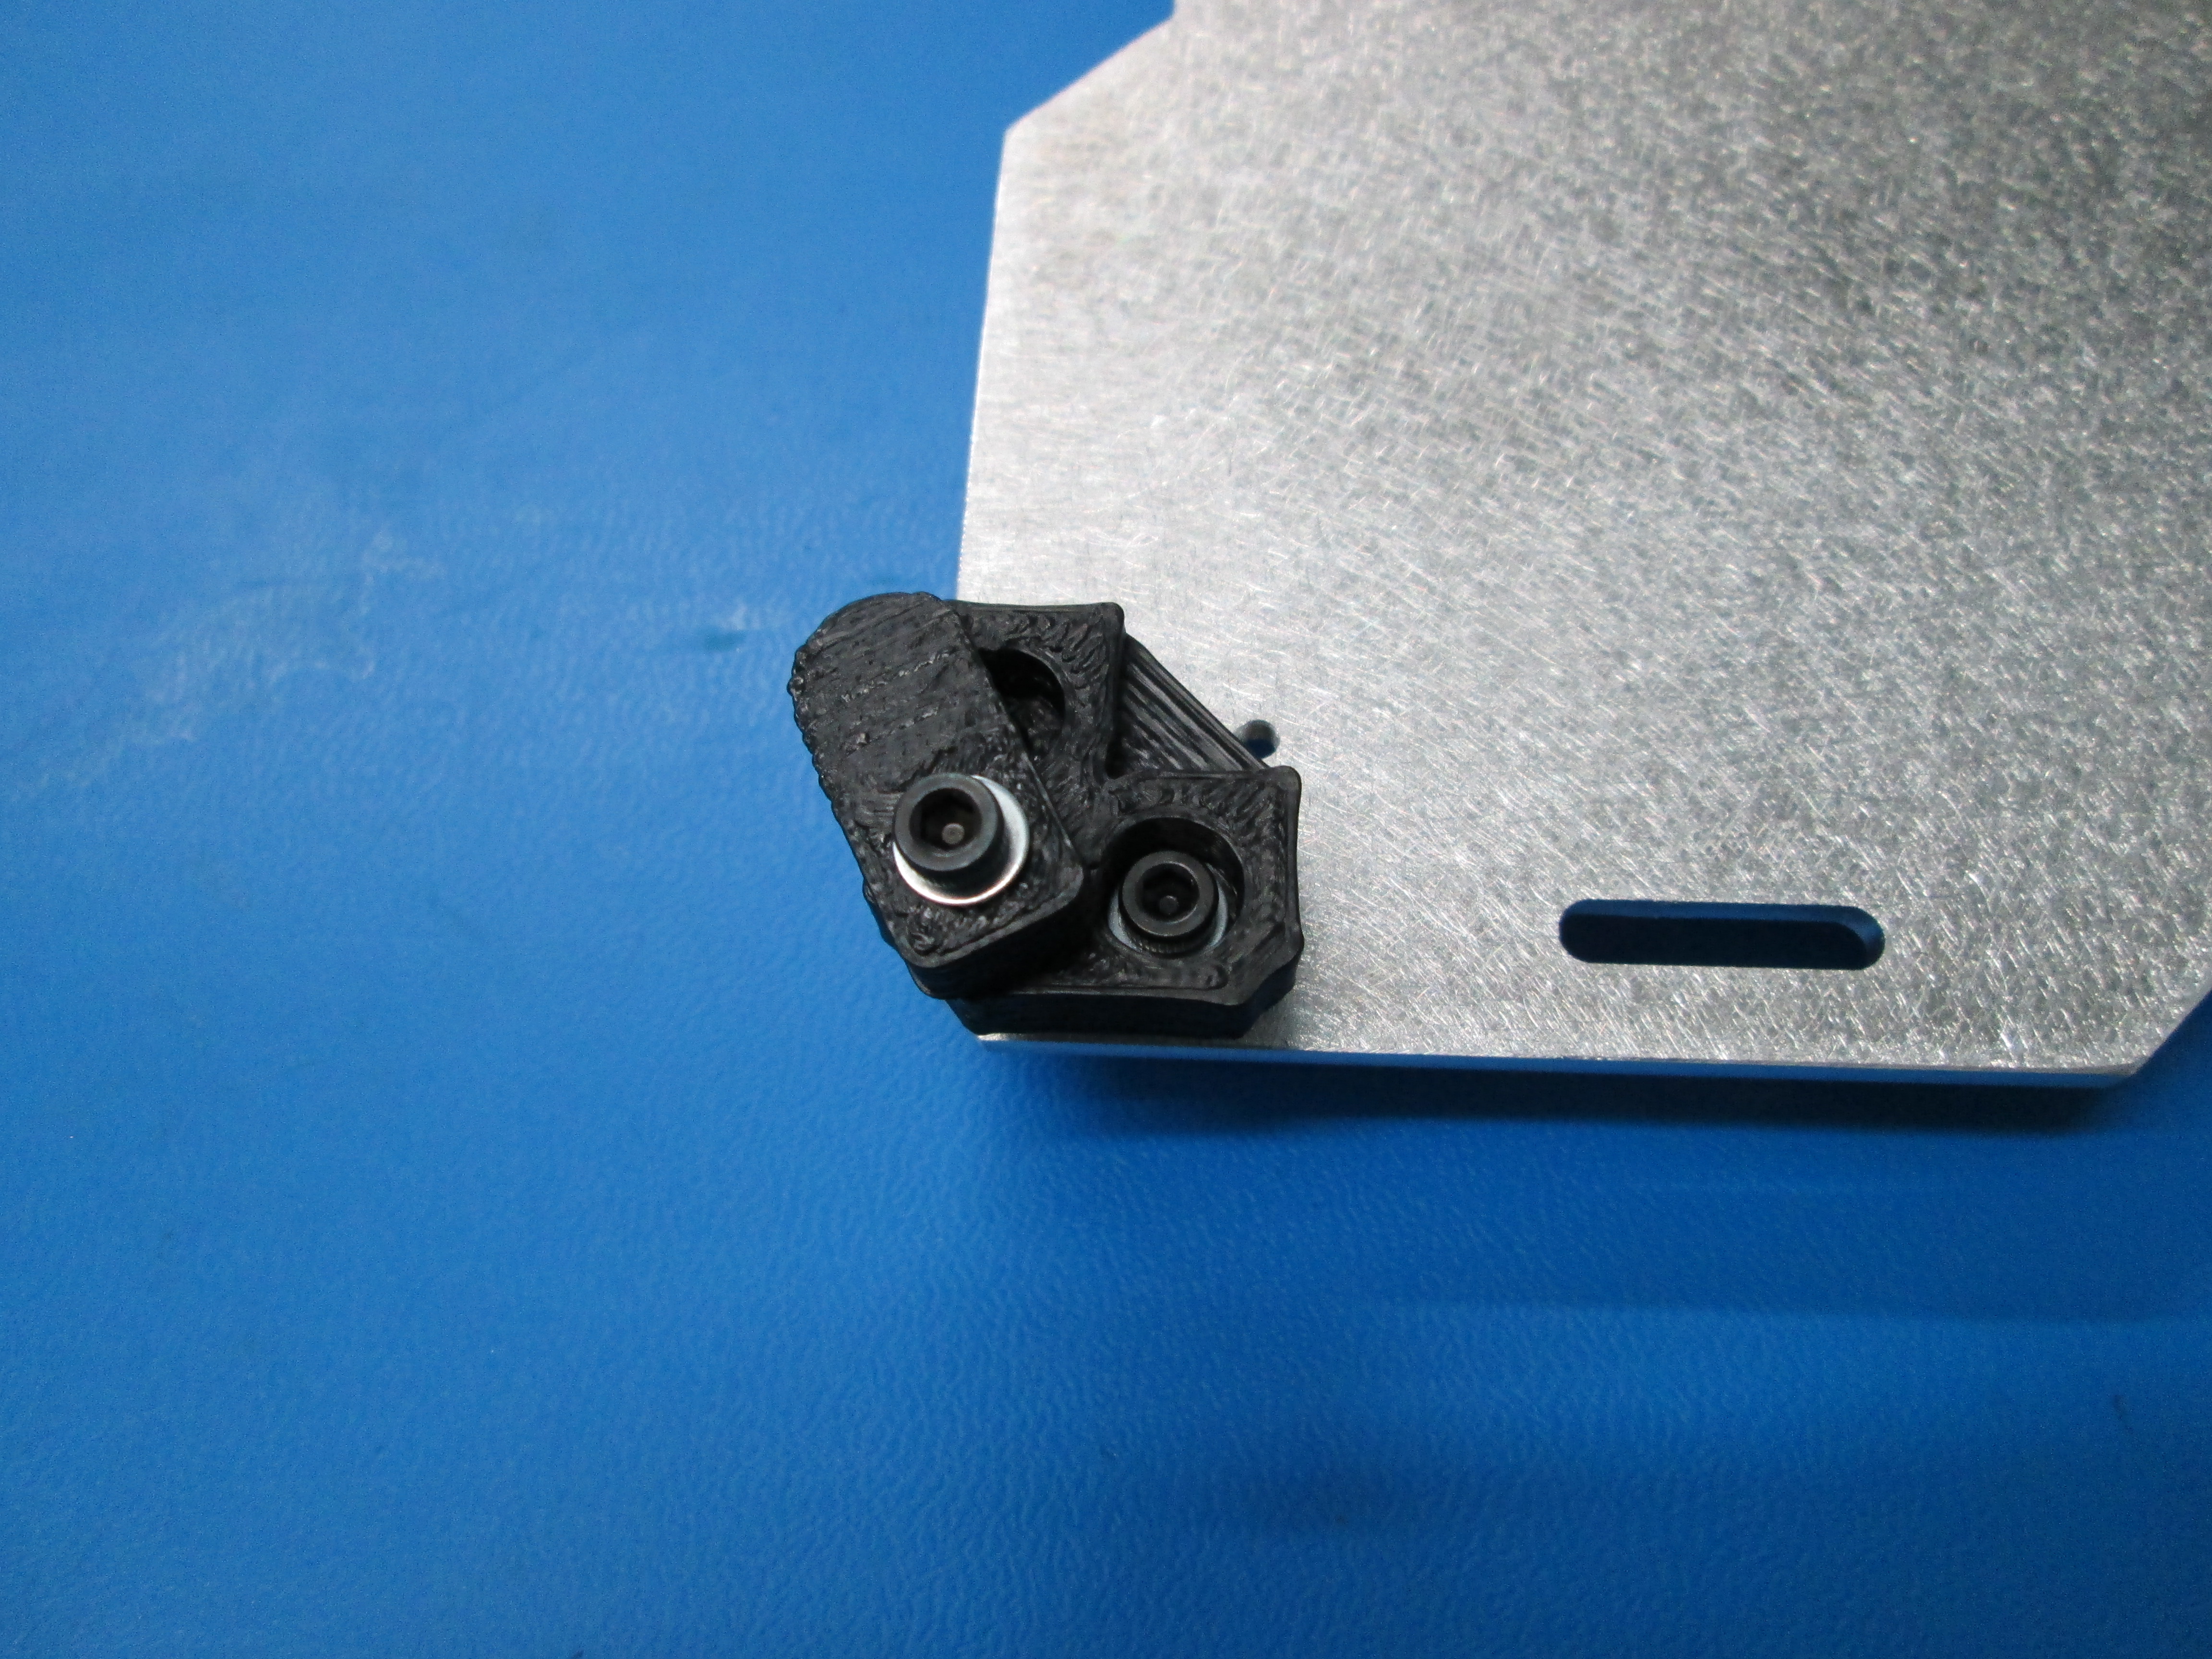
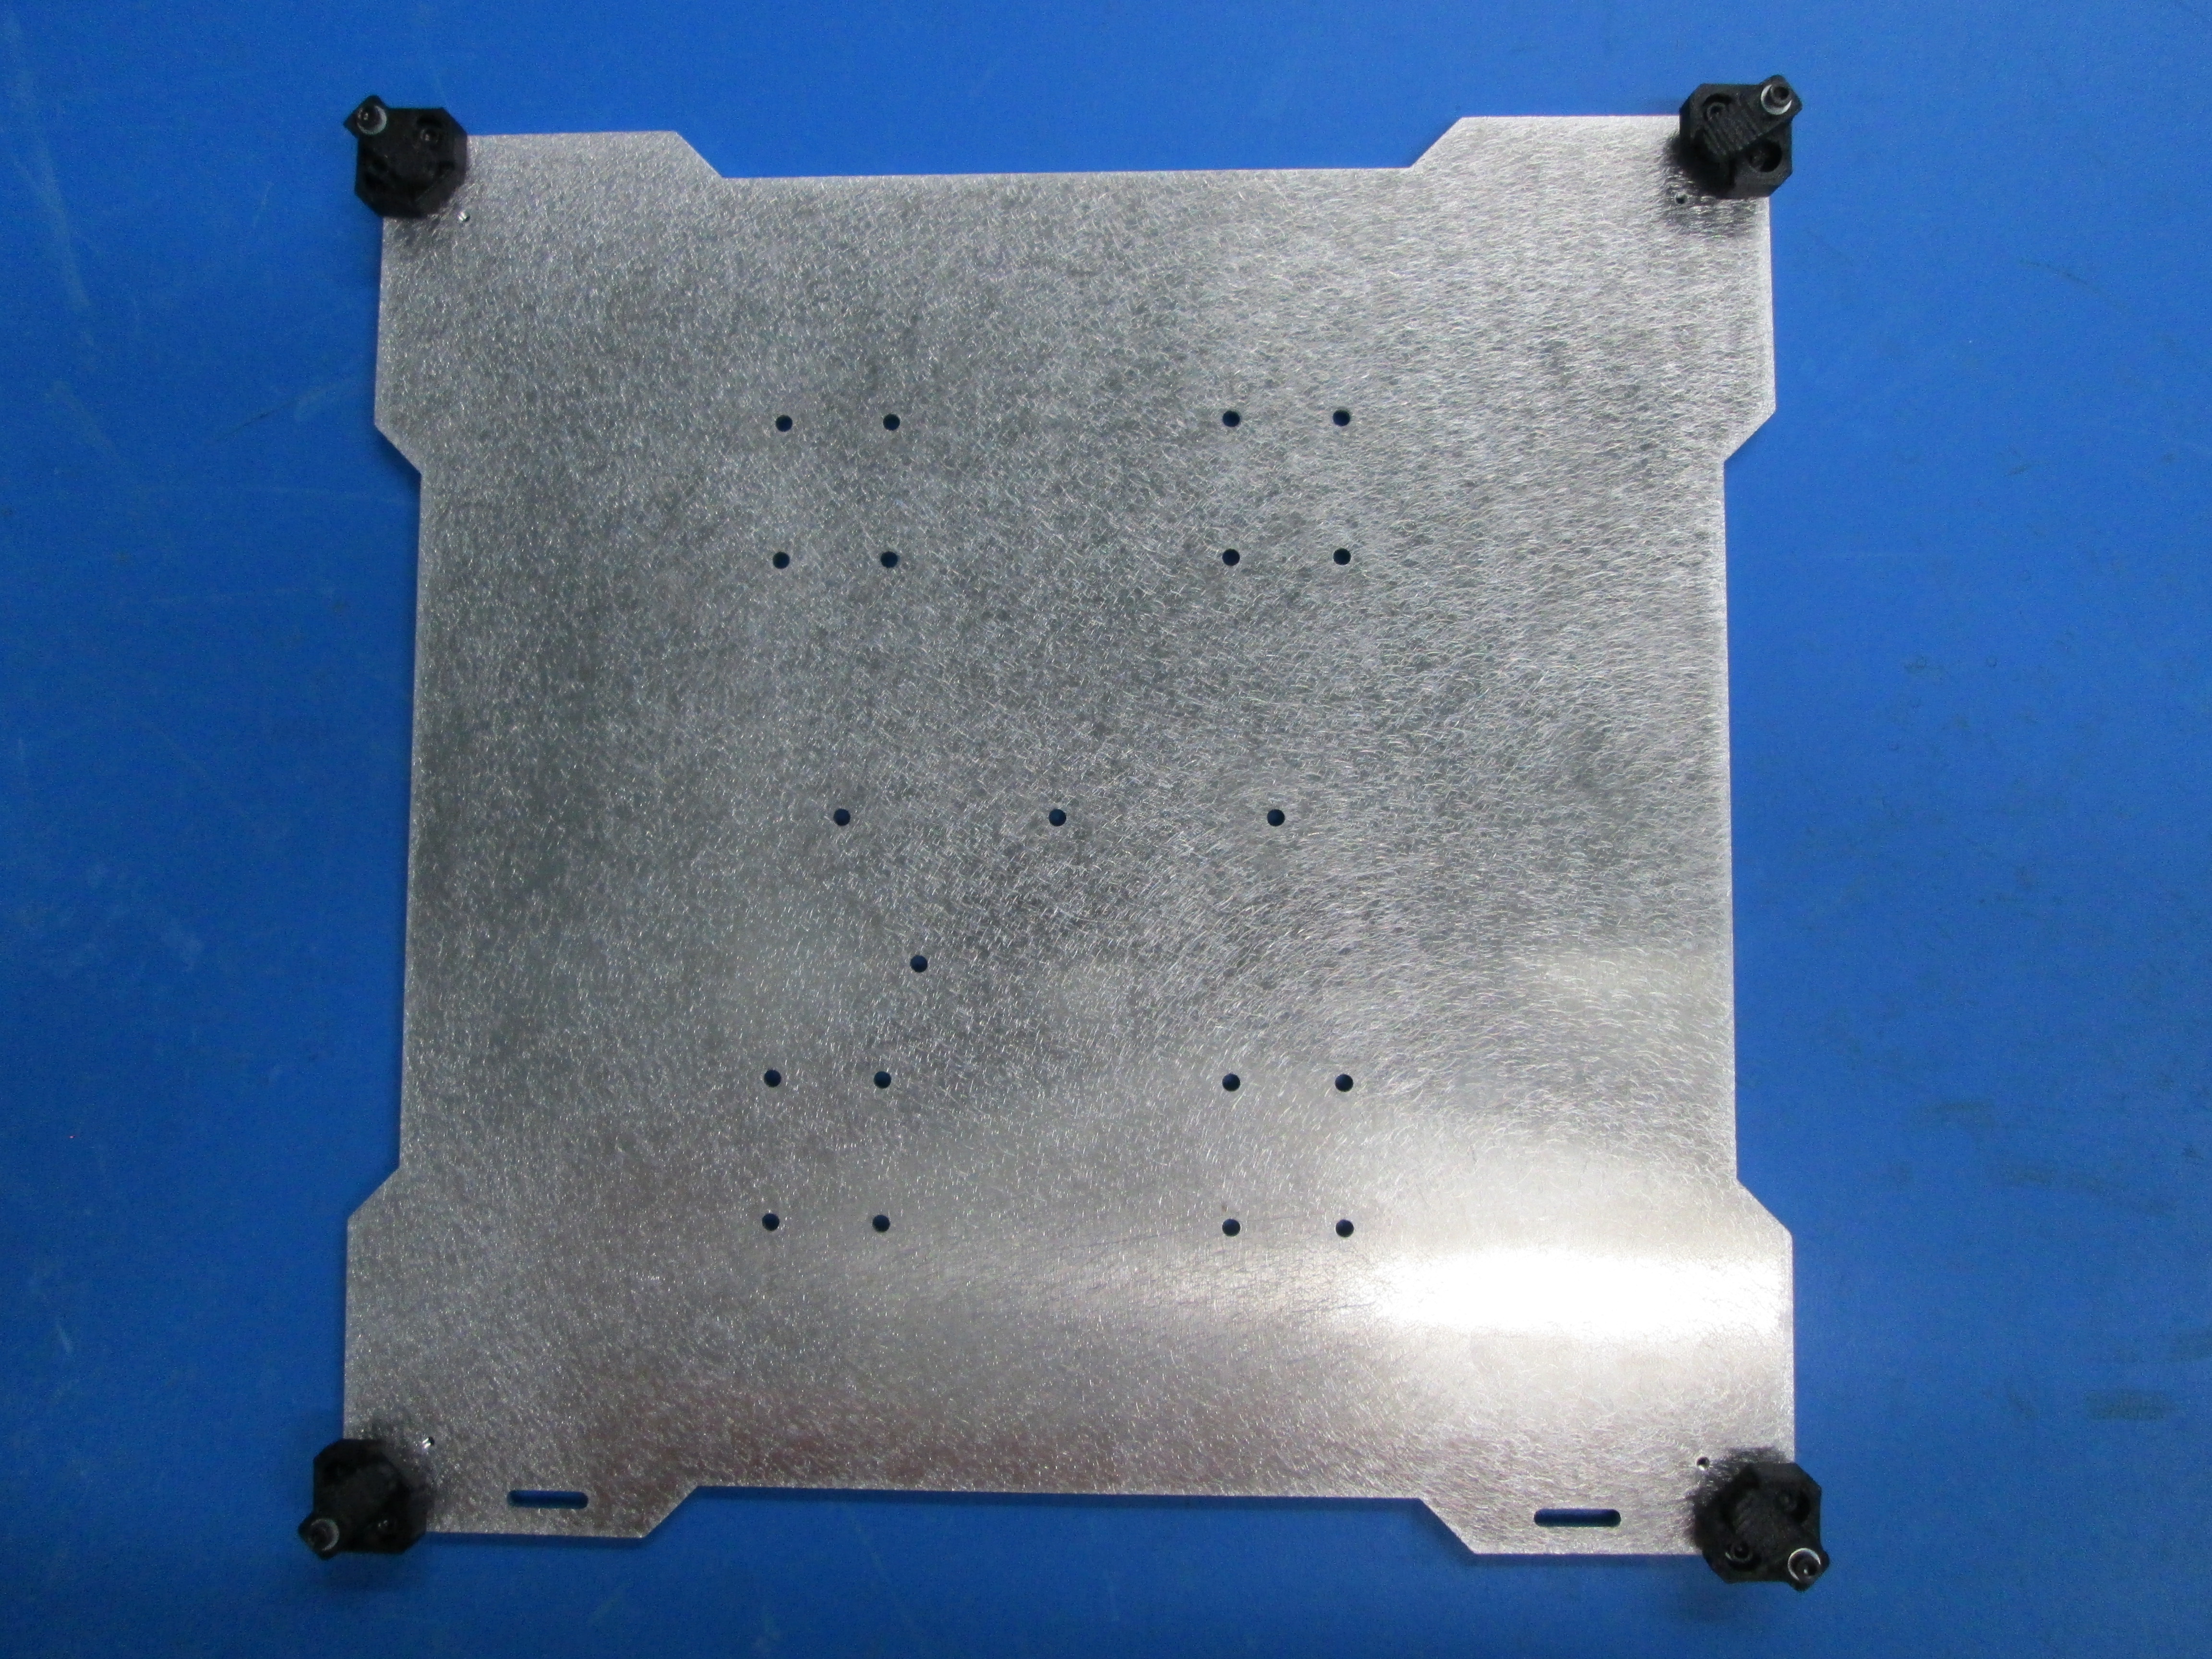
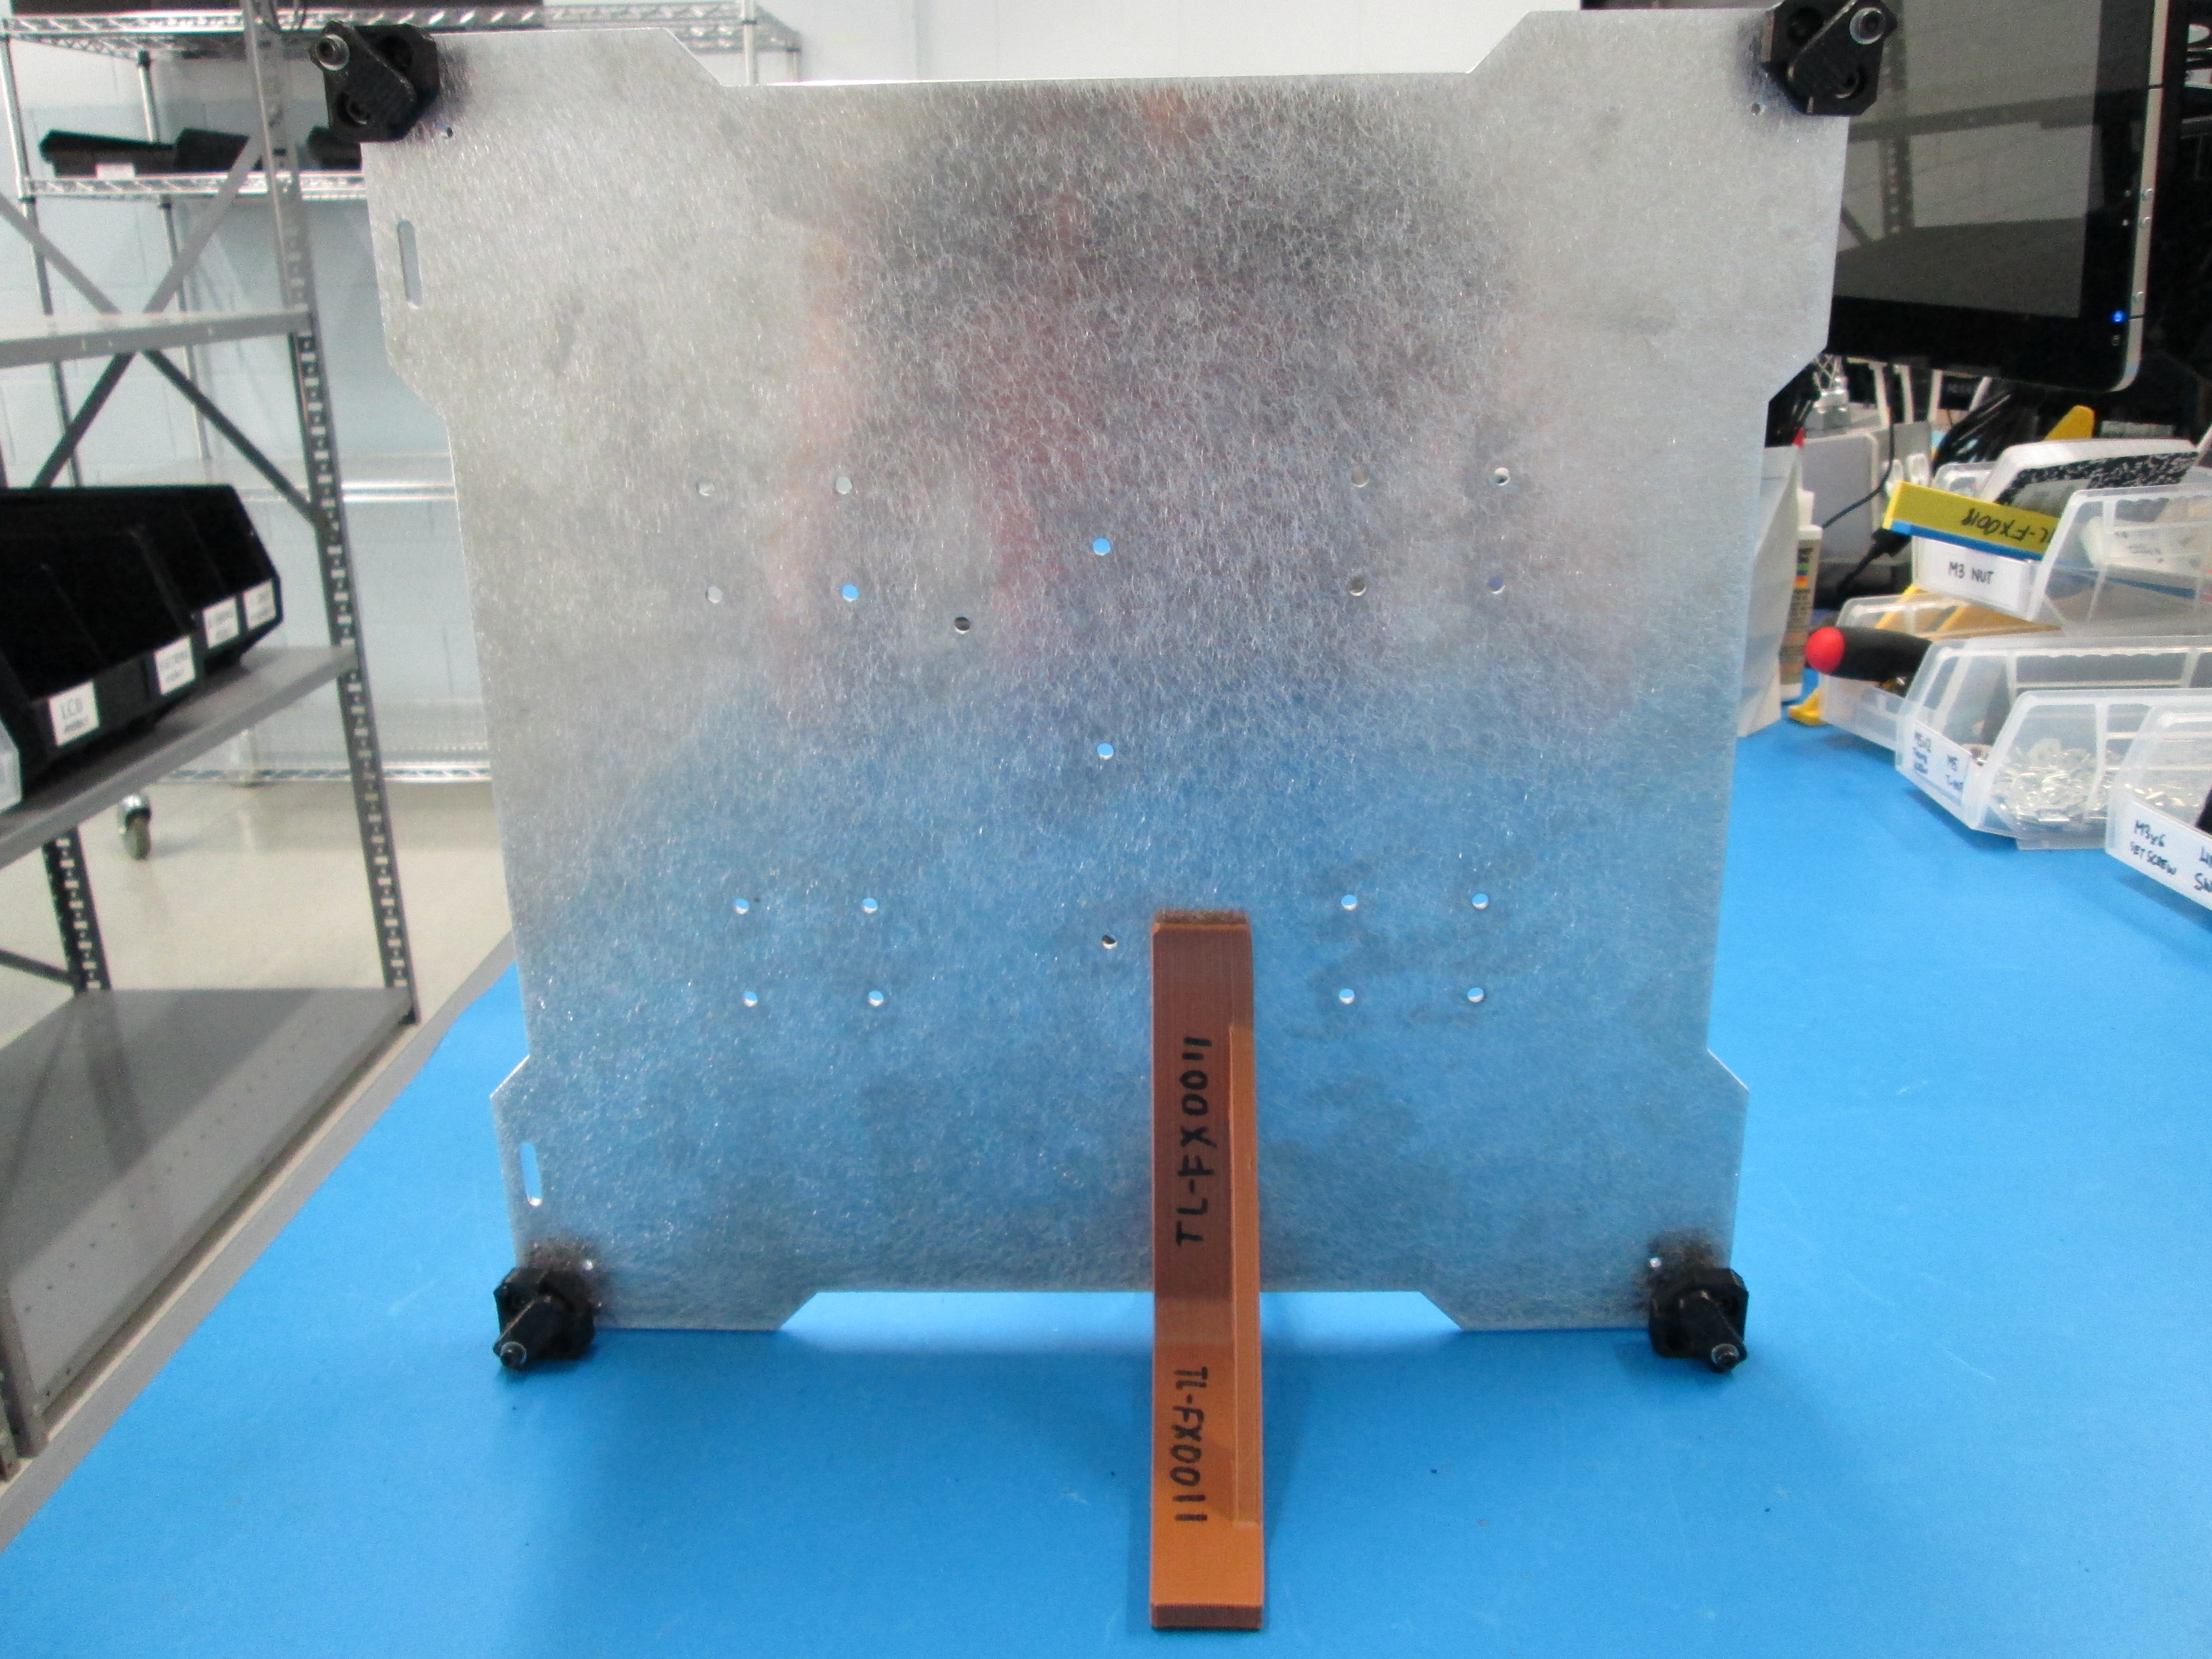
Install bed corner screws as shown. Note the orientation, there is a non-symmetrical center hole, and two "slots" on the edge. Make sure to align as picture shows. Install bed corners using a M3 x 12 SHCS, M3 washer and a bed spring (~9.5mm). Set the end of the bolt flush with the bottom of the plate for now. Install bed finger as shown using a M3 x 12 SHCS and M3 washer. Repeat in all 4 corners.
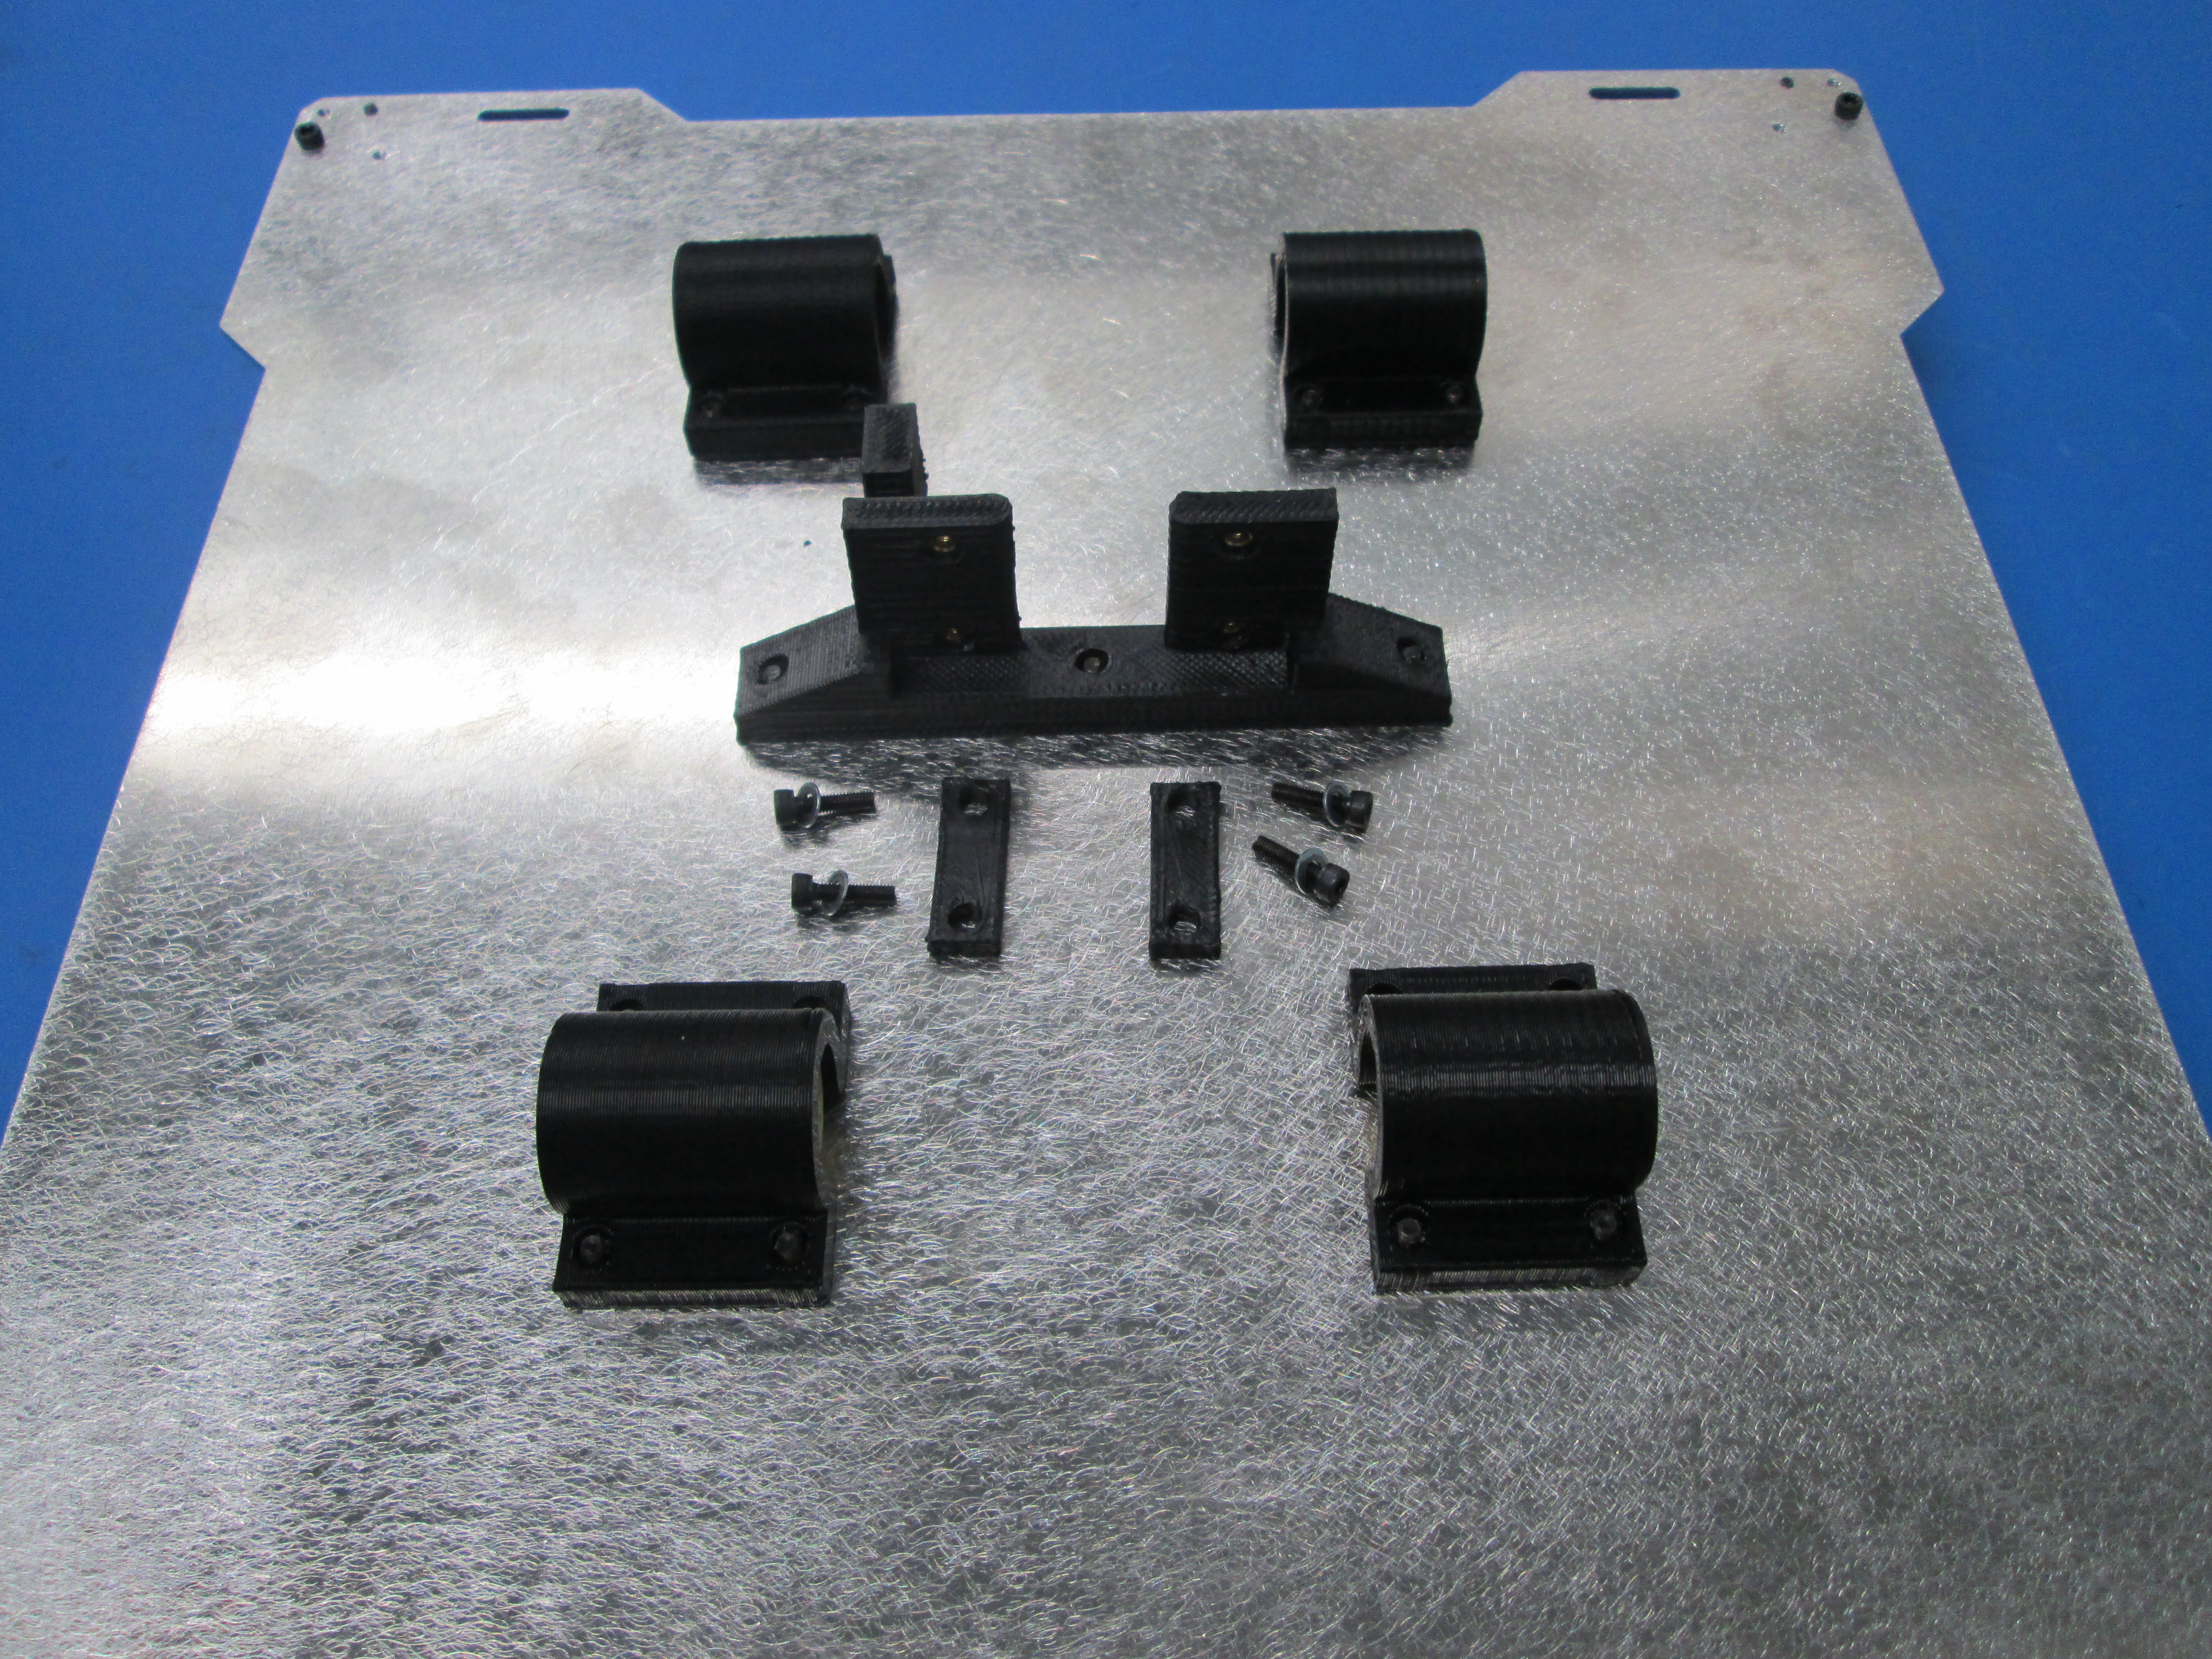
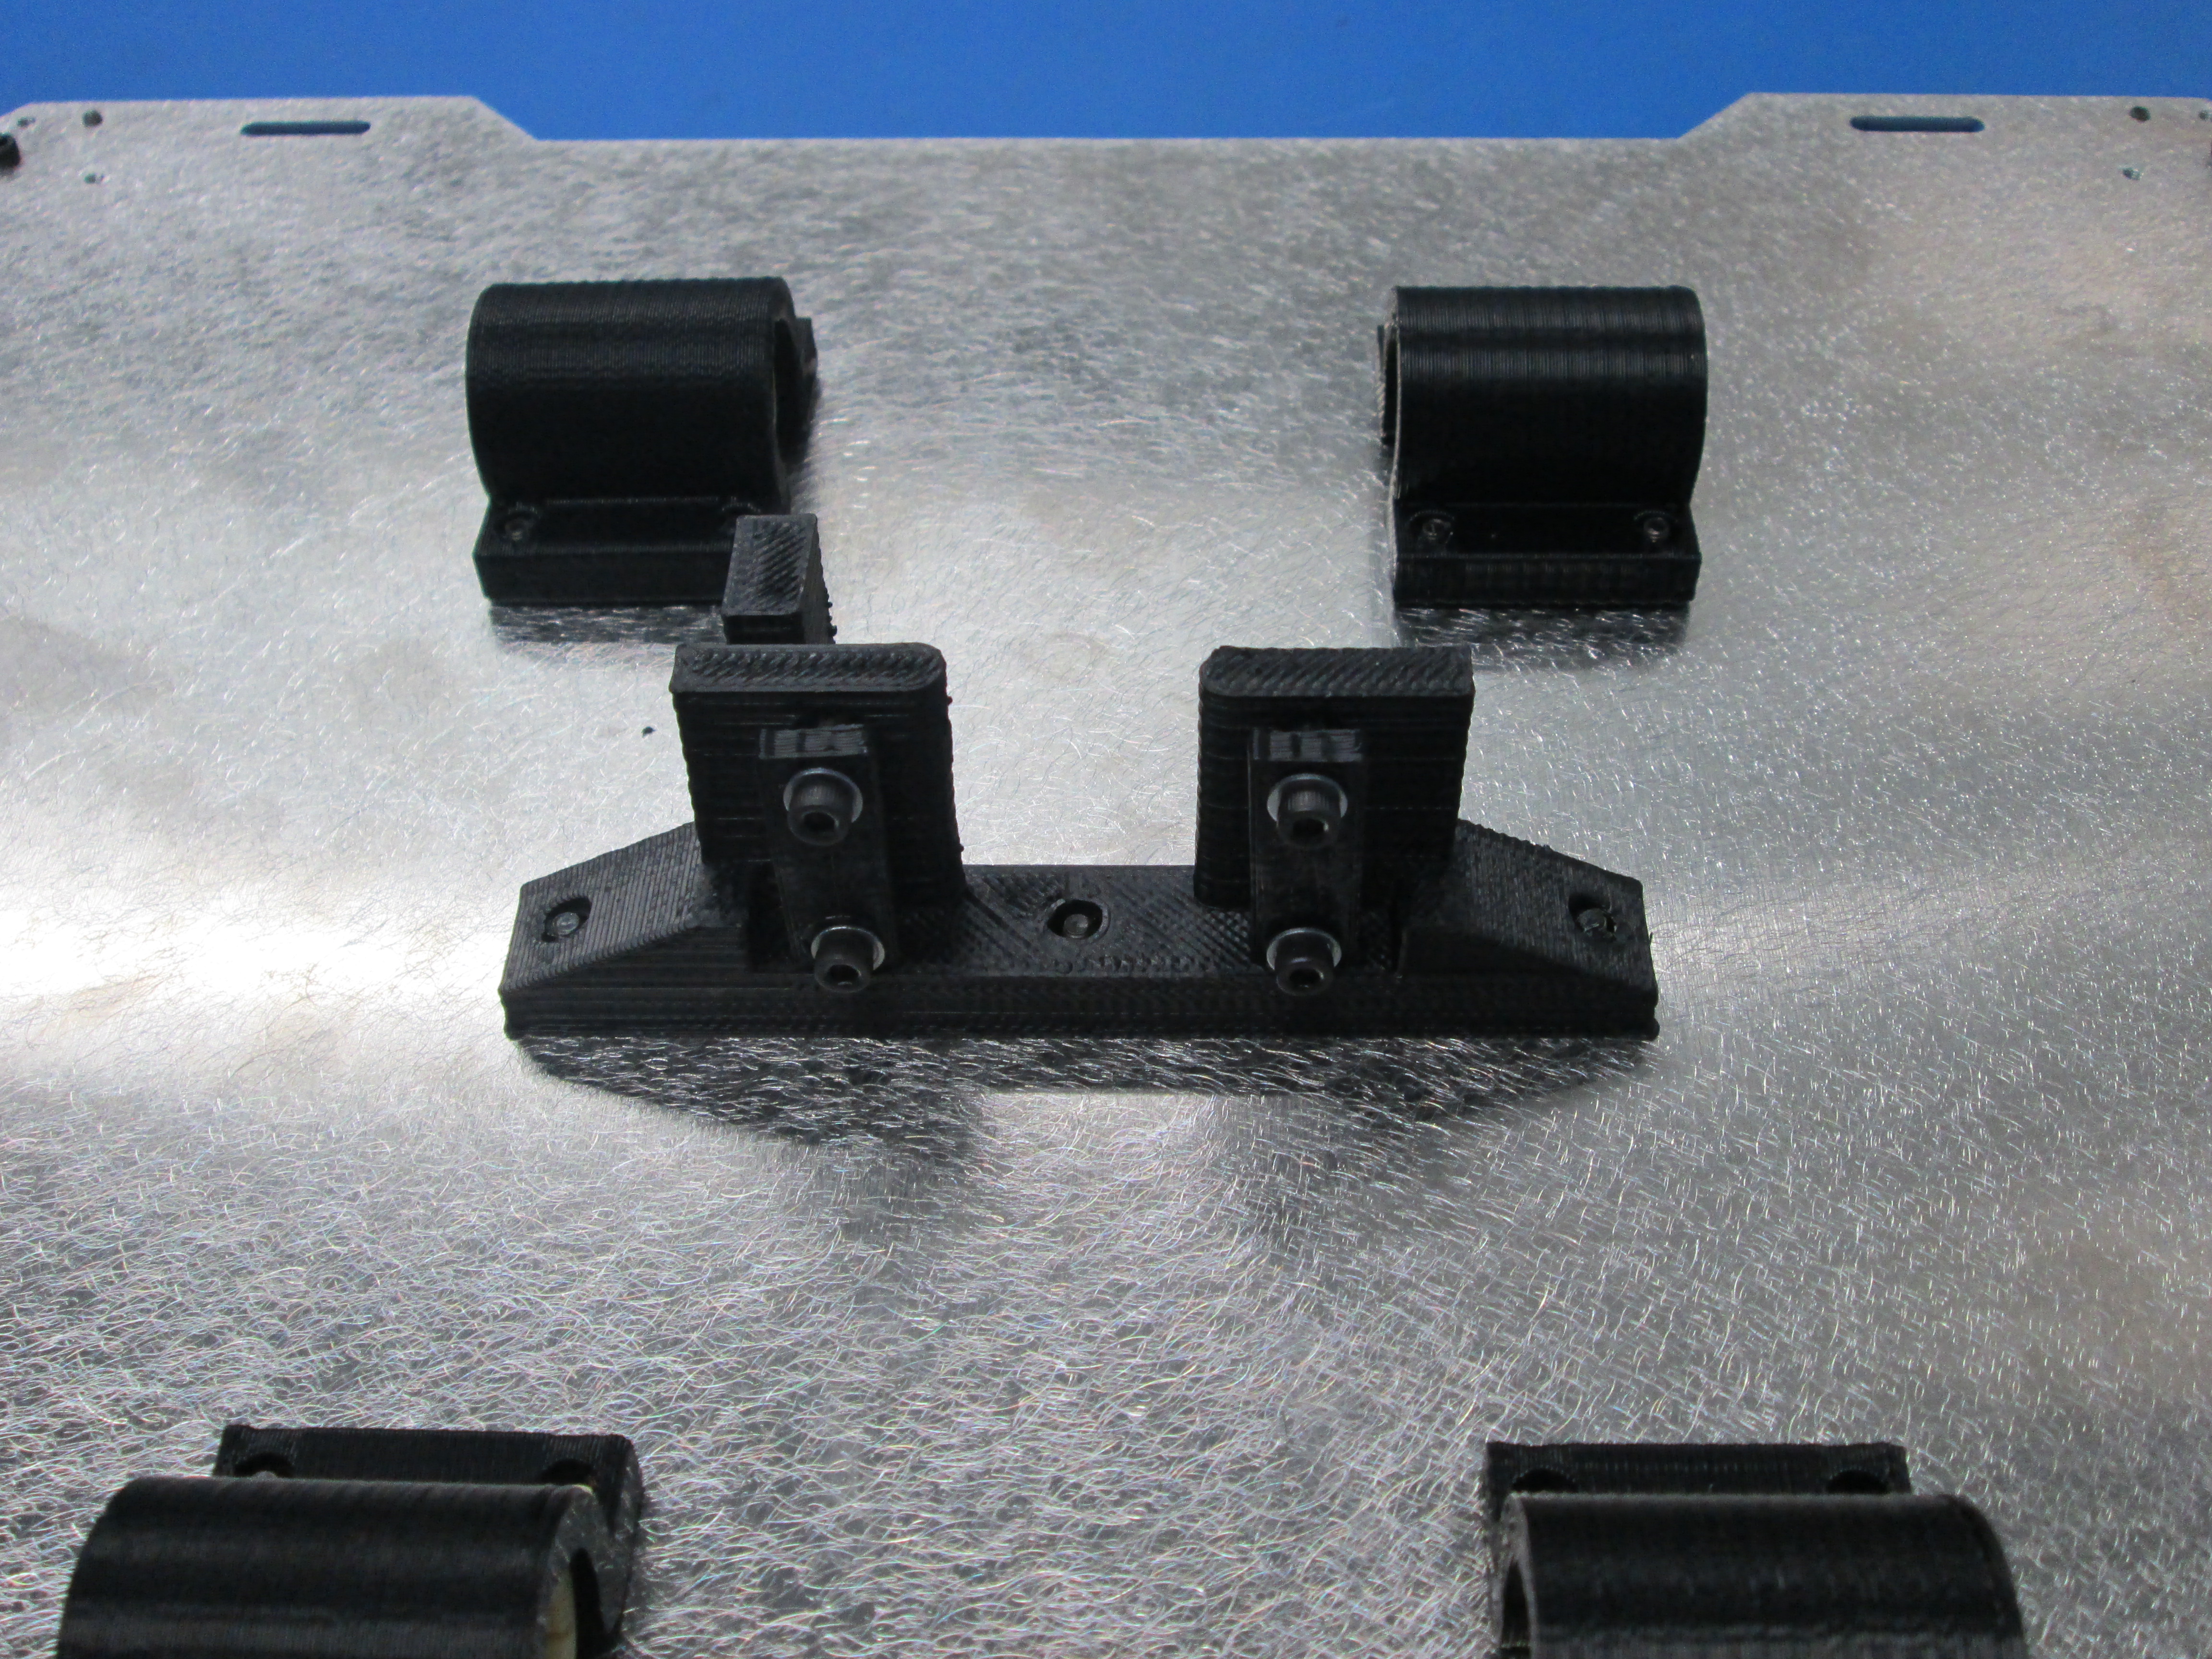
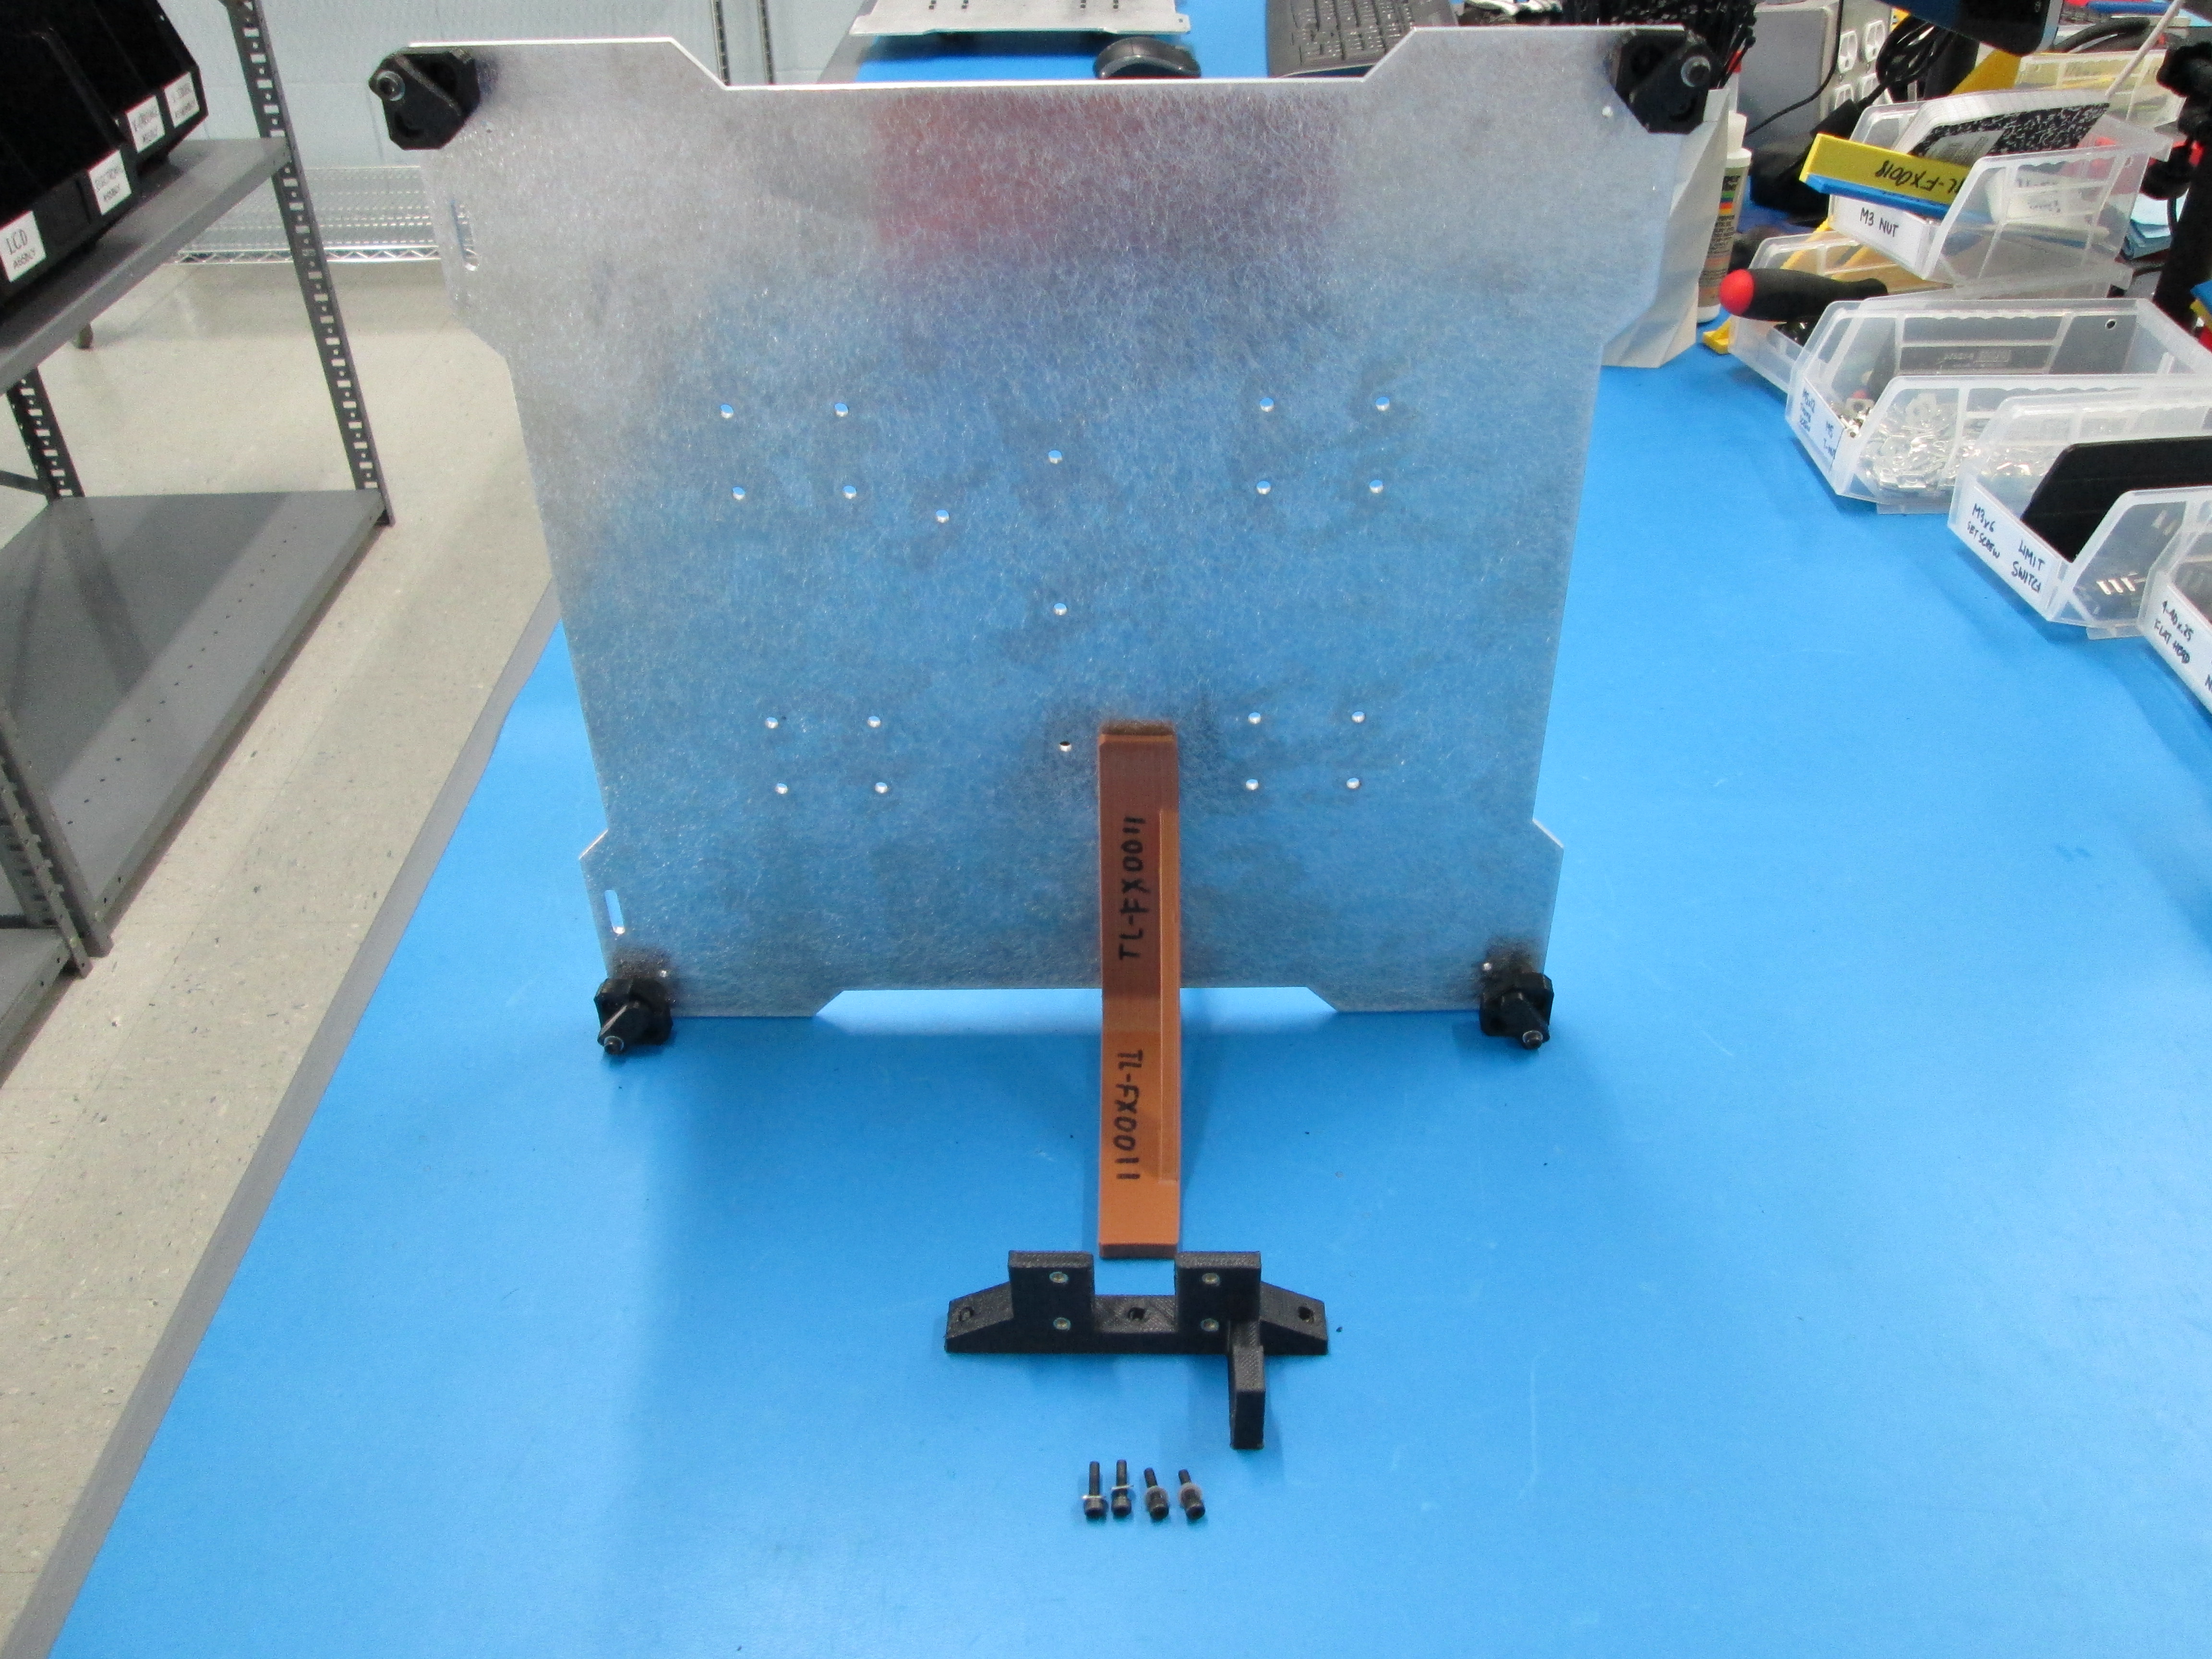
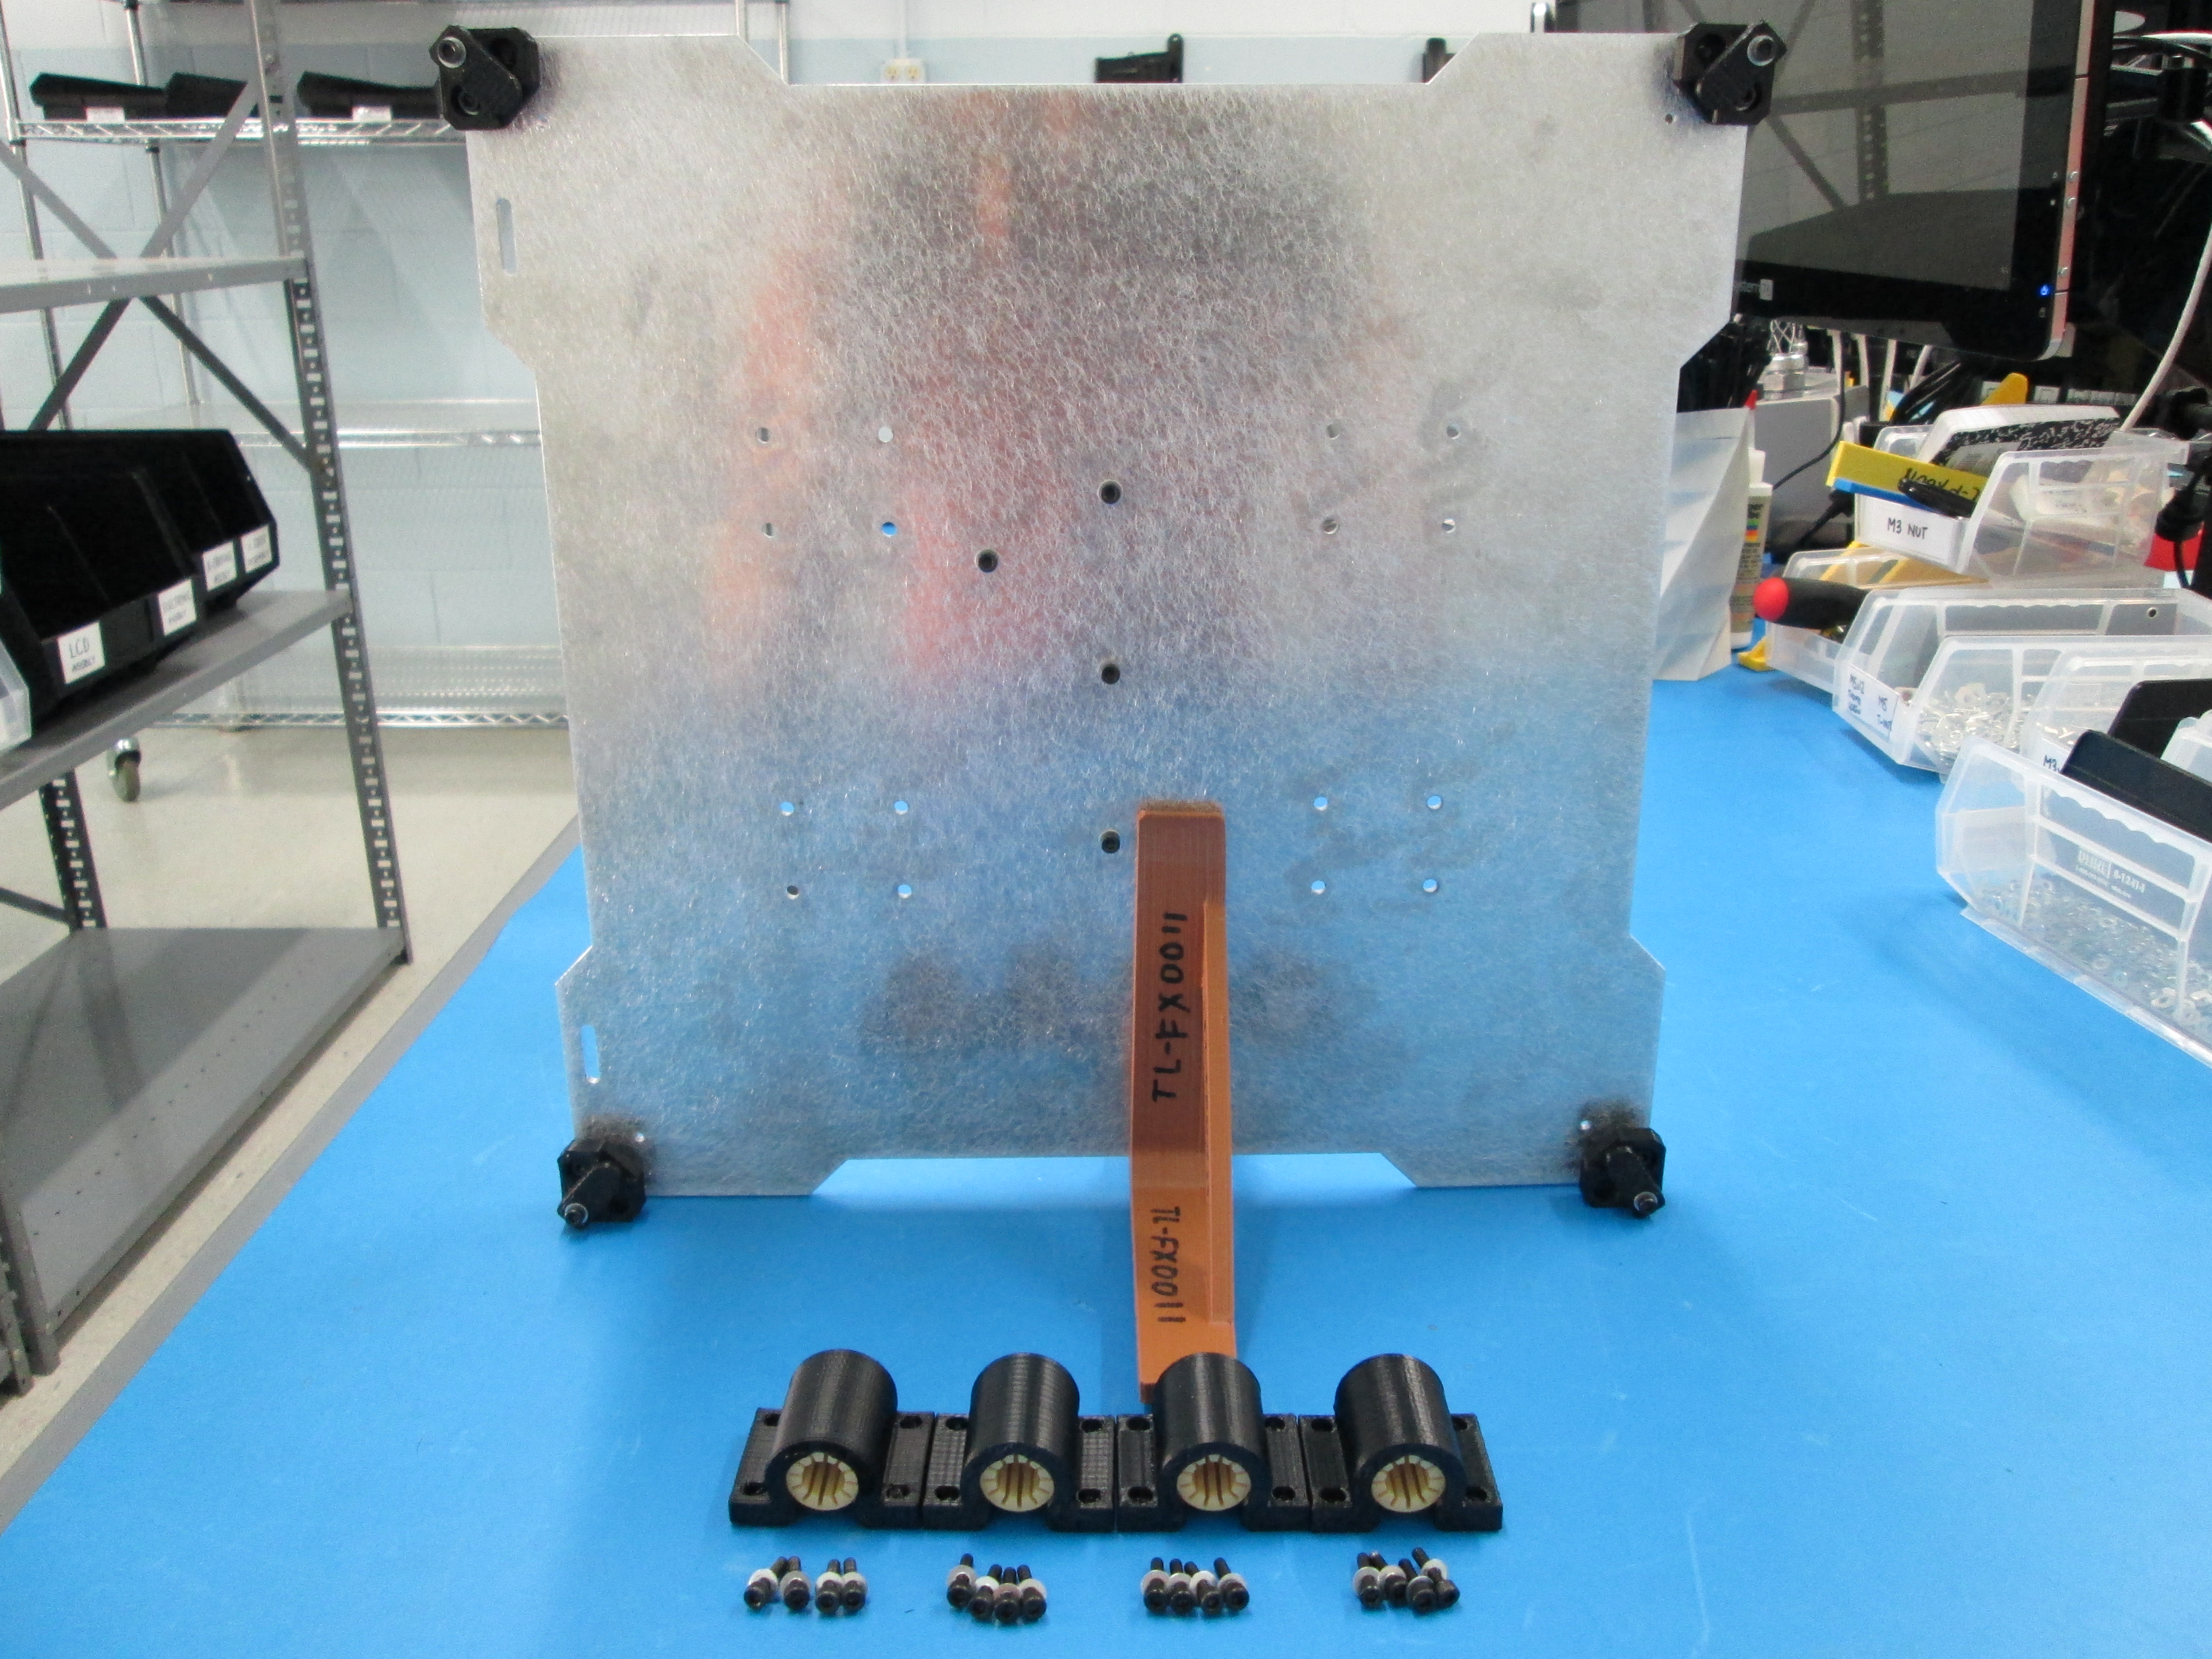
Set the table in the fixture. If not using the fixture, this can be done by setting the aluminum plate on its edge. Using 4 M3 x 12 SHCS and 4 M3 washers, attach the belt mount to the table as shown. Note orientation in picture, if it does not match, you will need to re-do the previous steps.

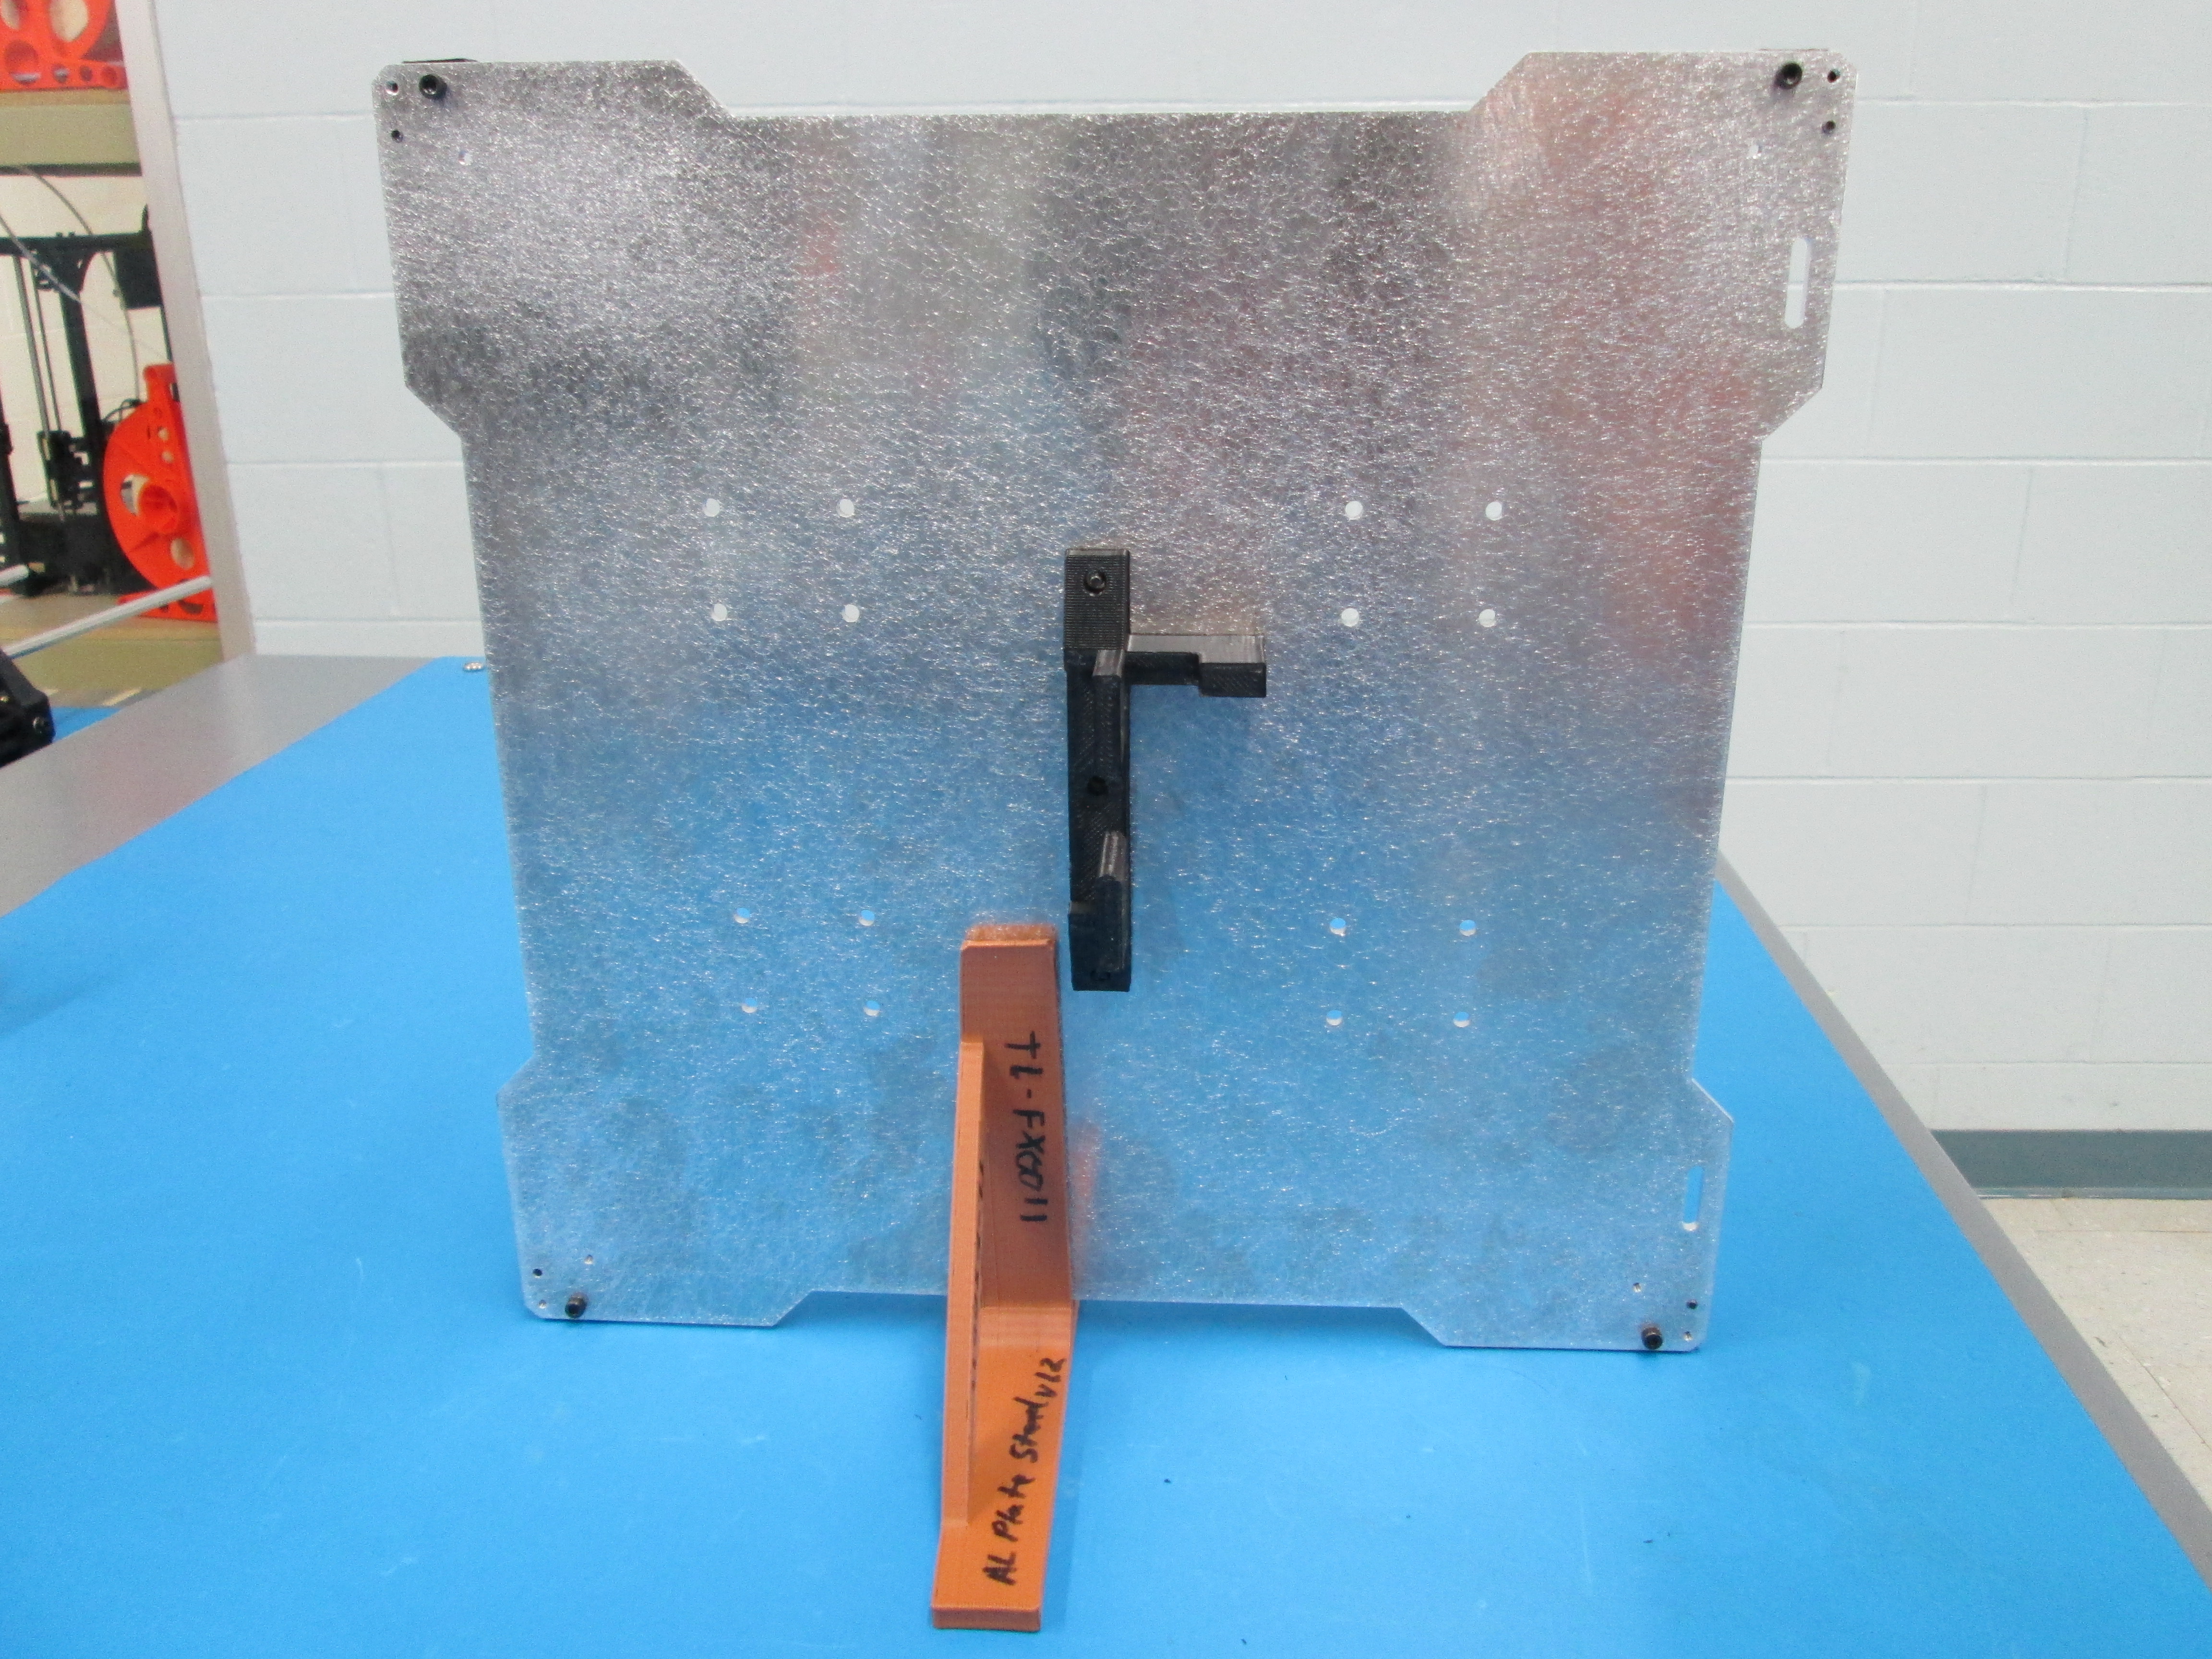
Install bearing holders using M3 x 12 SHCS and M3 Washers. Make the bolts tight enough that the bearing holders can't move up and down, but can still move side to side.
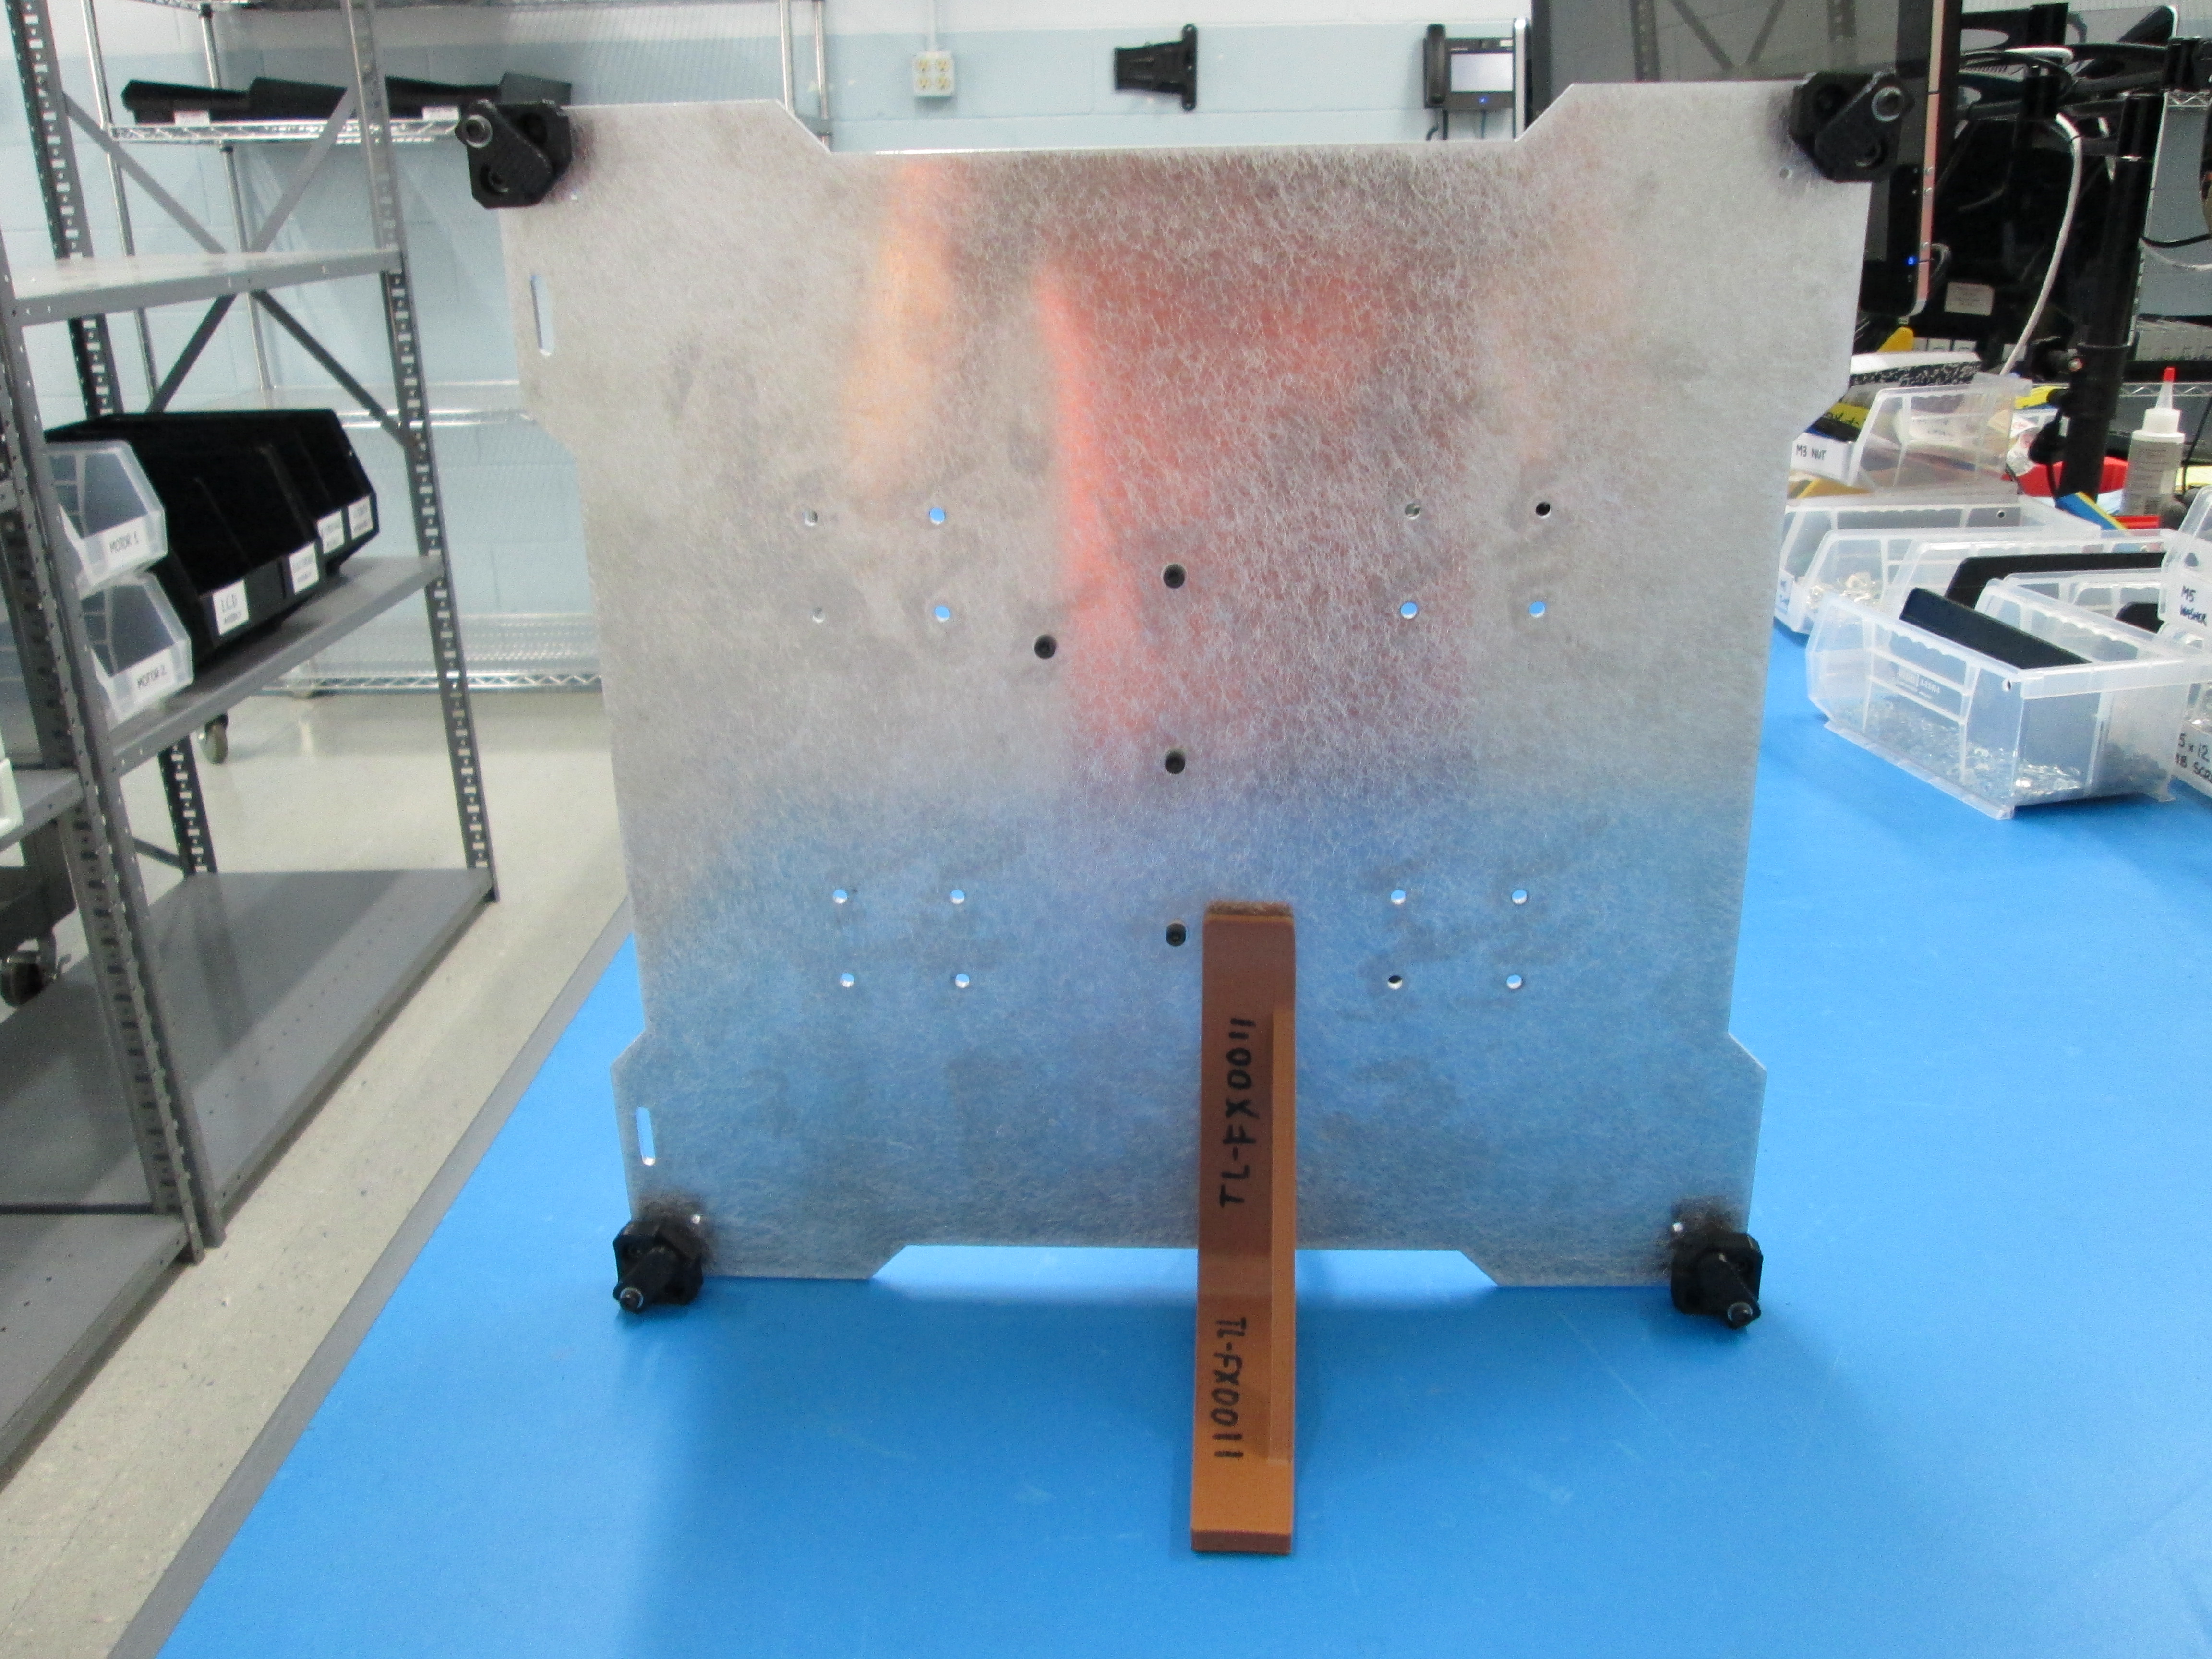
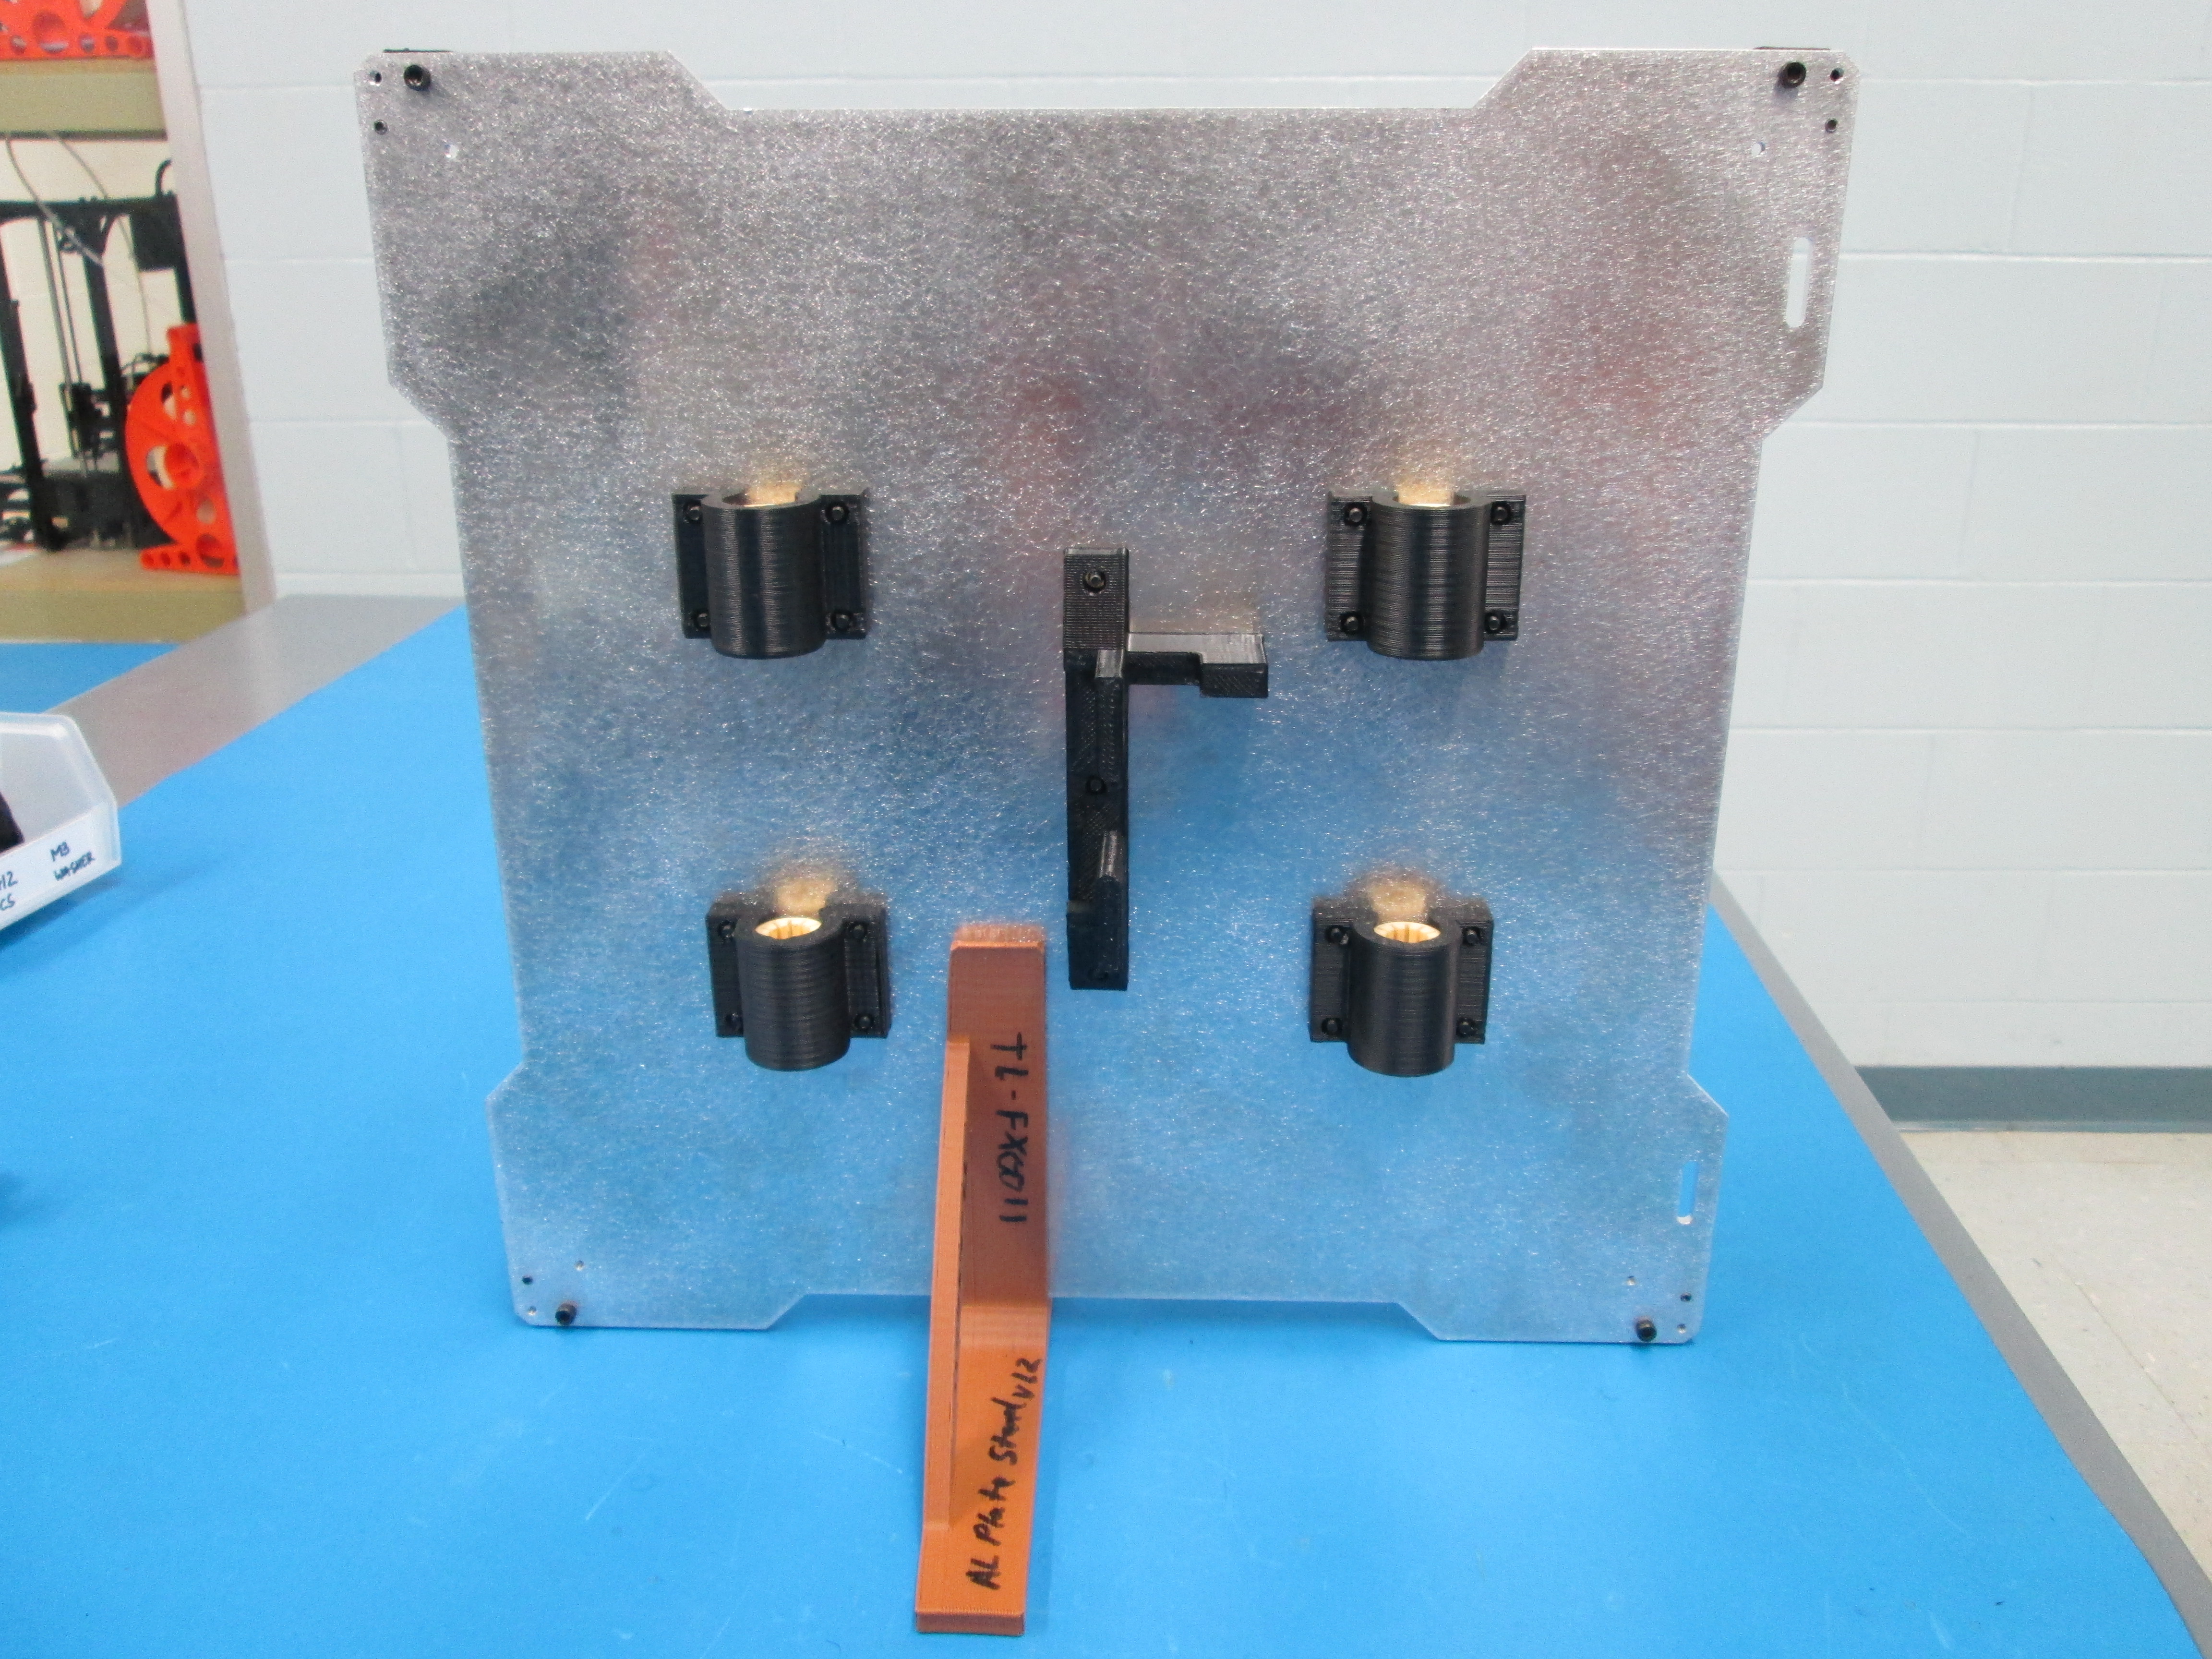
Install the 2 belt clamps using 4 M3 x 12 SHCS and 4 M3 washers. Leave the belt clamps loose at this point.